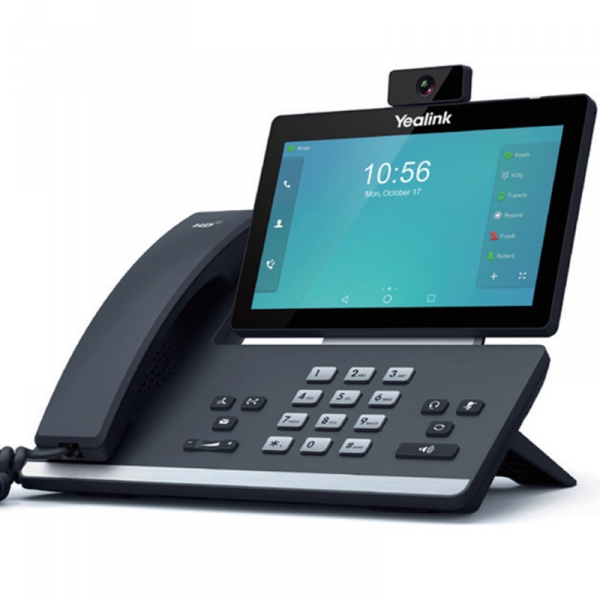
Yealink T58W
Content
About
| Phone web page | Yealink T58W |
| Default login | admin | |
| Default password | admin | |
| Video support | Yes |
Version 58
Tested Functions
| Yealink SIP-T58A/V/W | 2N IP Intercom | Direct Call | Audio | Video | Switch Control | Video Preview | Call Completed Elsewhere | Secure RTP (SRTP) |
|---|---|---|---|---|---|---|---|---|
| 150.86.57.201 | 2.32.4.41.2 | |||||||
| 58.85.0.5 | 2.31.0.40.4 | |||||||
| 58.83.0.68 | 2.27.0.36.6 | |||||||
| 58.80.9.3 | 2.23.0.32.5 | |||||||
| 58.80.0.40 | 2.23.0.32.4 | |||||||
| 58.80.0.10 | 2.19.0.28.5 | Un-Tested |
Uncompatible Yealink T58W firmwares:
58.84.0.22
58.84.0.15
58.83.0.15
58.84.0.25
This guide shows how to setup direct calling between Yealink T58W and our IP Intercoms.
If you configure everything according to this guide you’ll be able to automatically see video preview from up to 99 intercoms when a call is received on the phone as well as activate switches on intercoms. Additionally you’ll be able to call every 2N IP Intercom in the same network.
IP addresses used
- 2N IP Intercom 10.27.24.2
Intercom setup
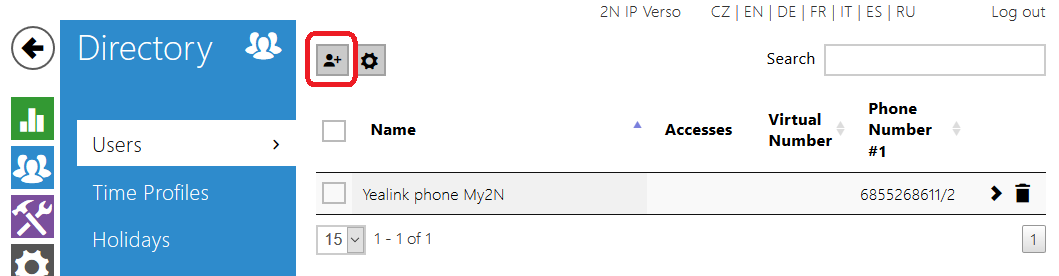
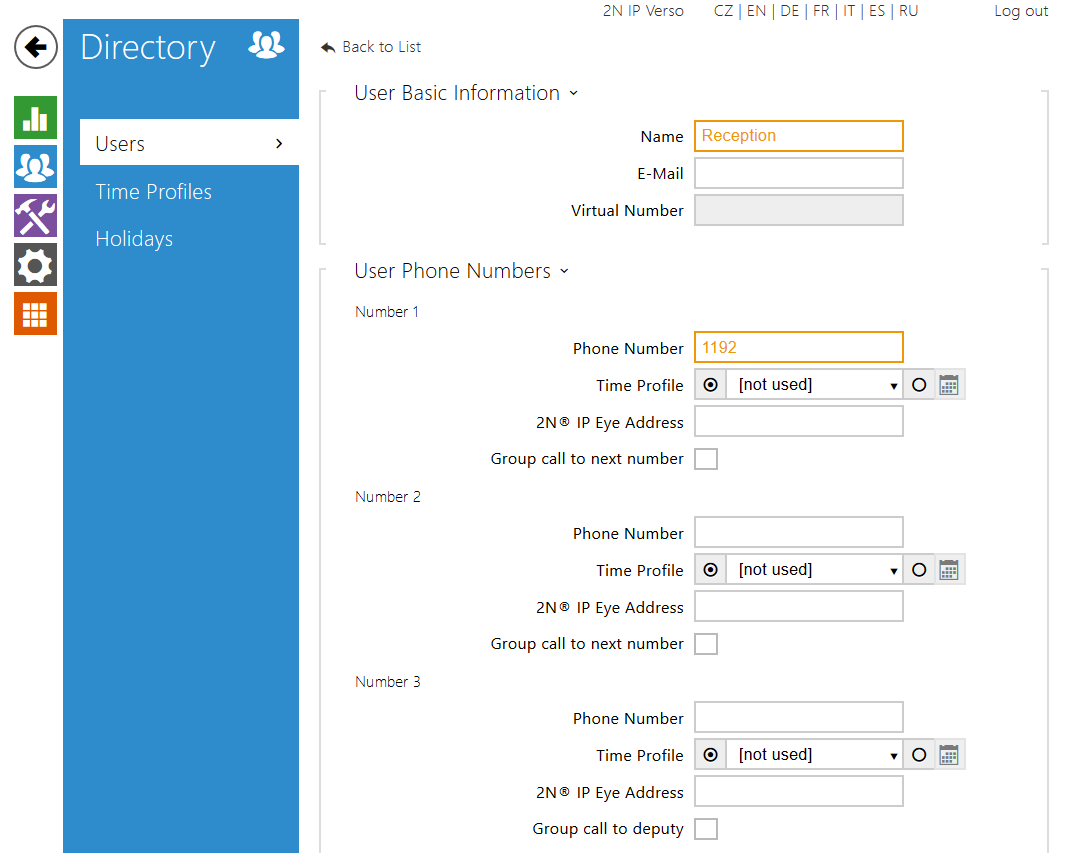
After you log in to the intercom, go to Directory.
 |
Add a new user.
 |
 |
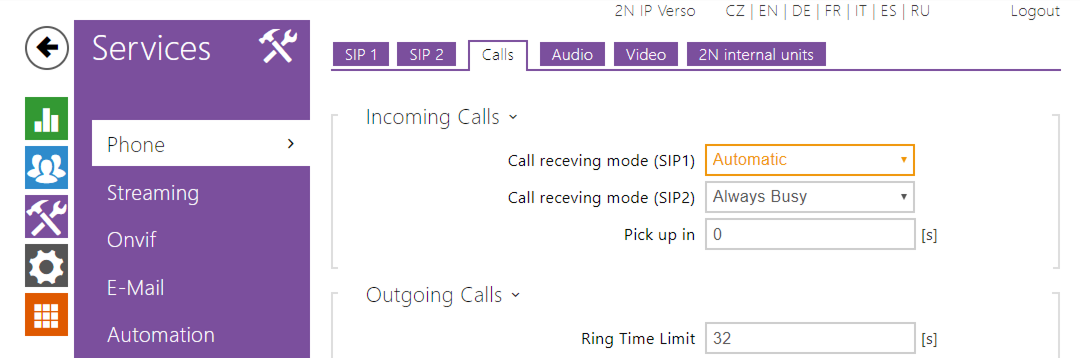 |
If you have problem with video, enable parameter "Polycom Compatibility Mode" in menu Service / Phone / Video / Advanced SDP Settings.
2N IP Intercom setup
Basic Settings / Phone book:
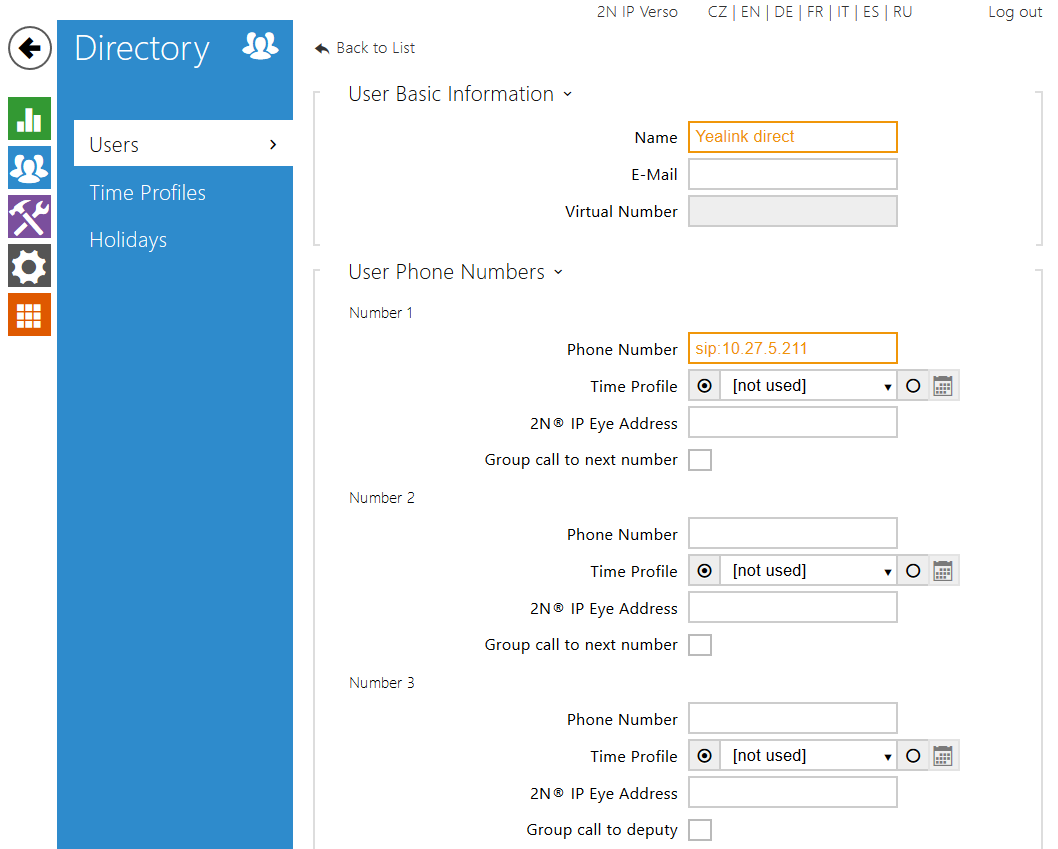
- Name - Set the personal name for the selected telephone directory.
- Phone Number - Phone number asi which is used by phone you need to call.
 |
My2N controls Directory by itself and you don't need to configure users manually.
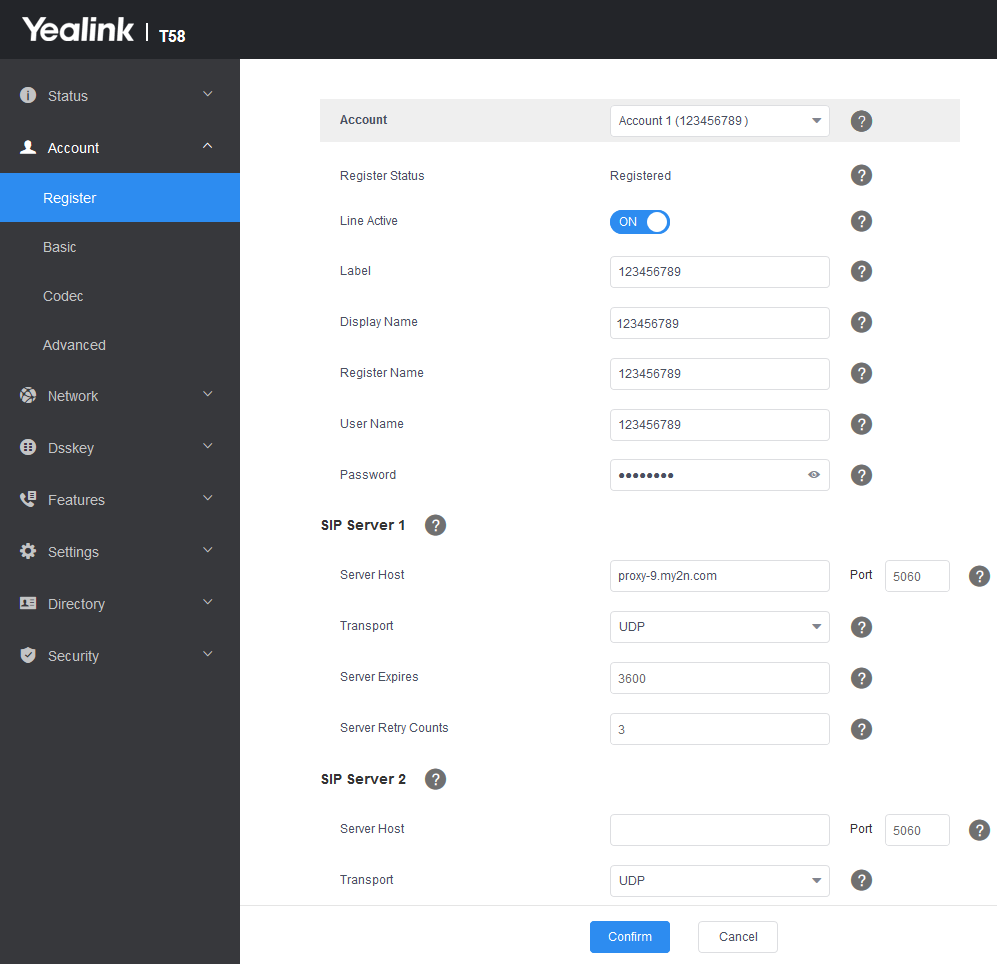
Yealink T58V/W settings
Account / Register:
- Line Active - set Enabled
- Display Name - set the personal name of Phone station
- Register name - set the selected Phone Number
- Password - set the password needed by PBX for used account
- Server Host - IP address of the PBX.
 |
My2N example:
 |
If you have problem with video, enable parameter "Polycom Compatibility Mode" in menu Service / Phone / Video / Advanced SDP Settings.
The Yealink offers an “Open Door” button function. To use this you should enter the intercom’s Switch Code into the phone’s configuration to open doors without having to enter this switch code manually. Firstly; this code has to be defined in the intercom’s configuration: Hardware>Switches>Switch#>Switch Codes or in Directory>Users>User#>User Codes.
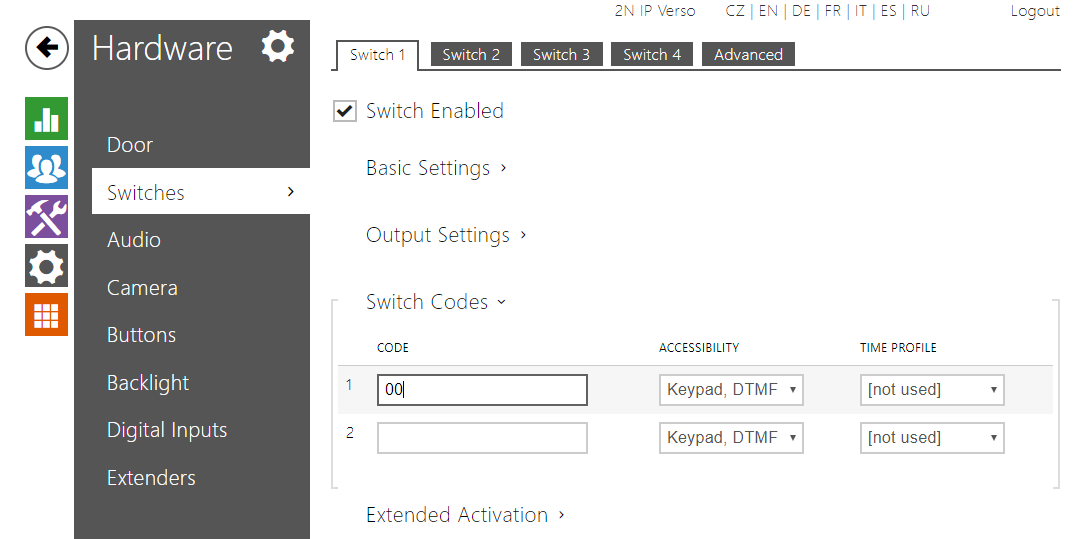 |
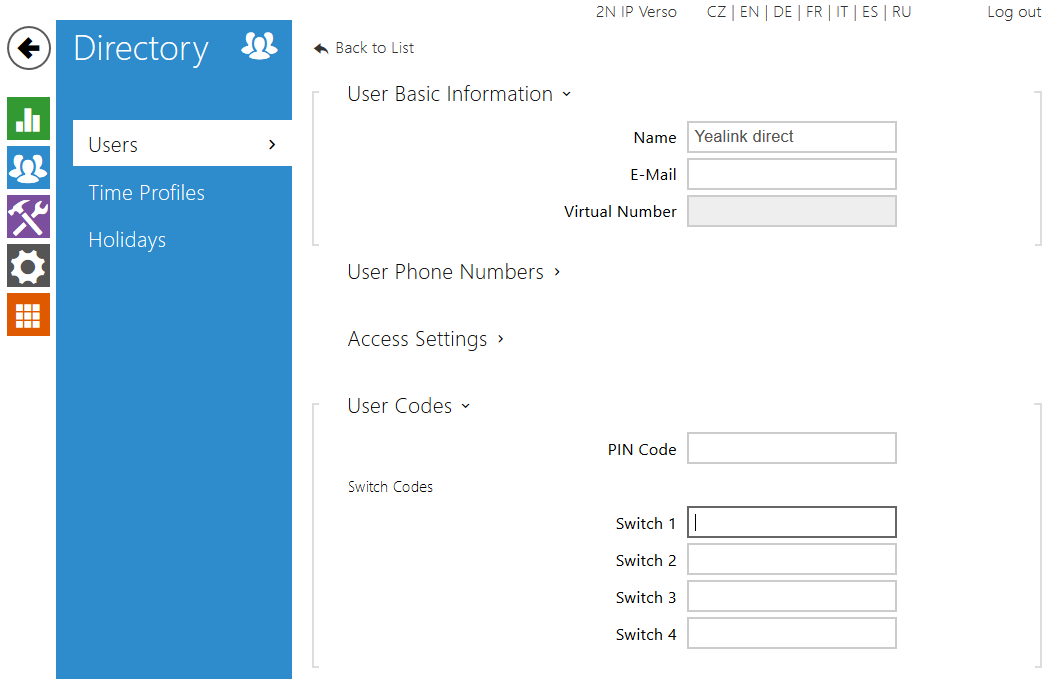 |
Yealink phone you will configure in menu Features>DoorPhone. Enter the phone number of 2N IP Intercom, Display Name and the Code set above to Unlock PIN field.
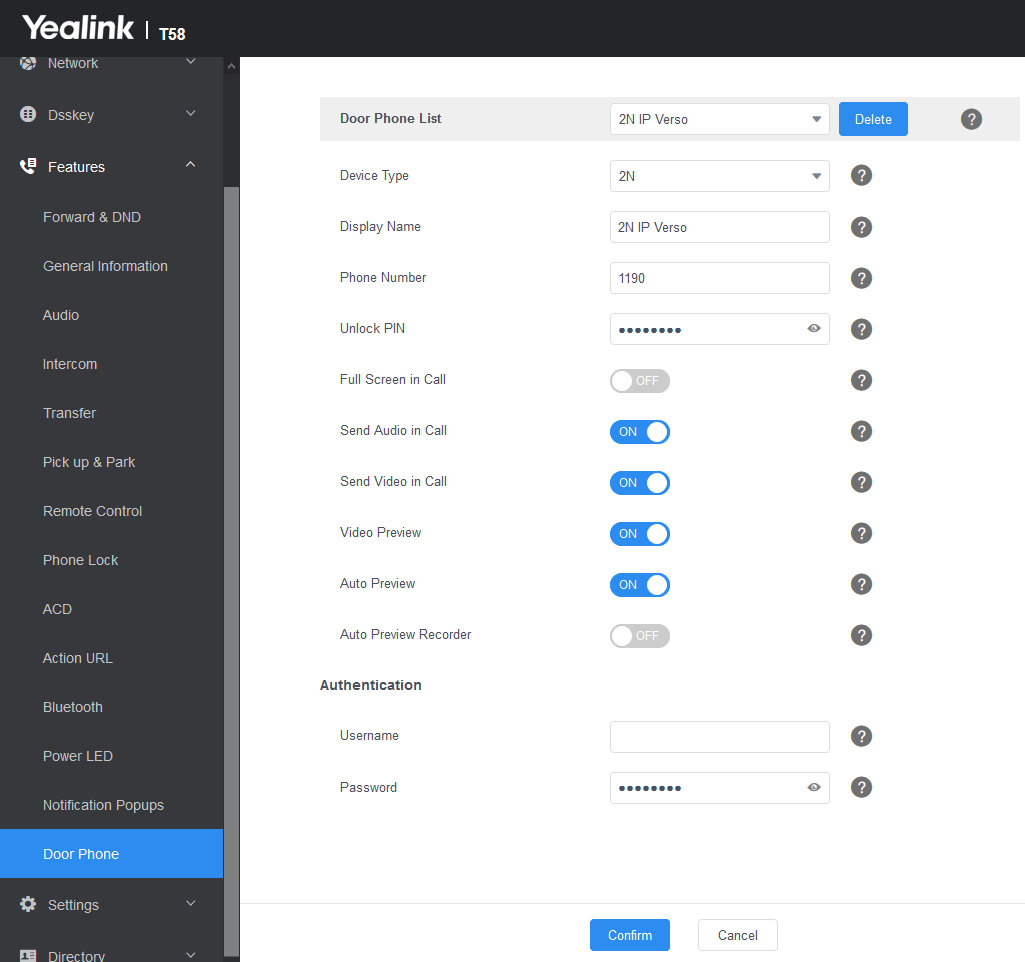 |
First step is to set your intercom number which it will call from to phone. Enter phone menu Features>Door Phone.
Device Type: 2N
Display Name: according to your preference
Phone Number: intercom’s IP, or phone number
Unlock PIN: 00* – This PIN has to be a valid code set in your 2N IP Intercom
Full Screen: Disabled
Send Audio: Enabled
Send Video: Enabled
Video Preview: Enabled
Auto Preview: Enabled
Direct call:
|
PBX or My2N example:
|
 |
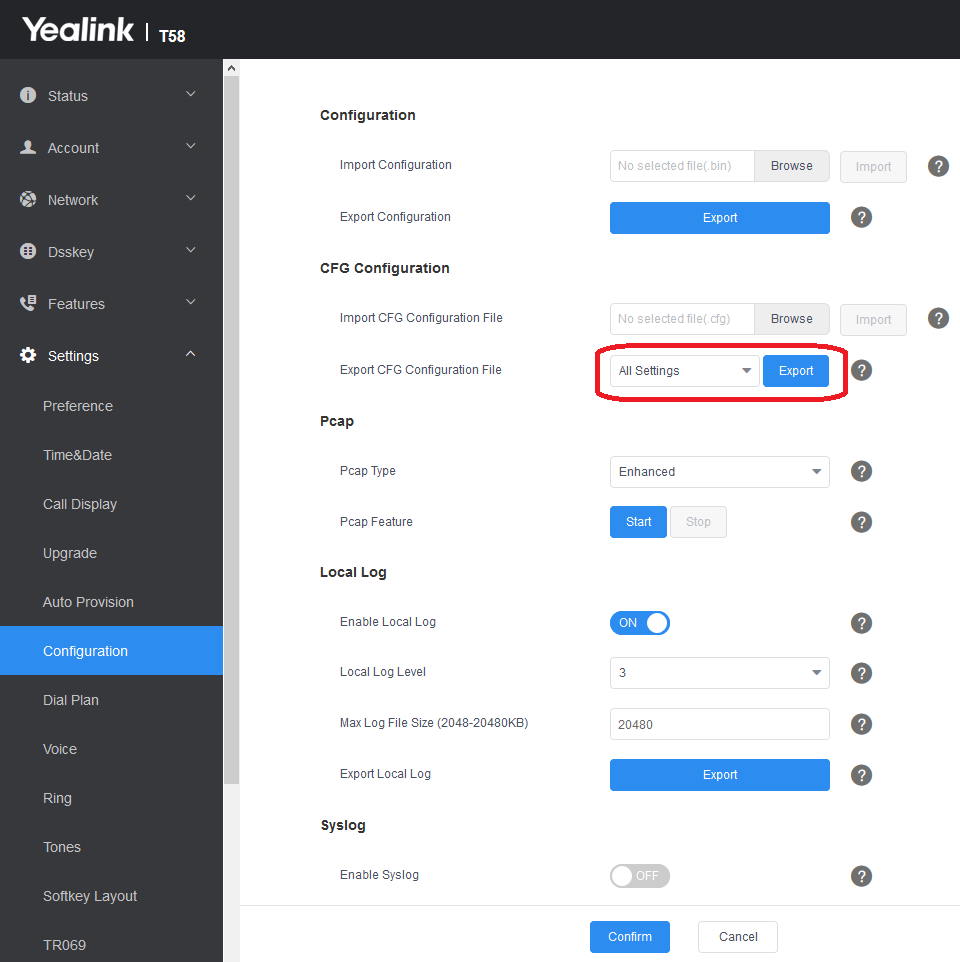 |
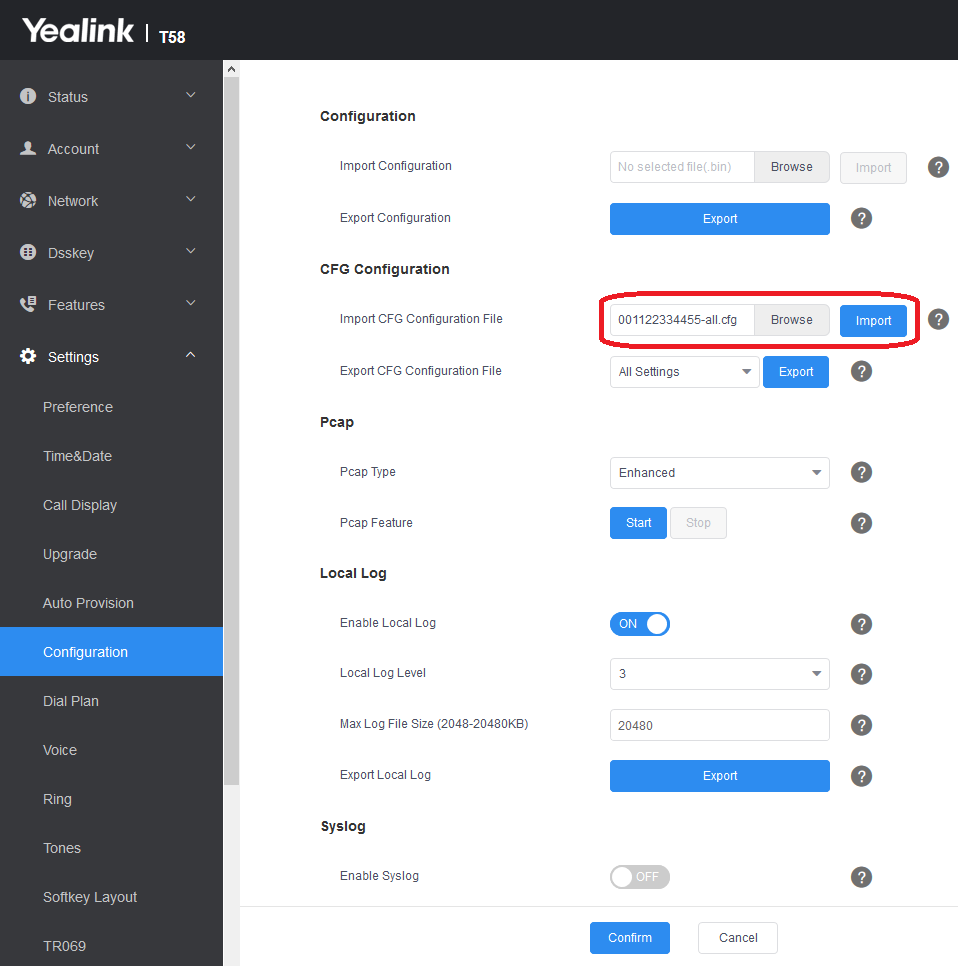
Save the file.
 |
 |
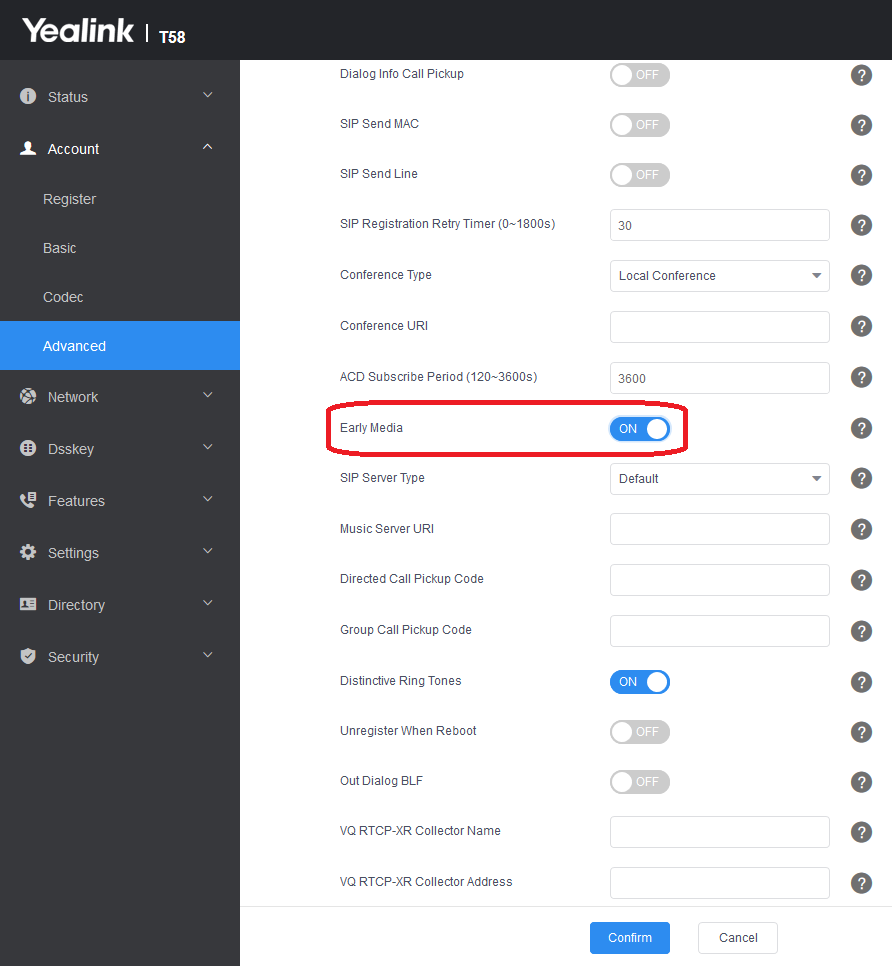
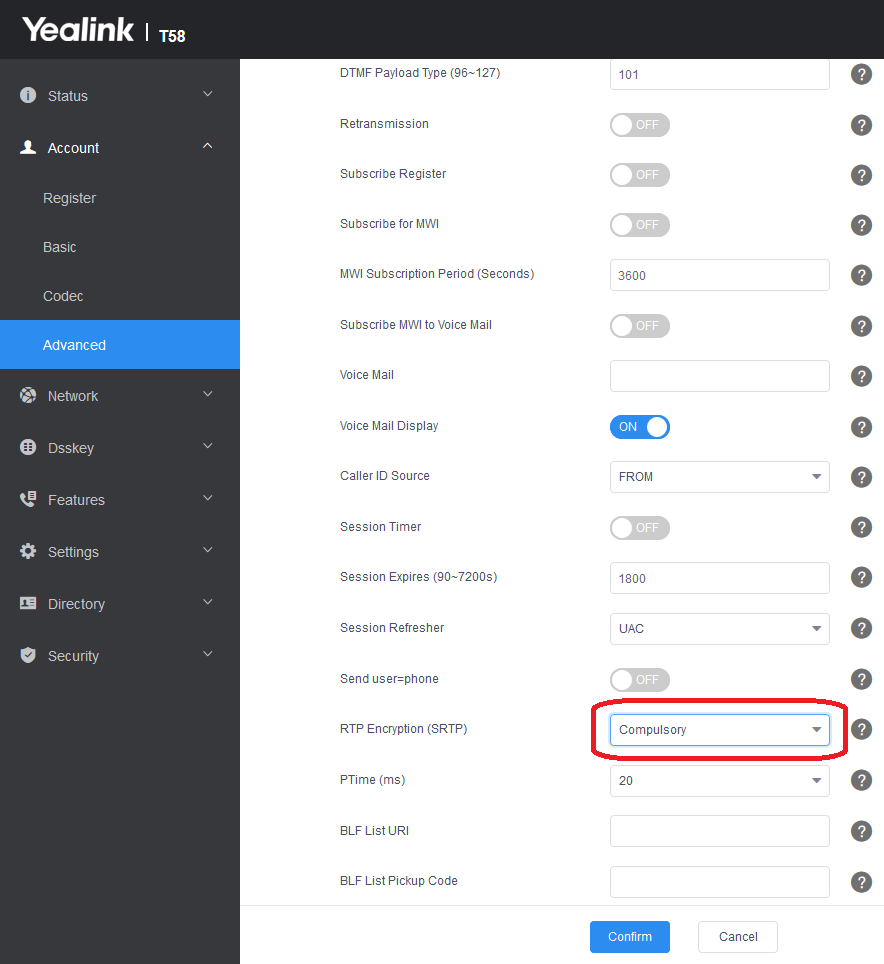
SRTP on Yealink T58V/W
To enable SRTP on your Yealink T58V/W go to Account and Advanced and set parameter "RTP Encryption (SRTP)" to compulsory.
 |
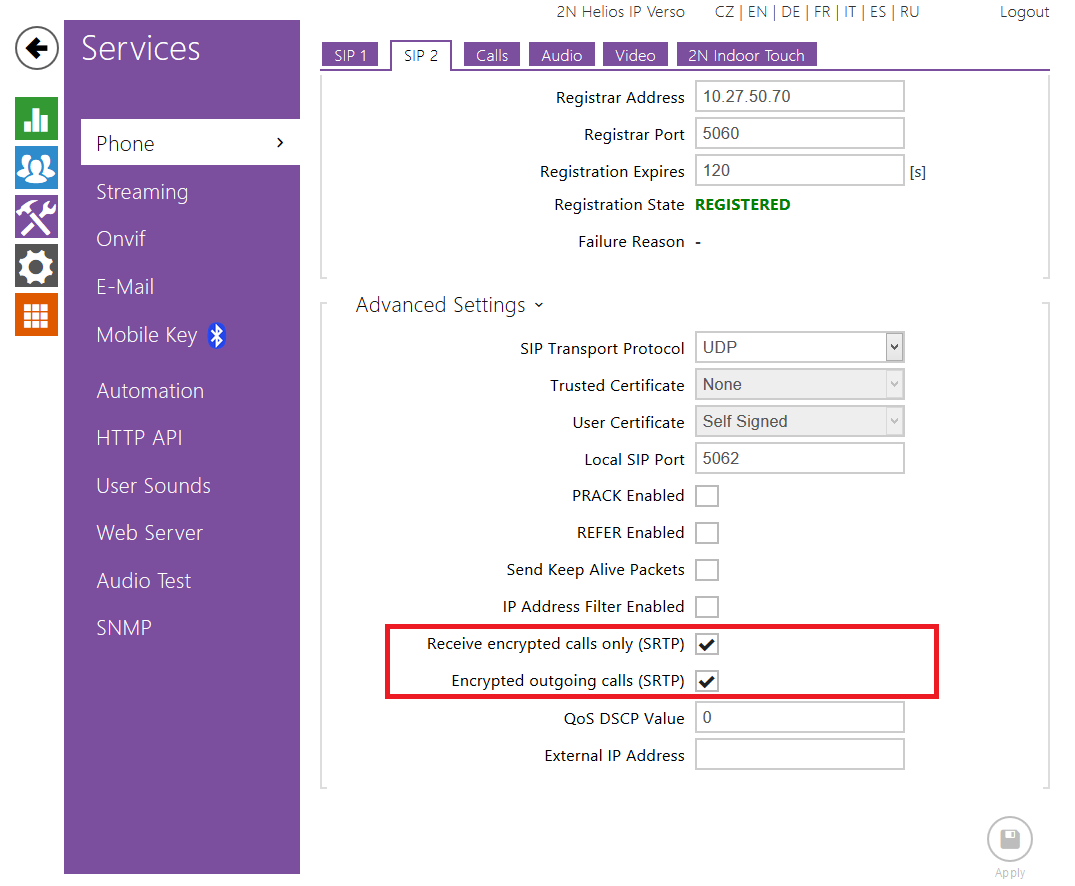
SRTP on 2N IP Intercom
Go to SIP settings in Services and in Advanced settings enable recieving and transmitting of SRTP calls.
 |
This quick guide describes how to setup monitoring of 2N IP intercom cameras on Yealink T58W.
IP addresses used
2N® IP Verso 10.27.5.211
Yealink T58W 10.27.24.2
Intercom setup
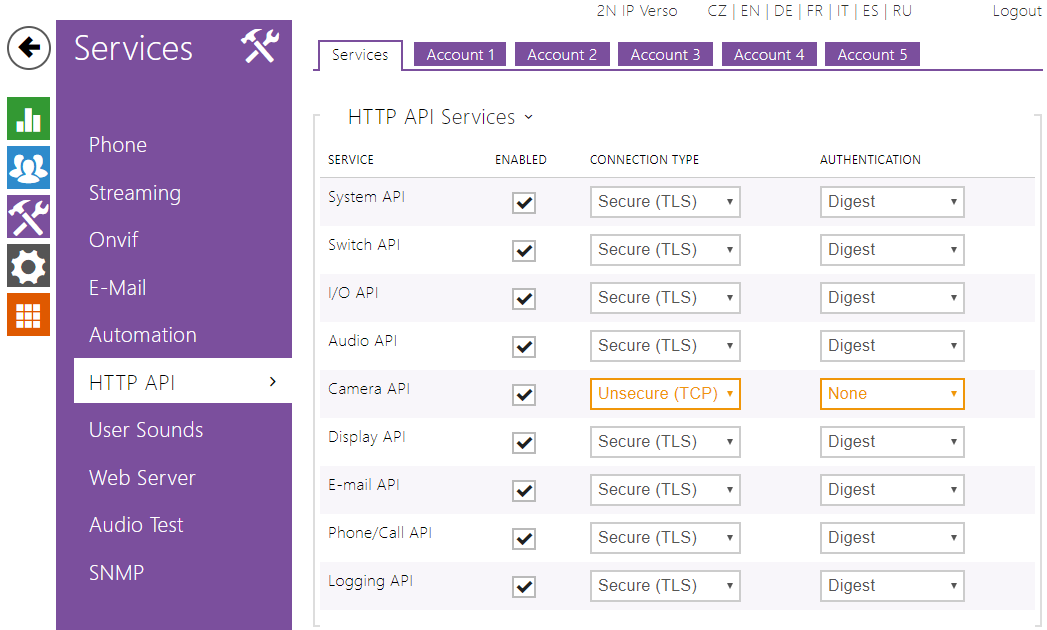
After you log in to the intercom, go to Services and then HTTP API. Locate the Camera API row and change Connection type to Unsecure (TCP) and Authentication to None.
 |
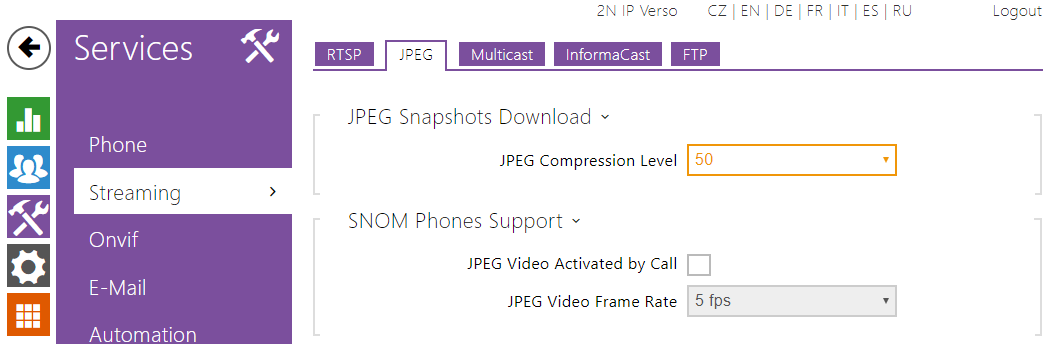
If you’re getting poor framerate or would like to save some bandwidth, you can decrease JPEG quality in Streaming>JPEG down to 50.
 |
Phone setup
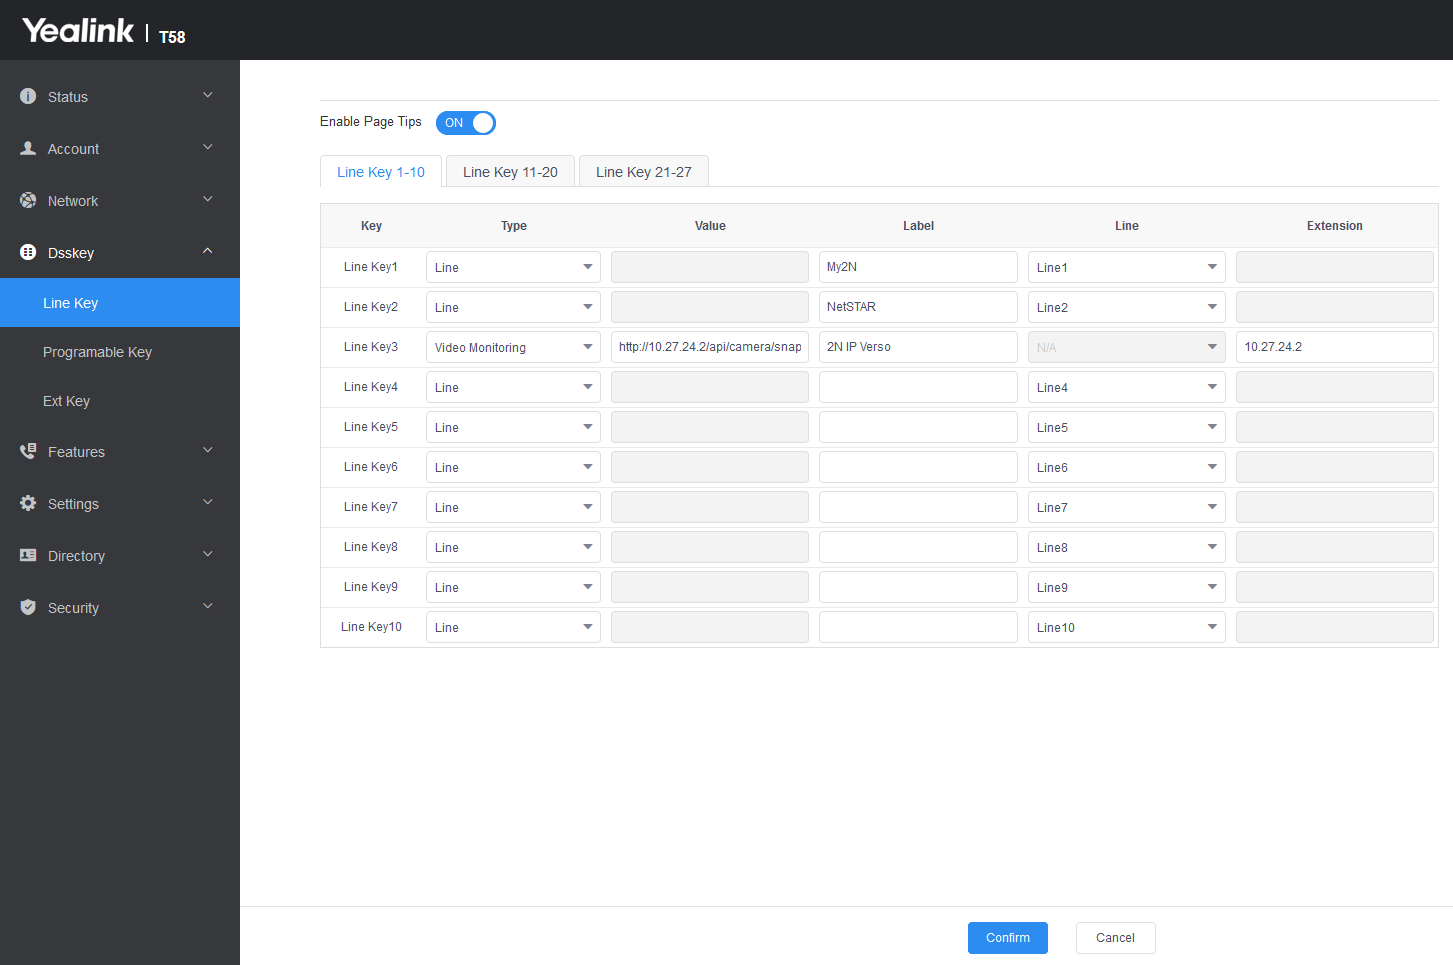
Log in to the phone’s web interface and go to DSSKey tab. Choose one of the Line Keys, click on its Type dropdown menu and select Video Monitoring. The most important field here is Value, this is where you put the address of the intercom’s HTTP API camera stream in the following format:
http://intercom’s IP/api/camera/snapshot?width=640&height=480&fps=15
The remaining fields are Label and Extension. Label is the name which will identify the intercom’s camera on the display of the phone. Extension is not important in this scenario, but you can enter the intercom’s IP.
The following picture shows that I have assigned one intercom camera to the phone’s DSS Keys using its respective IP address.
 |
How it works
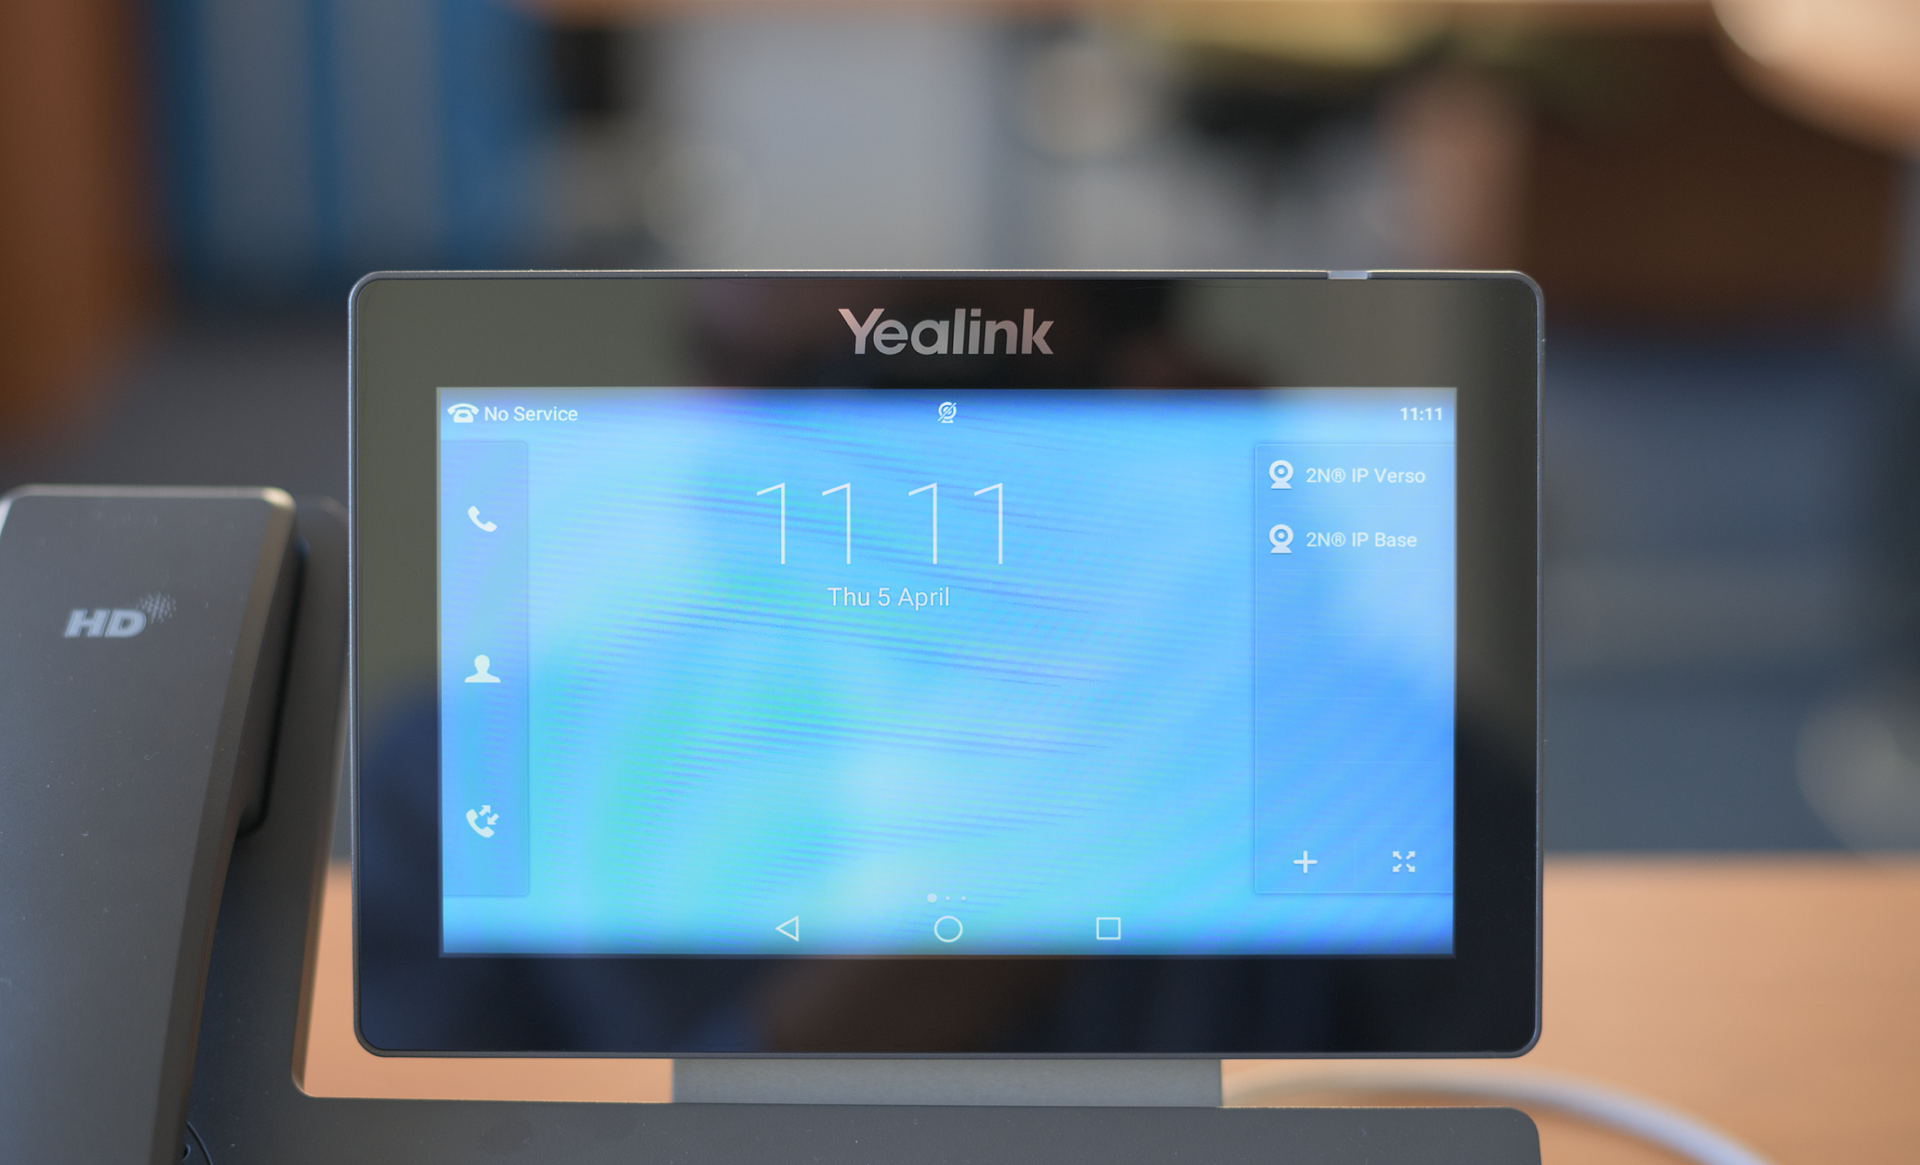
DSS Keys are accessible on the right side of the phone’s home screen.
 |
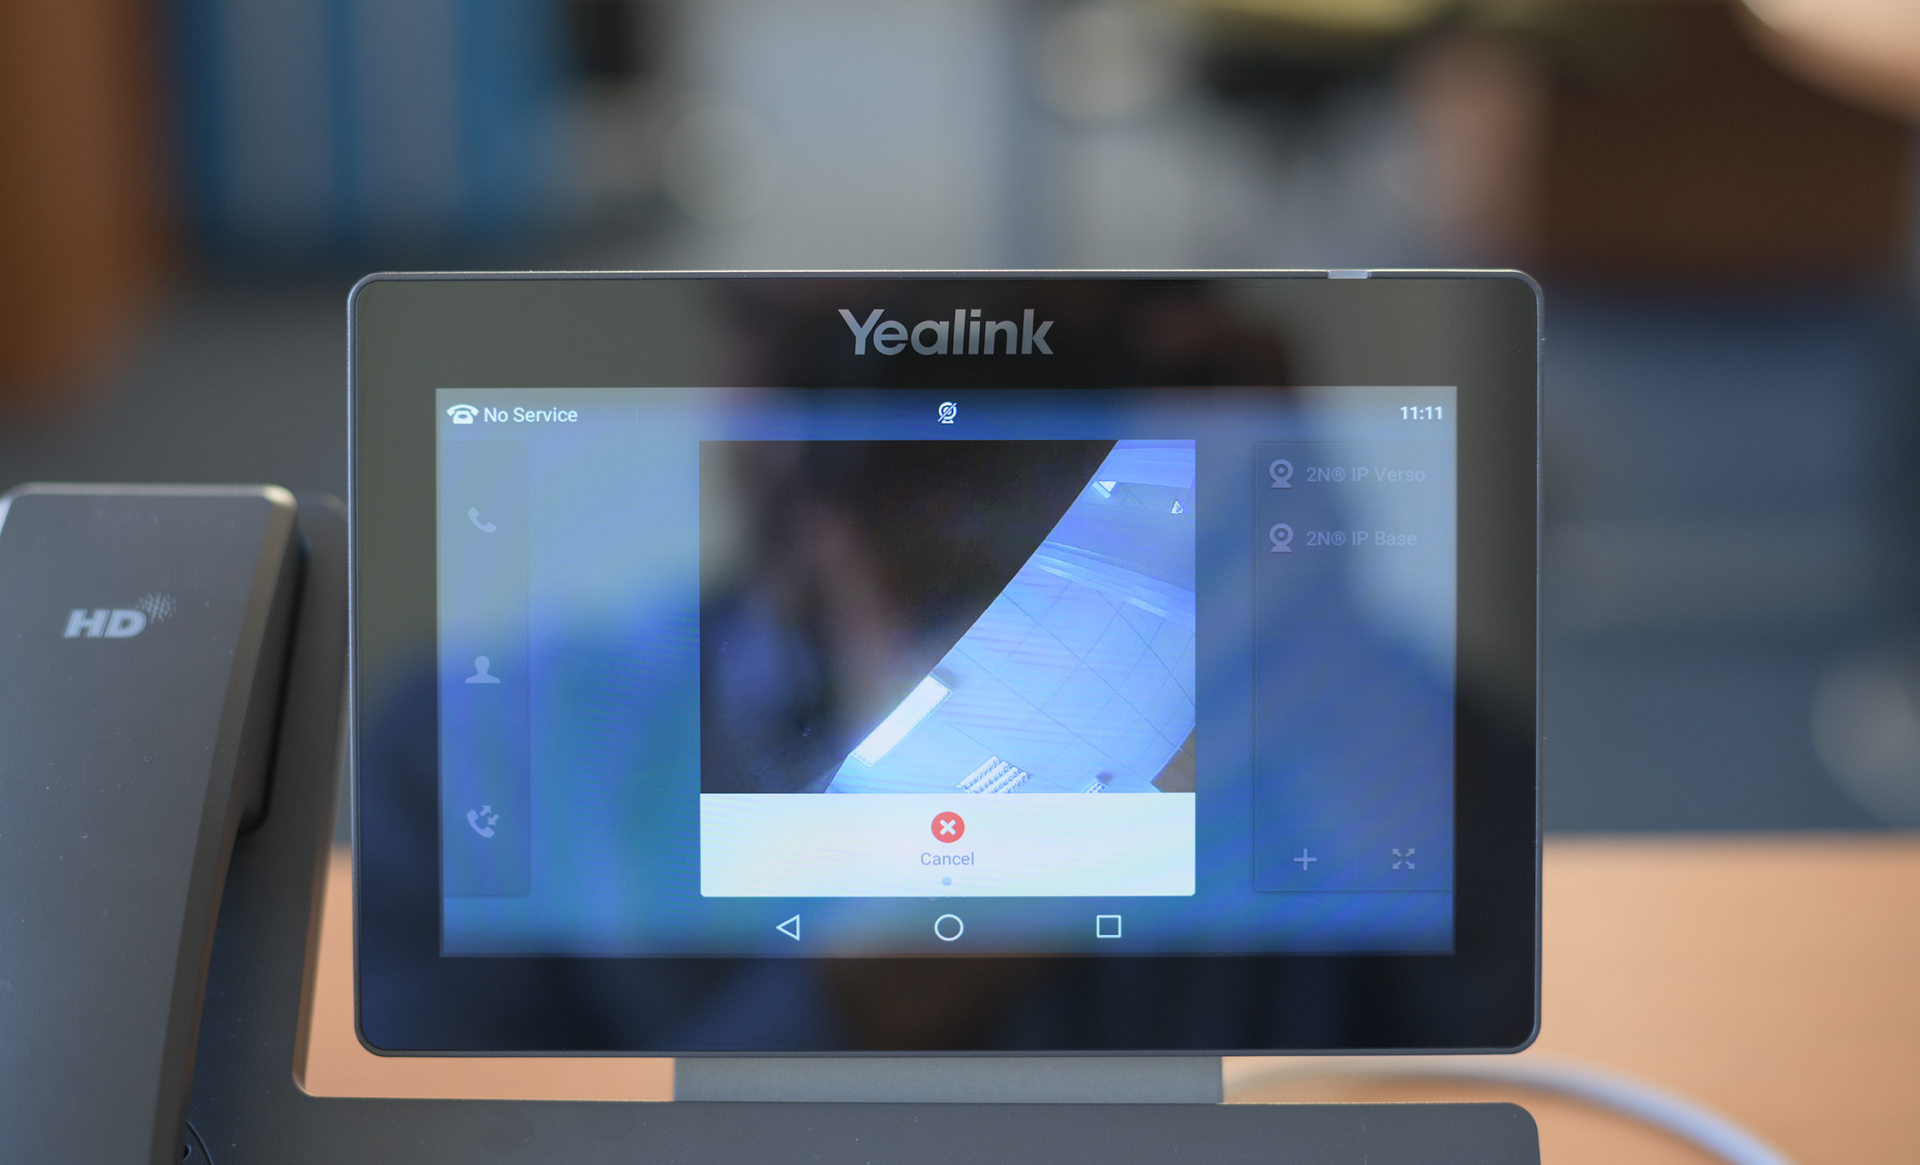
Once you tap on it, it immediately show your intercom’s camera feed.
 |
Used Symbols
![]() - Verified with video
- Verified with video
![]() - Verified with audio only
- Verified with audio only
![]() - Work with limitation
- Work with limitation
![]() - Incompatible
- Incompatible