Zoiper IAX SIP VOIP Softphone
Content
About
| Phone web page | Zoiper IAX SIP VOIP Softphone |
| Default login | N/A | |
| Default password | N/A | |
| Video support | Yes |

Version 2.8.99
Version detail: Version 2.8.99
Tested with
| Direct Call | Netstar 4.4 | |
|---|---|---|
| 2N IP Intercom |
Tested Functions
Audio | Video | Switch Control | Video Preview | Call Completed Elsewhere | Secure RTP (SRTP) | |
|---|---|---|---|---|---|---|
2N IP Intercom 2.24.1.33.9 |
Direct Call
Following guide is related to 2N IP Intercom firmware version 2.24
Connect to the 2N IP Intercom web configurator.
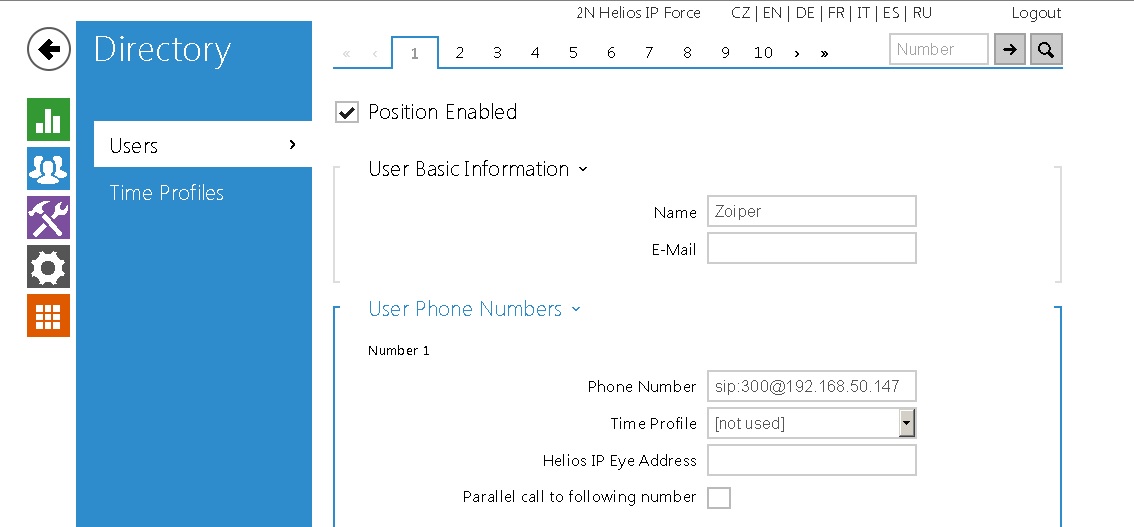
Enable one of the quick dial button position. When it is enabled, specify position name and phone number of the Zoiper client.
- set the user in Directory / Users to dial direct IP call according to Zoiper settings. If Zoiper has got a name 300 and IP address 192.168.50.147, set the Phone Number to sip:300@192.168.50.147 – see the picture below
 |
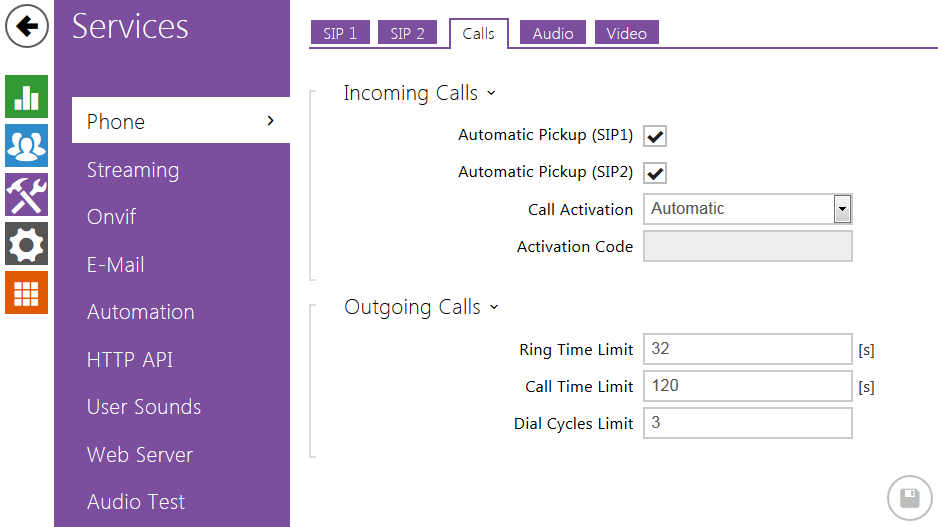
- navigate Service -> Phone -> Calls for the 2N IP Intercom settings for incoming calls.
 |
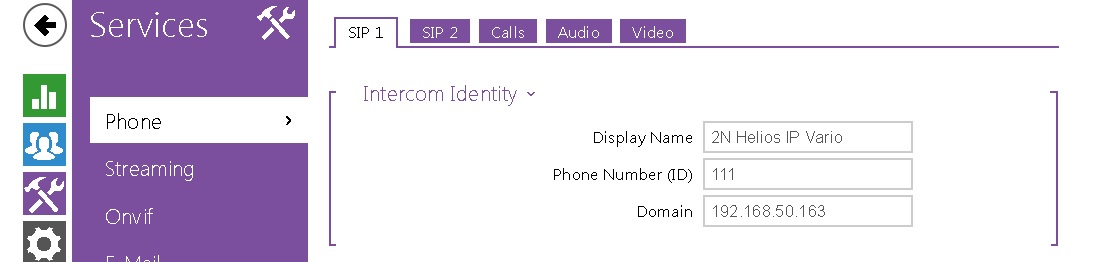
- set Domain IP address for at least one SIP account in Services -> Phone. This IP address is same as IP address of 2N IP Intercom. In our example, it is 192.168.50.163.
 |
If you set better parameters, it can happen that the video will be jamming (this depends on quality of your network).
 |
Zoiper for Android - direct call settings
Following guide is related to Zoiper for Android.
Zoiper is a FREE IAX and SIP softphone application for VOIP calls over 2G, 3G, 4G or WiFi.
Download Zoiper application from Google Play (Android) and install it.
In order to use Zoiper for direct SIP calls, you have to set up account. Zoiper will not let you to do any SIP calls, including direct SIP calls, unless you set up account.
However, for making direct SIP calls it is not necessary for that account to be successfuly registered to SIP proxy. You can easily register Zoiper account to 2N IP Intercom.
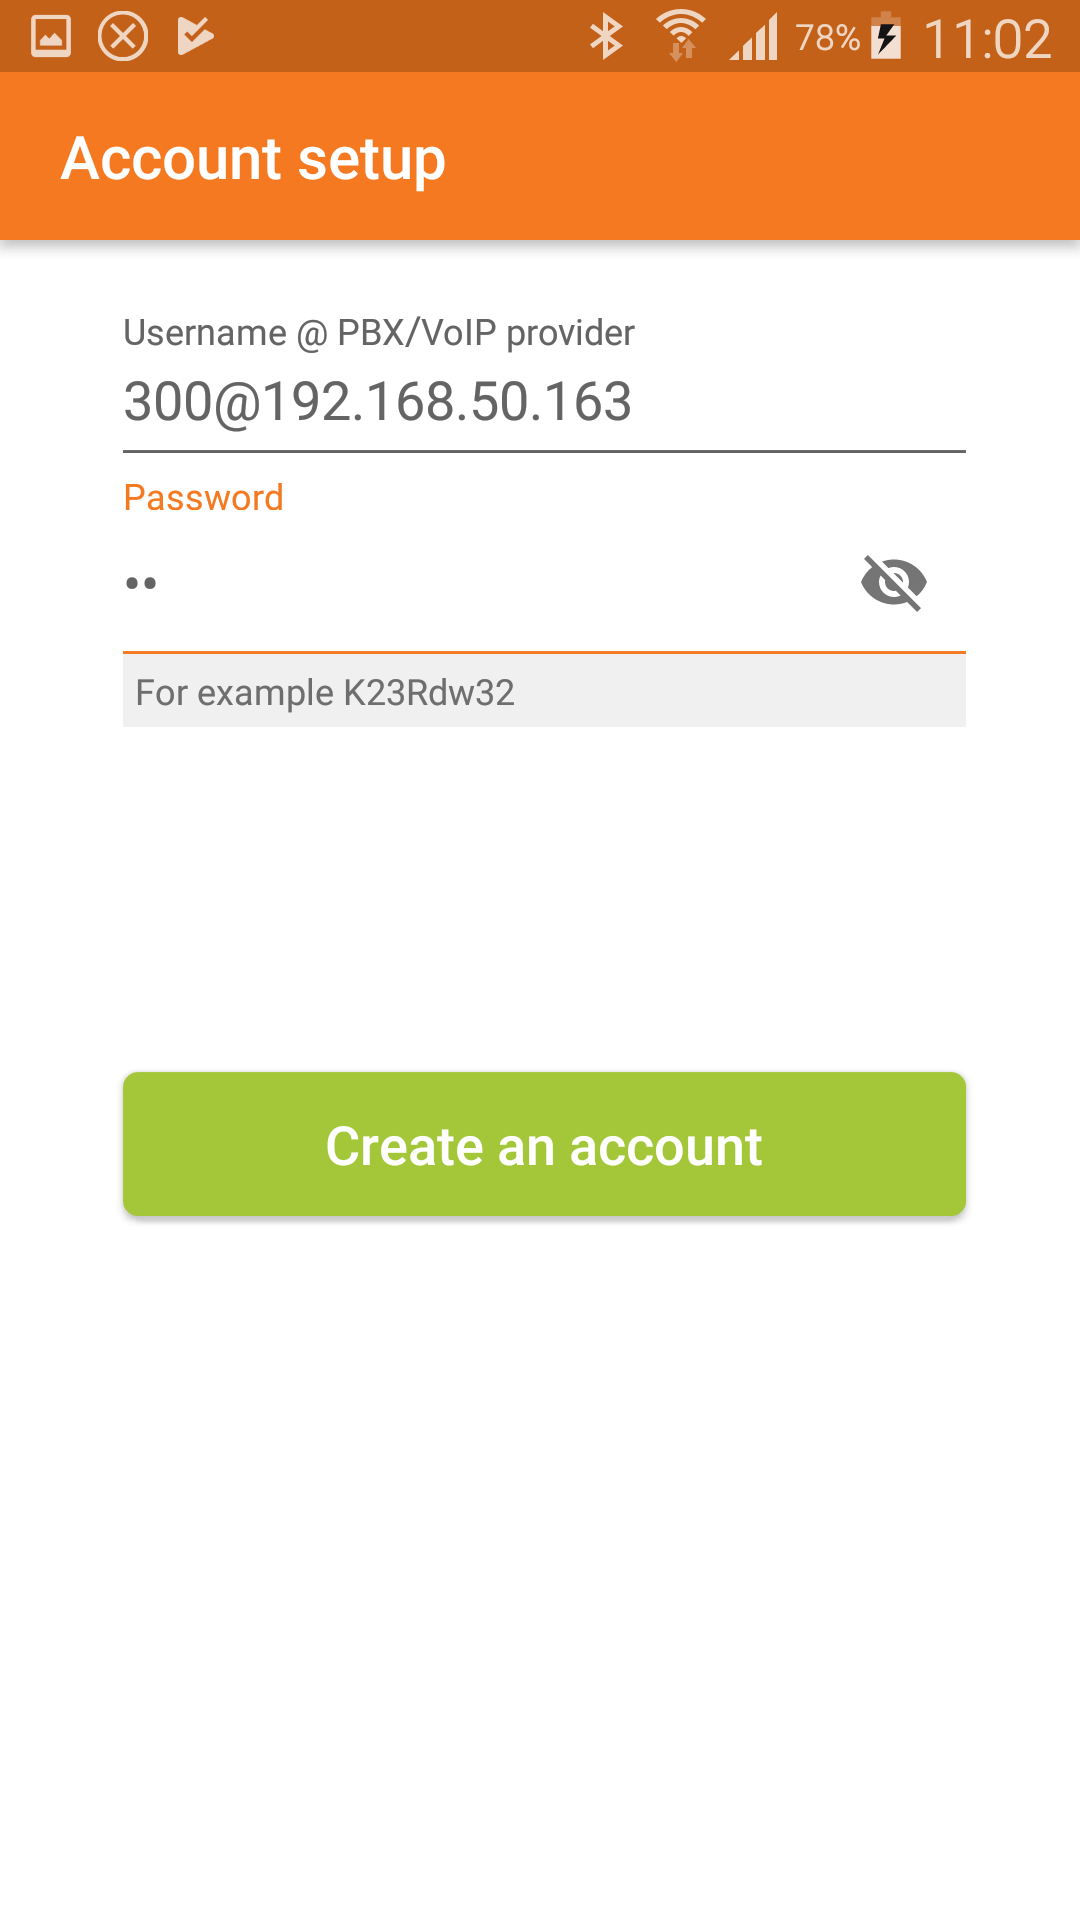
- Set up your account
 |
 |
 |
 |
 |
 |
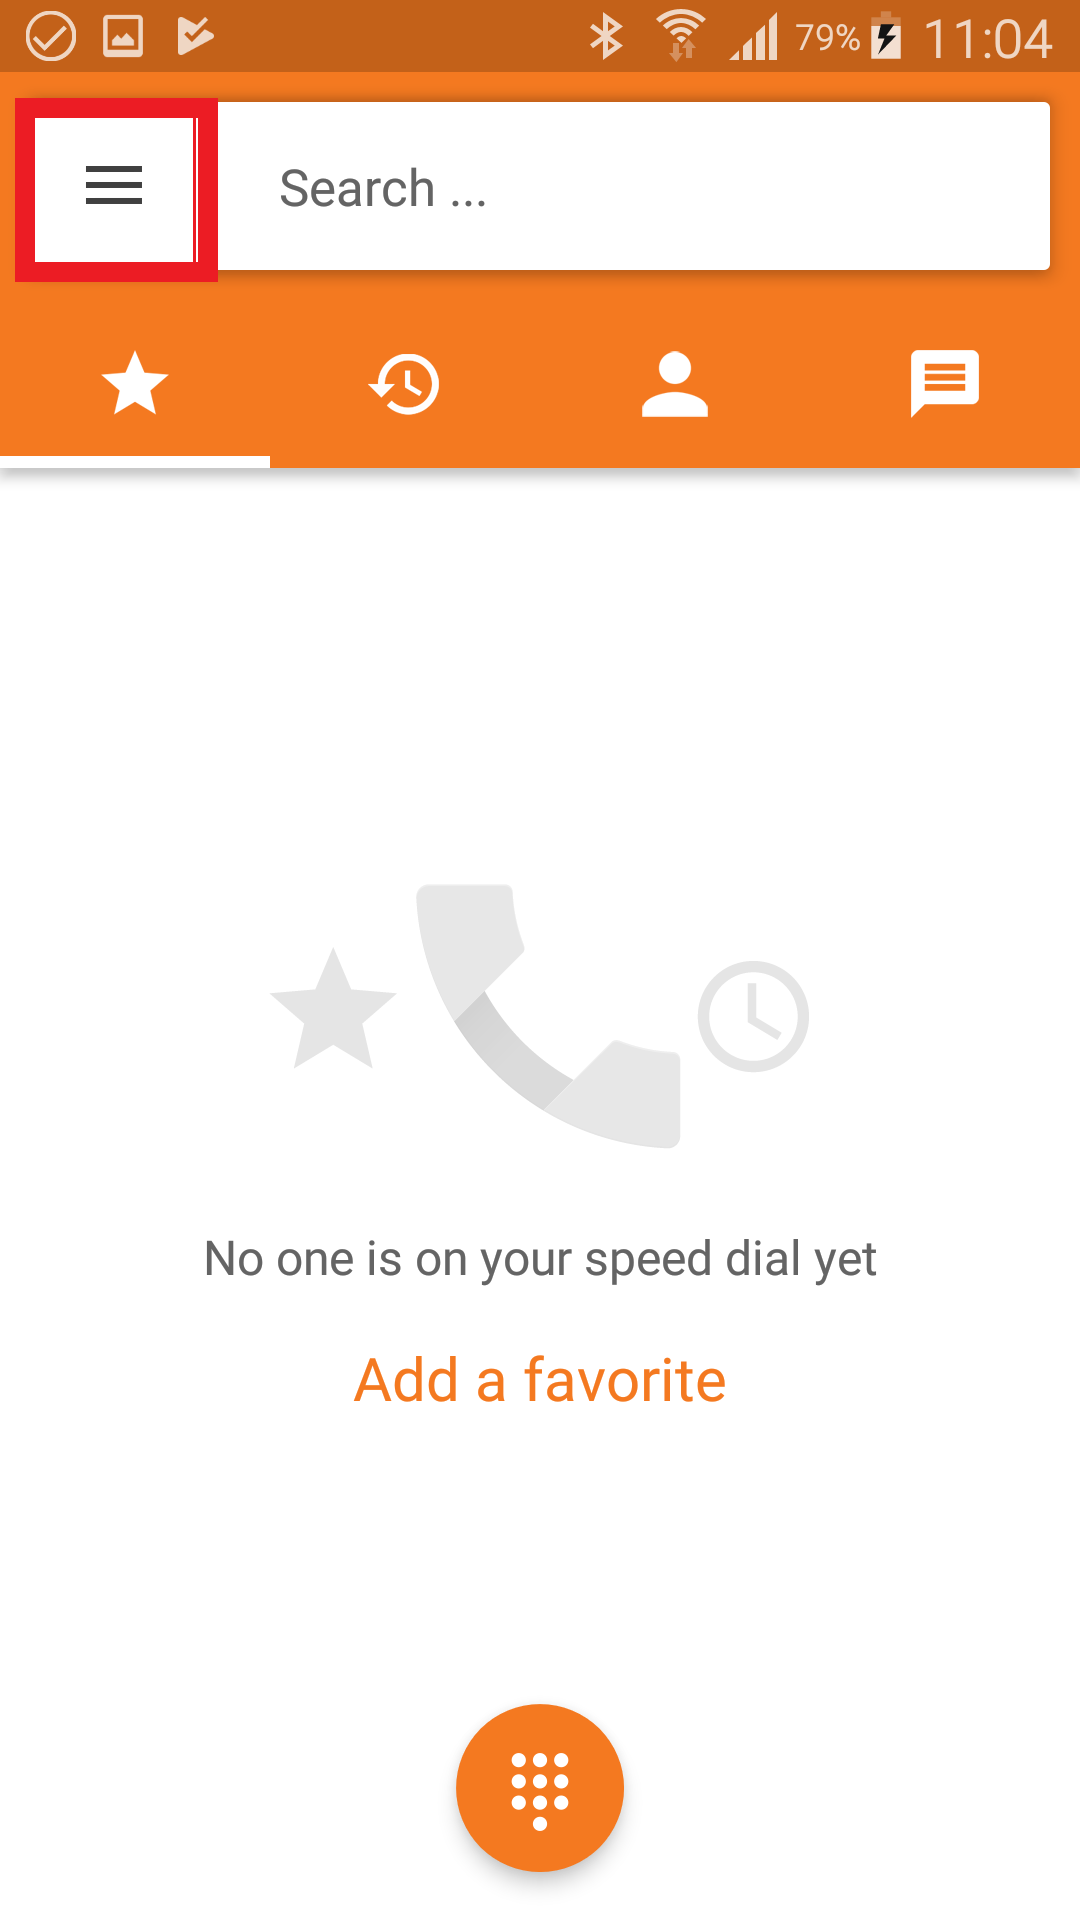
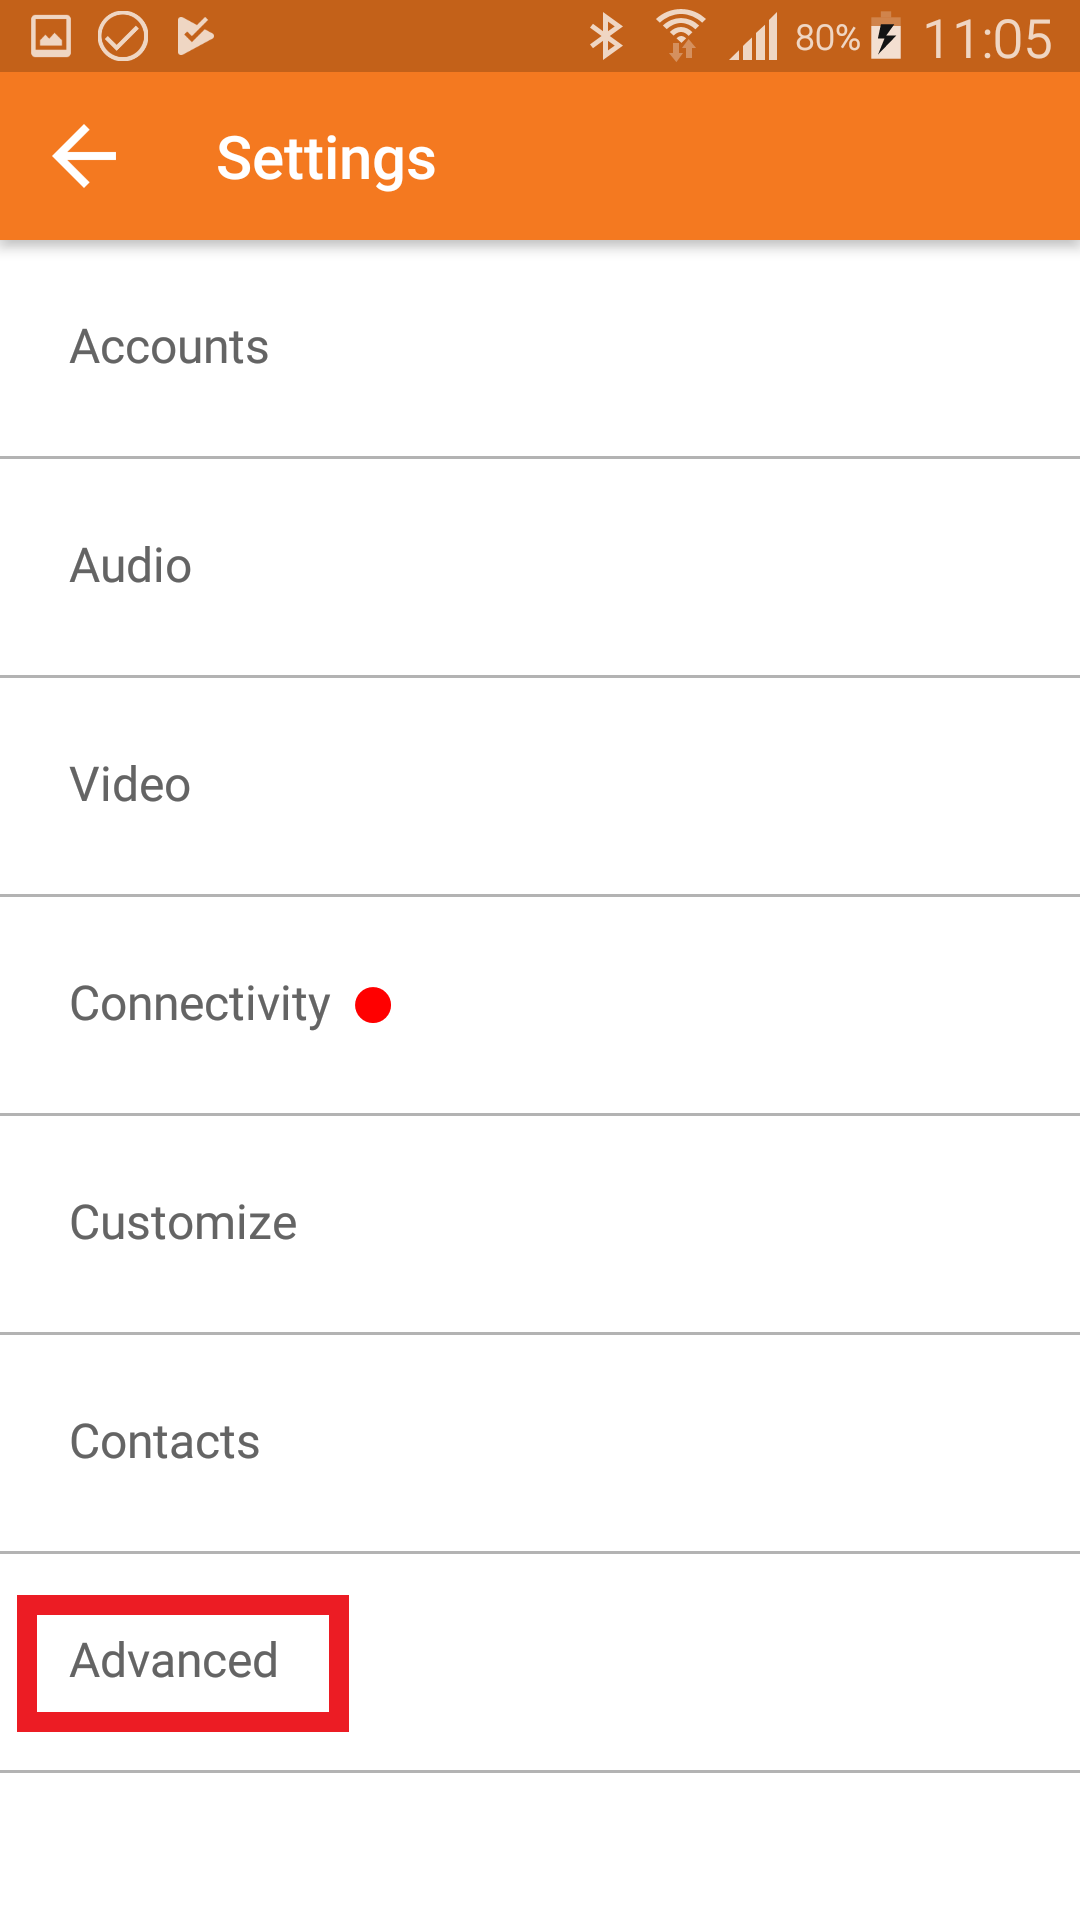
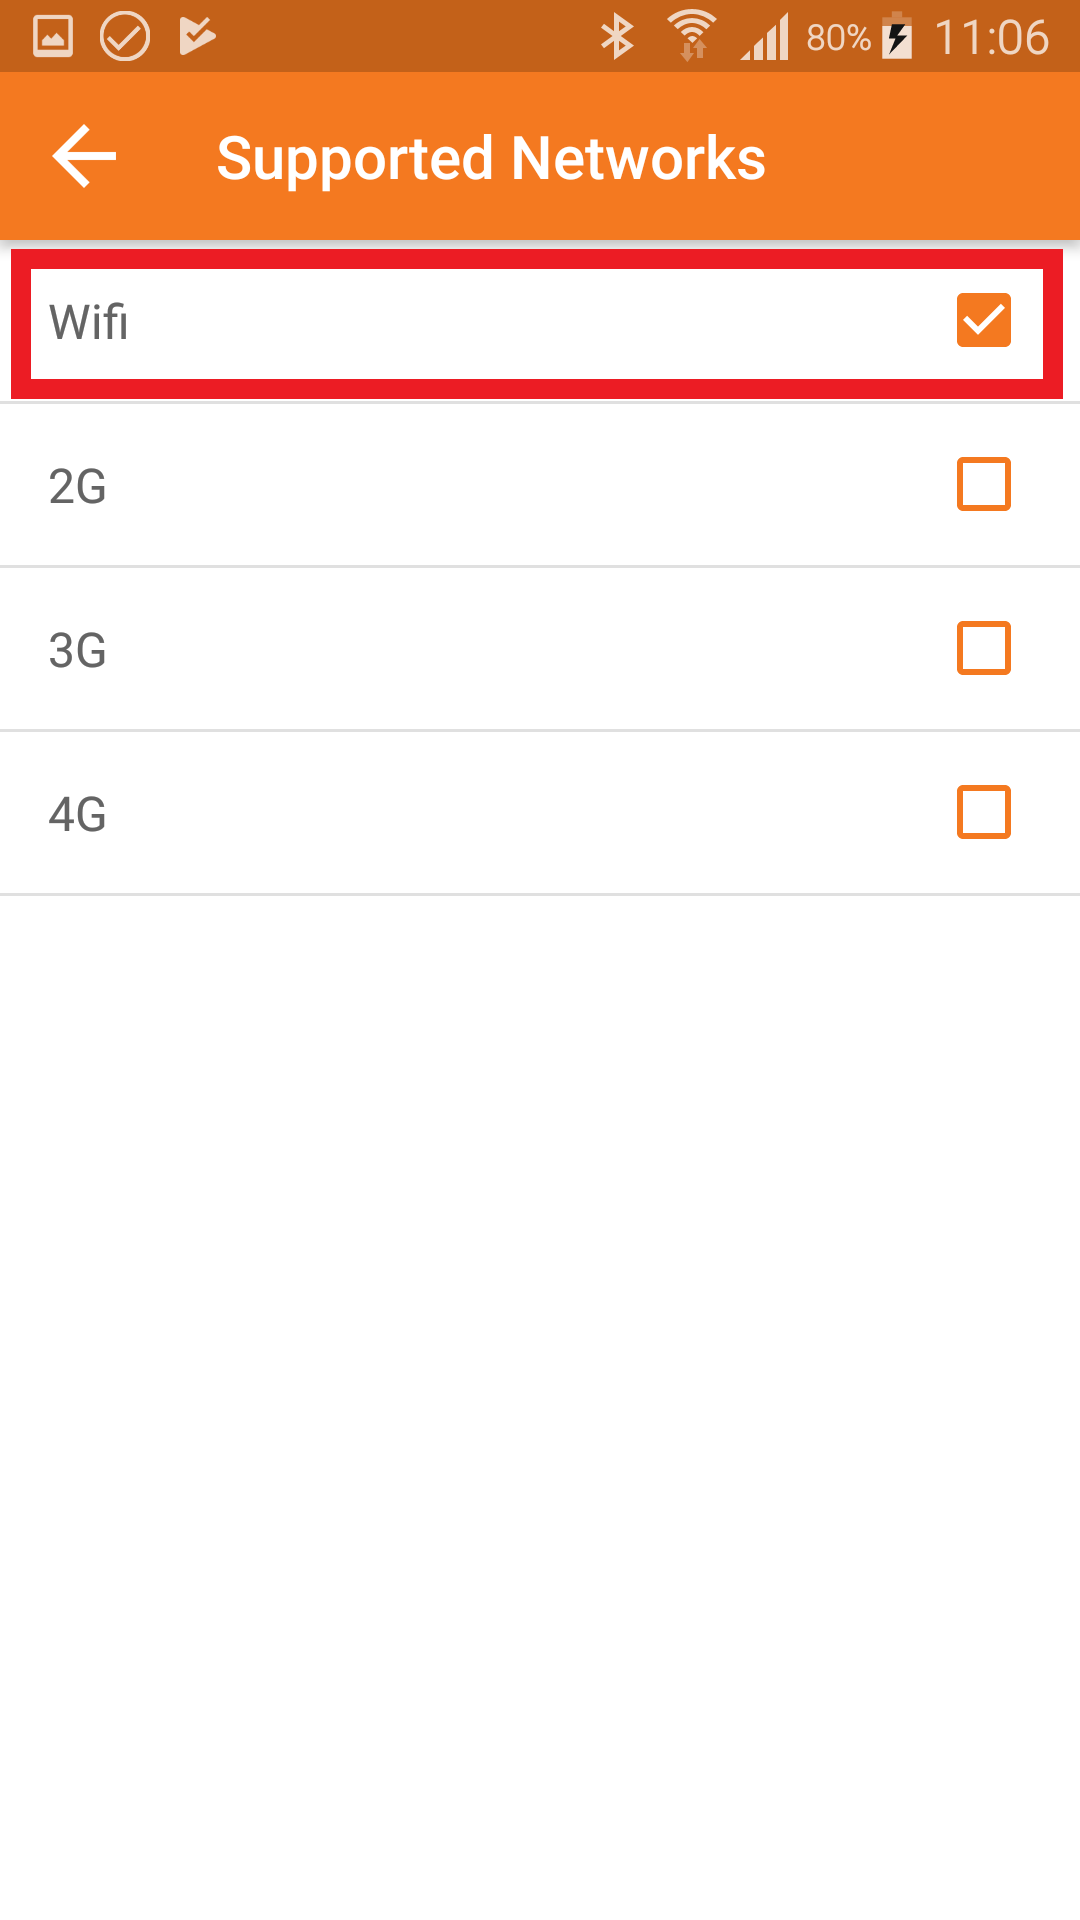
To do so, go back to Settings, choose Advanced → Supported Networks
there set WiFi to be ON and disable other network
 |
 |
 |
 |
 |
 |
 |
 |
 |
 |
Following guide is related to Zoiper for iOS.
Zoiper is an easy to use sip video softphone, with excellent voice quality and easy to setup.
In order to use Zoiper for direct SIP calls, you have to set up account. Zoiper will not let you to do any SIP calls, including direct SIP calls, unless you set up account.
However, for making direct SIP calls it is not necessary for that account to be successfuly registered to SIP proxy. You can easily register Zoiper account to 2N IP Intercom.
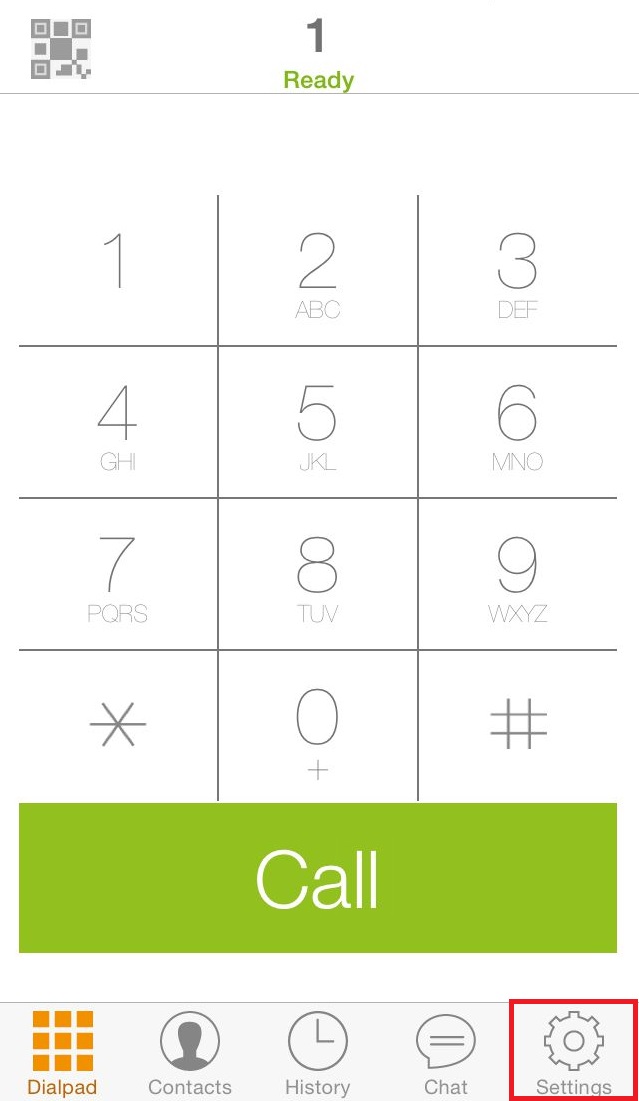
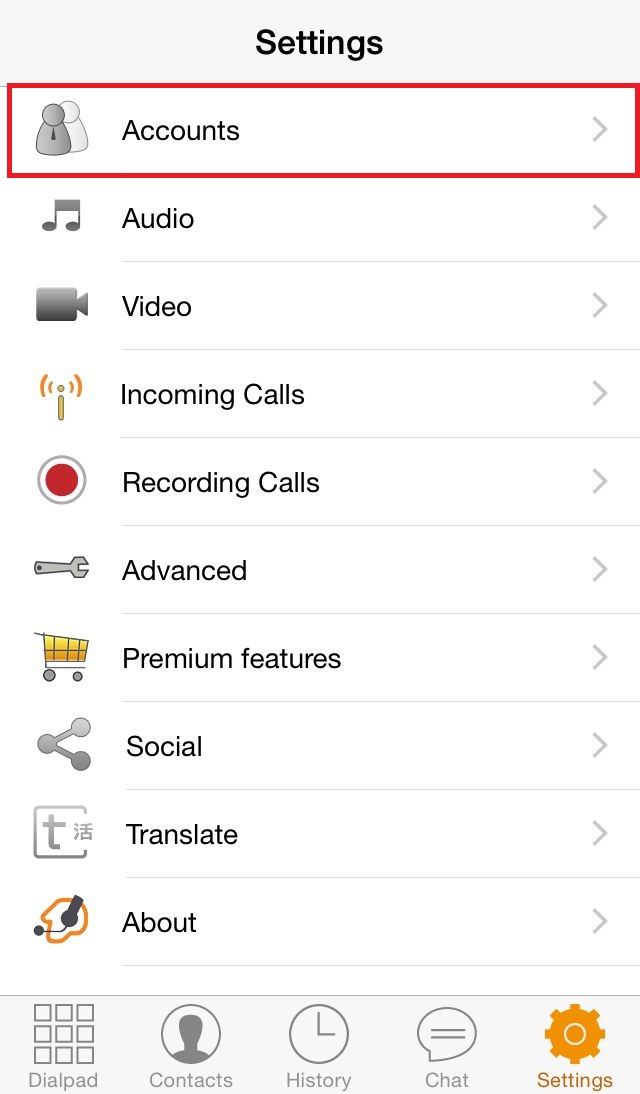
After installation of application in to device, navigate to SETTINGS

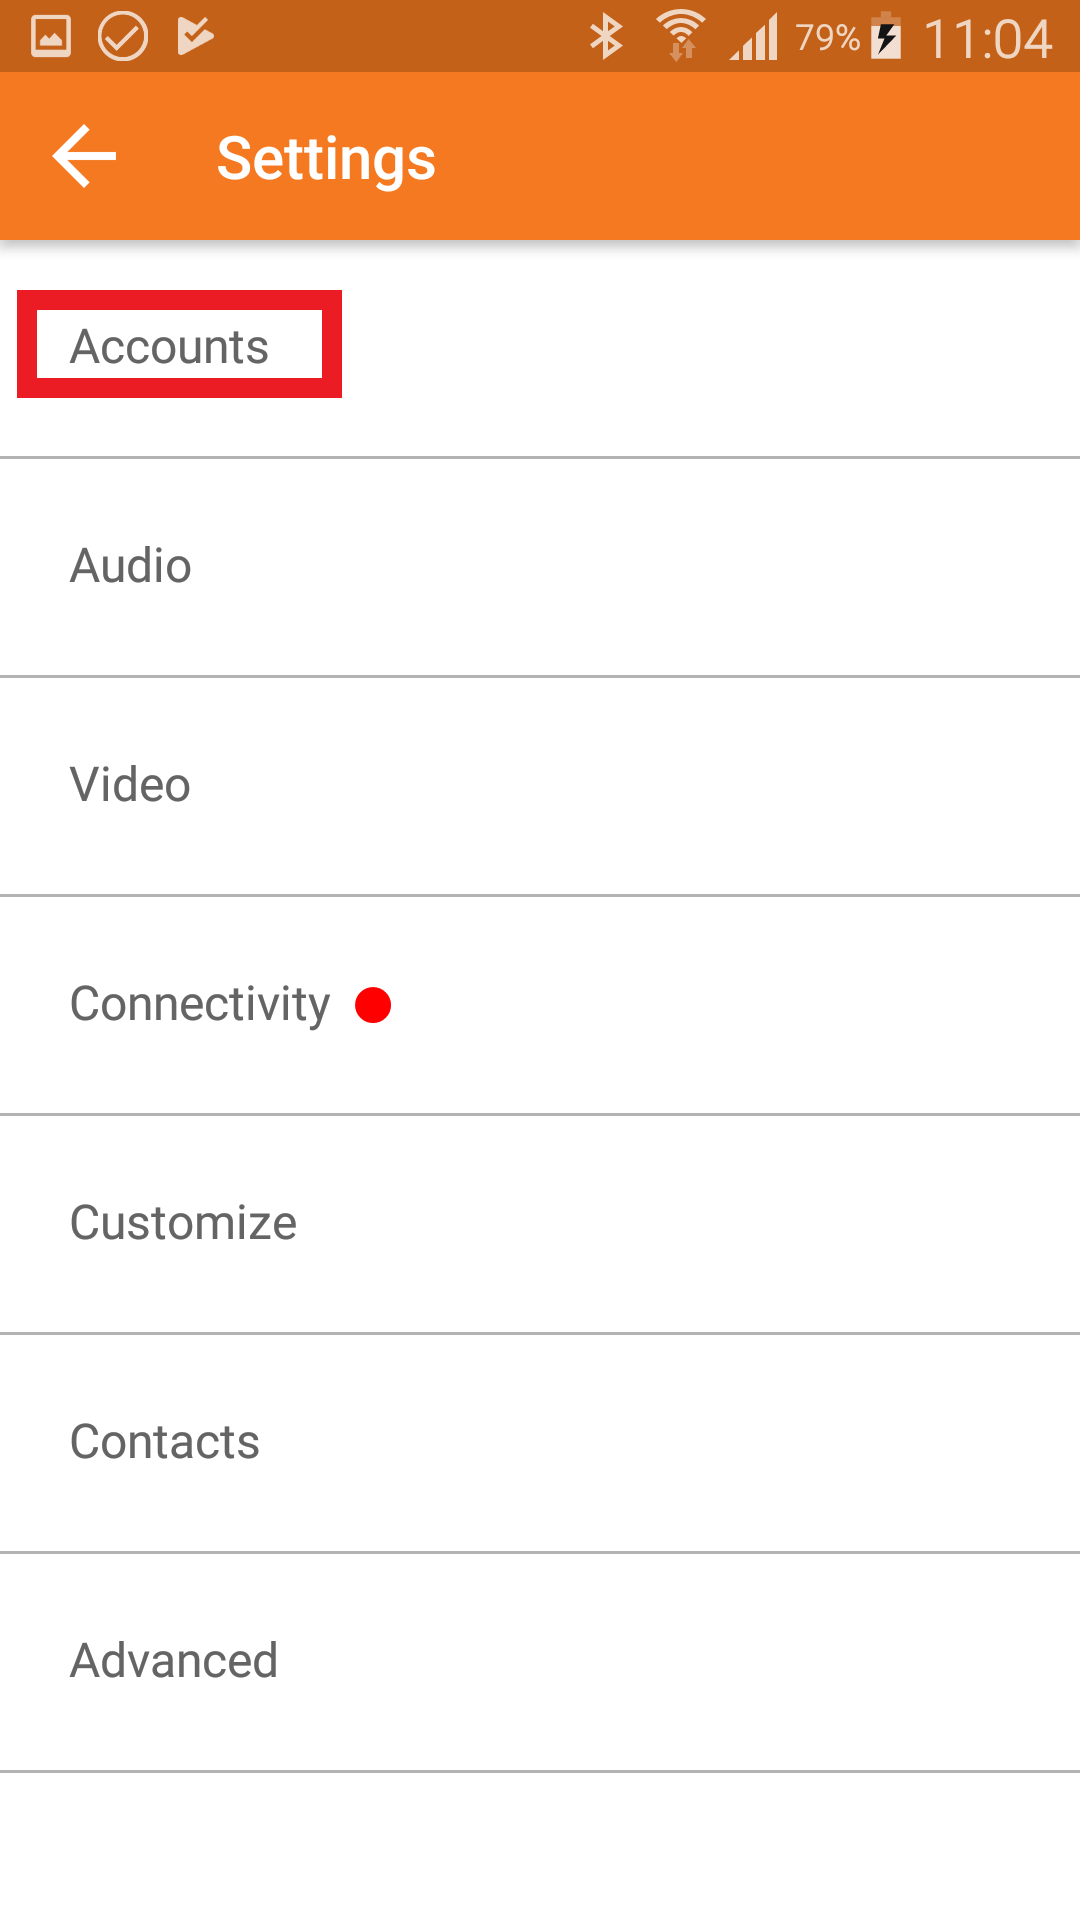
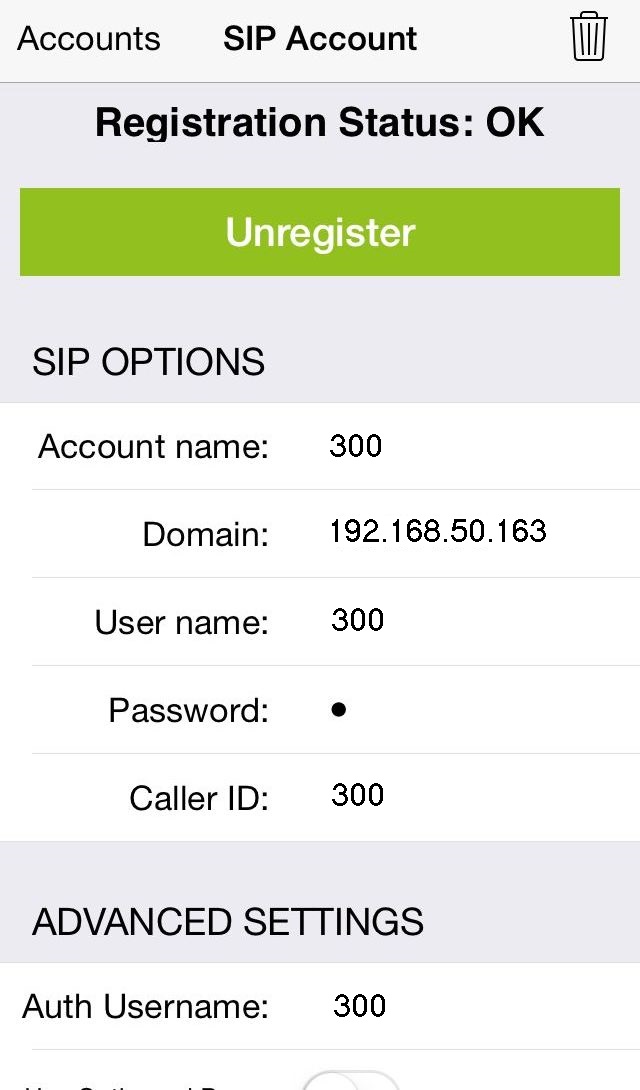
Navigate to Accounts and set SIPAccount.

Fill in Account name, Domain, User name, Password and Caller ID – In this case in our example, we will fill in IP address of 2N IP Intercom.
For our example, use following:Account name: 300
Domain: 192.168.50.163
User name: 300
Password: 300
Caller ID: 300
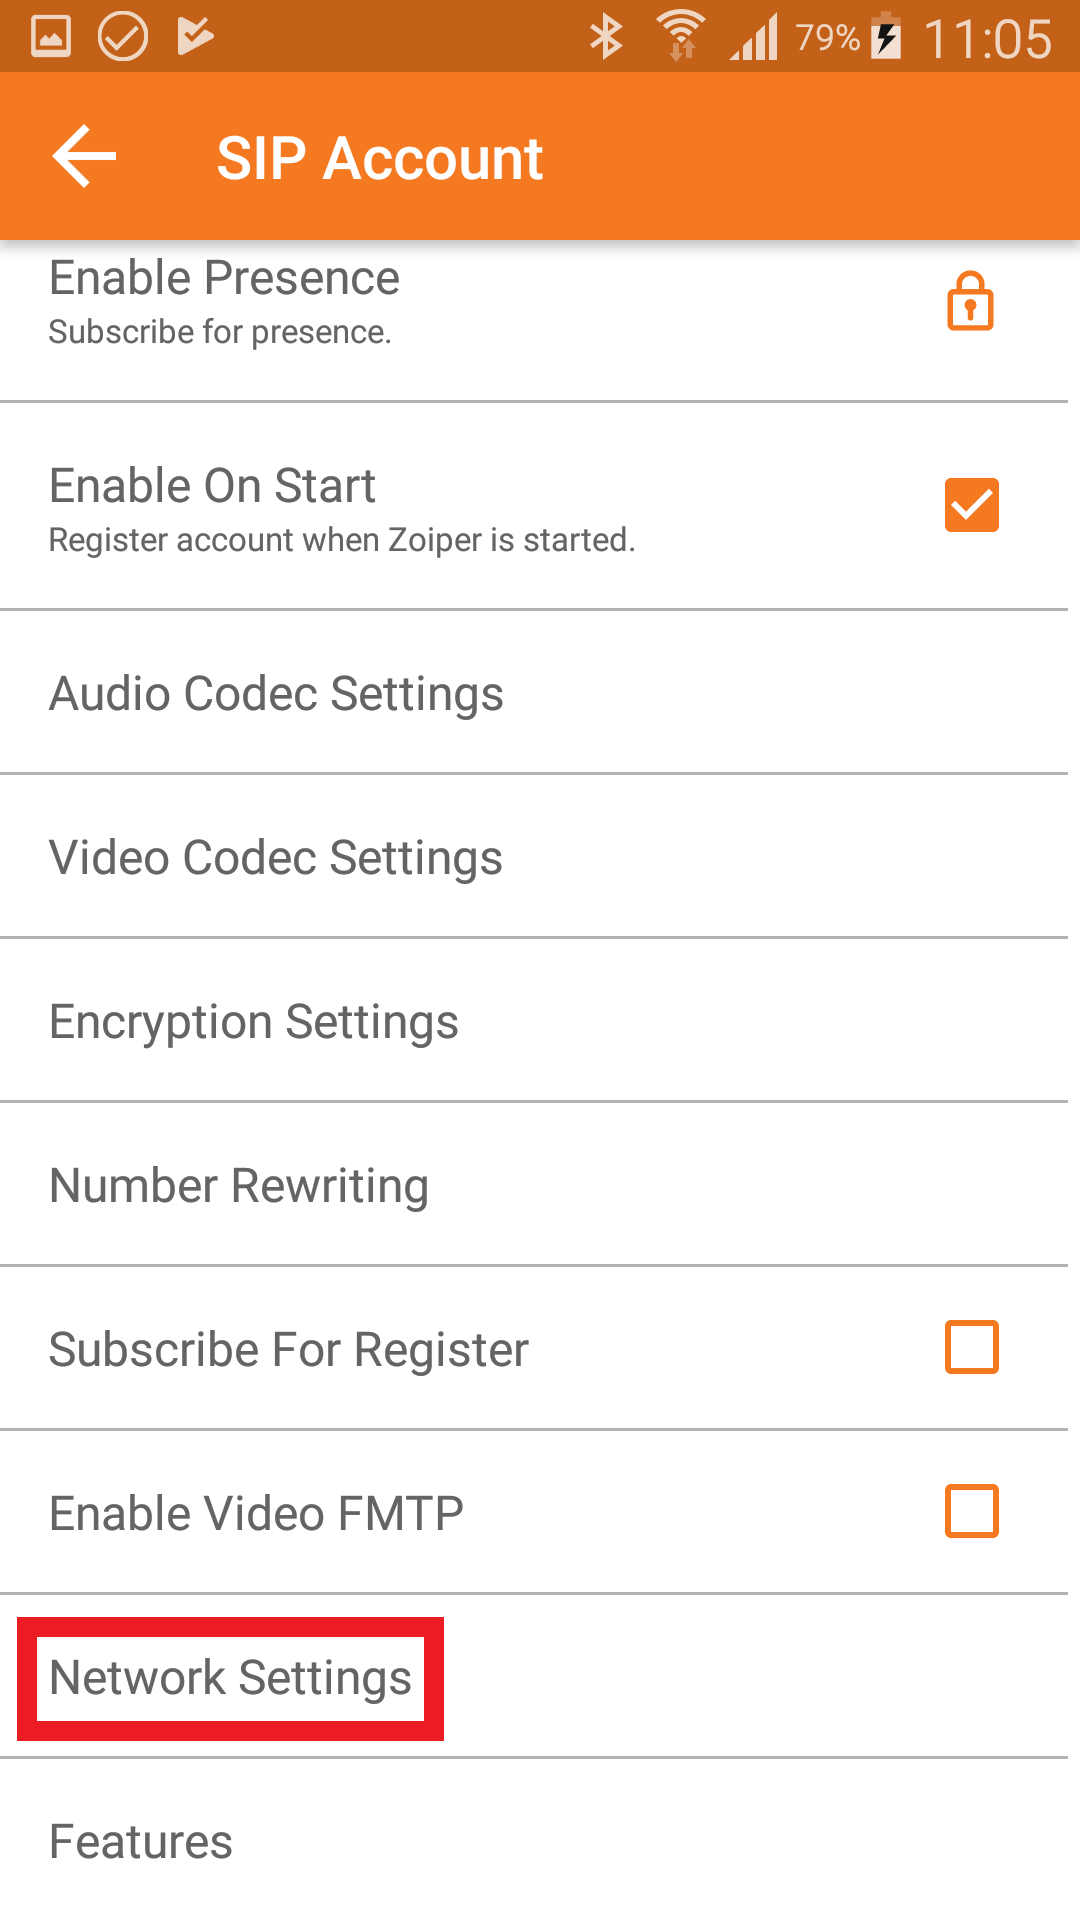
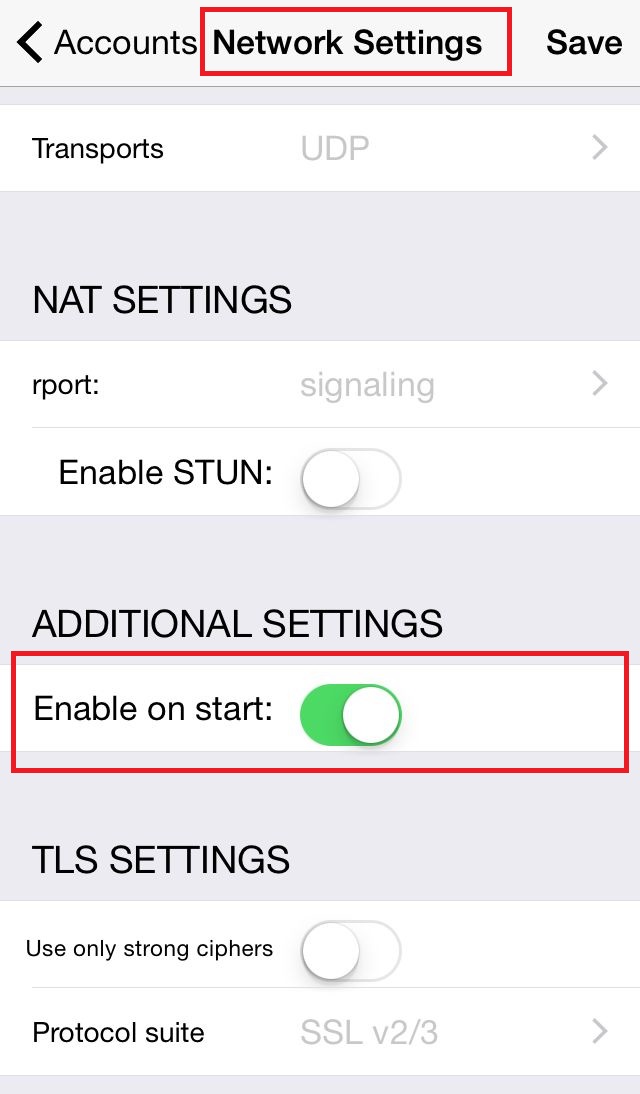
Set account to launch automatically on application startup in Accounts - Network settings menu.
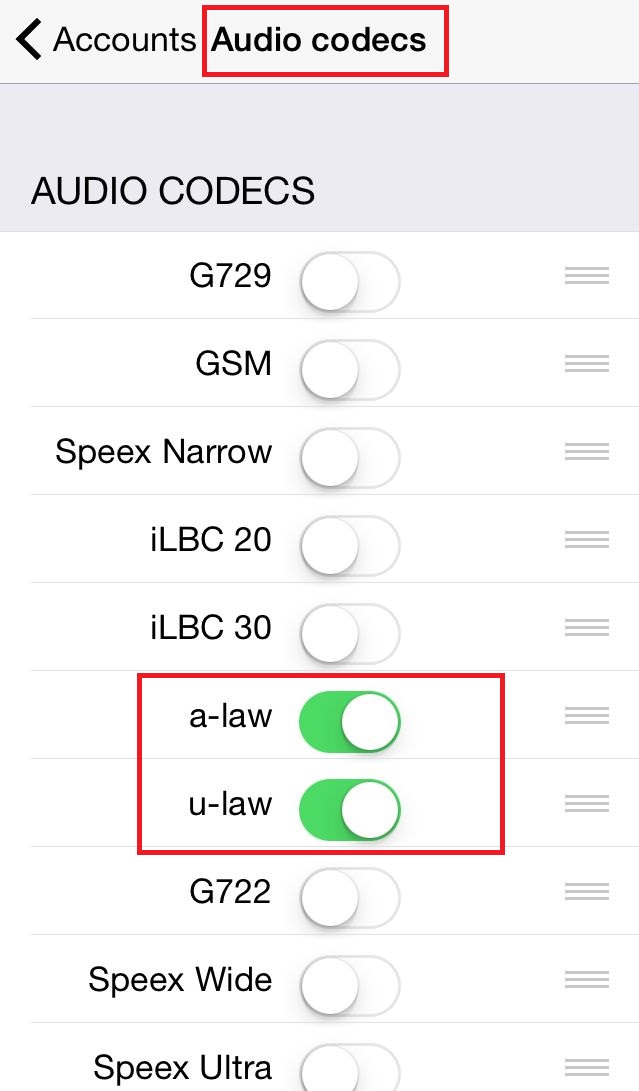
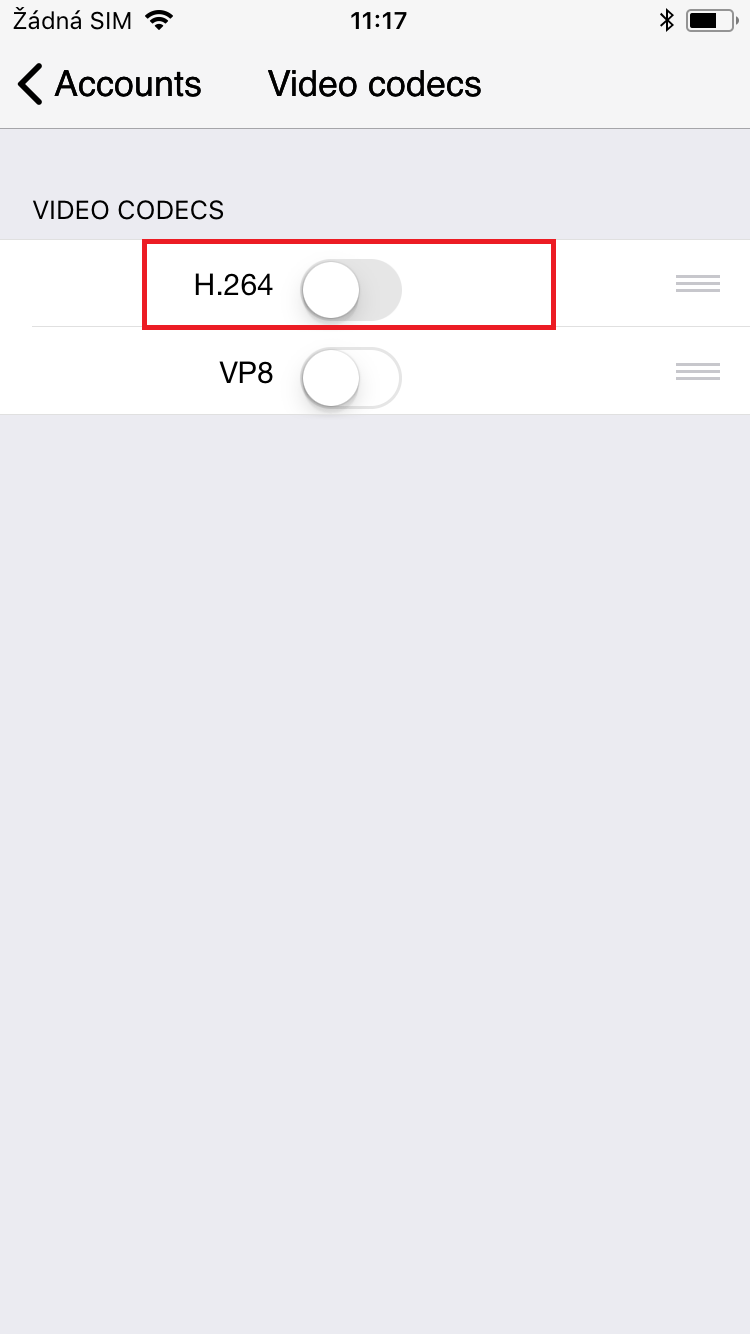
Choose codecs for audio (Audio codecs). For video (Video codecs) you have to buy license for video codec, in our case following:
for Audio: a-law, u-law
for Video: H.264

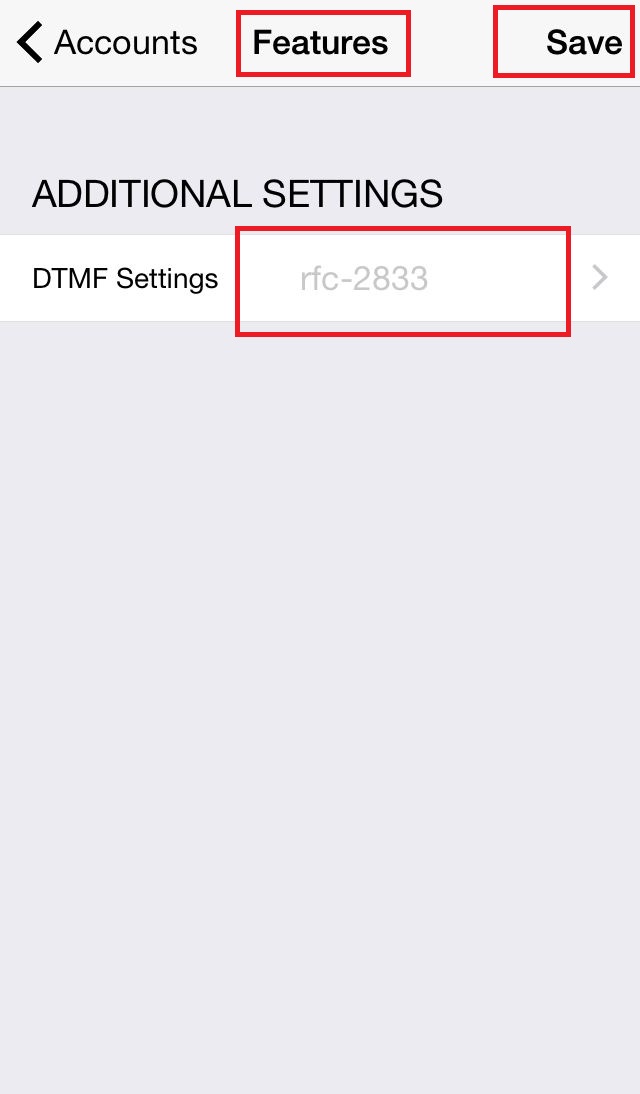
In Accounts - Features set DTMF signaling to RFC-2833 and save whole account settings by taping on SAVE.
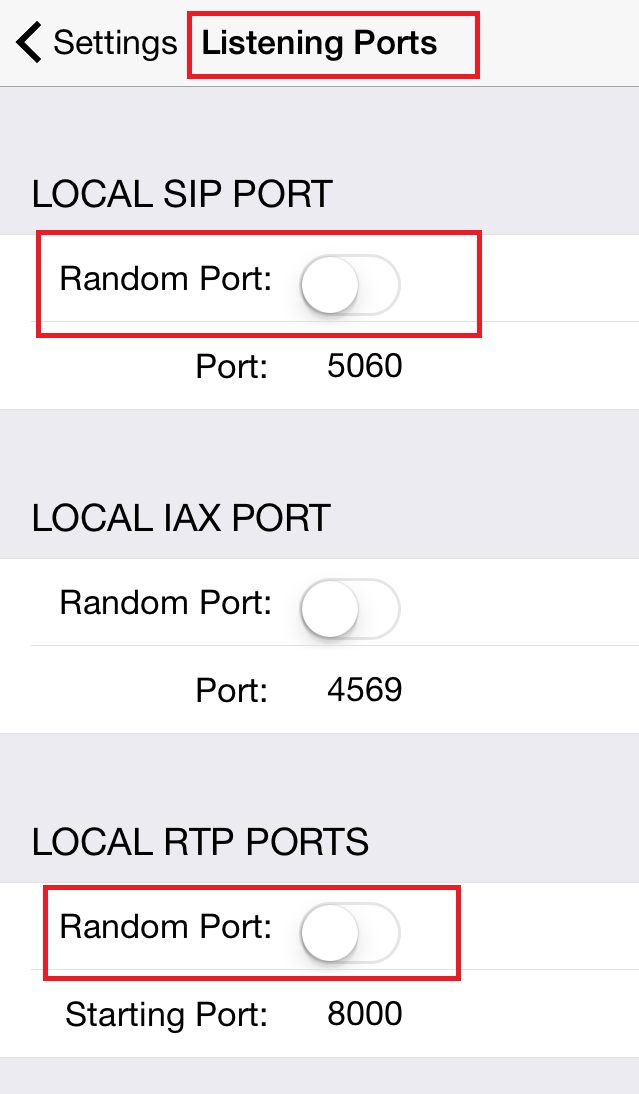
In Settings navigate to menu Advanced in order to set correctly Listening Ports paratemers. It is necessary to disable Random ports for SIP and RTP.
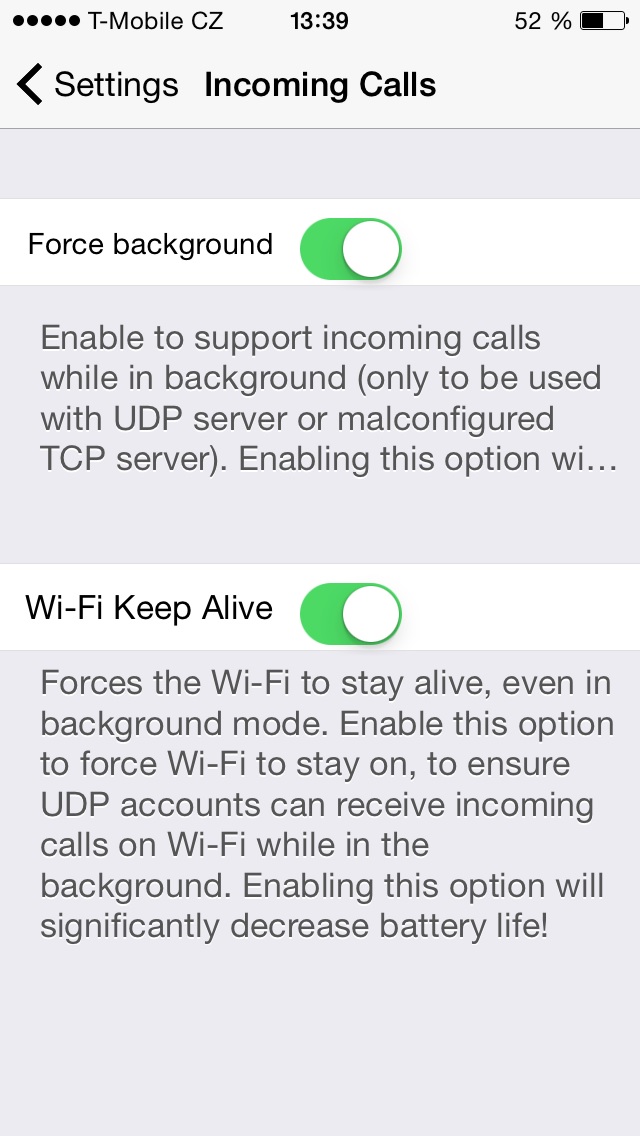
- In order to make application respond to incoming calls in standby mode, navigate to Settings - Incoming calls and set Force background and Wi-Fi Keep Alive to enabled.
 |
Zoiper for Windows - direct call settings
Following guide is related to Zoiper for Windows.
Zoiper is a FREE IAX and SIP softphone application for VOIP calls over ethernet or WiFi.
Download Zoiper application from homepage and install it.
In order to use Zoiper for direct SIP calls, you have to set up account. Zoiper will not let you to do any SIP calls, including direct SIP calls, unless you set up account.
However, for making direct SIP calls it is not necessary for that account to be successfuly registered to SIP proxy. You can easily register Zoiper account to 2N IP Intercom.
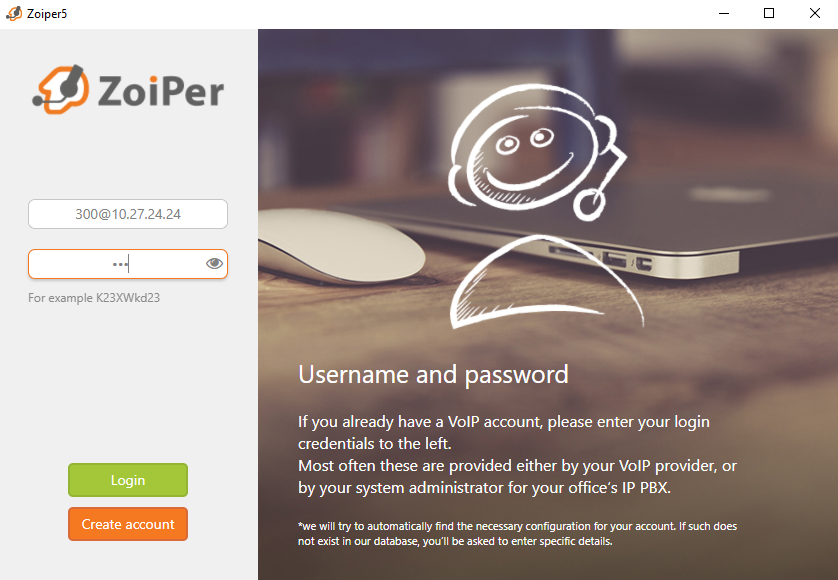
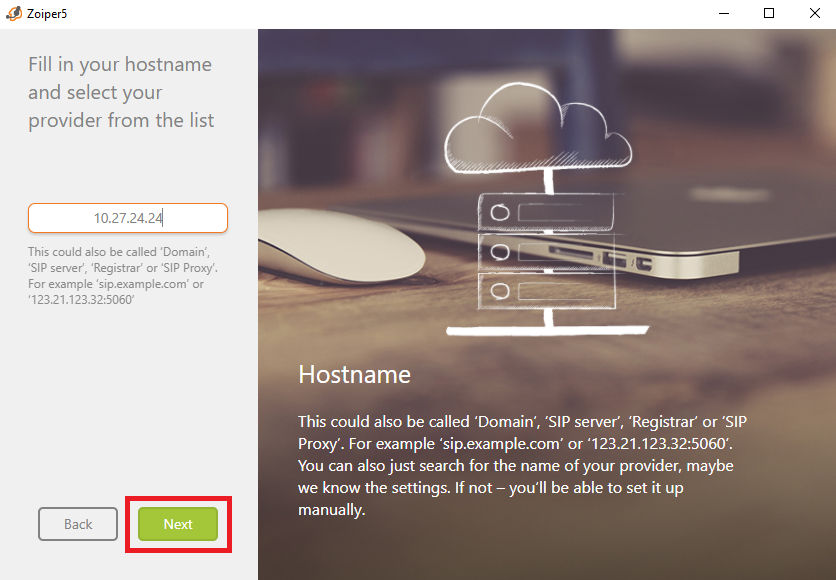
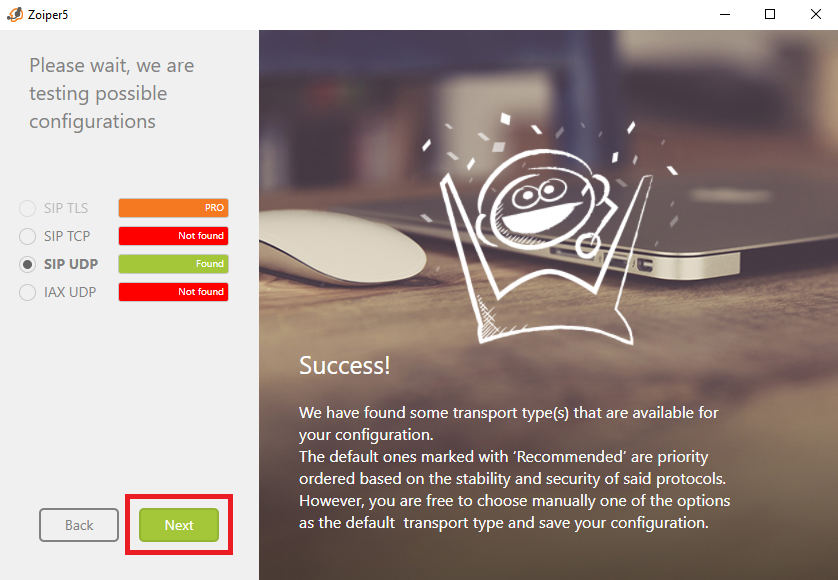
Launch application and set up your account
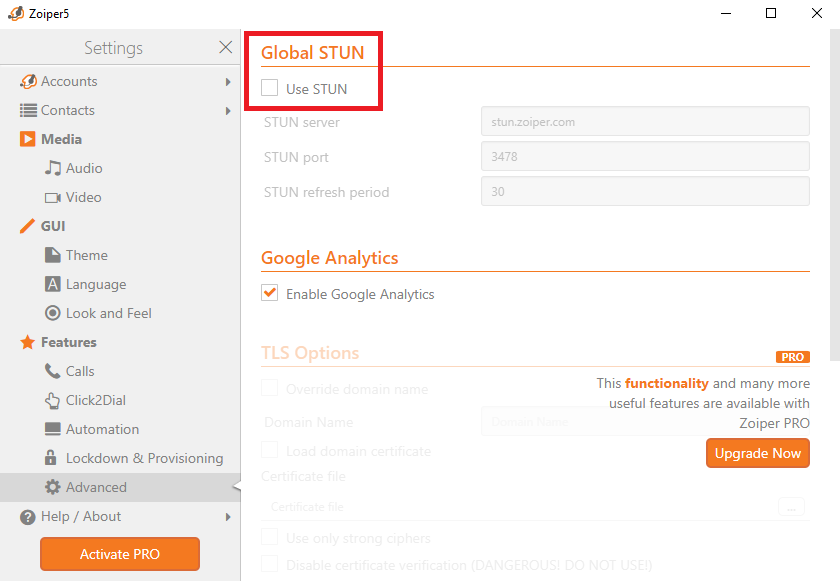
- When account is created, navigate to Settings and choose Advanced.
Disable STUN and disable using random ports.
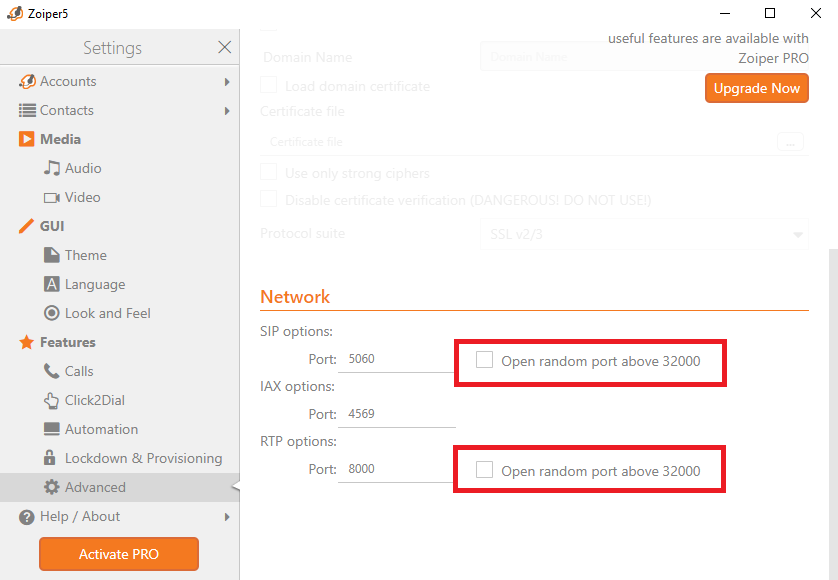
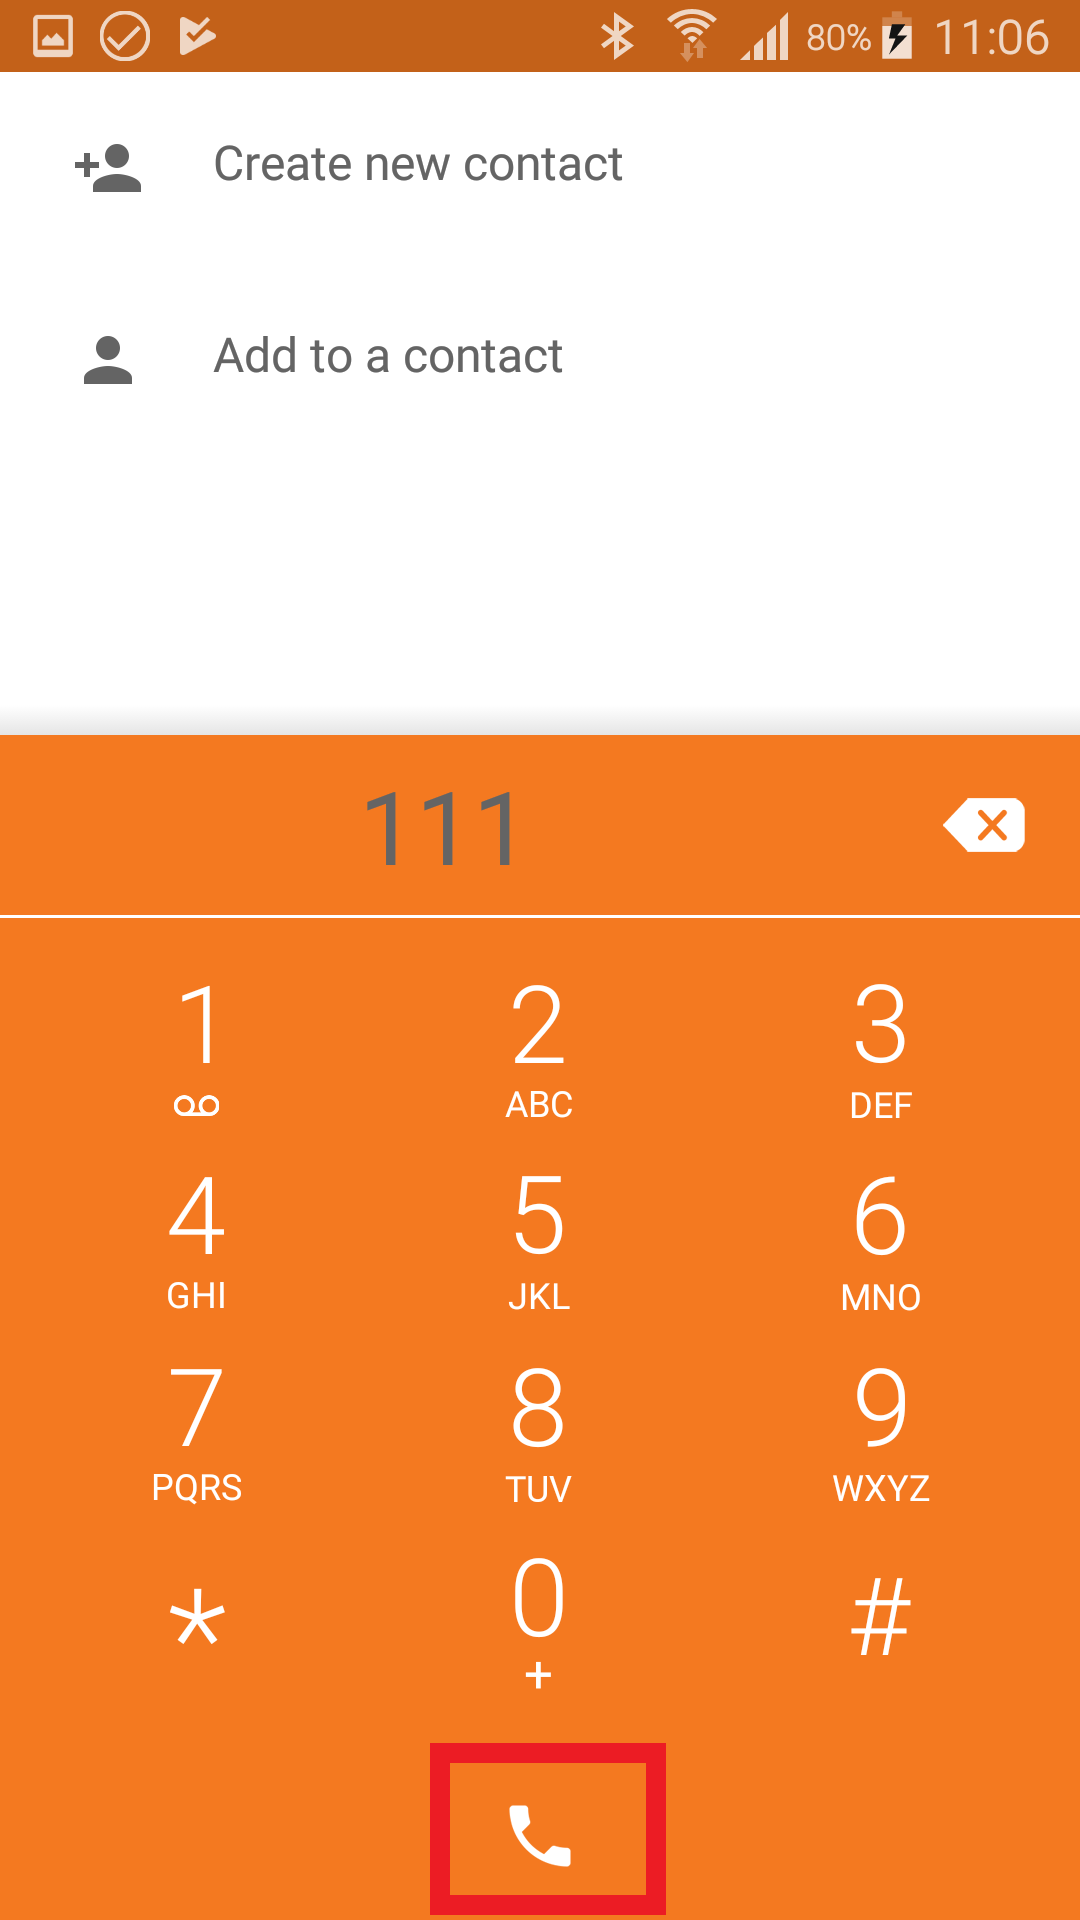
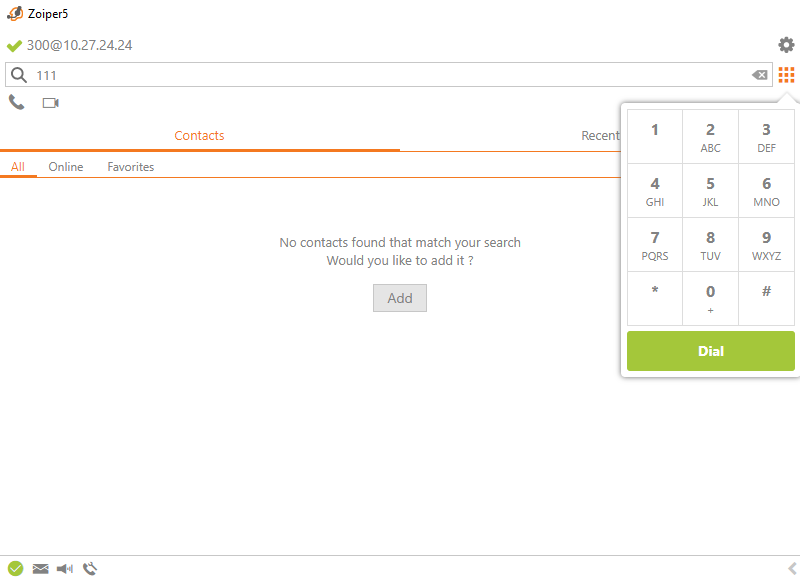
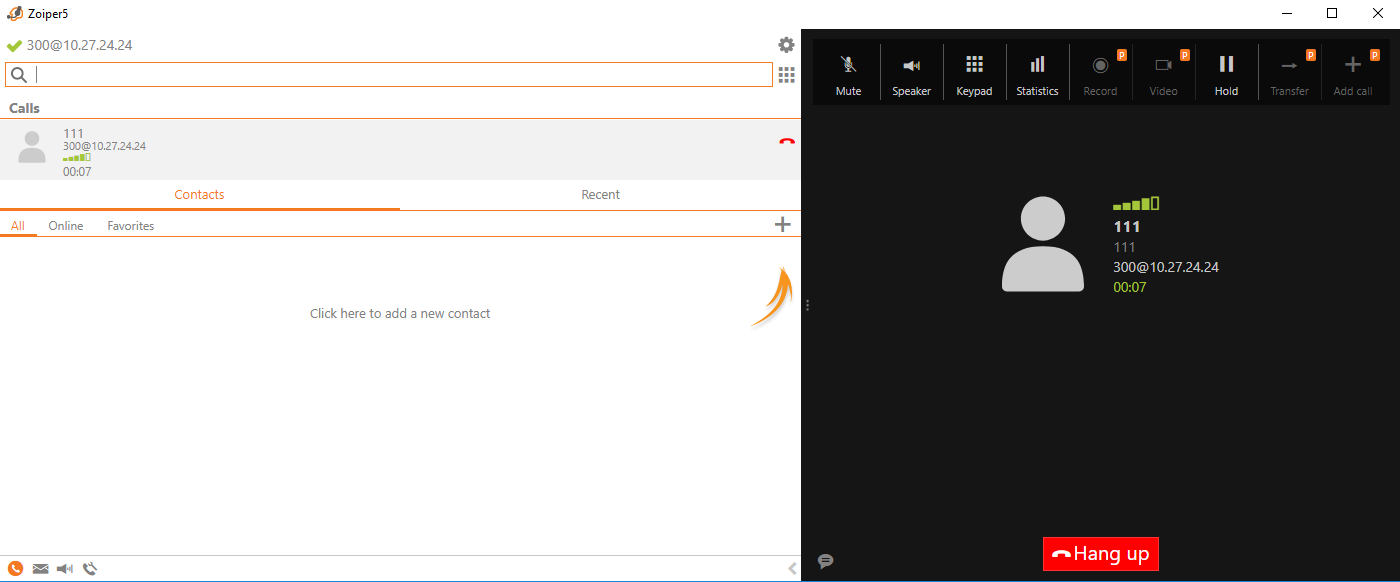
4. Save your settings and now, call any number, for example 111. All calls will be forwarded to 2N IP Intercom.
 |
 |
Settings with SIP proxy
2N IP Intercom - SIP proxy settings
Note for configuration
For proper video transmission your SIP Proxy have support the codec H.264! (if more video codecs are supported, then allow H.264 as the only video codec in case of troubleshooting)
Following guide is related to 2N IP Intercom firmware version 2.24
Connect to the 2N IP Intercom web configurator.
Enable one of the quick dial button position. When it is enabled, specify position name and phone number of the Zoiper client.
set the user in Directory / Users to dial SIP proxy call according to Zoiper SIP Proxy account settings. If Zoiper has got a number (extension) 300 on SIP proxy set the Phone Number to 300 – see the picture below:
If you want to receive calls on 2N IP Intercom, you have to allow incoming calls first. You can set it to Automatic pickup or By Activation Code after dial to be entered in order to make 2N IP Intercom answer calls.
- navigate Service -> Phone -> Calls for the 2N IP Intercom settings for incoming calls.
|
- set Domain IP address for at least one SIP account in Services -> Phone. This IP address should be same as IP address of SIP proxy. In our example, it is 192.168.50.120.
- enable Use Authentication ID and configure Authentication ID and Password according to your SIP proxy settings. In our example, both is set to 111.
- fill in Proxy Address and Proxy port according to SIP proxy serttings. In our example it is set to IP 192.168.50.120 and port 5060.
enable Registration Enabled and fill in Registrar address, Registrar Port and Registration Expires settings according to your SIP infrastructure configuration. This can be usually also on SIP proxy IP address.

As a last setting in 2N IP Intercom, navigate to Services -> Phone -> Video and set the video resolution and bitrate according to picture below (use codec H.264).
If you set better parameters, it can happen that the video will be jamming (this depends on quality of your network).
 |
Note
For proper video transmission your SIP Proxy have support the codec H.264! (if more video codecs are supported, then allow H.264 as the only video codec in case of troubleshooting)
Following guide is related to Zoiper for Android.
Zoiper is a FREE IAX and SIP softphone application for VOIP calls over 2G, 3G, 4G or WiFi.
Download Zoiper application from Google Play (Android) and install it.
In order to use Zoiper for SIP proxy registration, you have to set up account. Zoiper will not let you to do any SIP calls, including direct SIP calls, unless you set up account.
- Set up your account. Fill in Account name, Host, Username and Password – In this case in our example,
we will fill in IP address of SIP proxy on 192.168.50.163.
Please make sure you have account ready on SIP proxy. In our example we will use account 300 with password 300.
For our example, use following:
Account name: 300
Host: 192.168.50.163
Username: 300
Password: 2n
|
|
3. Choose Settings → Accounts → „YourAccount“ (300 in our example) for Account setup:
|
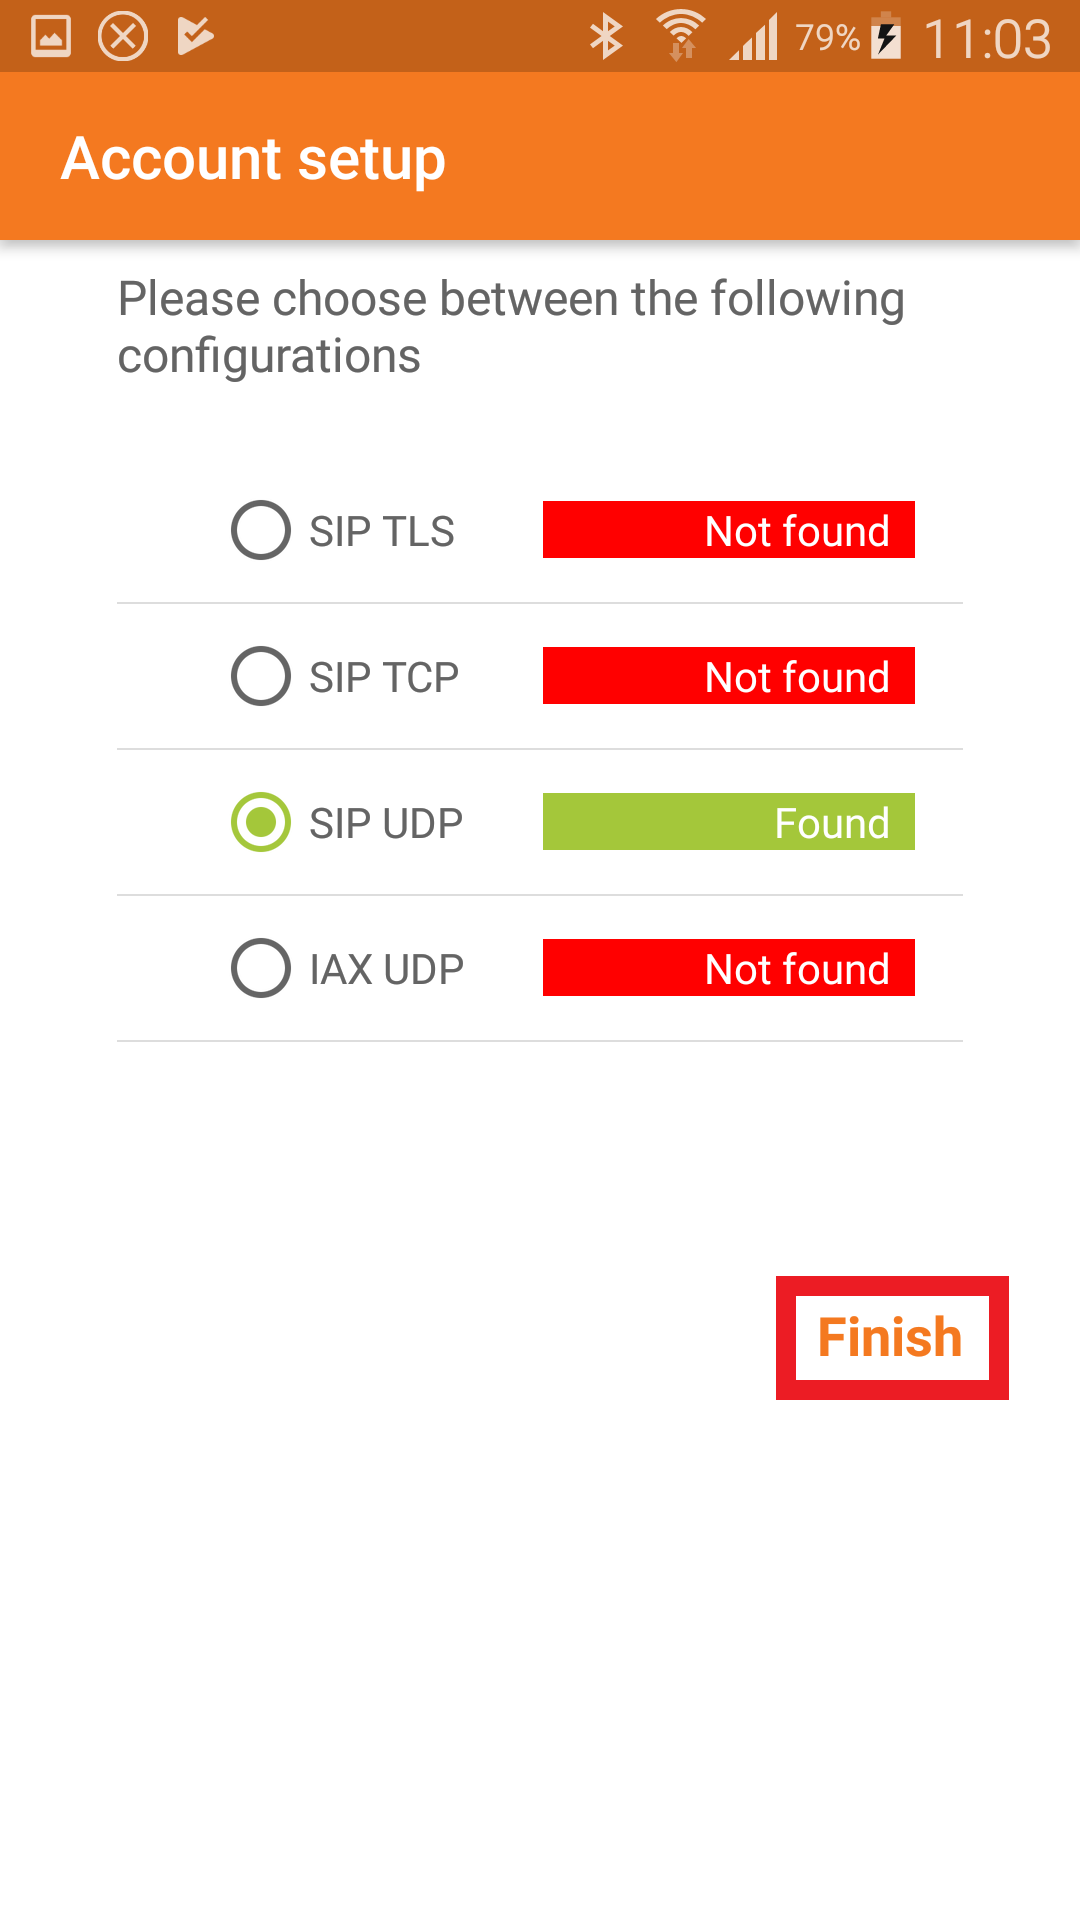
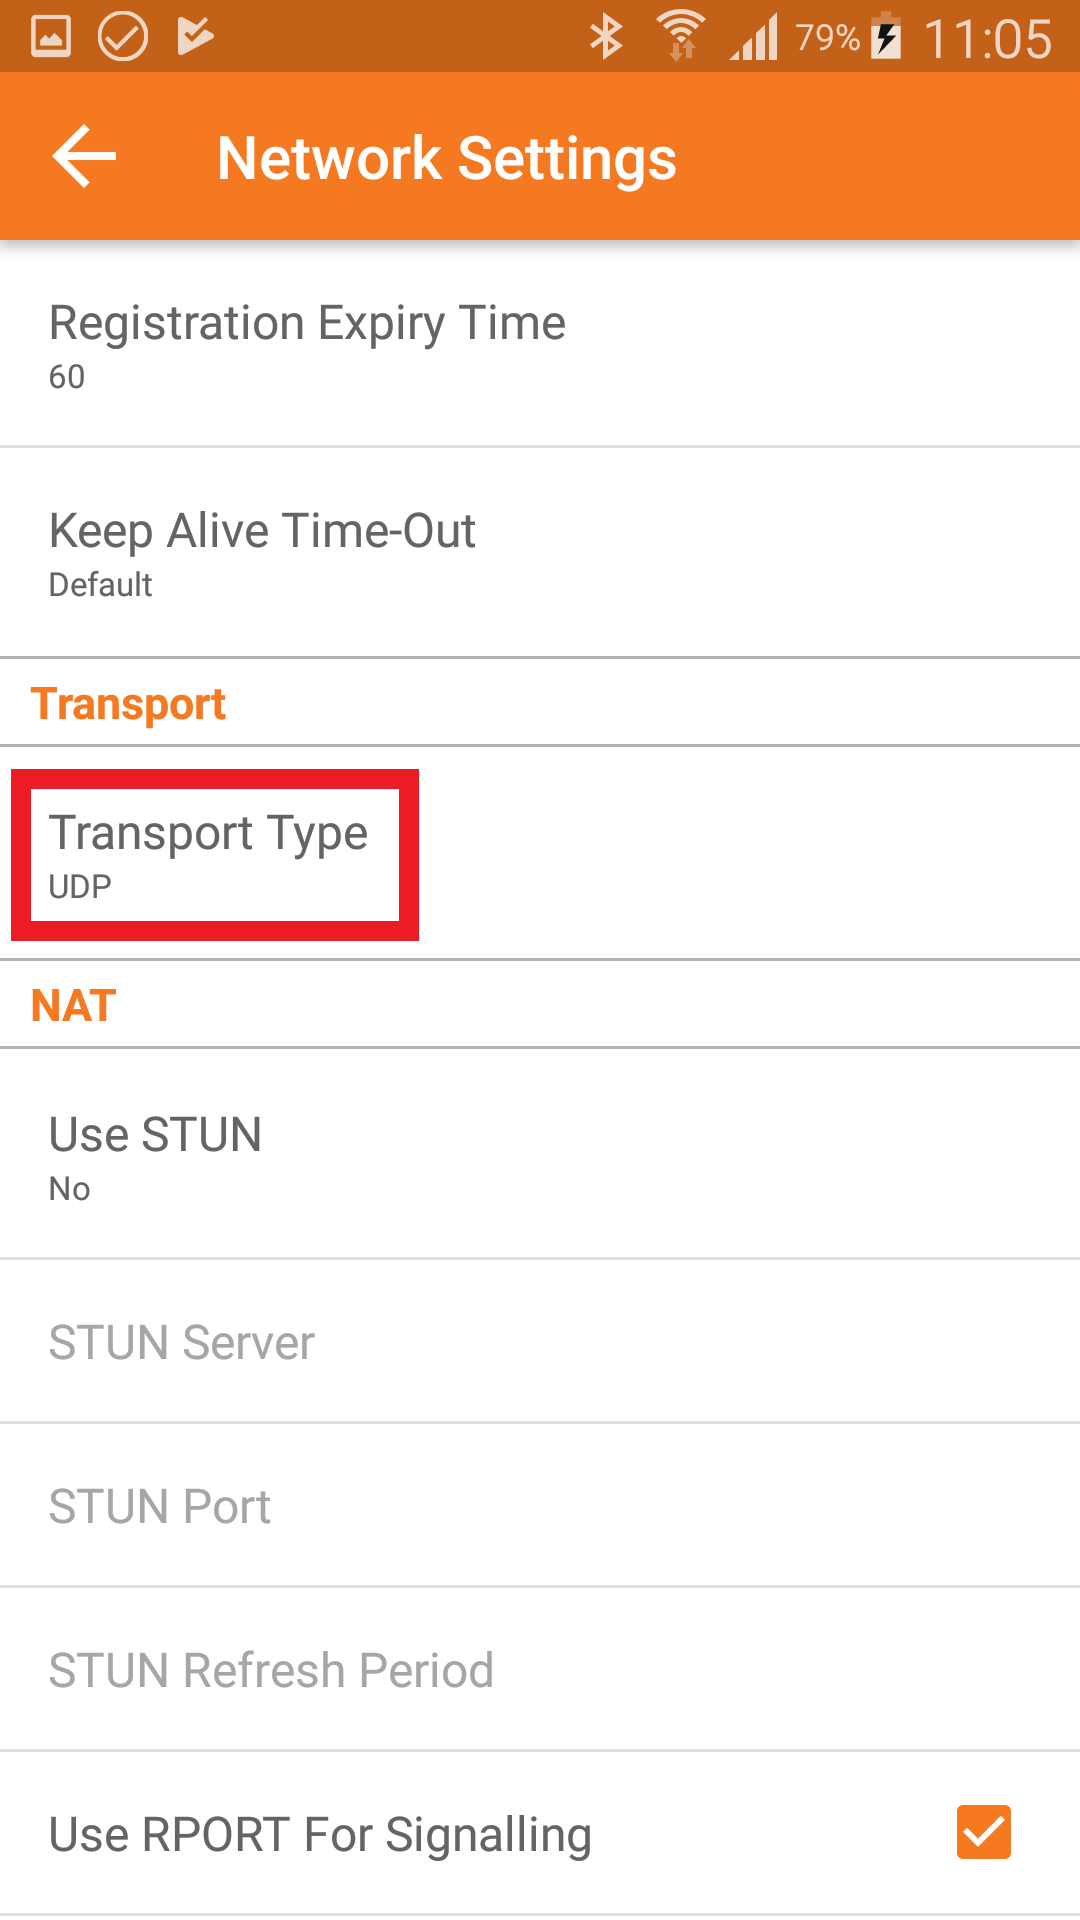
4. Scroll down to Network settings and and make sure that transport type is set to UDP .
|
|
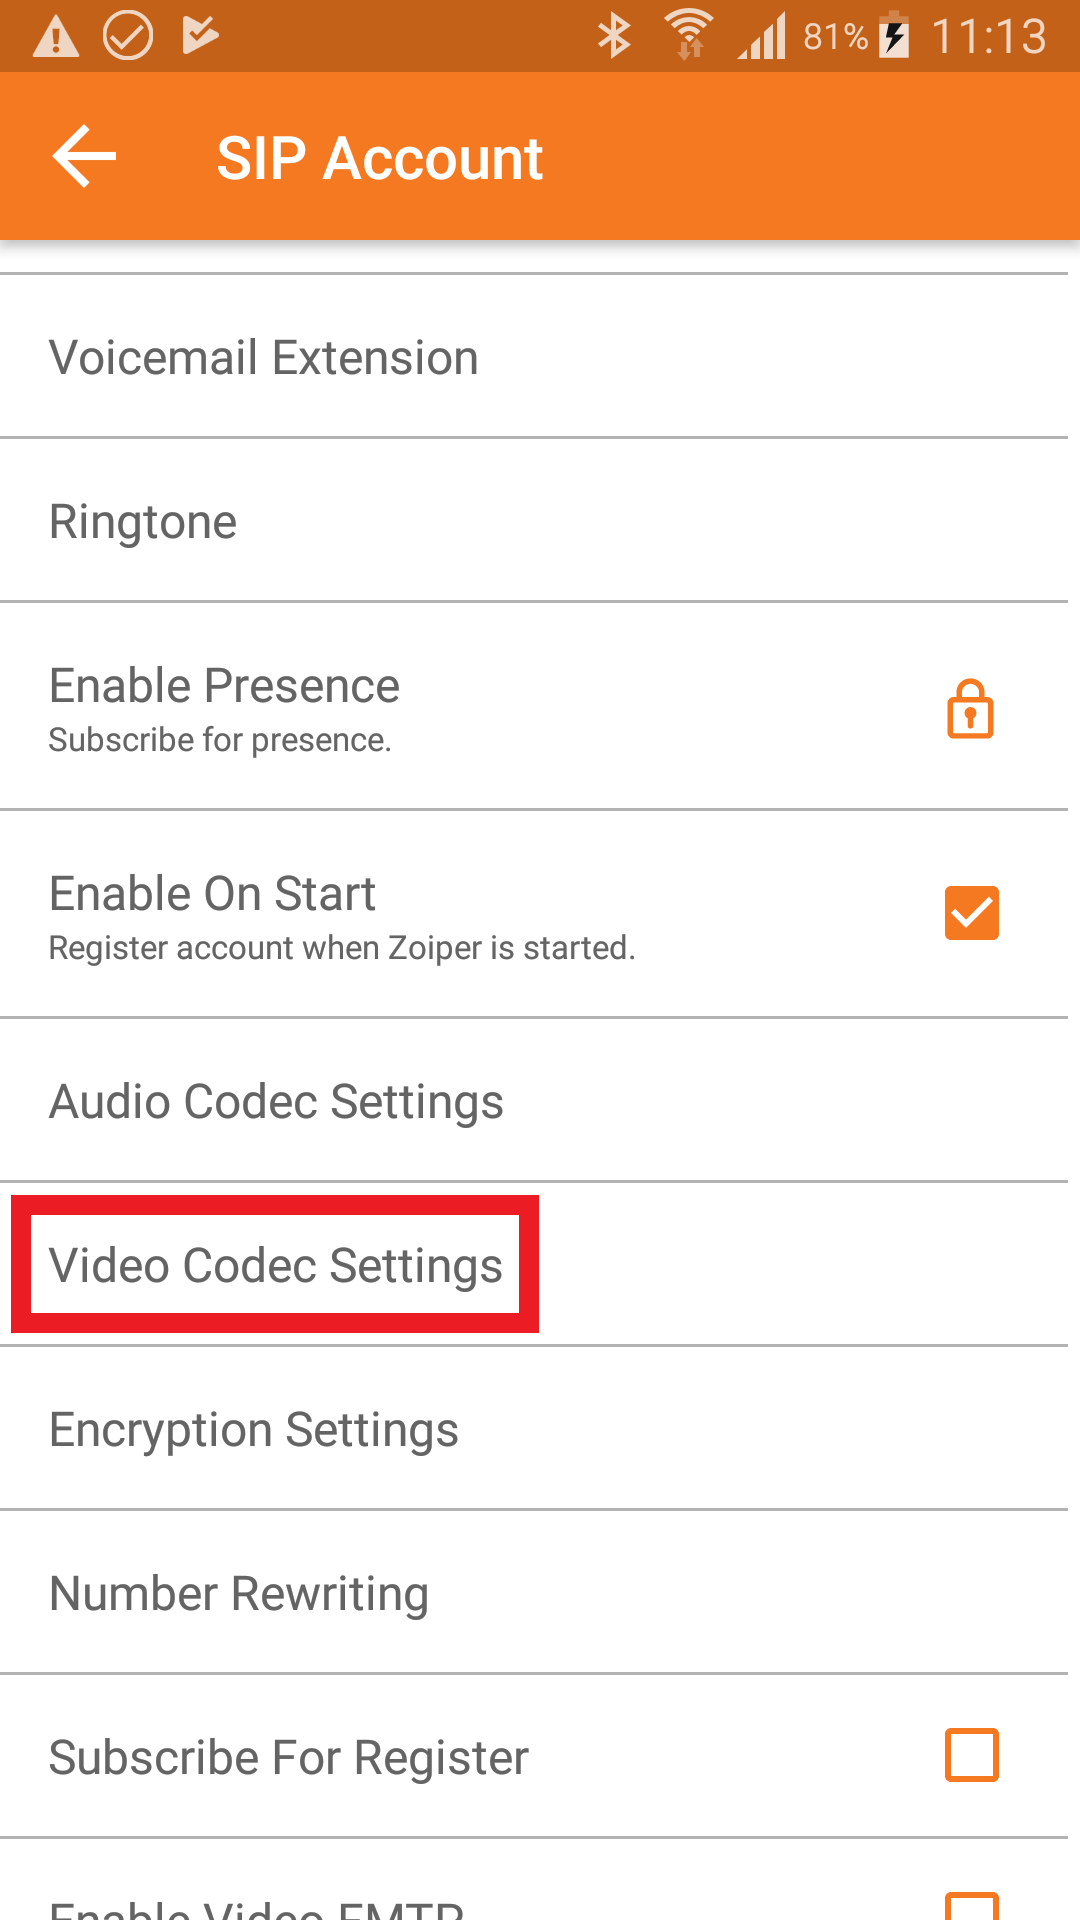
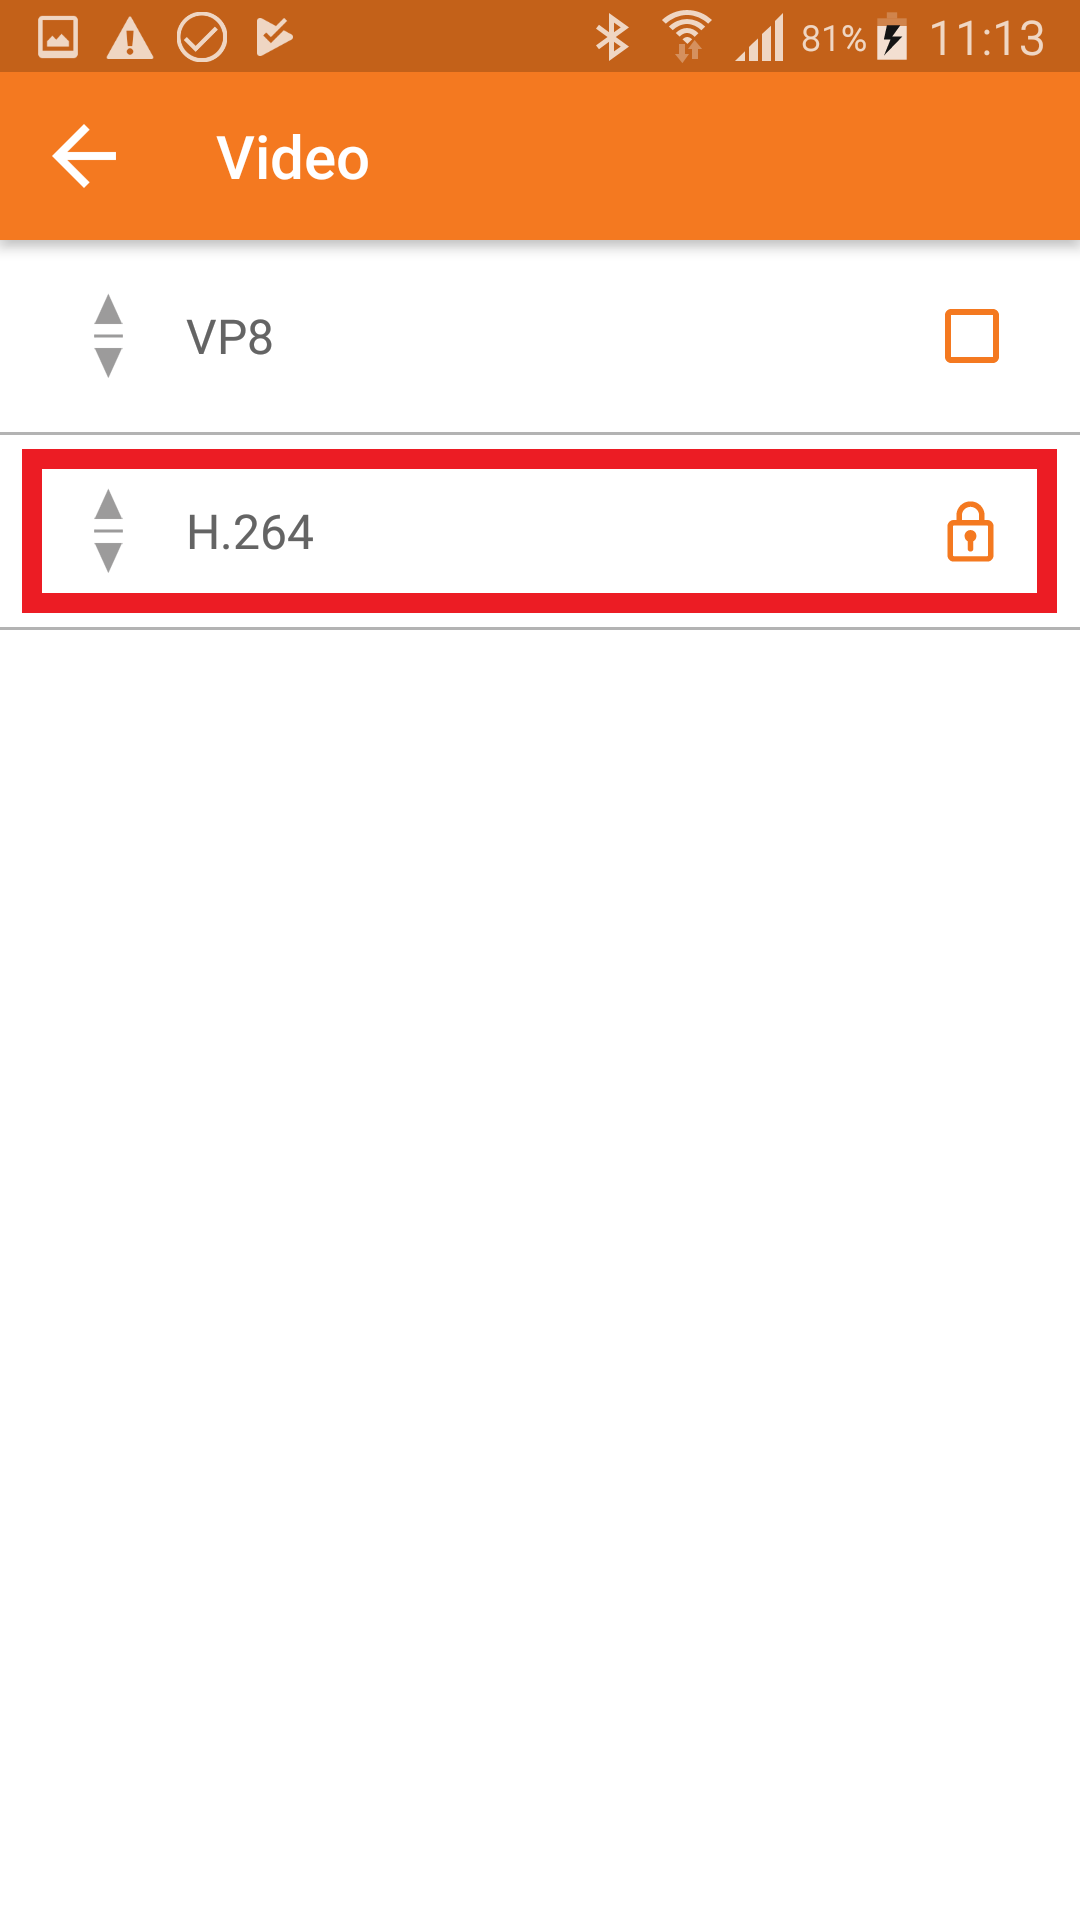
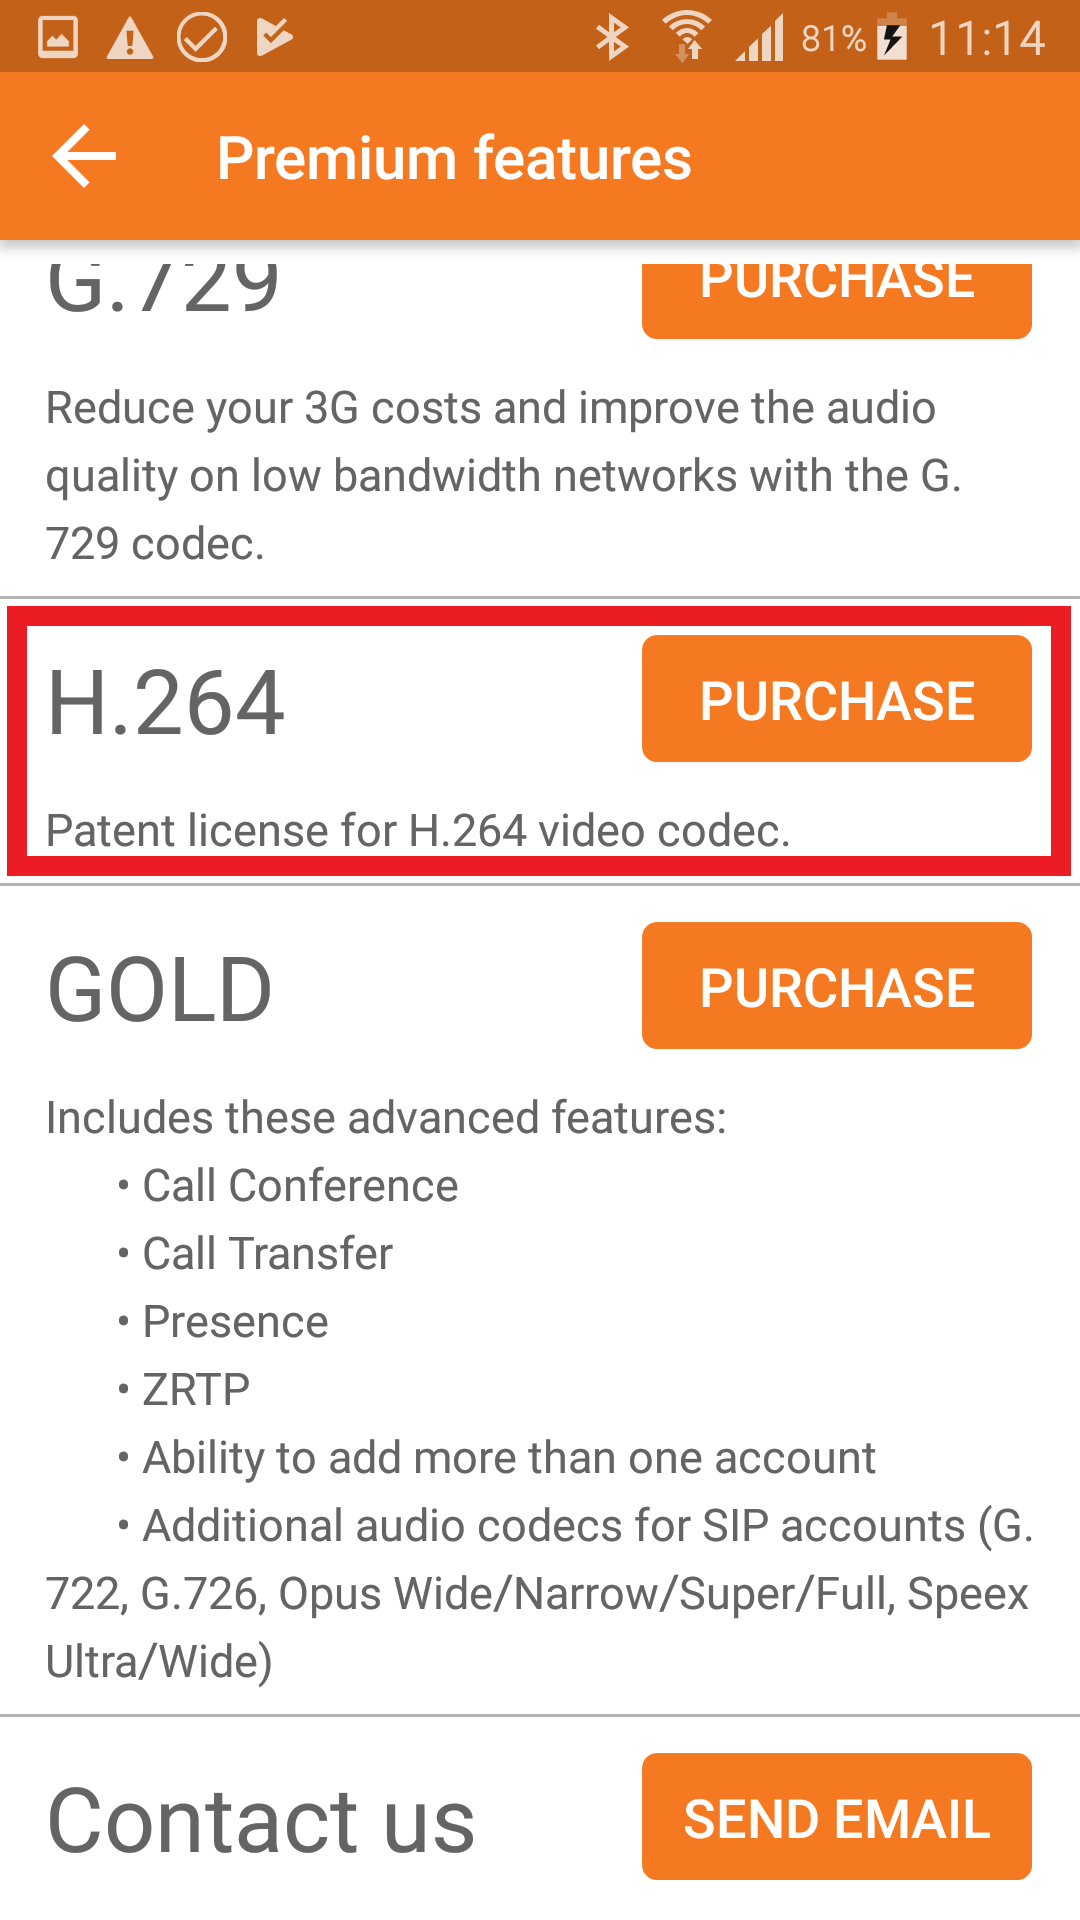
5. For watching video during call you have to buy license for video codec H.264. Go to Settings → Accounts, choose„YourAccount“ (300 in our example) → Video Codec Settings → H.264
|
|
|
|
|
|
 |
Following guide is related to Zoiper for iOS.
Zoiper is an easy to use sip video softphone, with excellent voice quality and easy to setup.
In order to use Zoiper for with SIP proxy, you have to set up account. Zoiper will not let you to do any SIP calls, including direct SIP calls, unless you set up account.
After installation of application in to device, navigate to SETTINGS
Navigate to Accounts and set SIP Account.
- Fill in Account name, Domain, User name, Password and Caller ID – In this case in our example,
we will fill in IP address of SIP proxy, for example 192.168.50.120.
Please make sure you have account ready on SIP proxy. In our example we will use account 300 with password 300.
For our example, use following:Account name: 300
Domain: 192.168.50.120
User name: 300
Password: 300
Caller ID: 300
Set account to launch automatically on application startup in Accounts - Network settings menu.

In order to make application respond to incoming calls in standby mode, navigate to Settings - Incoming calls and set Force background and Wi-Fi Keep Alive to enabled.

- Choose codecs for audio (Audio codecs). For video (Video codecs) you have to buy license for video codec. In our case following:
for Audio: a-law, u-lawfor Video: H.264
- Depending on your SIP proxy configuration and compatiblity choose codecs for audio (Audio codecs) and video (Video codecs).
In Accounts - Features set DTMF signaling to version supported by SIP proxy (most common settings will be: RFC-2833) and save whole account settings by taping on SAVE
Also depending on SIP Proxy configuration, you can set in Settings - Advanced - Listening Ports paratemers. It may be necessary to disable Random ports for SIP and RTP.
For specific settings of SIP proxy, please ask its system administrator.
After saving, you can make calls throug SIP proxy between 2N IP Intercom intercom and Zoiper application including video calls (if supported by SIP proxy).
For proper video transmission your SIP Proxy have support the codec H.264! (if more video codecs are supported, then allow H.264 as the only video codec in case of troubleshooting)
Following guide is related to Zoiper for Windows.
Zoiper is a FREE IAX and SIP softphone application for VOIP calls over ethernet or WiFi.
Download Zoiper application from homepage and install it.
In order to use Zoiper for SIP proxy calls, you have to set up account. Zoiper will not let you to do any SIP calls, including direct SIP calls, unless you set up account.
Launch application and set up your account. You need to use IP address of SIP proxy or SIP registrar server:
- When account is created, if SIP proxy requires additional settings, navigate to Settings and choose Preferences. Save your settings and now, call number, for our example 111.
|
|
For seeing video you have to buy license for video codec H264. Then go to Settings → Accounts → "choose your account" (in our example 300) → Advanced and choose video codec H264.
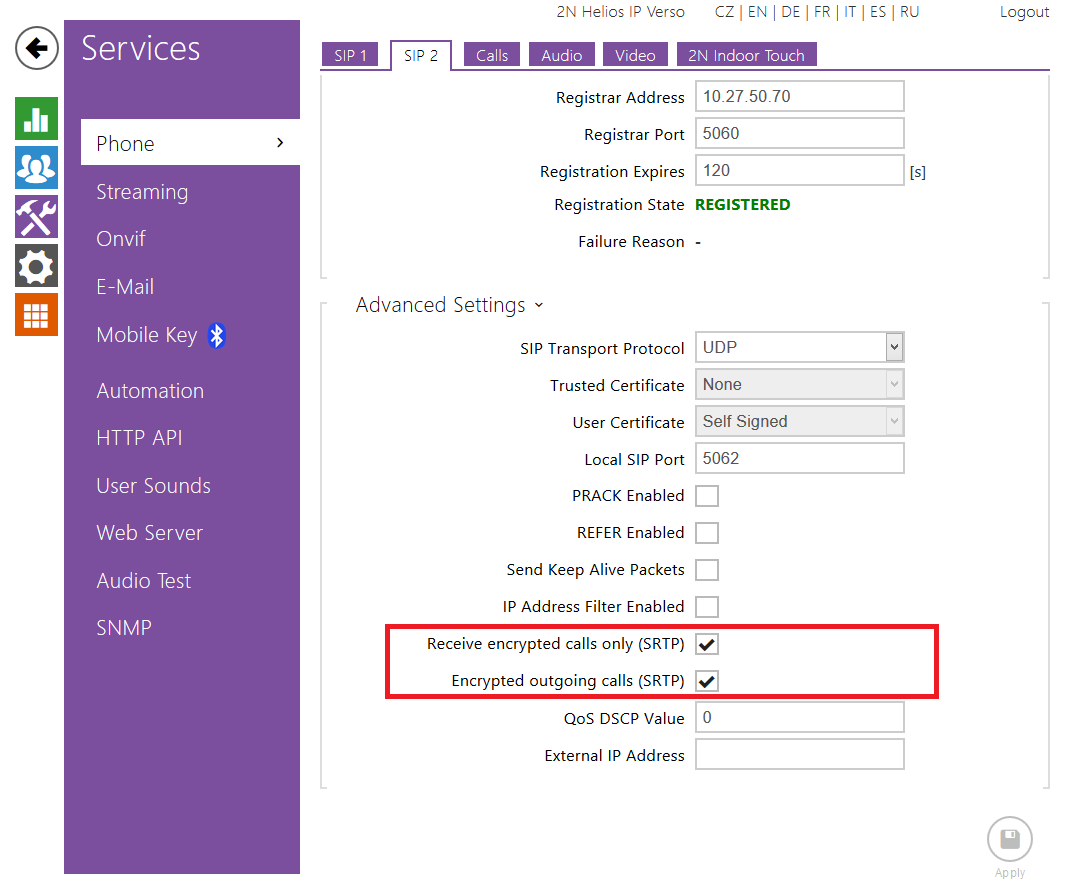
SRTP Setting
Go to SIP settings in Services and in Advanced settings enable recieving and transmitting of SRTP calls.
 |
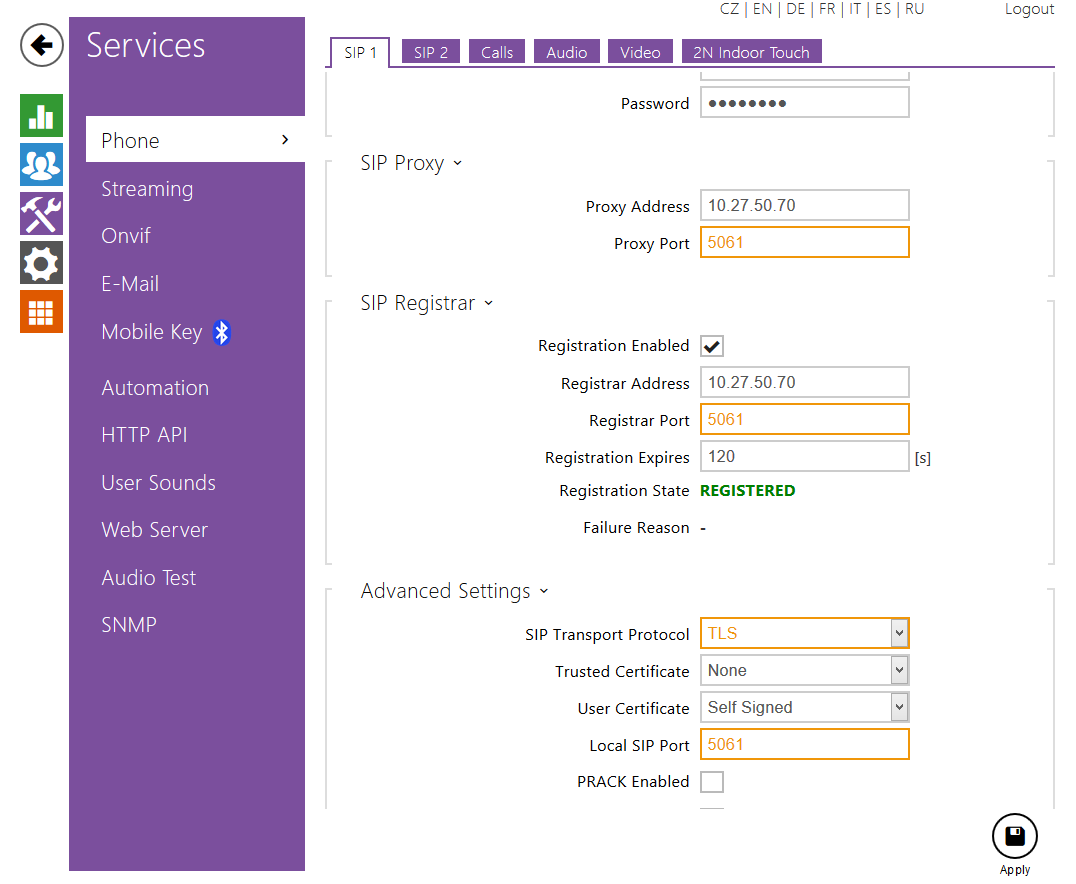
For TLS
Because Zoiper needs TLS to exchange SRTP media, it is needed to set TLS on your 2N IP Intercom.
Set port for Proxy,Registrar and Local SIP to 5061, and change SIP Transport Protocol to TLS.
 |
Warning
Without TLS Zoiper does not support sending or recieving of Secure RTP.
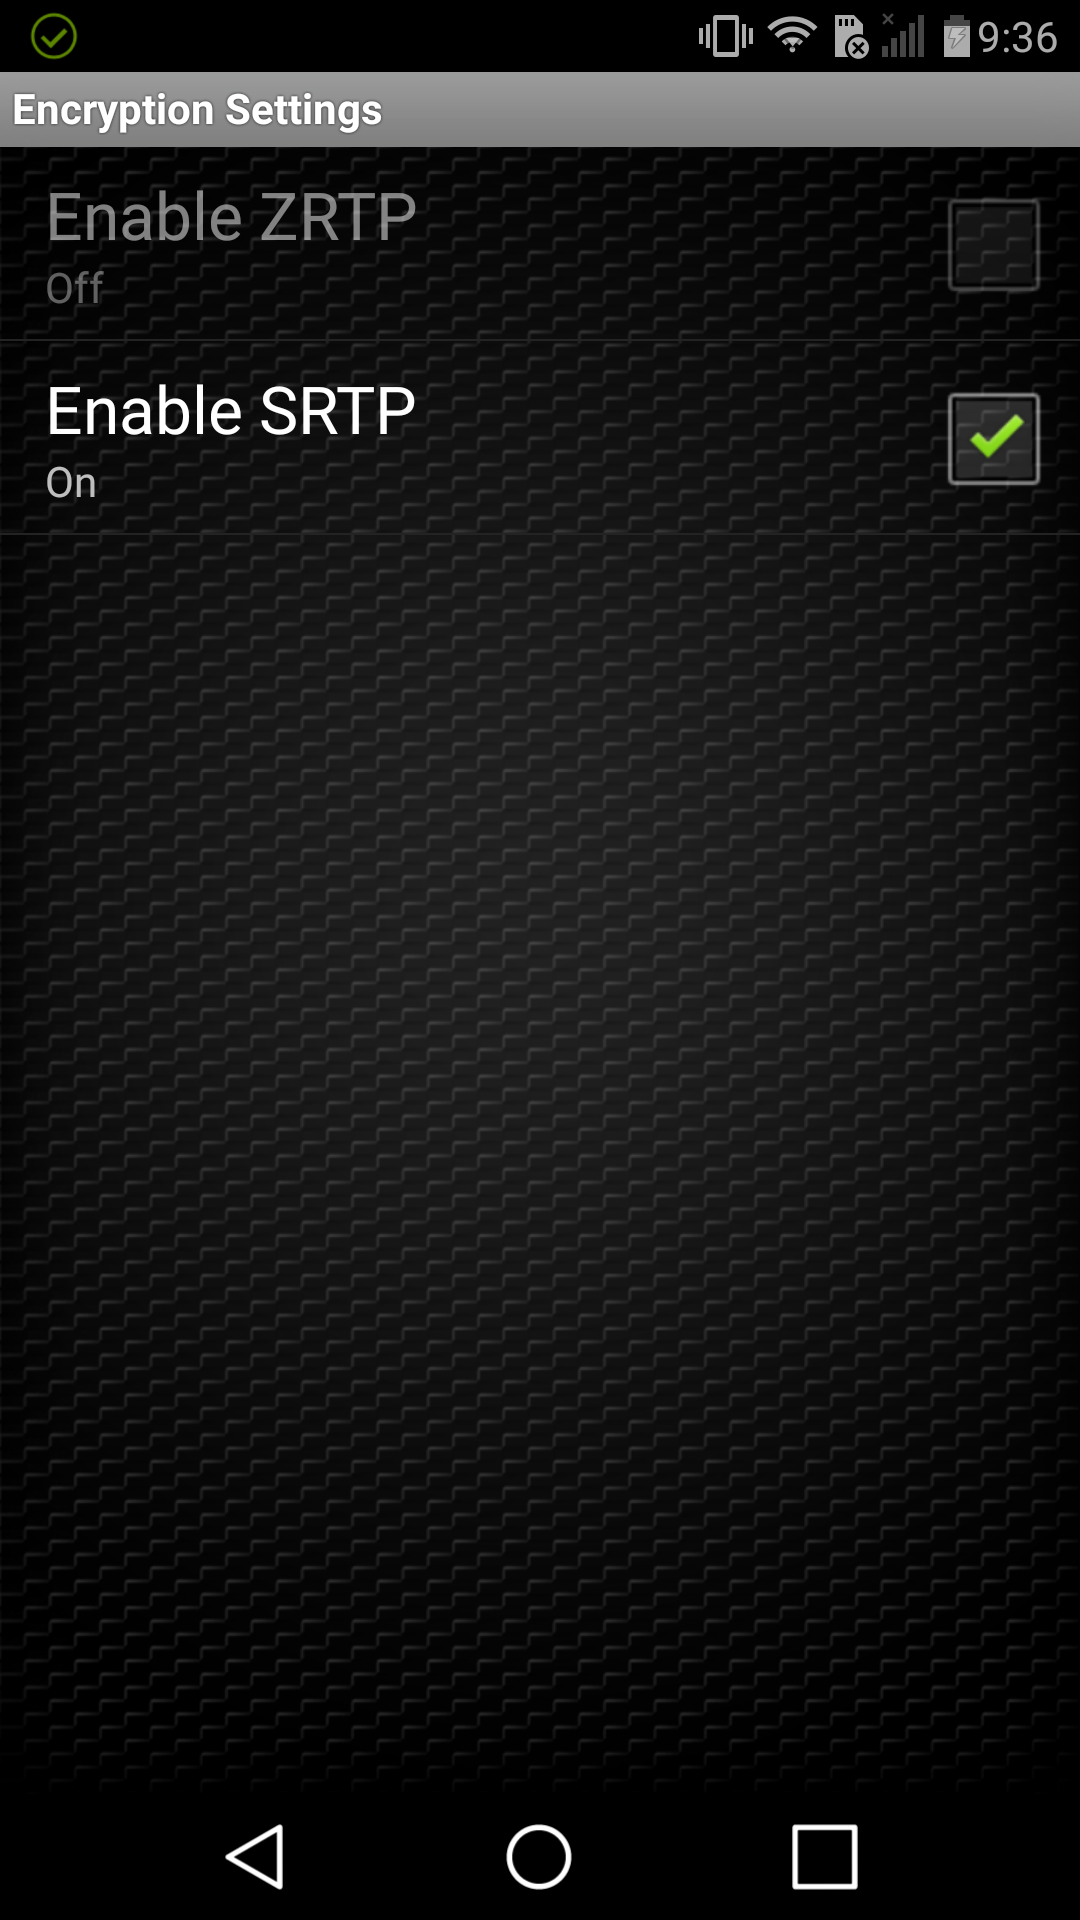
To set the SRTP on Zoiper go to Config / Account Settings / choose account for SRTP communication. I account settings go to Encryption Settings and Enable SRTP, and confirm usage of TLS and RPORT.
 |
To set the SRTP on Zoiper go to Settings / Preferences / go to account to wihich you are setting SRTP / Advanced and enable "use of rport","use of rport media" and set "Use TLS transport" and "TLS with SDES SRTP".
 |
Used Symbols
![]() - Verified with video
- Verified with video
![]() - Verified with audio only
- Verified with audio only
![]() - Work with limitation
- Work with limitation
![]() - Incompatible
- Incompatible