FIBARO

Content

About

Version 4

Used Symbols

About

FIBARO smart home devices provide a comprehensive environment that adapts to the needs of the entire family.

Begin your smart home adventure with FIBARO. Get to know our smart home system by discovering all the features it has to offer. Live comfortably with the flexibility to add more devices and integrations whenever you want.

https://www.fibaro.com

Version 4

FIBARO Home Center 2
(control unit)

Mobile application iPhone

Mobile application
Android

2N IP Intercom
Firmware versions

Scan deviceVideoAudioSwitch control

4.530

2.25.0

1.24.0.4

2.25.0.34.8

(tikot)(tikot)(tikot)(tikot)

4.040

1.5.2

2.11.0.20.3

(tikot)(tikot)(tikot)(tikot)

Settings FIBARO Home Center 2 setup

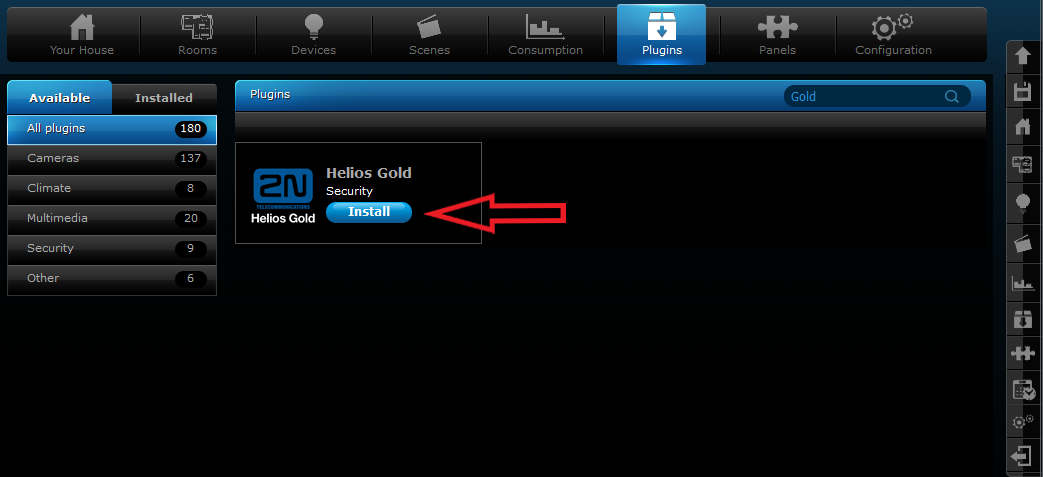
In your web browser we enter IP address of your FIBARO Home Center 2 device and we log in with administrator credentials. As first step we should check if there is Helios Gold plugin ready in FIBARO system. We can install it in menu PluginsAvailableSecurity and clicking the Install button.

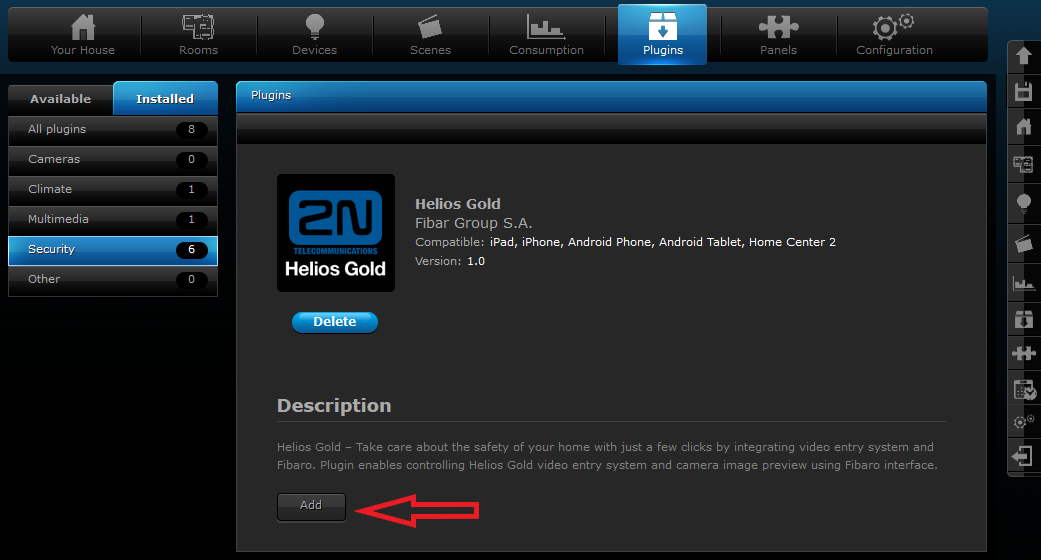
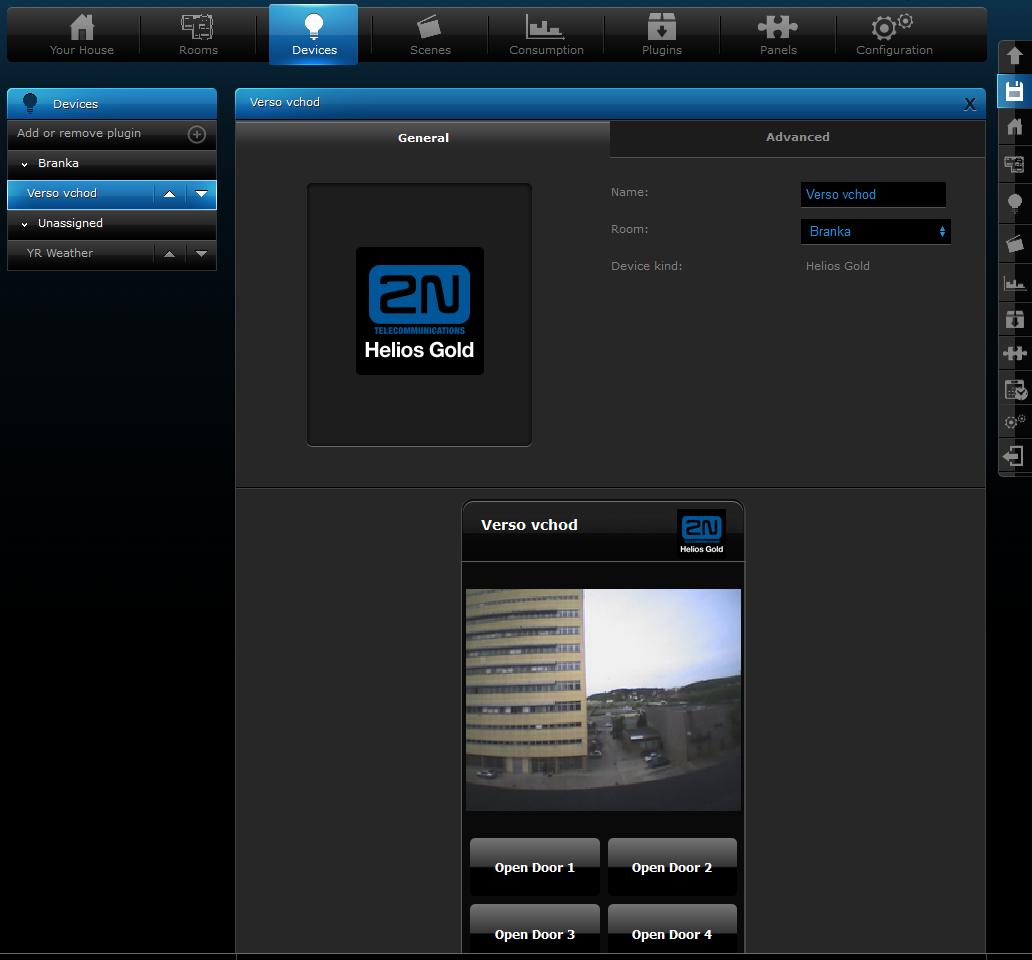
When we have Helios Gold plugin installed, we can set it up. By clicking the Add button we can add a new 2N IP Intercom device to your system.


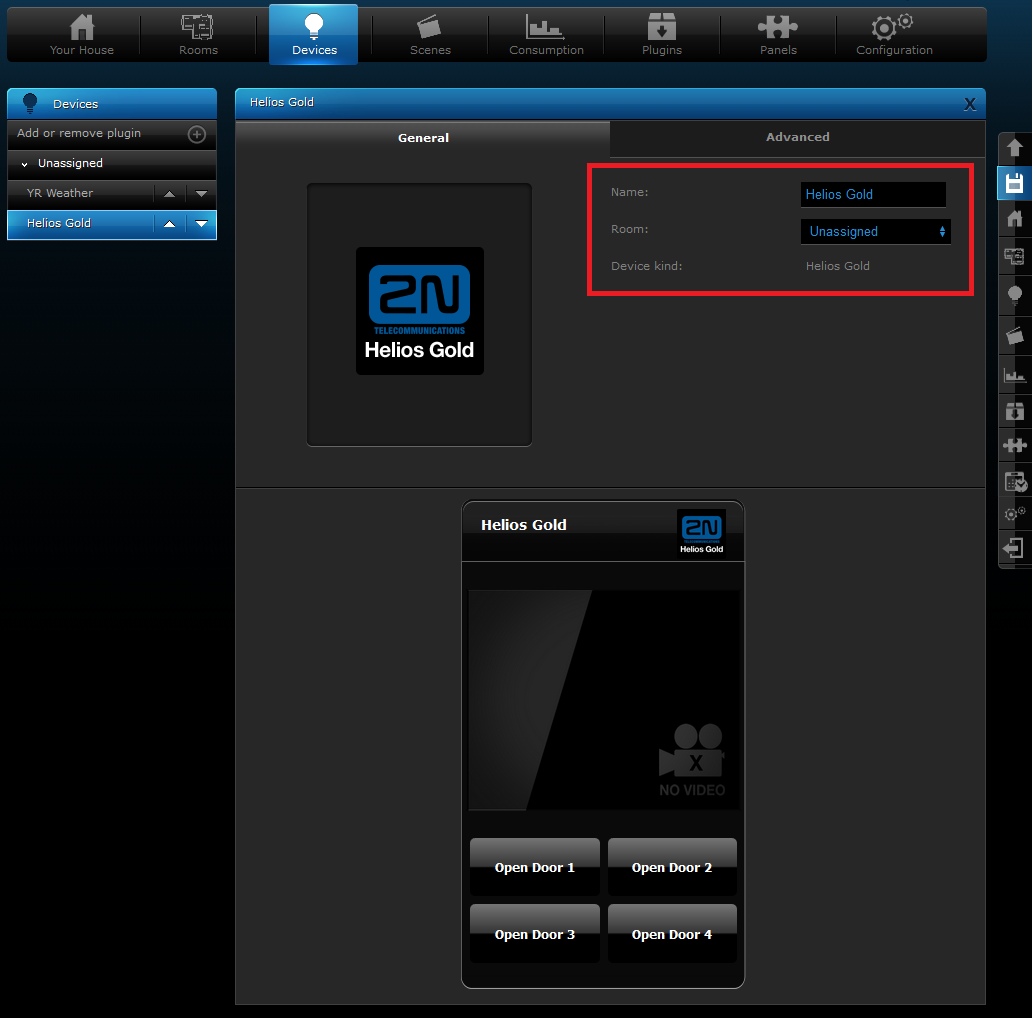
We can enter a Name of 2N IP Intercom device and assign it to a Room to be able  to recognize it for other users.


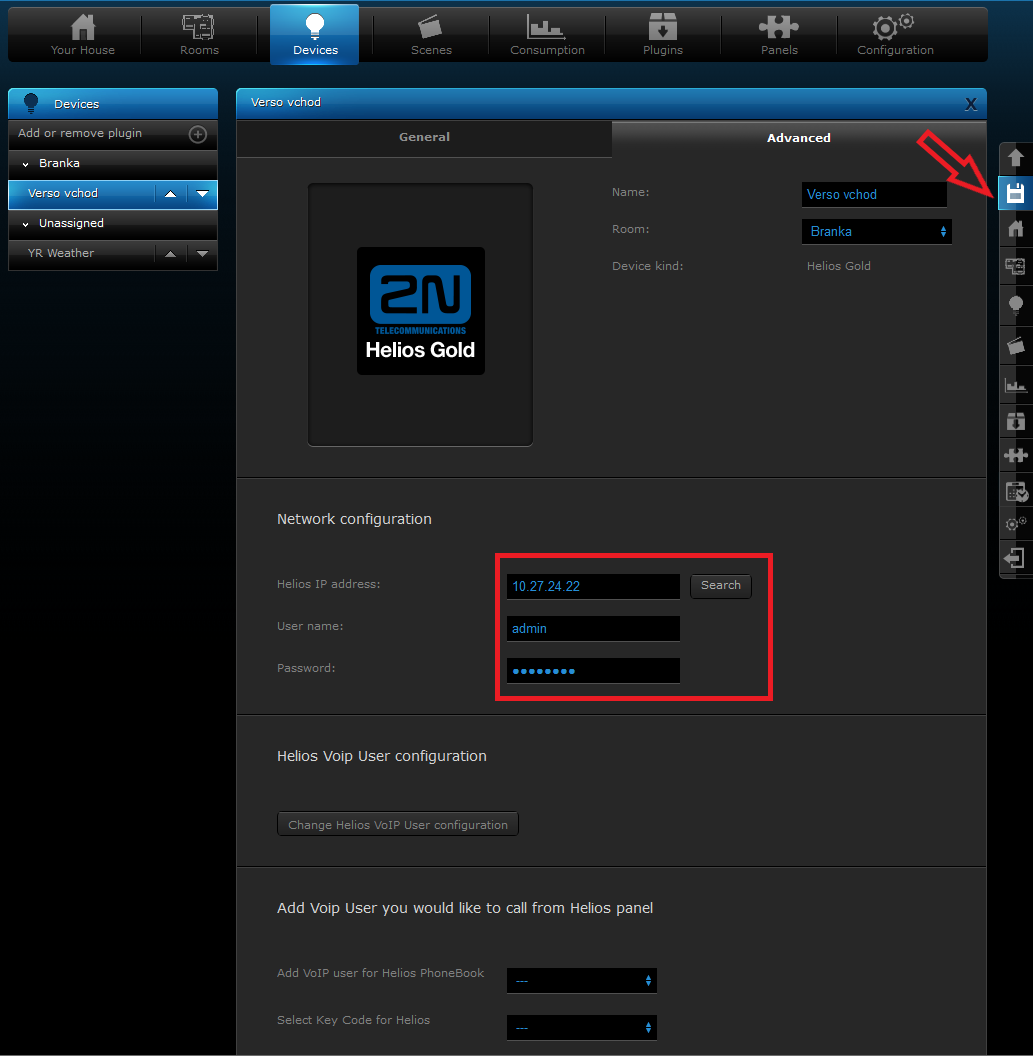
Moving to Advanced tab we can set other necessary parameters of 2N IP Intercom. There are two ways to add e device in your network:

1. Fill in known IP address manually.
2. We’ll use the Search button to show all 2N® IP intercom connected to your network.
Then we’ll fill up login credentials and we can save whole configuration by clicking the Save button in the ribbon placed on right side of page.


When we come back to General tab we should see video preview and we can control door lock. Prerequisite is HTTP API ready on 2N IP Intercom.

FIBARO Home Center 2 has its own SIP proxy server, that’s why it is easy to make calls.

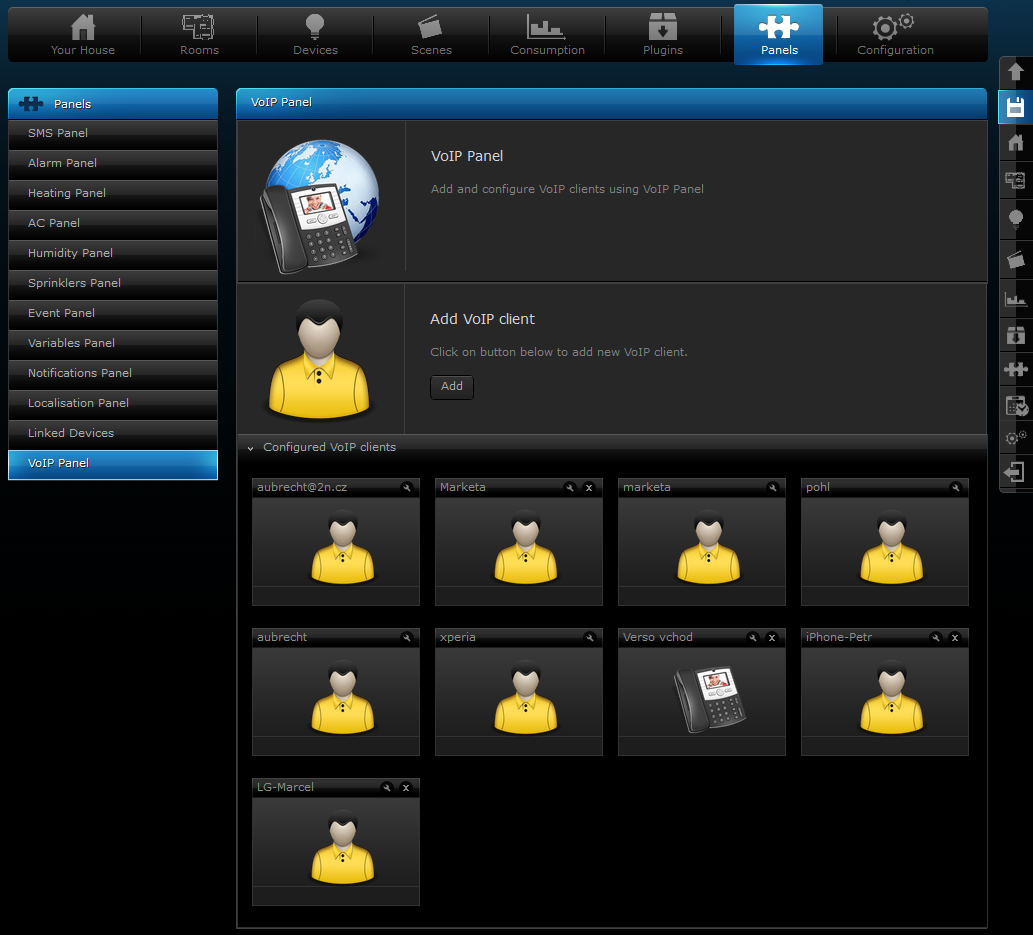
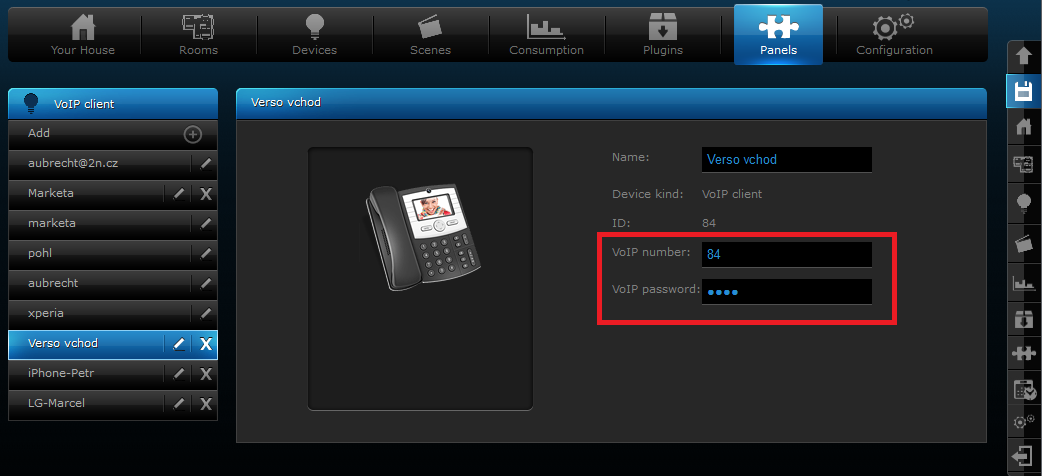
In the PanelsVoIP Panel menu we can see automatically generated SIP accounts of added devices and users. When we open an account we can check parameters of that account.


For setup of 2N IP Intercom we will use parameters VoIP number and VoIP password, if set.

Settings Smartphone connection to the system

Enter the IP address of 2N® IP Intercom into your web browser you want to configure. If you don’t knw the IP address, you can use 2N® IP Network Scanner (download https://www.2nusa.com/en_US/products/2n-network-scanner). Then we can login using known credentials, or by default login admin and password 2n.

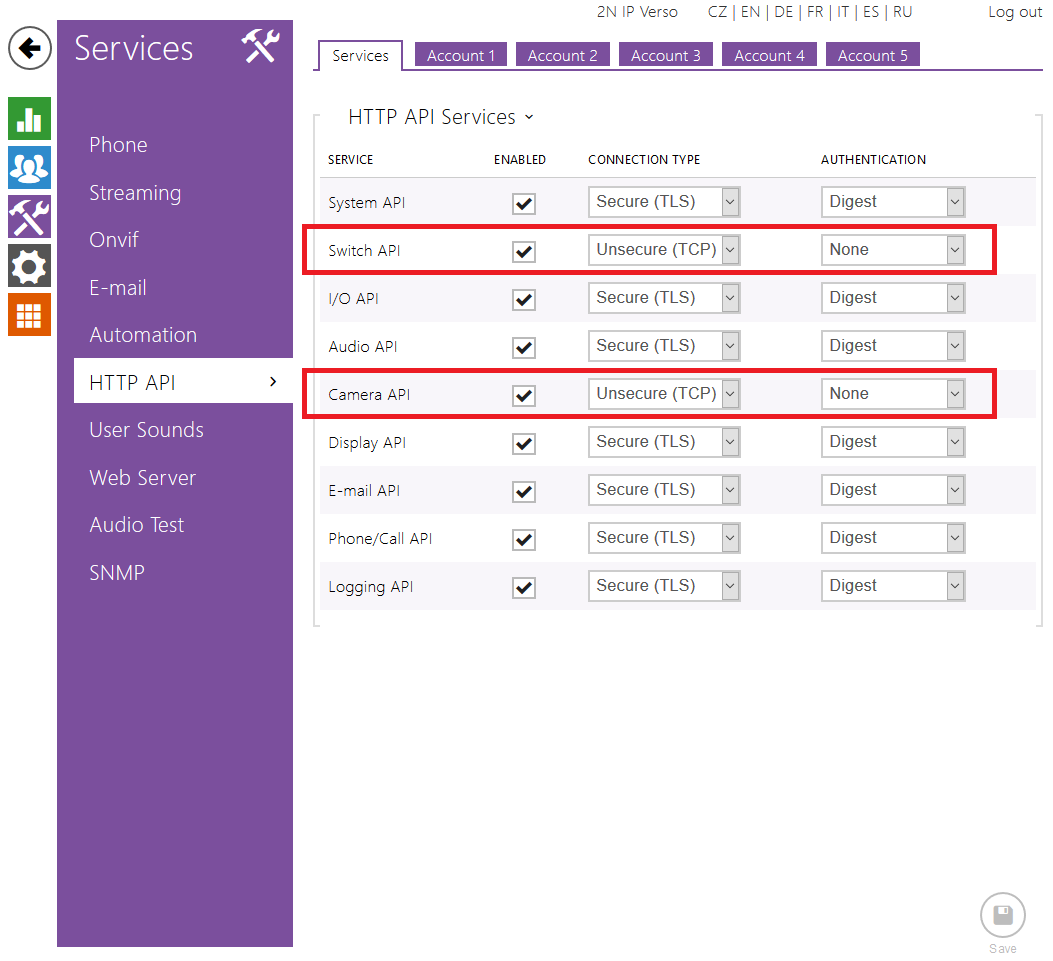
We need to prepare the access to HTTP API to be able control the door lock and to see video preview from 2N IP Intercom.

In the menu ServicesHTTP API, you should make sure that functions Switch API and Camera API have values set to Unsecure (TCP) connection type and authorization None. We can confirm that clicking Save button.

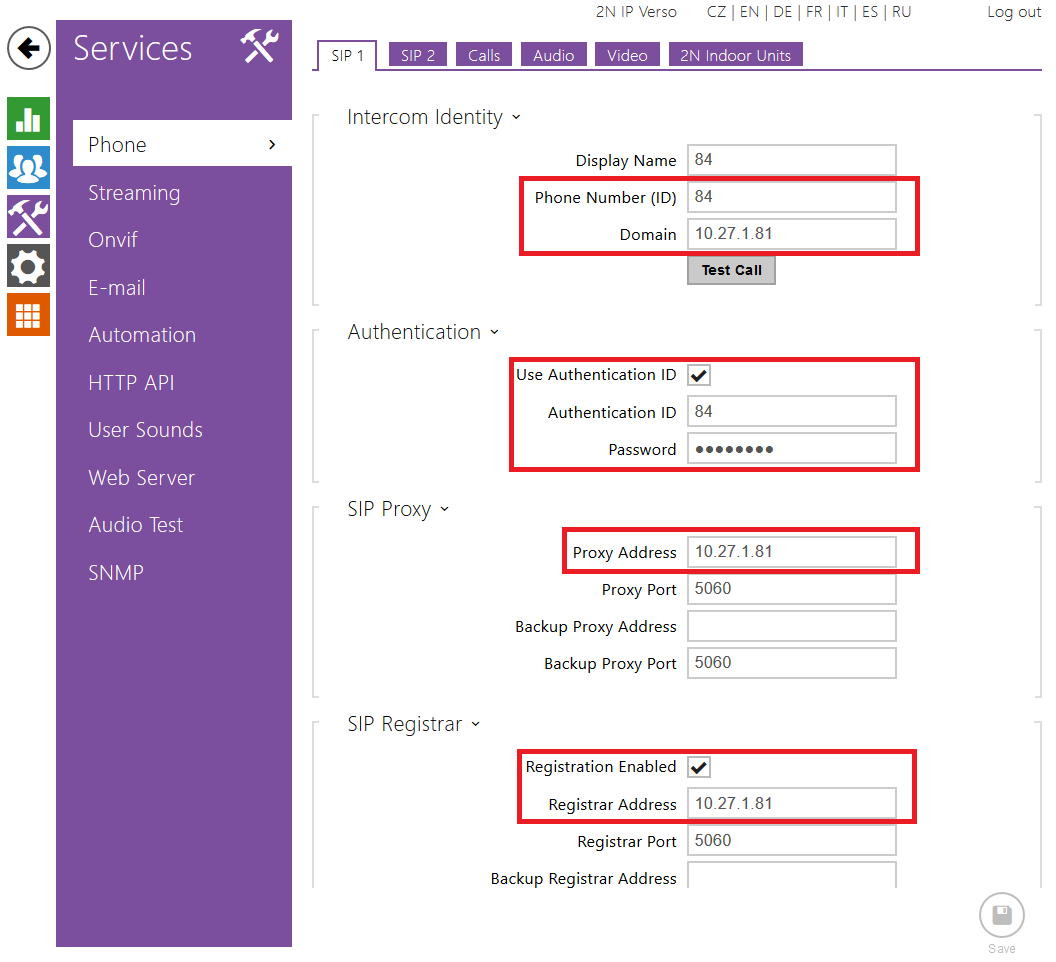
We can fill the Phone Number, ID and Password according to values from VoIP account in FIBARO Home Center 2. Proxy and Registrar Address we enter IP address of FIBARO Home Center 2 in your LAN.

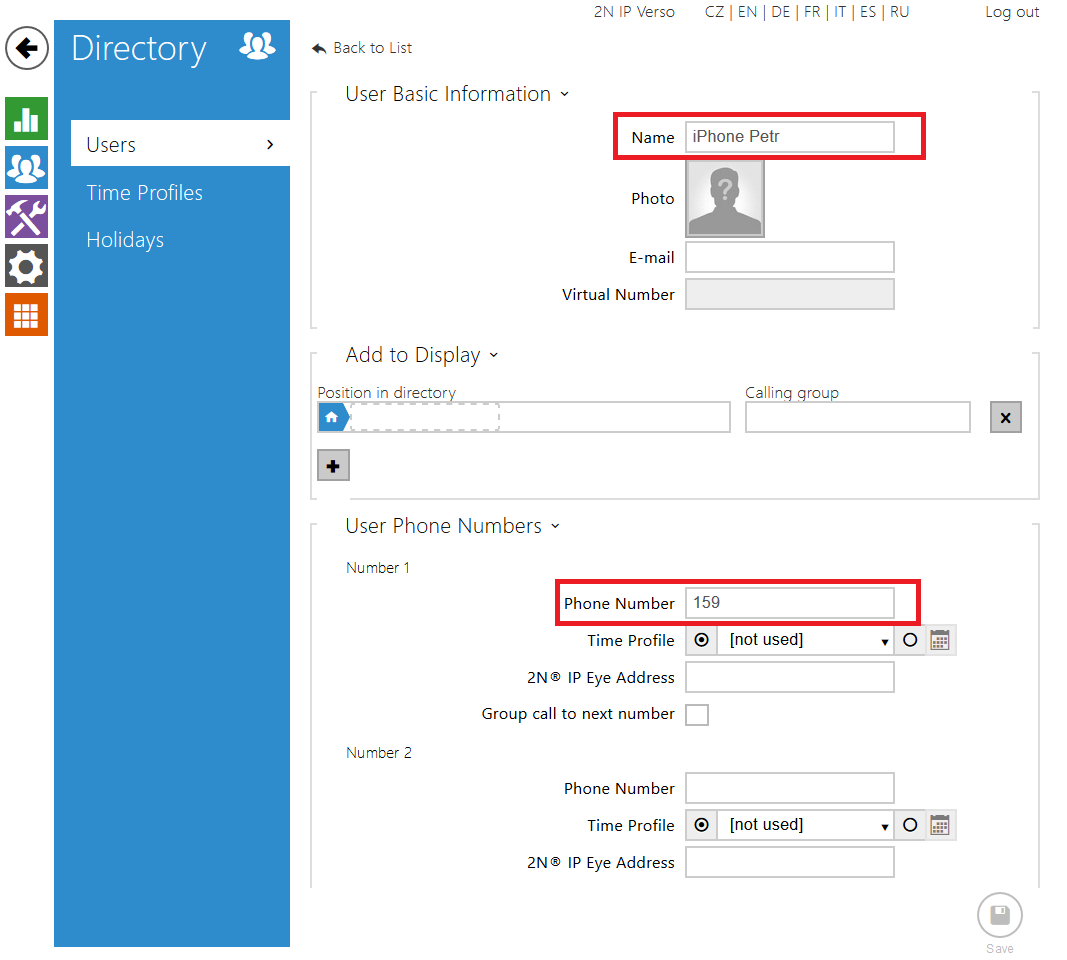
When we want to call from 2N IP Intrercom to phone numbers registered on FIBARO Home Center 2, we must enter them into 2N IP Intrercom directory.

We’ll find it in DirectoryUsers menu, clicking New user button we’ll open new user page. Please fill in fields Name and Phone Number. This name could be seen, if you use display module on your 2N IP Intrercom. Phone Number corresponds with VoIP user on FIBARO Home Center 2. We can save new user clicking Save button.

Please find the way how to assign users to buttons in manual: https://wiki.2n.cz/hip/conf/latest/en/5-konfigurace-interkomu/5-3-hardware/5-3-6-tlacitka

and how to setup display contacts, if the display module is equipped: https://wiki.2n.cz/hip/conf/latest/en/5-konfigurace-interkomu/5-3-hardware/5-3-8-displej

Used Symbols

(tikot) - Compatible

(varování) - Work with limitation

(chyba) - Incompatible