Aimetis Symphony
Content
About
Aimetis Symphony is an advanced video management software product with integrated video analysis. Symphony simultaneously enables digital video recording, intelligent video analysis and remote access to live and recorded images from any networked computer. Symphony analyzes incoming video against user-defined policies and initiates counter measures when an event violates a Rule. By using Symphony’s advanced business intelligence reporting and query tools, users can quickly access information or locate specific video in seconds, saving hours of forensic work.
http://www.aimetis.com/Symphony/
Version 7
Tested Functions
| Aimetis Symphony | 2N IP Intercom Version | Scan device | Video from 2N IP intercom | Audio from 2N IP intercom | Audio to 2N IP intercom | Switch control | Events from 2N IP intercoms |
|---|---|---|---|---|---|---|---|
7.0.5.1 | 2.20.0.29.5 | ||||||
2.19.0.28.5 |
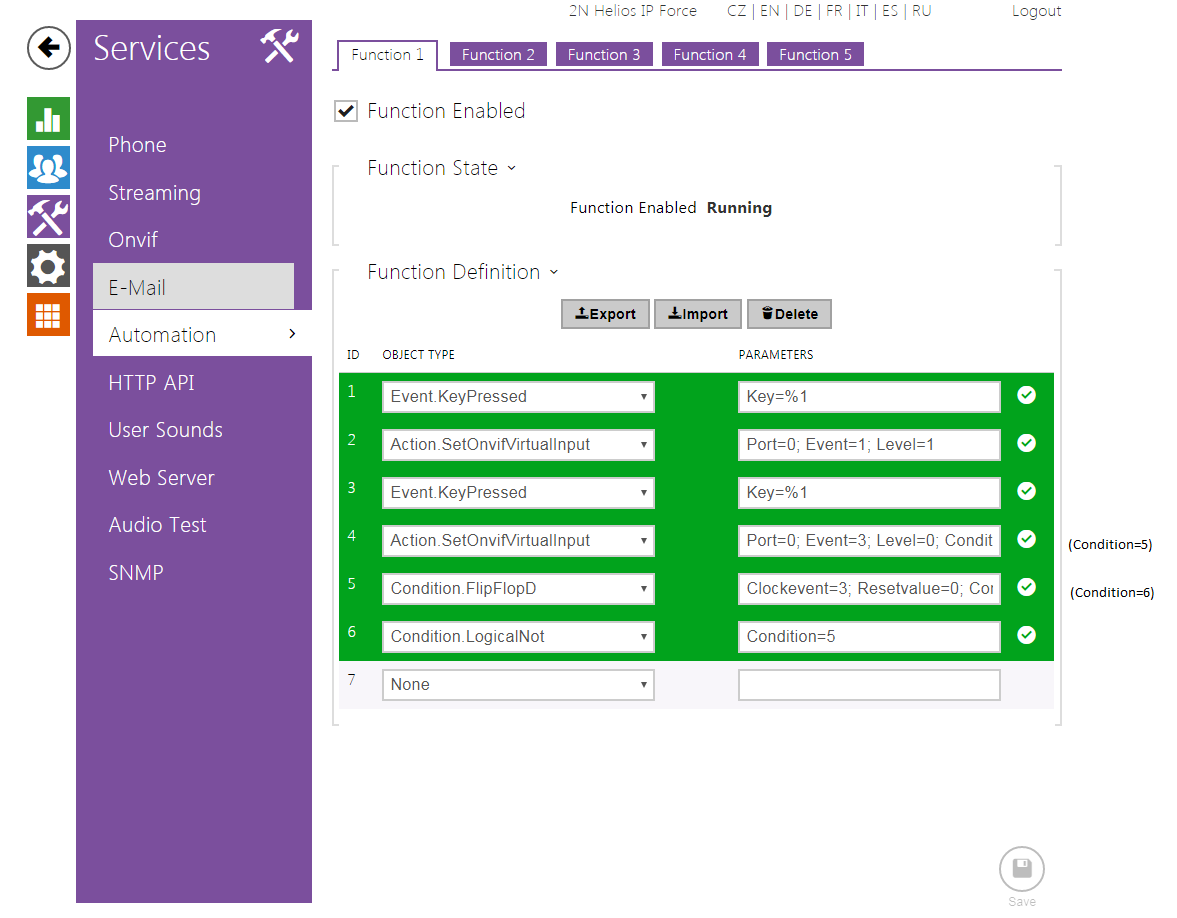
2N IP Intercom Settings
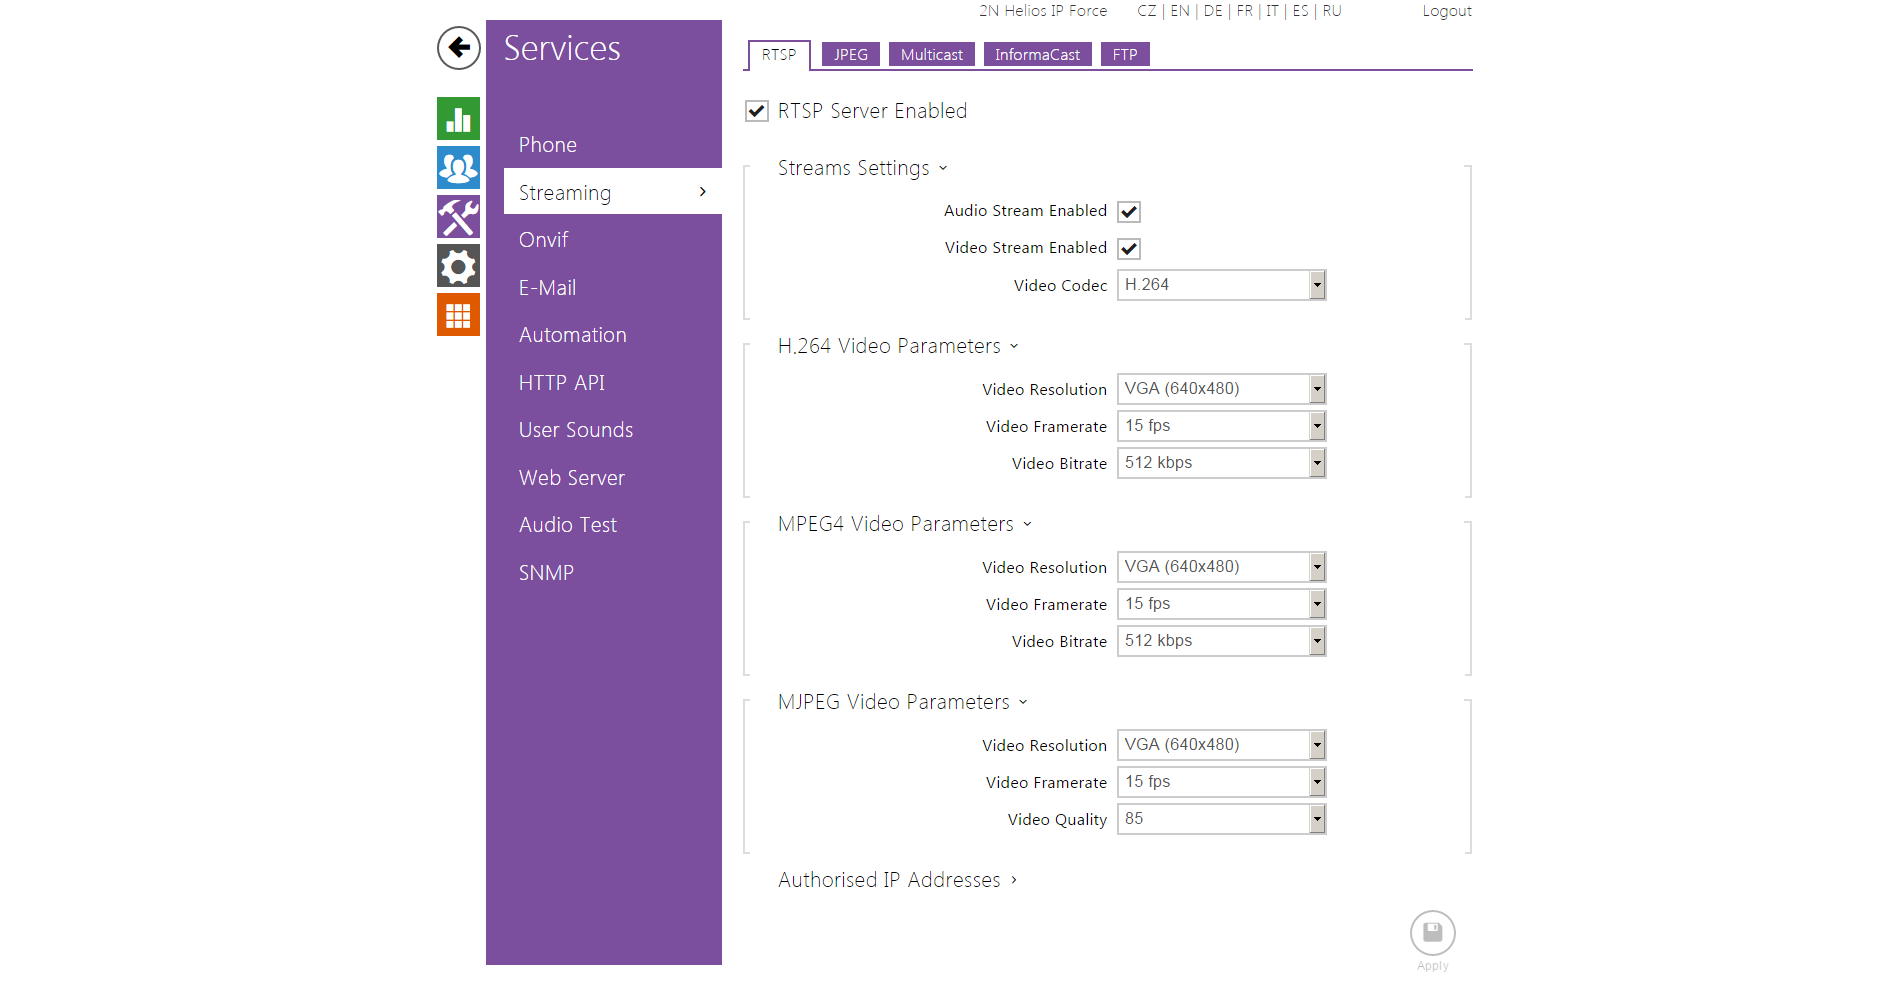
Enable parameter RTSP Server Enabled in menu Services / Streaming.
 |
 |
 |
Tested Features
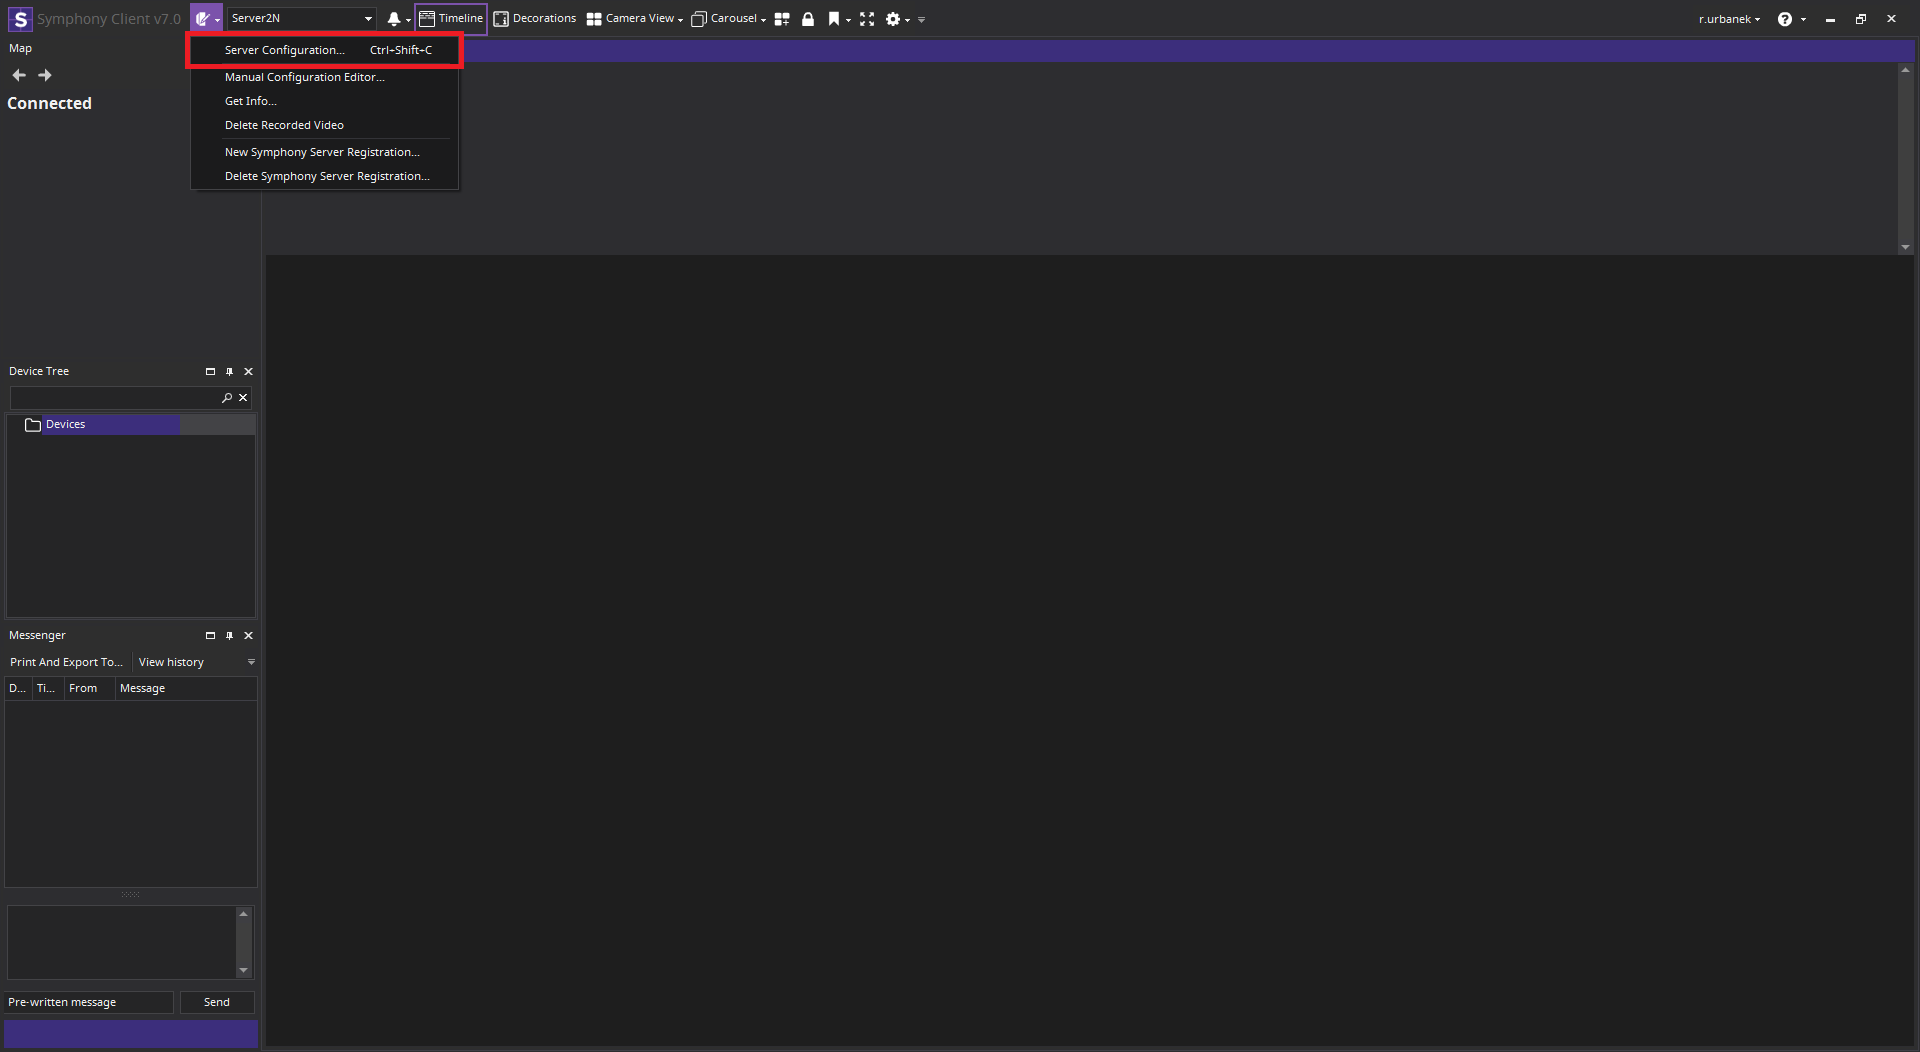
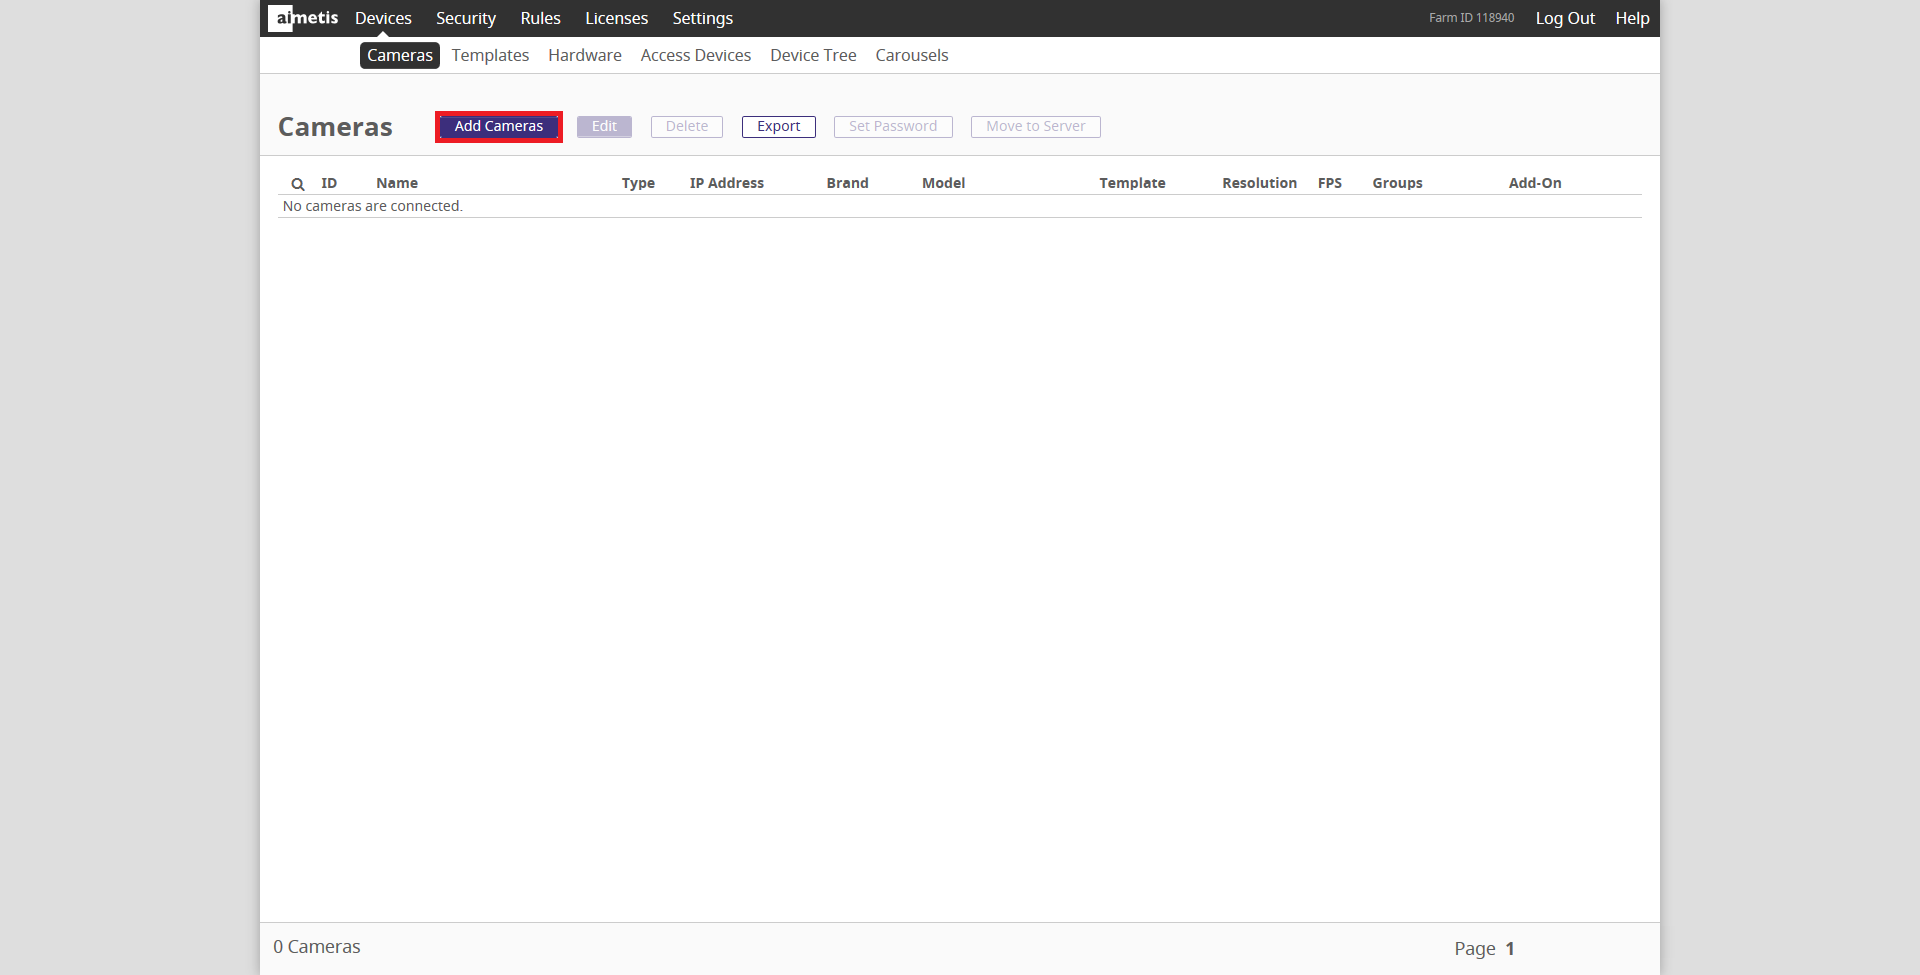
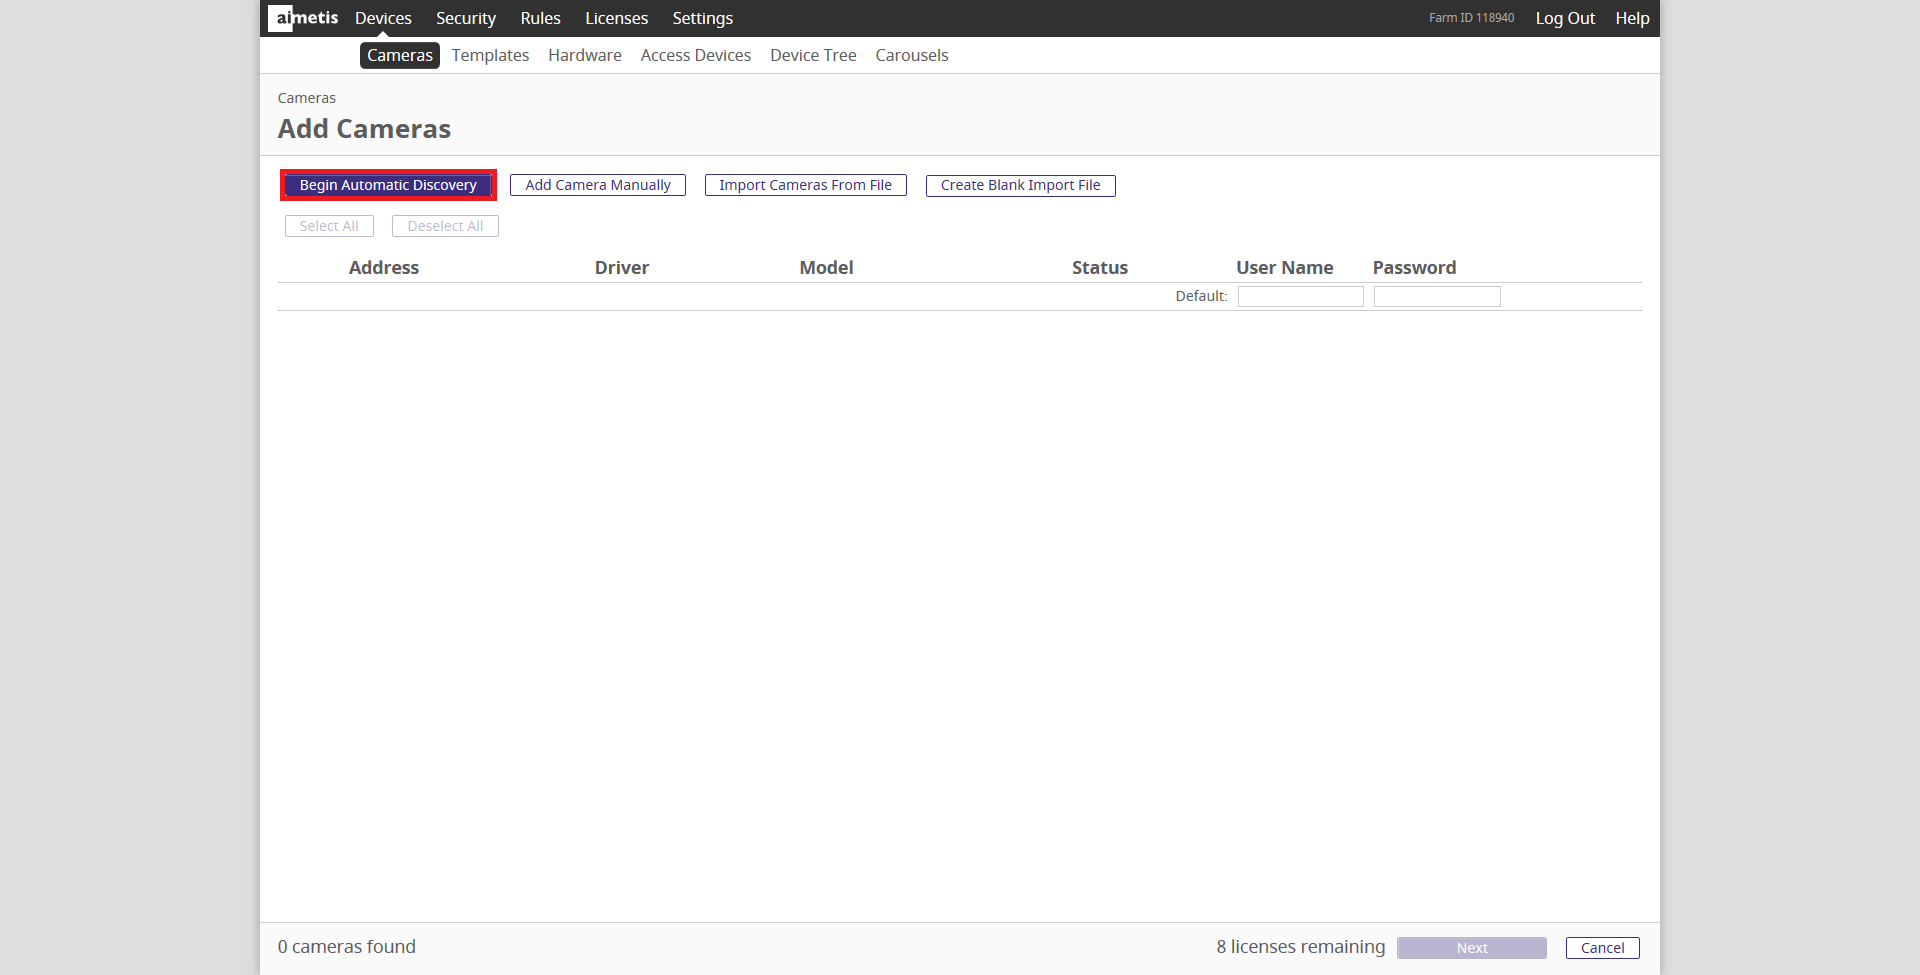
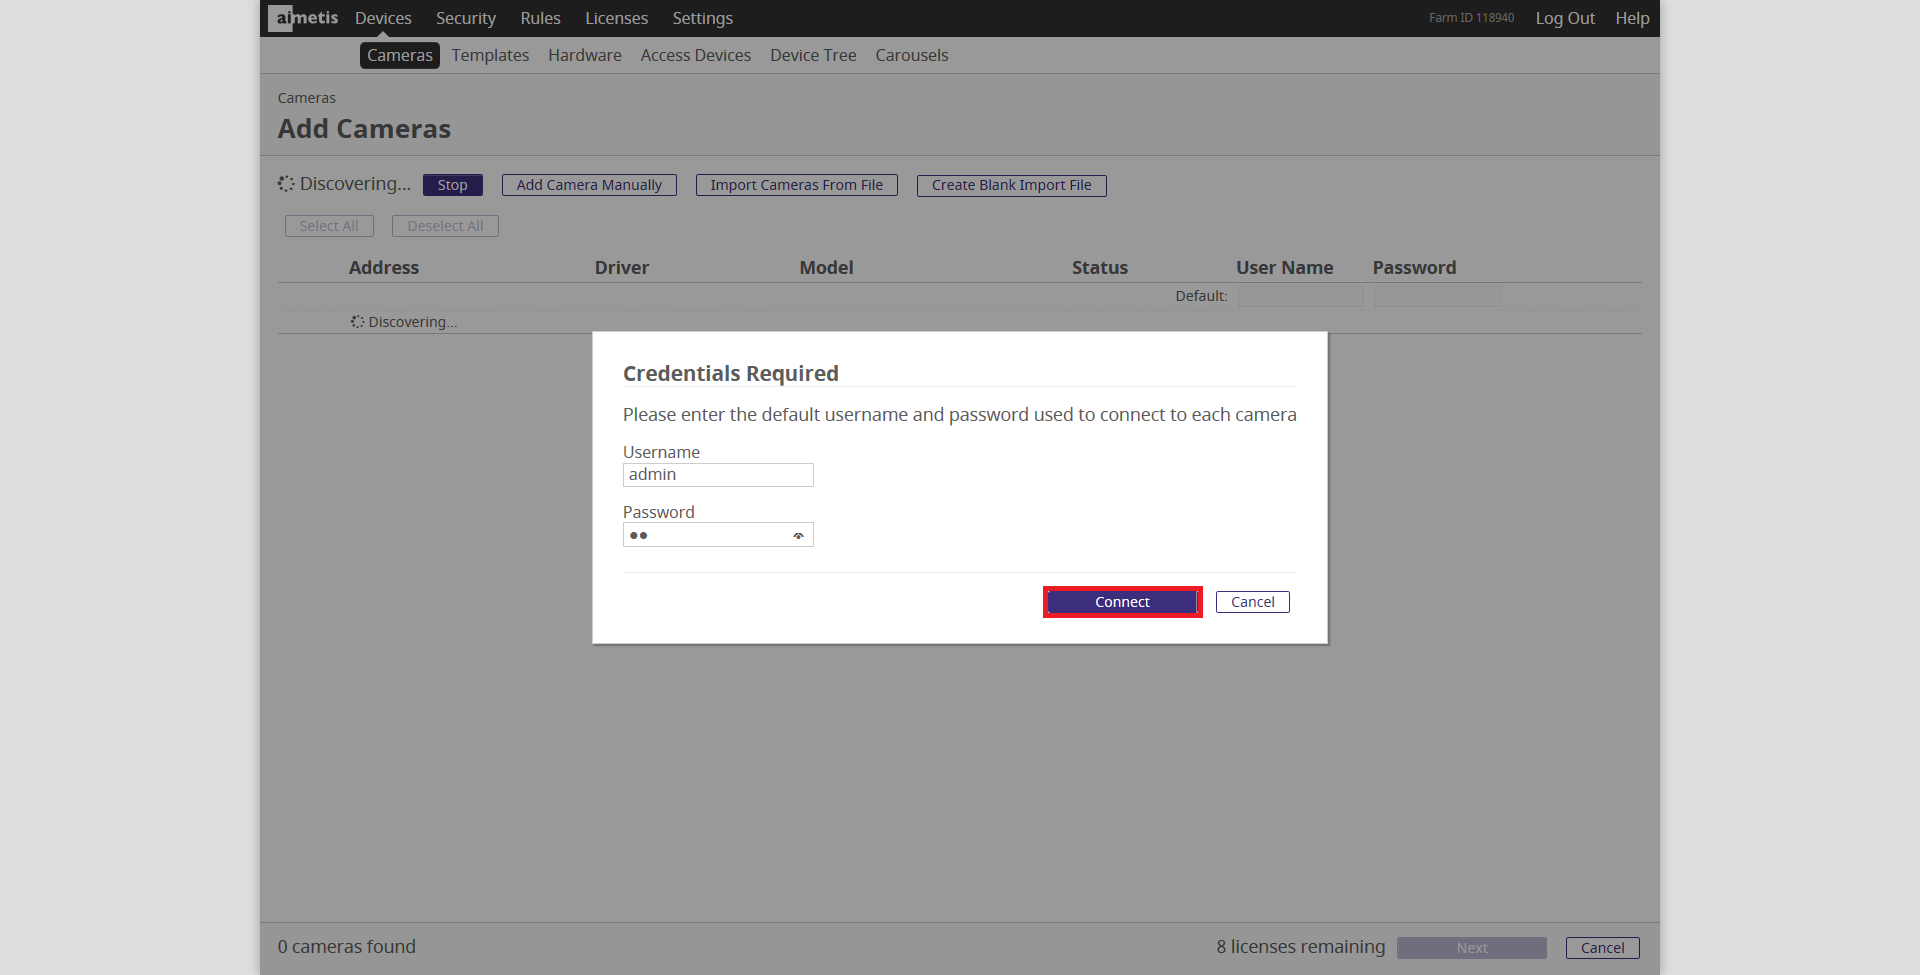
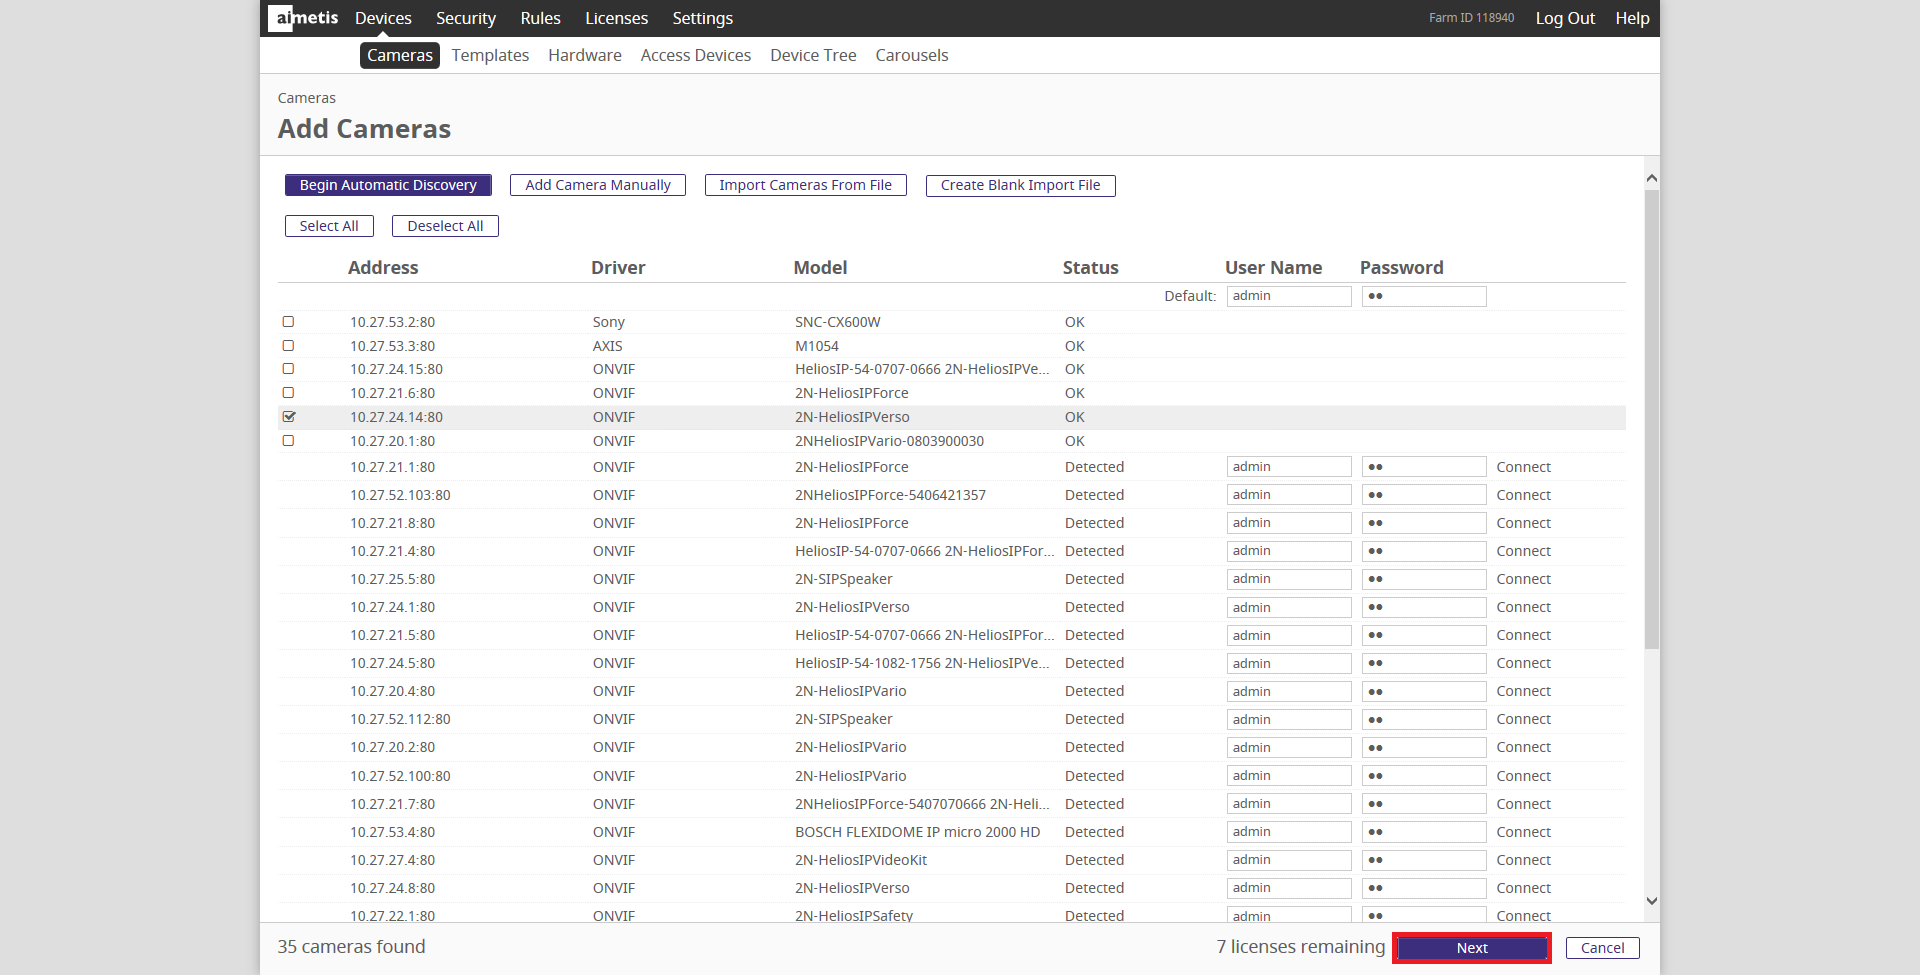
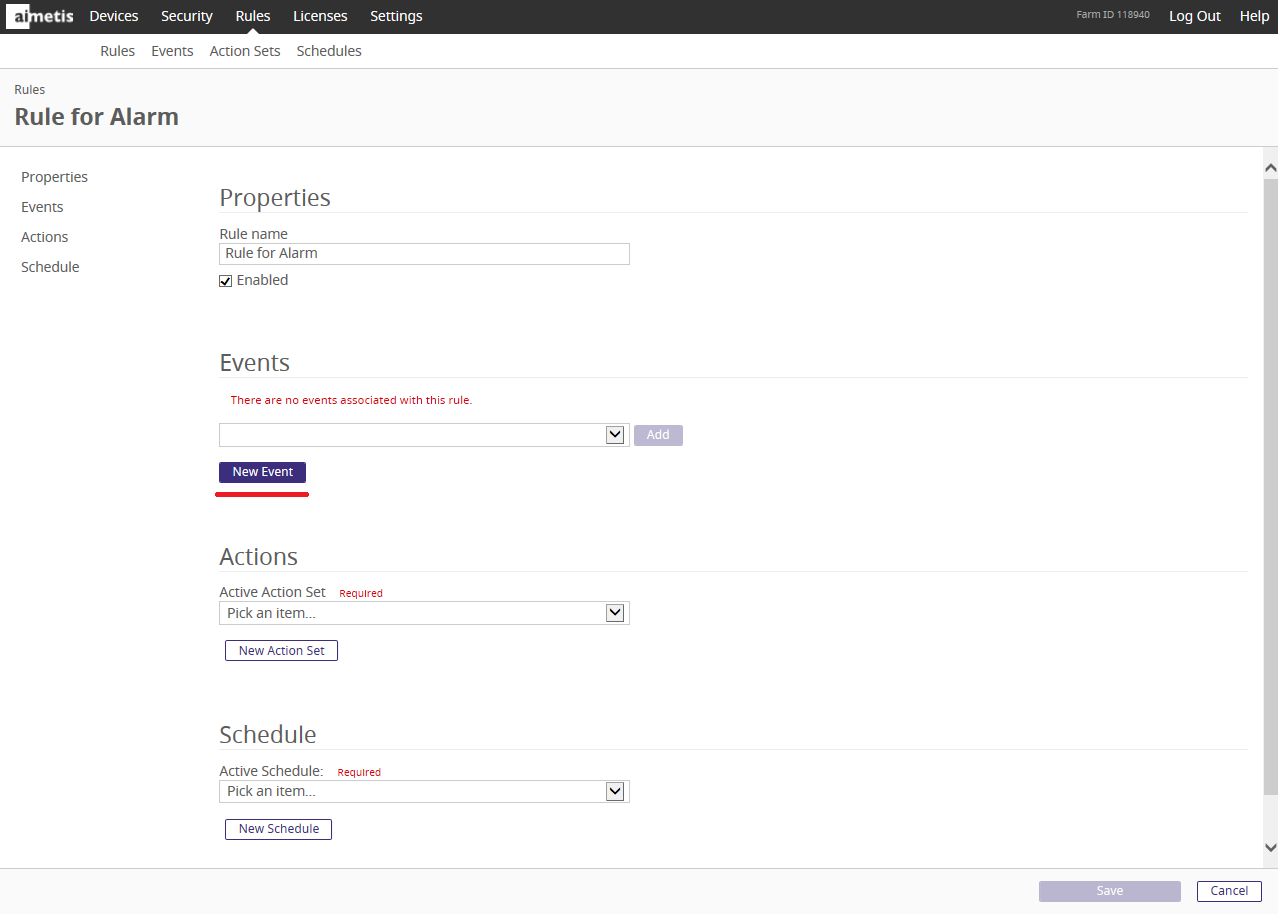
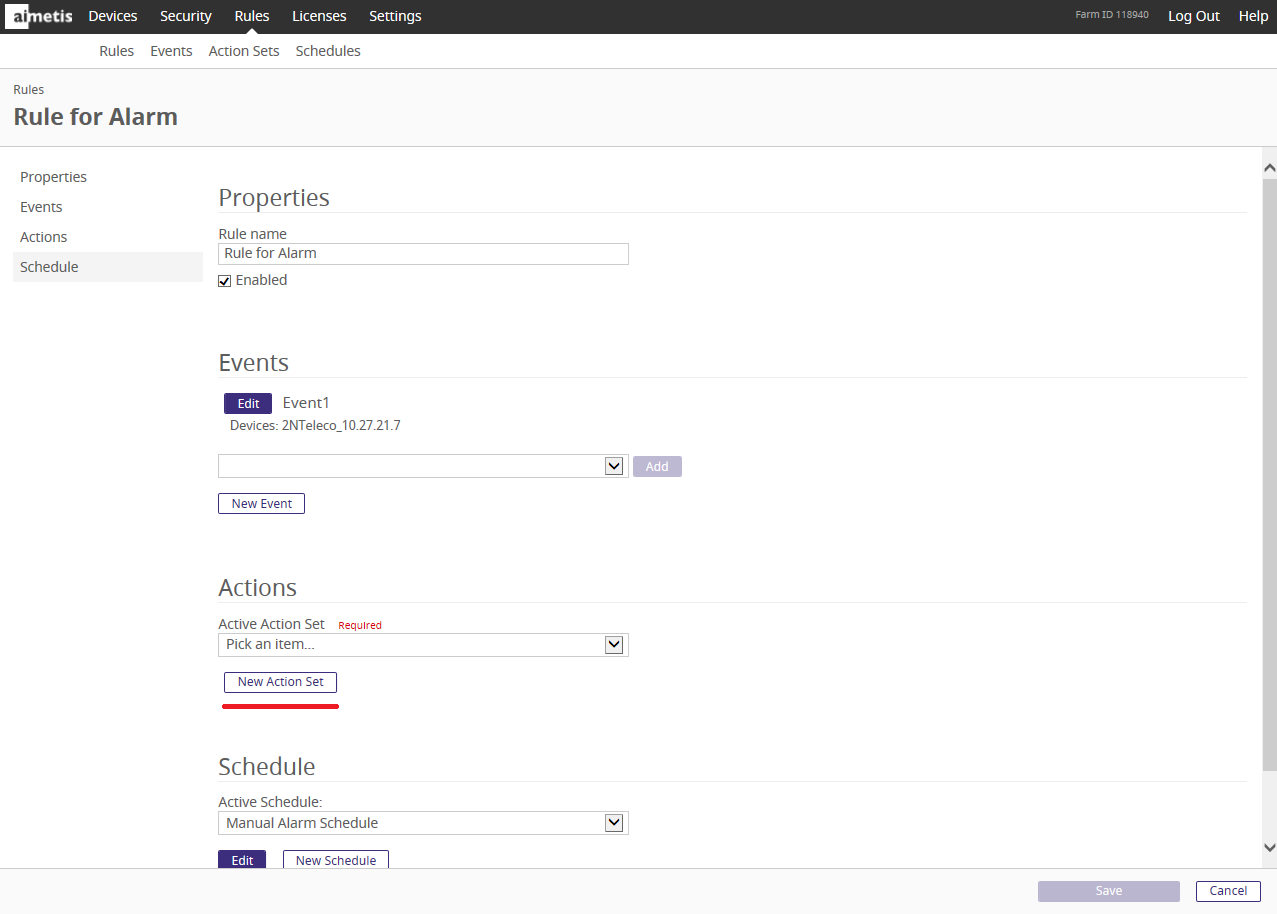
Start the Symphony Client and connect to your server. Choose Server Configuration from the Server menu. This opens the Server Configuration admin dialog in web browser.
 |
 |
 |
 |
 |
 |
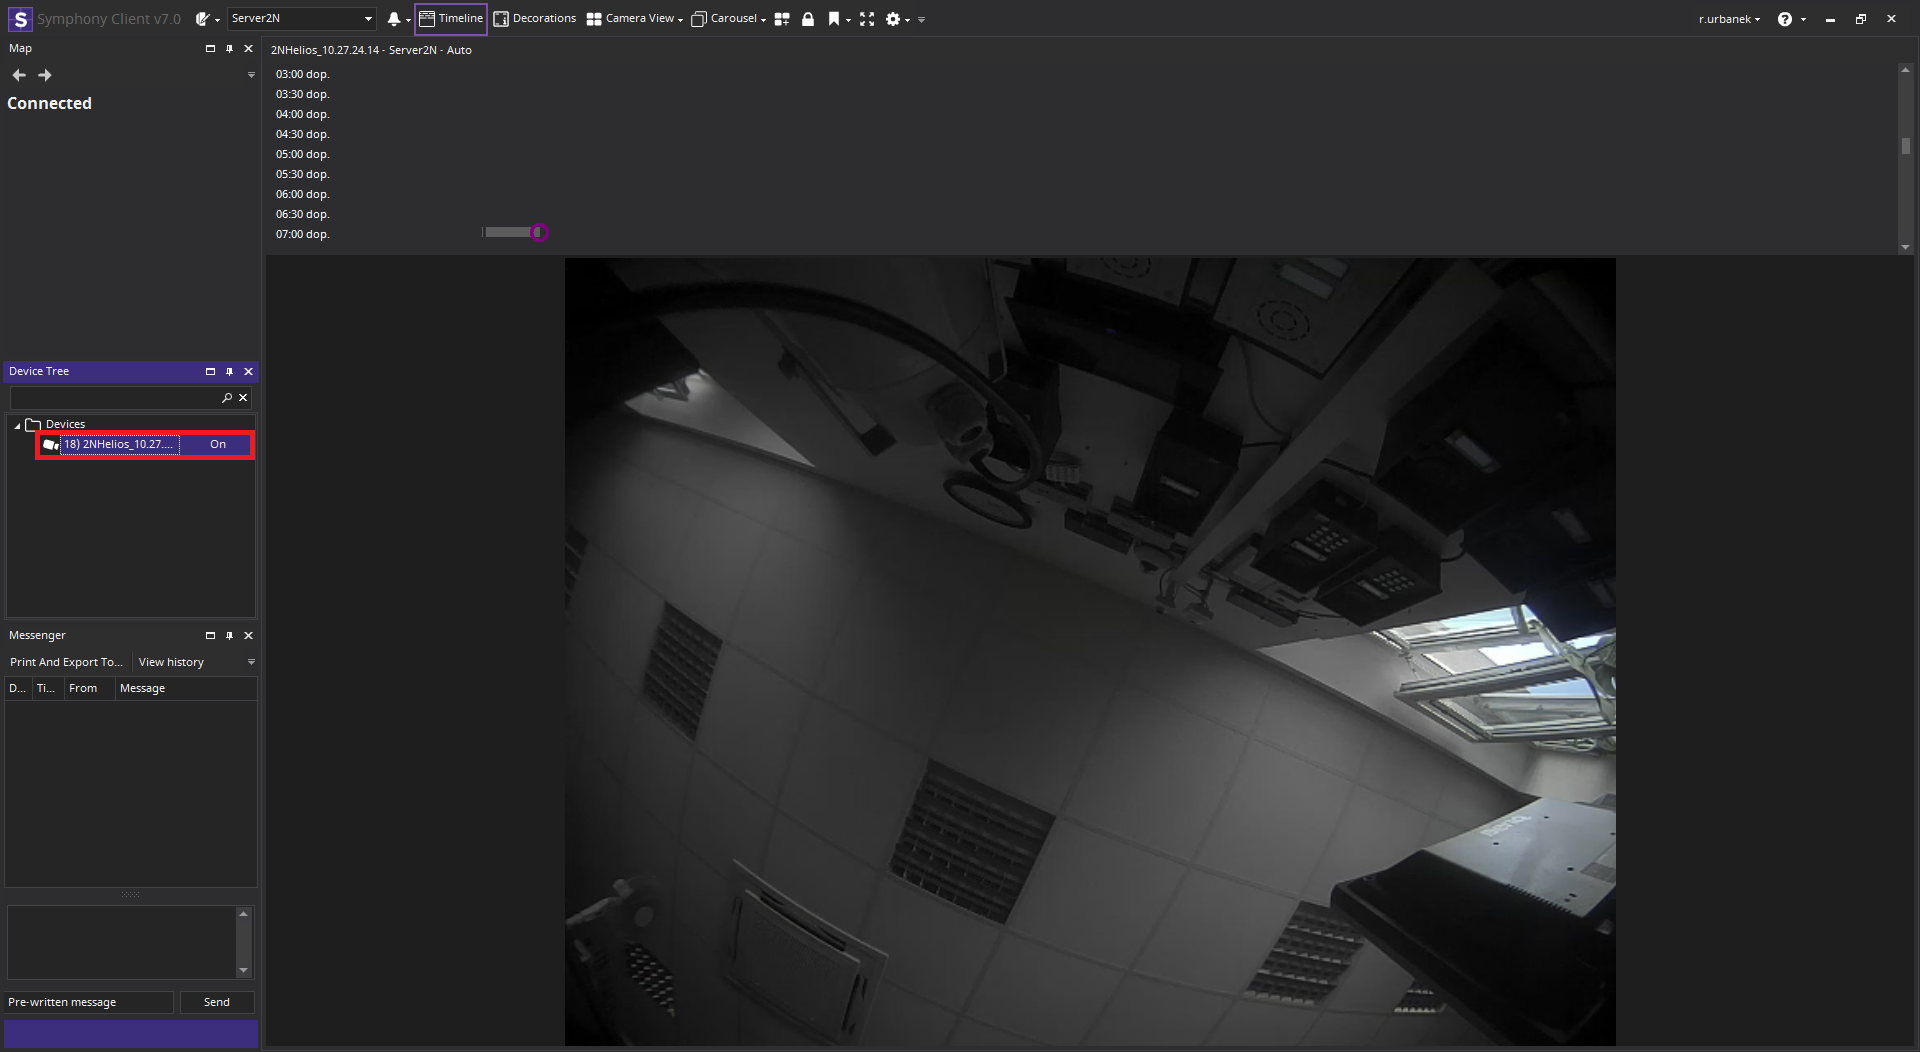
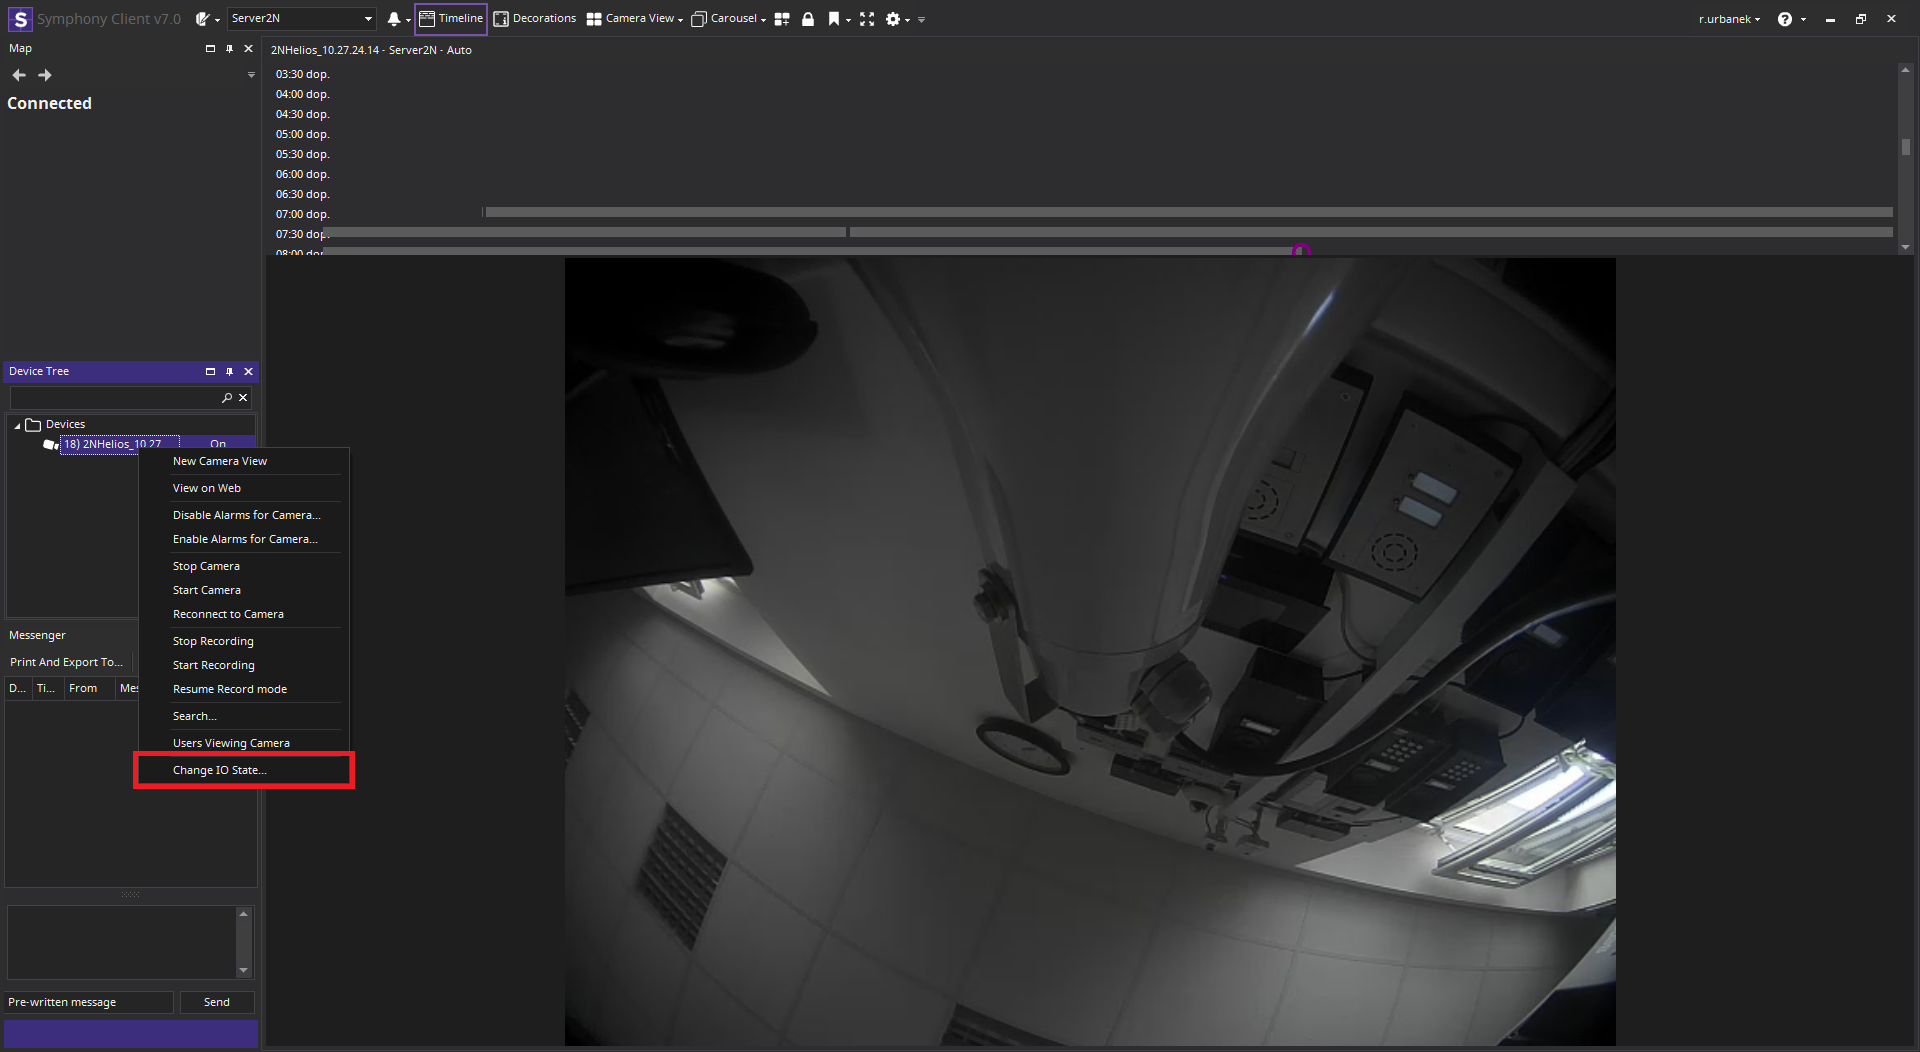
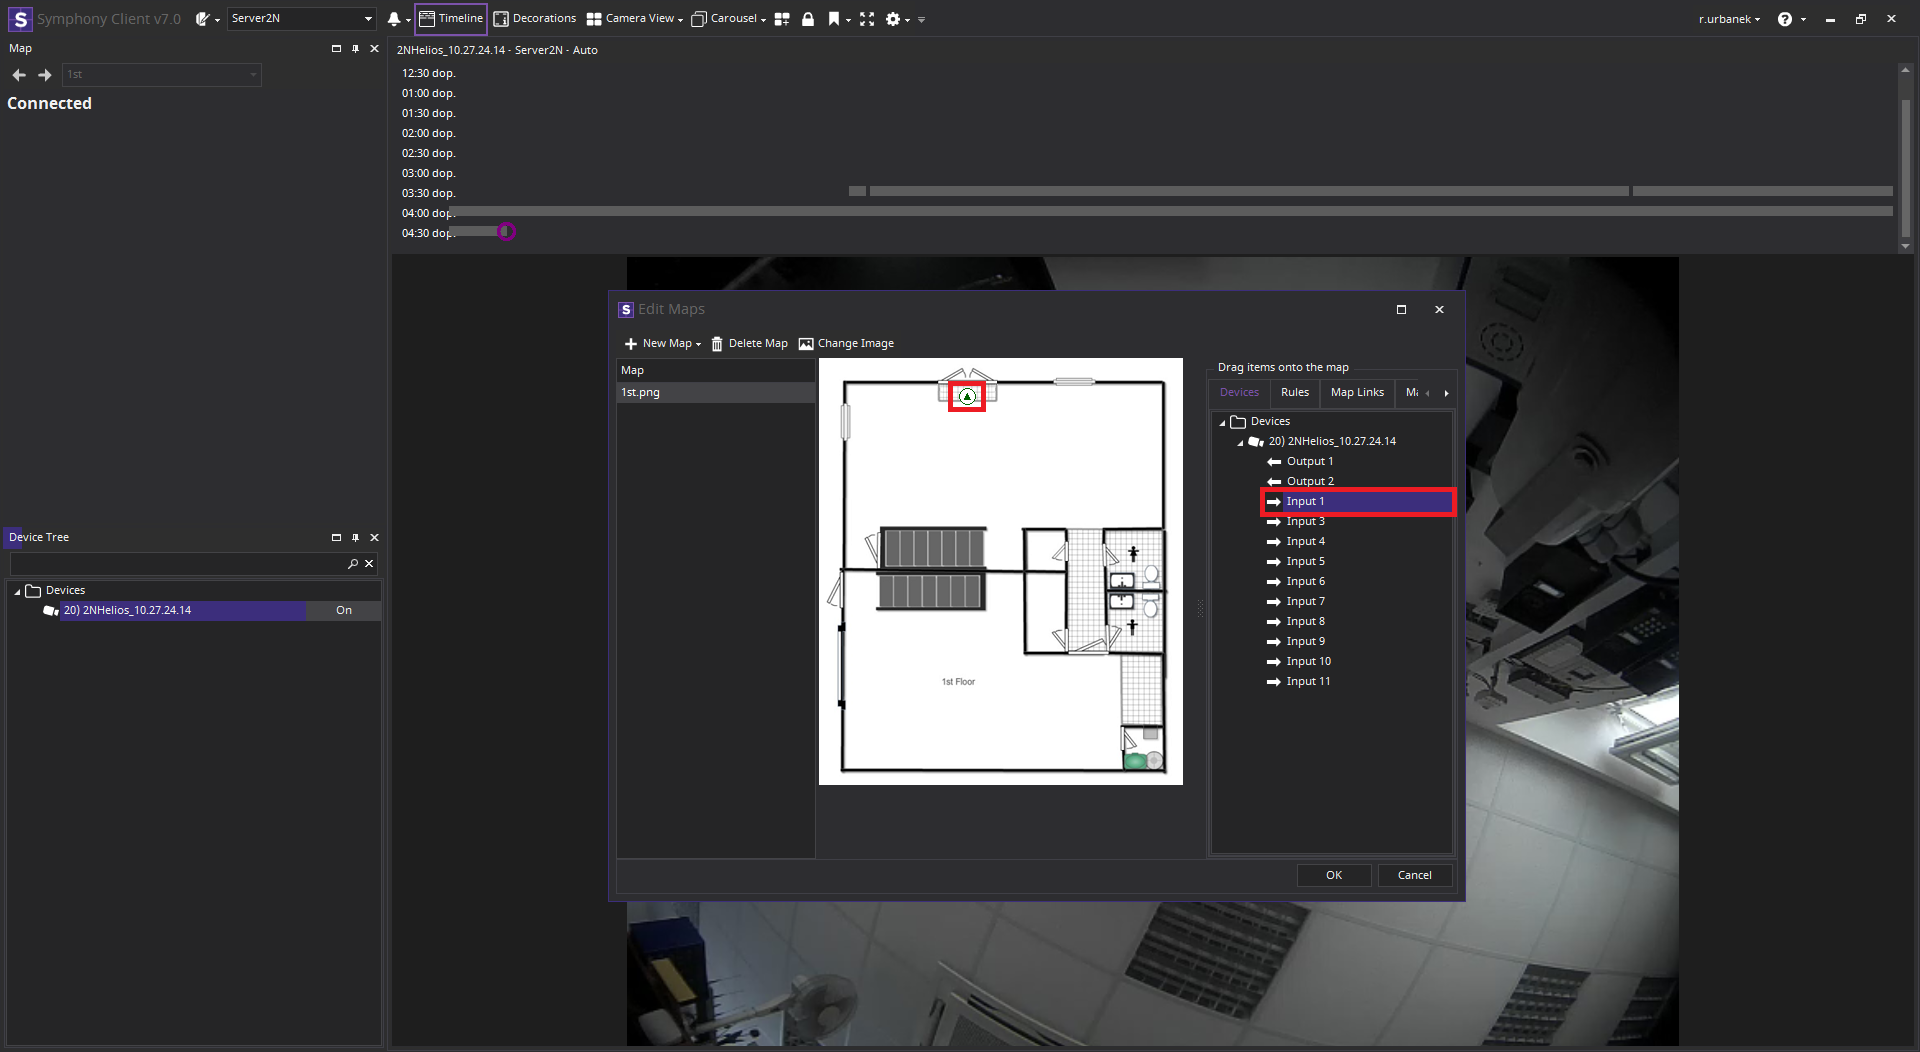
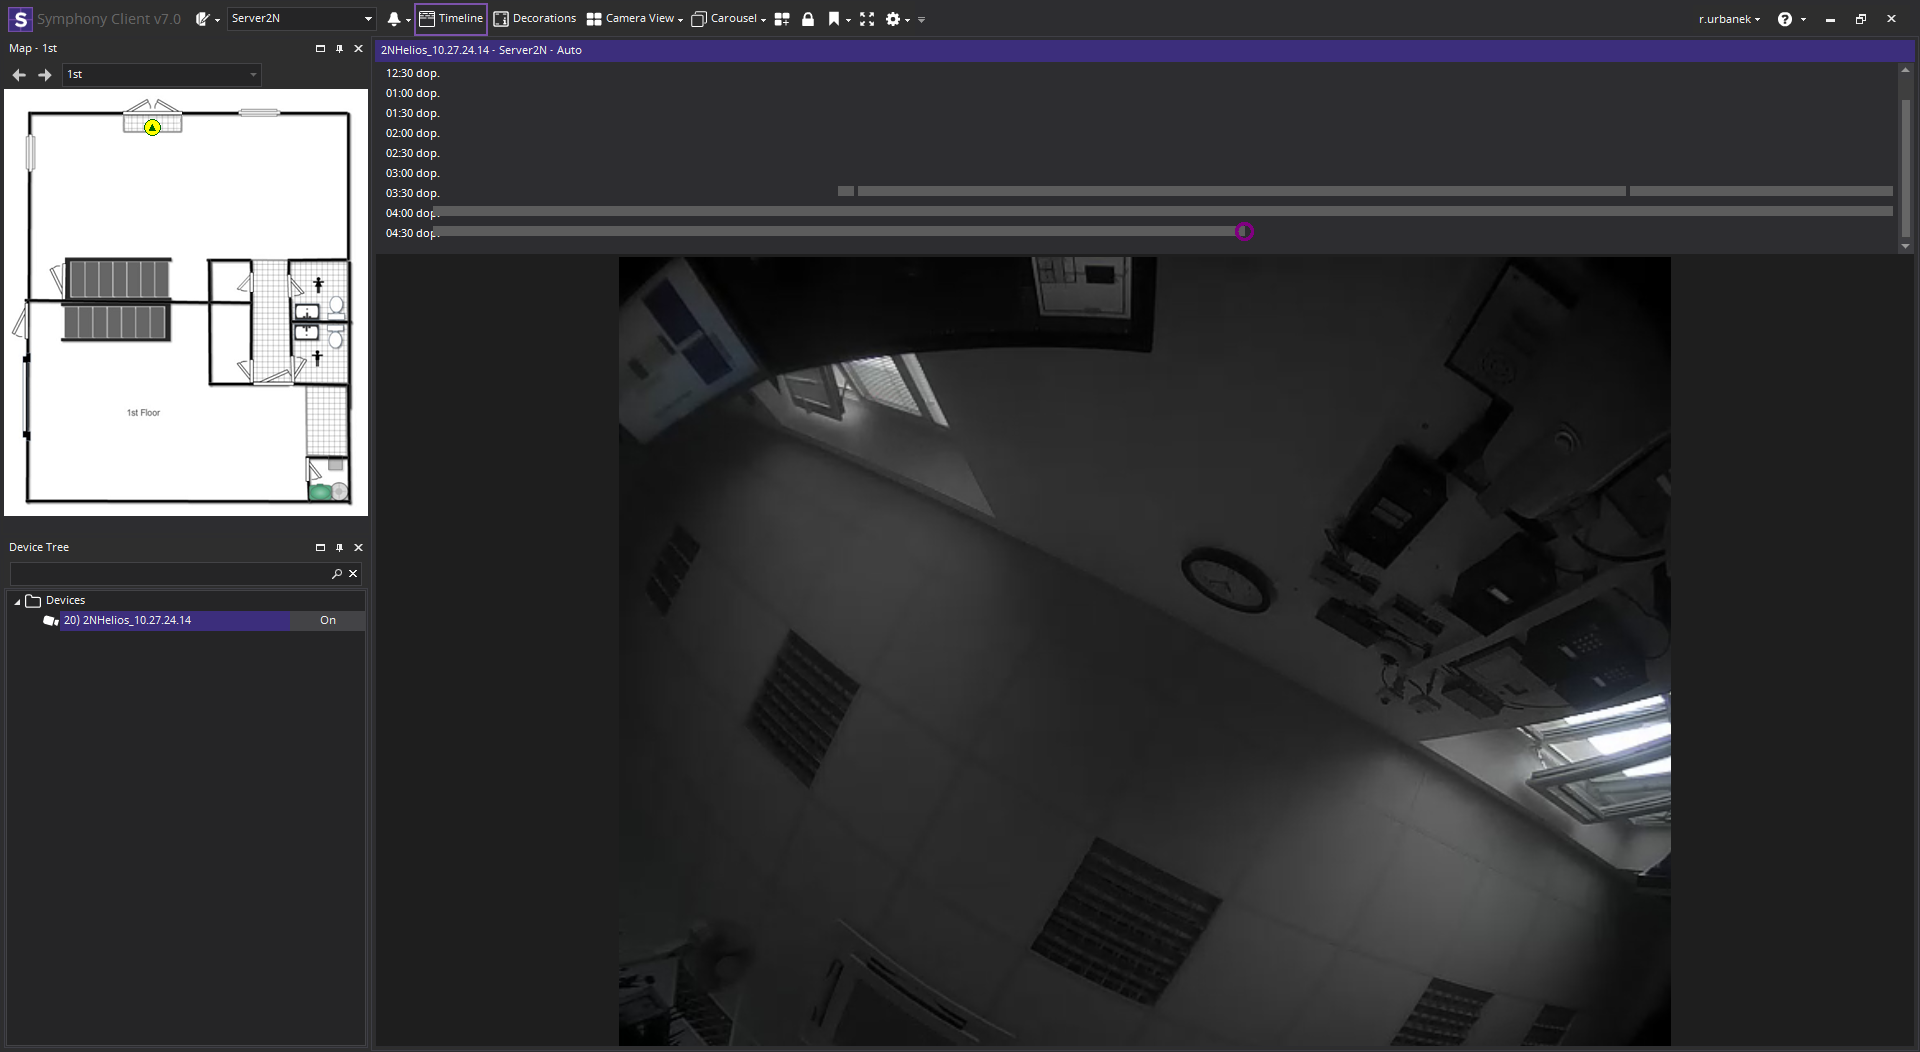
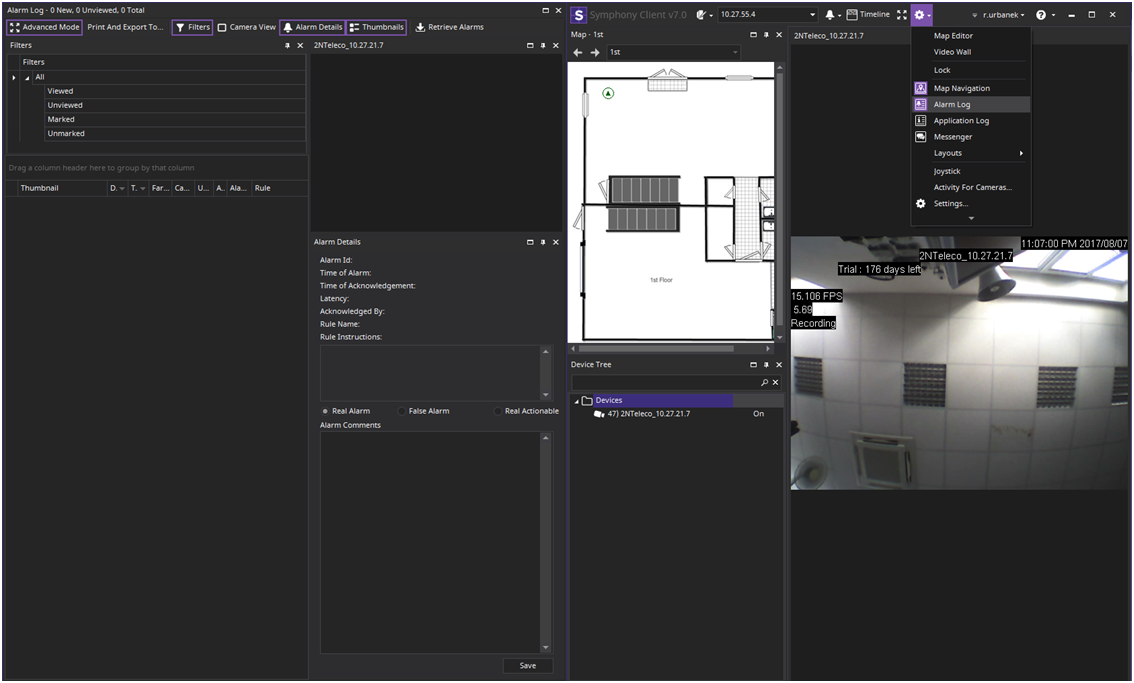
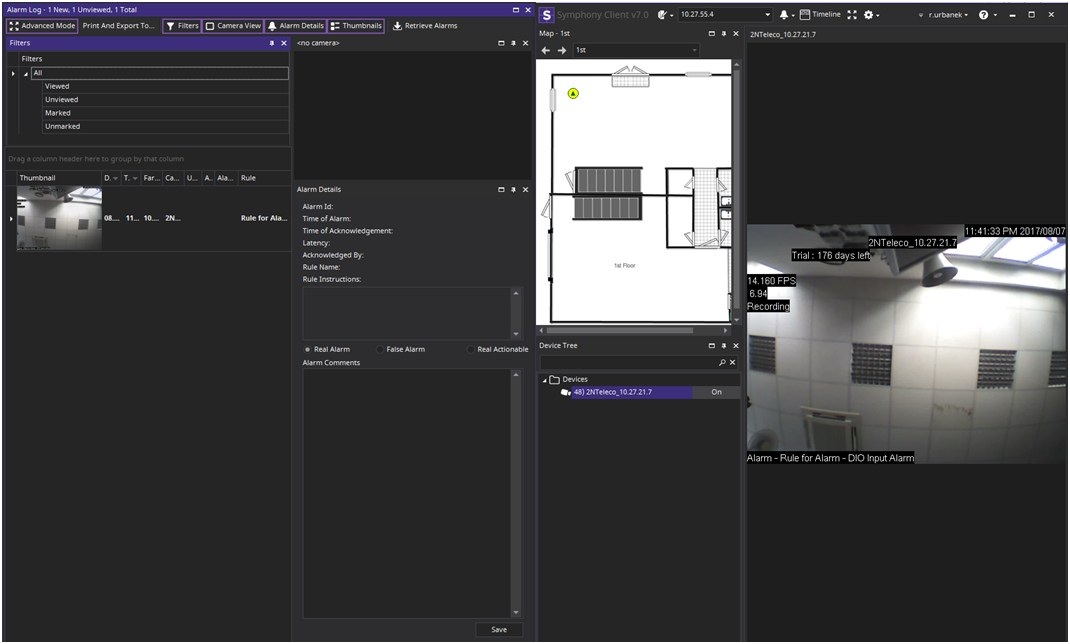
In the Symphony Client you can see Camera tree, in the Camera tree click on your camera.
 |
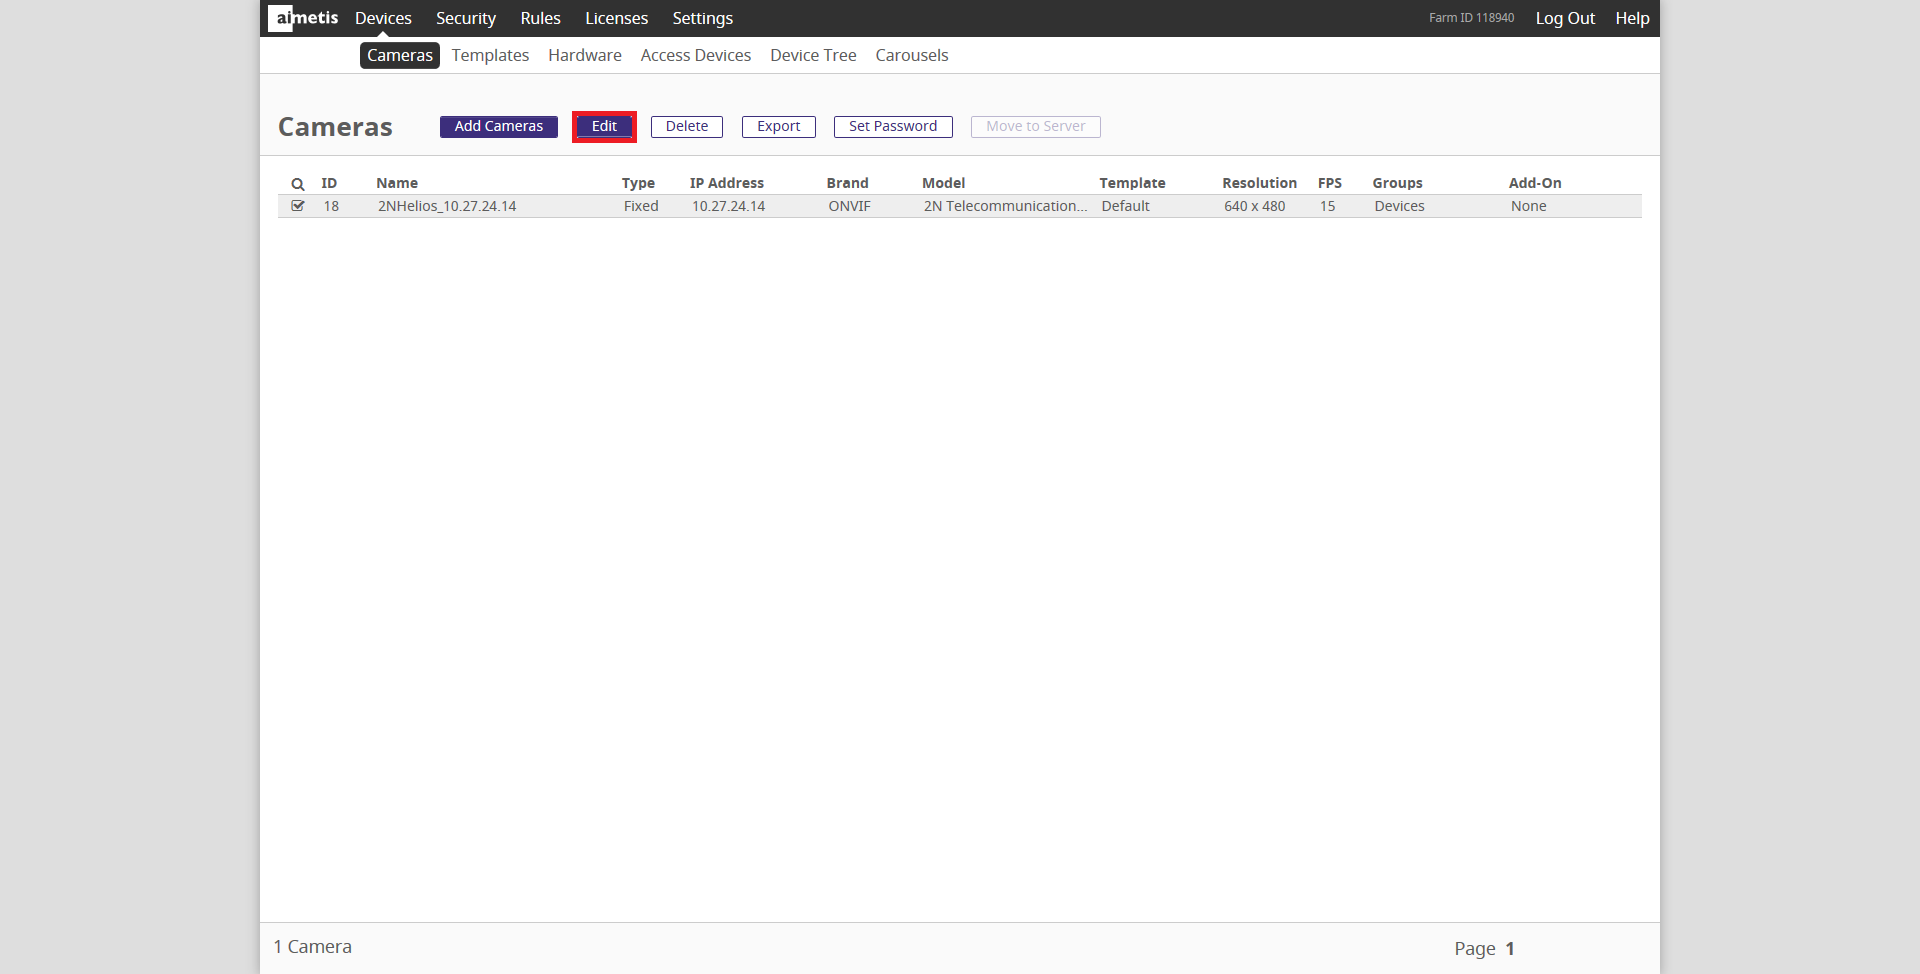
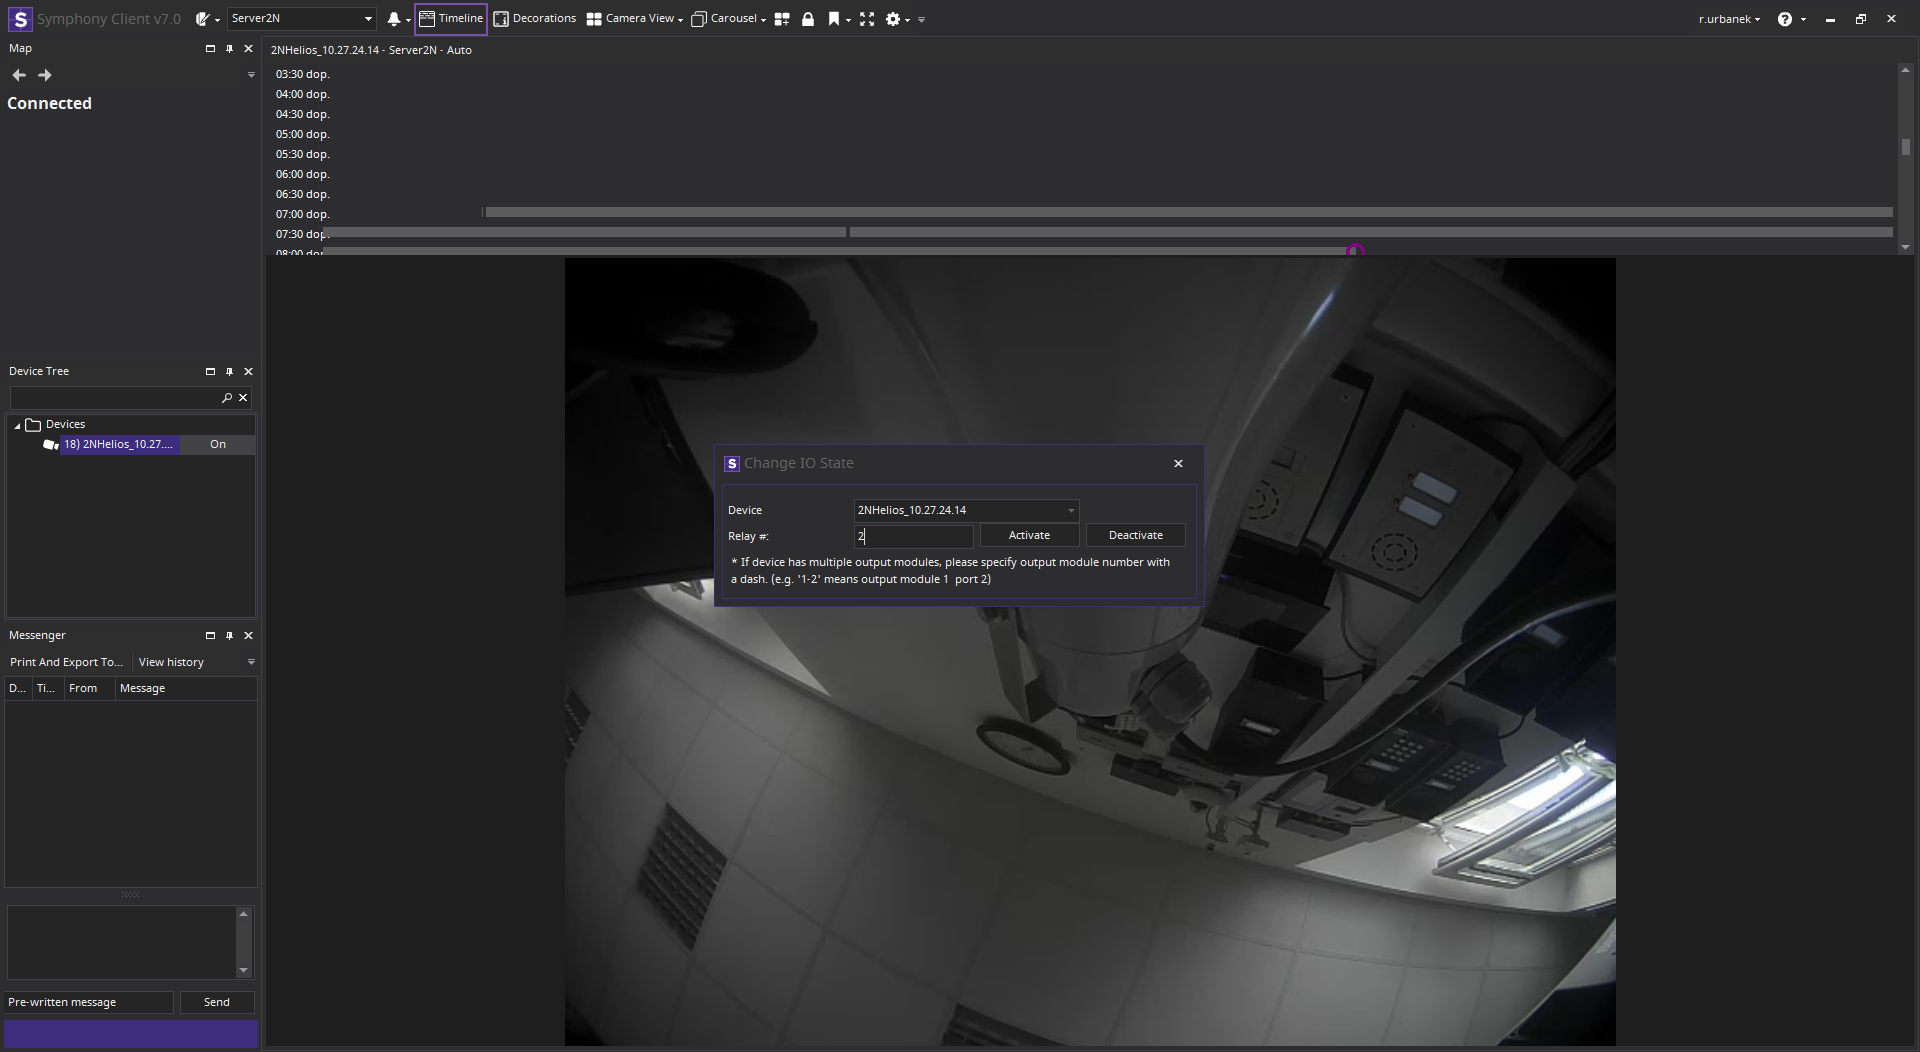
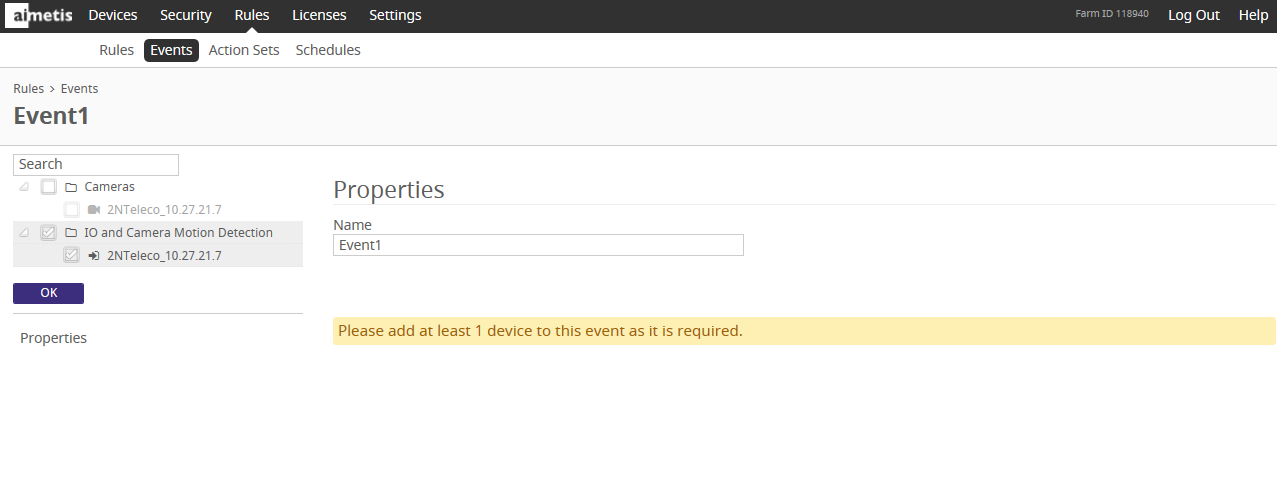
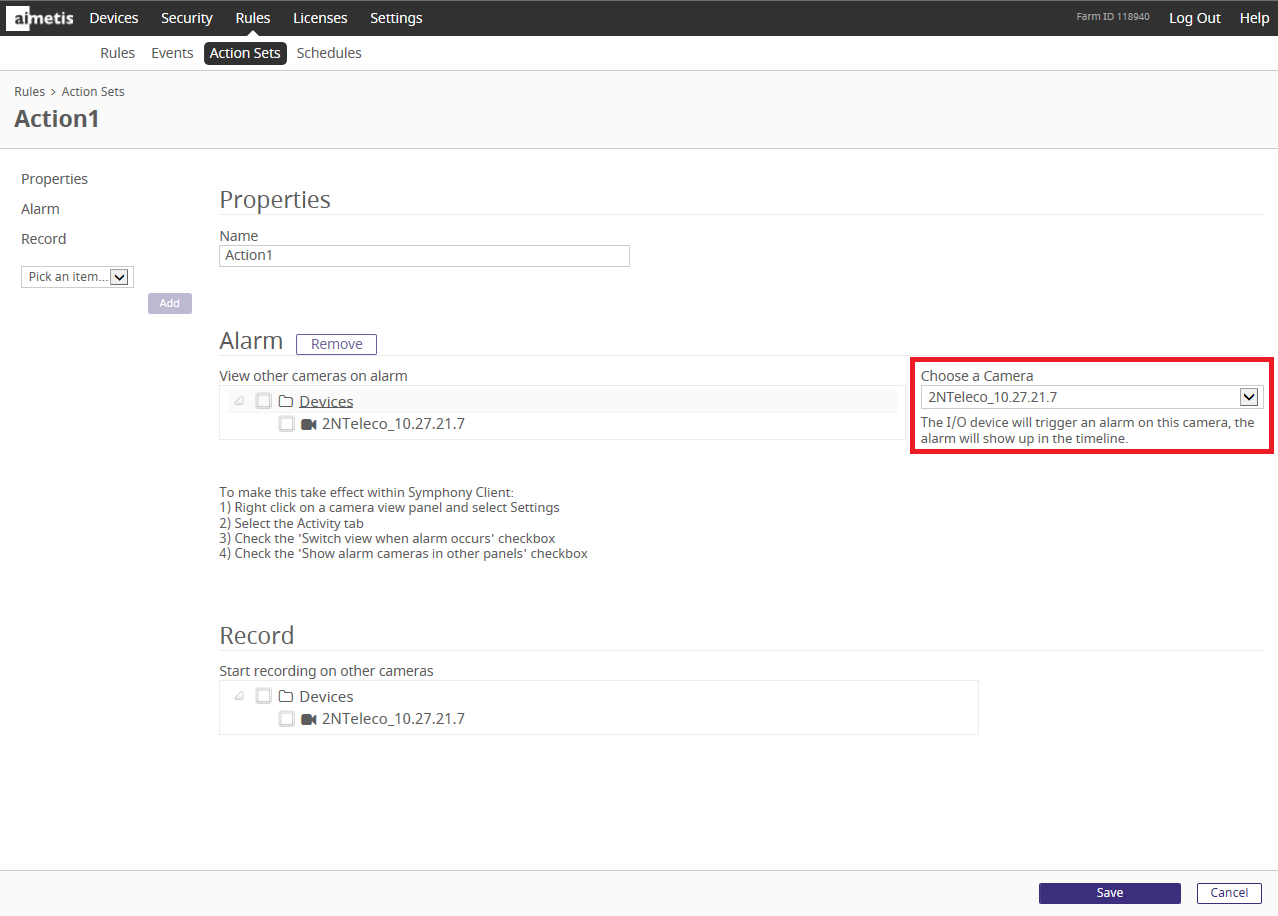
In web browser for Server Configuration click to edit your camera.
 |
 |
 |
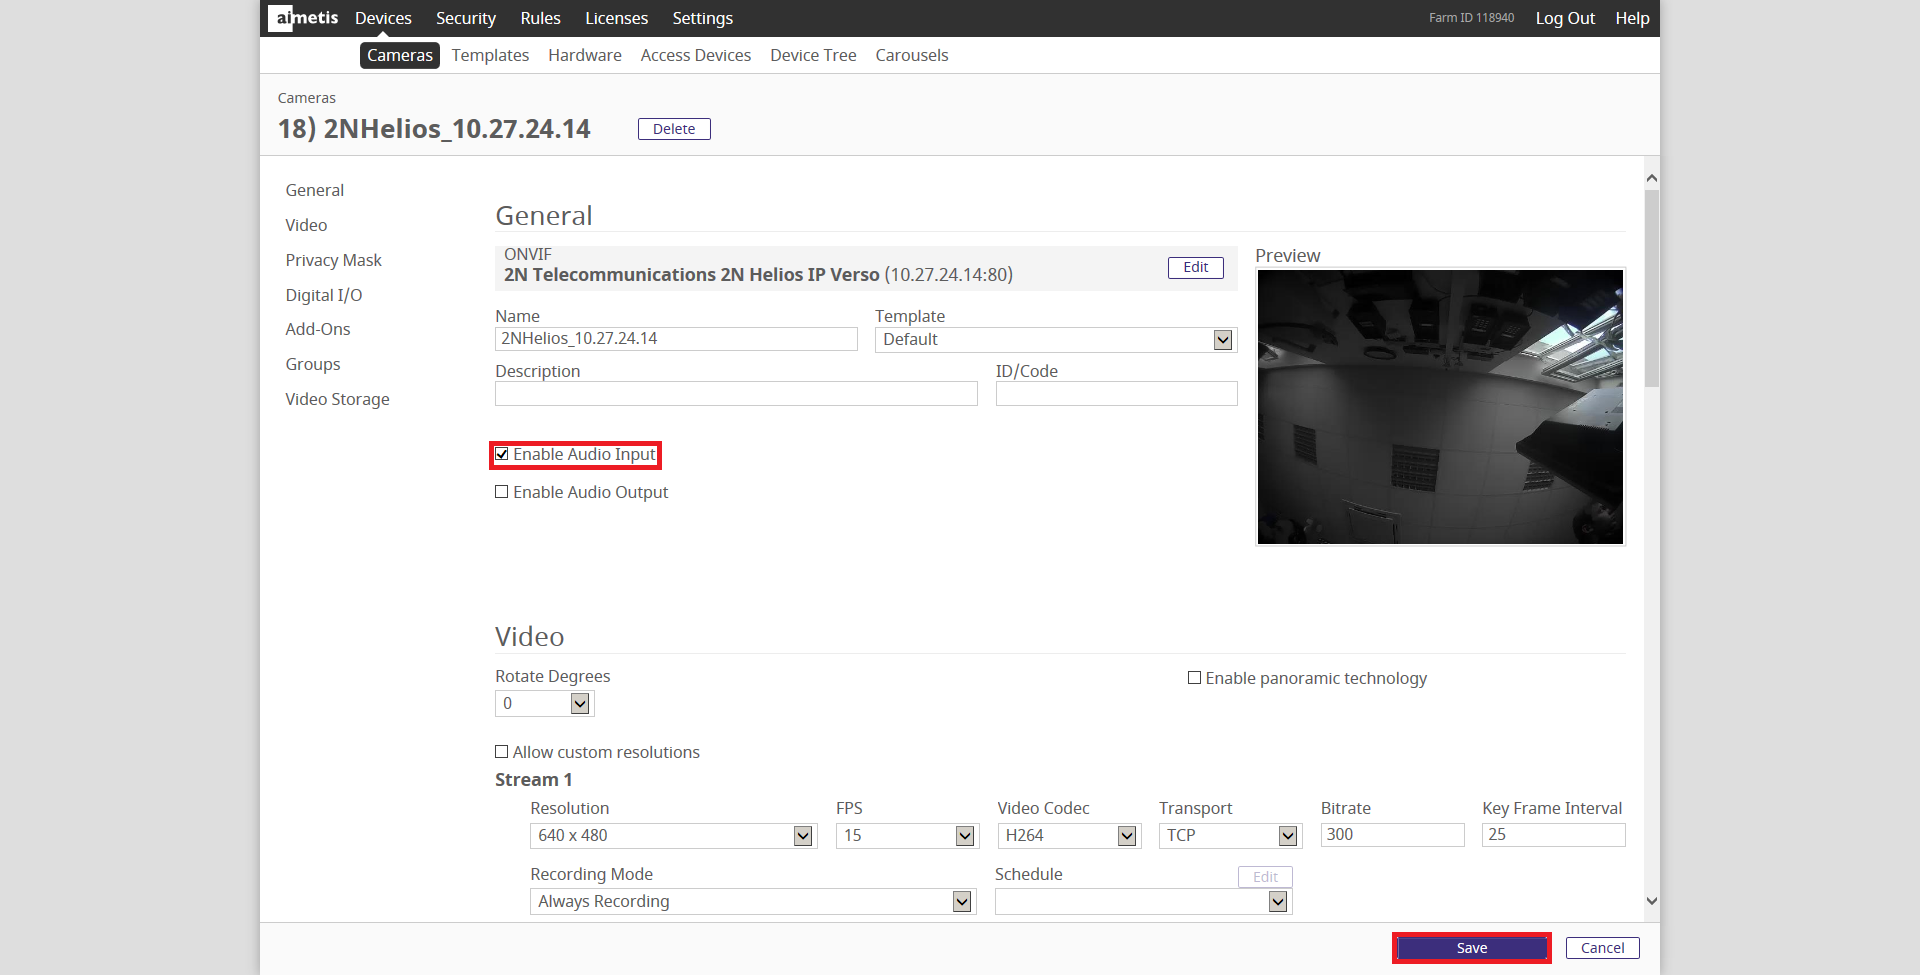
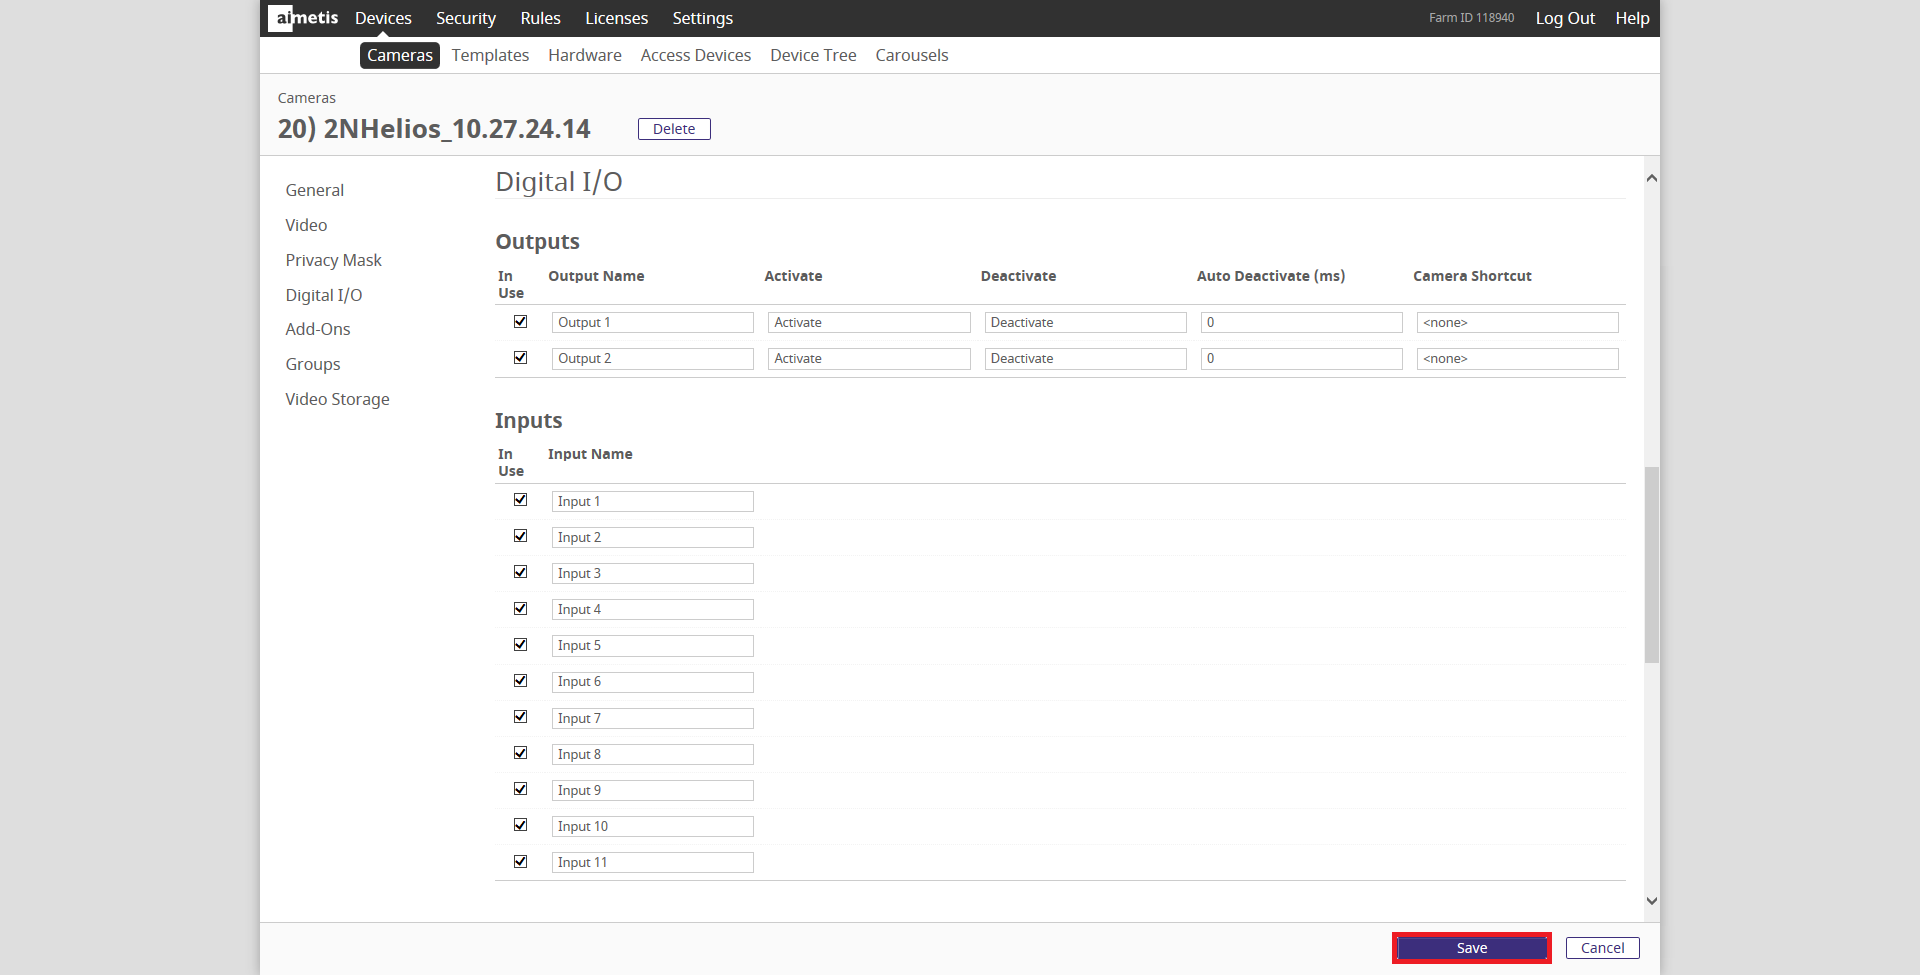
In web browser for Server Configuration click to edit your camera.
|
 |
 |
 |
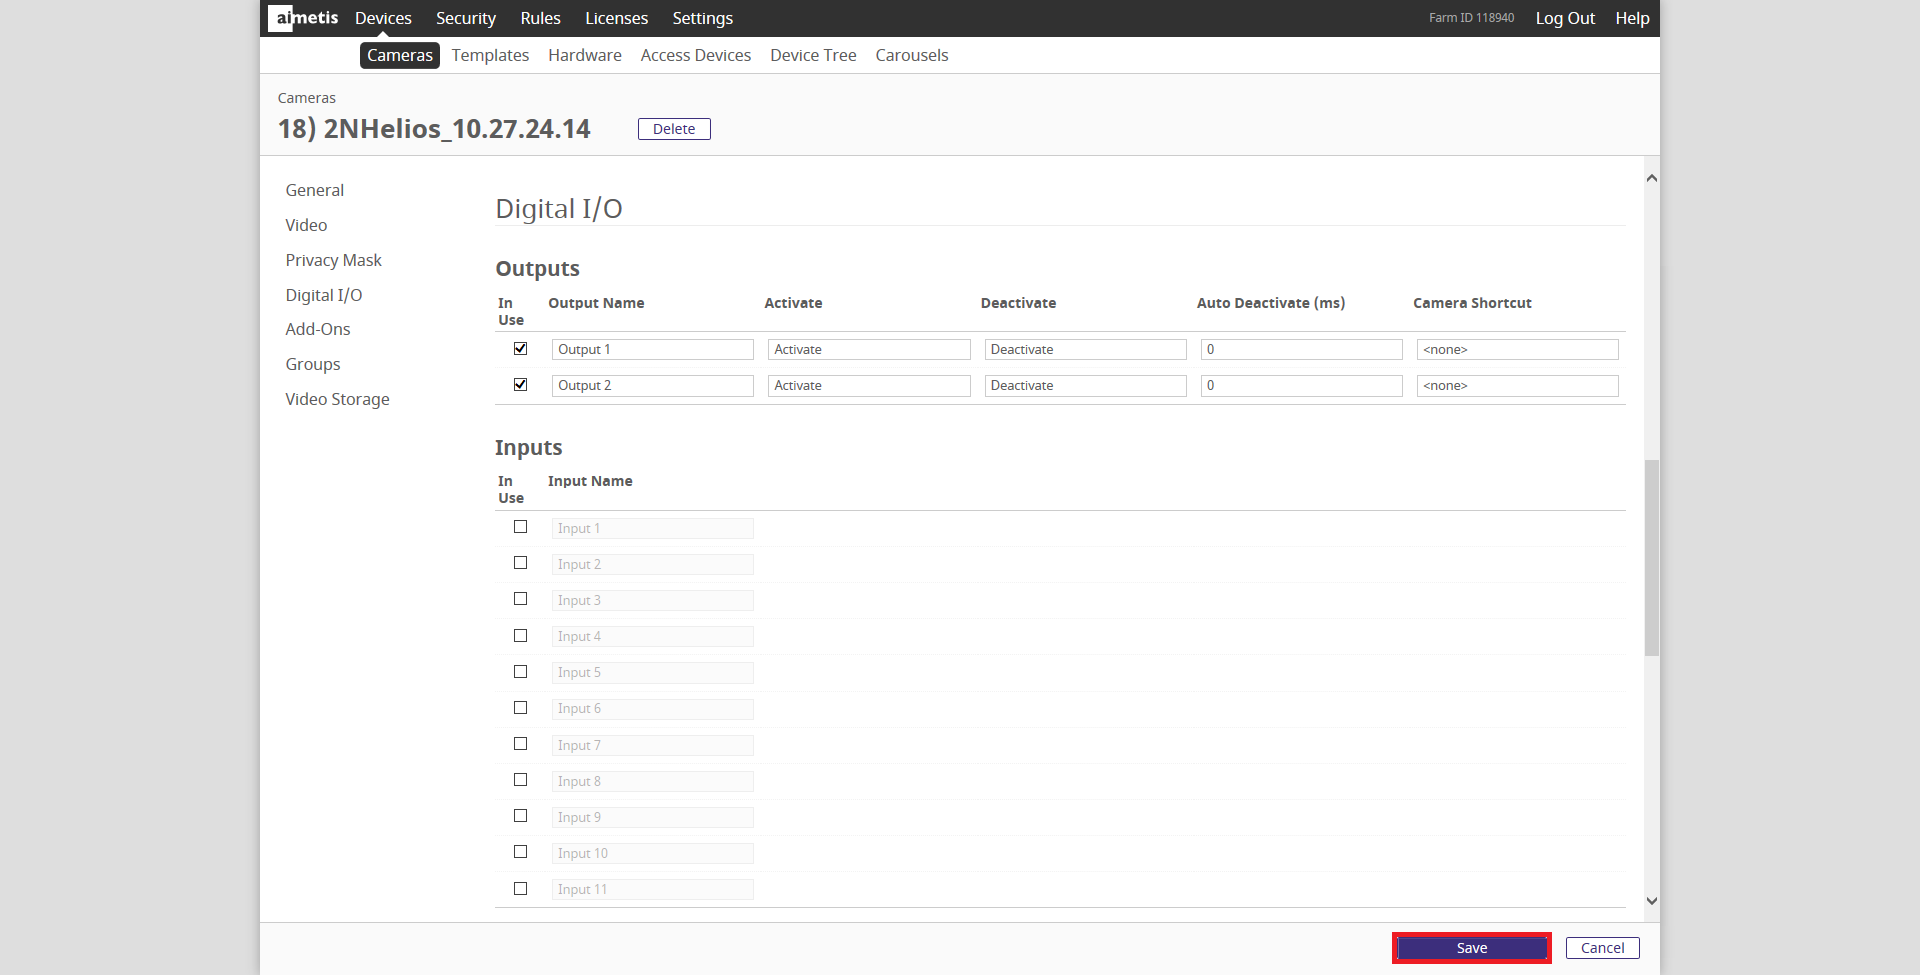
In web browser for Server Configuration click to edit your camera.
|
 |
 |
 |
 |
 |
 |
 |
 |
 |
 |
 |
 |
 |
 |
 |
 |
Version 6
Tested Functions
| Aimetis Symphony | 2N IP Intercom Version | Scan device | Video from 2N IP Intercom | Audio from 2N IP Intercom | Audio to 2N IP Intercom | Switch control | Events from 2N IP Intercom |
|---|---|---|---|---|---|---|---|
6.14.7.1 | 2.17.0.26.4 |
2N IP Intercom Settings
Enable parameter RTSP Server Enabled in menu Services / Streaming.
|
|
Tested Features
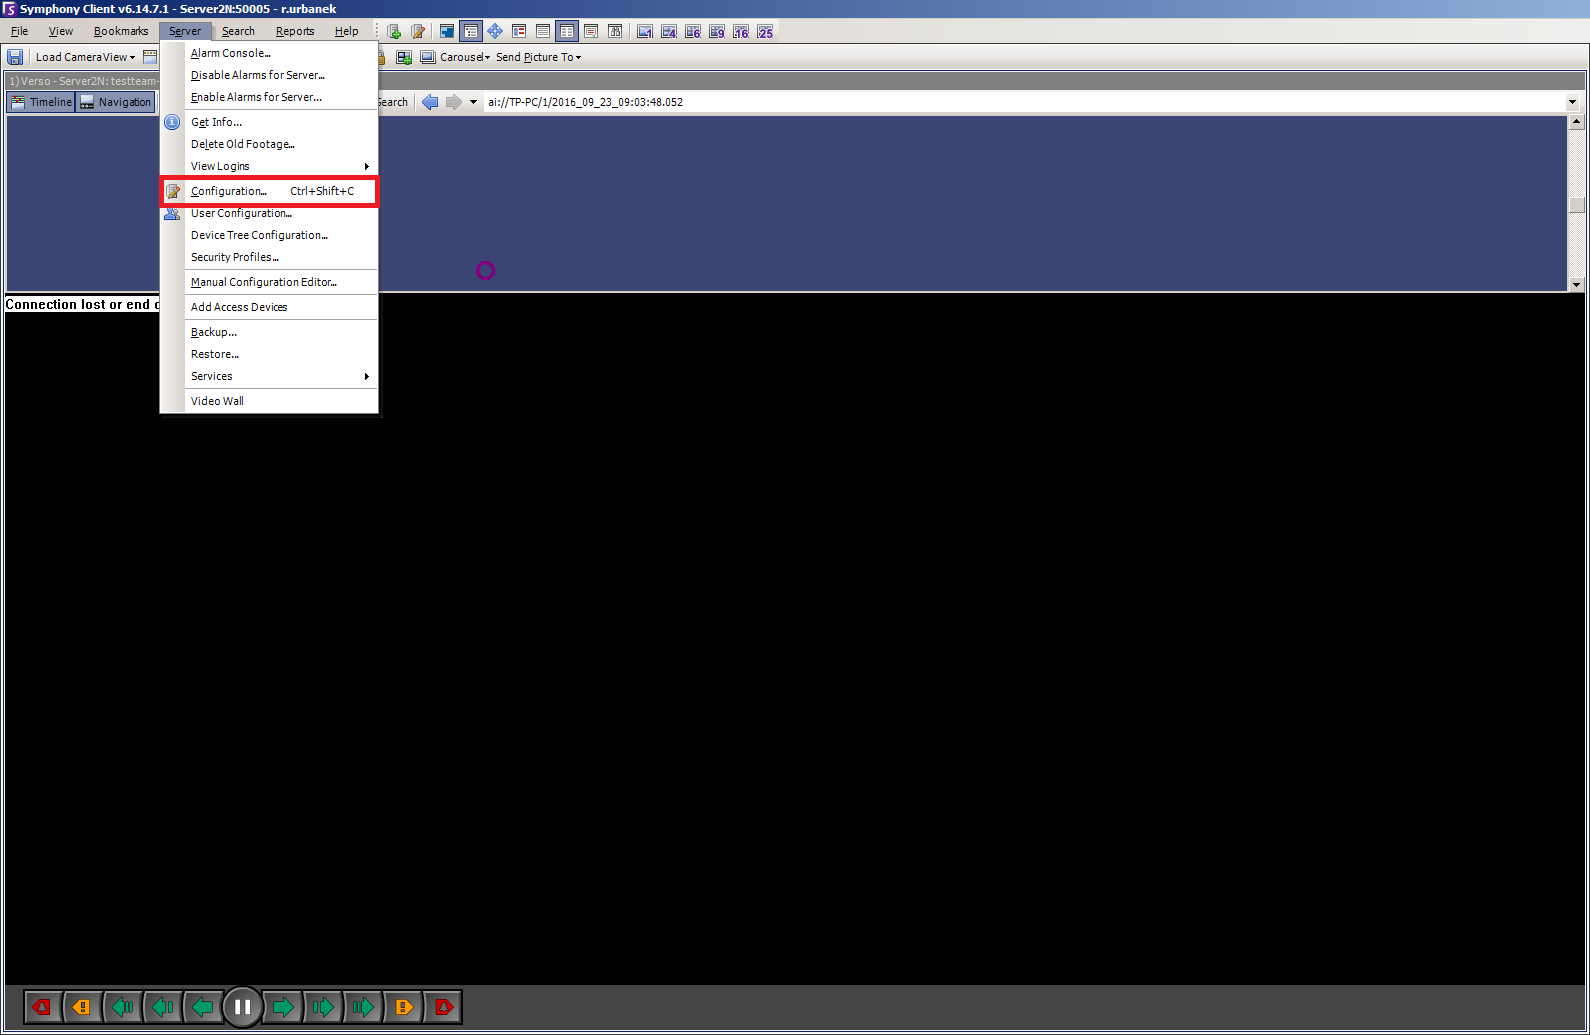
Start the Symphony Client and connect to your server. Choose Configuration from the Server menu. This opens the Server Configuration admin dialog.
 |
 |
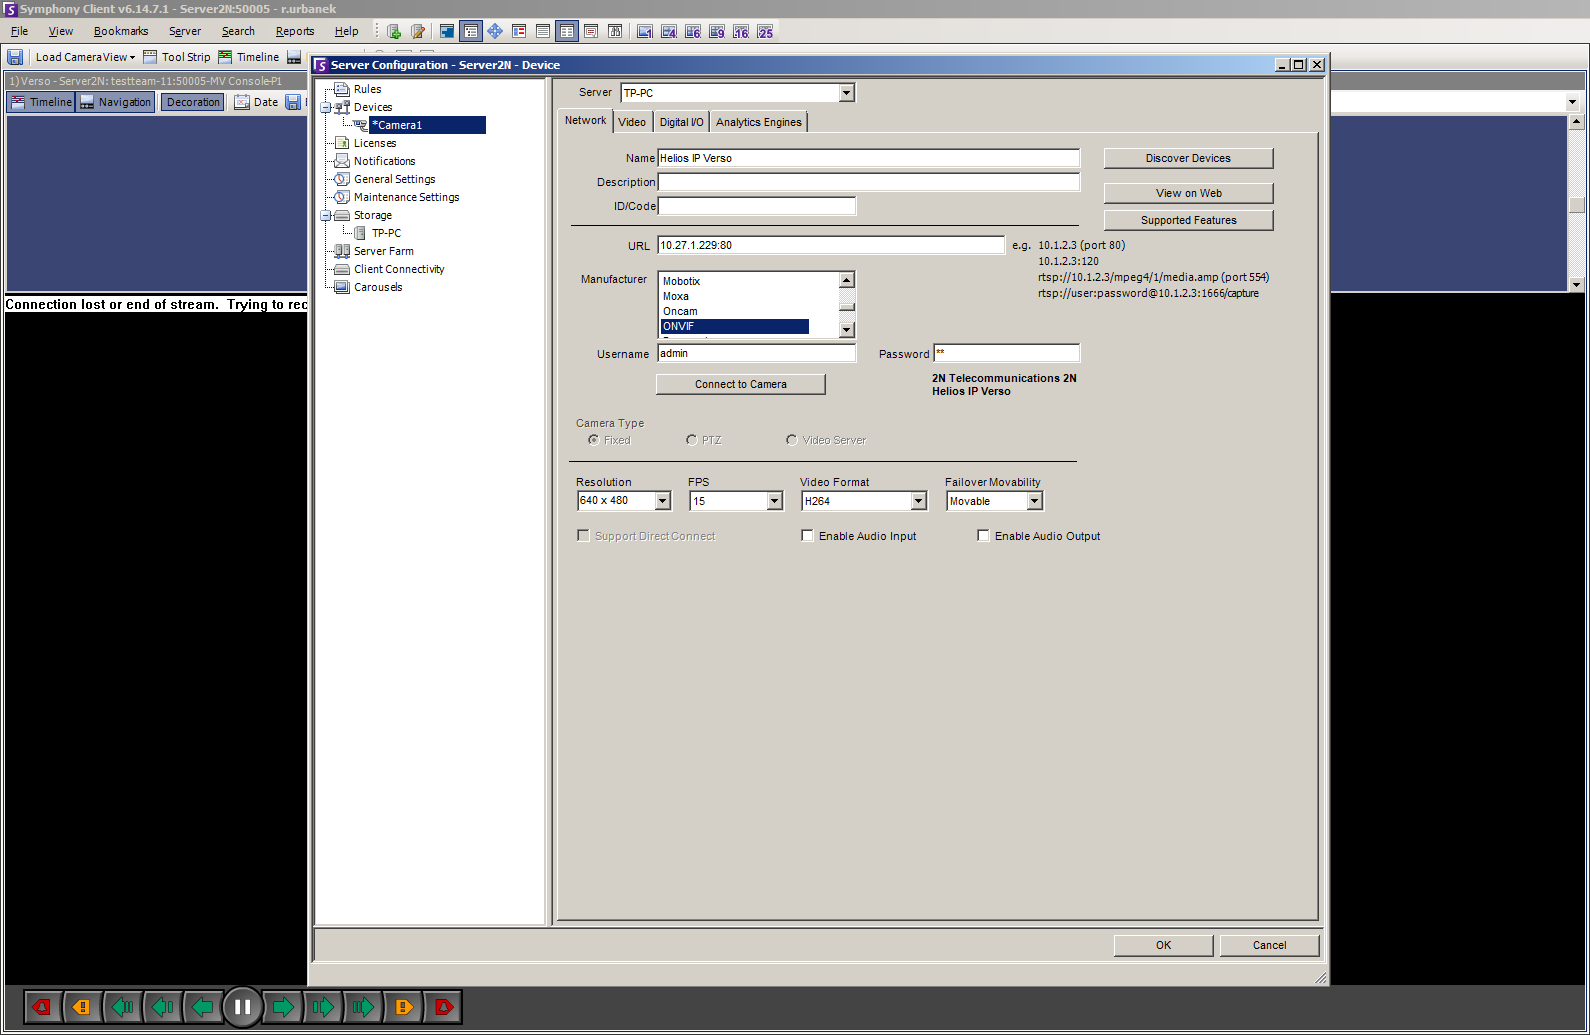 |
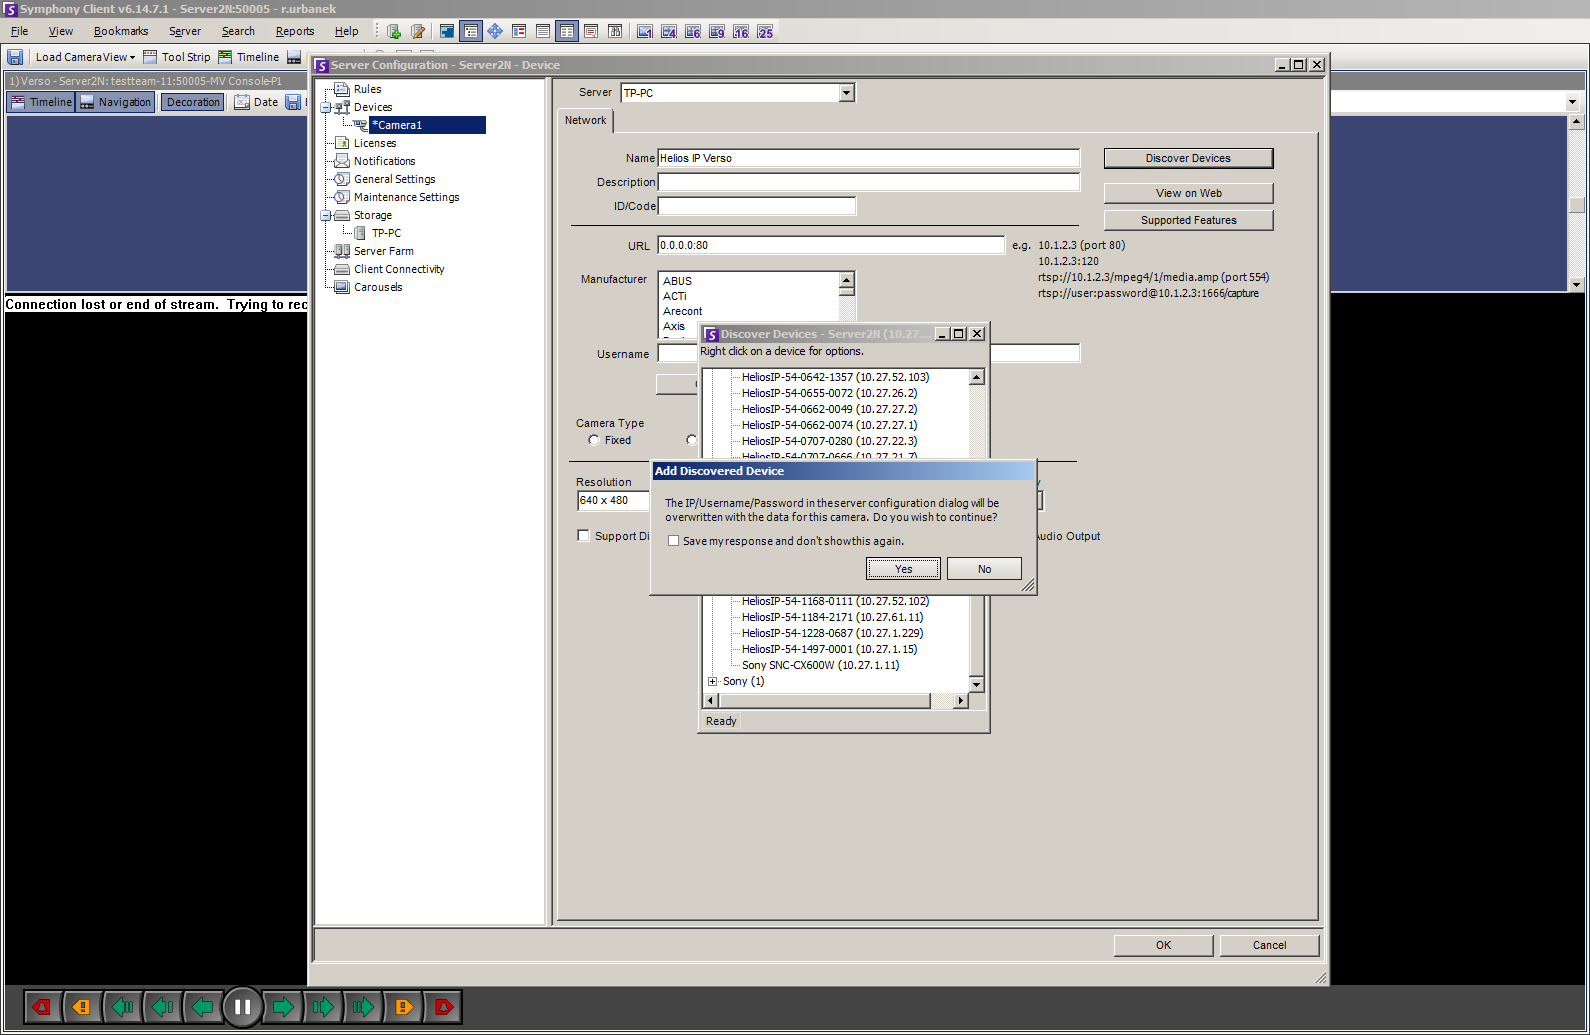
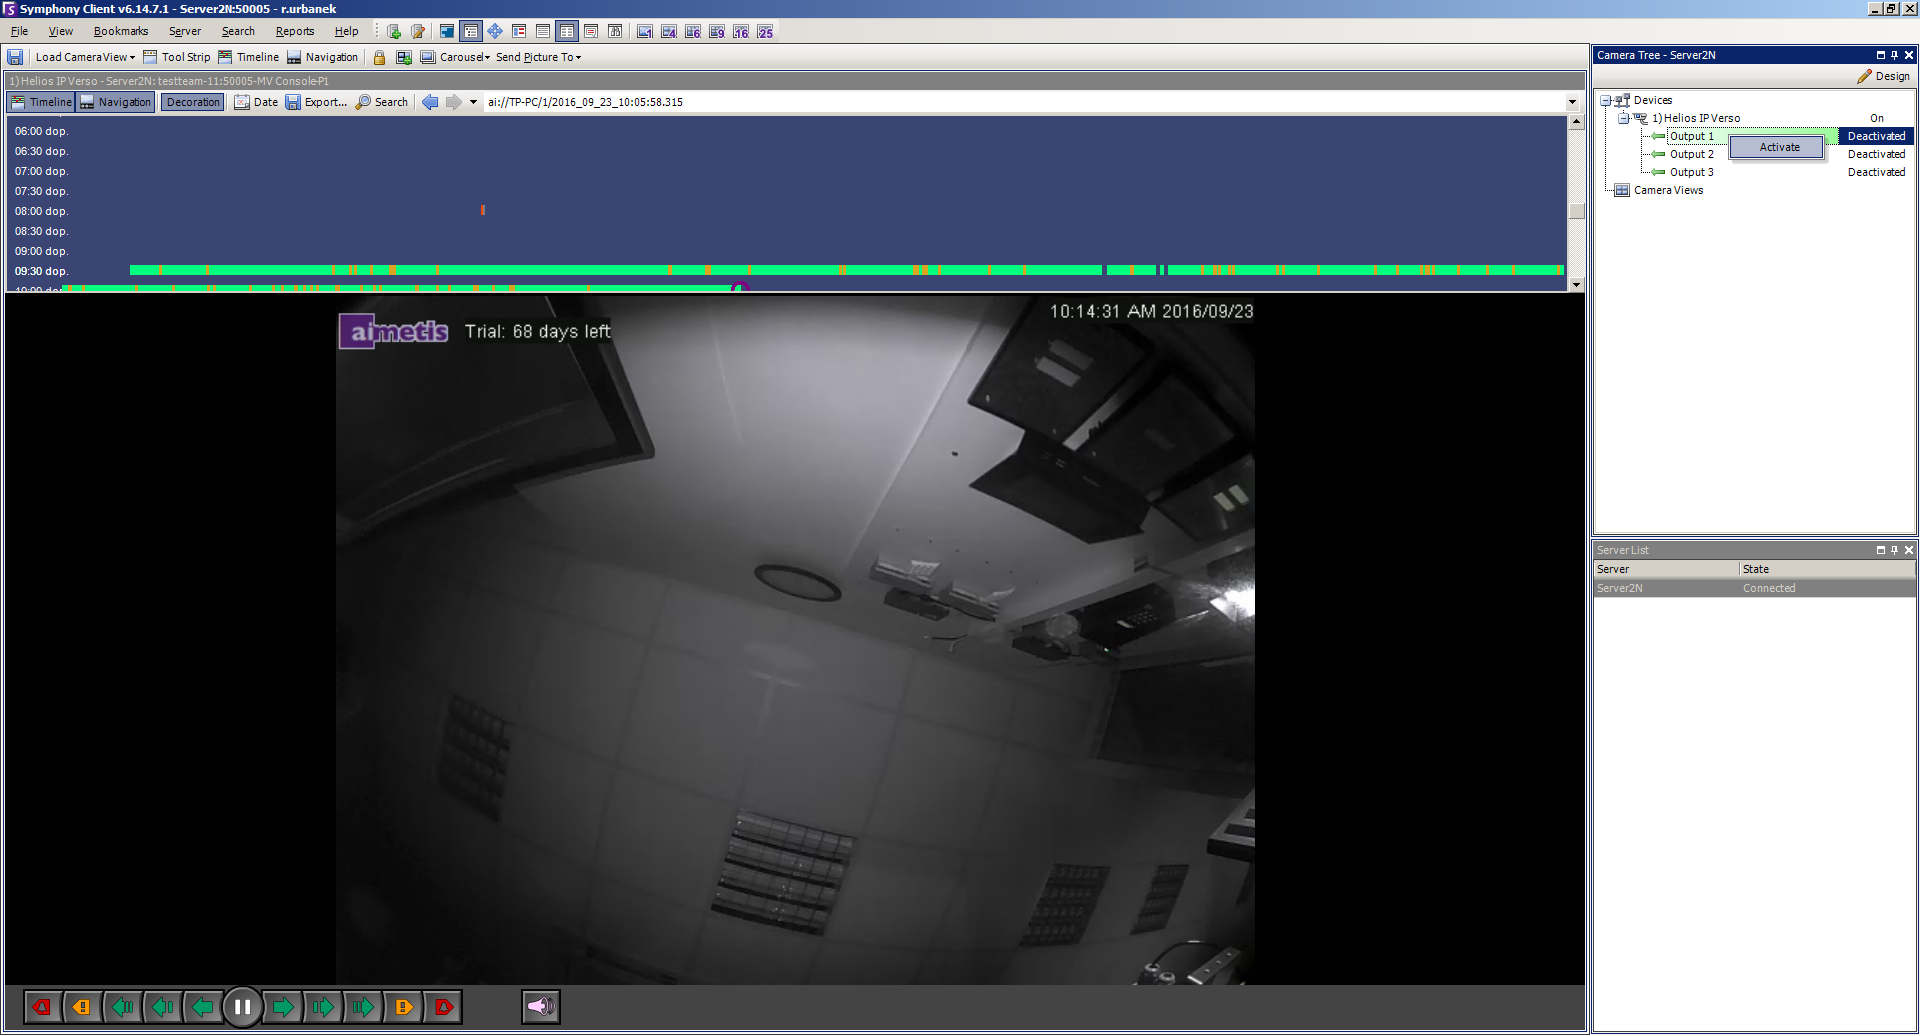
In the Symphony Client you can see Camera tree, in the Camera tree click on your camera.
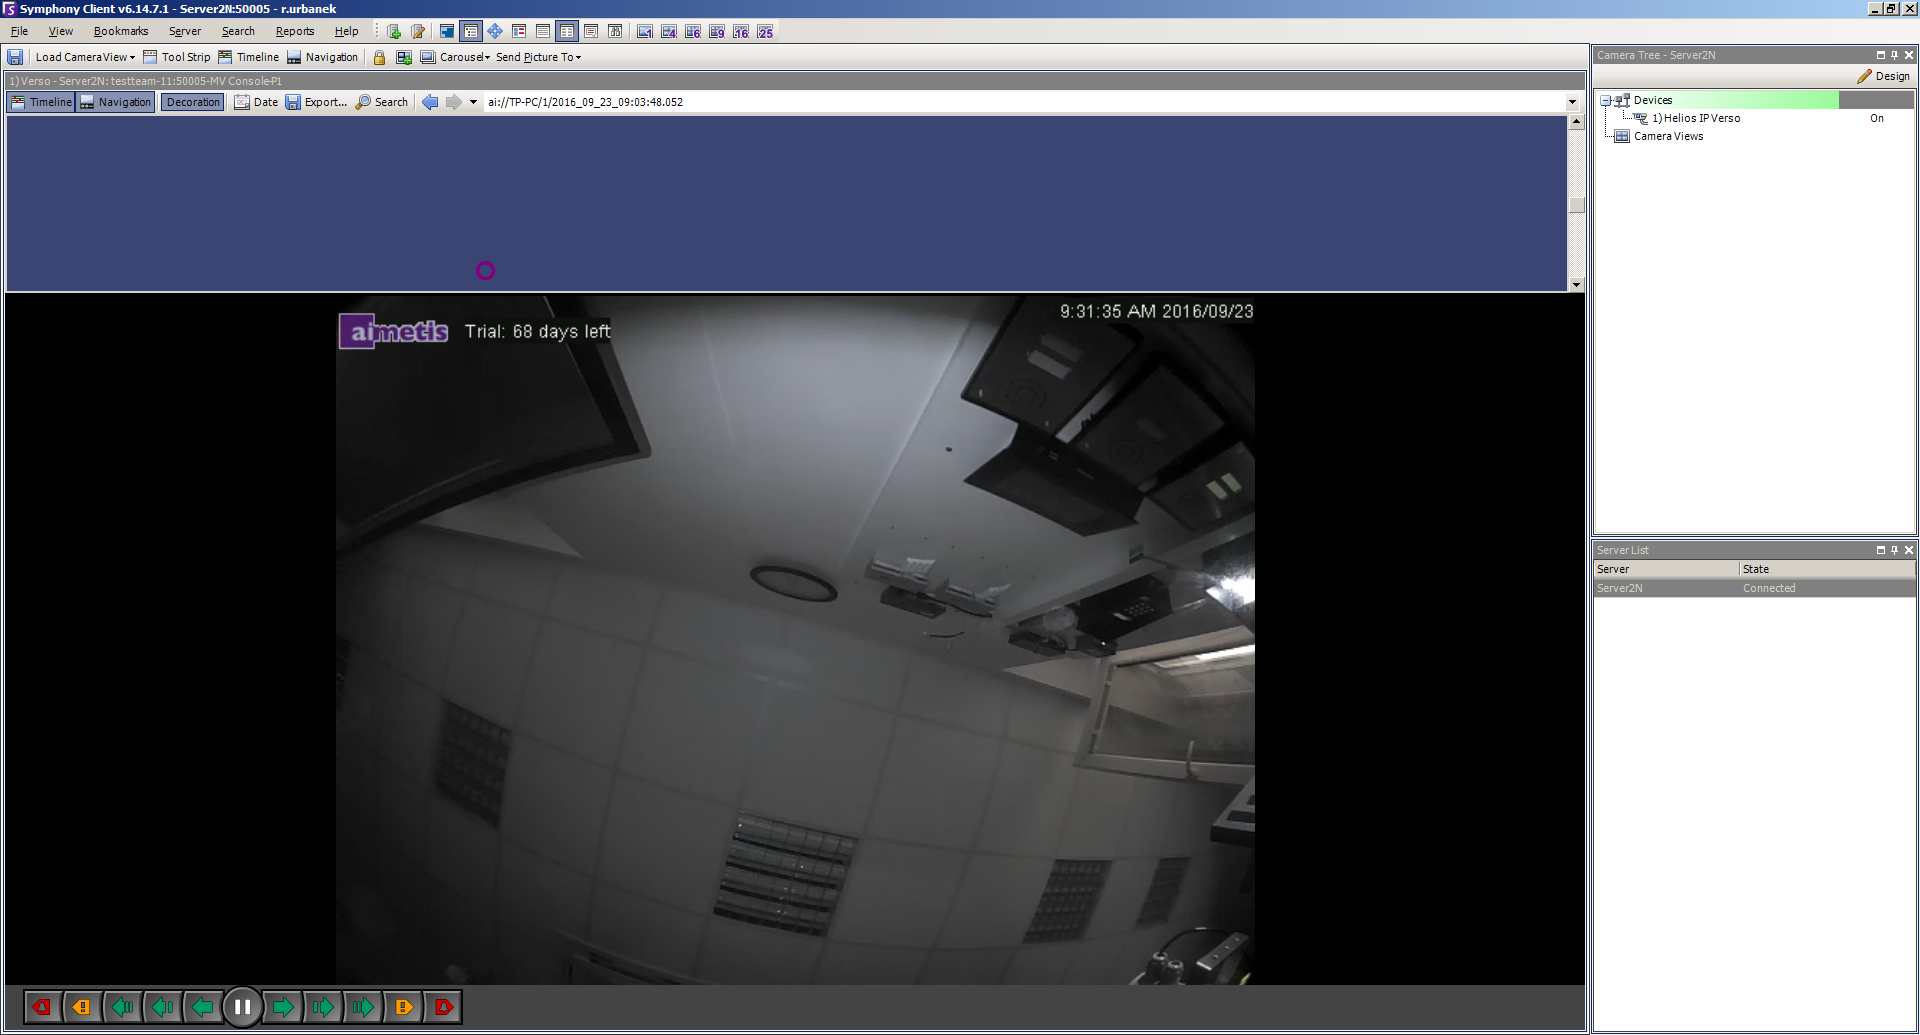 |
Choose Configuration from the Server menu. This opens the Server Configuration admin dialog. Select your camera, allow Audio Input and click on OK.
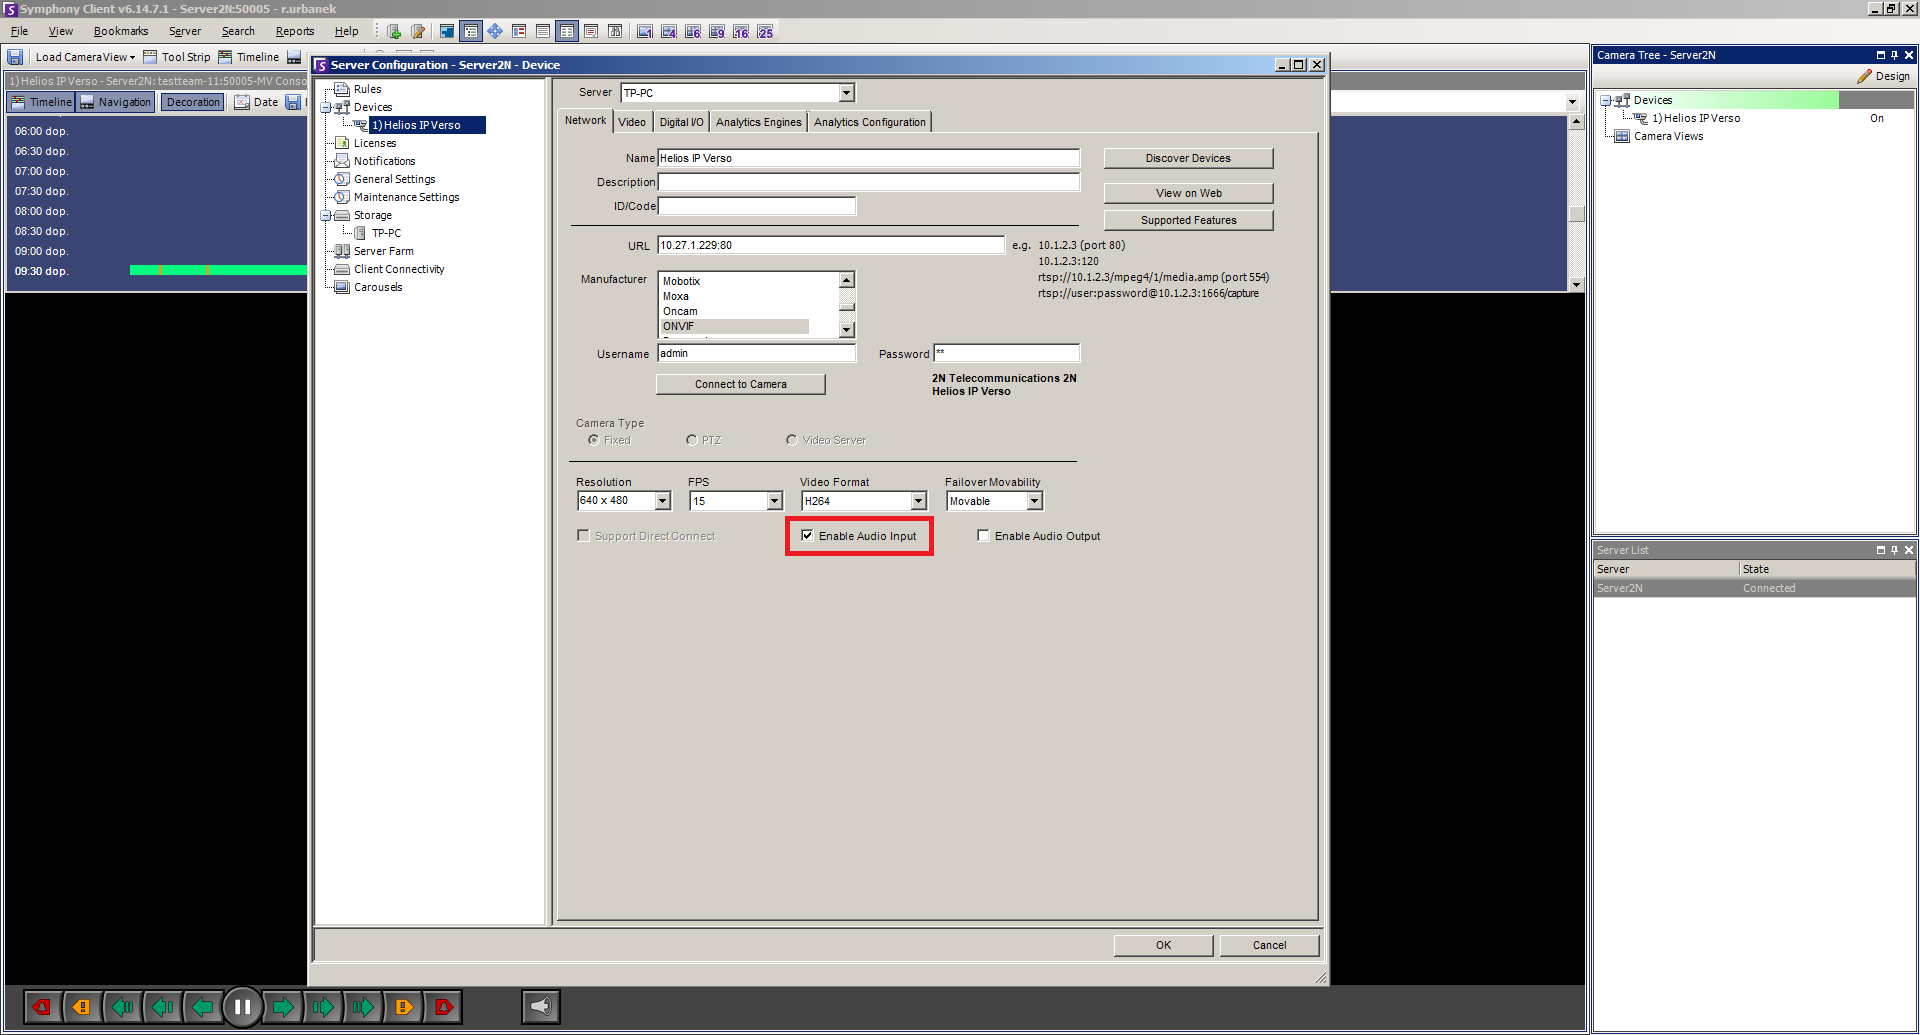 |
 |
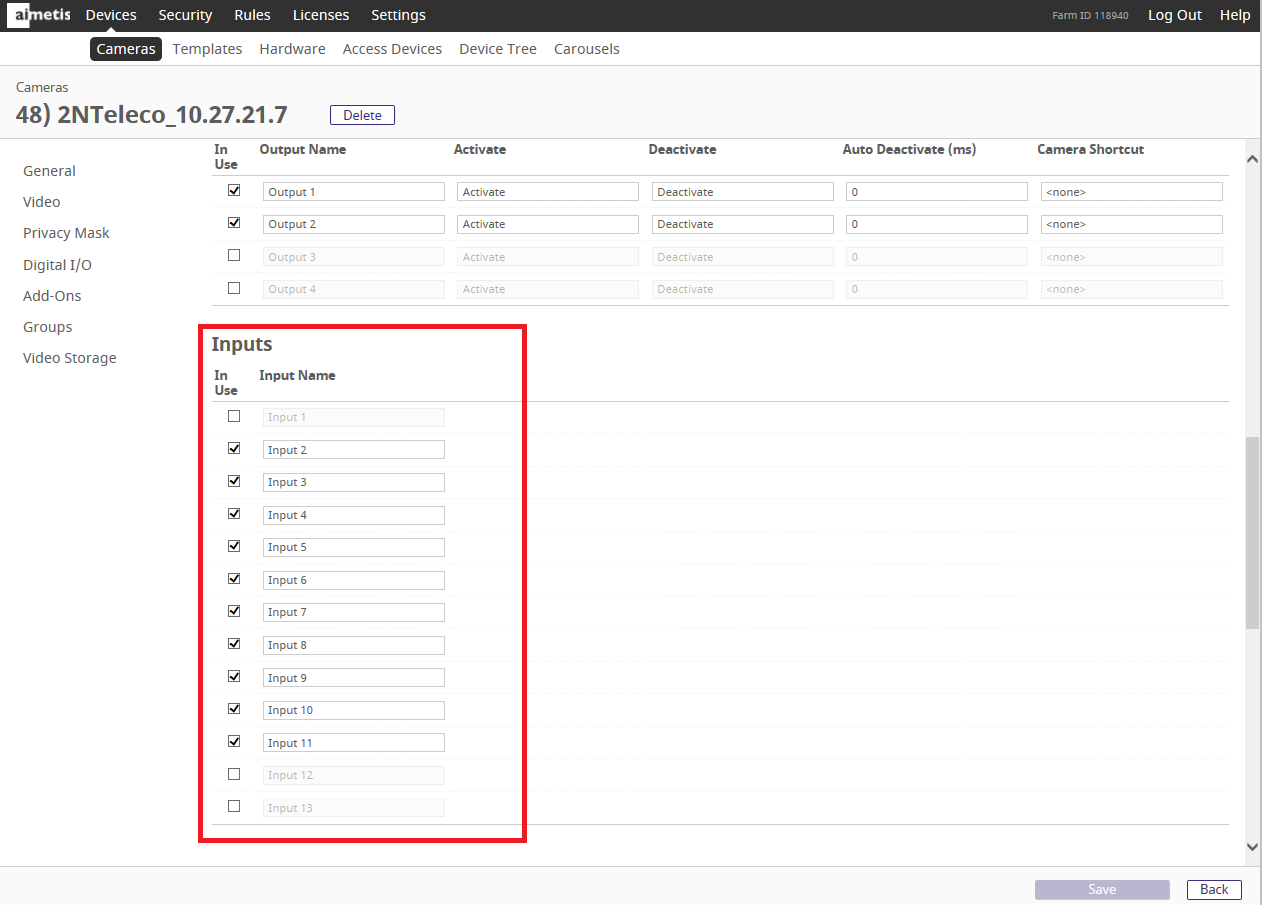
Choose Configuration from the Server menu. This opens the Server Configuration admin dialog. Select your camera, go to menu Digital I/O, allow Outputs and click on OK.
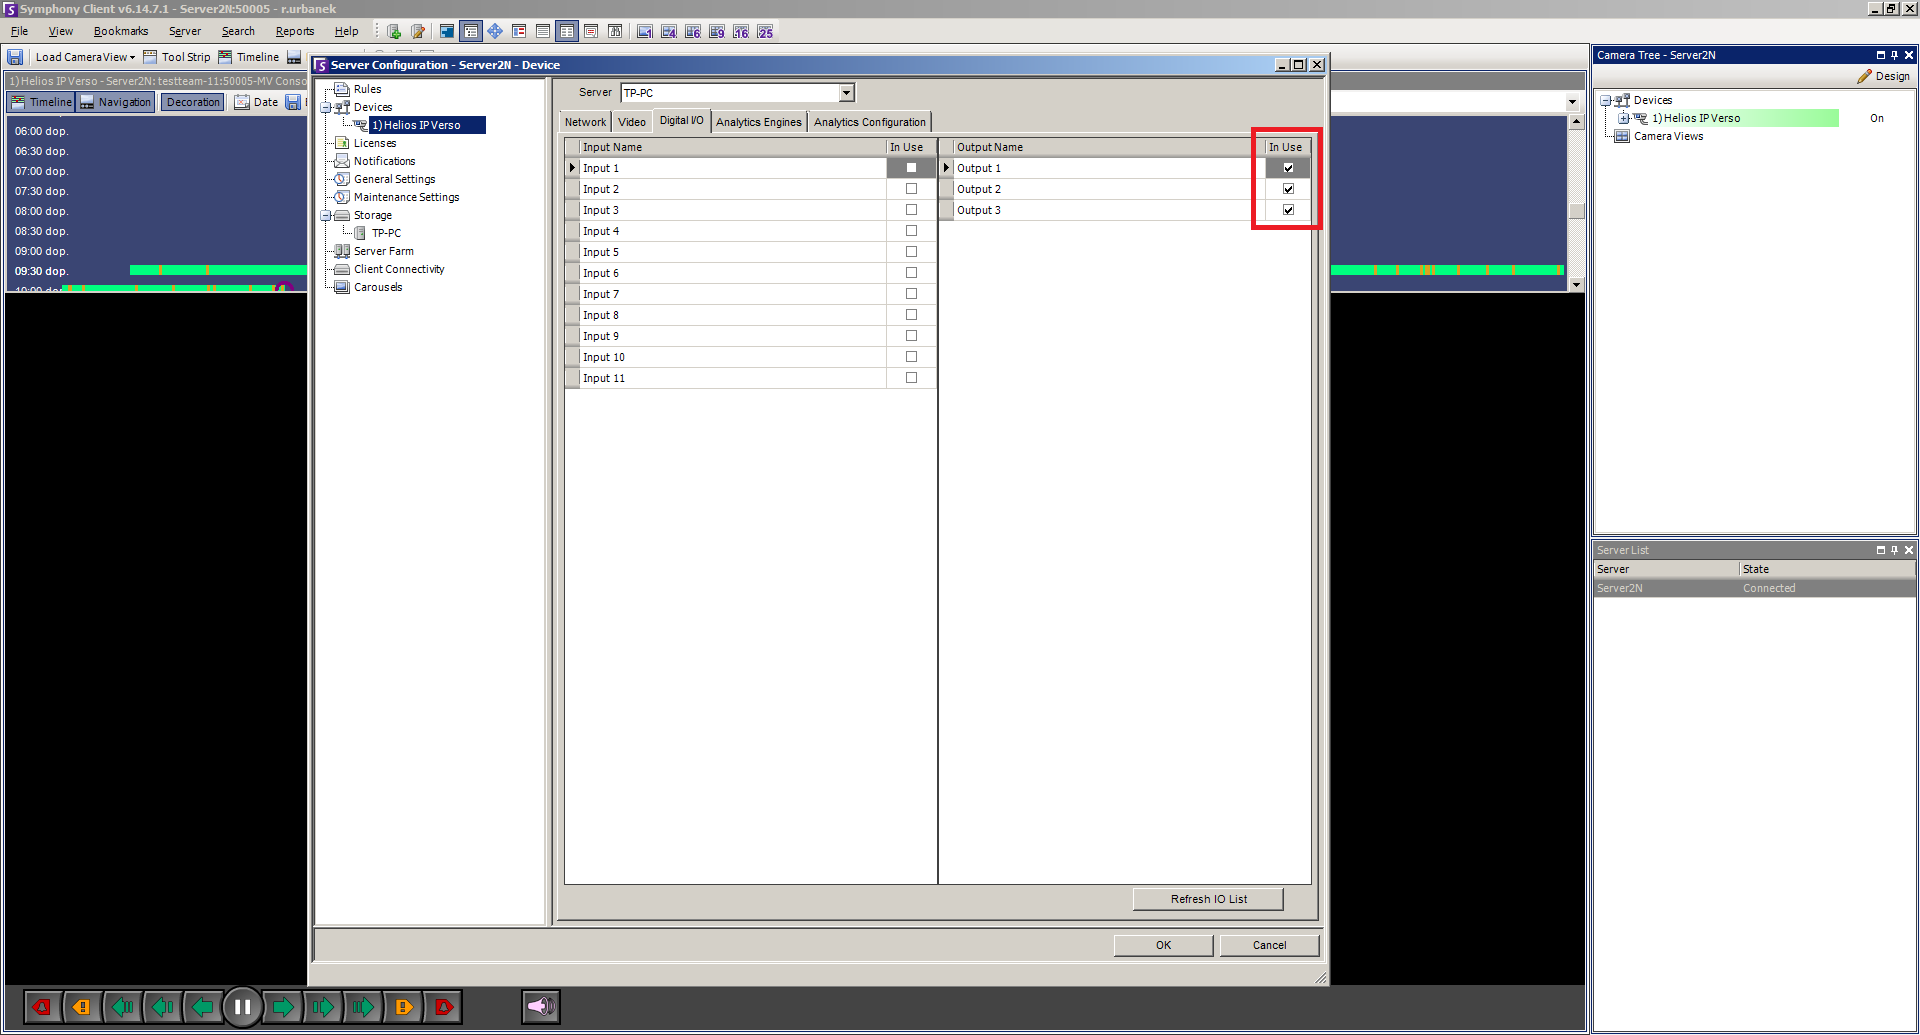 |
 |
Used Symbols
![]() - Compatible
- Compatible
![]() - Work with limitation
- Work with limitation
![]() - Incompatible
- Incompatible