Arteco NEXT
Content
About
Conceived with the aim of providing a unique platform for the management of various applications and devices in the world of security and automation, Arteco NEXT is the ideal tool for managing, monitoring, and immediately accessing countless devices.
Designed to give each user an immediate, flexible, interactive, clear and dynamic experience, Arteco NEXT fits perfectly in many different fields of application, operator requirements and environments.
Version 7
Tested Functions
| Arteco NEXT | 2N IP Intercom Version | Scan device | Video from 2N IP Intercom | Audio from 2N IP Intercom | Audio to 2N IP Intercom | Switch control | Events from 2N IP Intercom |
|---|---|---|---|---|---|---|---|
7.2.0.1625 | - |
2N IP Intercom Settings
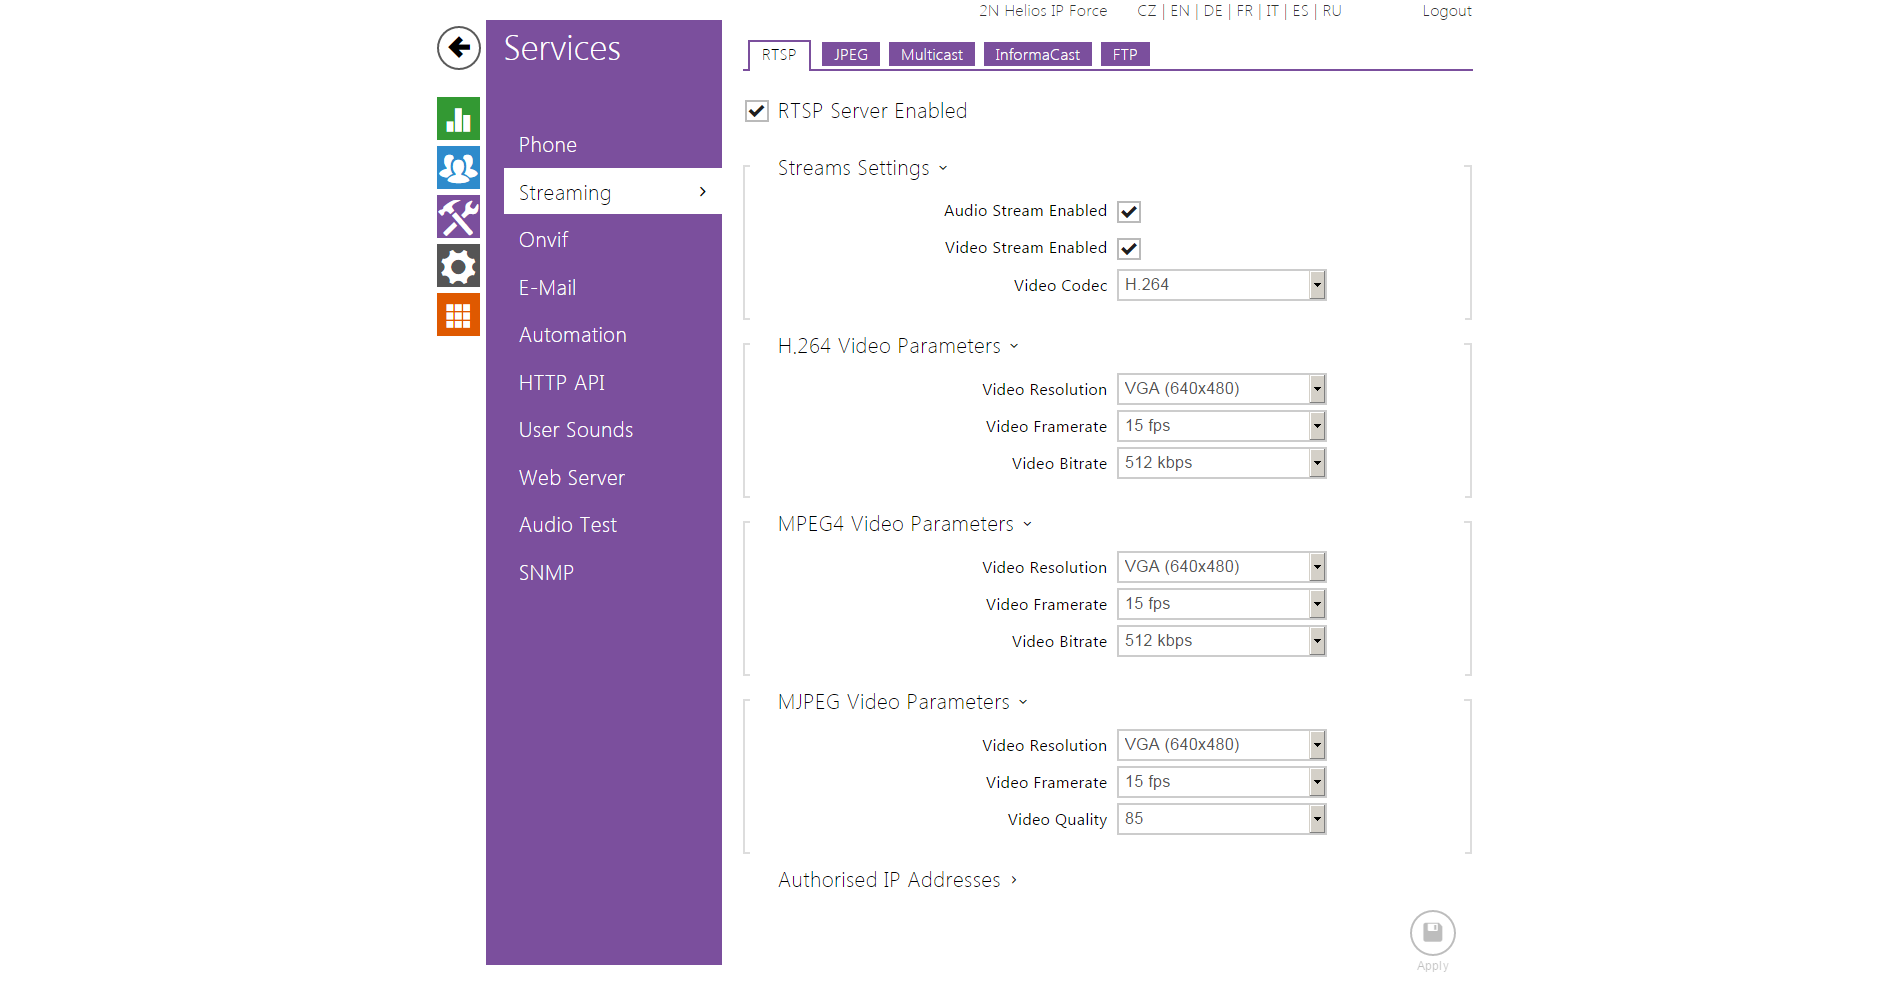
Enable parameter RTSP Server Enabled in menu Services / Streaming.
 |
 |
Tested Features
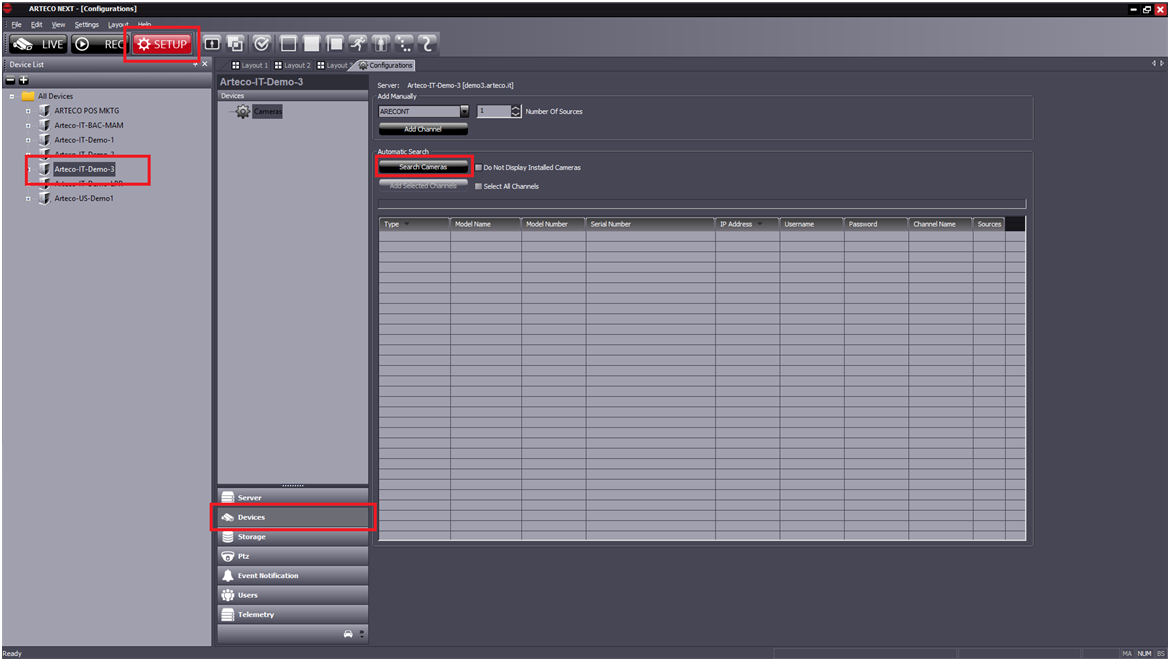
Enter in the “SETUP” environment, click on the Arteco server, then on “Devices” in the main console. Here you can choose if you want to add device manually or if you want to scan your local network for IP ready devices. Via automatic scan it is much easier. Click on “Search Cameras”, once the scan will be finished, you will see devices in your network.
 |
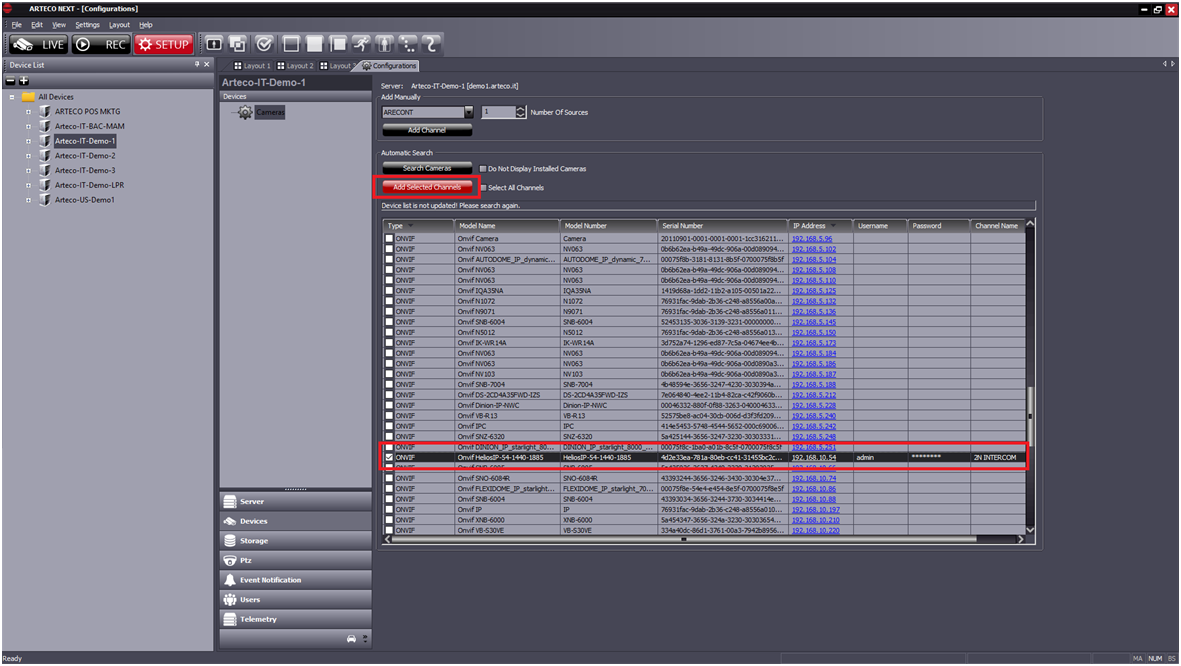 |
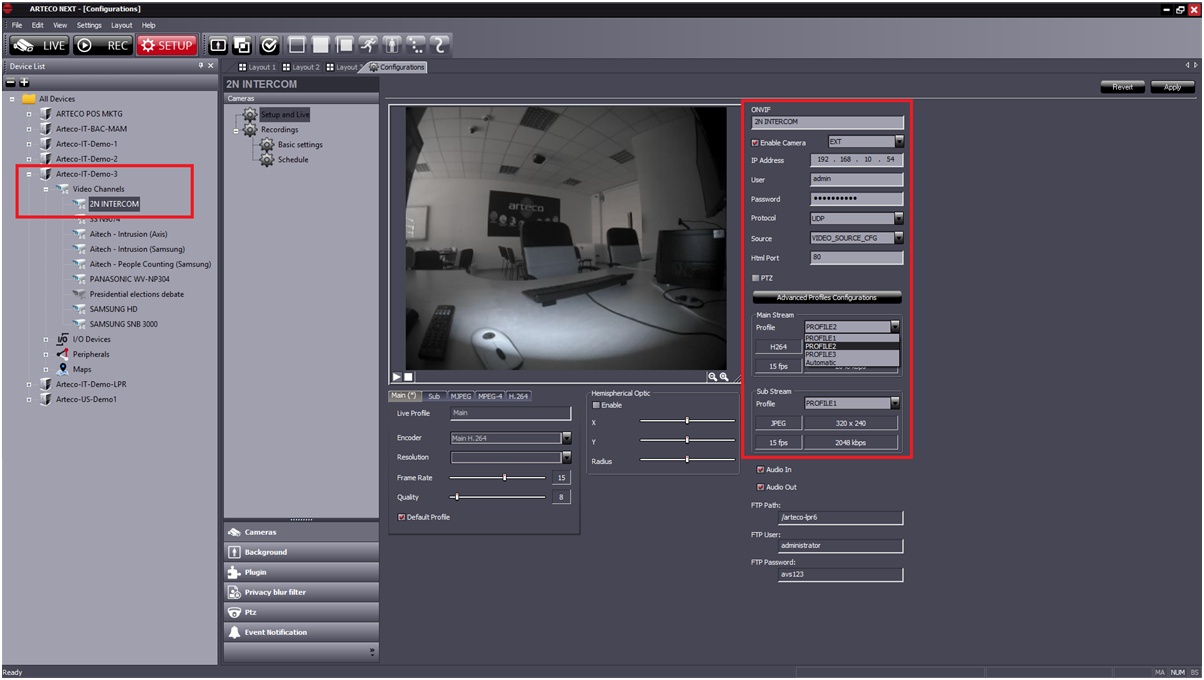
Now the device will appear in the tree menu. If you open it, you will see its configuration and are able to adjust some settings. No special settings are required.
 |
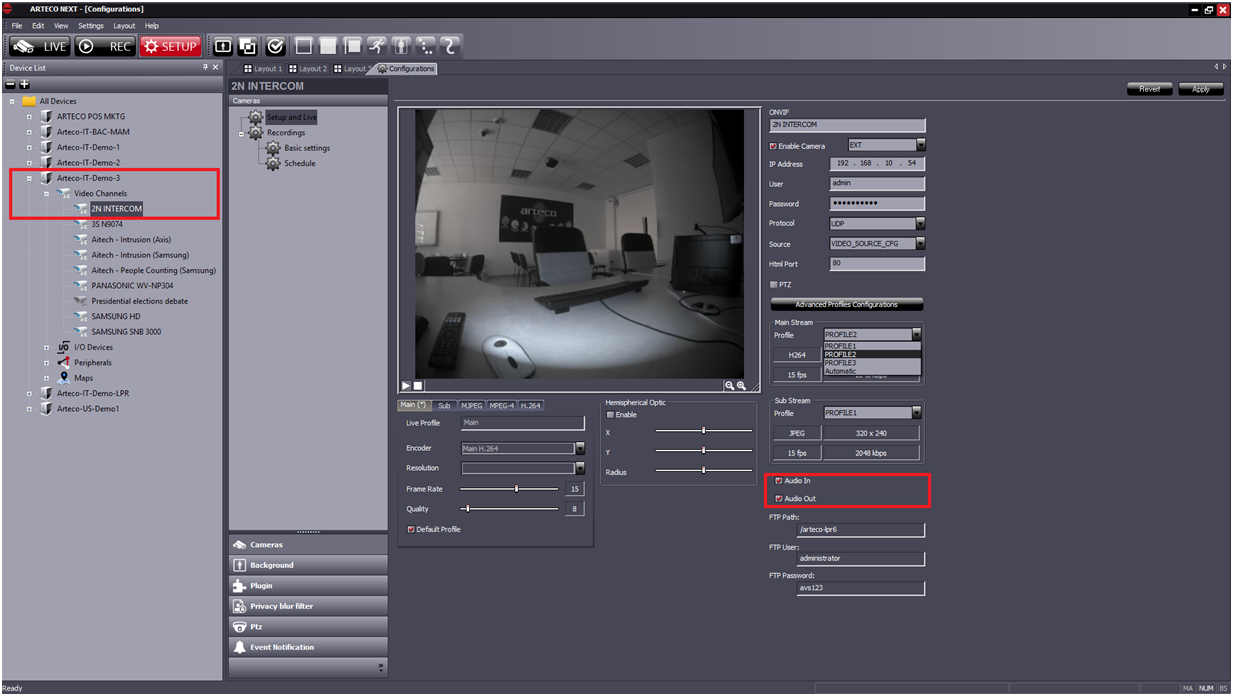
Enable Audio In and Audio Out through the combo-boxes to enable the audio capabilities of the device.
 |
Enable Audio In and Audio Out through the combo-boxes to enable the audio capabilities of the device.
 |
 |
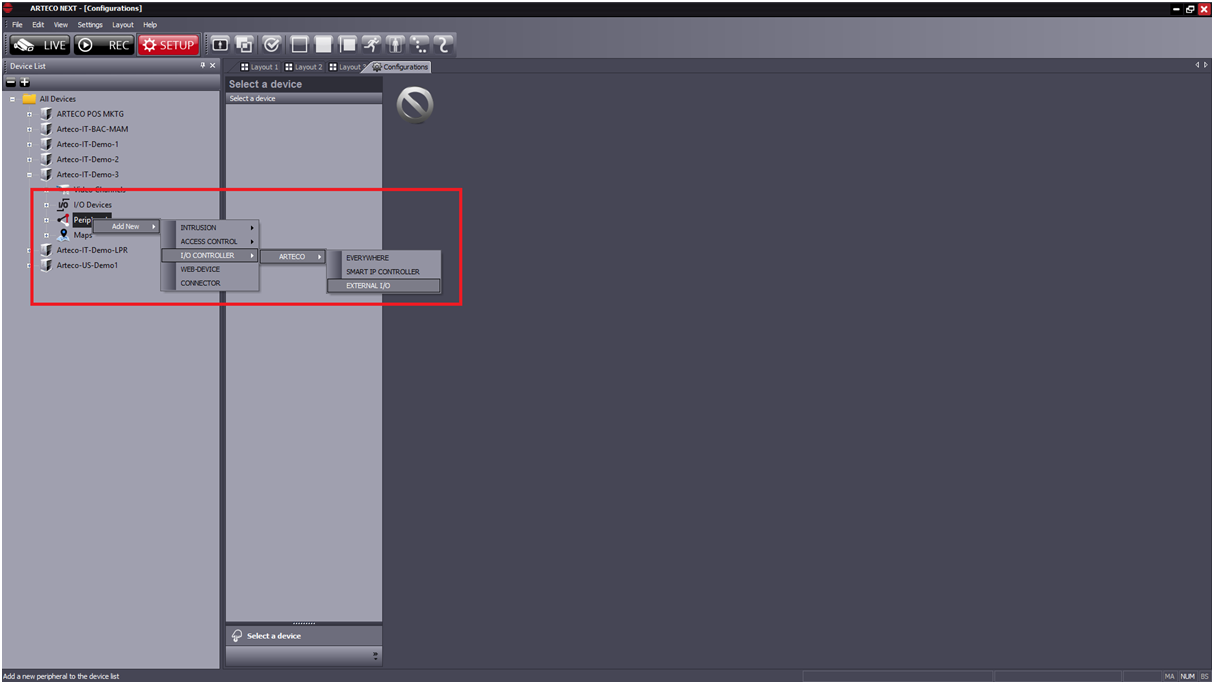
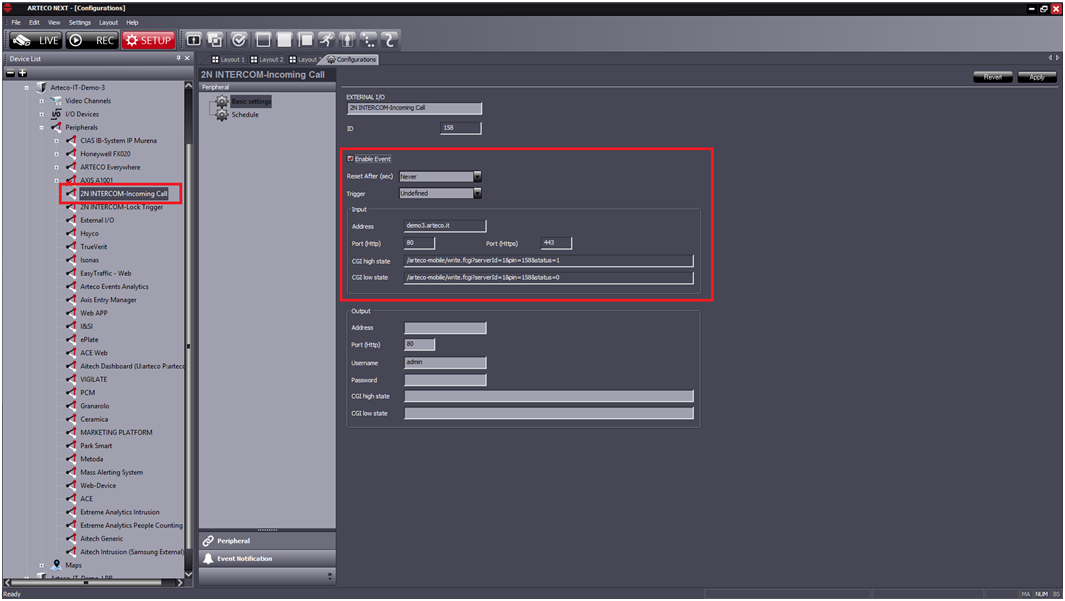
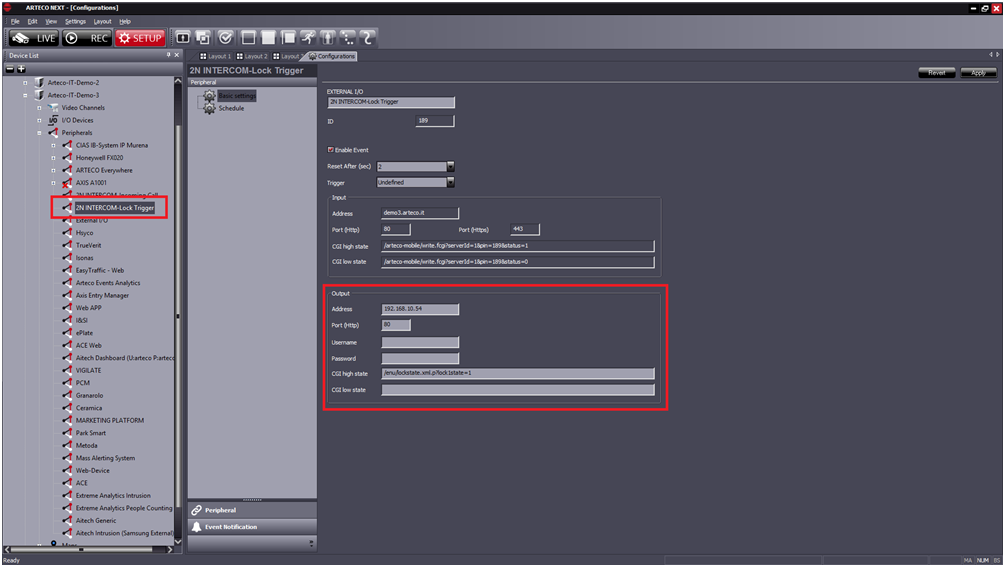
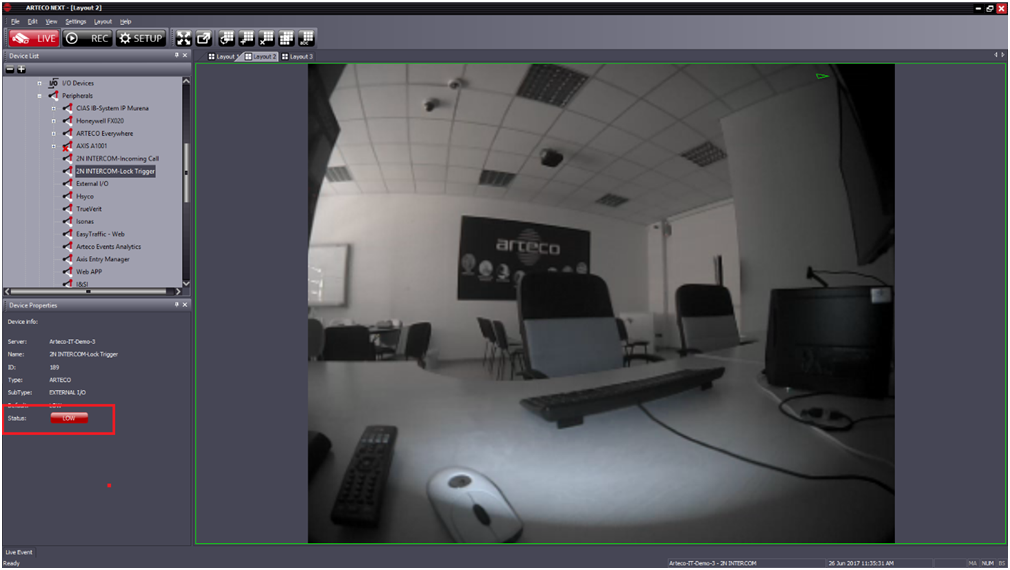
Once you have successfully added the device into the Arteco NEXT VEMS then move to the section "Peripherals" and make a right click on this item. After that, click on the "ADD NEW" -> I/O CONTROLLER -> ARTECO -> EXTERNAL I/O.
 |
 |
 |
Copy the commands defined in the INPUT menu of Arteco NEXT into the “Switches” menu of the 2N IP Intercom.
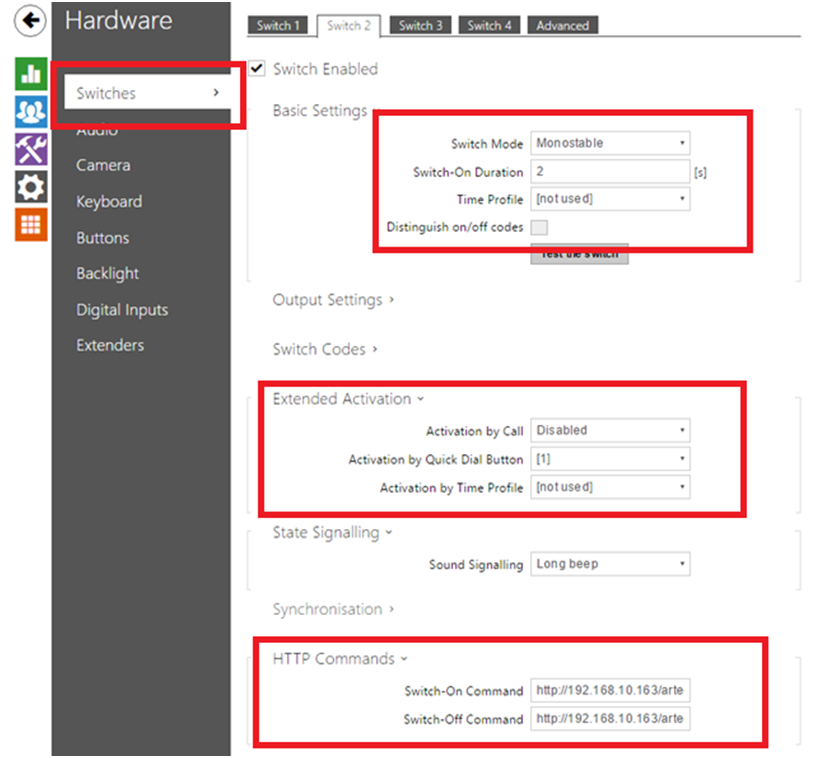 |
For futher info visit:https://wiki.2n.cz/hip/auto/latest/en/3-udalosti-event#id-.3.Události(Event)v2.18-KeyPressed
 |
 |
 |
Used Symbols
![]() - Compatible
- Compatible
![]() - Work with limitation
- Work with limitation
![]() - Incompatible
- Incompatible