Digifort
Content
About
The Enterprise version is the package that comprises all of the features available in the Digifort System, offering total management of unlimited cameras and alarm devices, and is ideal for any company that wants total control of its security project, guaranteeing high performance, reliability and scalability.
Digifort Enterprise allows the use of several models of IP cameras and video servers of various manufacturers, has making possible the choice of hardware which best meets the clients needs.
Version 7
Tested Functions
| Digifort | 2N IP Intercom Version | Scan device | Video from 2N IP Intercom | Audio from 2N IP Intercom | Audio to 2N IP Intercom | Switch control | Events from 2N IP Intercom |
|---|---|---|---|---|---|---|---|
| 2.43 | |||||||
| 7.3.0 | 2.30.2.39.7 | ||||||
| 7.2.1 | 2.28.0.37.5 | ||||||
| 2.25.0.34.8 | |||||||
7.2.0 | 2.19.0.28.5 | ||||||
7.1.0 | 2.17.0.26.1 |
2N IP Intercom Settings
Enable parameter RTSP Server Enabled in menu Services / Streaming.
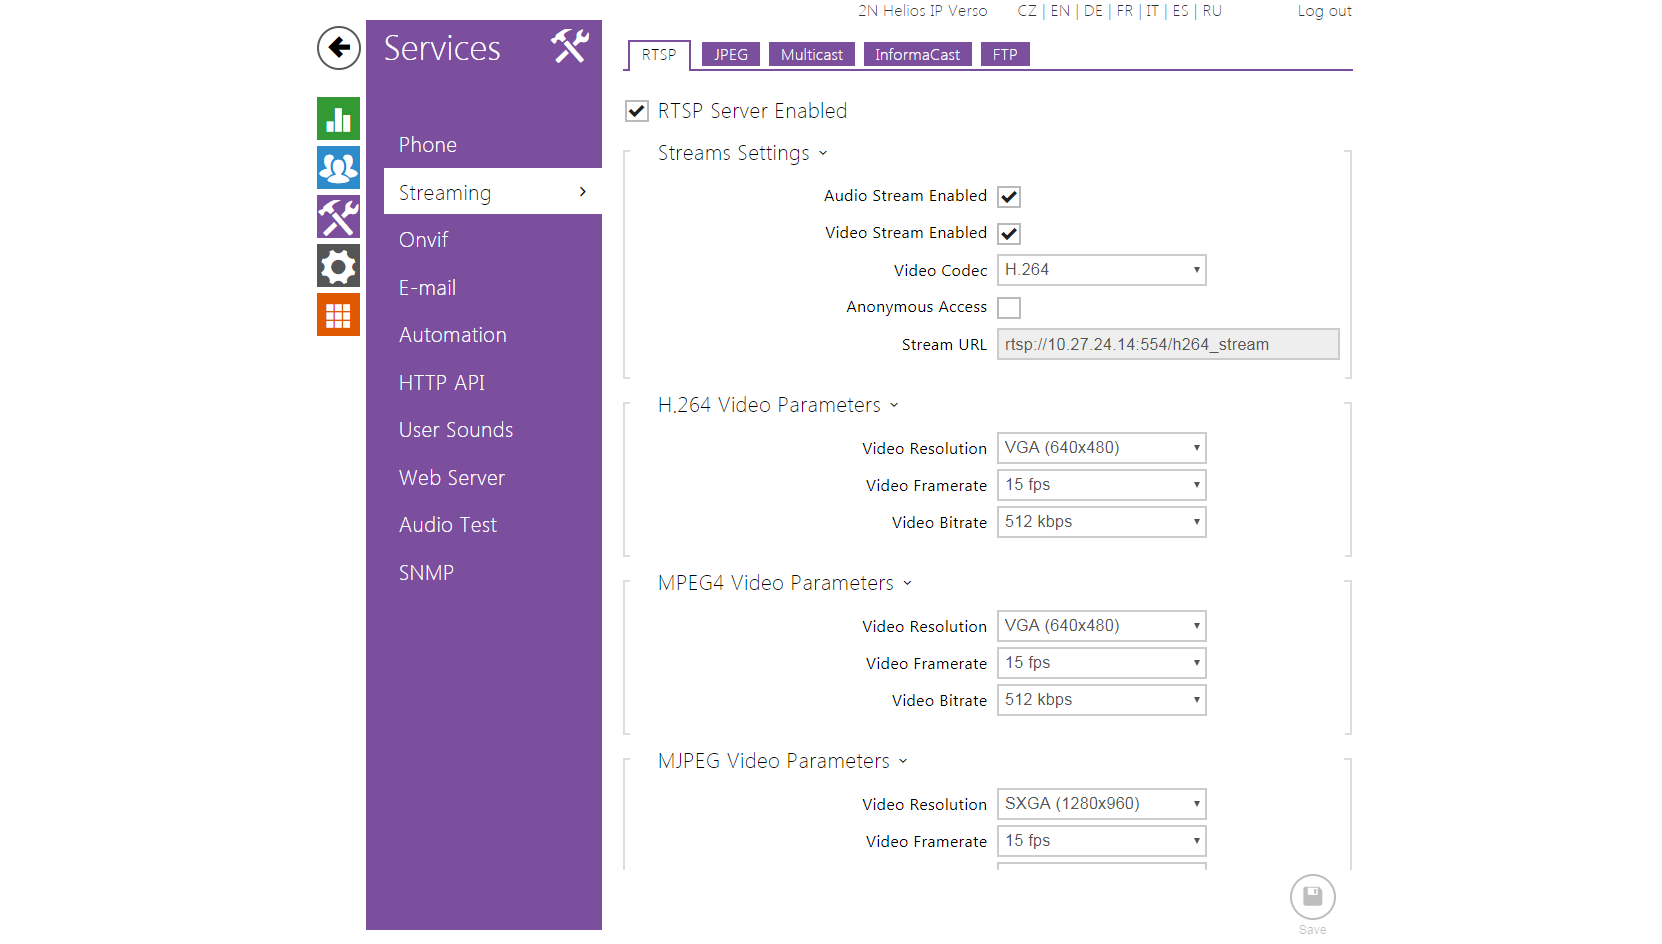 |
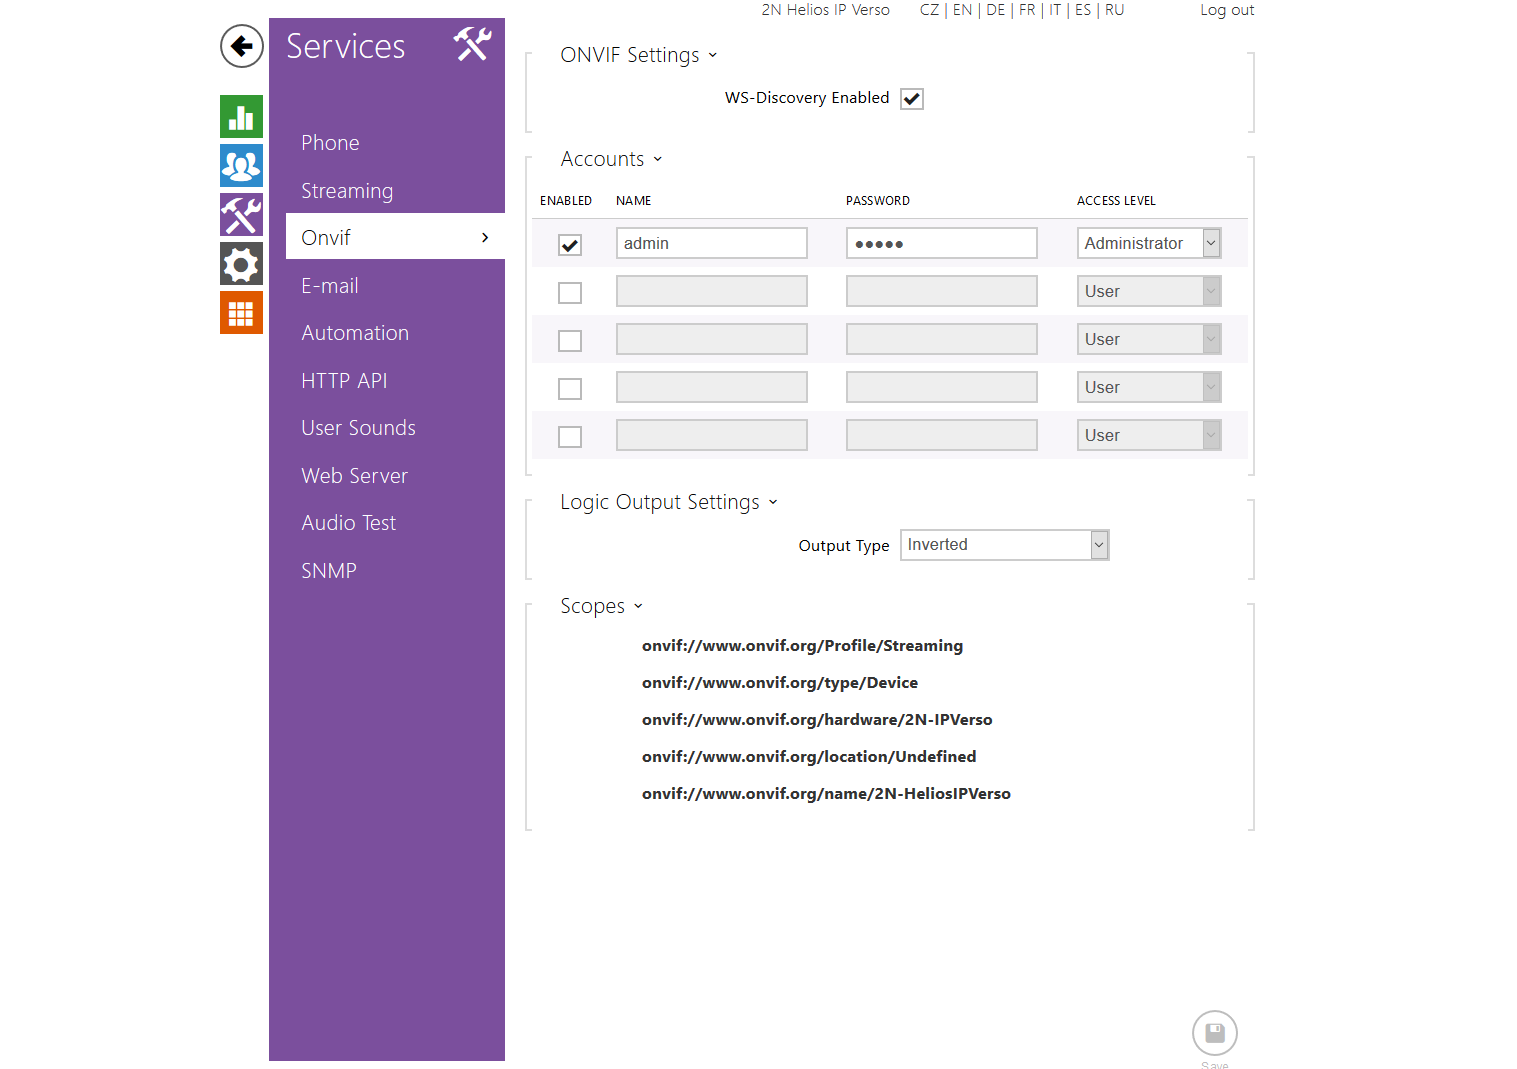
Enable Onvif and set authorisation data in menu Services / Onvif.
 |
Tested Features
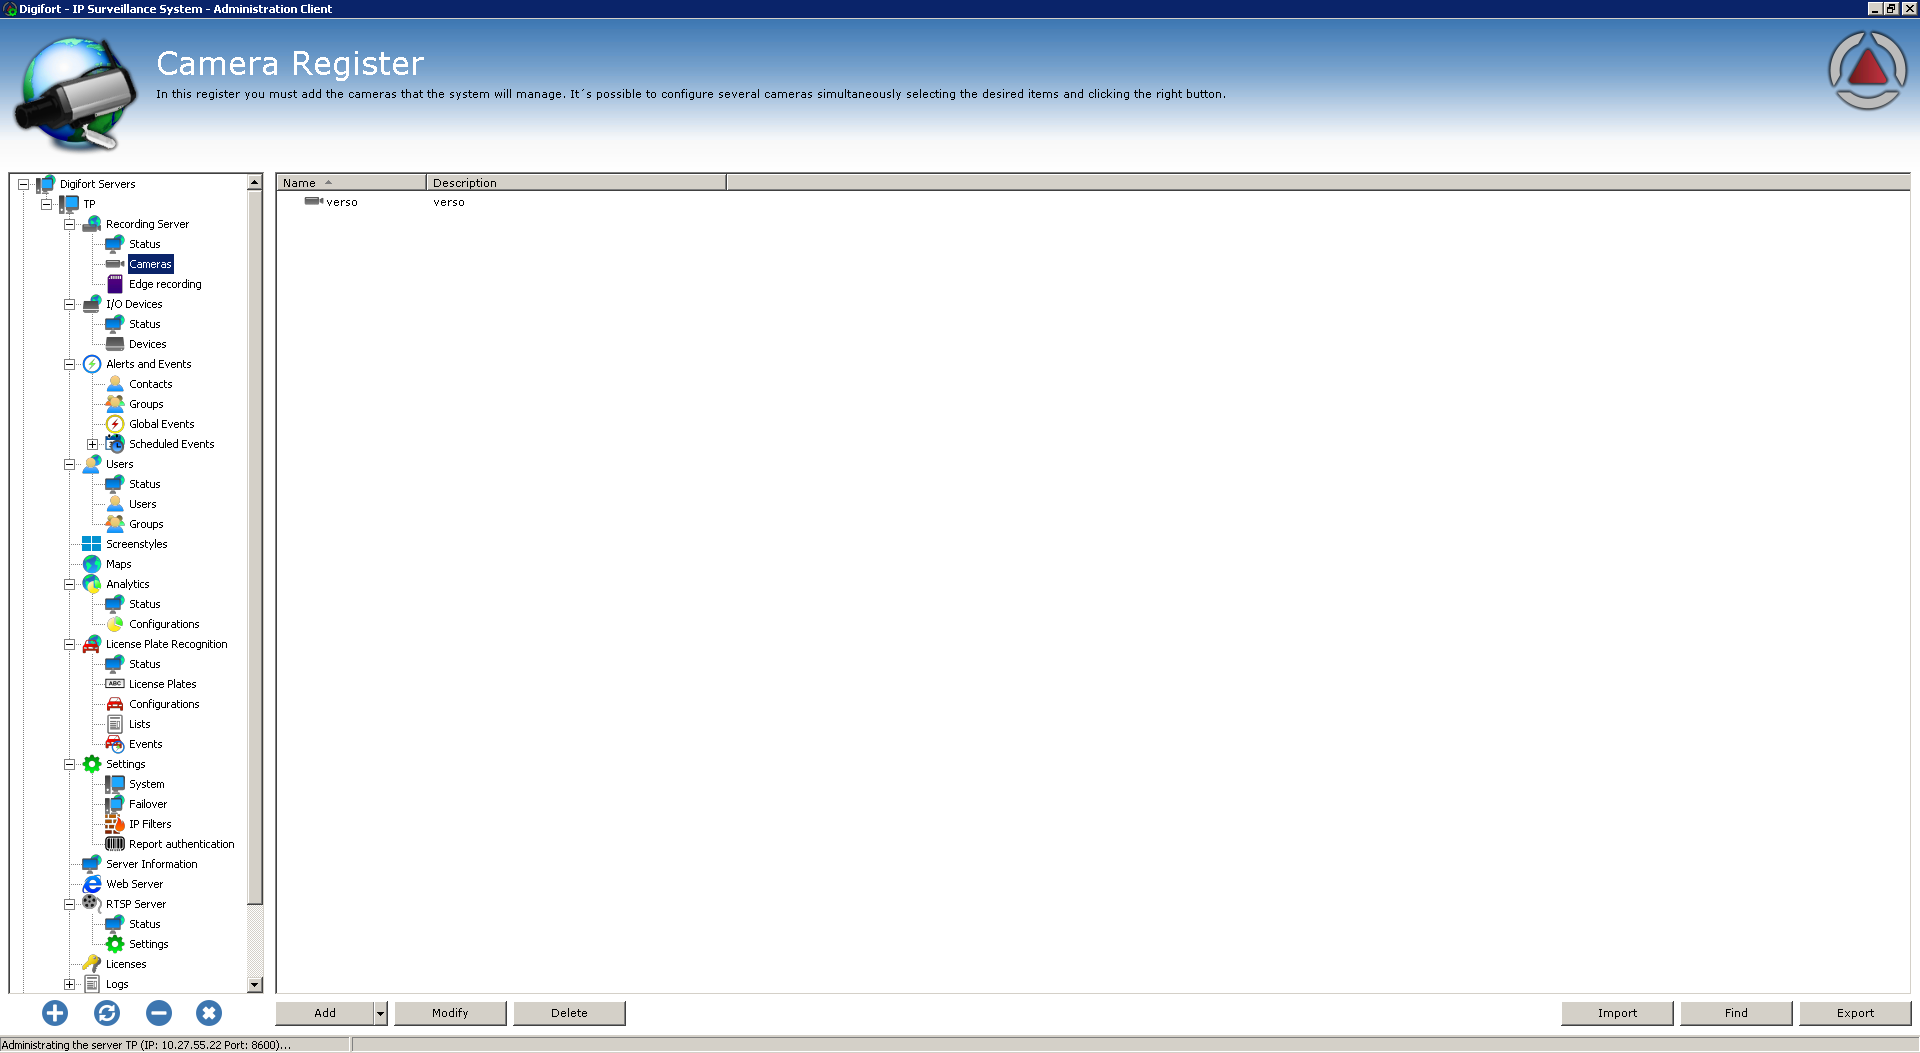
To scan network for 2N IP Intercom, go to Recording Server / Cameras to chose Find in lower part of Administration Client.
 |
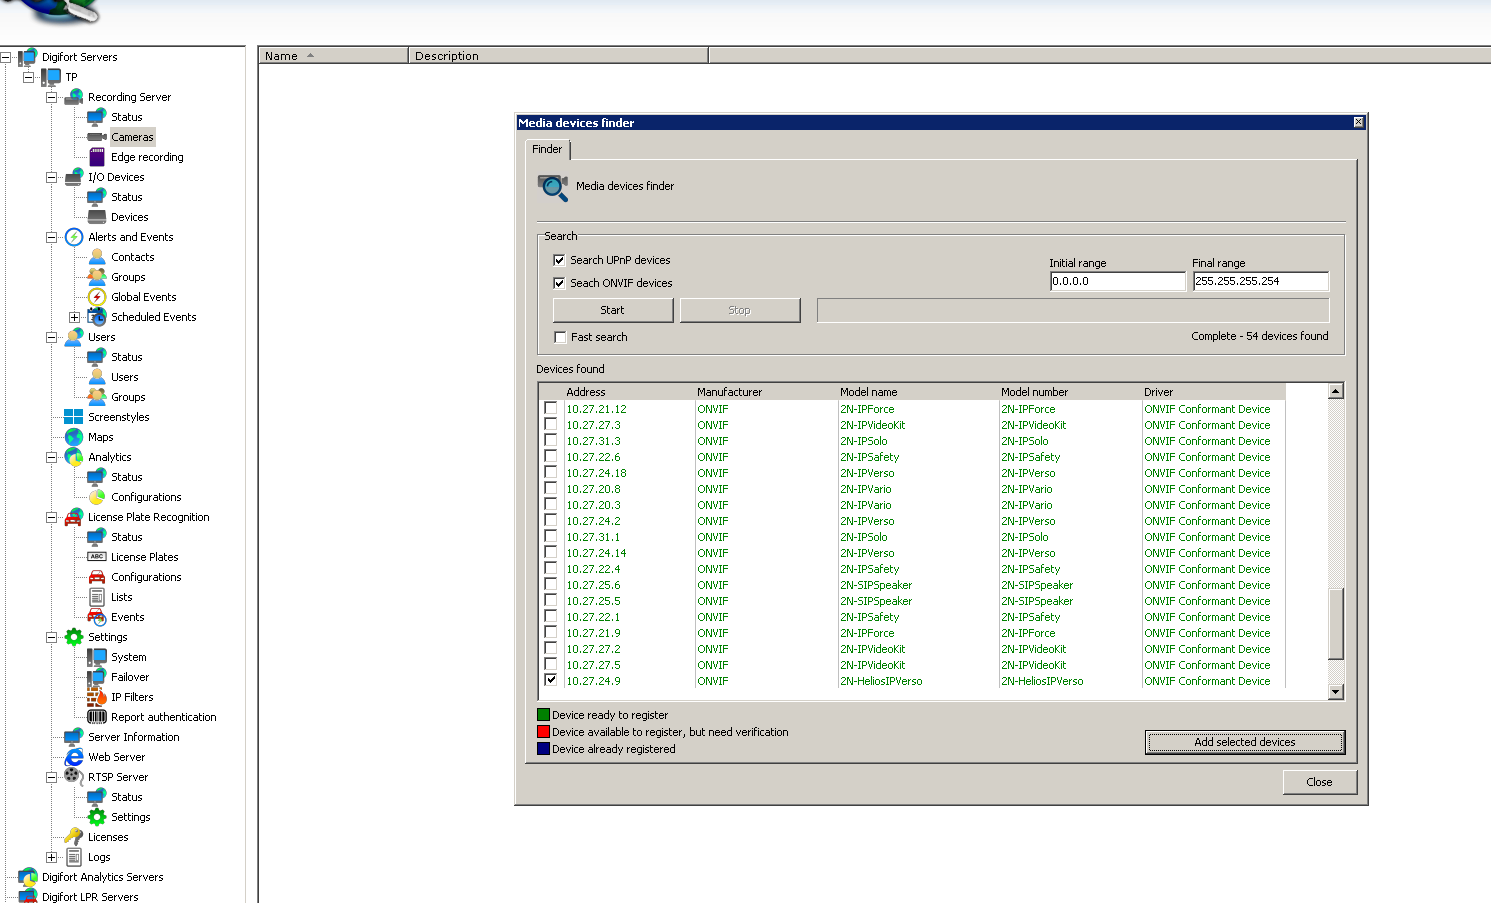
In the next window click on button Start to initiate scan. After scan for 2N IP Intercom check devices to add to Digifort VMS. And proceed with "Add selected devices".
 |
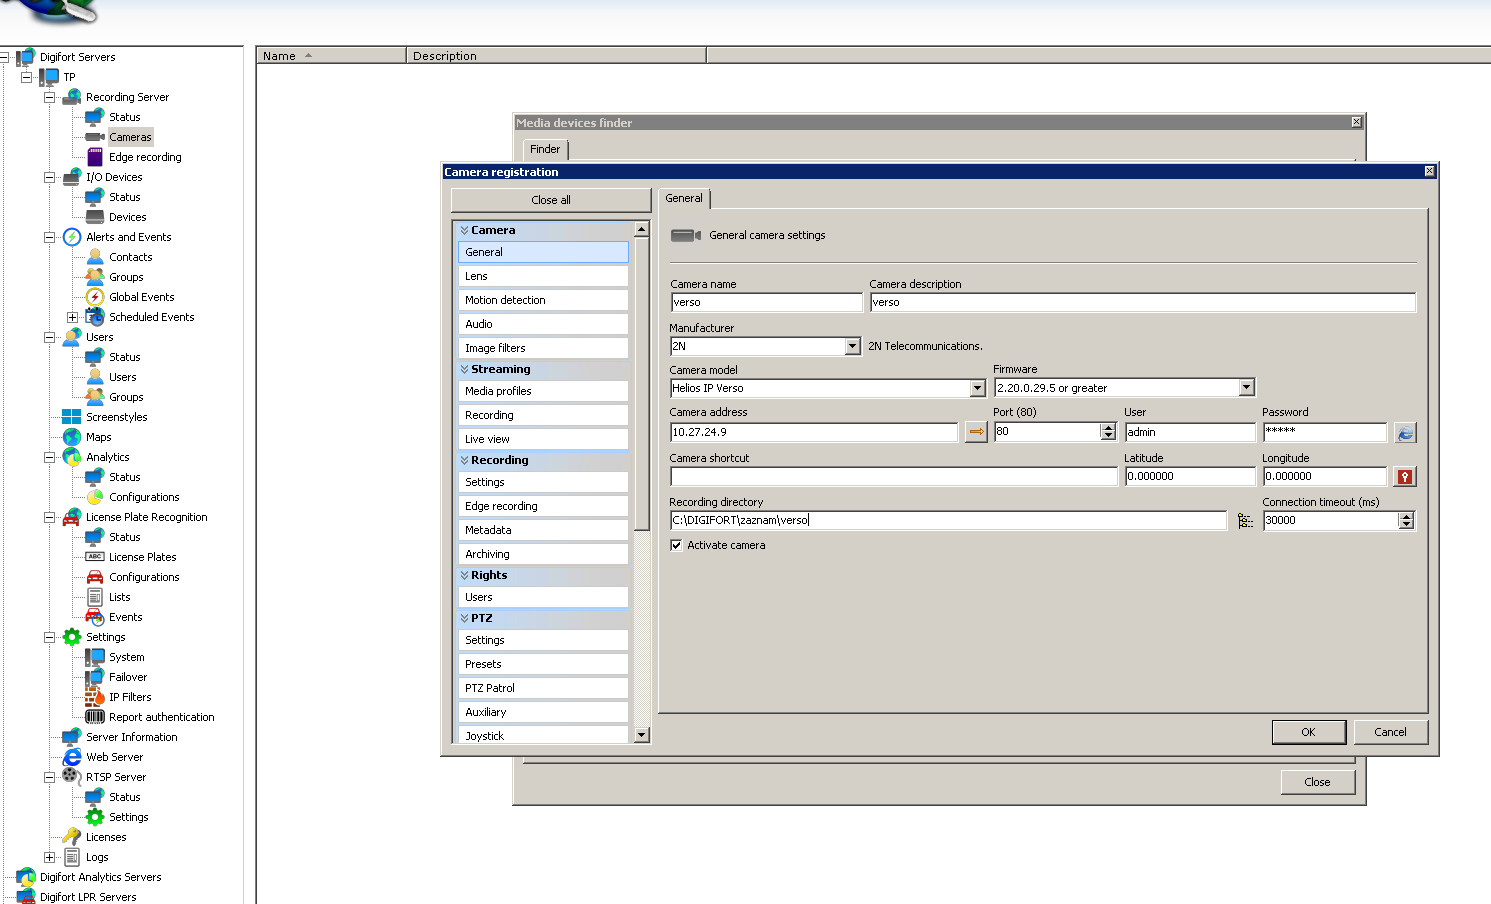 |
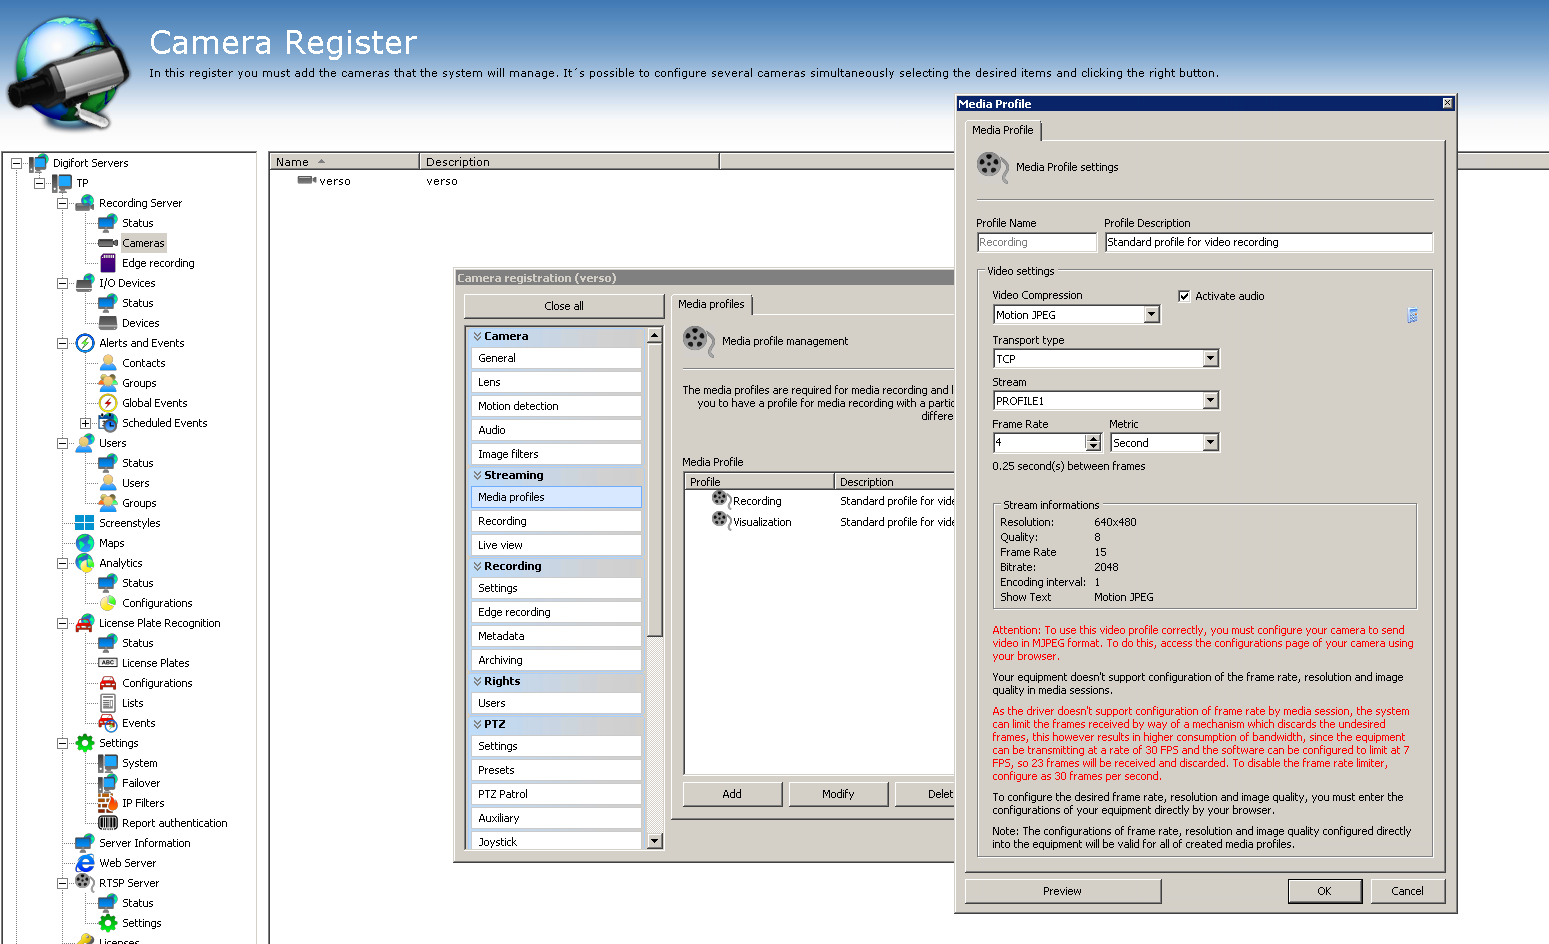
In the Media Profiles section, select Motion JPEG and TCP transport, both for Recording and Visualization profiles.
 |
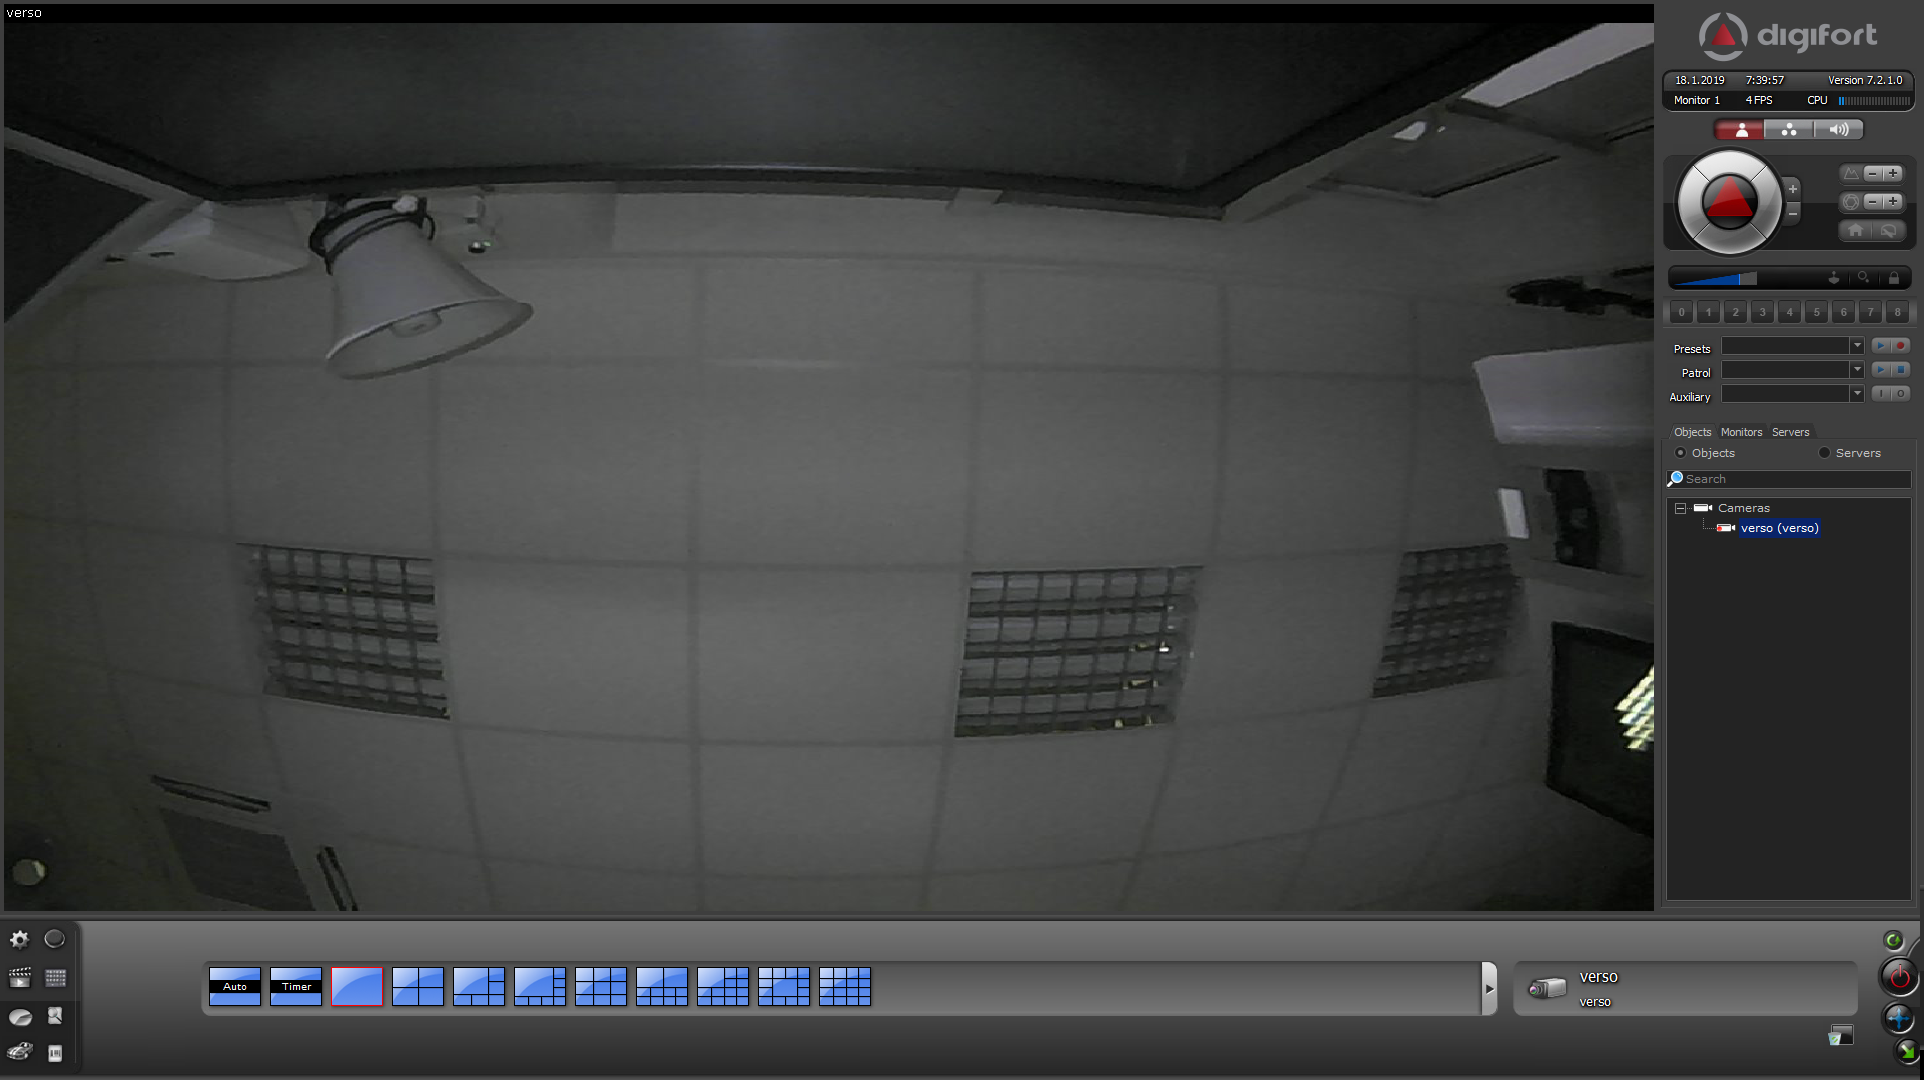
Double-click the shortcut icon Surveillance Client on the desktop. The login screen is shown. Type your user name in the User name box, and your password in the Password box. Click Login. After successful login you should add your camera. Adding a Camera to a View: Drag selected camera and drop it into your View from the camera tree.
 |
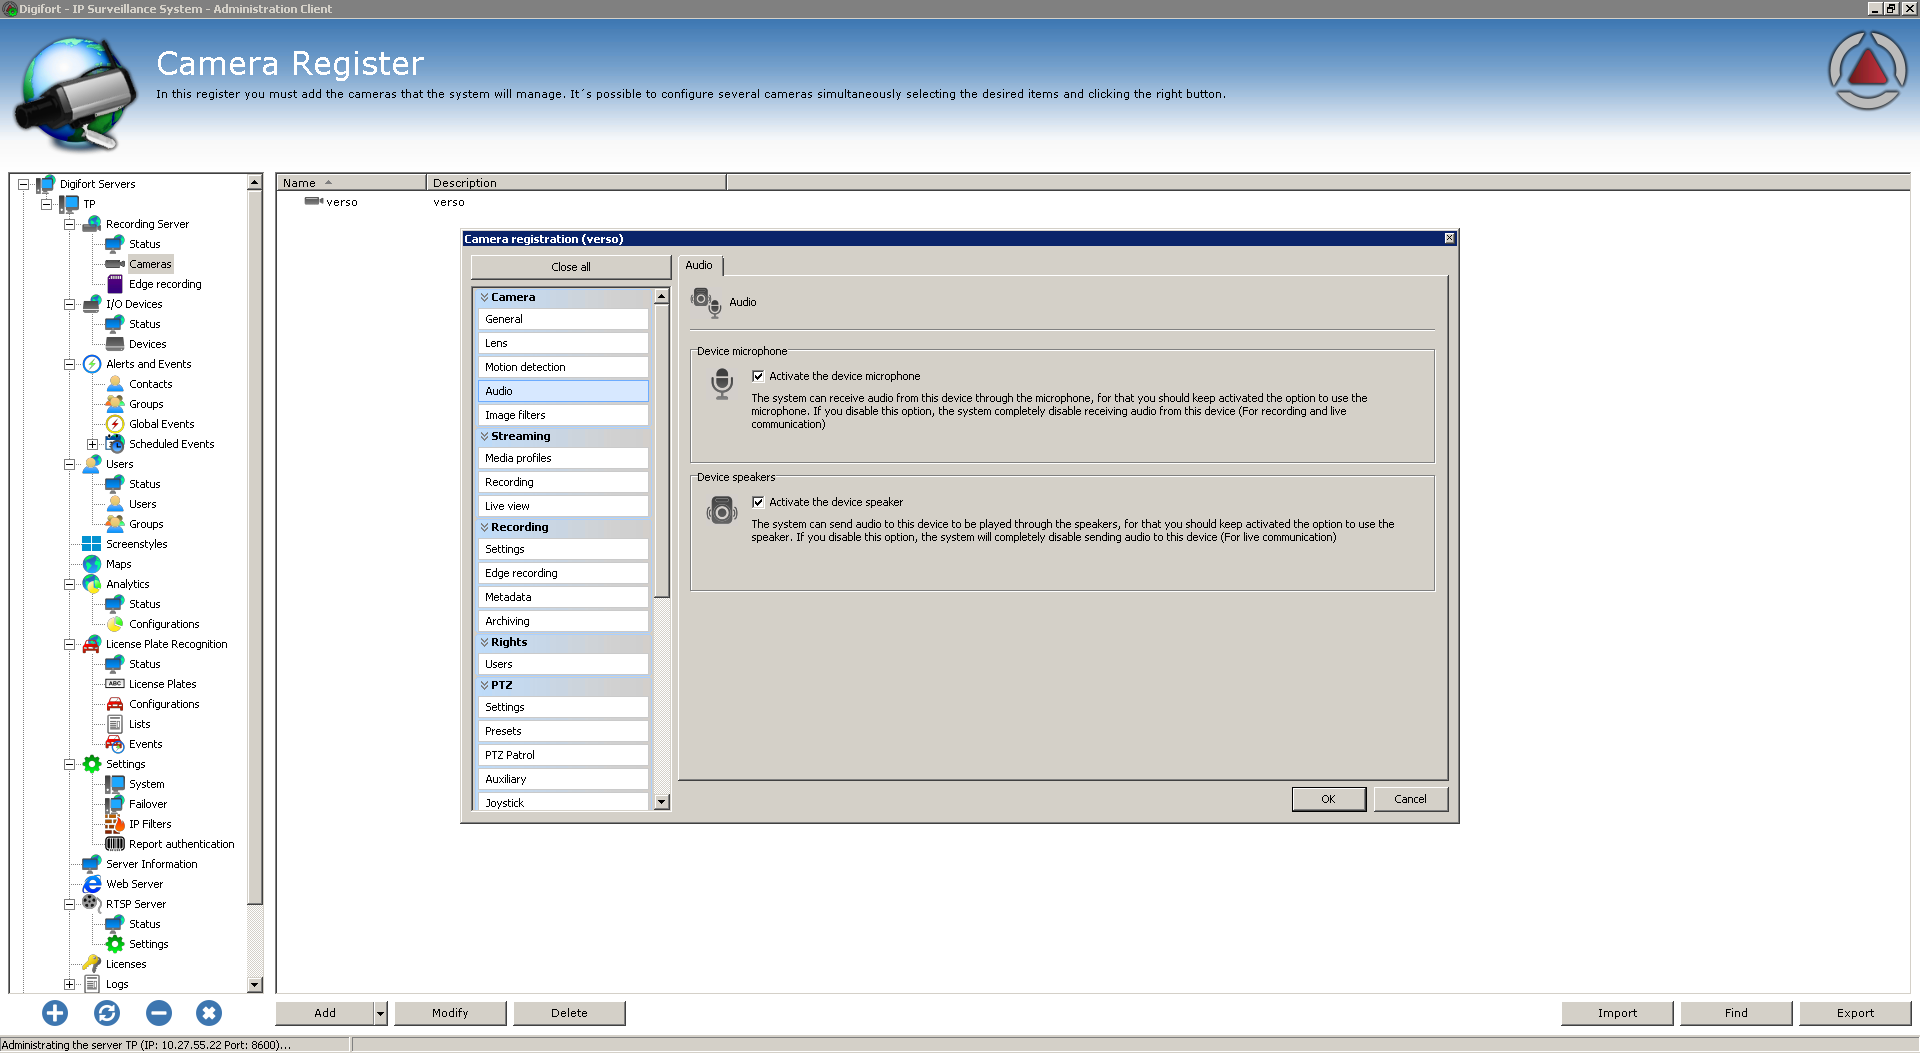
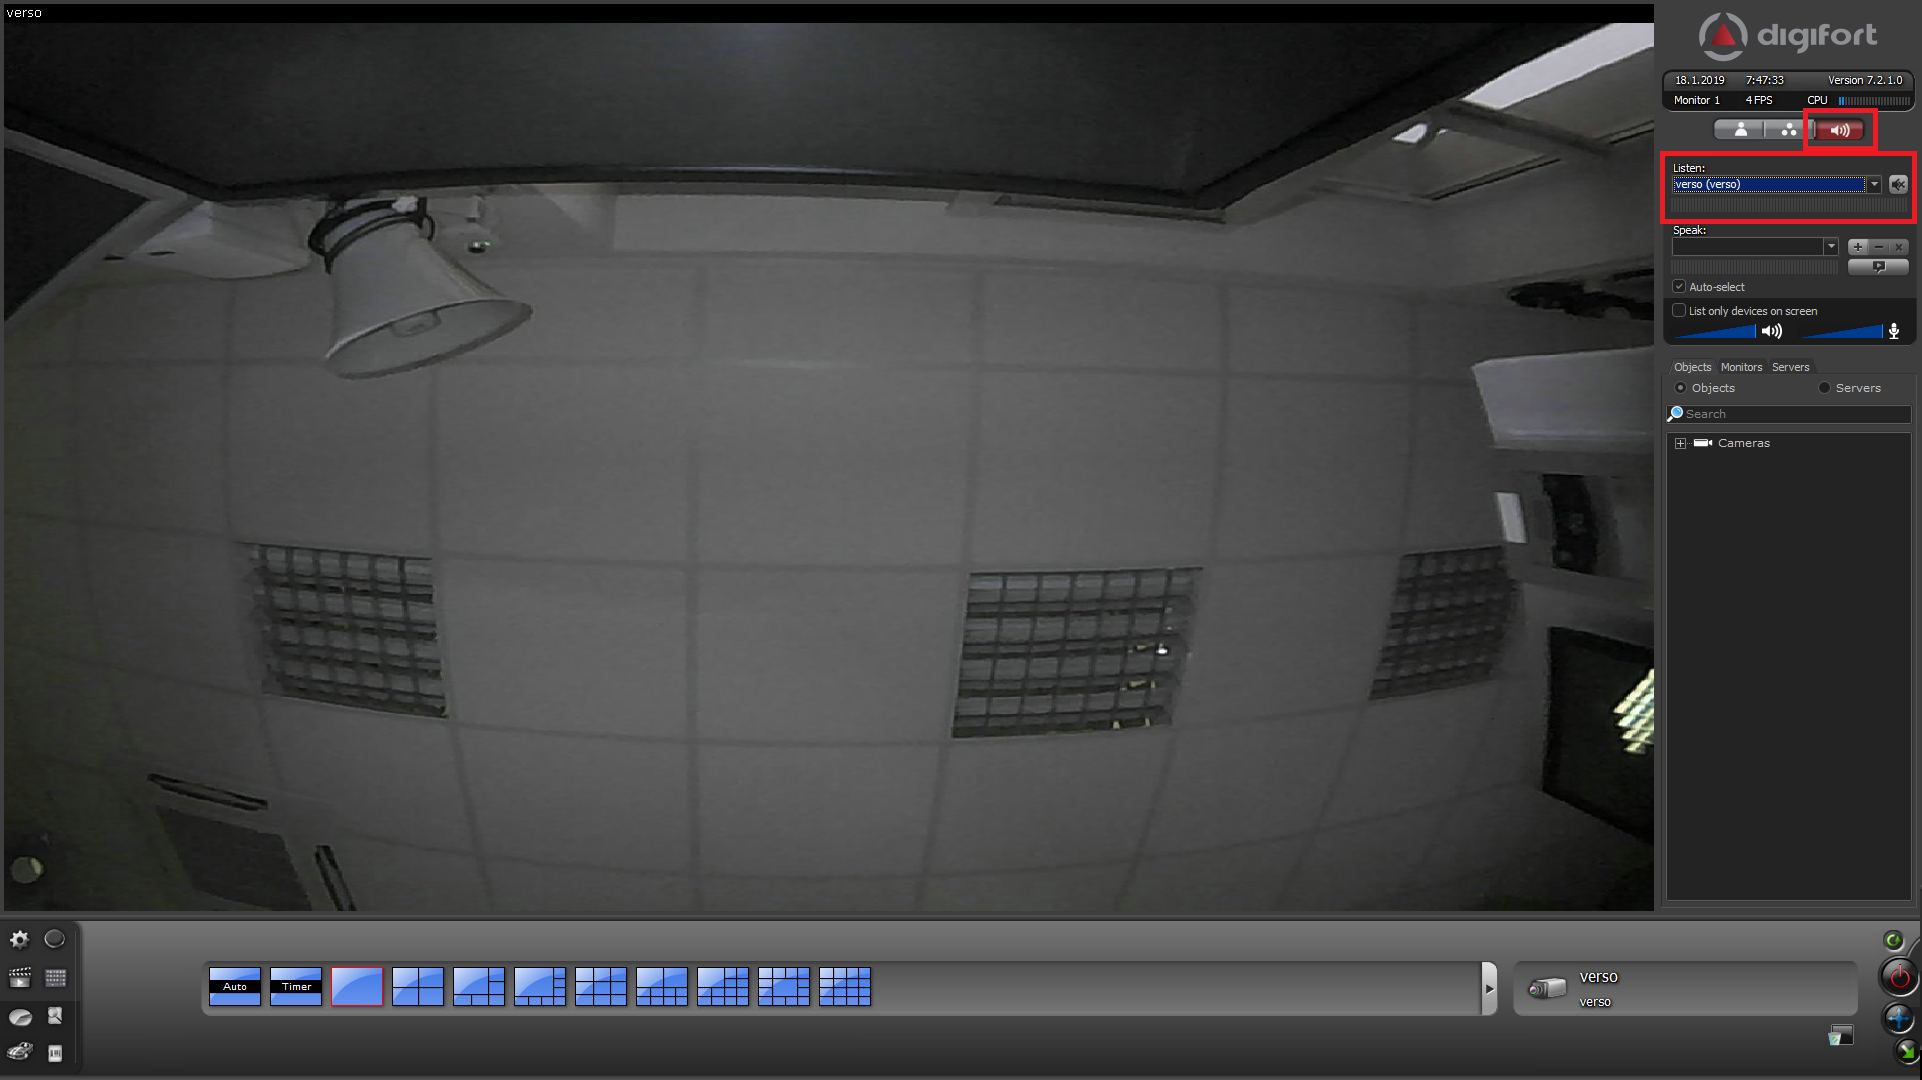
Tick the "Activate the device microphone" check box to enable audio from 2N IP Intercom.
 |
Tick Activate audio check box in the Media profiles -> Visualization.
 |
 |
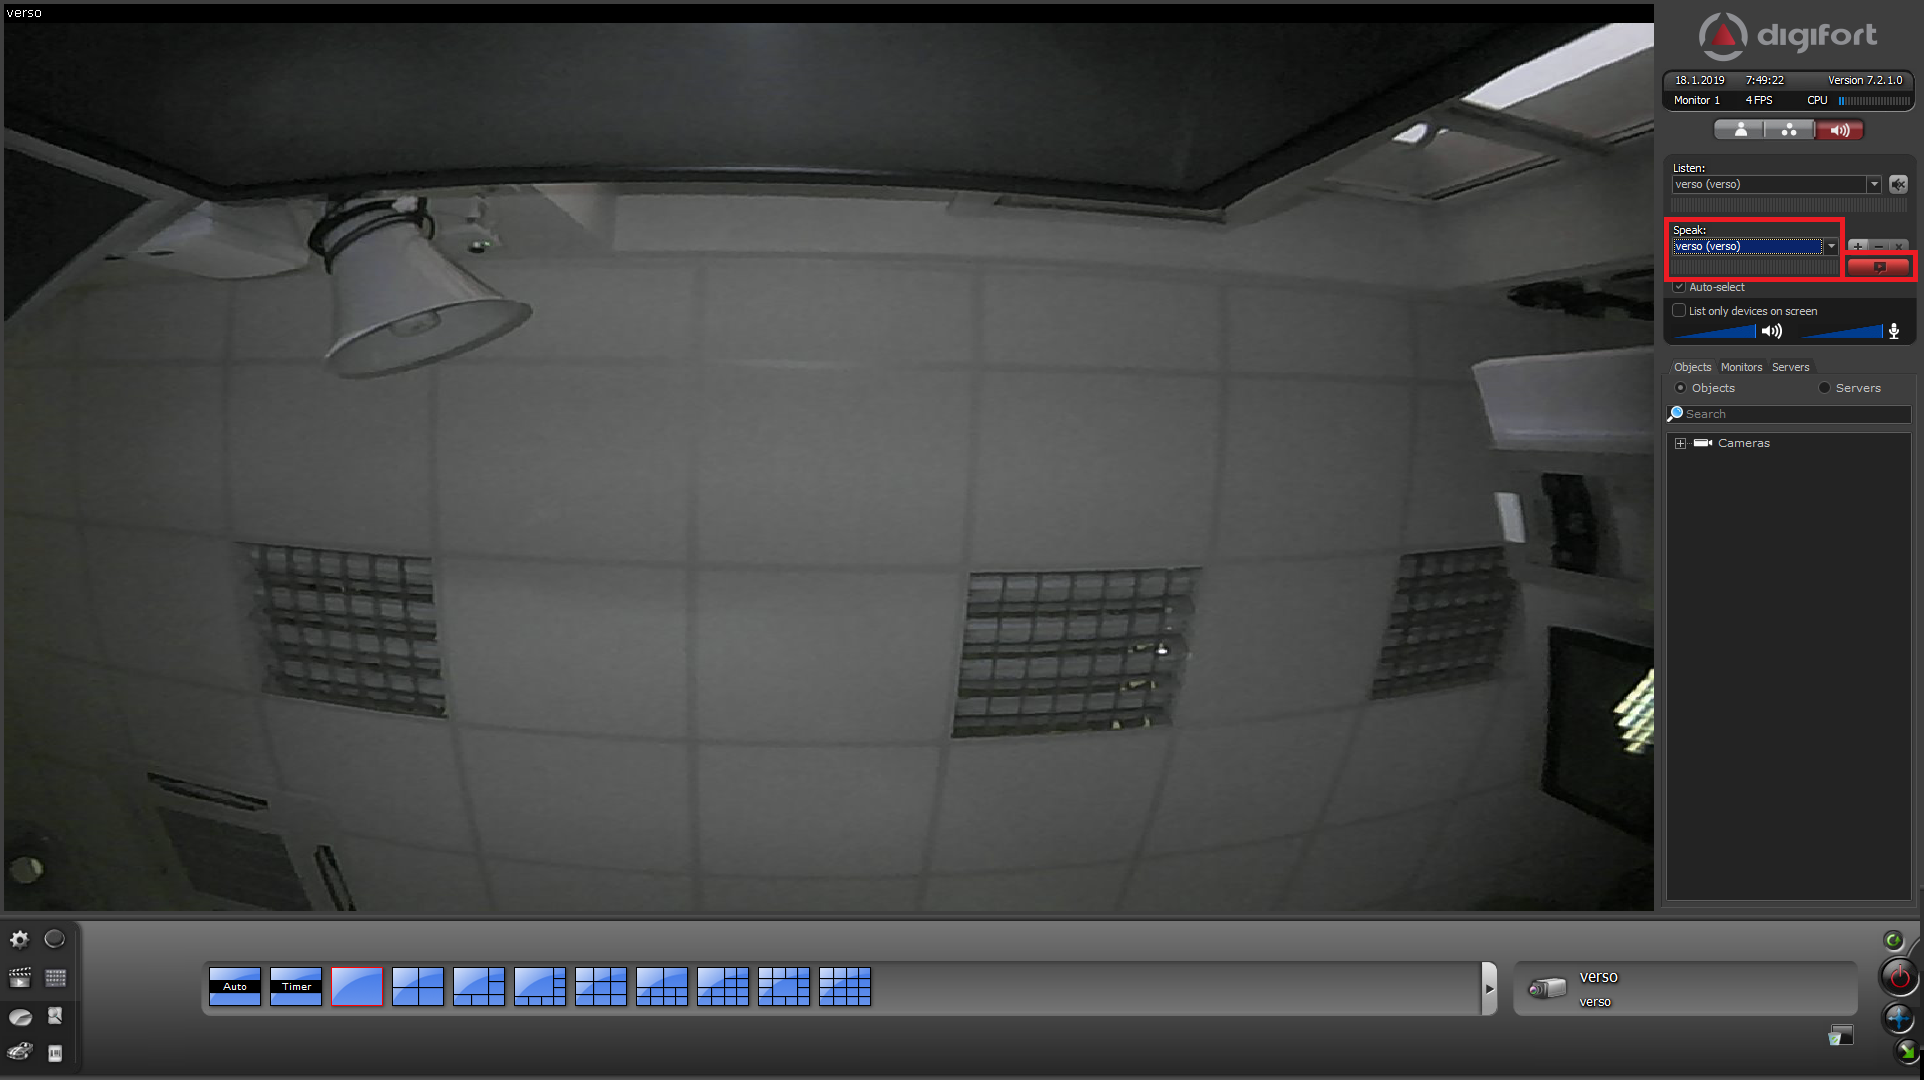
Tick the "Activate the device speaker" check box to enable audio to 2N IP Intercom.
|
Tick Activate audio check box in the Media profiles -> Visualization.
|
 |
Used Symbols
![]() - Compatible
- Compatible
![]() - Work with limitation
- Work with limitation
![]() - Incompatible
- Incompatible