digivod®
Content
About
digivod® is one of the most innovative and most powerful video management software systems on the market and it will fulfill your highest requirements and expectations. With its modular concept, digivod® allows you to build a highly scalable software system which will meet all requirements for IP video management solutions. Due to the modular structure of the software and its many options for connecting it to other systems, it provides you with a variety of operation areas which is almost unlimited.
http://www.digivod.de/en/products.html
Version 3
Tested Functions
| digivod® | 2N IP Intercom Version | Scan device | Video from 2N IP Intercom | Audio from 2N IP Intercom | Audio to 2N IP Intercom | Switch control | Events from 2N IP Intercom |
|---|---|---|---|---|---|---|---|
3.5.0.35365 | 2.19.0.28.5 | N/S | |||||
3.4.0.32588 | 2.18.0.27.1 | ||||||
3.3.0.31042 | 2.17.0.26.1 | ||||||
3.3.0.29504 | 2.15.0.24.3 | ||||||
2.13.0.22.2 |
2N IP Intercom Settings
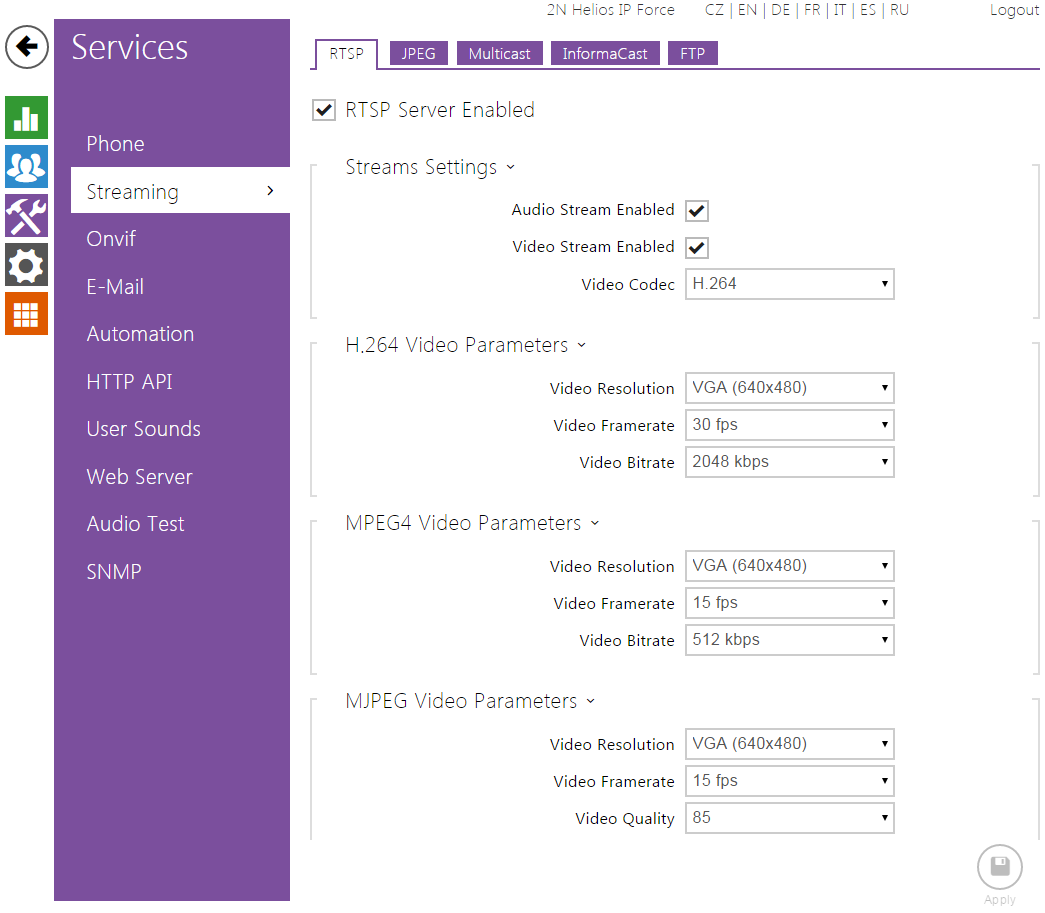
Enable parameter RTSP Server Enabled in menu Services / Streaming.
 |
 |
Tested Features
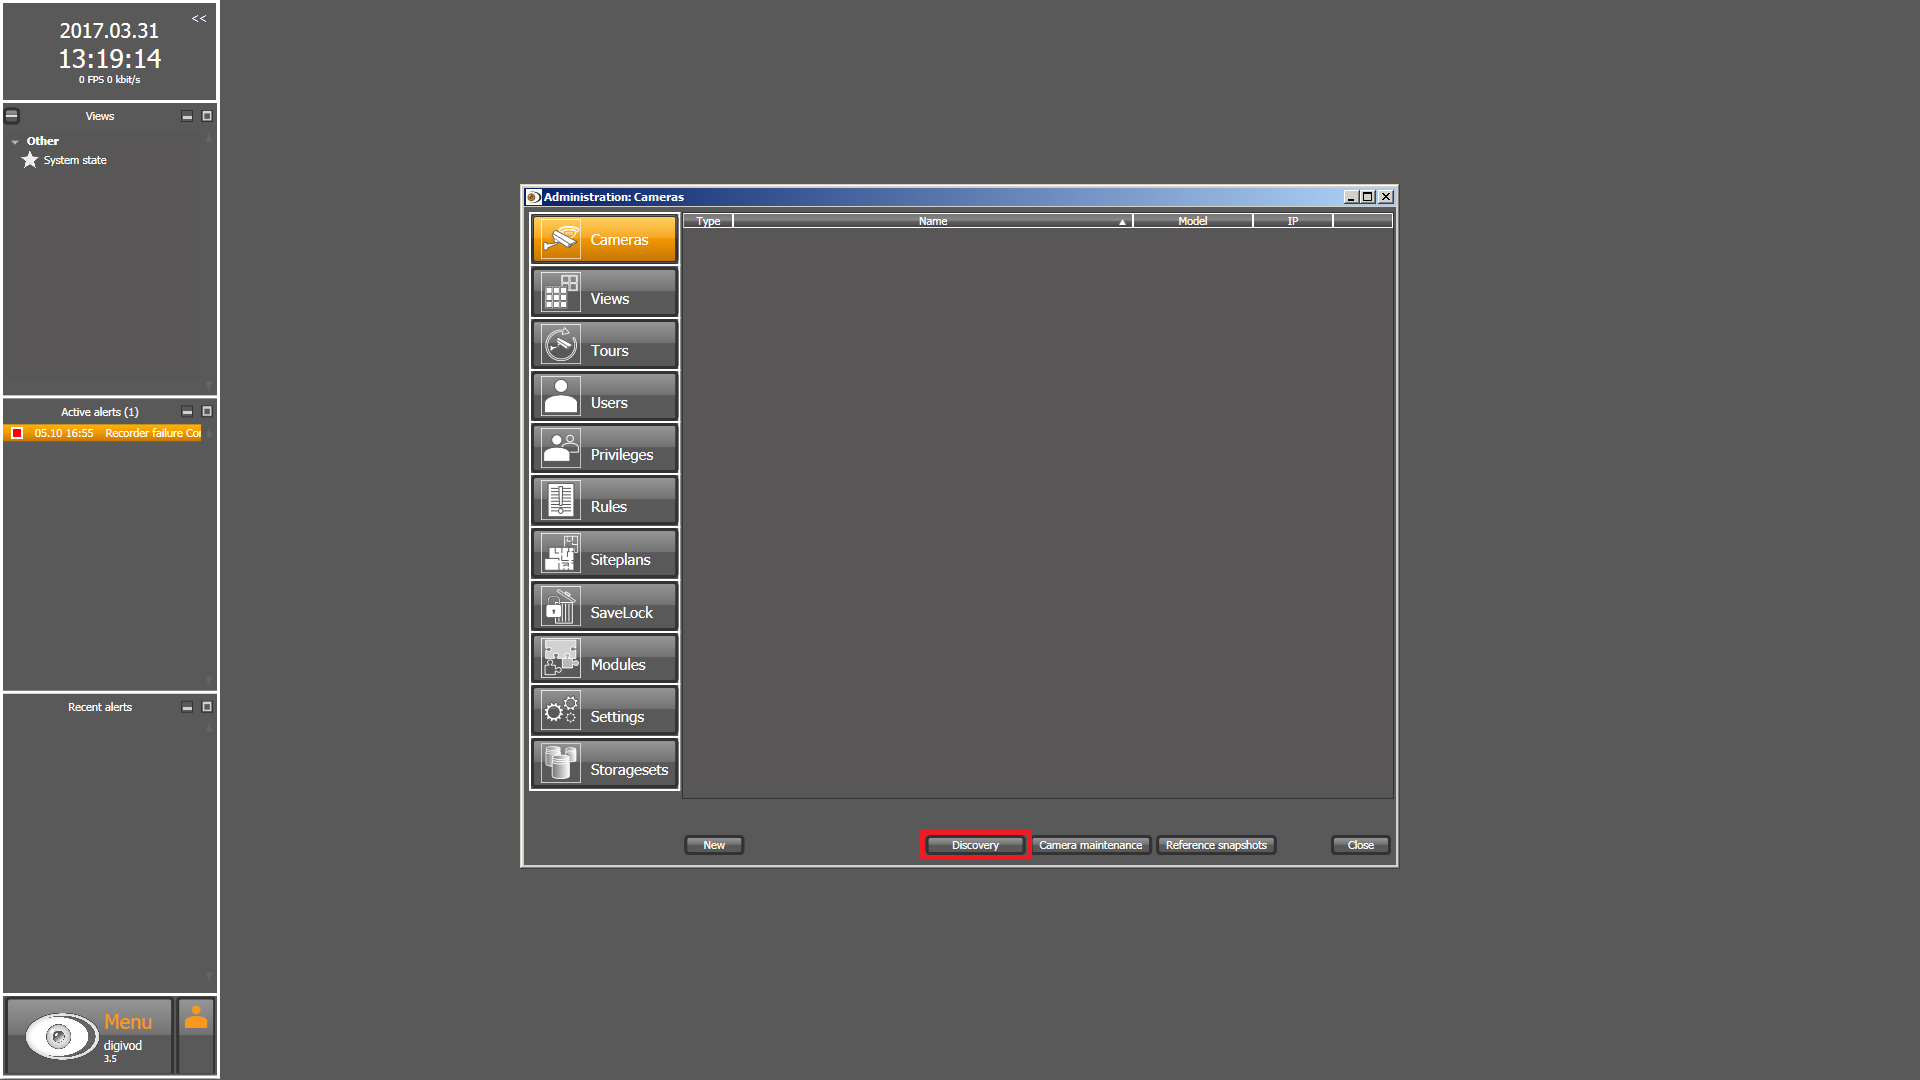
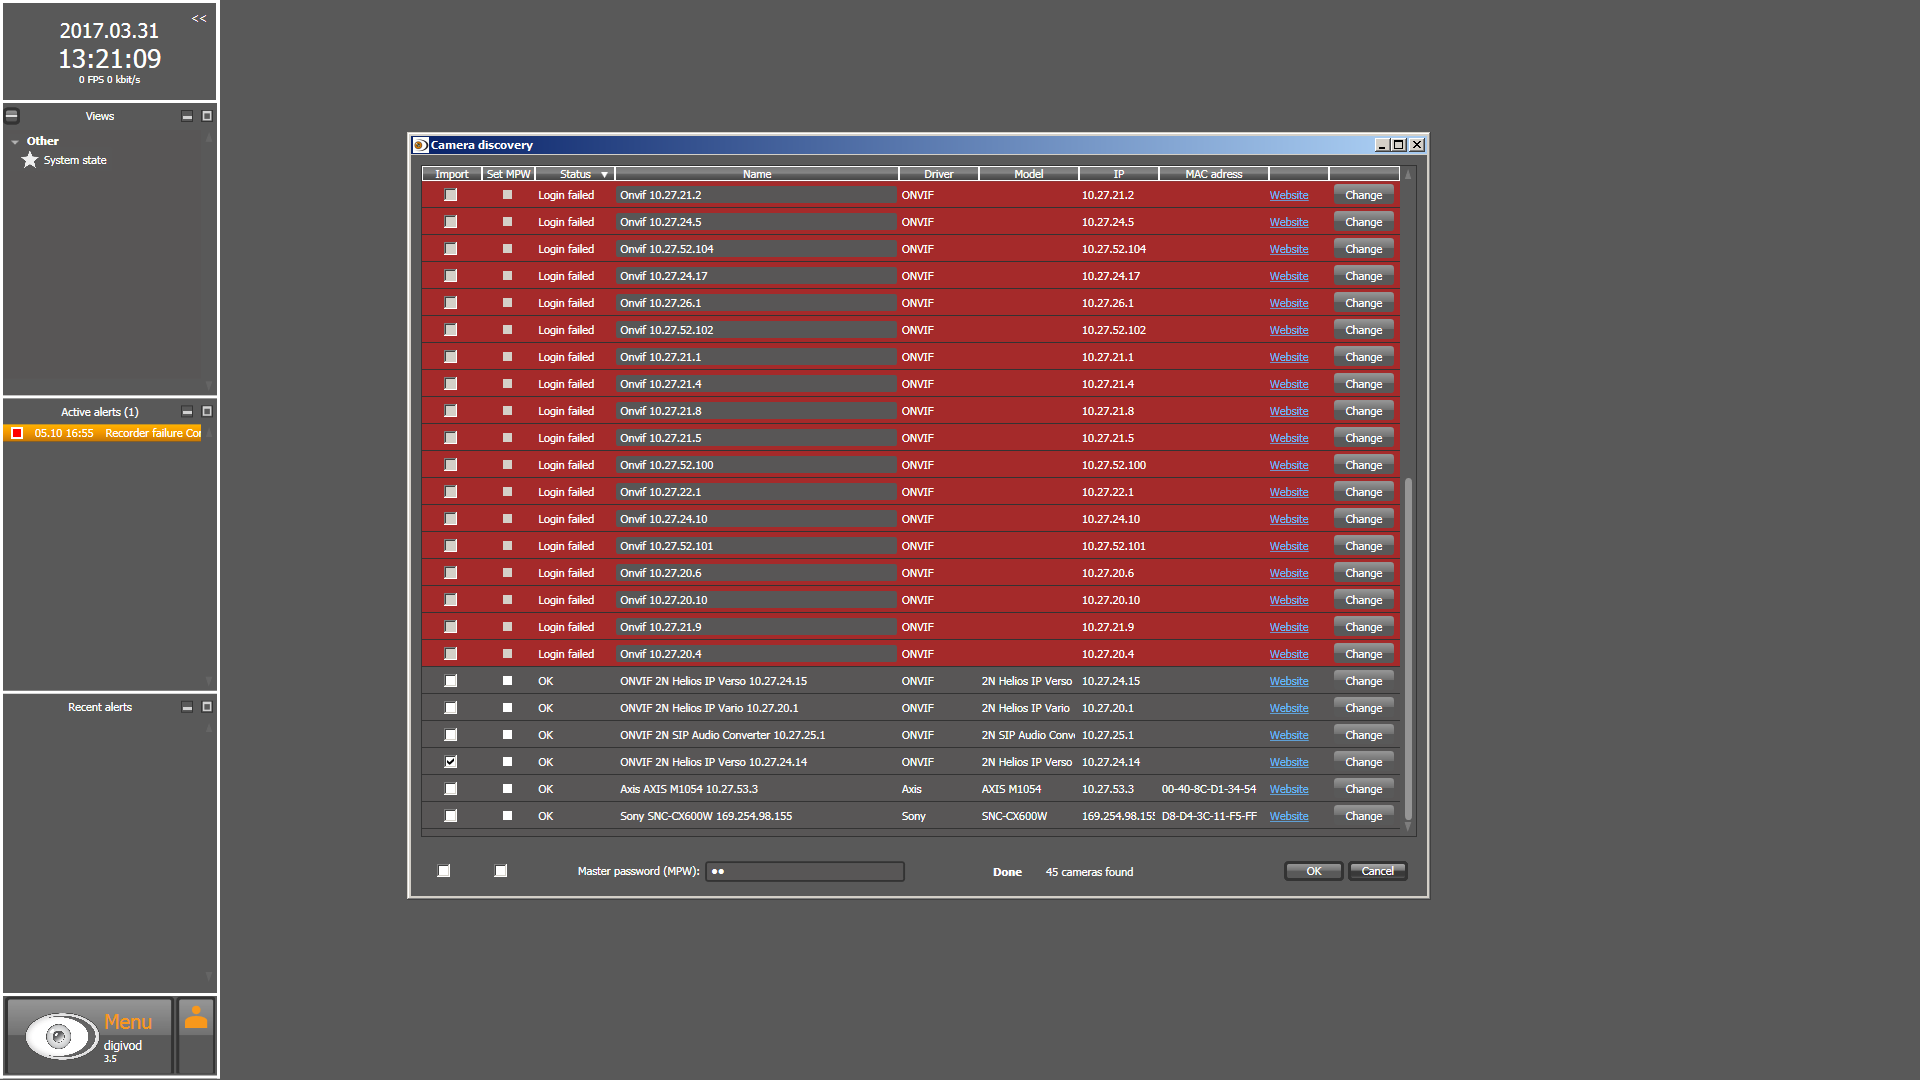
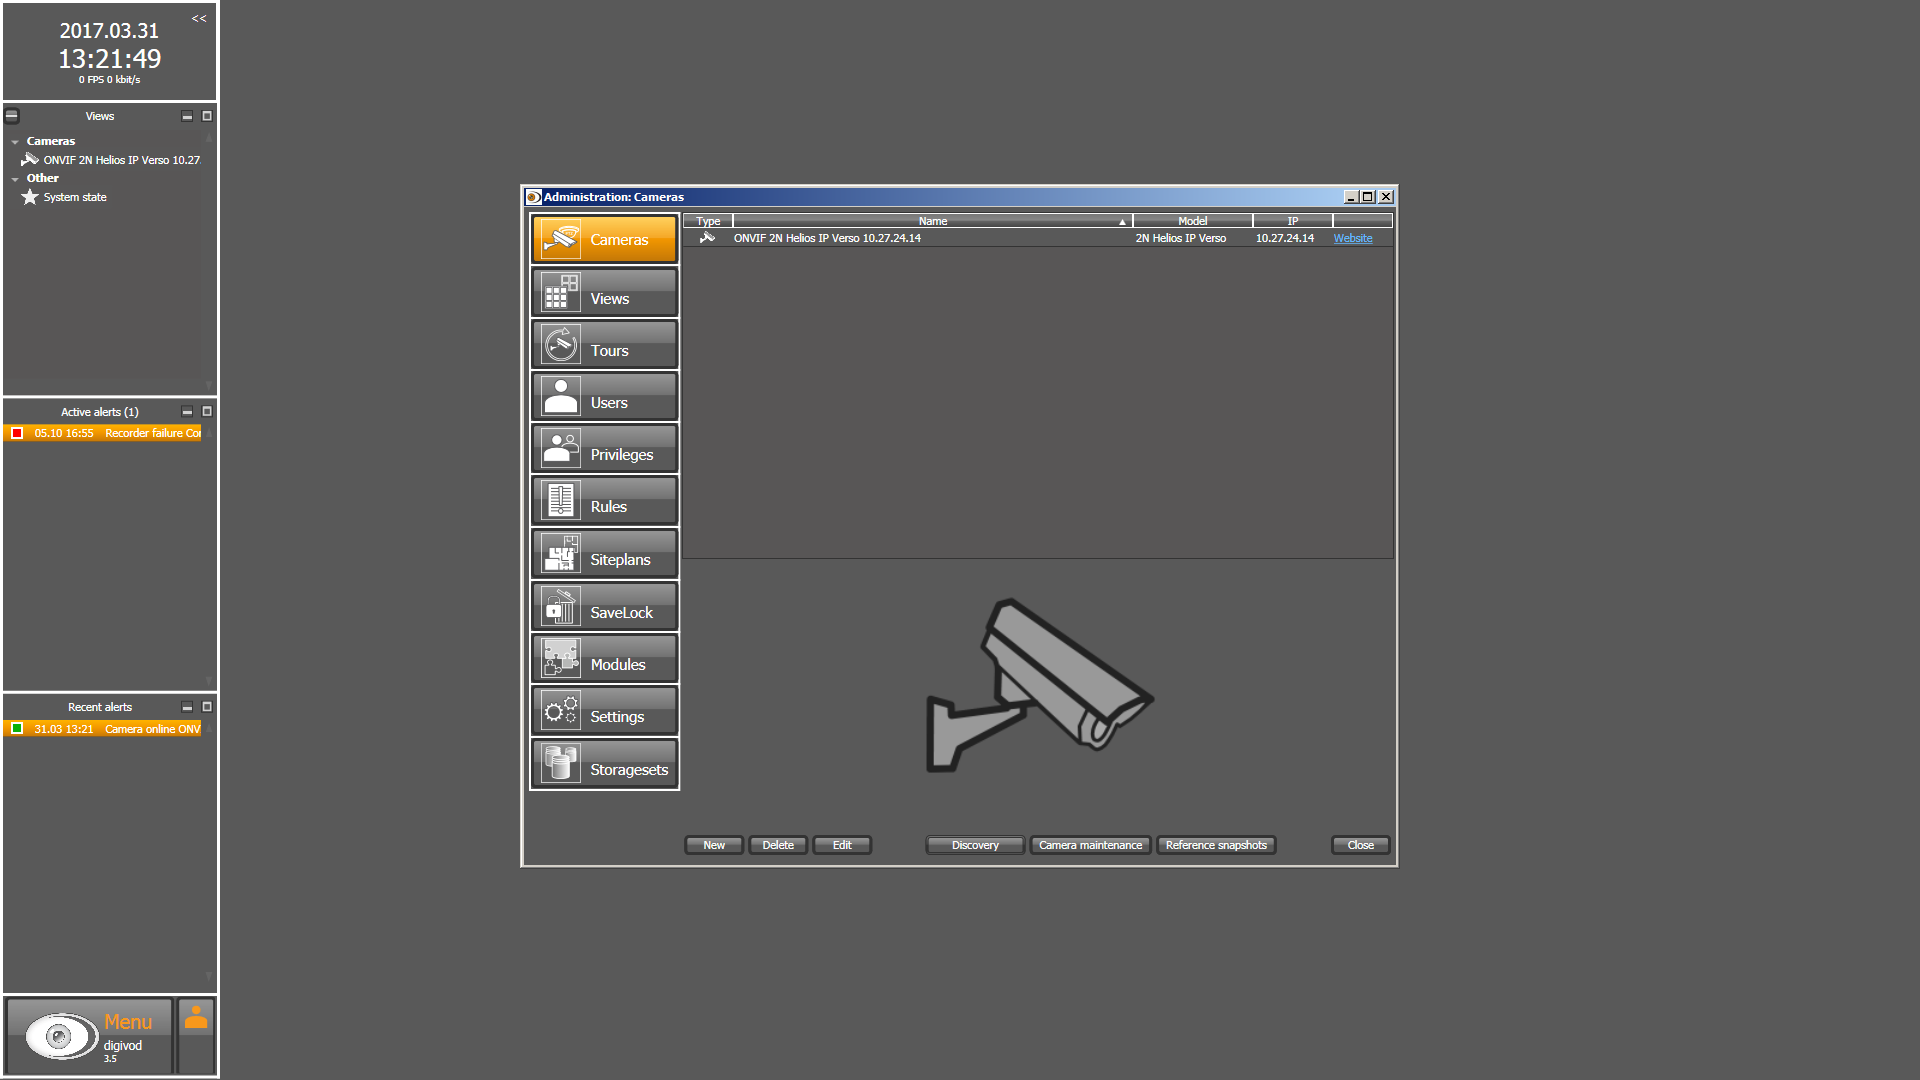
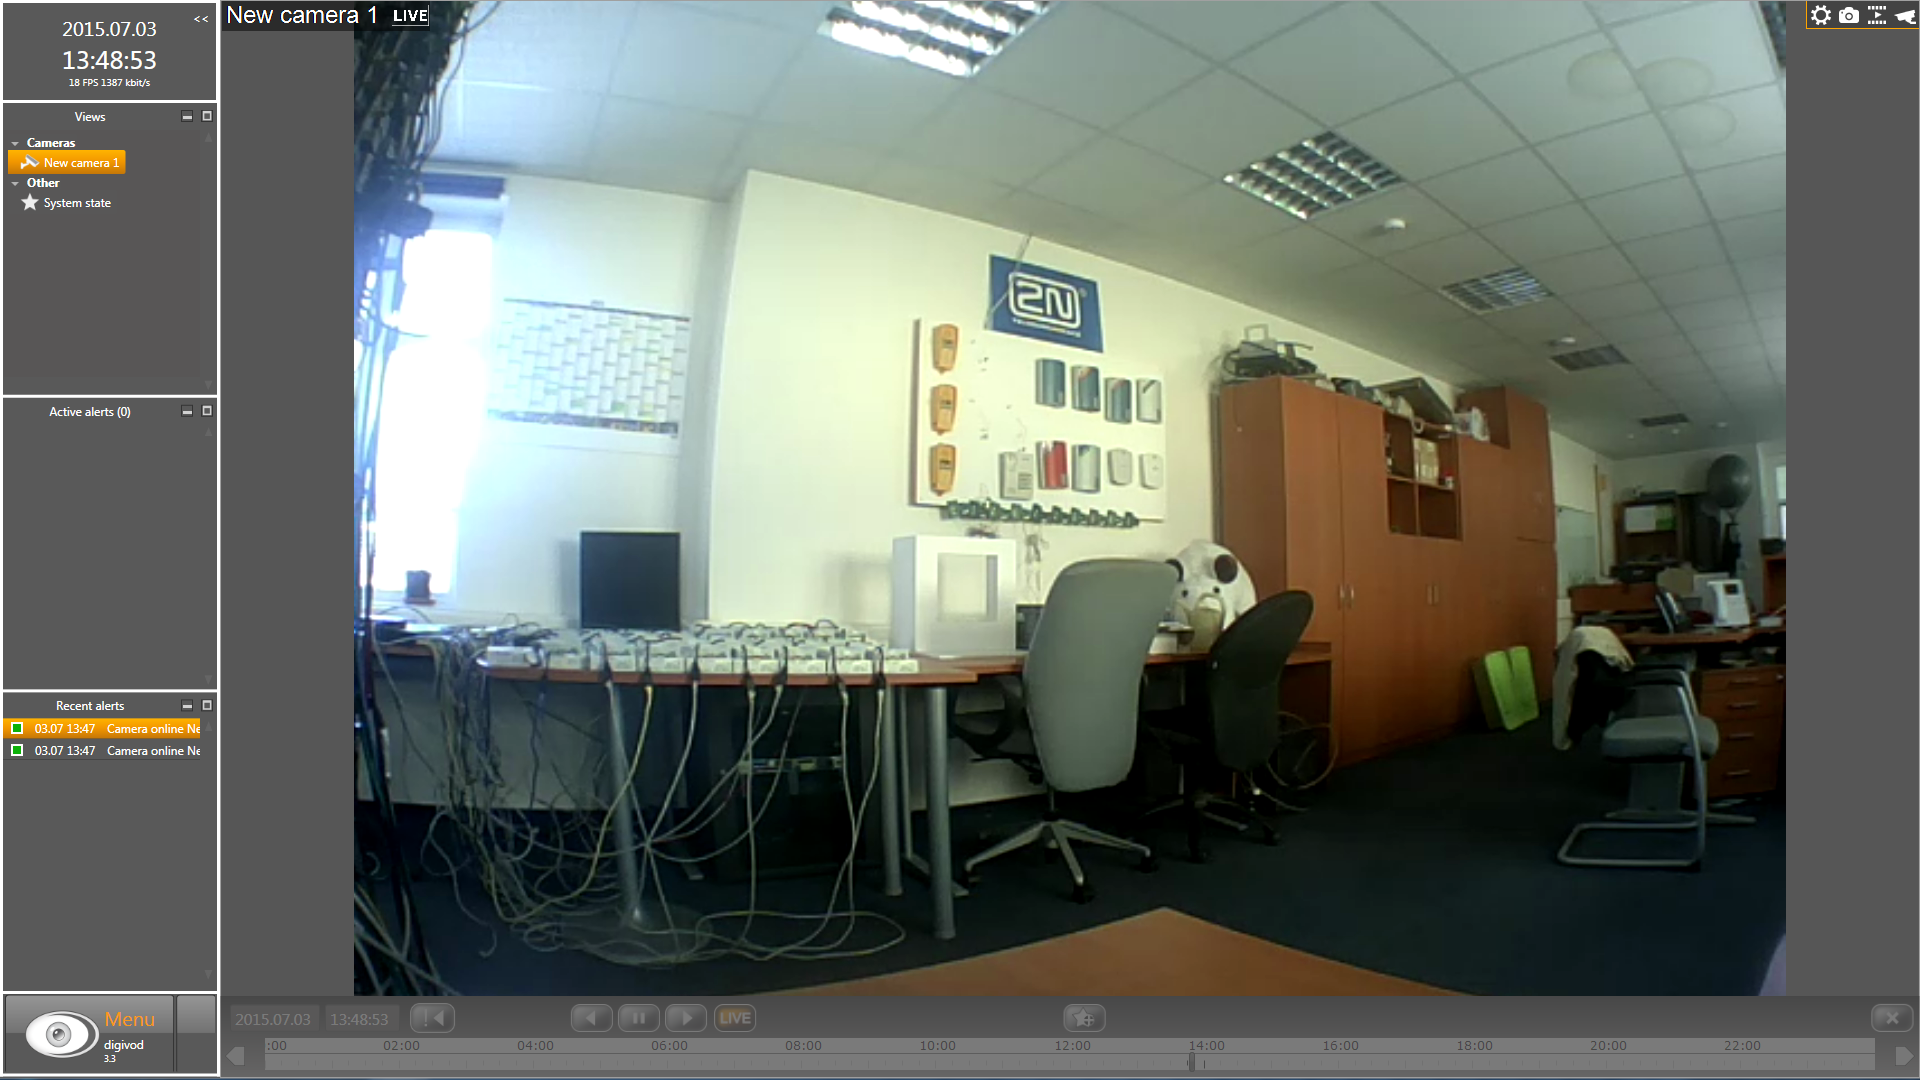
The digivod® observer is the digivod® control center. This program can be started either from the starting menu (start/all programs/digivod2/digivod Observer) or using the desktop icon ‘digivod Observer‘. Make sure that the digivod® dongle is plugged to a free USB port on the digivod® server. The program starts with the login screen. Enter ‘user name’ and ‘password’ and press the OK button. Open the administration menu by selecting the menu option in the digivod® main menu.
 |
 |
 |
 |
 |
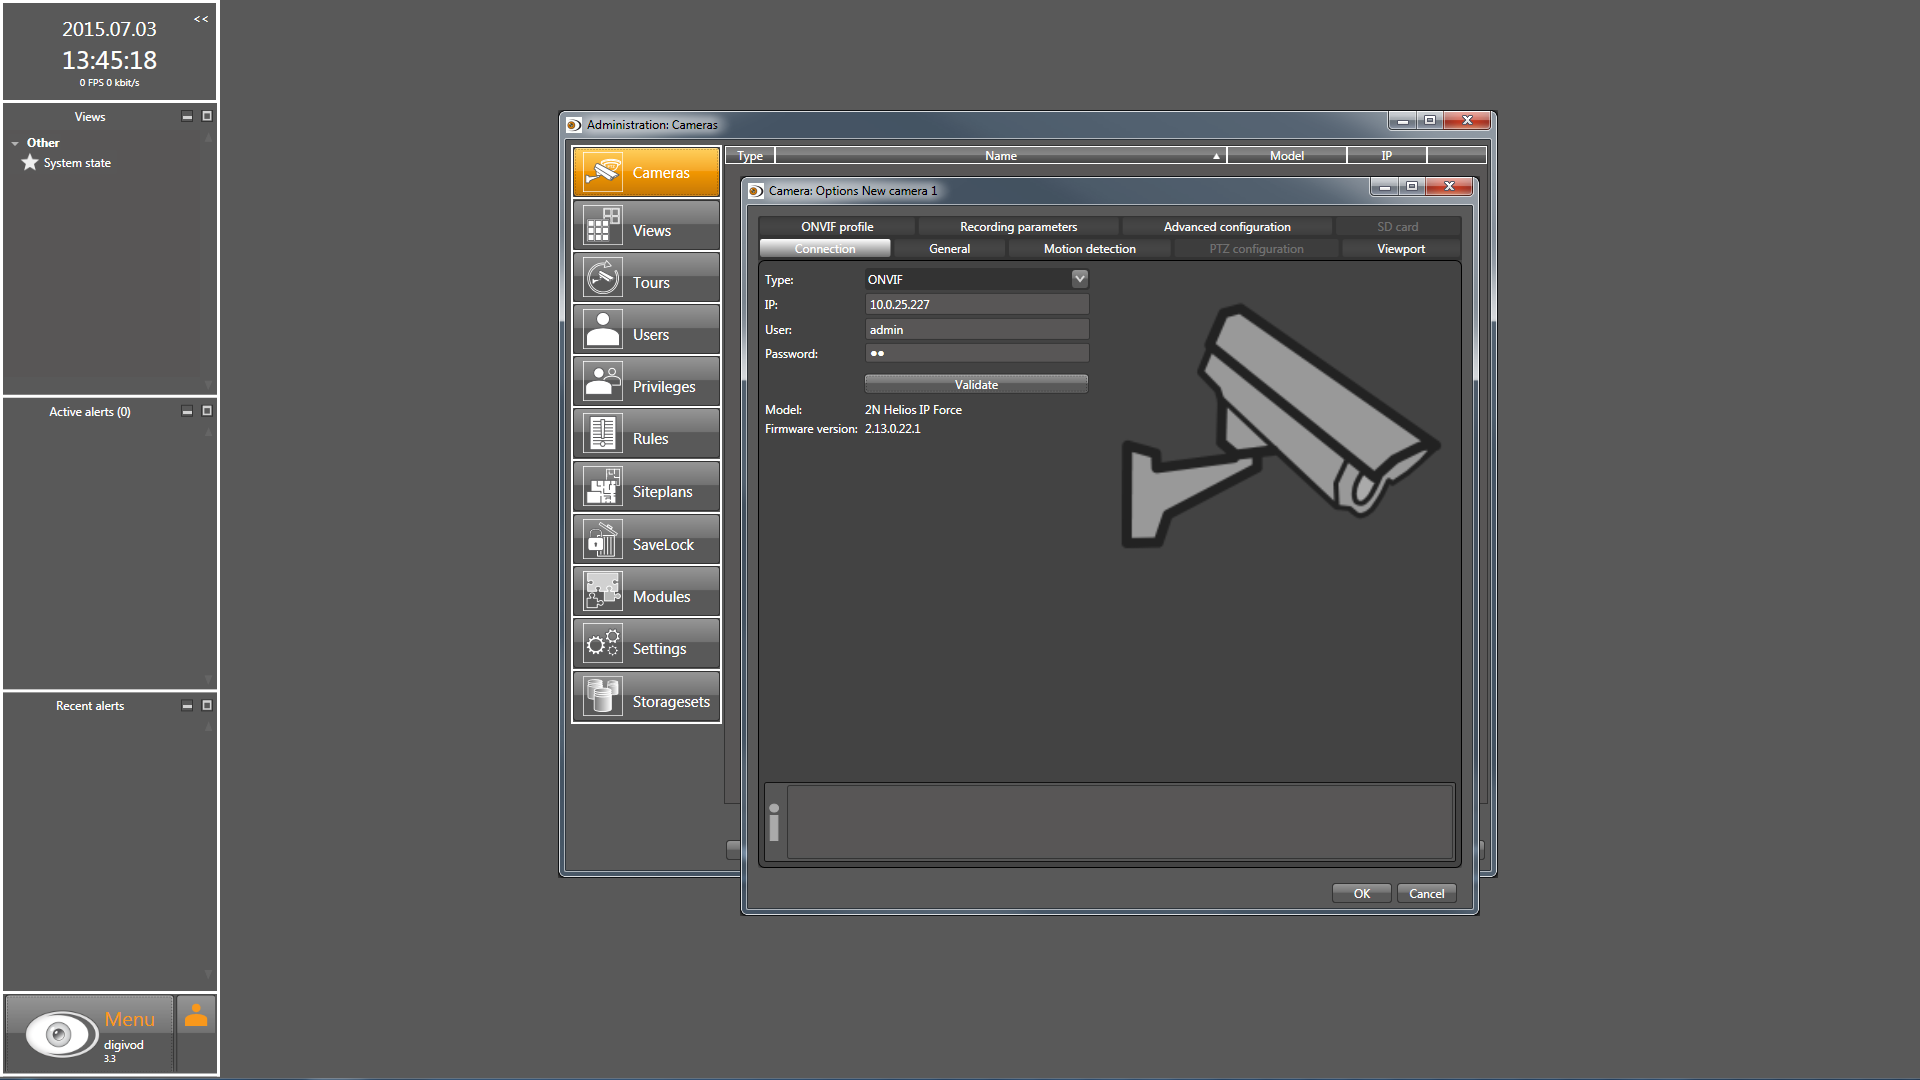
Now enter your camera manufacturer, IP connections and access data for administrator access to your camera. When selecting the button Validate, digivod® connects to the camera and, if successful, displays the current image of this camera as a still image(!).
 |
 |
 |
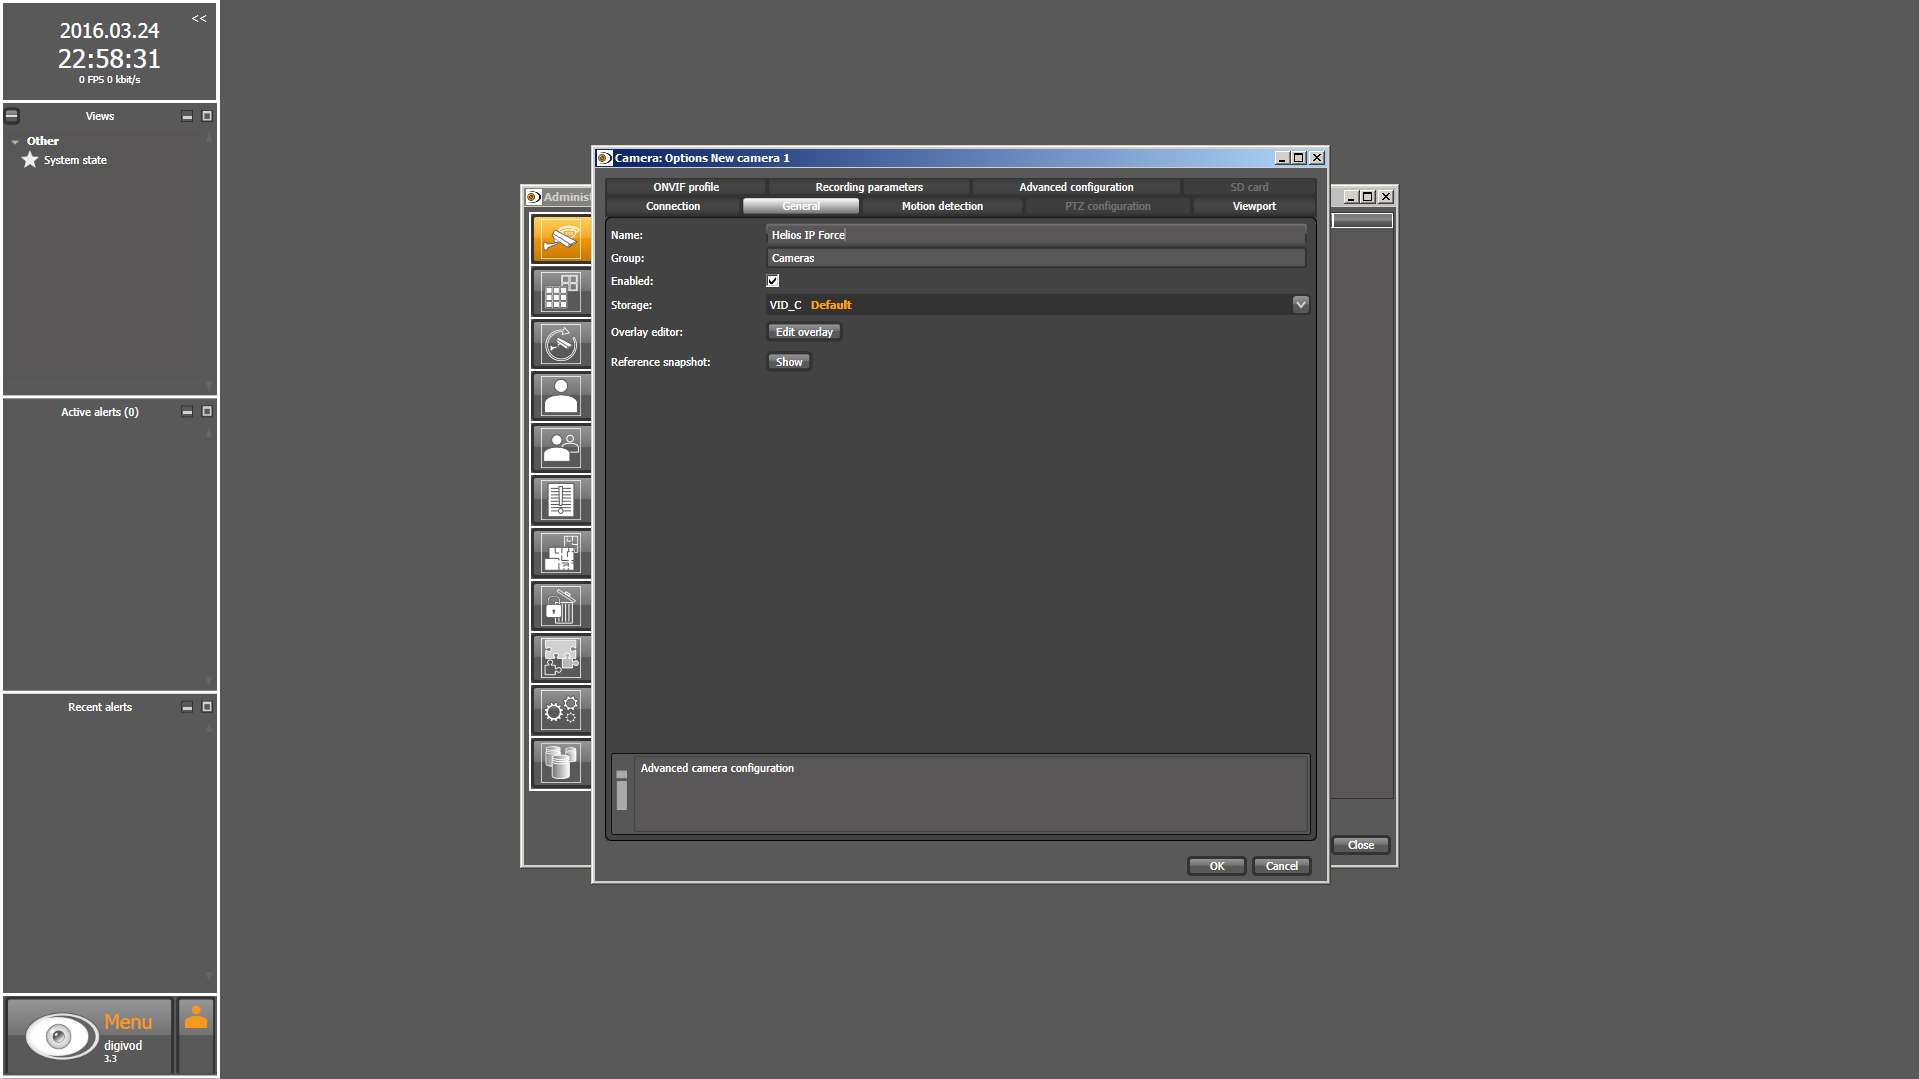
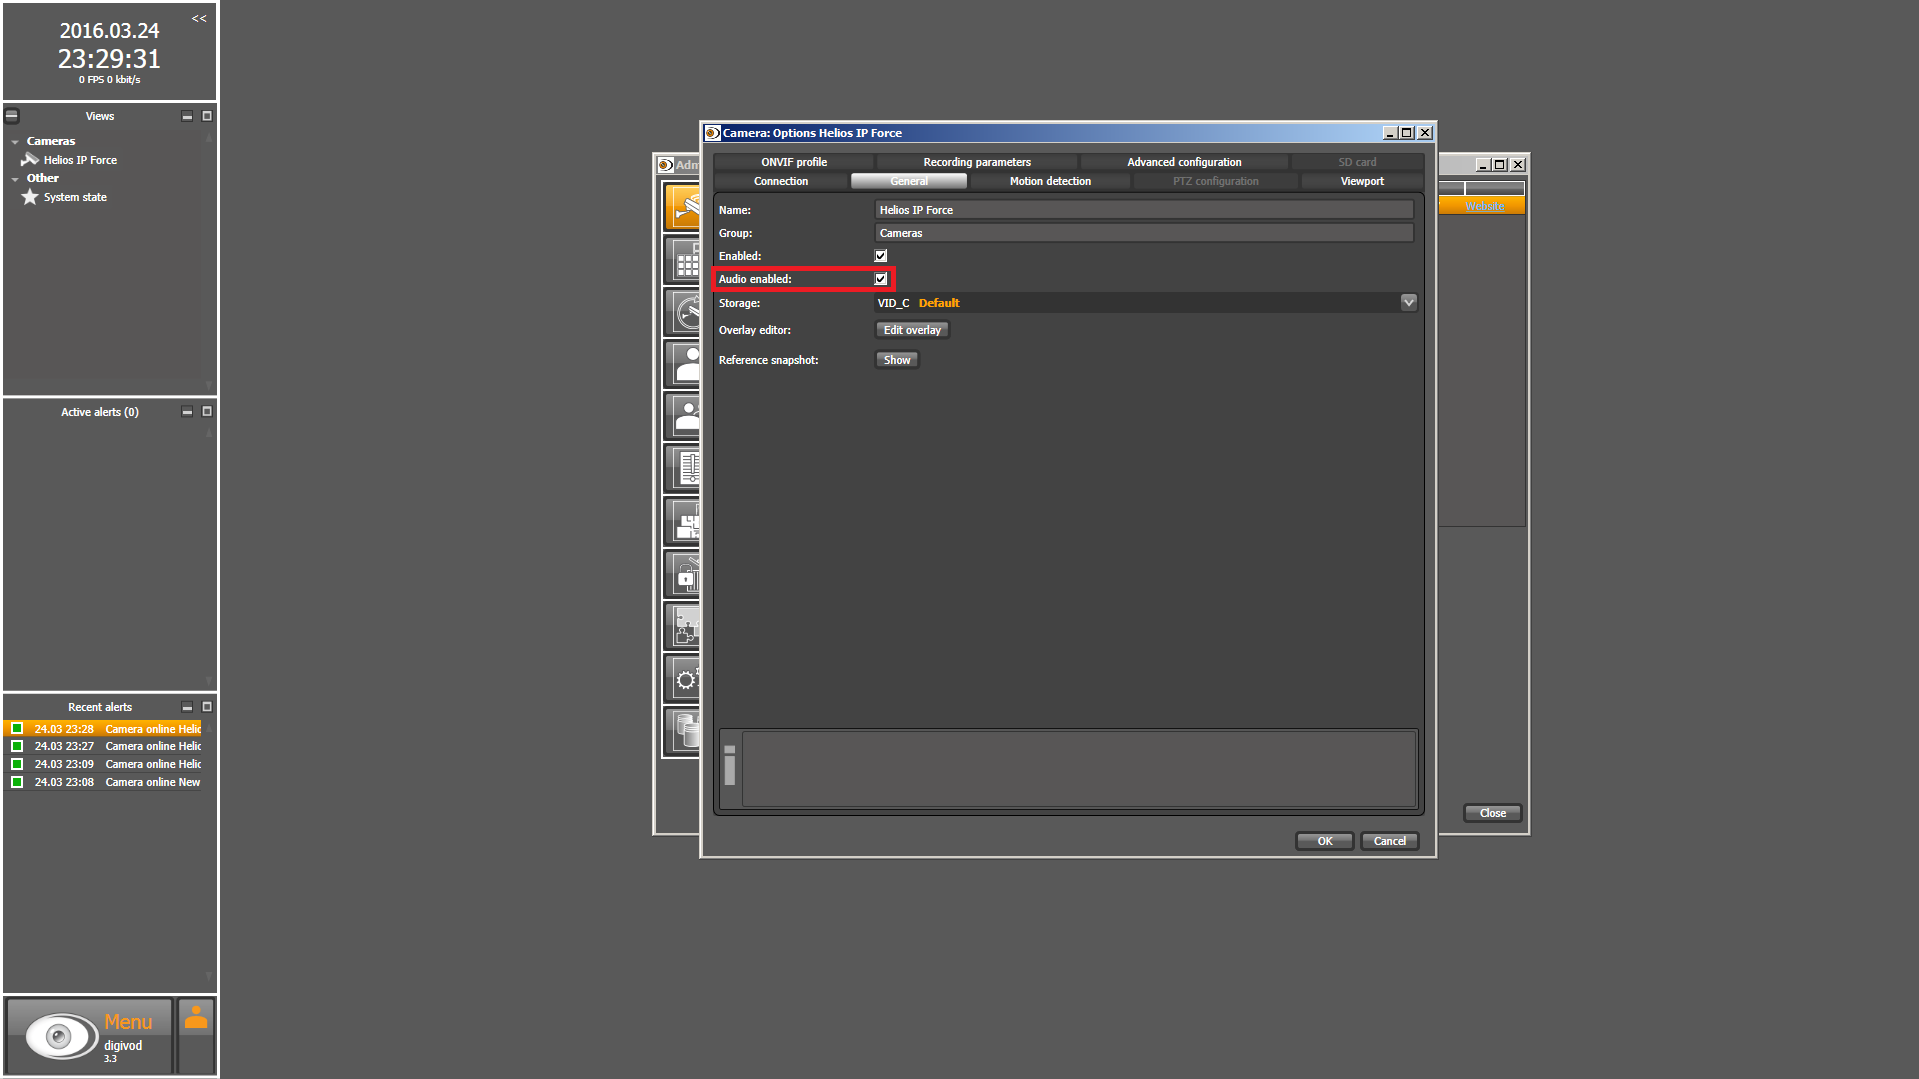
In the Administration / Cameras / Camera: Option / General Camera configuration / Video the check box ‘Audio enabled’ allows audi stream. Press the OK button and Close the administration menu.
 |
 |
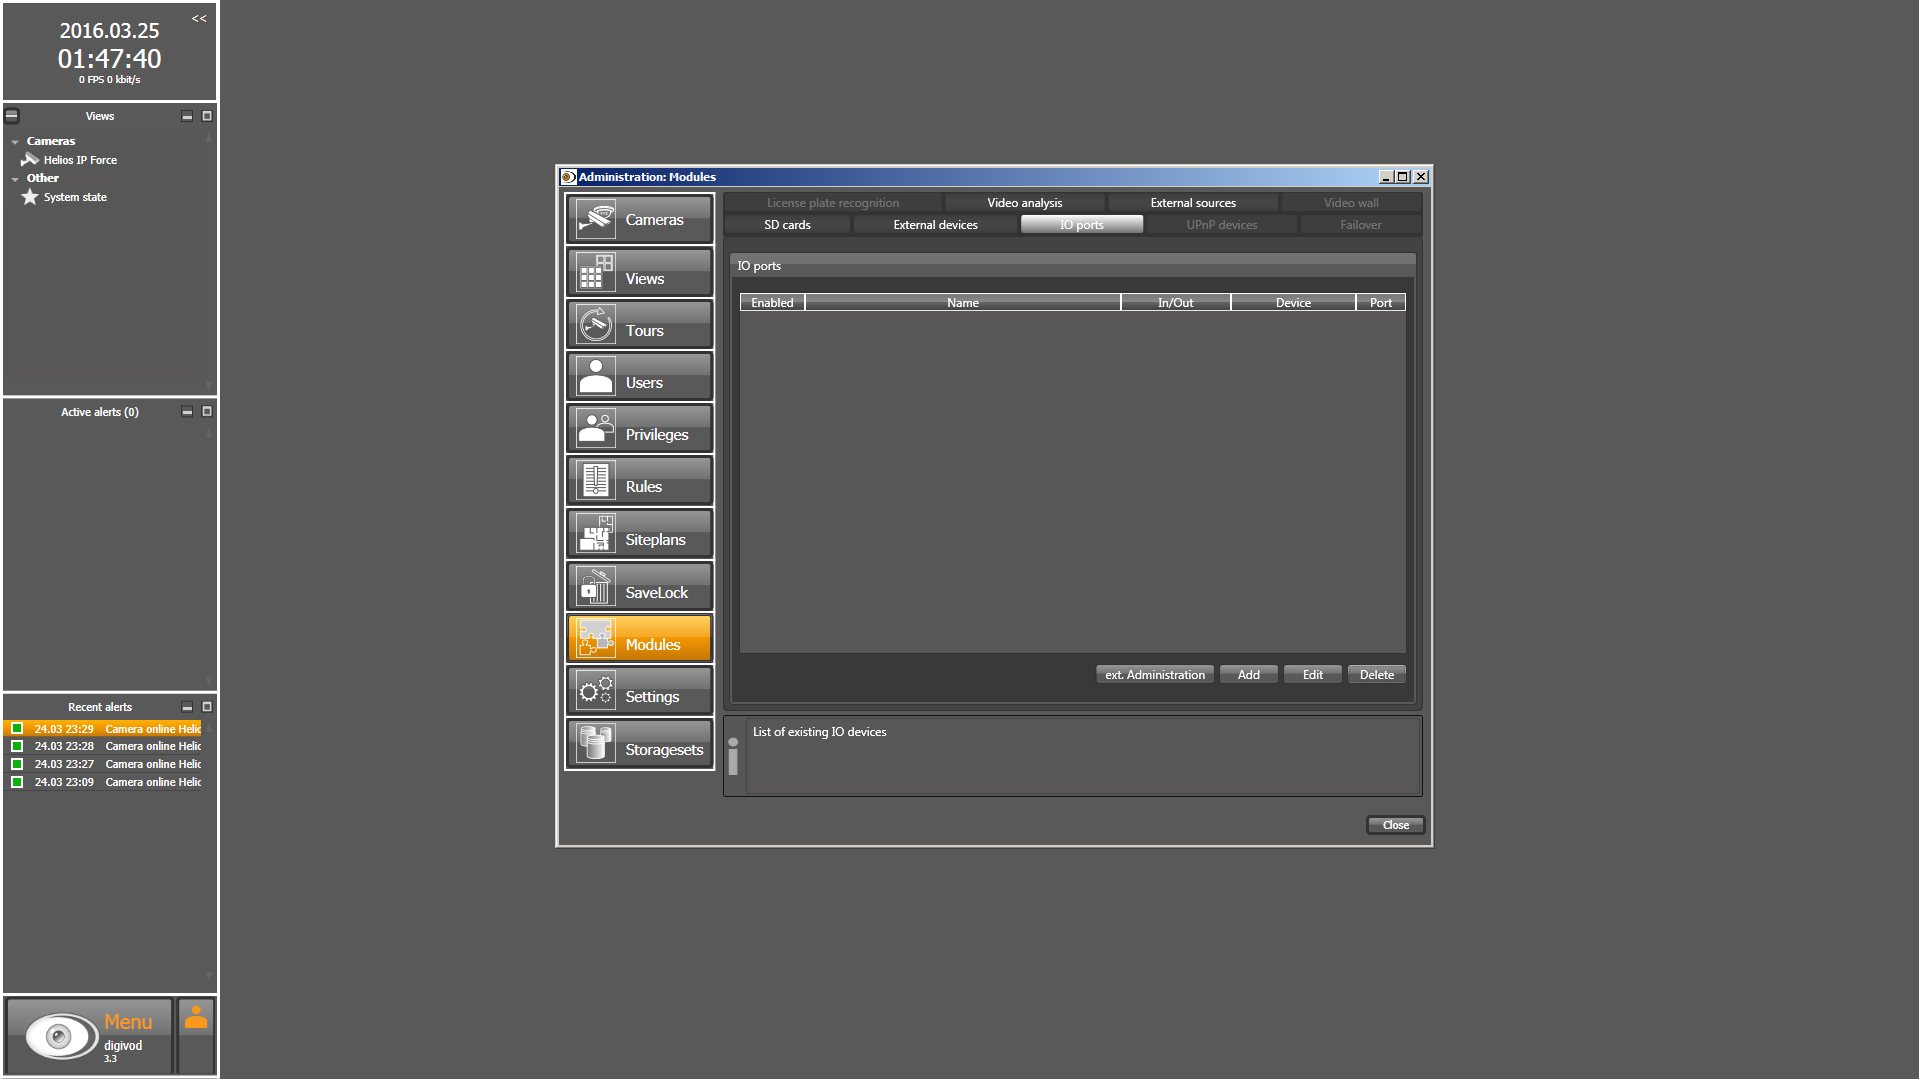
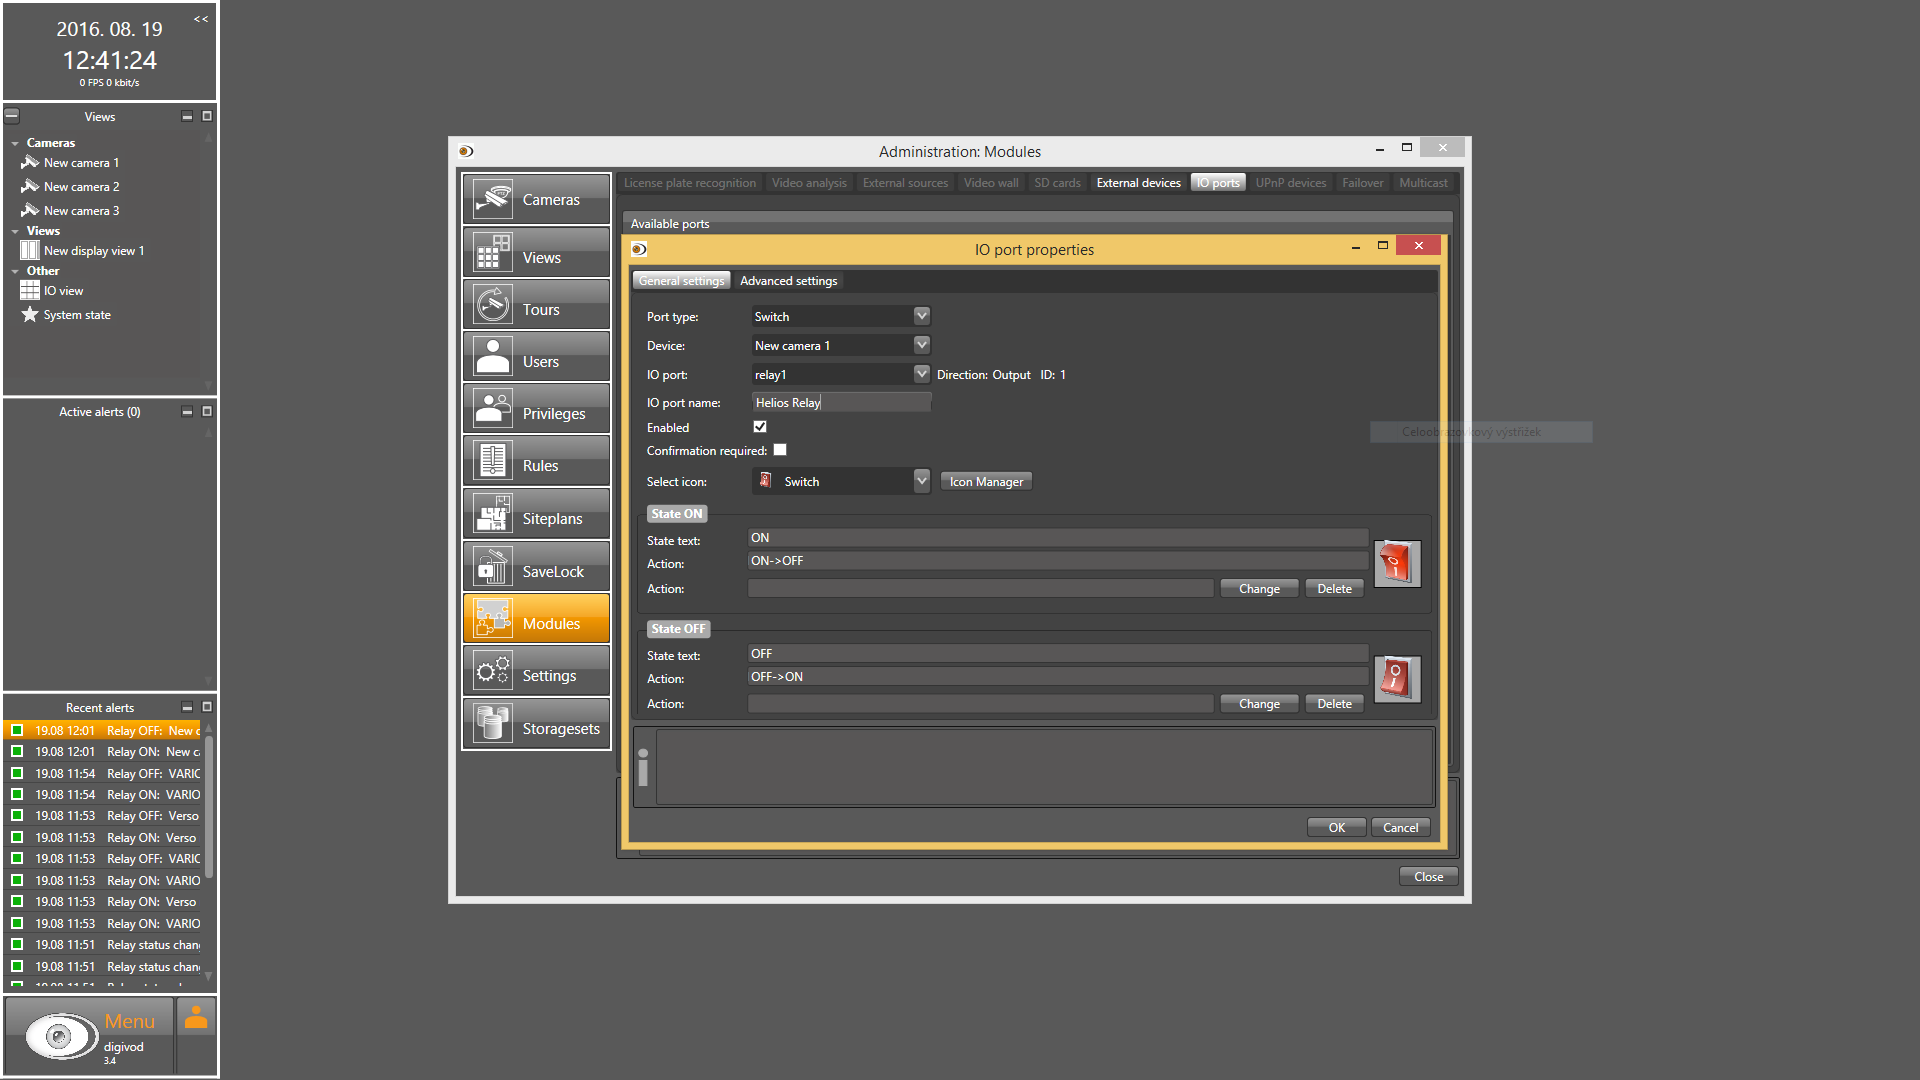
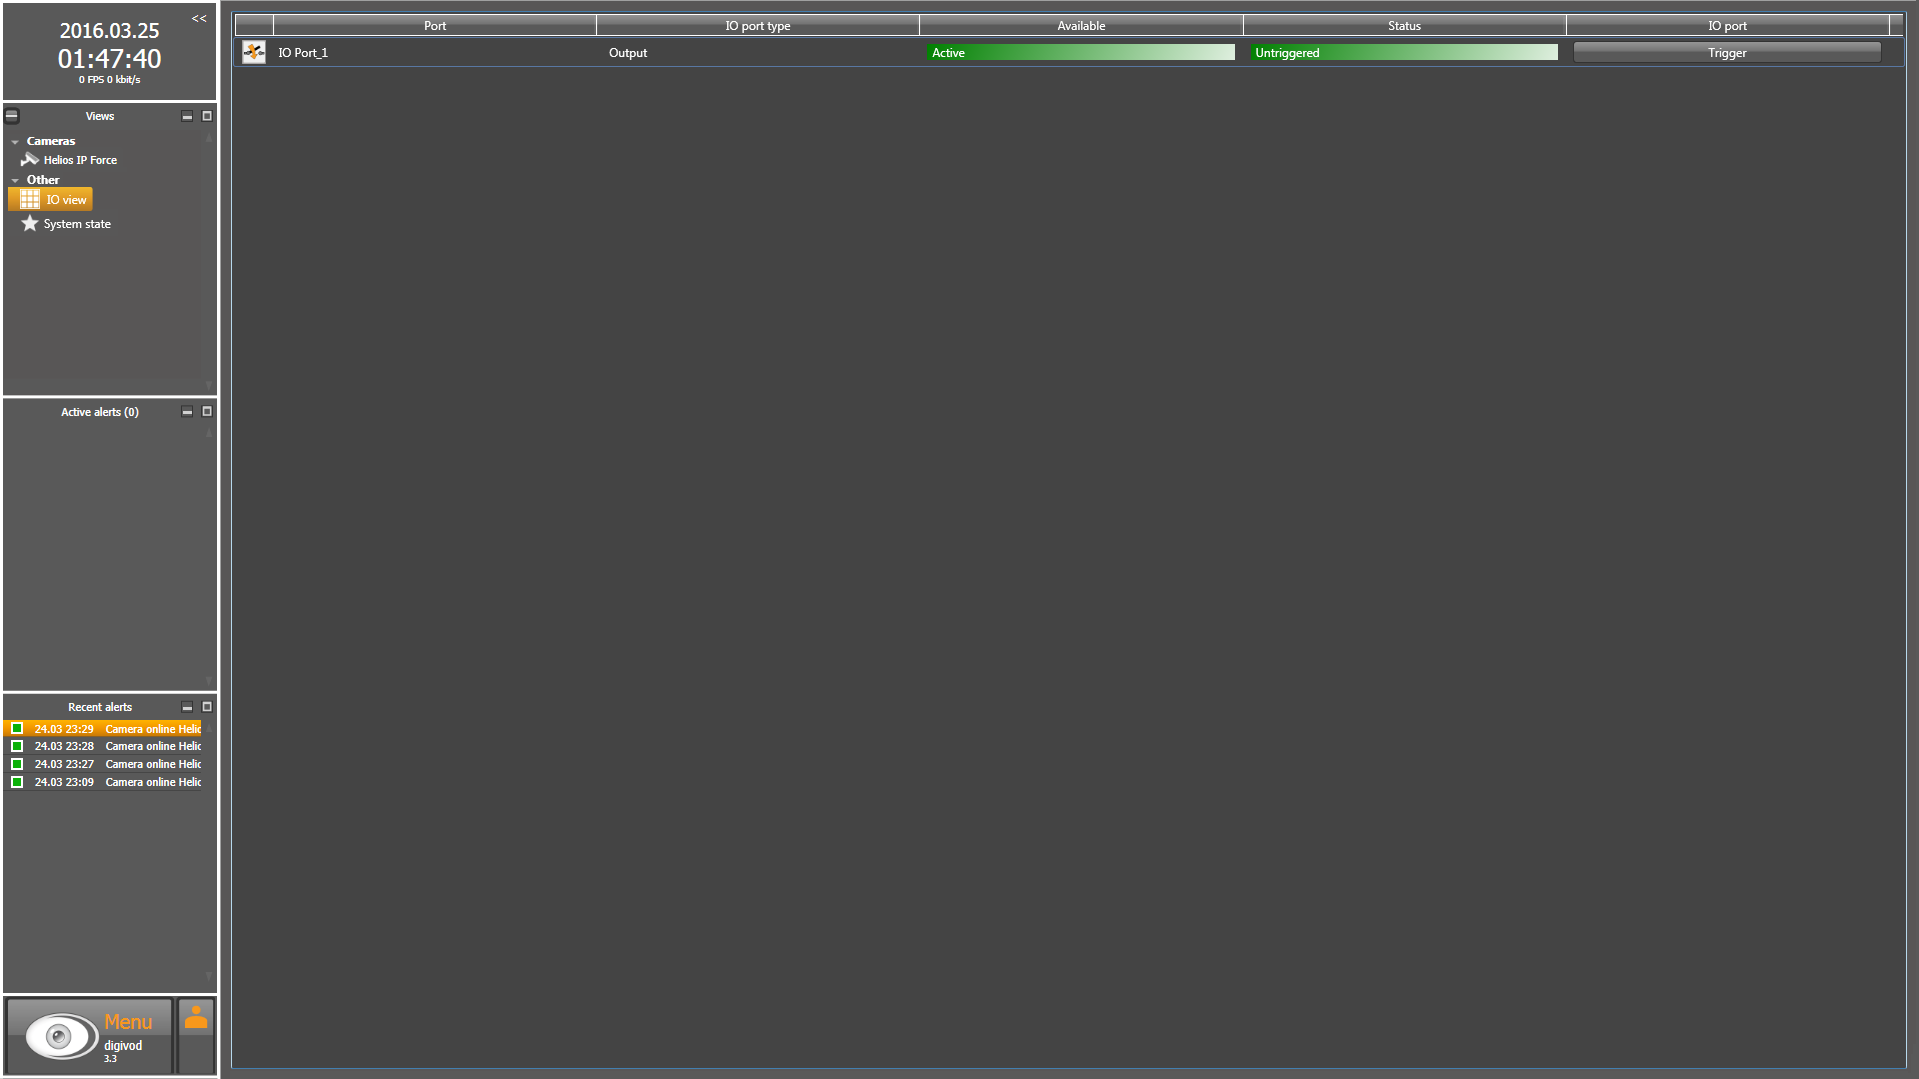
Open the administration menu by selecting the menu option in the digivod® main menu. In this tab you may create and maintain IO ports. The list shows the IO ports that already exist. Before an IO port of an IP-based external device can be used, the device must be created first. Click Add to create a new IO port.
 |
 |
 |
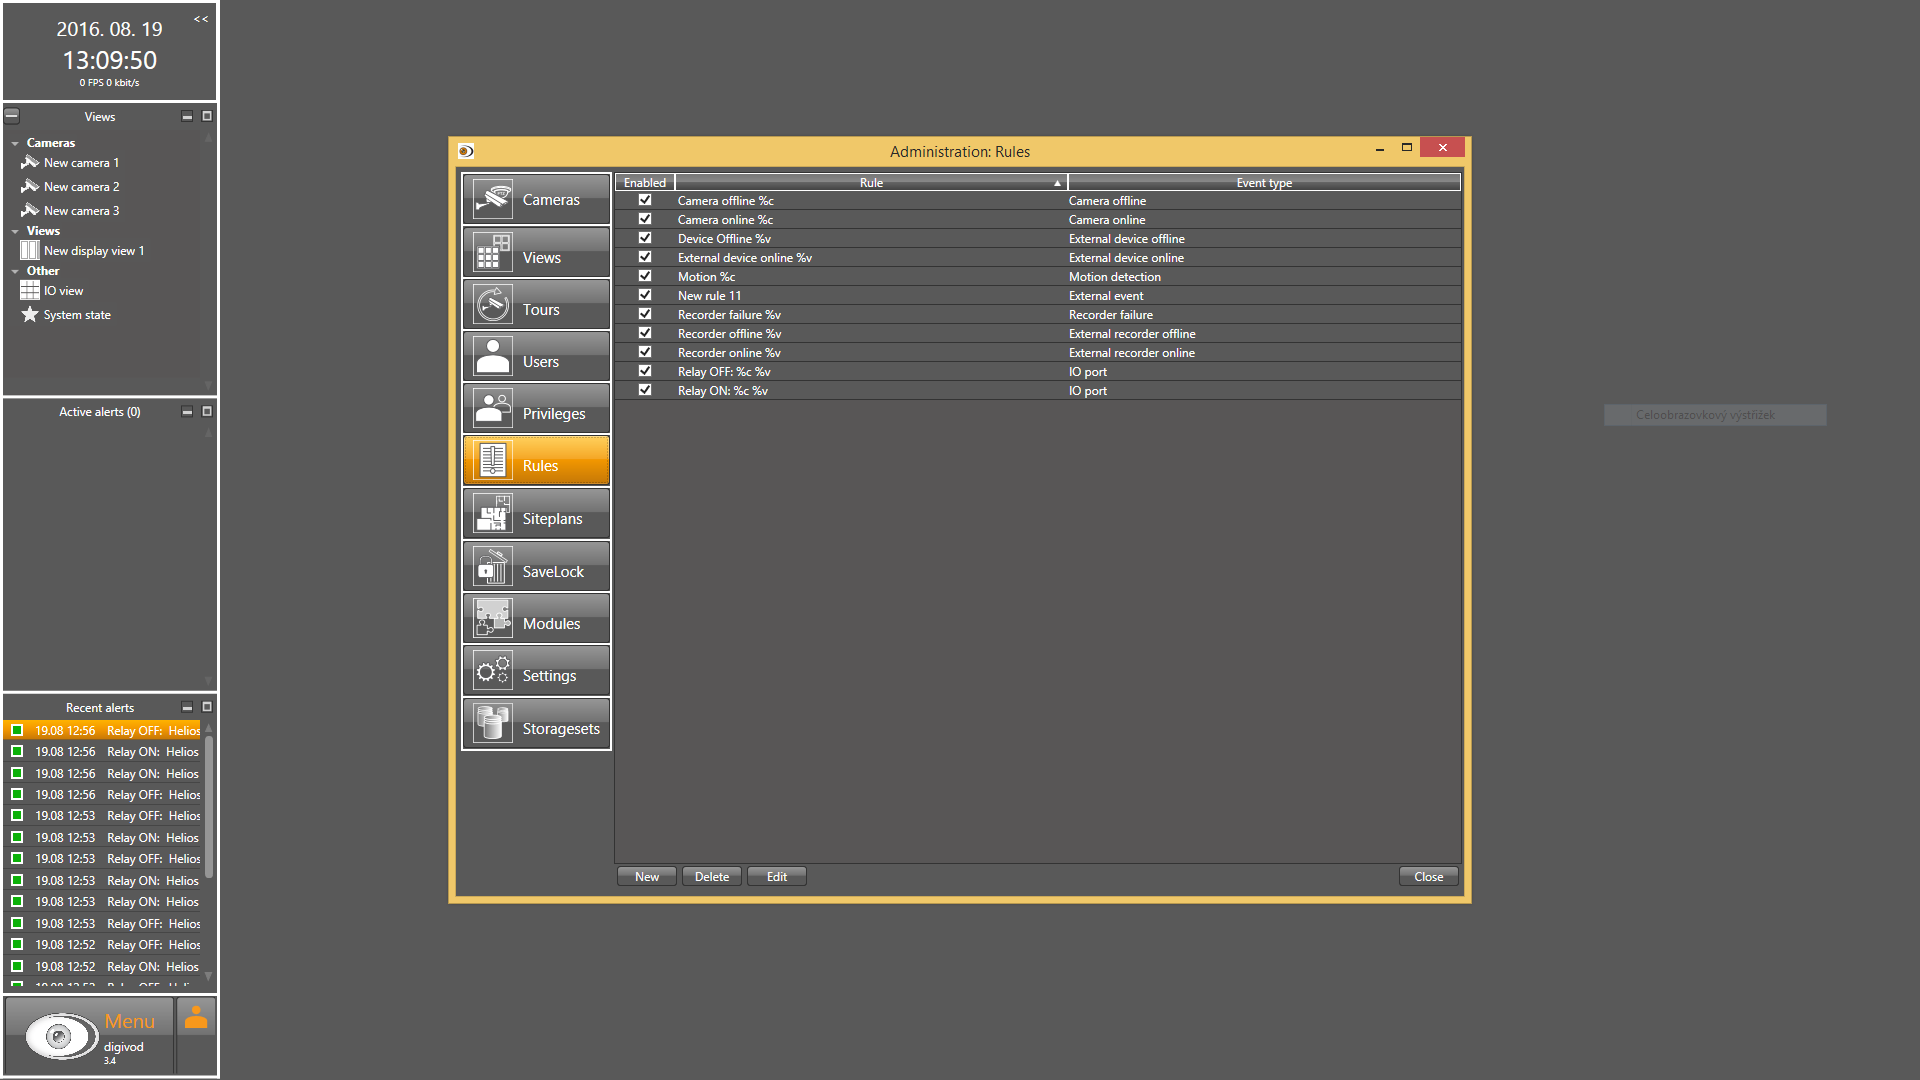
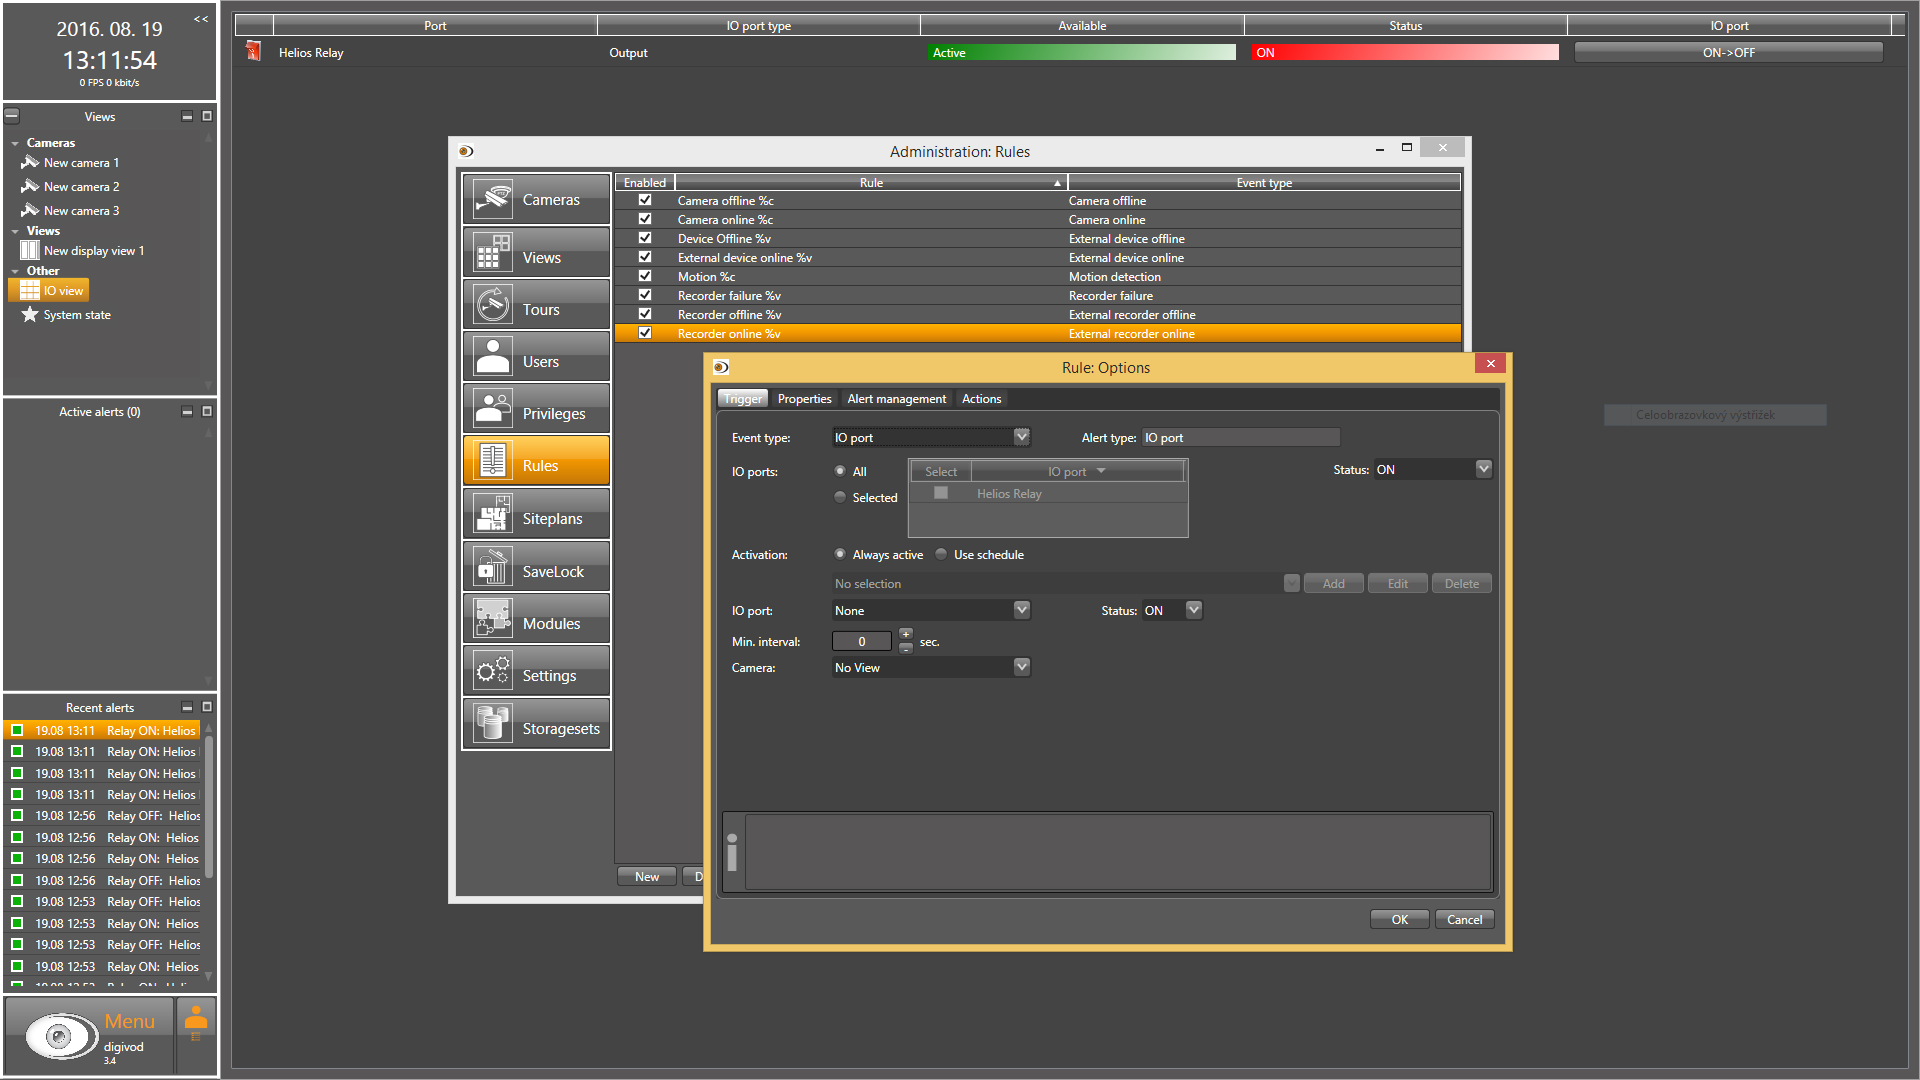
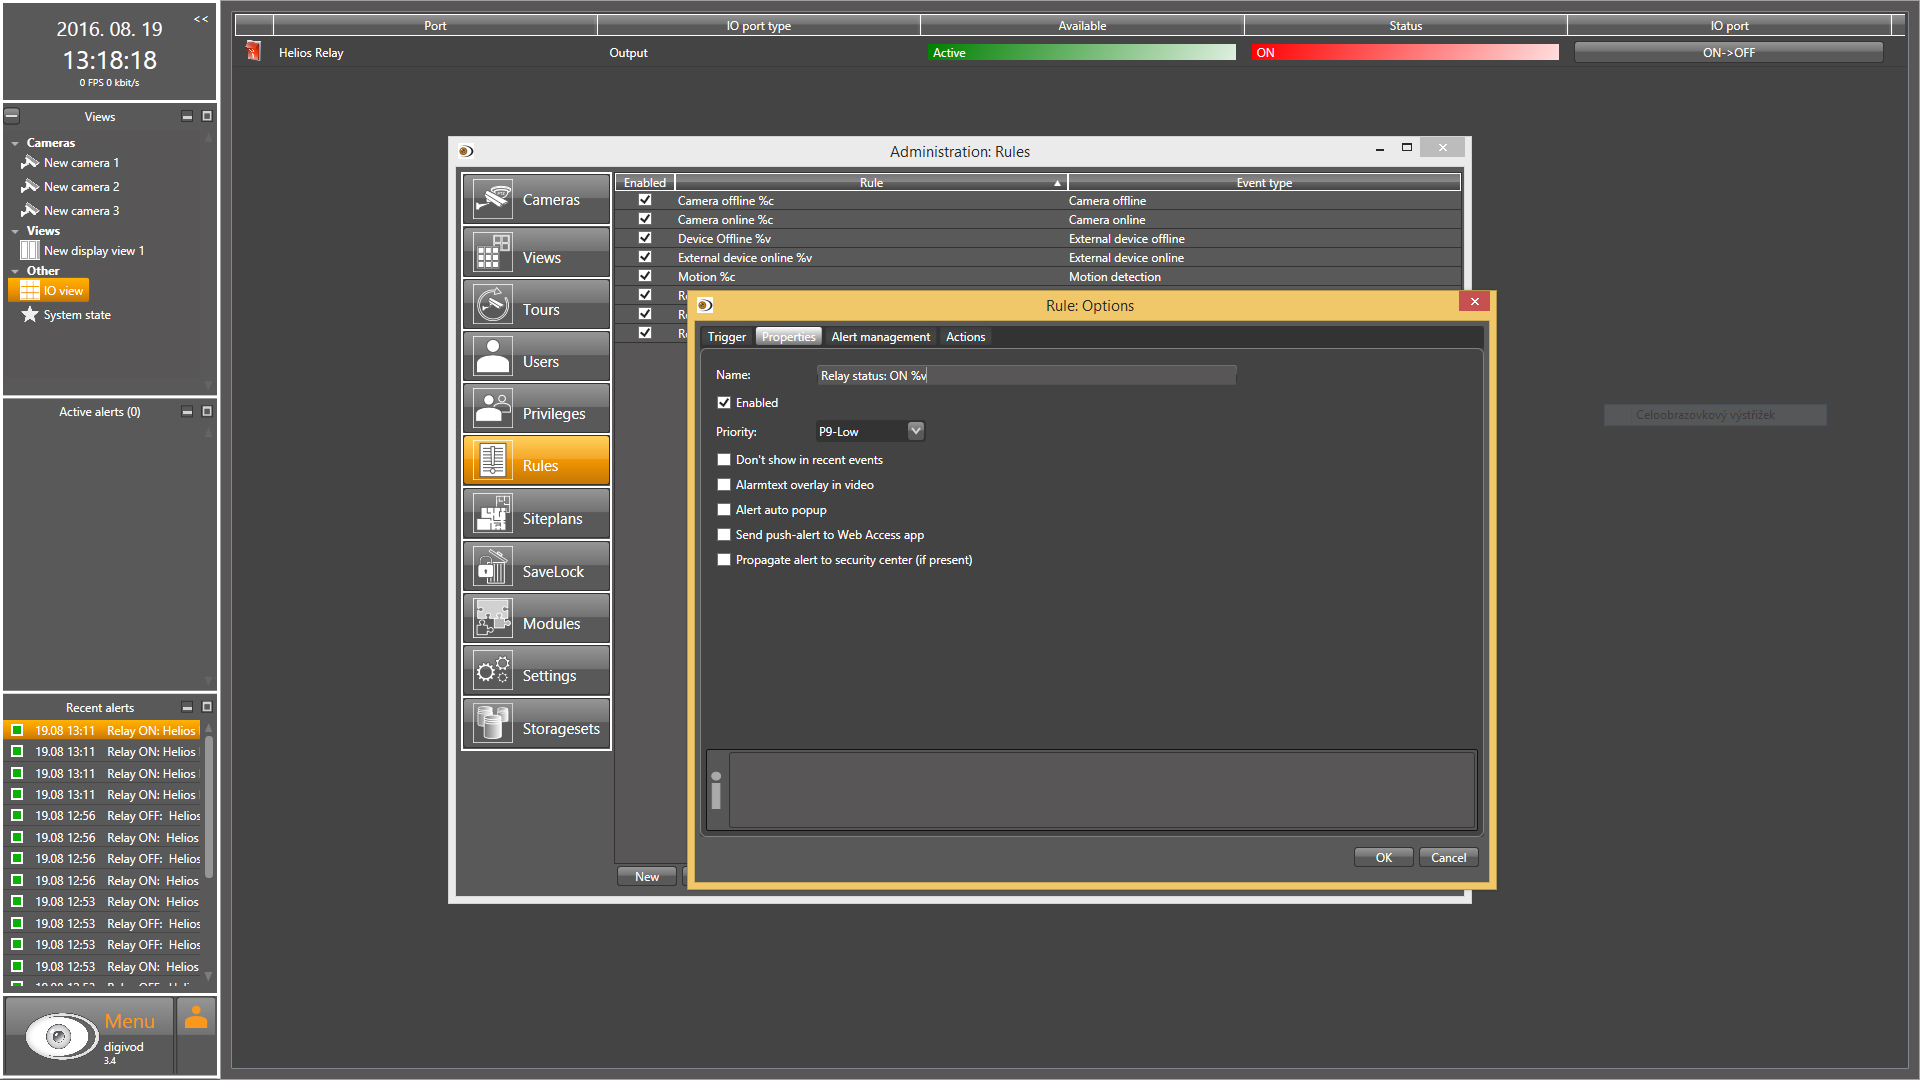
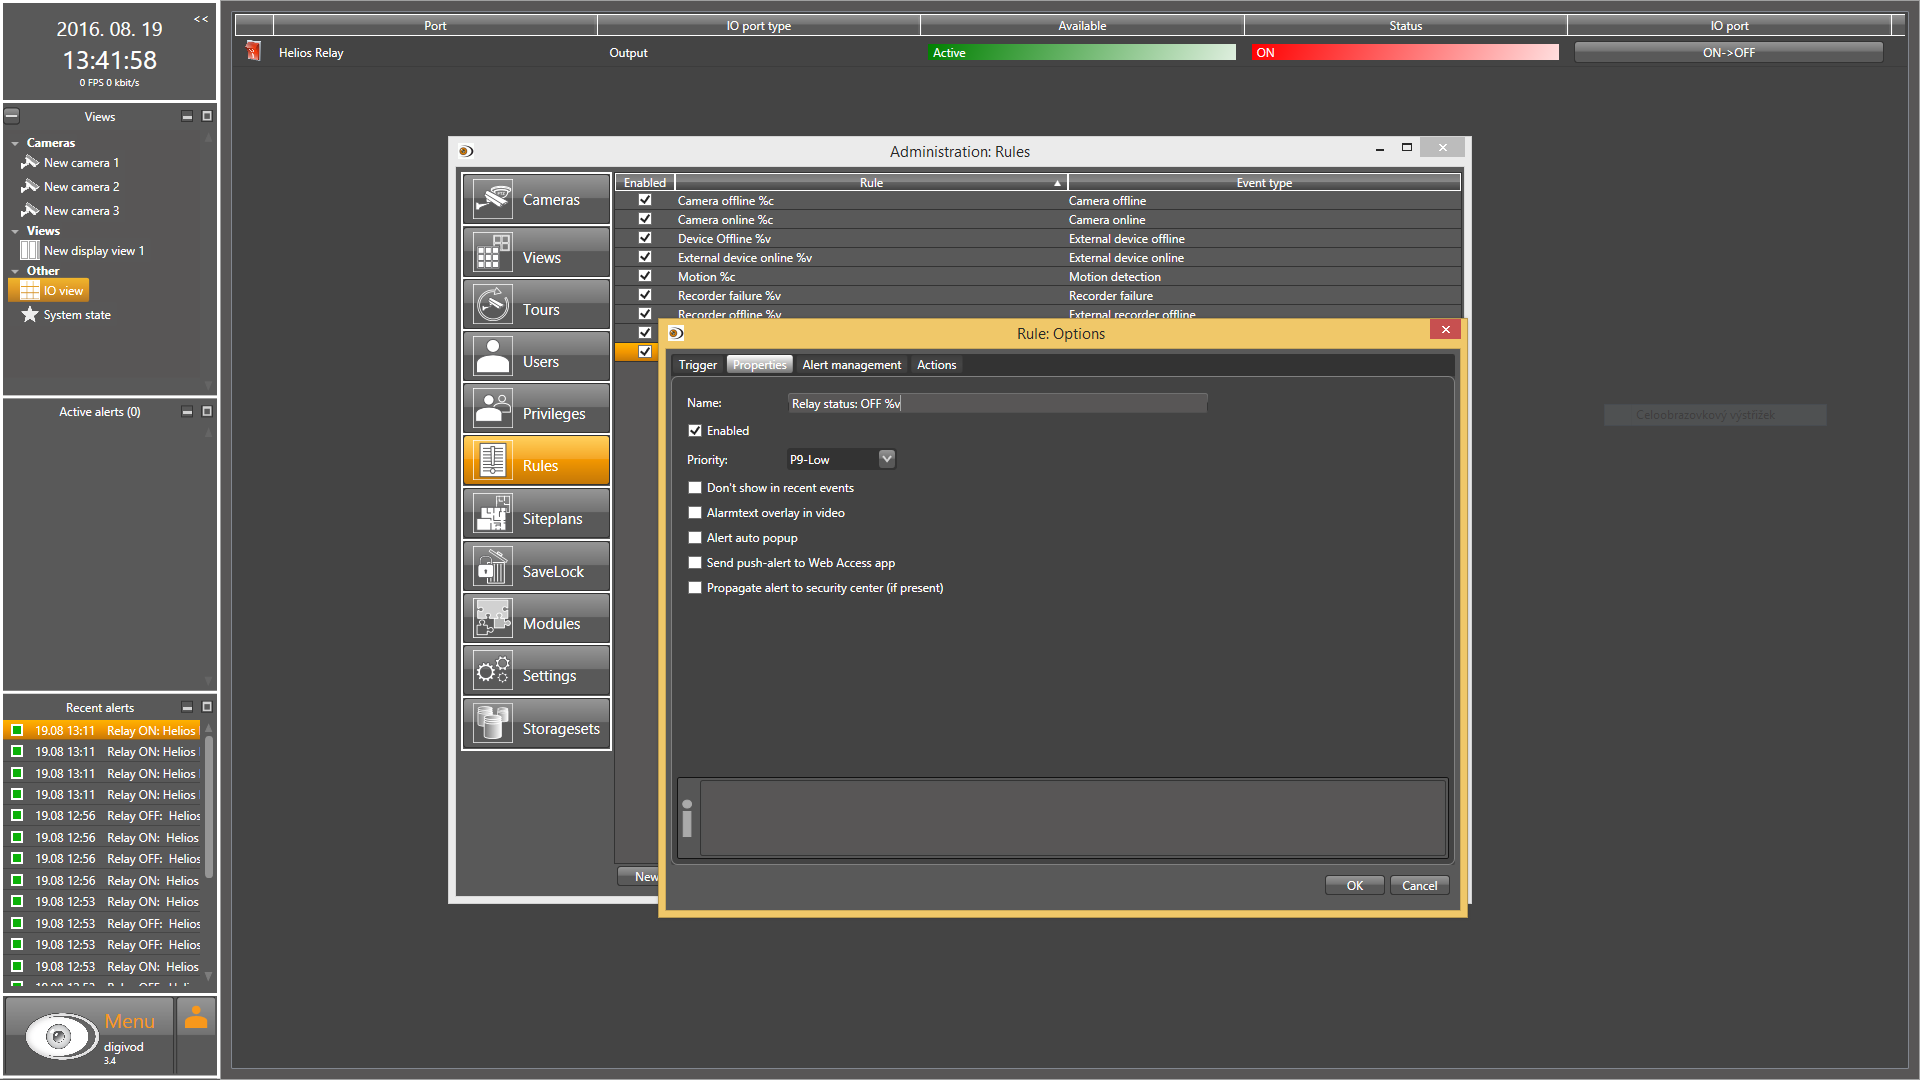
In current state only events digivod is able to log are those set in digivod, for example relay status set from digivod, camera status etc. Rules for alarms can be set add Administration/ Rules section.
 |
 |
 |
 |
 |
Used Symbols
![]() - Compatible
- Compatible
![]() - Work with limitation
- Work with limitation
![]() - Incompatible
- Incompatible