5.3.1 Network
The Network section describes how to configure the Ethernet adapter in 2N® IndoorTouch 2.0:
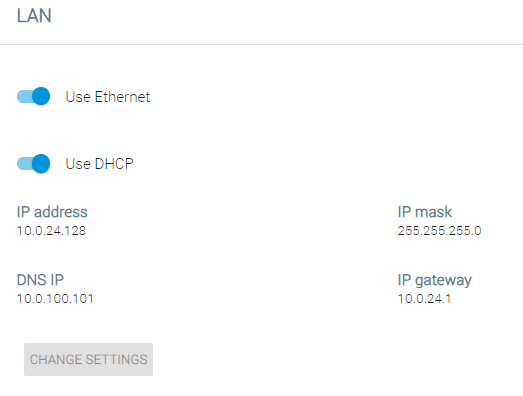 |
- Use Ethernet – enable the Ethernet connection
- Use DHCP – Yes/No – enable/disable obtaining settings from DHCP
- IP address – current IP address
- IP mask – IP mask address
- DNS IP – DNS IP address
- IP gateway – IP gateway IP address
- Change settings – display the setting editing window
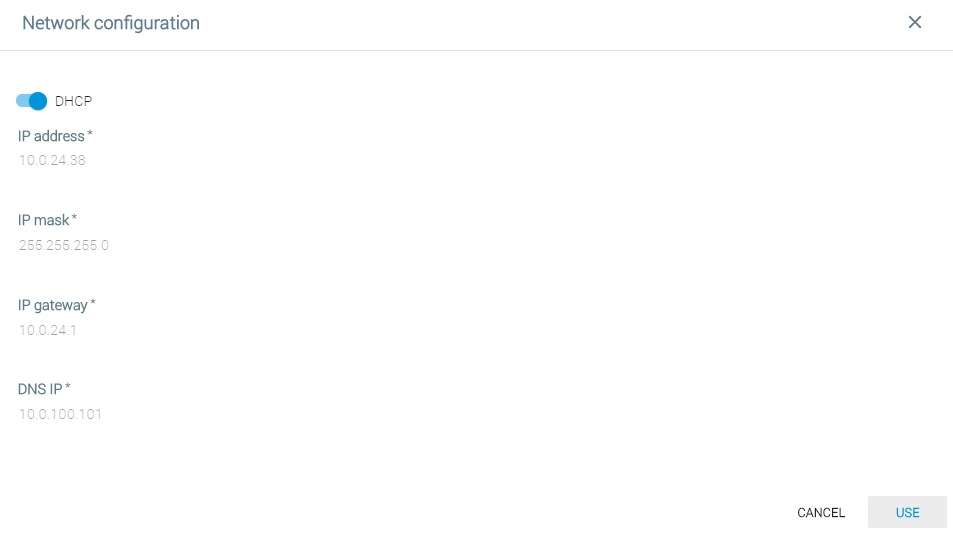 |
- DHCP – enable/disable obtaining of settings from DHCP. If disabled, the remaining IP address settings become available.
- IP address – device IP address
- IP mask – IP mask address
- IP gateway – IP gateway IP address
- DNS IP – DNS IP address
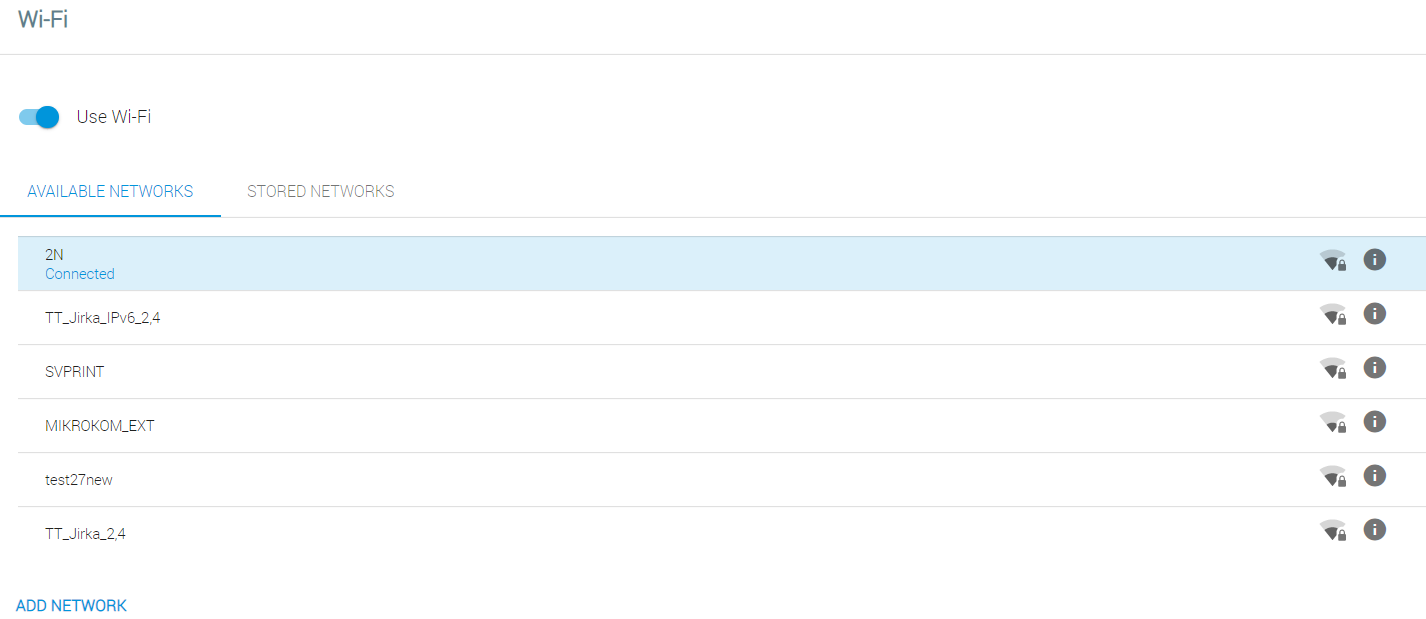 |
- Use Wi-Fi – enable/disable the Wi-Fi connection. Ethernet and Wi-Fi can be used at the same time. If these two networks are used, select the network for the Internet connection. By turning off Wi-Fi you may execute a system logout. The device may no longer be available at the current address
- Available networks – display the list of available Wi-Fi networks.
- Stored networks – display the list of stored networks.
 |
- Connection to two networks simultaneously – display the Ethernet + Wi-Fi connection state.
- Connection type – display and edit the Internet connecting network.
Caution
- Where two networks are used simultaneously (Ethernet + Wi-Fi), packets are not routed from one network to another. It is because 2N® Indoor Touch 2.0 is just a client and not a network element in either network.