2.11.2 Fireman
Description: 1-Button Version
The Fireman audio unit improves the fire fighting operations by setting up top priority calls to the cabin audio unit in one and the same lift shaft.
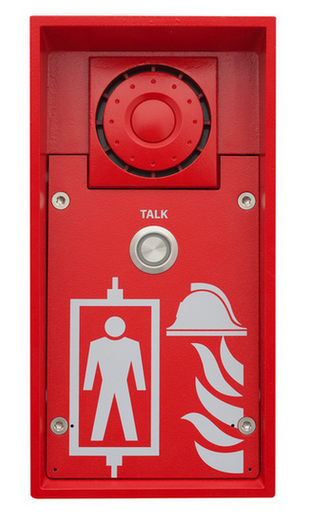 |
Install the Fireman audio unit in a dedicated space that can be easily accessed by firemen.
The Fireman call has the highest priority, suspending all the other calls (refer to Function Description ).
Press the button to set up the call. The maximum possible call duration is unlimited. Repress the button to stop the call.
The Fireman call setup is signalled by the Fireman audio unit LED (blue LED shining around the button).
The Fireman call is indicated by a flashing green LED on the machine room audio unit. The audio unit microphone is off by default. Press and hold the TRIPHONY button for 3 seconds to activate the microphone and enable communication within a fire call. Once the microphone is activated, the TRIPHONY button starts flashing.
Caution
- The Fireman calls has the highest priority and suspends all the other calls except for the Fireman call set up in another shaft.
- You can join in the Fireman call from a machine room audio unit configured as the intercom.
The audio unit is fed from the CU or splitter via a two-wire bus. By disconnecting the audio unit from the bus you turn the audio unit off.
Description: Knob+Button (Push-To-Talk)
The Fireman audio unit improves the fire fighting operations by setting up top priority calls between the Fireman audio unit and the cabin and machine room audio units in one and the same lift shaft.
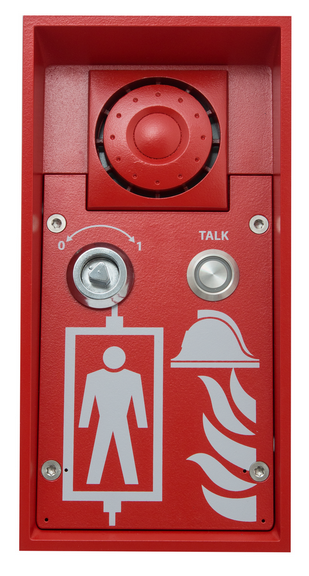 |
Install the Fireman audio unit in a dedicated space that can be easily accessed by firemen.
The Fireman call has the highest priority, suspending all the other calls (refer to Function Description ).
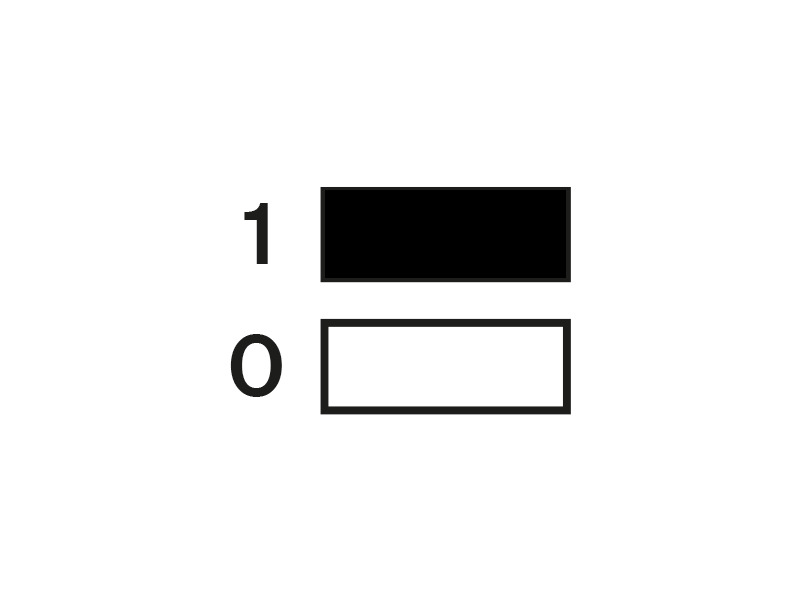
Turn the knob (0 > 1) to activate the Fireman call. The maximum possible call duration is unlimited. The call is hands-free and terminated by turning the handle back to position 0.
The Fireman call setup is signalled by the Fireman audio unit LED (blue LED shining around the button).
Pressing the Push-to-Talk button silences all the other audio units connected to the fire call and the sound is only transmitted from the Fireman audio unit. When you release the Push-to-Talk button, audio transmission is re-enabled from the other audio units.
The Fireman call is indicated by a flashing green LED on the machine room audio unit. The audio unit microphone is off by default. Press and hold the TRIPHONY button for 3 seconds to activate the microphone and enable communication within a fire call. Once the microphone is activated, the TRIPHONY button starts flashing.
Caution
- The Fireman calls has the highest priority and suspends all the other calls except for the Fireman call set up in another shaft.
- The Fireman call is set up to the cabin and machine audio units in one and the same shaft.
- The audio unit is fed from the CJ or splitter via a two-wire bus. By disconnecting the audio unit from the bus you turn the audio unit off.
Before You Start
Product Completeness Check
Please check the 2N Lift8 Fireman package for completeness before starting installation:
- 1 2N Lift8 Fireman
- 1 double Torx 10 / Torx 20
- Bushings (in package insert): 1x 2N Lift8 Fireman short manual1 mounting template
- 1 big two-hole sealed bushing with nut
- 1 replaceable one-hole sealing for big bushing for thick cables
- 1 big blind with nut
- 1 small bushing with nut
- 1 big bushing packing
- 2 small bushing packings
- 4 (5 x 90) mm screws
- 4 "intelligent" (8 x 50) mm wall plugs
Electrical Installation
Use the Torx 20 spanner included in the delivery to loosen the 4 screws and remove the audio unit front cover. Find the board with electronics under the cover.
Description of Terminals, Connectors and Jumpers
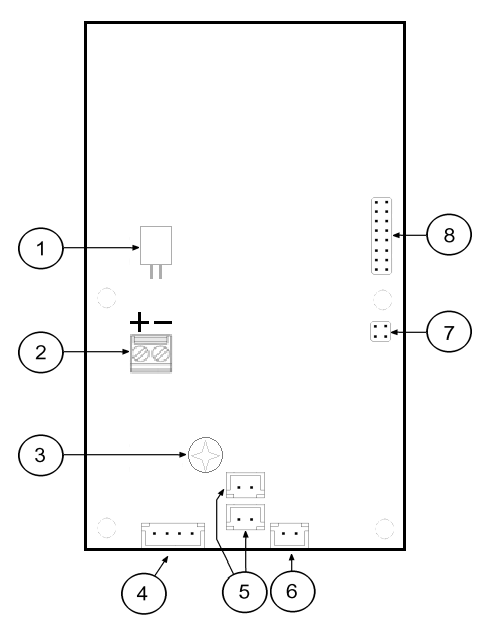 |
Terminals, Connectors and Jumpers on Fireman Audio Unit Board
Terminals and Connectors | |||||||||
|---|---|---|---|---|---|---|---|---|---|
1 | Speaker connector | 5 | 2 microphone connectors | ||||||
2 | Audio unit bus | 6 | Detent button (knob) connector | ||||||
3 | Volume setting (trimmer) | 7 | Configuration jumper | ||||||
4 | Button connector (Push to talk) | 8 | Servicing connector | ||||||
Bus Connection
Remove the audio unit cover and unplug terminal 2 (audio unit bus). Connect the bus and replace the terminal keeping polarity.
Warning
- The audio unit is intended for 2N Lift8 audio unit bus connection exclusively. Do not connect it to other wires to avoid its damage or destruction.
- Keep polarity while connecting the audio unit to make the audio unit work properly.
Caution
- The audio unit is fed via a two-wire bus. By disconnecting the audio unit from the bus you turn the audio unit off.
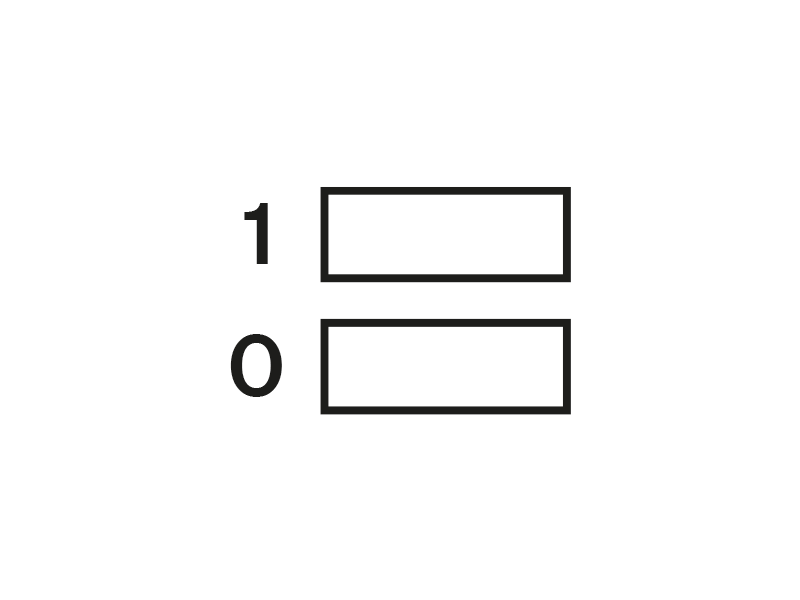
Wiring 2 Fireman Audio Units
Since firmware version L8 2.9.0., it is possible to connect up to 2 Fireman audio units to one splitter. Different addressing has to be set for each of the 2 Fireman audio units connected. Fireman is addressed by mounting a jumper on the top pair of pins for configuration jumpers #7.
Table of configuration jumper mounting options:
| Fireman č. 1 | Fireman č. 2 | |
|---|---|---|
Knob+Button (Push-To-Talk) |
|
|
Volume Setting
Use the trimmer on the electronics board to adjust the volume (refer to the Description of Terminals, Connectors and Jumpers above).
Caution
- Use the trimmer to set the best acoustic properties while eliminating feedback.
Mounting Completion
- Having connected all the wires, check the bushings if employed for tightness.
- Install the front panel carefully. Make sure that the wires inside the device are placed so that there is space for the front panel. Tighten the four screws again with the enclosed Torx 20 spanner, for example, to fit the panel into position on the metal chassis.
Caution
- A wrong mounting procedure may deteriorate the Fireman's water resistance and damage the electronics due to water leakage.
- 2N Lift8 Fireman is assembled with stainless steel screws. Using different, lower-quality screws may lead to screw and surface corrosion!