2.13 MEEF Evacuation Audio Unit – Cabin Connection
The evacuation audio unit for the MEEF (Main Elevator Evacuation Floor) is used for connection with the elevator cabin in the evacuation mode. Activates a call with the maximum priority. The connection is established between the evacuation audio unit, the cabin audio unit or the machine room (if installed) in the same elevator shaft. If any of the machine room audio units is set as a control center (intercom), it is possible to join the evacuation call.
 |
Description of use
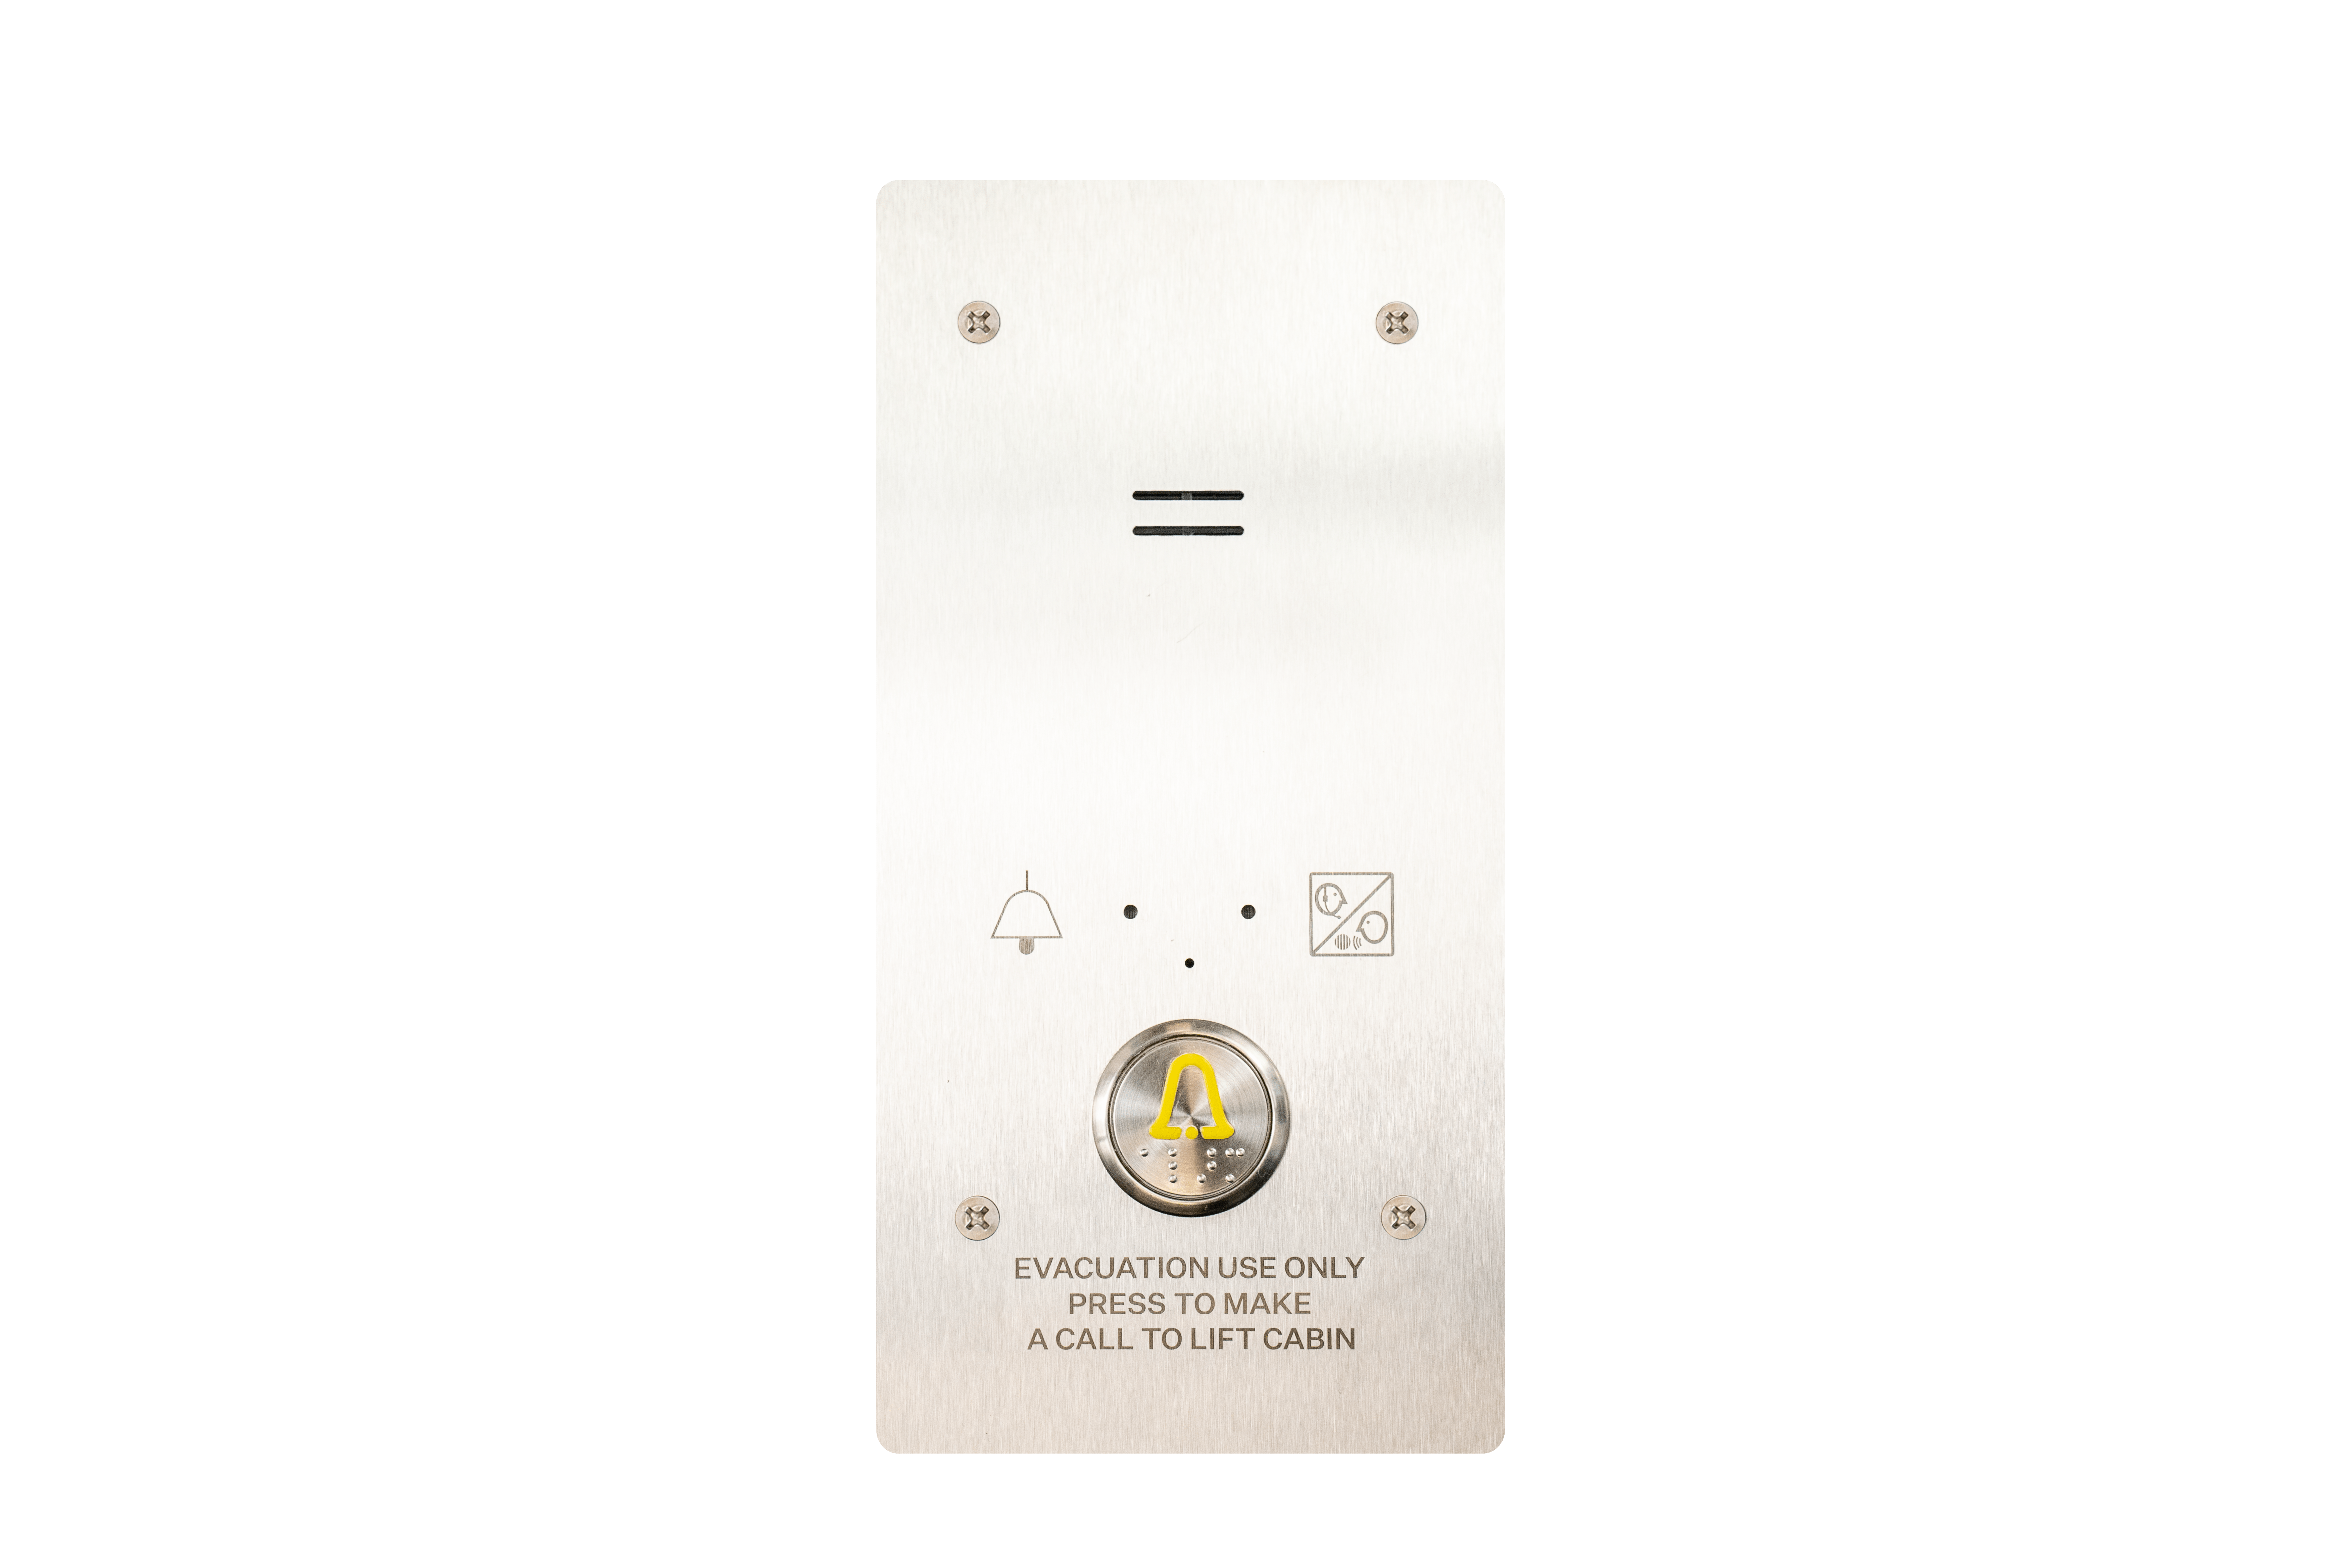
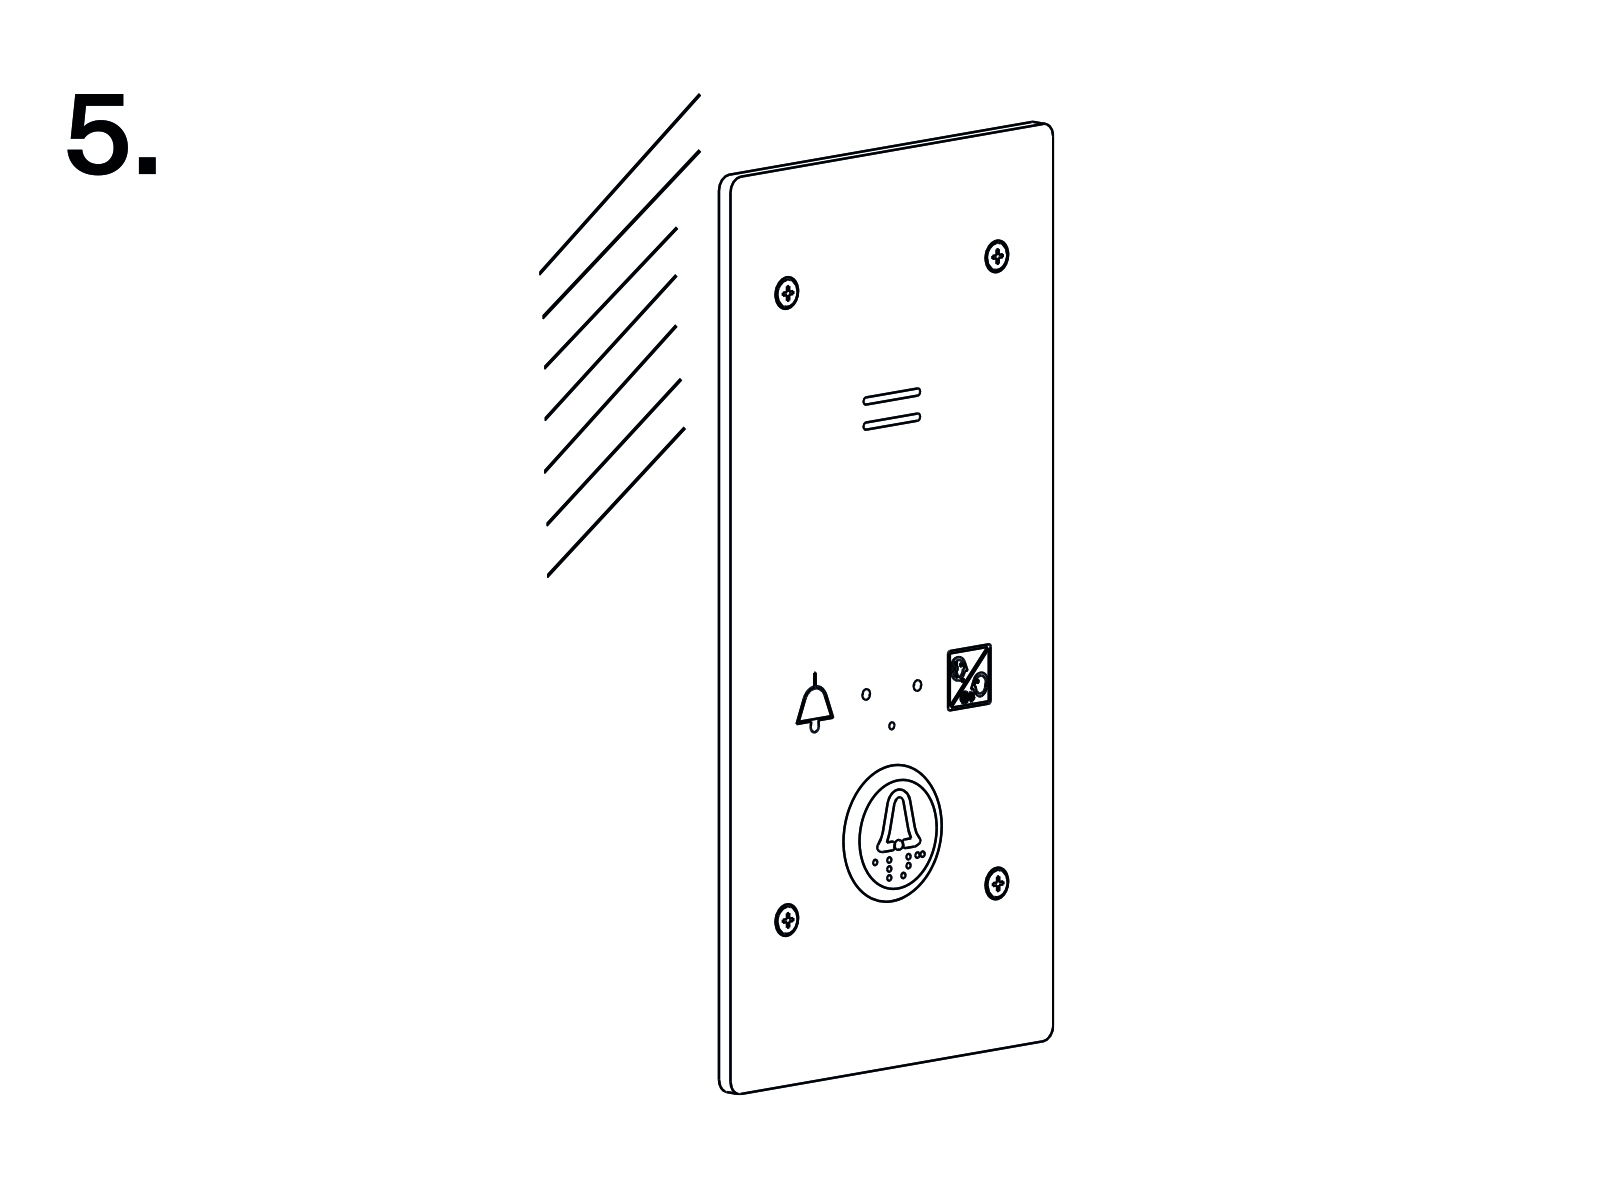
Install the audio unit in a pre-designated space where the audio unit is easily accessible. The evacuation call has the highest priority, interrupting all the other calls. It is set up on the cabin audio unit in one and the same shaft.
The call is set up by pressing the button. The call is hands-free and is ended by repressing the button. The maximum call duration is not limited.
The call setup is signaled by a LED on the panel front.
If the control-center configured machine room audio unit is used, the Fireman call is signaled by a green LED flashing on the audio unit. Push ![]() (for longer than 2 s) on the audio unit keypad to join in the call. Push
(for longer than 2 s) on the audio unit keypad to join in the call. Push ![]() (for longer than 2 s) on the audio unit keypad to leave the call without terminating it.
(for longer than 2 s) on the audio unit keypad to leave the call without terminating it.
Caution
- The call has the highest priority and suspends all the other calls.
- The call is set up by the cabin audio unit in one and the same shaft.
- The button is part of the front panel.
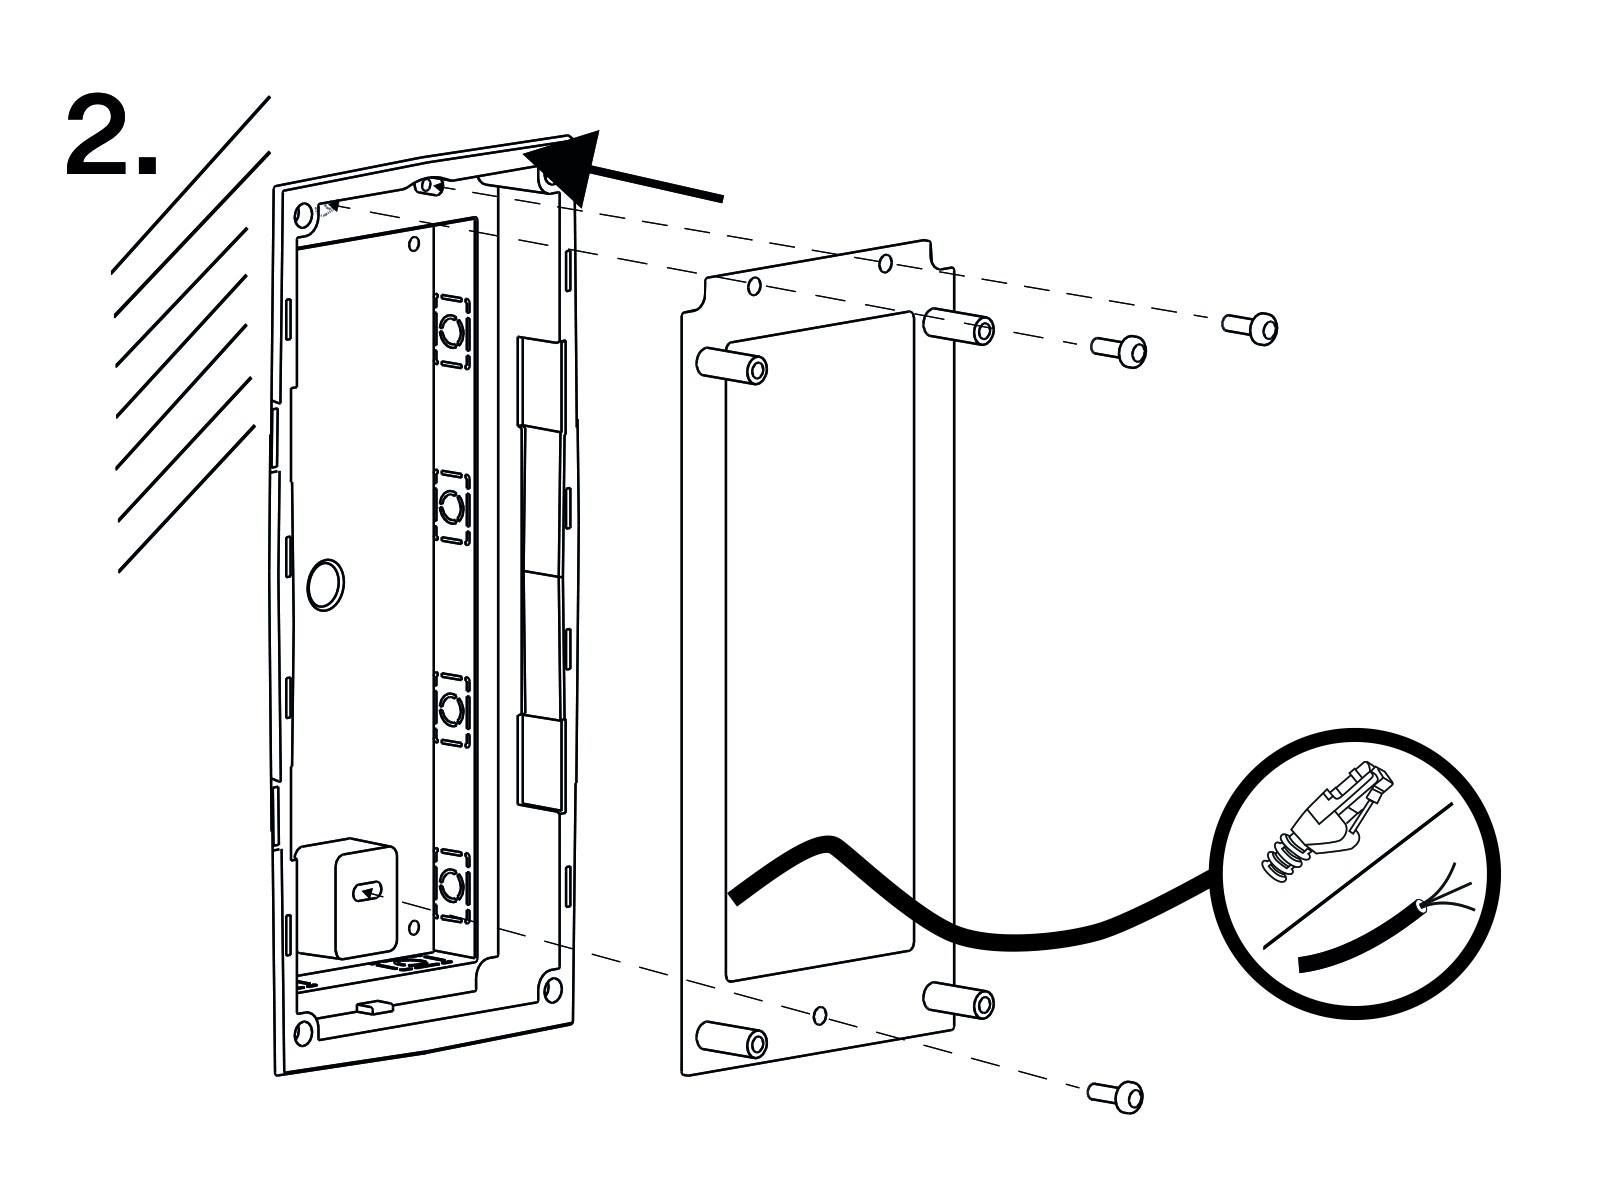
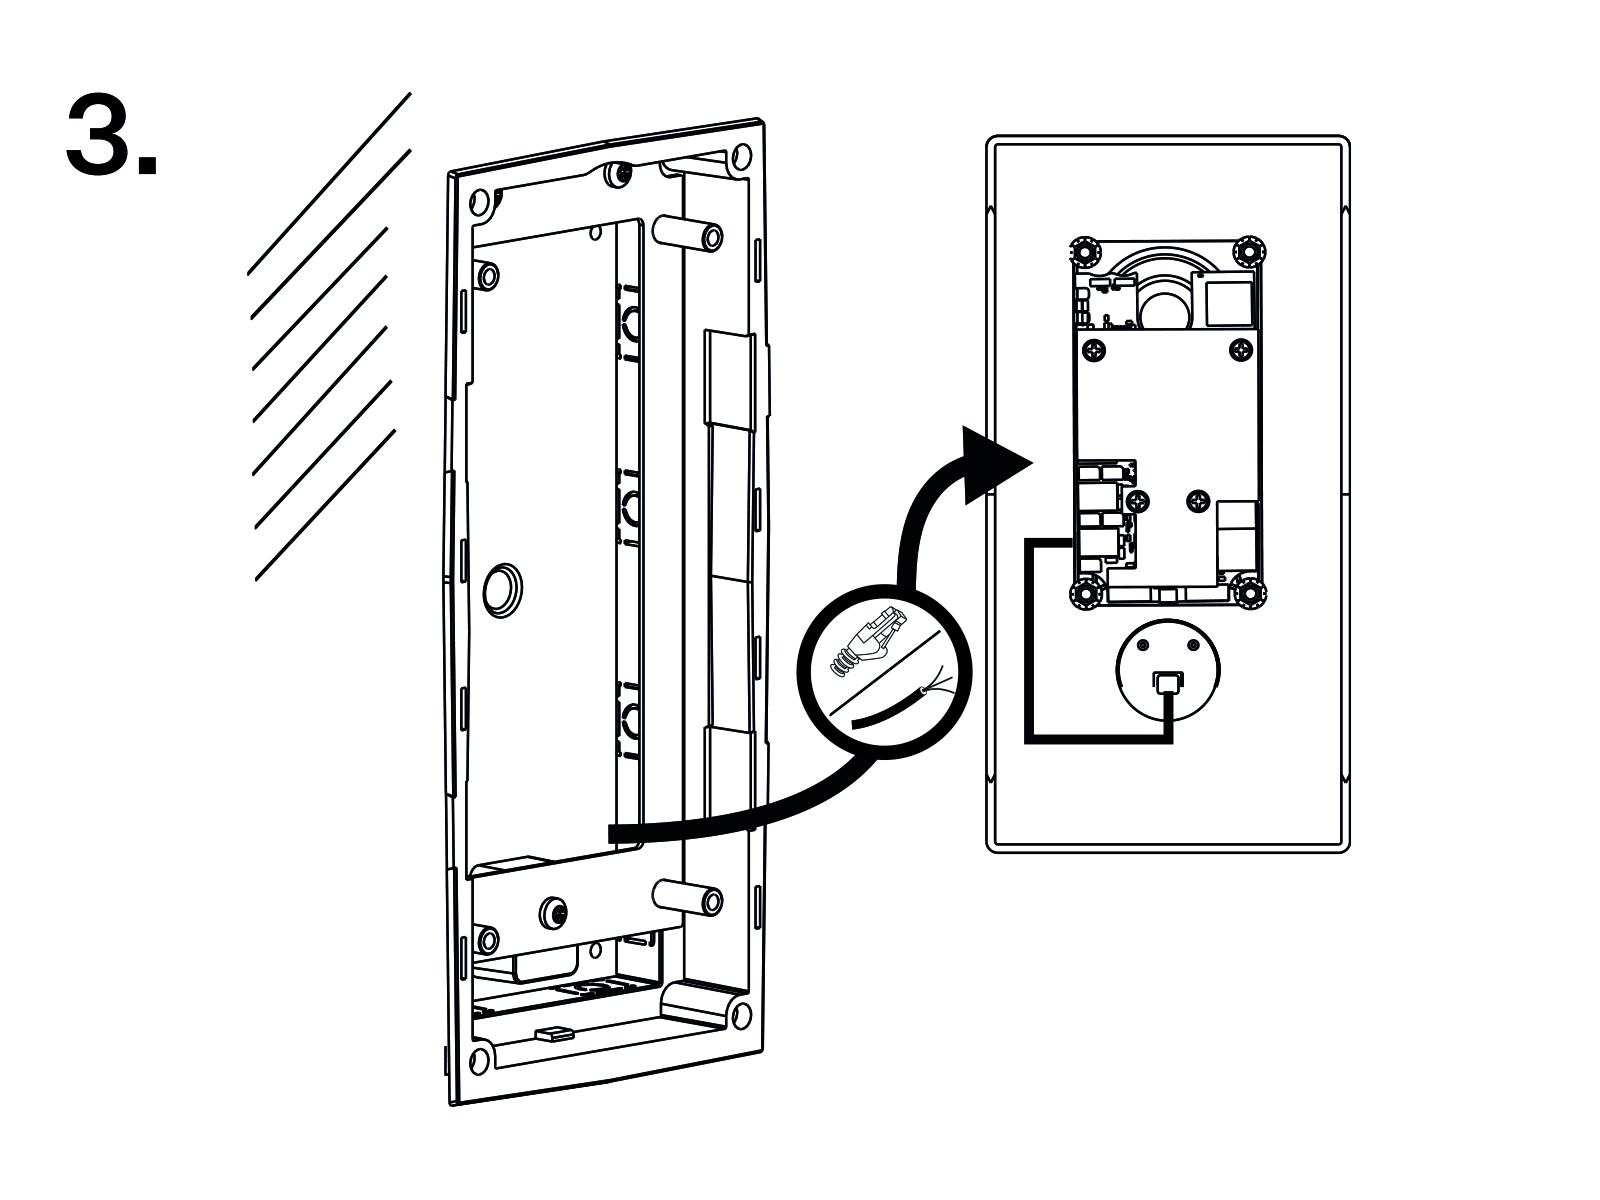
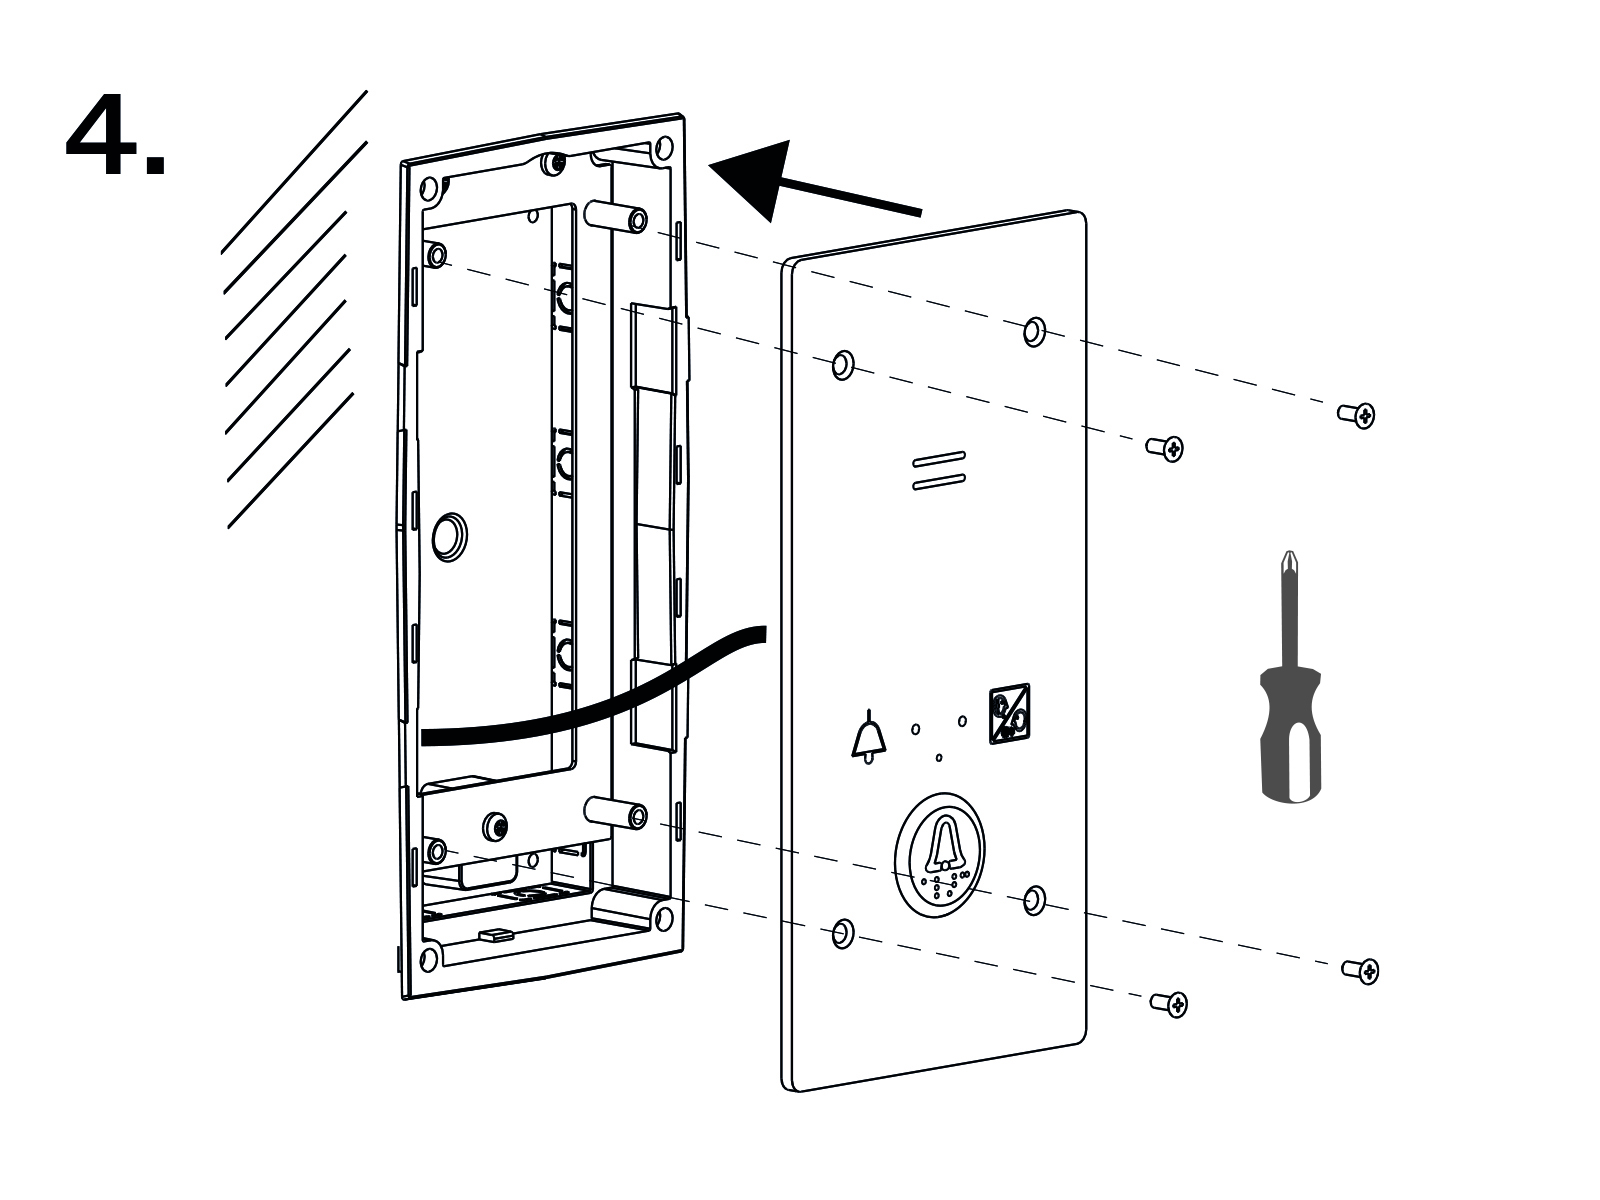
Mechanical installation

Separate Speaker Mounting
The speaker is equipped with a cable and can be separated from the electronics by simply being slid out within the reach of the cables delivered (1 m). This option is useful where there is not enough space for the whole electronic equipment. Fit the loudspeaker according to the instructions below:
- While gluing choose such procedures or adhesives that prevent membrane damage by adhesives and volatile substances, or heat.
- We recommend you to keep the speaker sealed to eliminate vibrations and ensure electric insulation.
Frequently Asked Questions Concerning Speaker
- Can I use a speaker of my own?
Yes, but keep the impedance of 64 Ω. Doing this, however, you assume responsibility for sufficient volume and frequency range.
- Can I use a longer cable for the speaker?
You can use a longer cable for the speaker, but not for the microphone.
Electric Installation
Description of Terminals, Connectors and Jumpers
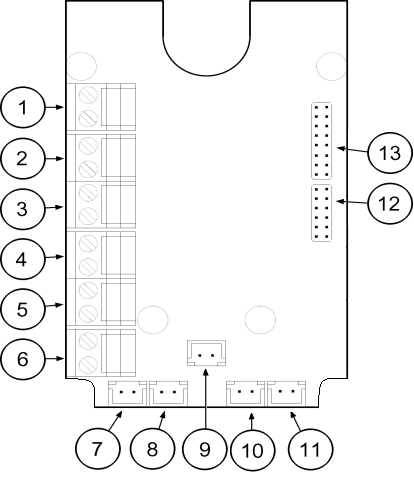
s Figure: Board Terminals, Connectors and Jumpers |
Terminals | Connectors | ||
|---|---|---|---|
1 | Audio unit bus | 7 | Unconnected |
2 | Unconnected | 8 | LED (optional) |
3 | Unconnected | 9 | Microphone connector (optional) |
4 | Unconnected | 10 | Induction loop connector |
5 | Activation/Deactivation – without detent | 11 | Speaker connector |
6 | Unconnected | 13 | Servicing connector |
Configuration jumpers | Two LED signal lamps (other side) | ||
| 12 |
jumper connected |
| on – active call |
| 2. (green) | |||
Note
- If an external LED is connected to connector 8, the LED 1 indicator will not be shining.
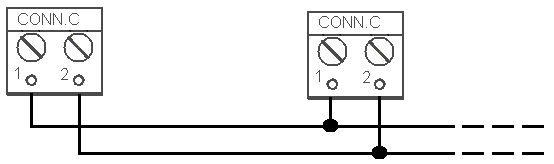
Bus Connection
Pull the terminal out of connector 1 – Audio units bus, connect the bus audio units wires and replace the terminal to connector 1. Mind the polarity.
|
Warning
- The audio unit is intended for 2N Lift8 audio unit bus connection exclusively. Do not connect it to other wires to avoid its damage or destruction.
Upozornění
- Maintain polarity while connecting the audio unit to avoid audio unit error.
- Proper polarity (+ -) is shown on the cover of audio unit.
- The audio unit is powered via a 2-wire bus. Disconnection of these wires results in the audio unit switch-off.
Volume Setting
Loosen the four screws slightly and move the cover downwards. Remove the cover. Use the trimmer in the lower part of the electronics to adjust the volume (see the figure below).
 |
Caution
- Use the trimmer to set the best acoustic properties while eliminating feedback.