2.7 Voice Alarm Station
Description
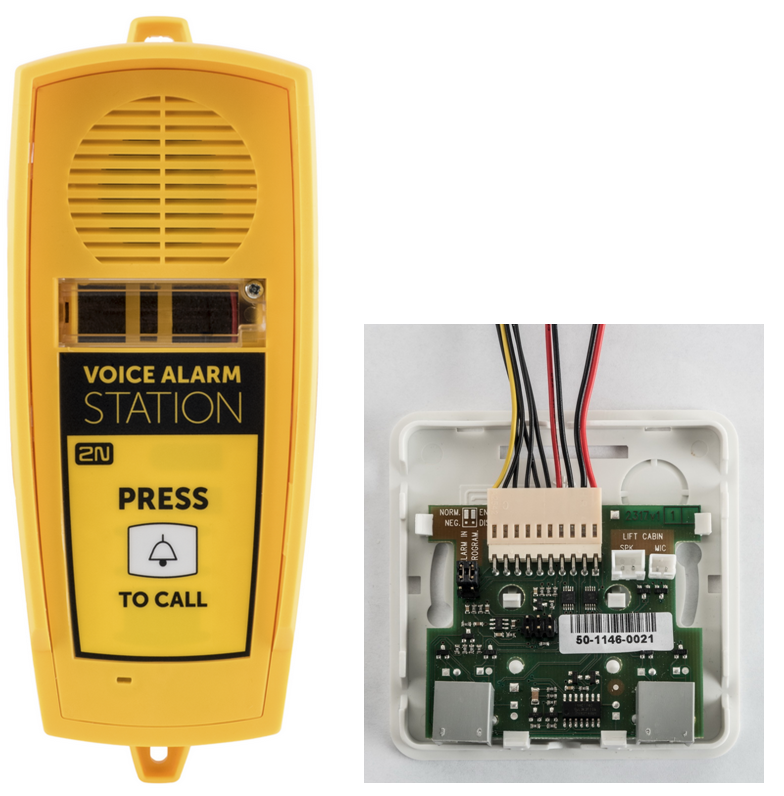
The 2N® Voice Alarm Station is a switch that helps you extend 2N® LiftIP with one or more audio units installed on the cabin roof and under the cabin.
Operation
Push Press to call for activation. A call is set up to the number set in 2N® LiftIP (ALARM button memory 011 to 016).
Caution
- The audio unit does not contain any call setup LED indicator. A LED is shining on the 2N® LiftIP audio unit to indicate call setup and connection confirmation.
- You have to wait for approx. 30 s before setting up a call from another audio unit. The switch remembers the last calling audio unit and an alarm call is set up from this last calling audio unit within 30 s.
Mounting
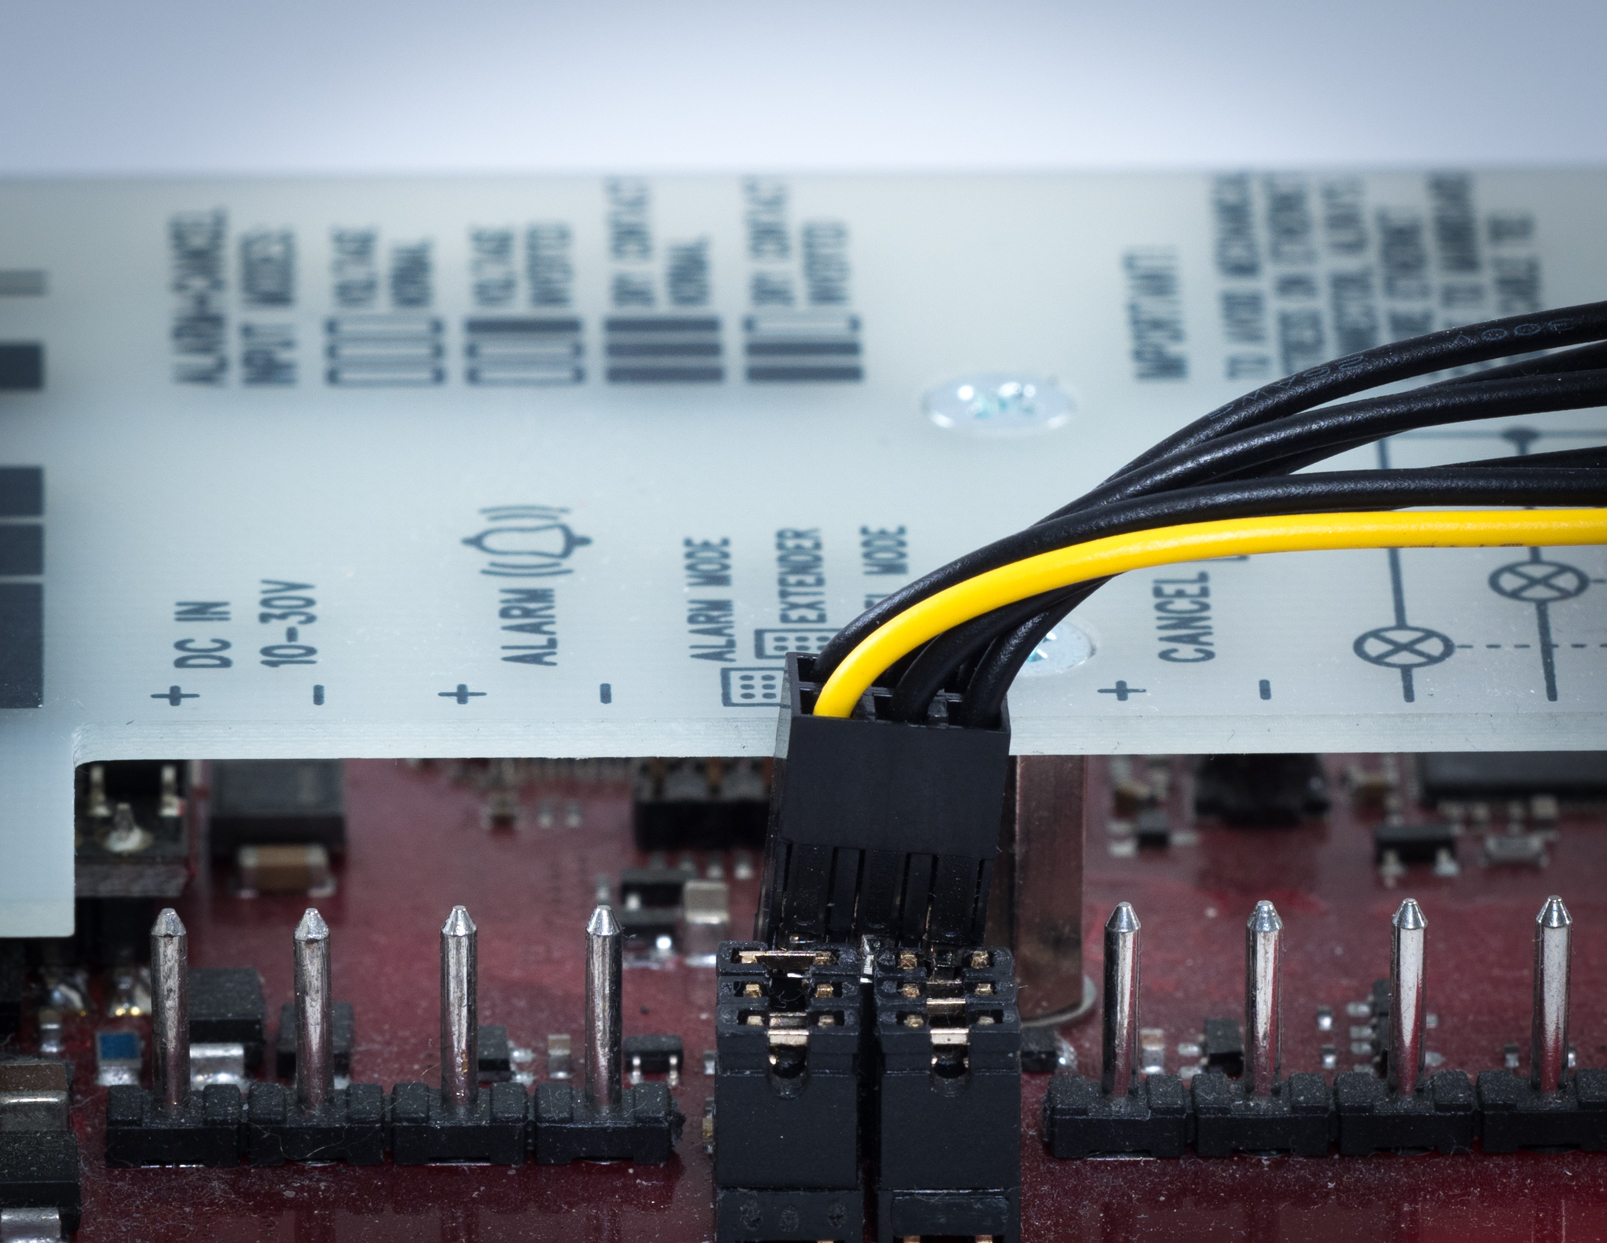
Mount the interconnecting cable connector on the 2N® LiftIP extender jumper.
Connect the cable connectors from the package to the 2N® LiftIP microphone and speaker connectors (these connectors cannot be confused as they have different sizes and pictograms).
Warning
- Disconnect LiftIP from the power supply while connecting the IO extender (DC 10–30 V or PoE).
- Make sure that all the pins are inserted in the 6-pin connector correctly.
- Keep the correct connector wiring (yellow wire - see the figure below).
- Wrong wiring may lead to a module damage.
Remove the cover from the switch. Interconnect the switch and the 2N® LiftIP audio unit with the cable enclosed.
Connect the microphone and speaker from 2N® LiftIP in the switch. The speaker and microphone connectors are properly marked (SPK and MIC). Pull the cables through the holes.
Caution
- If you use the cable version of 2N® LiftIP, then insert the cabled microphone in the switch MIC connector. Otherwise, this connector remains unoccupied.
Break out the cable holes on the switch upper cover. Then replace the switch cover. Use 2 RJ-12 audio unit connectors on the switch side to interconnect the audio unit and the switch using the cable included in the audio unit package.
Dimensions
Audio unit – Voice alarm station: 225 x 87 x 67 mm
Switch: 81 x 81 x 30 mm


