3.2 Step-by-Step Basic Configuration
Tip
- We strongly recommend to use configuration wizards for first usage. This wizard will guide you through the basic configuration of 2N® SIM Star server.
 |
The subsection provides detailed 2N® SIM Star Server configuration steps. The aim of the procedure is to log in one SIM Board SIM card to the network through a GSM module of the selected gateway. The procedure assumes that the other system components have been configured properly and deals with the 2N® SIM Star Server part only.
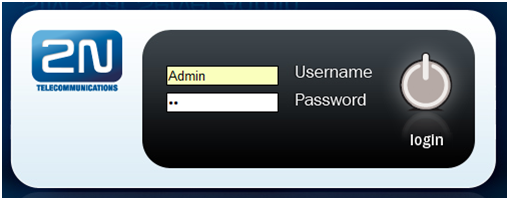
Log in to the web configuration interface as described in the Login subsection.
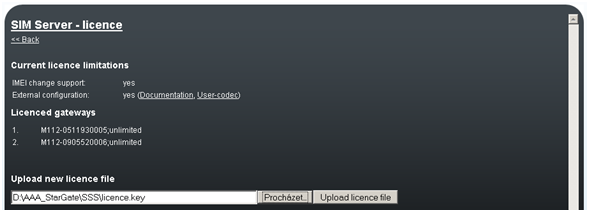
Upload the licence including the selected gateway serial number into 2N® SIM Star Server. To do so, use the SIM Server Management / Licence file menu.
Move to the Gateways menu and add a gateway using the Add gateway item. Fill in all necessary data. Refer to the Add Gateway subsection for description of the items in the case of doubts. Once you have installed the licence and filled in the IP addresses, ports and login data, the GSM gateway will be marked as connected in the overview table.

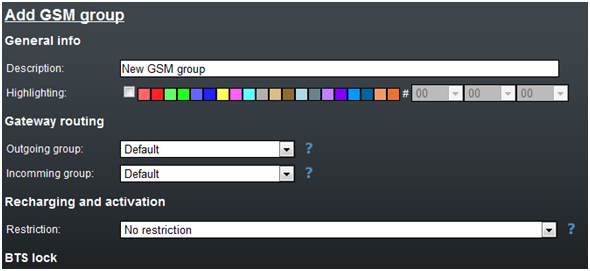
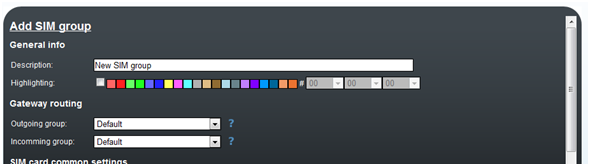
Proceed to the GSM groups menu and add a group using the Add GSM group item.
Tip
- Highlight the GSM/SIM groups by colour to make their listings clearer.
- Create new GSM/SIM groups simply by copying an already established group. Click on the
 button in the list of GSM/SIM groups.
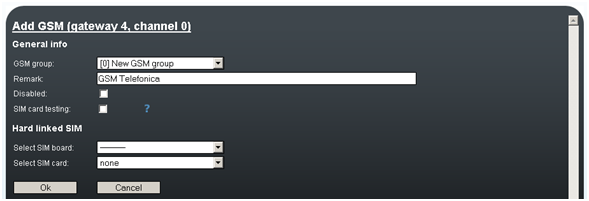
Proceed to the GSM menu. Select your gateway in the filter. An overview of all gateway channels gets displayed. Click on Add in the last but one column in the row corresponding to the suitable position in the GSM gateway. Set a group for the GSM channel, fill in the other parameters if applicable and push Ok.
Proceed to the SIM Boards and add a SIM Board using the Add SIM Board link. Complete all necessary data. Refer to the Add Gateway subsection for description of the items in the case of doubts. If you have installed all parameters correctly, the SIM Board will be marked as connected.

Proceed to the SIM groups menu and add a group using the Add SIM group link. Complete all necessary data. Refer to the Add Gateway subsection for description of the items in the case of doubts.
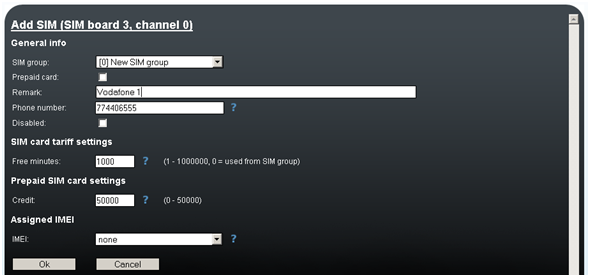
Proceed to the SIM menu. Select the added SIM Board in the filter and view the SIM cards in the corresponding SIM Board positions. However, these SIM cards have not been added yet. Click on Add in the SIM card row. Assign the SIM card to the SIM group created in the preceding step and set the required count of free minutes for the SIM card (or the available credit in the case of a prepaid SIM card).
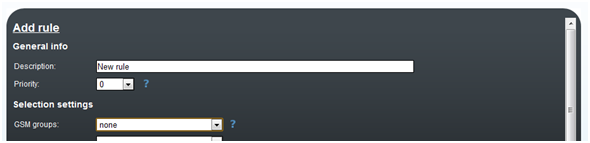
Proceed to the Rules menu and add a rule using the Add rule link. Select your GSM group and the SIM group. Set the selection method for the SIM card to be assigned. Define the days and times for the rule.
Tip
- If you work with time conditions frequently, use the
 button in the Rules menu for facilitation.
- If you work with time conditions frequently, use the
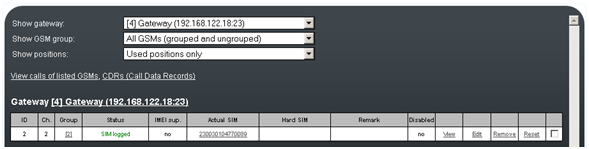
Now the SIM card should start logging in to the network through the GSM module. View the login process in the Status column of the GSM menu after filtering the added GSM gateway.
Note
- When the SIM cards fail to log in to the GSM modules automatically, click on the failing GSM module / SIM card to check the GSM module / SIM card setting and state. Refer to the Lookup info menu for current data.