3.1.5 Buttons
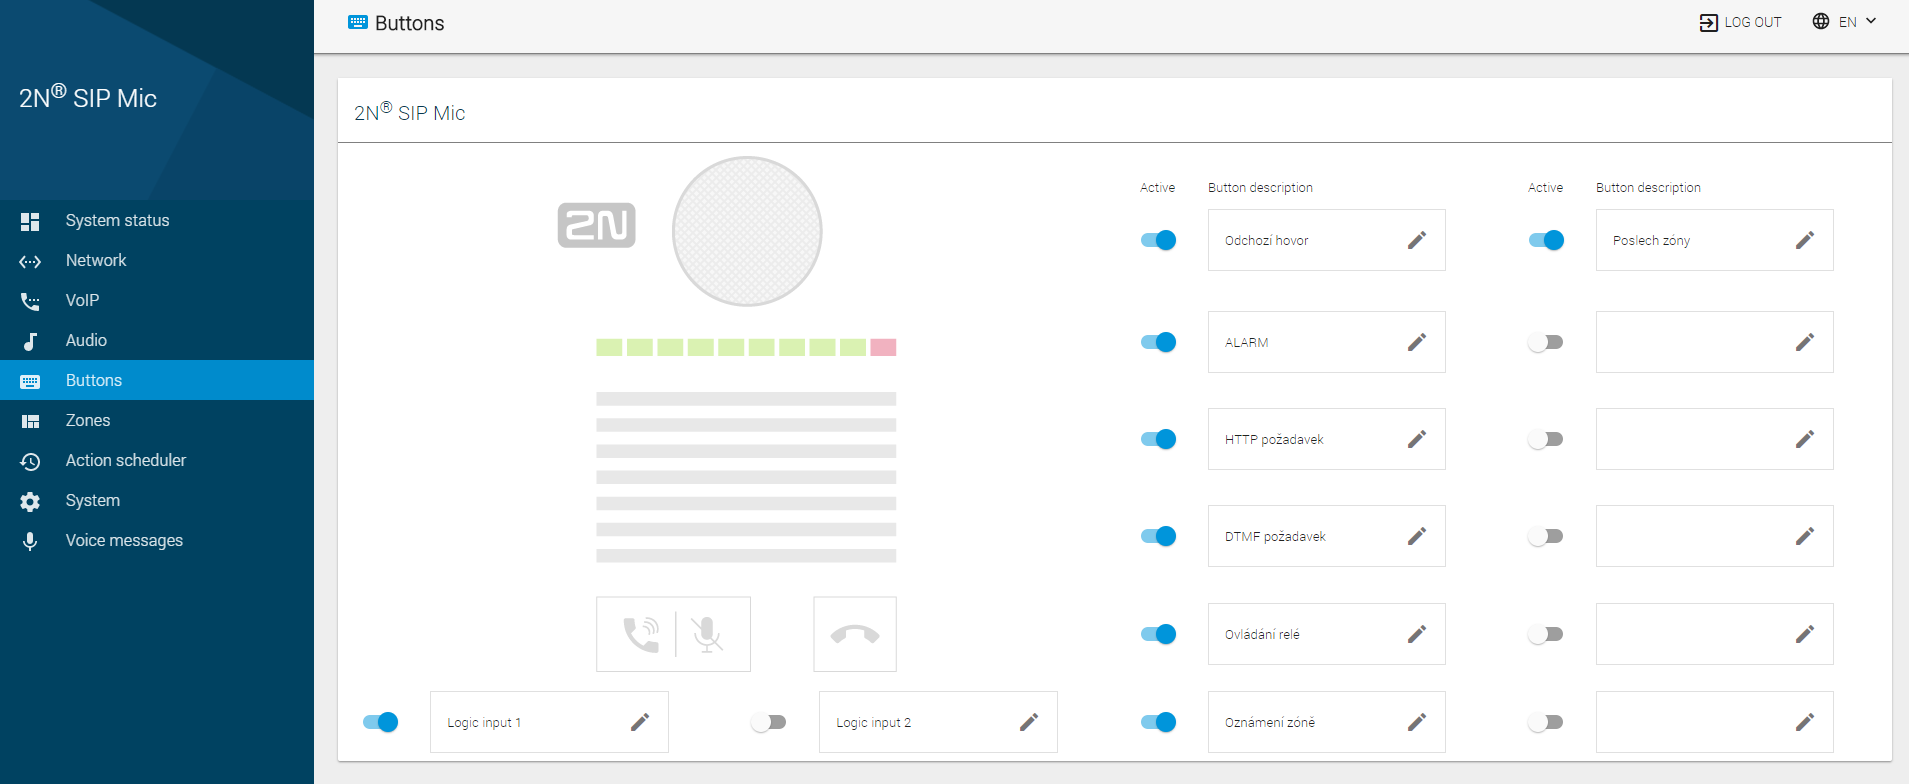
Assign one of he seven available functions to the 2N® SIP Mic buttons on this page. See the button survey below. Logic inputs are located below the call controlling buttons on the device back side. By default, all the available buttons are inactive and assigned no action. The options are as follows:
- Outgoing call – when the button is pressed, a call is set up to the set destination via SIP Proxy.
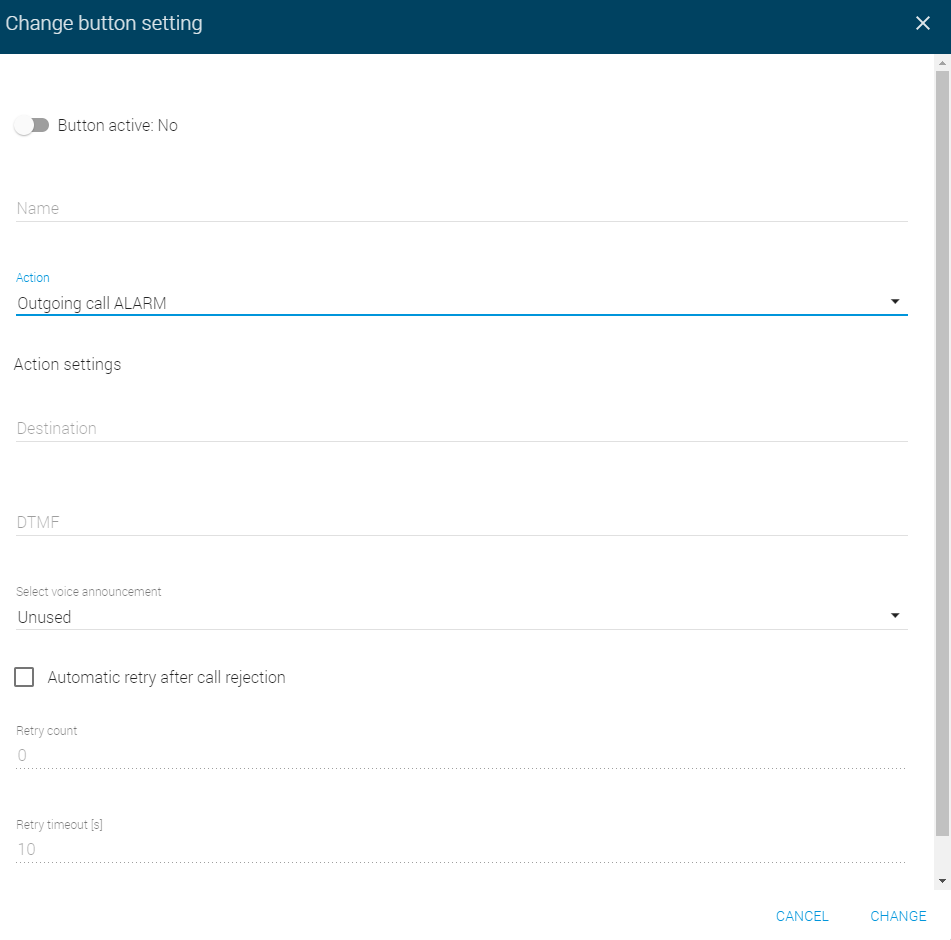
- Outgoing call ALARM – when the button is pressed, a call is set up to the set destination via SIP Proxy. The DTMF code or a voice message is played after the setup.
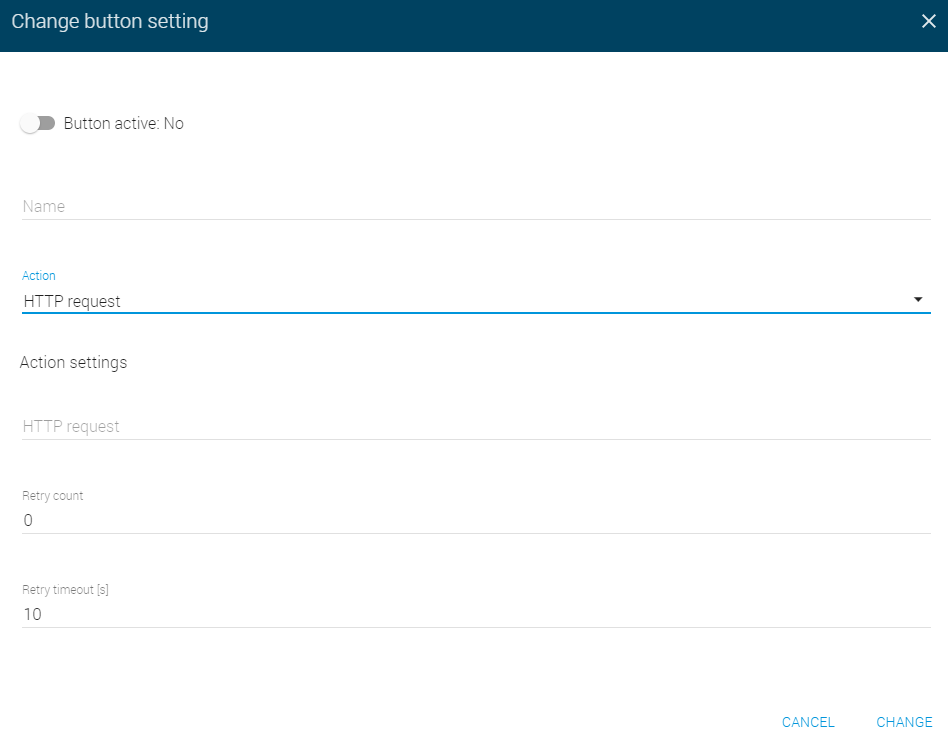
- HTTP request – when the button is pressed, an HHTP request is sent from 2N® SIP Mic.
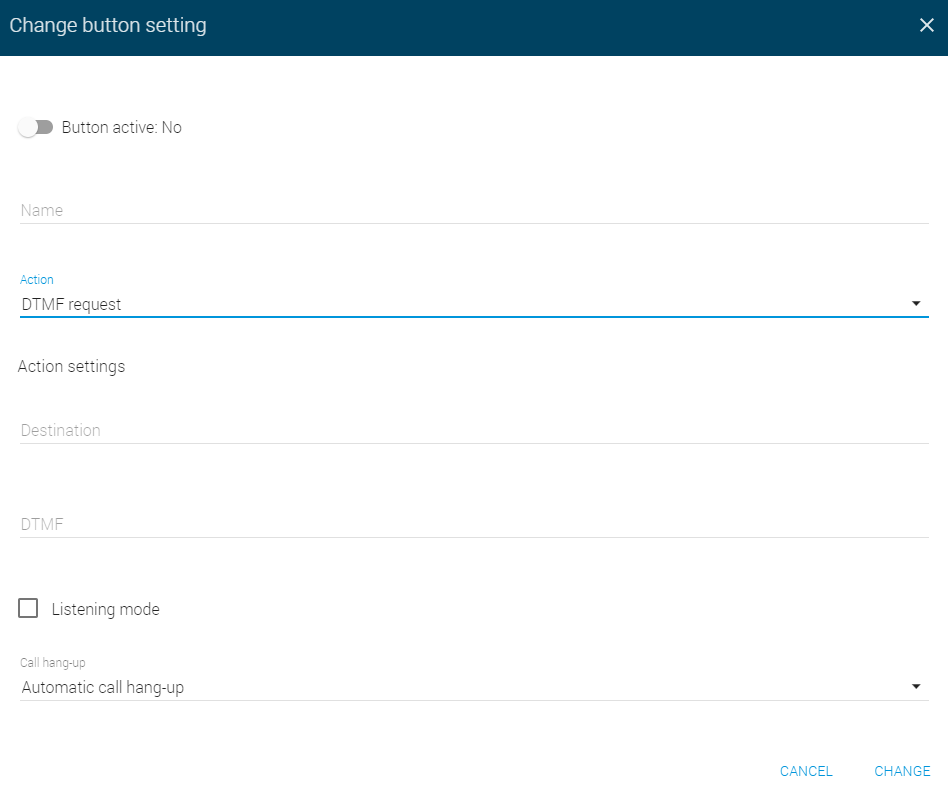
- DTMF request – when the button is pressed, a call is set up to the set destination via SIP Proxy. The selected DTMF code is played after the setup.
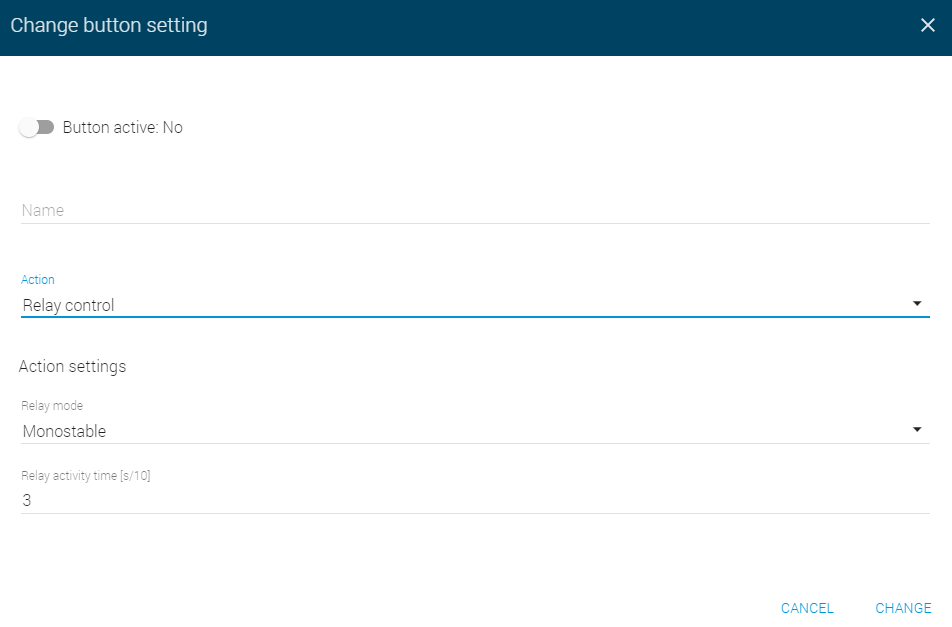
- Relay control – the button controls the relay whose terminals are located on the 2N® SIP Mic back.
- Announce to zone – the button activates the defined announcement to a zone.
- Listen to zone – the button activates the defined listening to a zone.
Change Button Setting
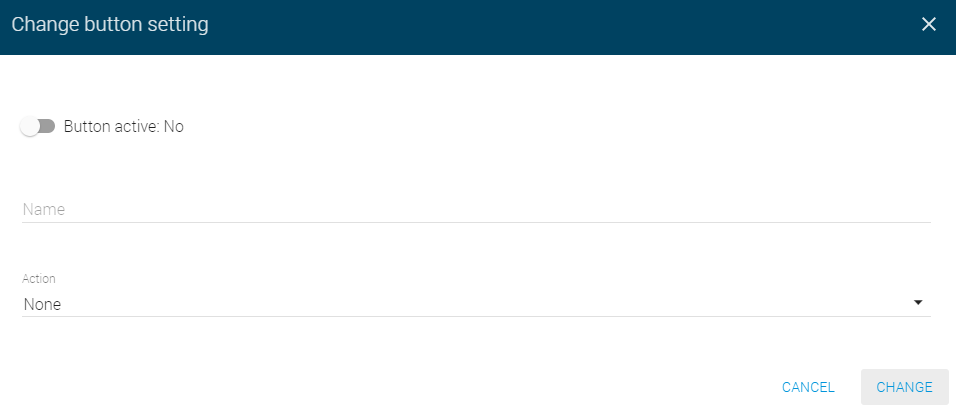
Click the edit symbol at the button to be edited to open a dialogue window. Each type of action includes three identical options.
- Button active – activate the button to enable the action to be executed.
- Name – button name.
- Action – choose one of seven available actions.
Edit Button Setting for Logic Inputs 1 and 2
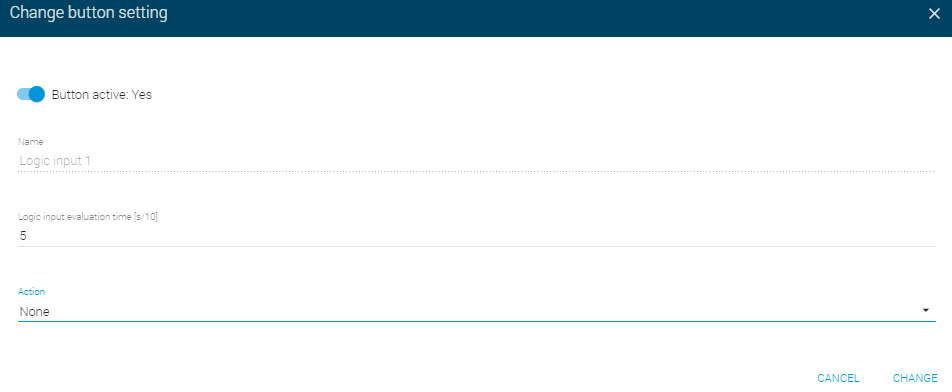
Click the edit symbol at the button to be modified to open a dialogue window. Each type of action includes three identical options.
The logic inputs on the device back side are used for connection of, e.g., a security system, fire alarm or emergency switch. In case the connected device is activated by a potential threat detection, the preset action will be forced automatically after the logic input evaluation time has passed.
- Button active – activate the button to enable the action to be executed.
- Name – button name.
- Logic input evaluation time [s/10] – set the time necessary for the logic input state evaluation. Set 0 to disable the button function. Choose 1–255 s to activate the button.
- Action – choose one of seven available actions.
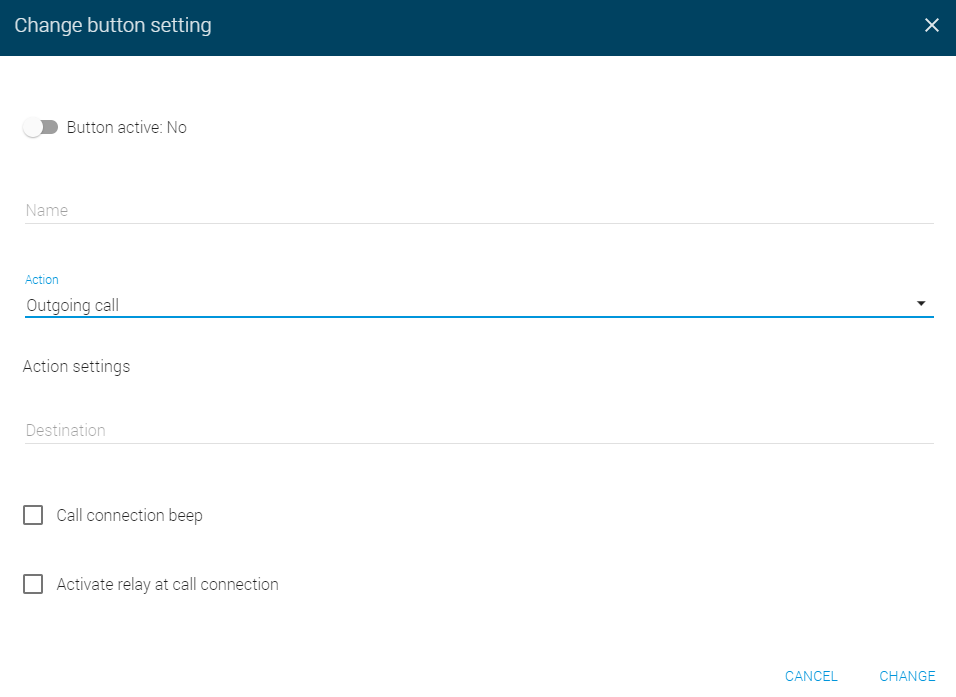
Outgoing Call
- Destination – set the destination (phone number or IP URI) to which the call shall be directed via SIP Proxy.
- Call connection beep – set the call connection beep for 2N® SIP Mic. This selection is inactive by default.
- Active relay at call connection – activate the relay at call connection. This selection is inactive by default.
Outgoing Call ALARM
- Destination – set the destination (phone number or IP URI) to which the call shall be directed via SIP Proxy.
- DTMF – enter the DTMF code to be sent from 2N® SIP Mic after call connection. Not completed by default.
- Select voice announcement – select a voice message to be played at call connection. No voice message is selected by default.
- Automatic retry after call rejection – select automatic retry after call rejection. The selection is inactive by default.
- Retry count – set the count of call setup retries after call rejection: 0 to 30. The default value is 0.
- Retry timeout – set the timeout in seconds for call setup retries: 0 to 30. The default value is 10 s.
HTTP Request
- HTTP request – set the HTTP request to be sent from 2N® SIP Mic when a button is pressed. You can set up to 12 destinations and send a different HTTP request for each of them.
- Retry count – set the count of HTTP request sending retries if unsuccessful: 0 to 30. The default value is 0.
- Retry timeout – set the timeout in seconds for HTTP request sending retries: 0 to 30. The default value is 10 s.
DTMF Request
- Destination – set the destination (phone number or IP URI) to which the call shall be directed via SIP Proxy.
- DTMF – set the DTMF code to be sent from 2N® SIP Mic when a button is pressed. Set the DTMF sending method in the VoIP menu.
- Listening mode – play the DTMF code using the 2N® SIP Mic speaker.
Call hang-up – define the call hang-up. The options are Automatic call hang-up (default) and Repeated button press call hang-up.
Relay Control
Press a 2N® SIP Mic button to control the relay in one of the following three modes:
- Monostable – the relay is activated for a defined period of time.
- Relay activity time
- Bistable – the relay state changes for a period of time defined by the parameter.
- Minimum activation time
- Activate relay by pressing a button – the relay is active while the button is being pressed, yet for the minimum time specified here.
- Minimum activation time
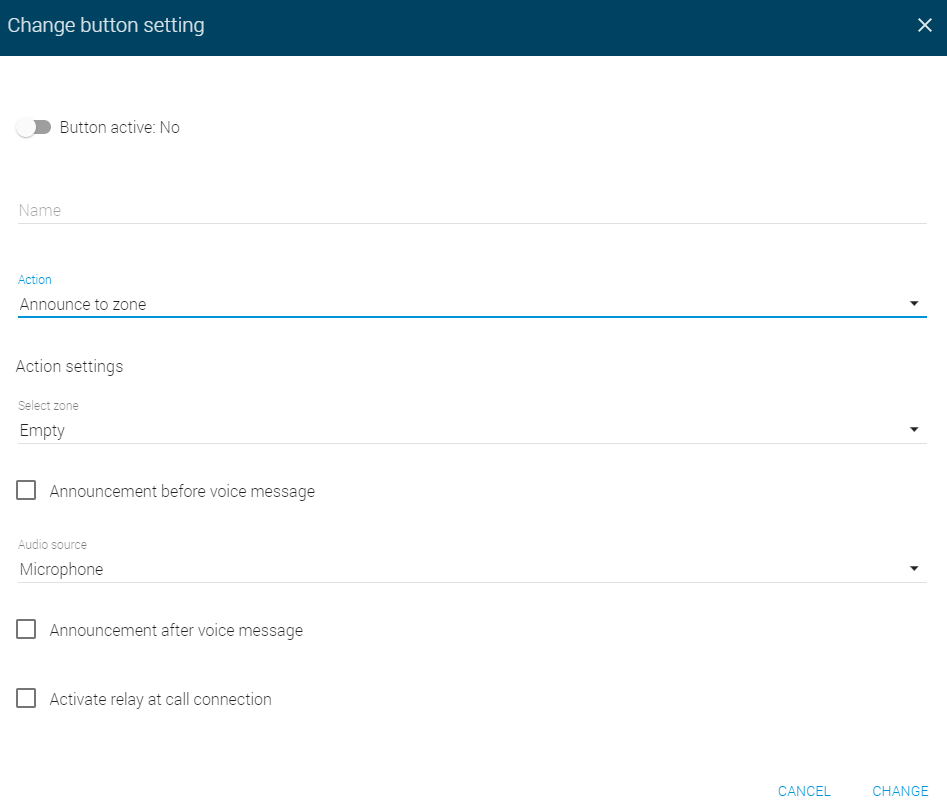
Announce to Zone
- Select zone – select a zone for the announcement. Set the zone in the Zones menu.
- Announcement before voice message – enable playing announcements before voice messages. Load a message of your own in the System messages / Voice messages menu. Disabled by default.
- Audio source – set the audio source to be used for announcements. The default value is Microphone.
- Audio message
- Voice message – set the voice message to be played. Load a voice message in the Voice messages menu.
- Microphone
- Input line – use the signal brought to the 2N® SIP Mic input.
- Automatically after timeout expiry – make the announcement end after a timeout expiry. Set values 0 to 9600. The default value is 10.
- By pressing a button – make the announcement end when a button is pressed.
- Audio message
- Announcement after voice message – enable playing announcements after voice messages. Load a message of your own in the System messages / Voice messages menu. Disabled by default.
Active relay at call connection – the relay is activated when the call is connected. The selection is inactive by default.
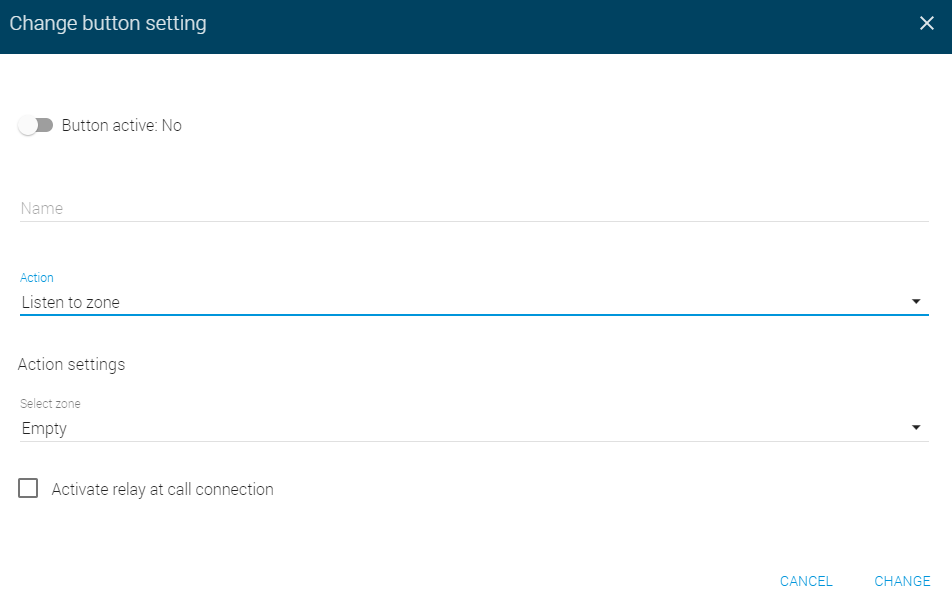
Listen to Zone
- Select zone – select a zone for the announcement. Set the zone in the Zones menu.
- Activate relay at call connection – the relay is activated when the call is connected. The selection is inactive by default.
Note
- The maximum count of simultaneous audio streams is 4. Two MP3 messages, one message via the microphone and one message via the line input can be played at the same time. Any other request is ignored.
Caution
- There are three options how to enter the Destination format correctly:
- number ... (must be enabled & defined SIP Proxy)
- ip[:port] ... (ip:port overrides those defined in SIP Proxy)
- number@ip[:port] ... (ip:port overrides those defined in SIP Proxy)

