2.2 Mechanical Installation
Surface Mounting
To mount your 2N® SIP Speaker, Wall Mounted unit on a wall or another solid surface use the speaker holder. Fit this holder with screws to keep the device in place. Follow the figure below while drilling the mounting holes.
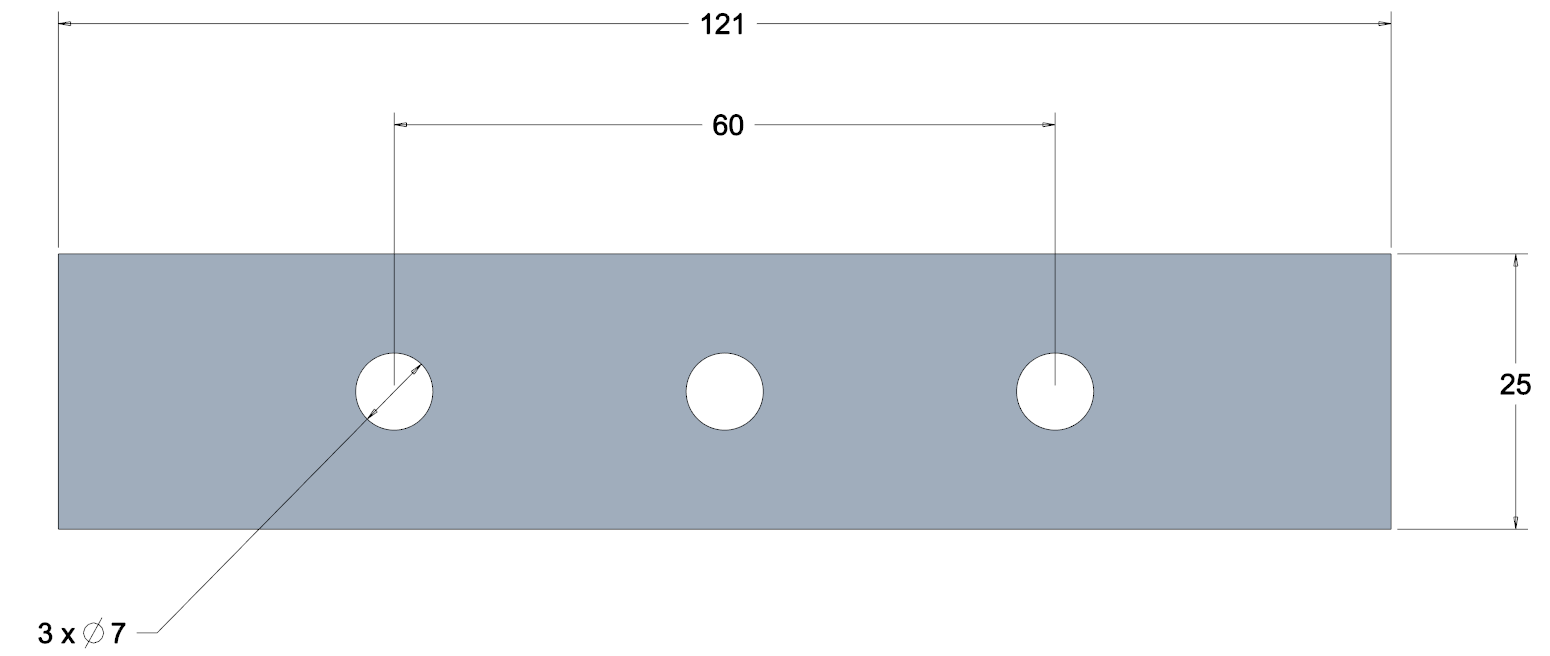 |
Mounting Holes
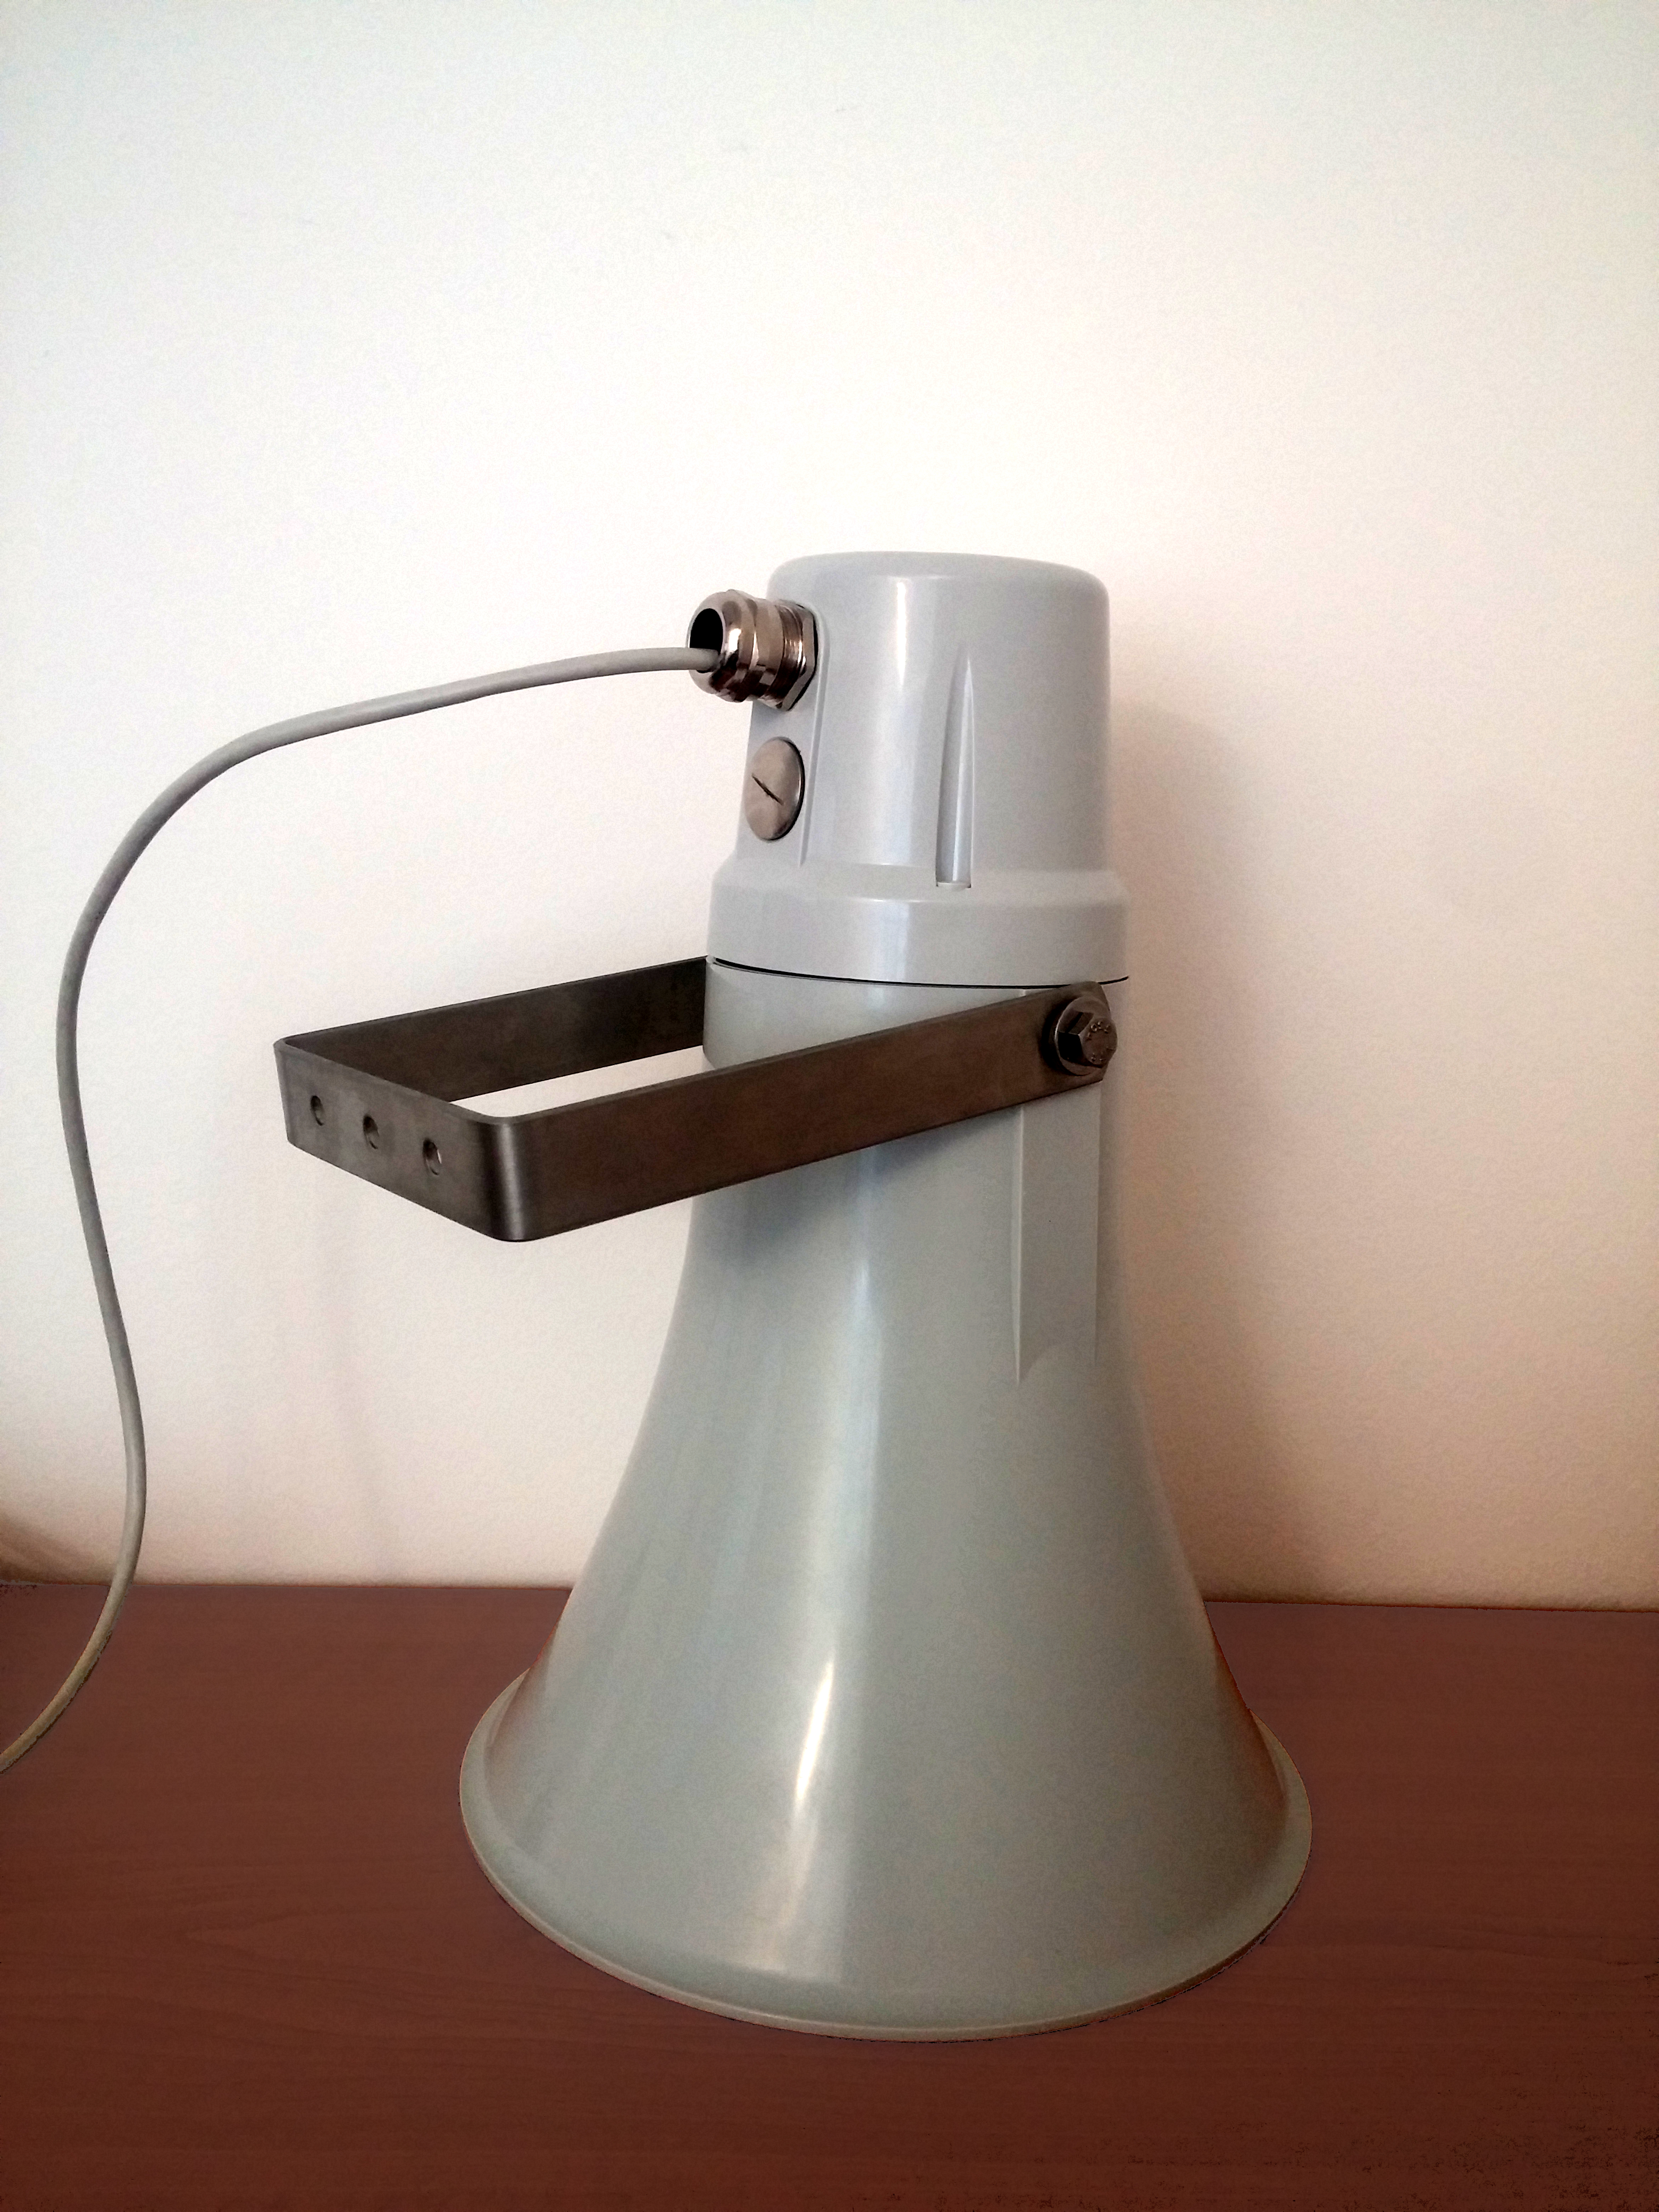 |
Speaker Holder
Warning
- To ensure the IP cover class, tighten the screws between the body and the wave guide with a torque of 0.85 Nm. Using a higher value may lead to cracks in the screw joints.
Sealing with Cable Bushing
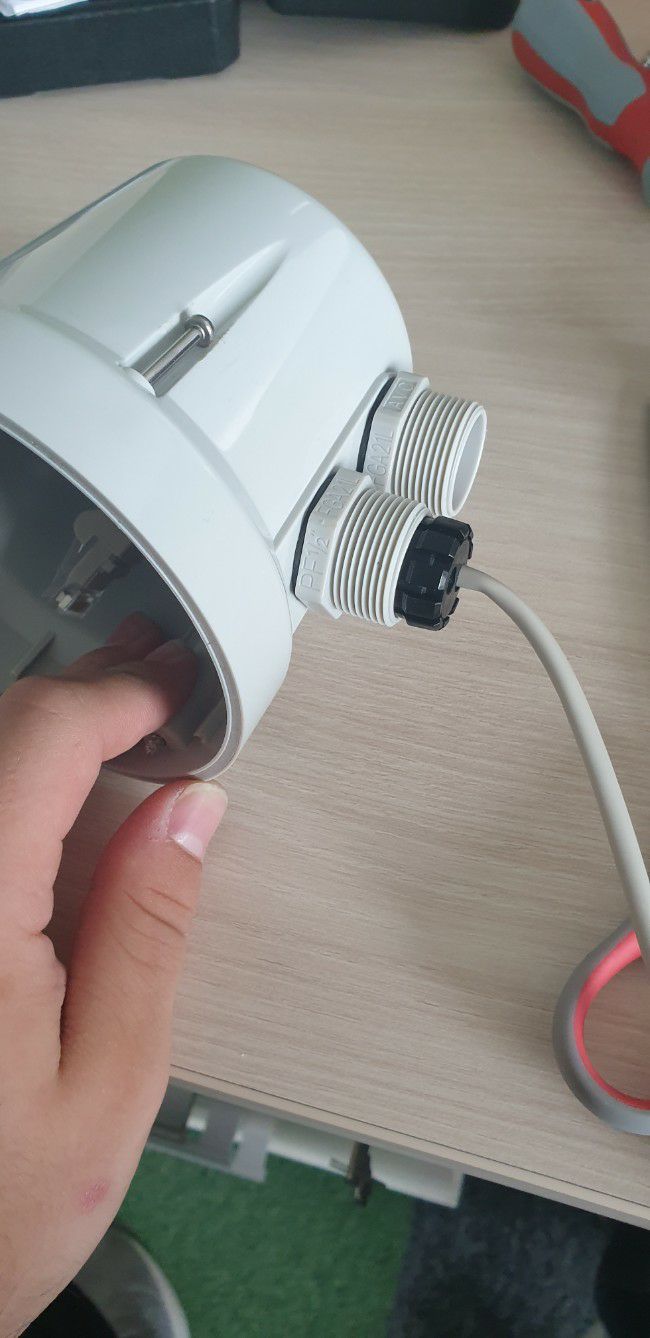
Use a cable bushing to seal the unit and prevent water from getting to the motherboard in order to avoid the motherboard damage.
Tip
- You can pull the network cable including the RJ-45 terminal through a big cable bushing as shown below.
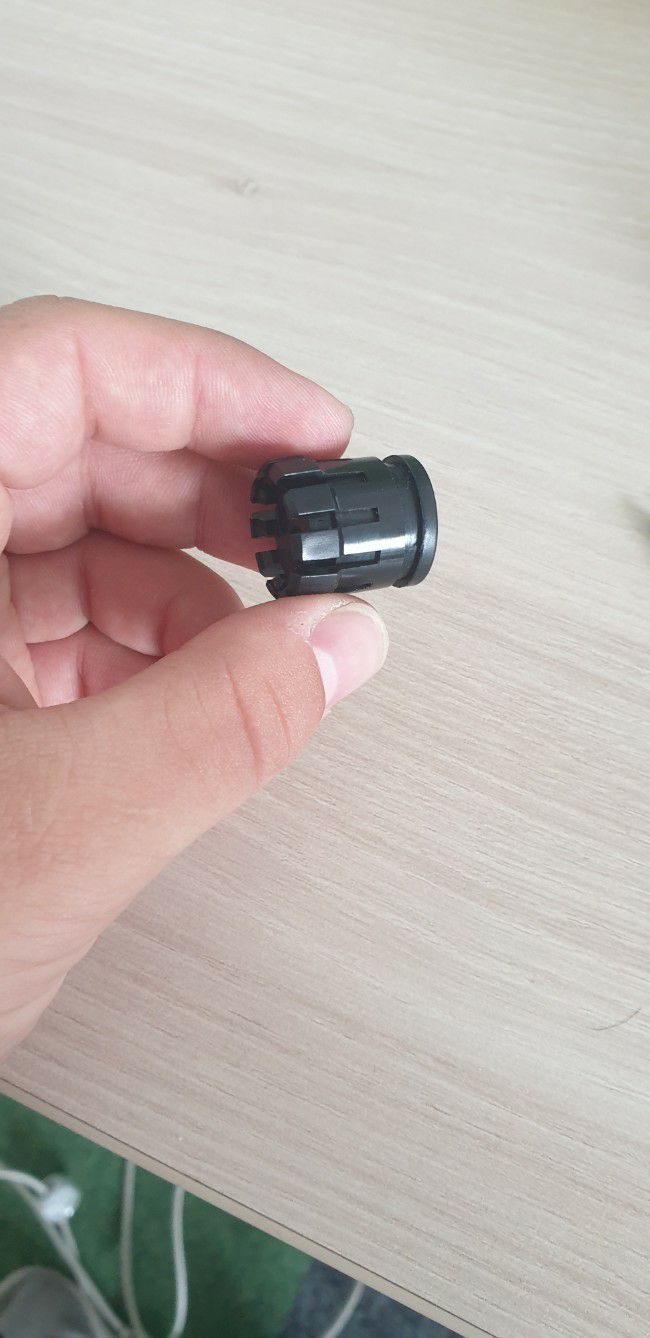 |
Push to remove the seal from the plastic case.
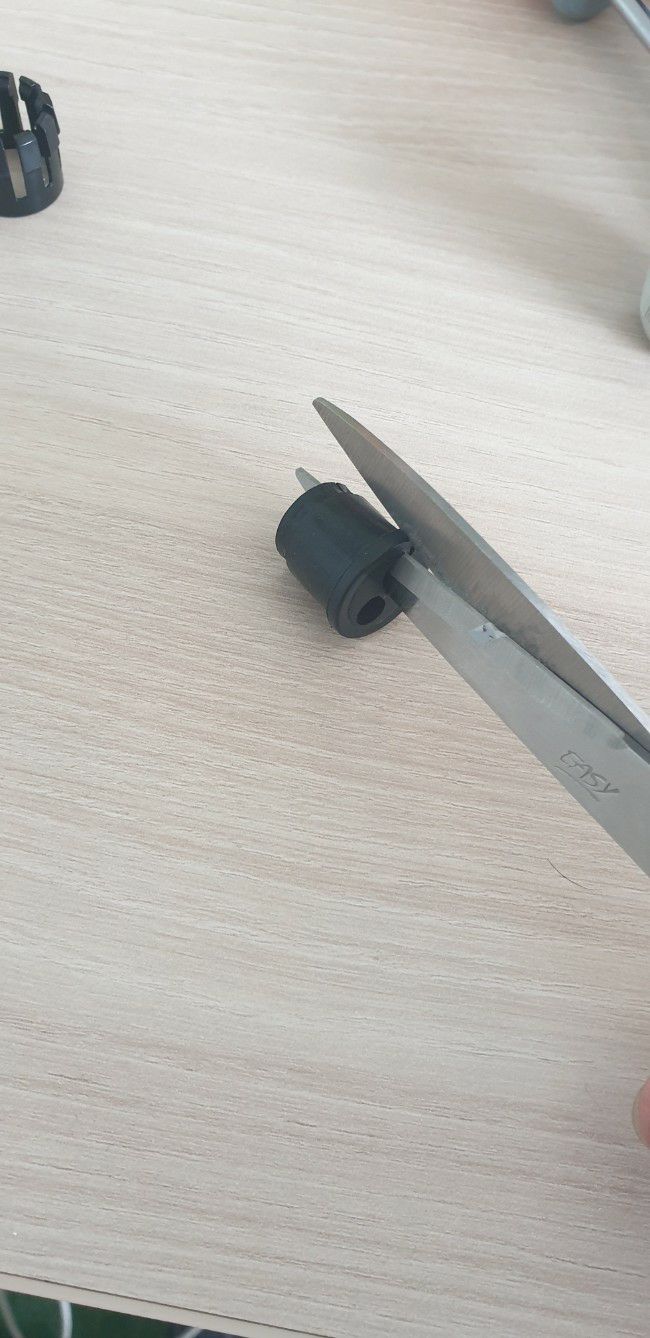 |
Cut the seal as shown in the figure to insert the UTP cable.
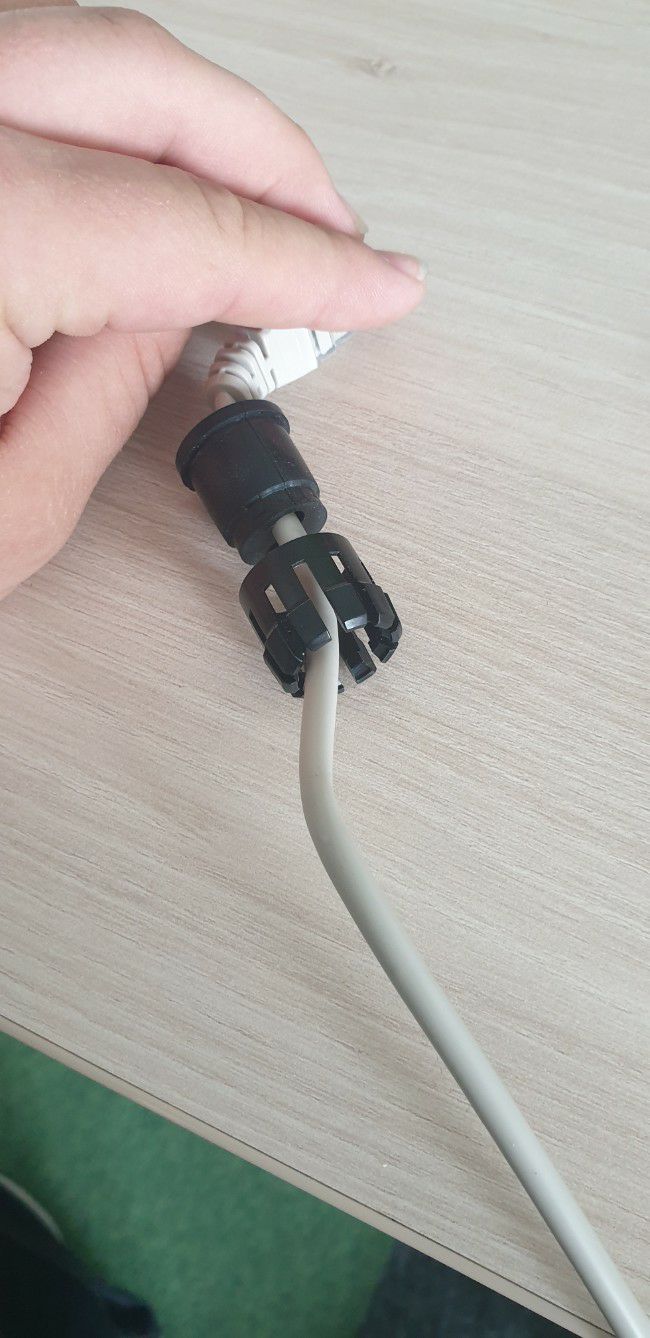 |
Insert the case first, then insert the seal and pull the UTP cable through the seal.
 |
Having pulled the cable through, place the case with the seal as shown.
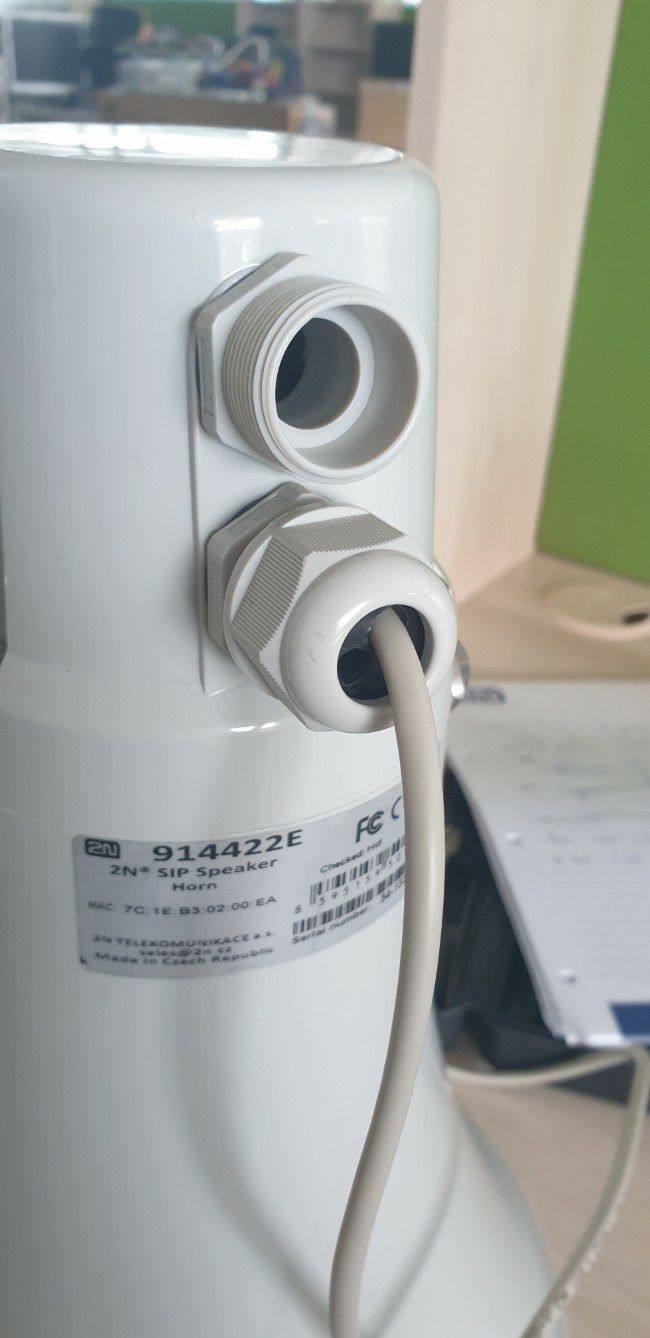 |
Now the unit is protected against water infiltration.
Warning
- The warranty does not apply to damage incurred as a result of water penetration into the device where the sealing cable bushings are not used.