2.1 Before You Start
Product Completeness Check
Please check the product delivery before starting installation:
| 1 | 2N® Indoor Talk |
| 2 | External power and doorbell button terminals |
| 1 | Certificate of ownership |
| 1 | 2.5 mm hexagon key wrench |
| 1 | Quick Start manual |
| 1 | display cleaning cloth |
Front Layout
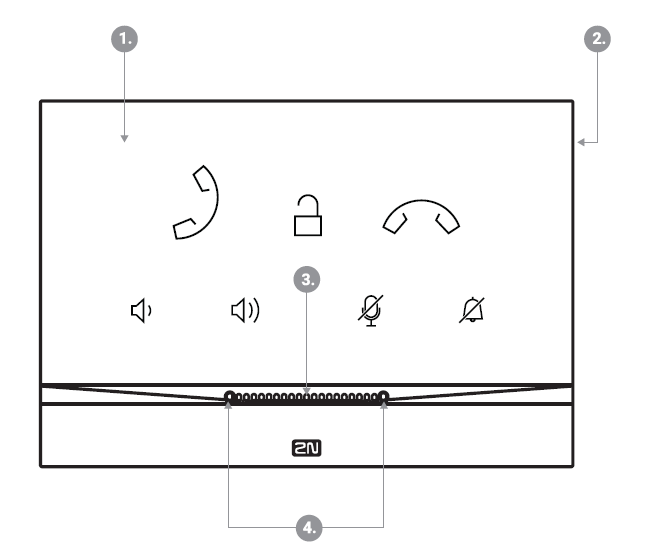 |
- Panel with capacitive touch layer
- Speaker
- Microphone
- Anchoring holes
Backside Connectors
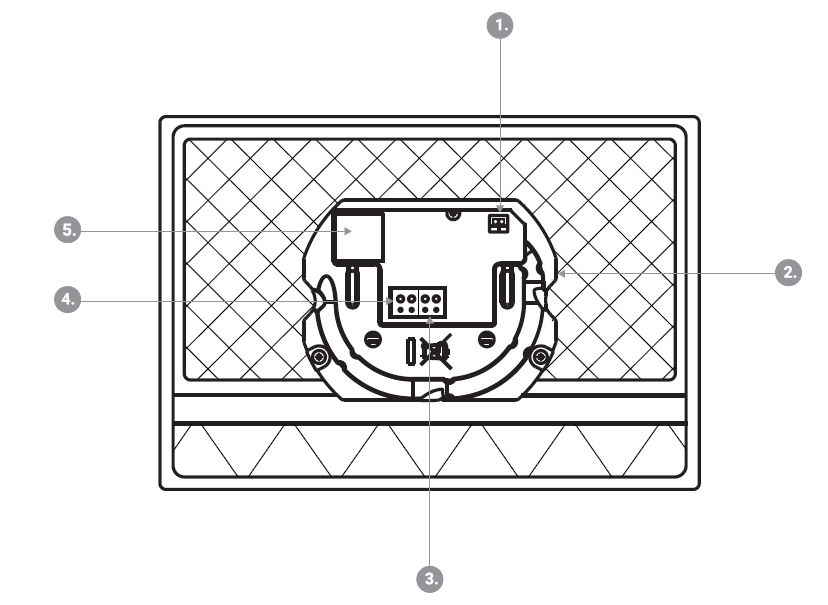 |
- External induction loop output
- Reset button
- Doorbell button input
- 12 V / 1 A DC power supply input
- Ethernet
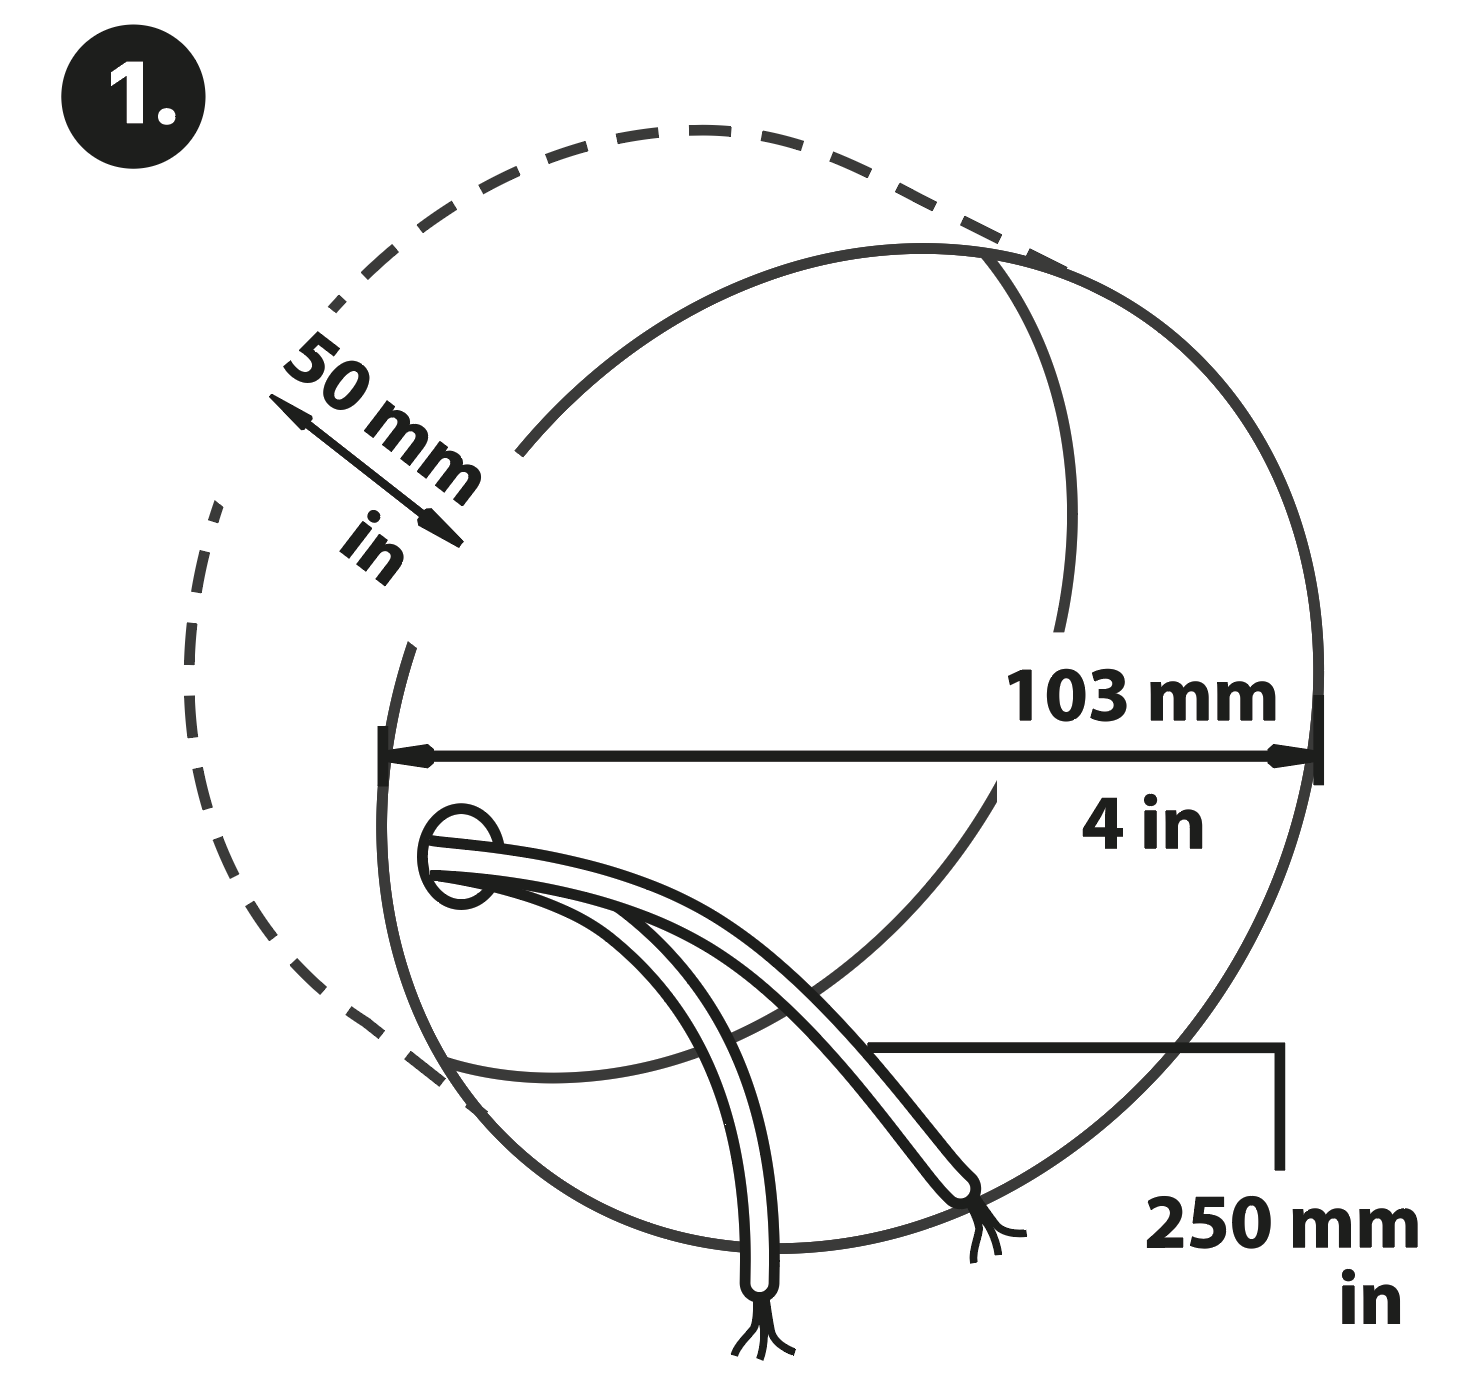
2N® Indoor Talk is designed for flush mounting (brick, plasterboard, wood). Use the flush mounting box (Part No. 91378800), which is not included in the package. Alternatively, the product can be mounted into a desk stand (Part No. 91378802), which is not included in the package.
Caution
- Before starting the mechanical installation on a selected place, make sure carefully that the preparations connected with it (drilling, wall cutting) cannot damage the electrical, gas, water and other existing wires and pipes.
 |
 |
 |
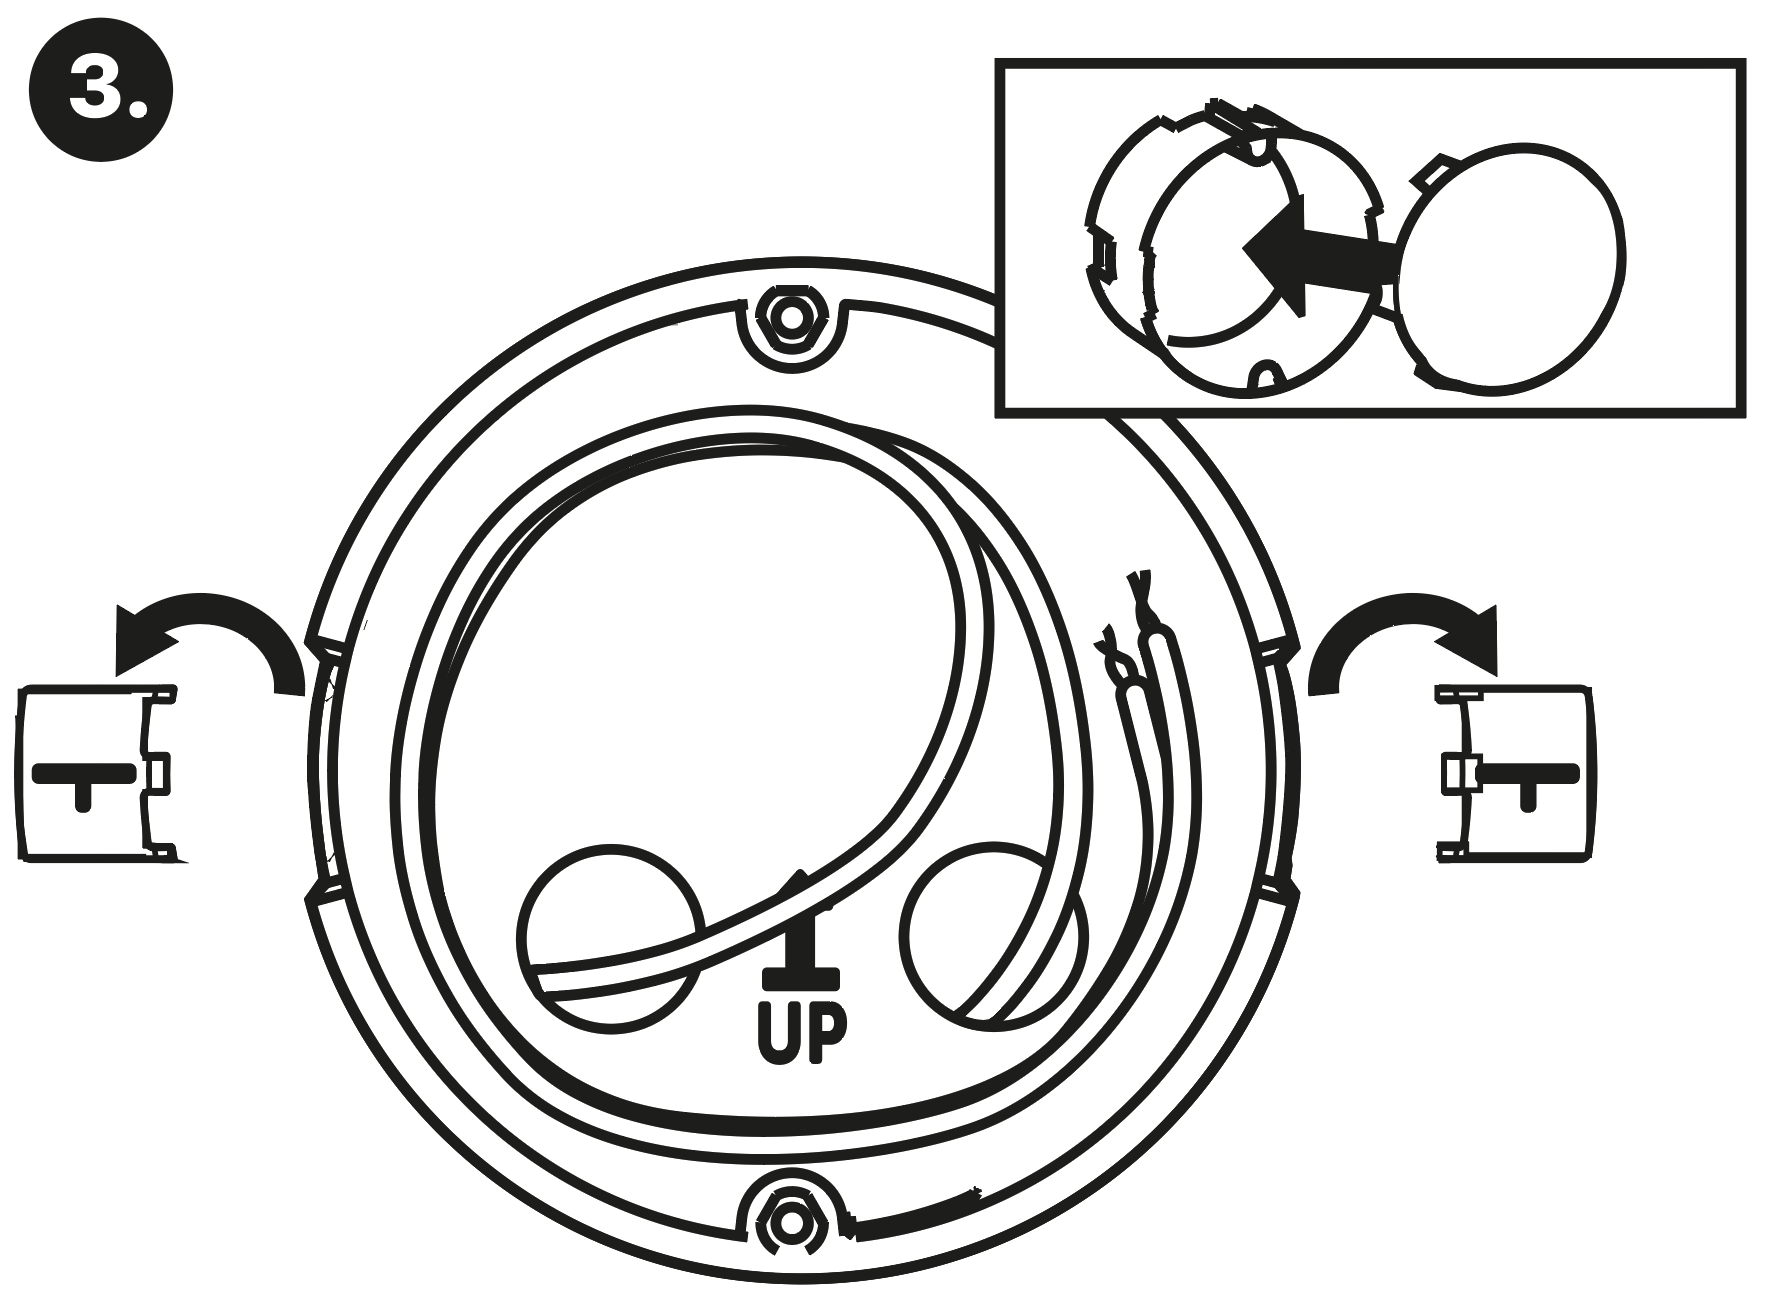 |
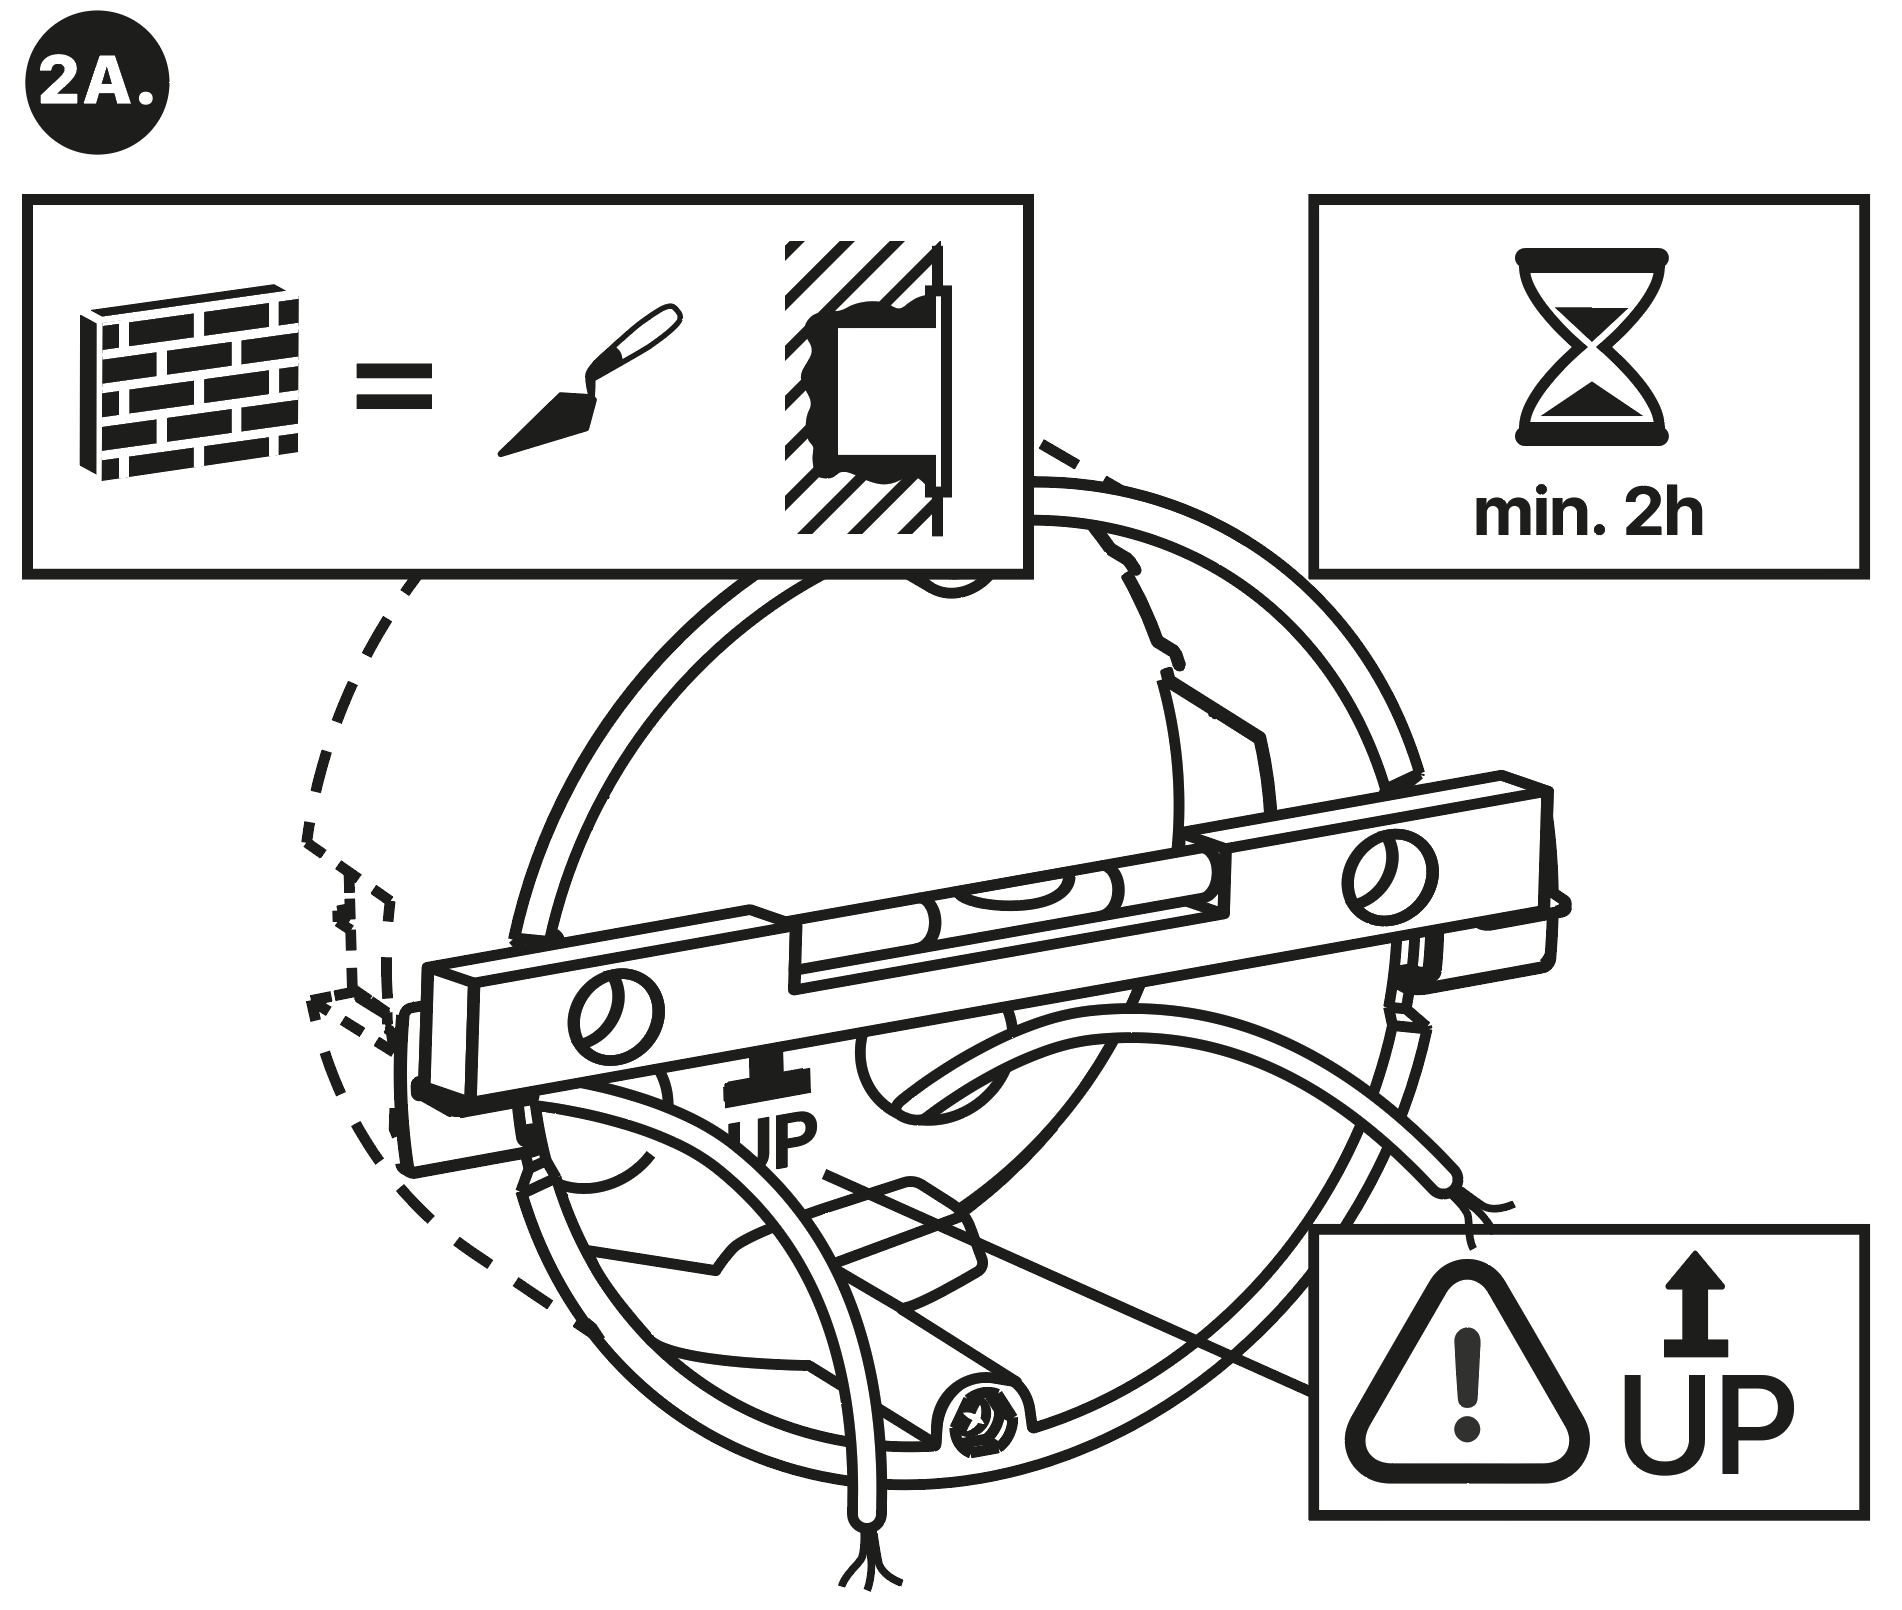
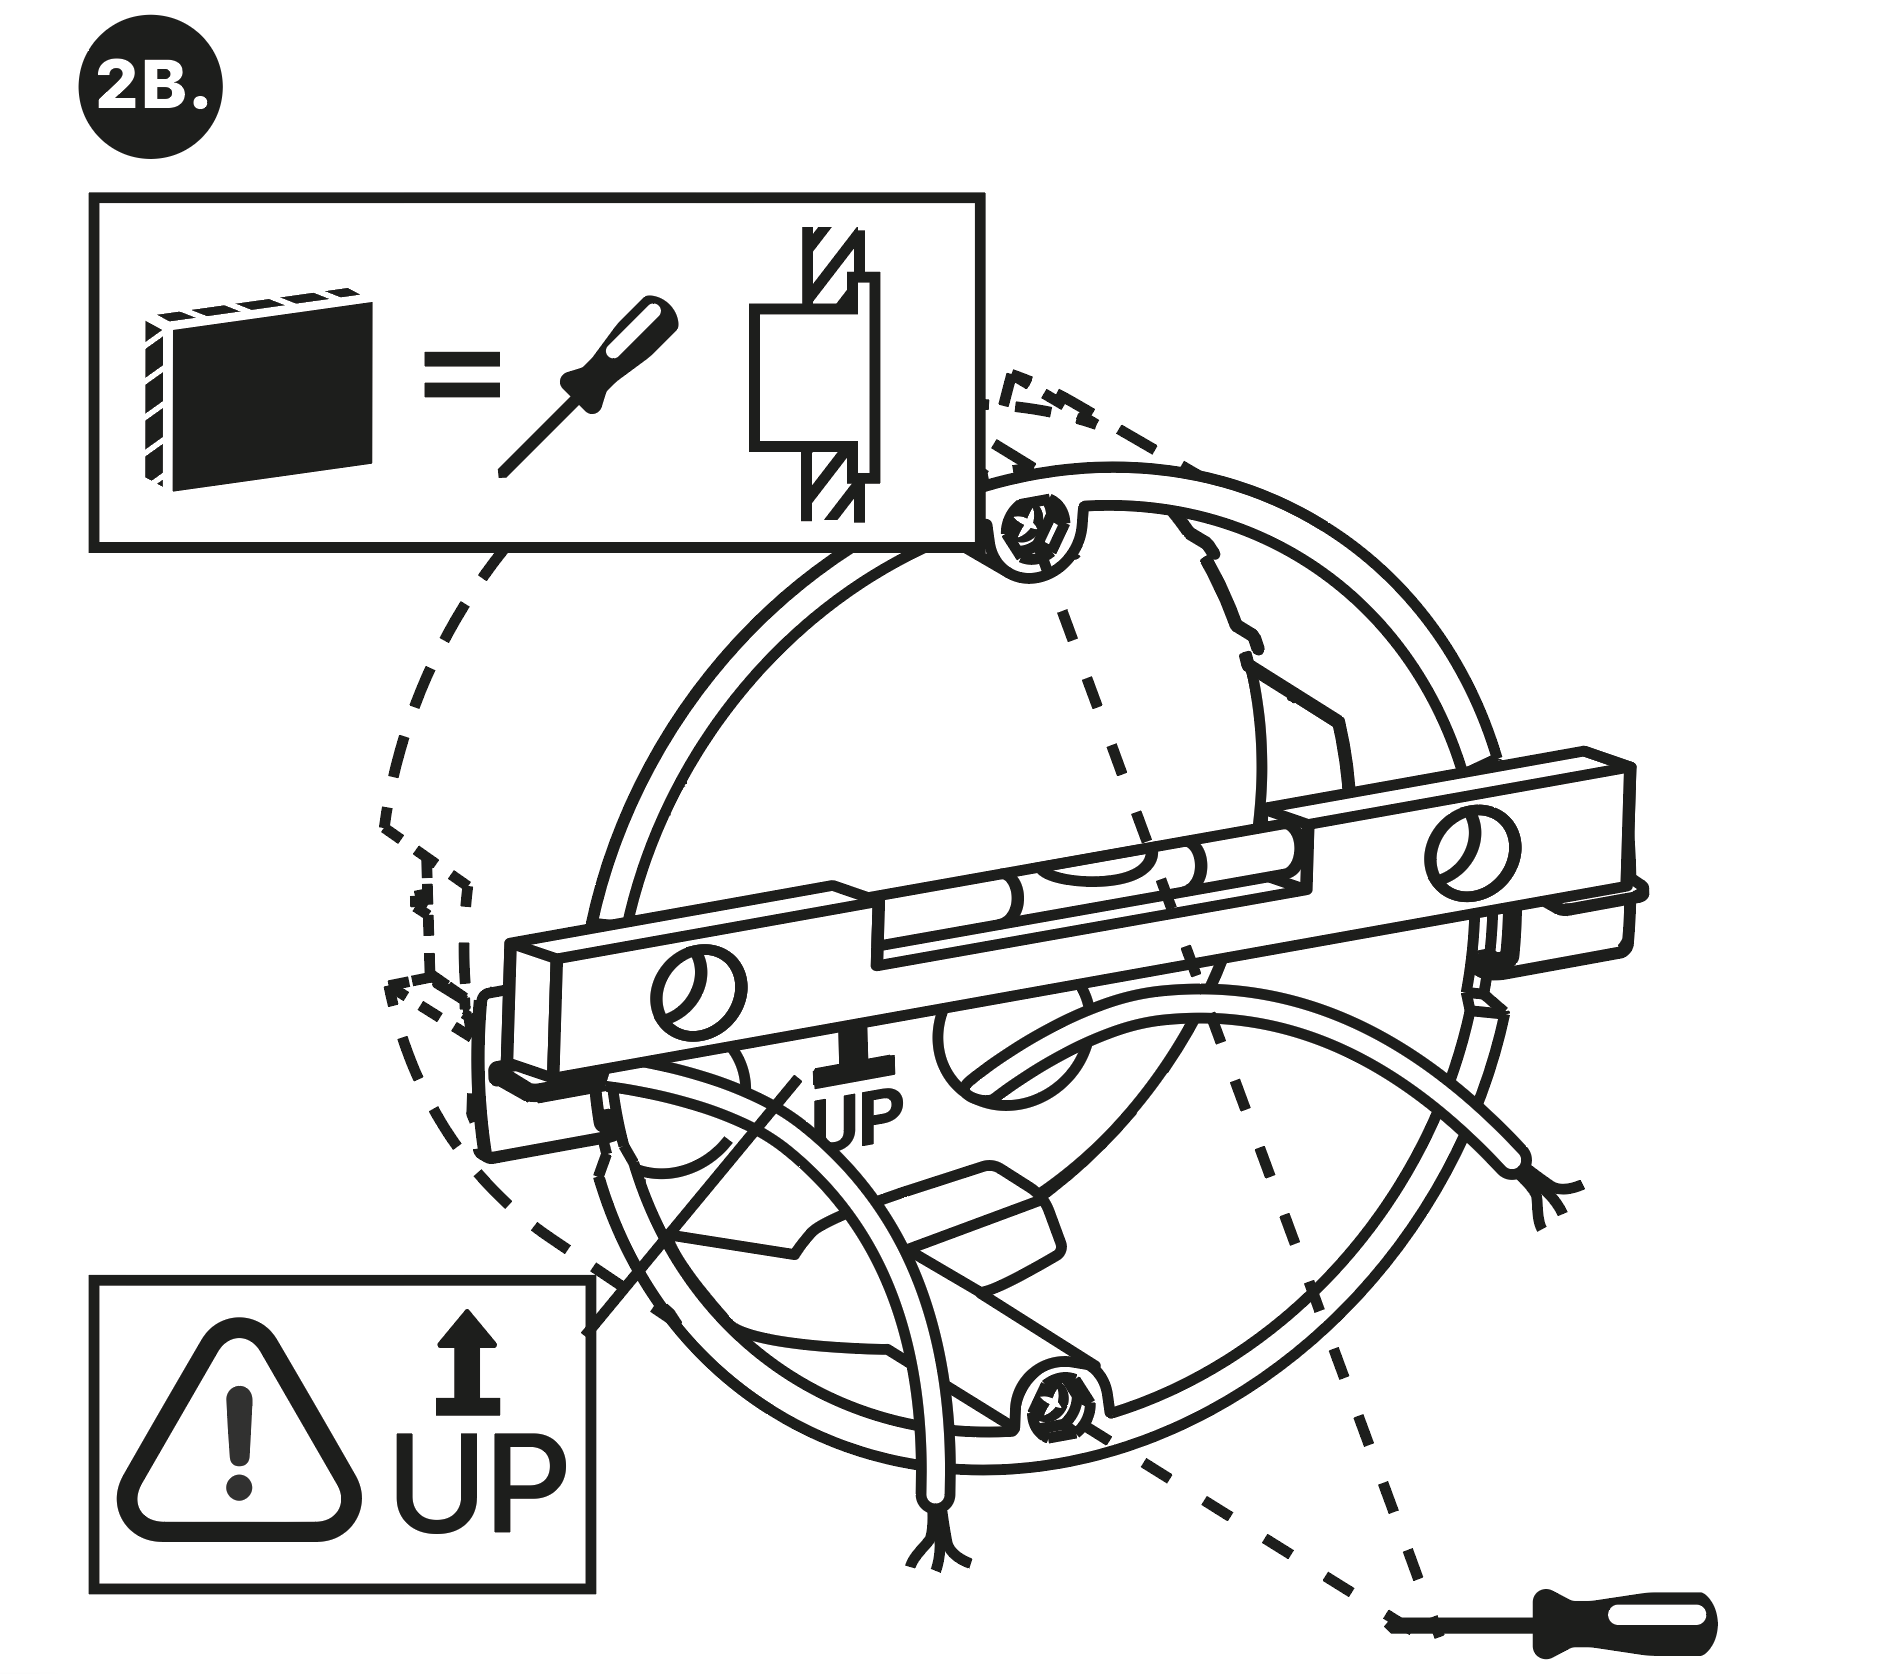
Cut a circular hole of the diameter of 103 mm and depth of 50 mm before installation. It is assumed that all necessary cables of the maximum length of 25 cm will lead to the hole. Put the flush mounting box in the hole to make sure that the hole is deep enough. If the hole complies with the box size, wall in the box and level the box using a water level on the holding clips. When the mortar hardens, break off the clips and cap the box with the cover provided. Use anchoring elements to fix the device into plasterboard.
Use a 2.5 mm hexagon key wrench (part of 2N® Indoor Talk delivery) for fitting 2N® Indoor Talk into the flush mounting box.
Note
- Respect the local standards concerning installation of electronic devices on flammable materials while flush mounting 2N® Indoor Talk.