2.1 Before You Start
Caution
- Make sure that you are equipped with all system components necessary for putting 2N® VoiceBlue Next in operation (SIM card, VoIP phone and/or duly configured SIP line of your SIP Proxy, an available 100BaseT socket and a PC for initial settings).
Product Completeness Check
Before installing this product, check whether the 2N® VoiceBlue Next delivery complies with the following packing list. Be careful because there may be differences in the packing list depending on whether you have ordered a two-channel or four-channel version of the 2N® VoiceBlue Next product (different part numbers).
Package | 2ch VBN | 4ch VBN |
|---|---|---|
2N® VoiceBlue Next | 1 | 1 |
Power supply adapter | 1 | 1 |
Short antenna | 1 | None |
Long antenna | 1 | 1 |
Ethernet cable | 1 | 1 |
Quick Start manual | 1 | 1 |
Wall-mounting set | 1 | None |
SIM card cover including screws | 1 | None |
Rubber feet | None | 4 |
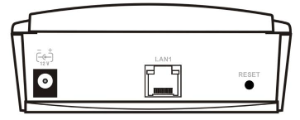
Connector Lay-Out (2-Channel Version)
The following connectors are mounted on the 2N® VoiceBlue Next bottom:
- Power supply connector – DC jack 2.1mm
- 10/100BaseT Ethernet connector
- RESET button – press for a short time to restart the GSM gateway and for a long time to restart the GSM gateway and download the factory settings.
 |
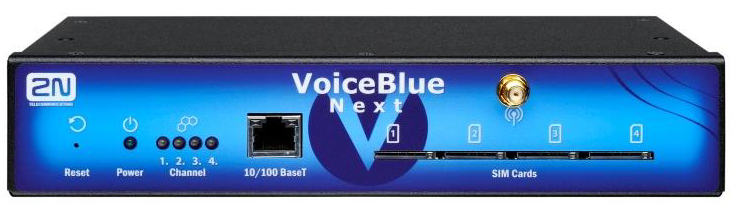
Connector Lay-Out (4-Channel Version)
The following connectors are mounted on the 2N® VoiceBlue Next bottom:
- 10/100BaseT Ethernet connector with PoE support
- RESET button – press for a short time to restart the GSM gateway and for a long time to restart the GSM gateway and download the factory settings.
- Antenna connector for all GSM/UMTS channels
- SIM holder
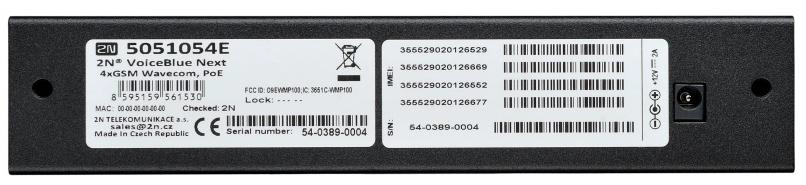
Find a power supply connector (DC Jack 2.1mm) and type plates at the rear.
 |
 |
Status LED Indicators
The 2N® VoiceBlue Next states are indicated by LEDs on the front and system connector sides. For the LED types see the table below.
 |
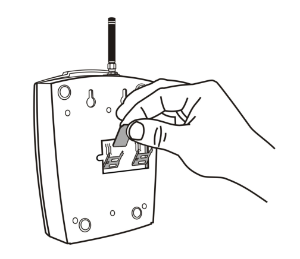
SIM Card Placement (2-Channel Version)
Lift off the SIM card holder on the 2N® VoiceBlue Next backside, insert the SIM card and replace the holder, securing the latch.
 |
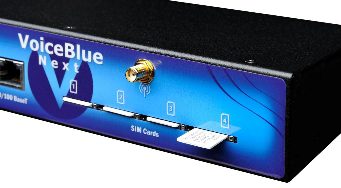
SIM Card Placement (4-Channel Version)
Insert a SIM card into one of the four SIM holders on the 2N® VoiceBlue Next front making sure that the chip contacts are at the front bottom. The SIM holders are equipped with the push&pull technology for facilitation.
 |
Caution
- Remember to set call forwarding, call barring, preferential network(s), SMS centre and similar provider and SIM card services in your mobile phone before inserting the SIM card in 2N® VoiceBlue Next.
- If two SIM cards are used, both of them must have an identical PIN, or PIN request disable must be selected.
- Disconnect 2N® VoiceBlue Next from the power supply before inserting the SIM cards!
Licences
2N® VoiceBlue Next may contain time-limited software licences (SIP signalling, Mobility Extension, e.g.) that render services for limited hours only. Every gateway restart adds one hour to the internal licence counter. To check the current licence status, use the web interface of the gateway (refer to Subs. 3.4), or the AT interface of the Telnet protocol (refer to S. 4).
Caution
- A GSM gateway with an expired licence cannot process any incoming and/or outgoing calls! To avoid this, ask your dealer for licence prolongation or an unlimited licence!
GSM/UMTS Network Restriction
Some 2N® VoiceBlue Next types may be restricted to certain GSM/UMTS networks only. If so, the red indicator at the given GSM/UMTS module is on and the 'netw-err' cause is detected. Contact your dealer please for more information.
Tip
- Contact your dealer please for more information.
Potential GSM/UMTS Troubles
All 2N GSM gateways work reliably under a long-time full load. The following problems may be caused by GSM/UMTS networks:
- GSM/UMTS module(s) cannot log in, log in slowly, or log out occasionally. This problem may be caused by any of the following situations:
- The GSM/UMTS signal is low. The minimum signal level should be approximately −80dBm. If lower, change the antenna position or type!
- The GSM/UMTS cell (BTS) to which the GSM/UMTS modules are trying to log in is overloaded. Change the antenna position or reduce the count of the logged-in GSM/UMTS modules.
- One of the GSM/UMTS modules is permanently logged-out or fails to make outgoing calls:
- The problem indicates a GSM/UMTS network overload on the installation site. To eliminate the problem, set the Relax delay parameter to 2 seconds (refer to the GSM Basic Parameters subsection). If the GSM module fails to log in or rejects to make outgoing GSM calls even after the gateway restart, consult your GSM provider for your SIM card/GSM module availability.
The manufacturer shall not be held liable for any SIM card or provider service unavailability in the case of a breach of the provider's SIM terms and conditions for the SIM card use.