License Plate Recognition (LPR) – how to configure it?
General information
2N devices can now use recognized license plates as another credential for entry or exit. This function can be enabled on any device that supports “Access Control” functionality. License plates may be assigned to a user and their validity is controlled by the same access rules as their other credentials.
If the function is enabled and a valid HTTP request is received, this event is recorded into the event log of the 2N device as LicensePlateRecognized with the following parameters:
- session= which contains ID of the authentication session
- licensePlate= which contains the license plate recognized by the camera
- ap= which defines if the HTTP request’s direction is entry (0) or exit (1)
- uuid= which links the received licensePlate to a specific user ID, if licensePlate isn’t assigned to any users, the uuid parameter will be left out
- valid= which defines whether the licensePlate has the right to enter (true) or not (false)
Optionally, a snapshot containing a recognized license plate may be attached to the LPR HTTP request. The device receiving these requests can then store up to 5 most recent snapshots. These can then be downloaded by 2N® Access Commander and linked to an access log.
One license plate should always be assigned to one user, otherwise its access rules may not be applied correctly if different users have different access rules. The first match found in the directory will be used for authentication.
Prerequisites
- Suitable Axis camera with ACAP support
- Suitable Axis camera with System On Chip (SoC) ARTPEC-6 or 7 (armv7hf compatible)
- License Plate Recognition app:
- Option 1: VaxALPR On Camera – Axis version 2-2-15+
or - Option 2: Axis License Plate Verifier 2.1-0+
- Option 1: VaxALPR On Camera – Axis version 2-2-15+
- 2N® Access Commander 2.0+
- FW 2.37+
- 2N IP/LTE Intercoms (apart from 2N® IP Uni)
- 2N Access Units
2N device configuration
Let’s configure the intercom or access unit first to have everything prepared for the integration.
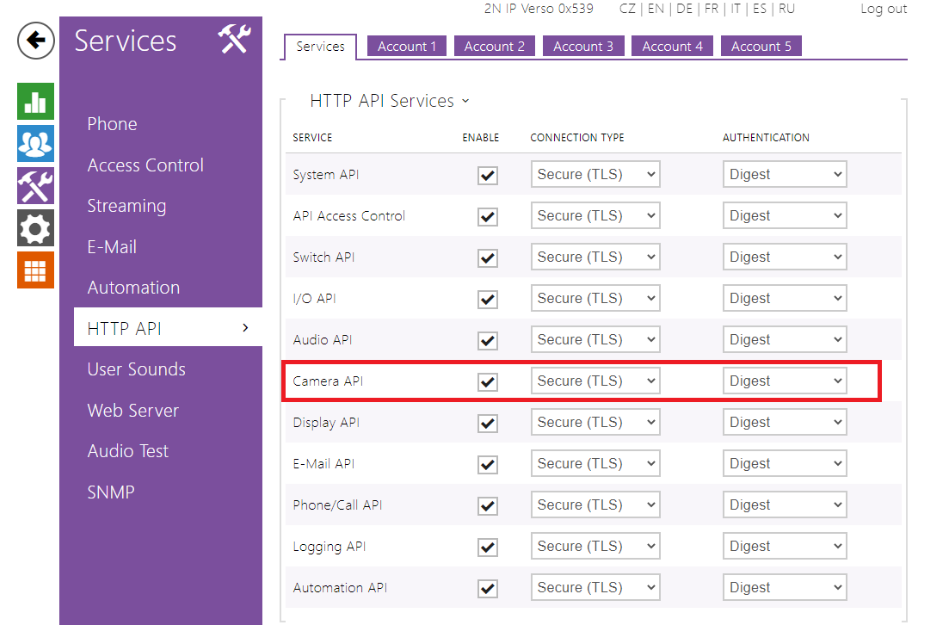
Go to Services -> HTTP API -> Services and make sure Camera API is enabled.
We recommend using Secure (TLS) / Digest as connection / authentication types.
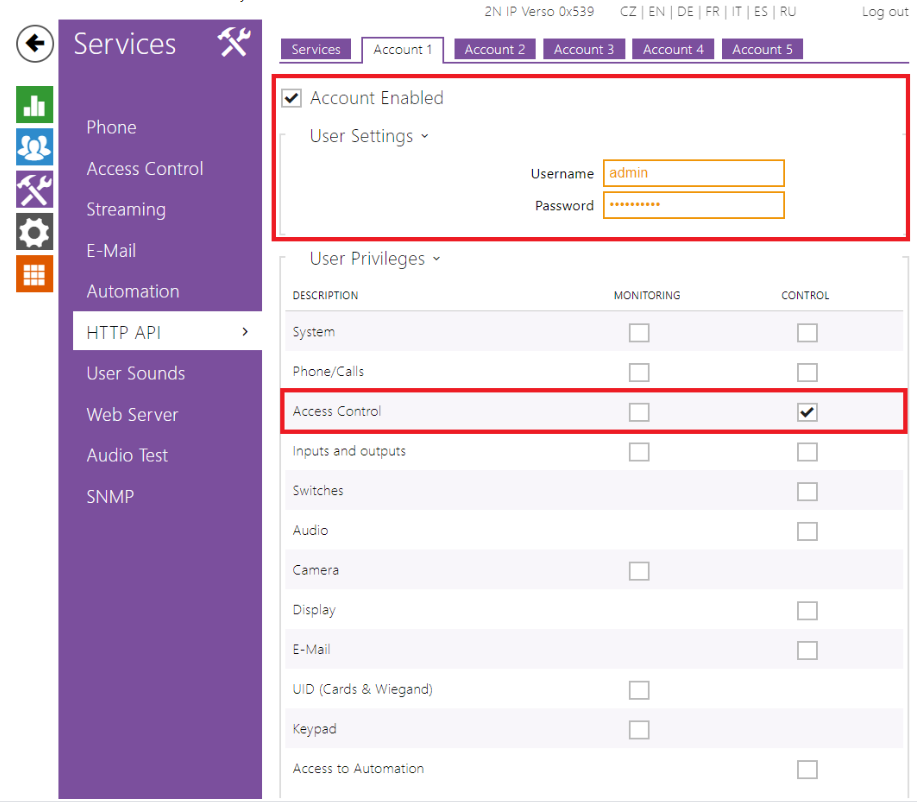
Then continue to Account #, enable it, enter credentials you’d like to use, and tick the Access Control checkbox.
2N® Access Commander info
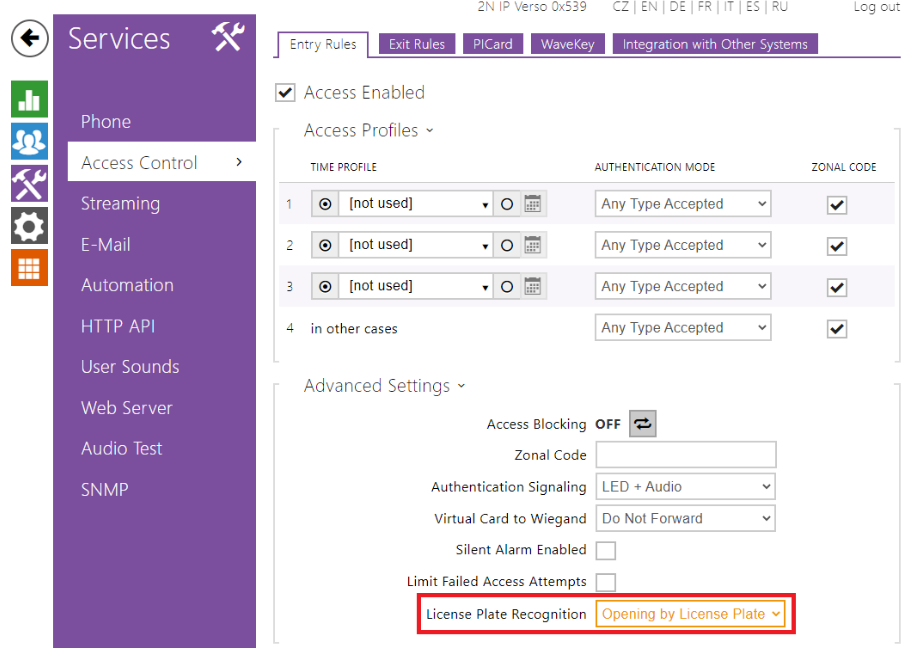
If the 2N device is connected to 2N® Access Commander, then the following settings are managed by it.- Now go to Services -> Access Control > Entry or Exit Rules -> Advanced Settings and select Opening by License Plate from the License Plate Recognition dropdown menu.
- The last step here is to create a user in Directory -> Users and add their license plates under Car Fleet Management. You can enter up to 20 license plates separated by commas, each license plate can contain up to 10 characters – spaces are ignored.

LPR app installation
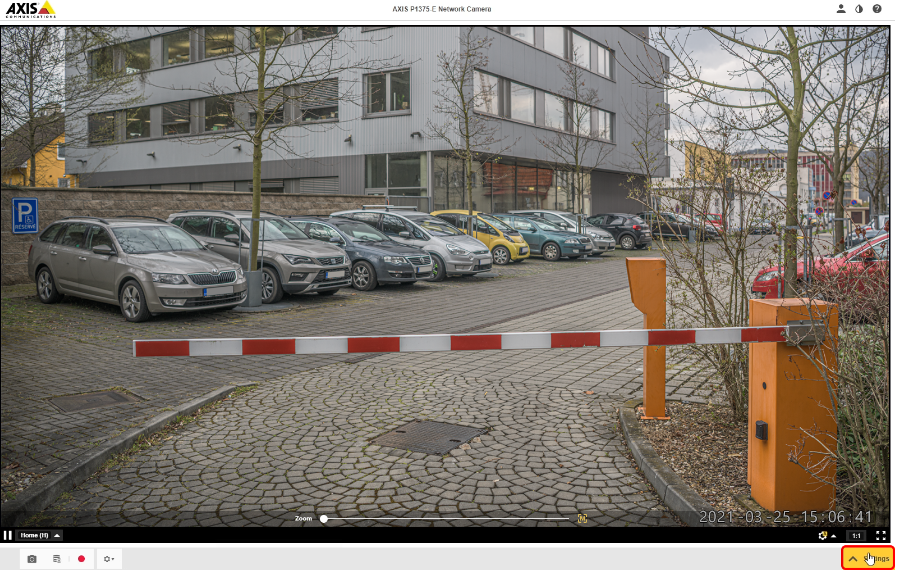
- Log in to an Axis camera with ACAP support and enter Settings,
Apps, and click on Add,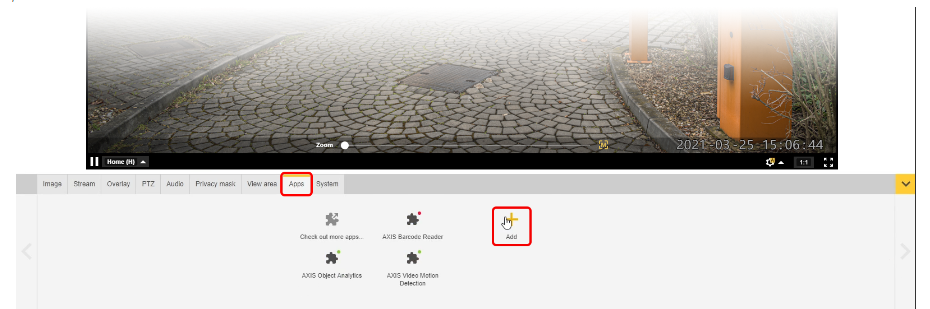
and then Browse.
- Locate the *.eap file of either VaxALPR downloaded from Vaxtor or ALPV downloaded from Axis

and click Install.
- Once the app is installed, it’ll appear in the list of installed apps, open it,
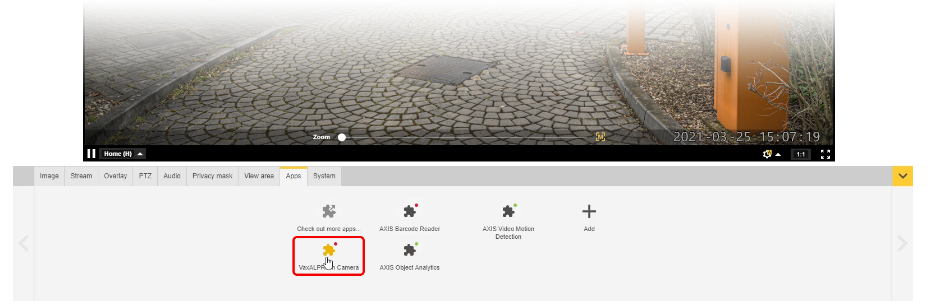
and install your license key.
- Then start the app and open it.

Option 1: VaxALPR
- Open the hamburger menu and select Reporting.

- Scroll down to 2N and enable it. Fill in your 2N device’s IP address and configure the rest based on the security settings and credentials you entered in the HTTP API section of the 2N device. Then click Submit Reporting to save the changes. You can also test the connection via theTest Reportingbutton below.

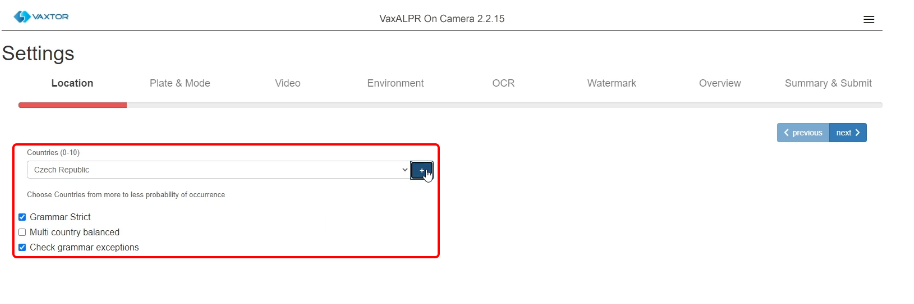
- Open the hamburger menu again and enter Settings. The first step called Location contains settings which define the countries whose license plates should be recognized. You can select up to 10.
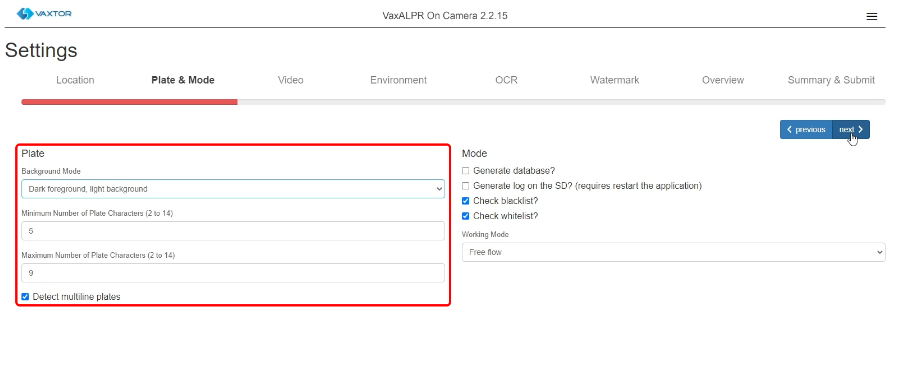
- In the next step called Plate & Mode, you can choose the background mode of detected plates and their minimum and maximum number of characters. There’s also an option to detect multiline plates – recommended for motorcycles.
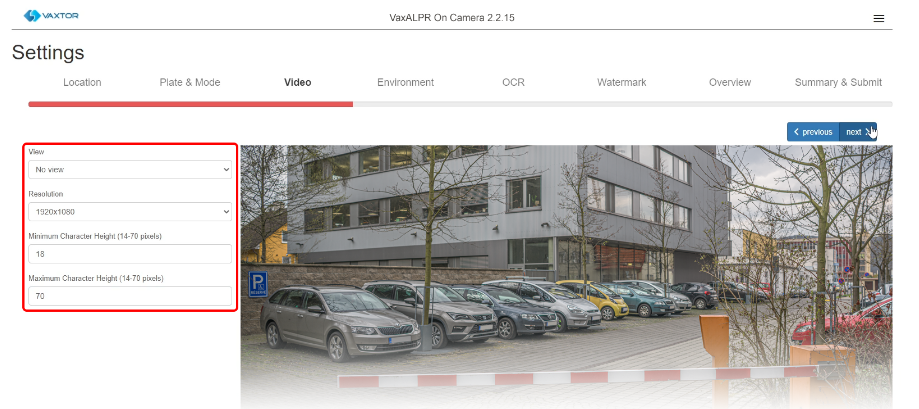
In Video you can set the minimum and maximum character height. Optimal settings are dependent on numerous factors, please consult the VaxALPR manual for more details.
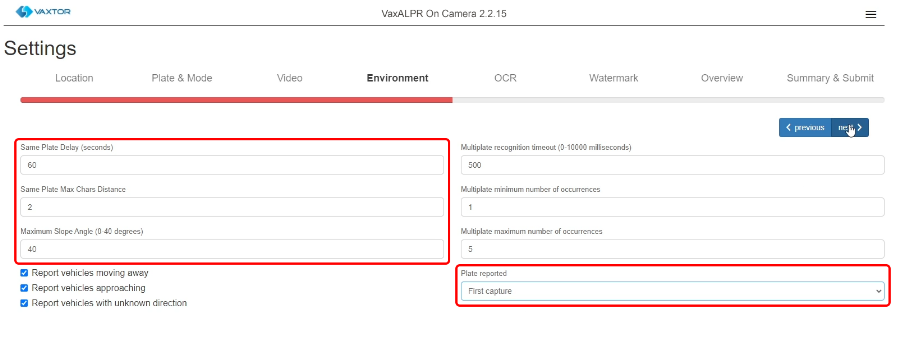
- In Environment, you have the option to adjust how often can the same plate be authorized, what’s the maximum angle under which OCR should recognize license plates and most importantly, when to report a recognized plate.
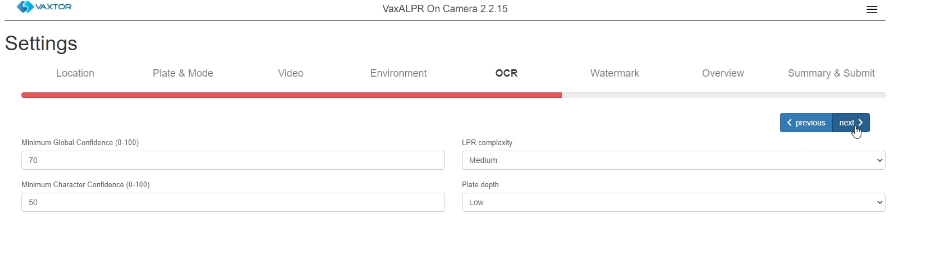
- The OCR section lets you fine tune the LPR confidence.
The Watermark section lets you adjust the images sent to 2N devices. Leave the Maximum JPEG size filter set to 0 as the maximum image size sent to 2N devices is 256 kB anyway – if the compressed file is bigger than that, it won't be sent. Thus you should adjust JPEG quality accordingly, we recommend setting it to 50 if your camera has a resolution around 1920×1080 px. For lower image resolutions or when Perform report crop to 640×480 is checked you can set the quality to a higher value.

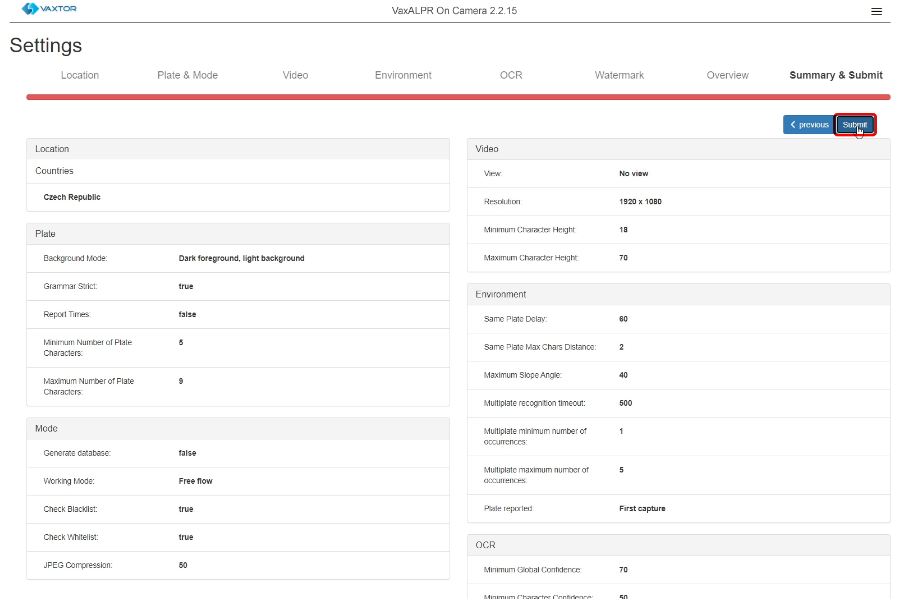
- Summary & Submit contains an overview of all previously configured settings. Make sure to click Submit to save the changes you made.
- Now, if everything is configured properly, and a license plate is recognized, it’ll be sent into your 2N device. Based on whether this plate is valid or not, the barrier/door will open.
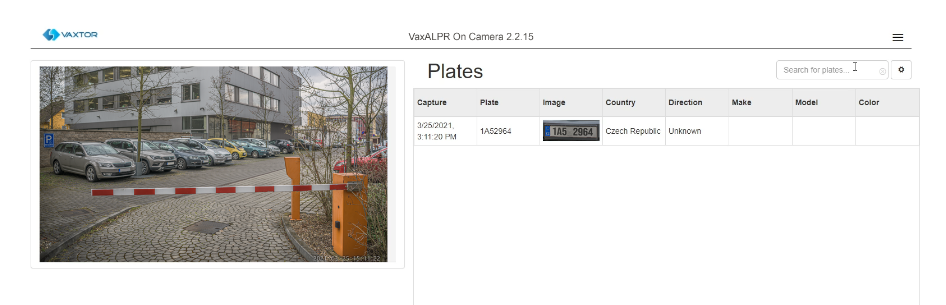
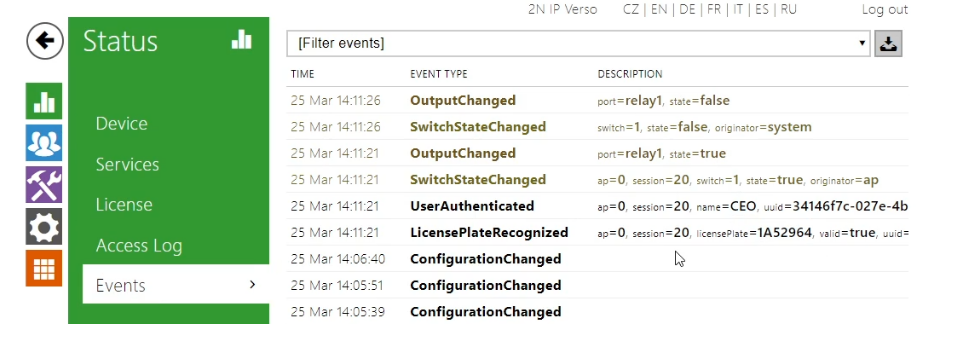
- Received license plates will be shown in the Event Log.
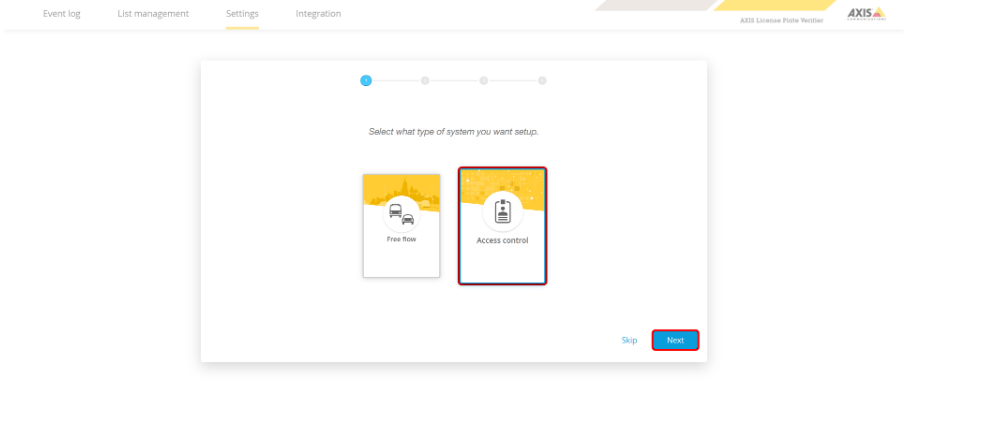
Option 2: ALPV
- With Access control selected, hit Next.
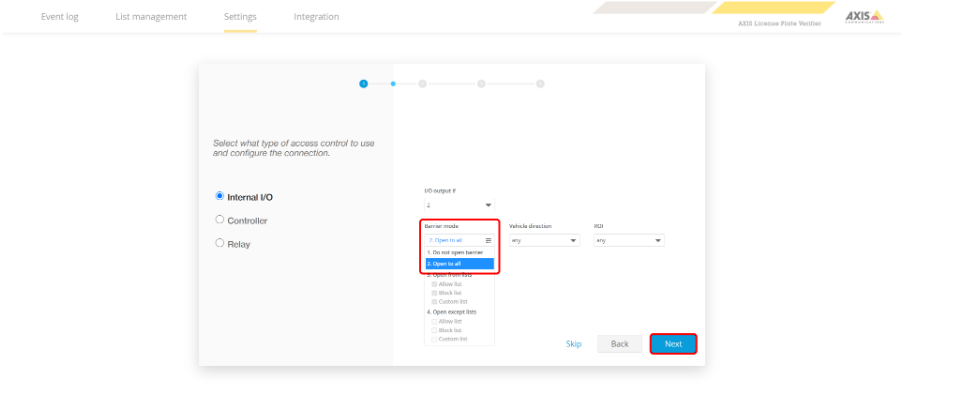
- Set Barrier mode to Open to all. Next.
- If your camera view is upside down, change Image rotation to 180. Next.
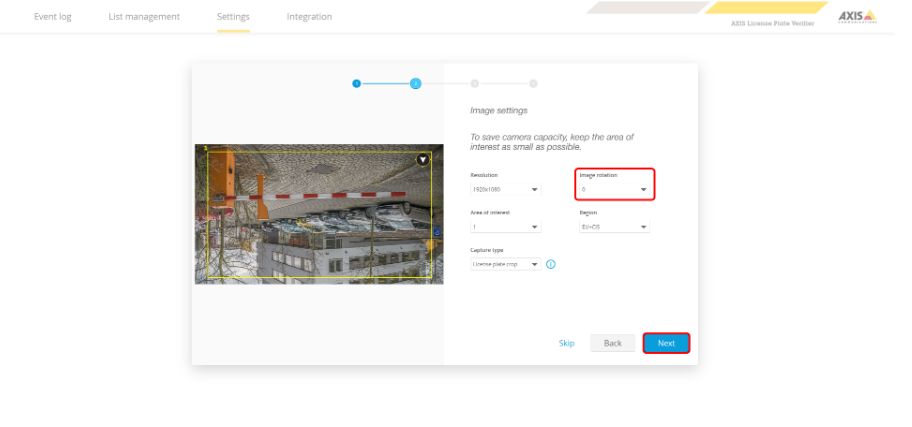
- Next.
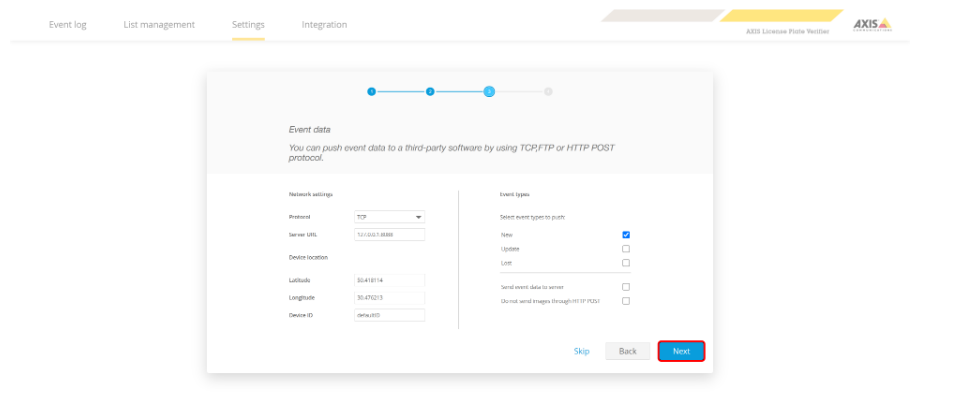
- Finish.

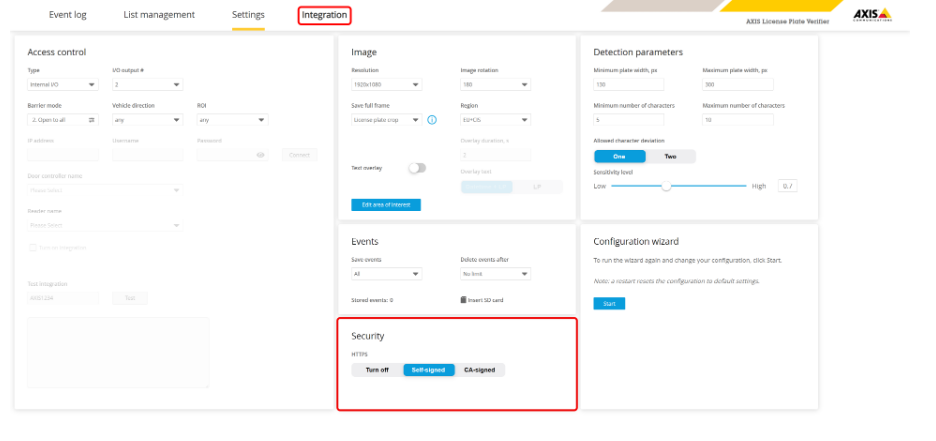
- Now go to Settings…

- …and enable Self-signed certificate in the Security section. Then continue to Integration.
- Enter your 2N device’s IP address and credentials into the Direct integration tab on the right. Make sure to select HTTPS as connection type and turn on Enable integration, then click Save and continue to Event log.
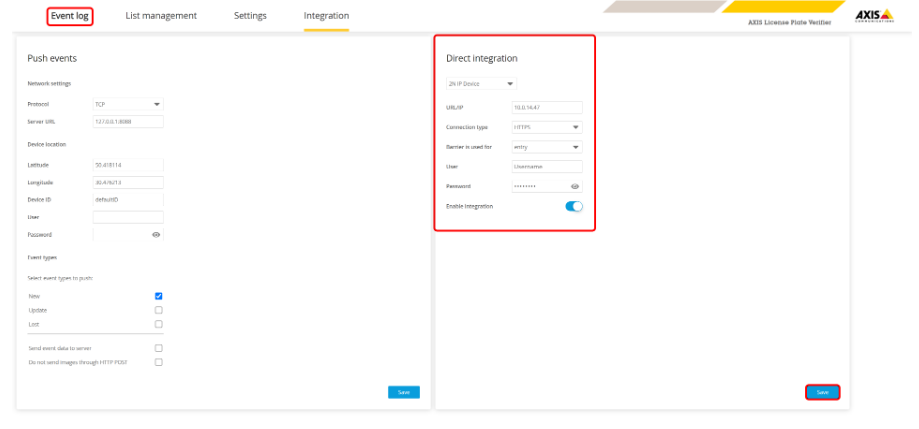
- If everything is configured properly. When a license plate is recognized, it’ll be sent into your 2N device. Based on whether this plate is valid or not, the barrier/door will open.
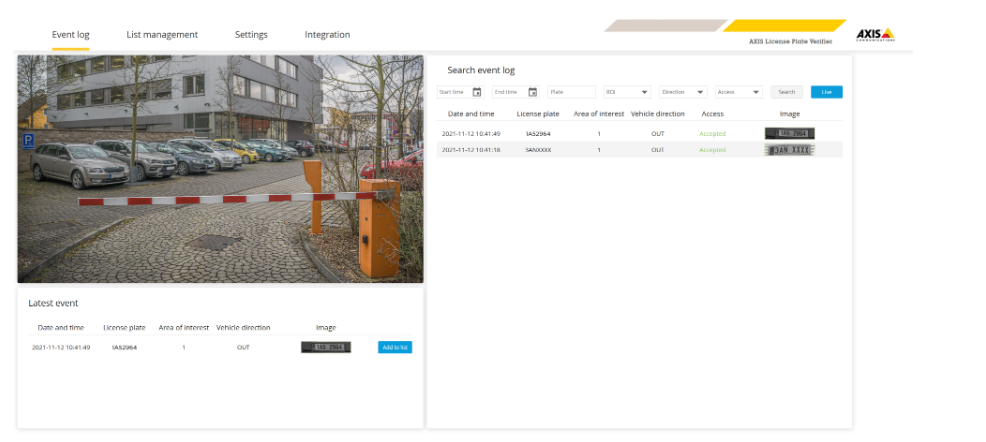
- Received license plates will then be shown in the Event Log of your 2N device.

2N® Access Commander configuration (optional)
Version 3.0+
When a 2N device is connected to 2N® Access Commander, then most of its settings are managed by it. Thus, LPR settings will be managed by 2N® Access Commander, but still you have to configure the device’s HTTP API credentials as those are device dependent.
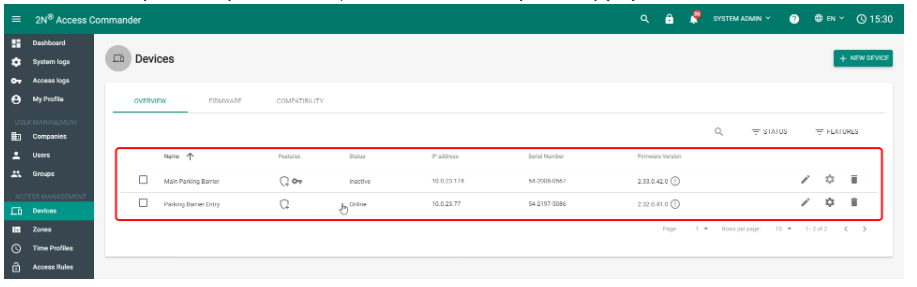
- Configure your 2N® Access Commander as you normally would. Then open details of the device you already prepared for LPR
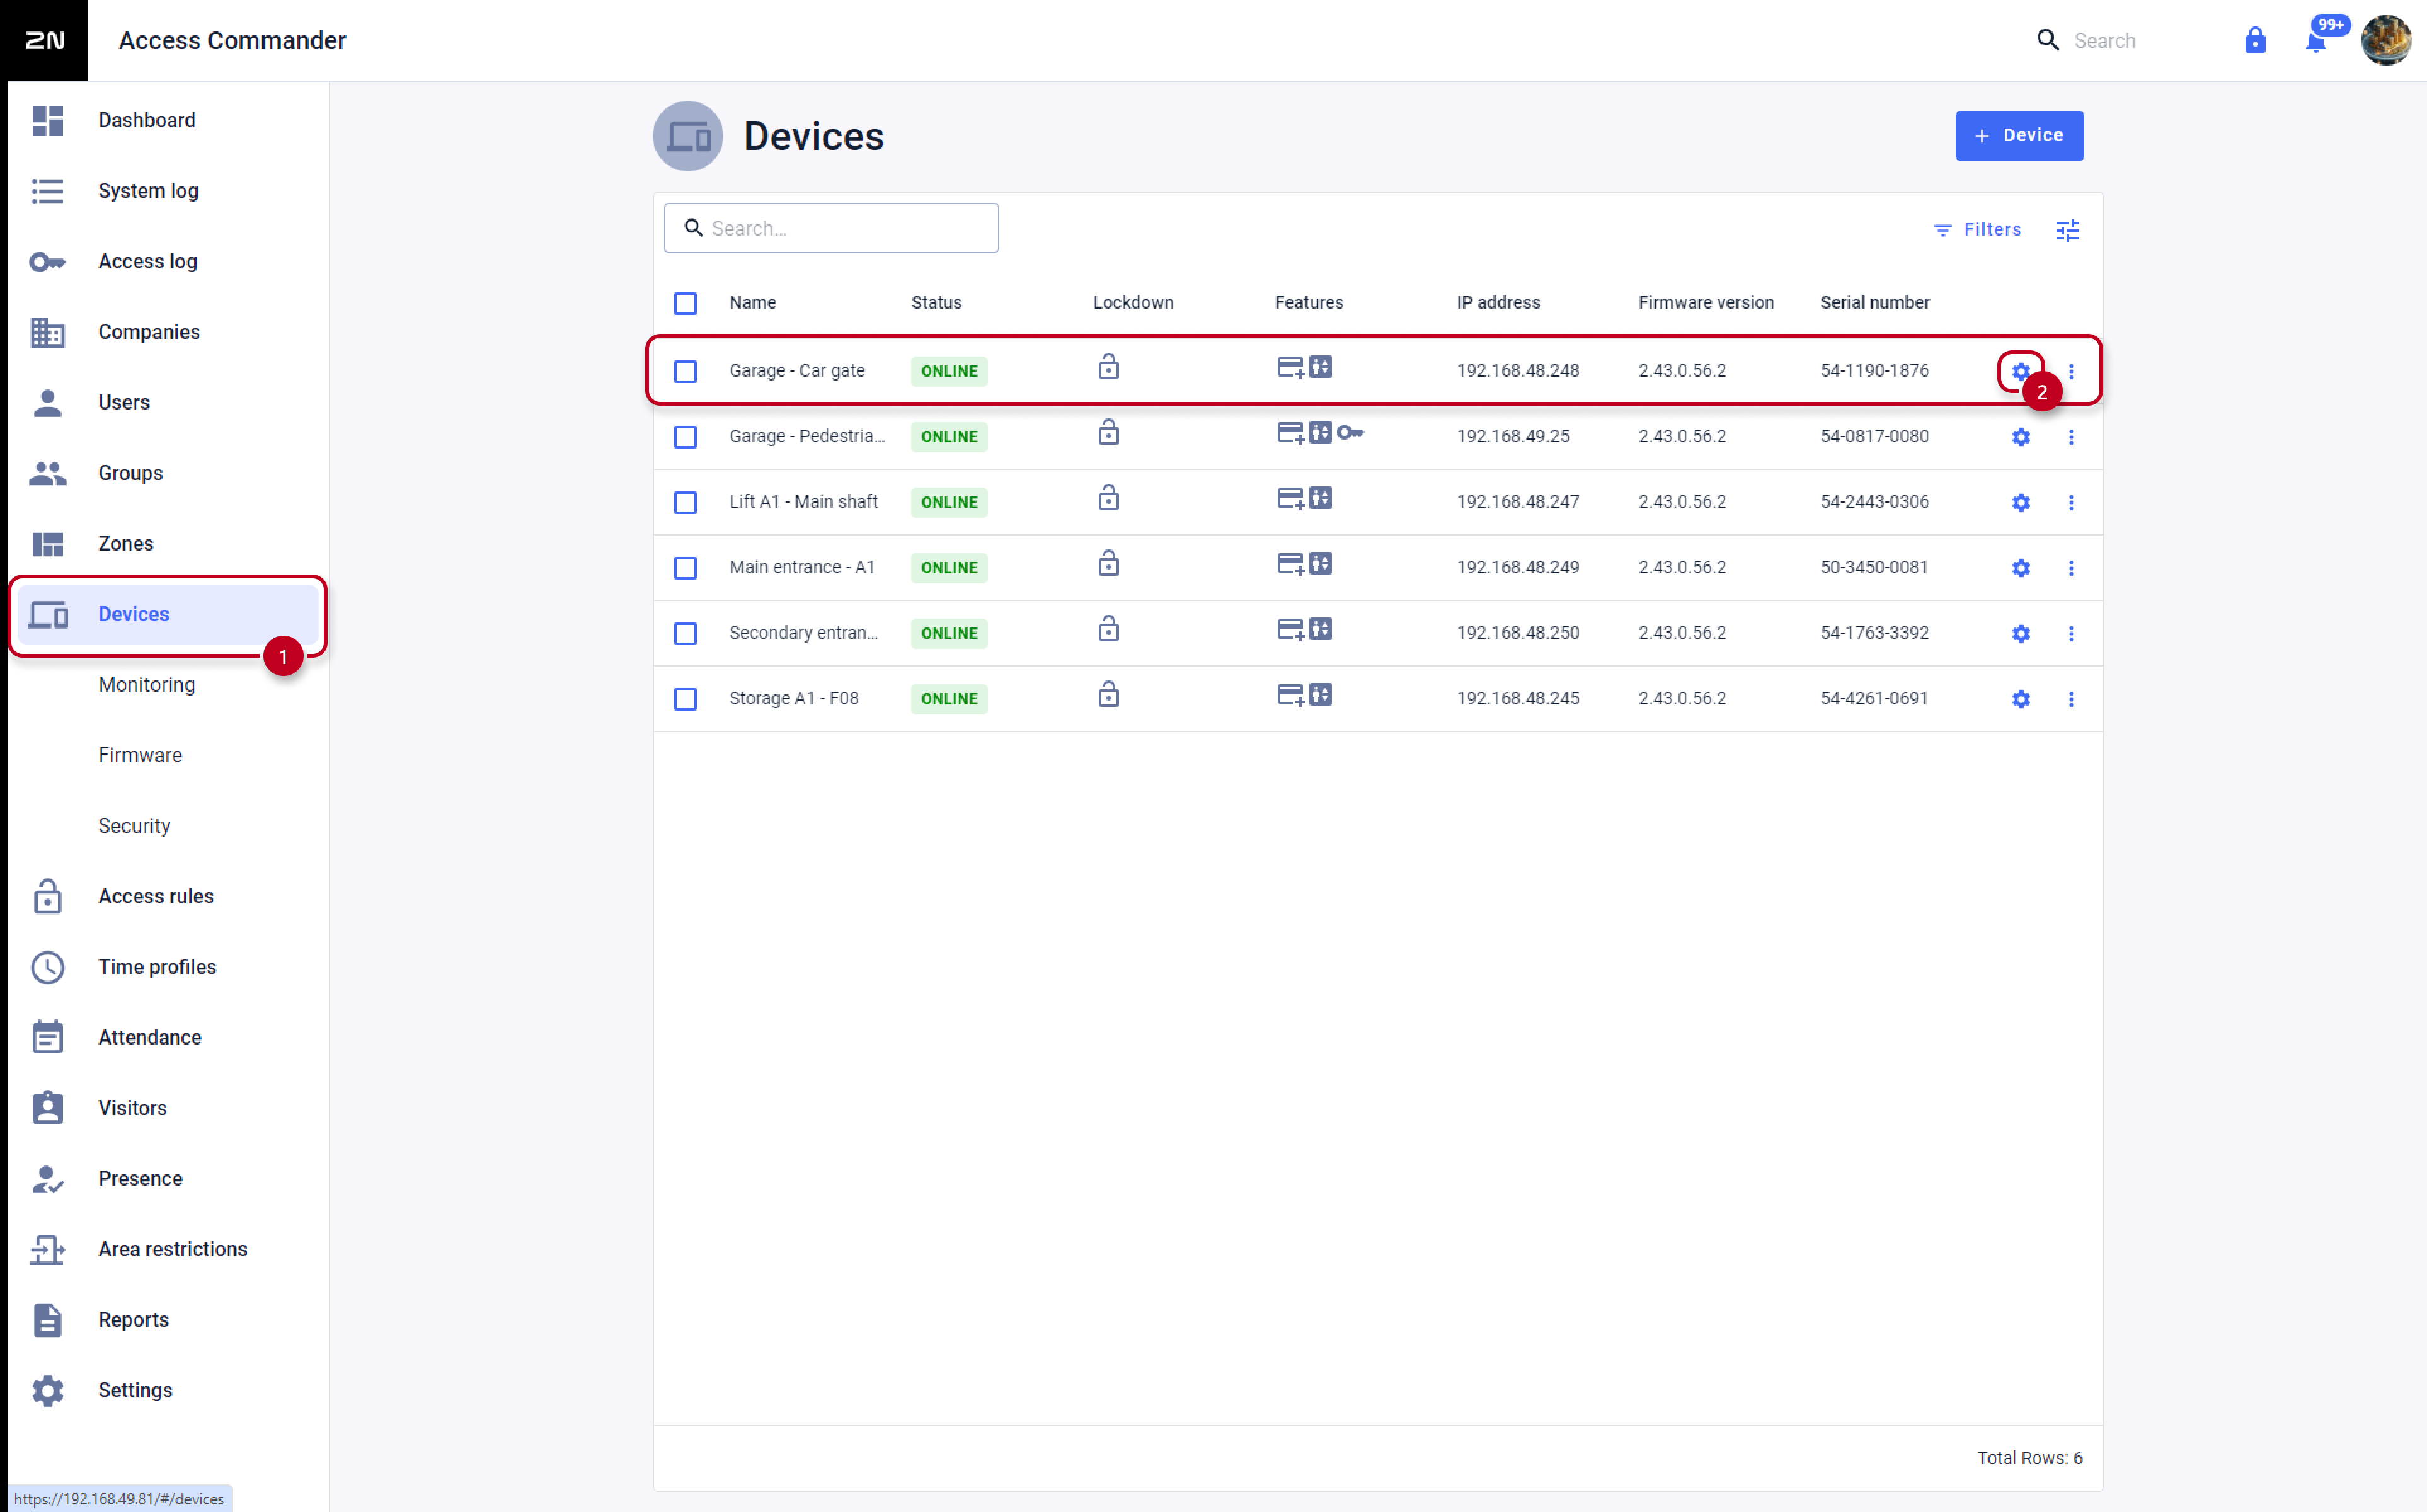
and make sure it has Lift Control turned off (option to activate will be shown) and that it’s assigned to the proper zone.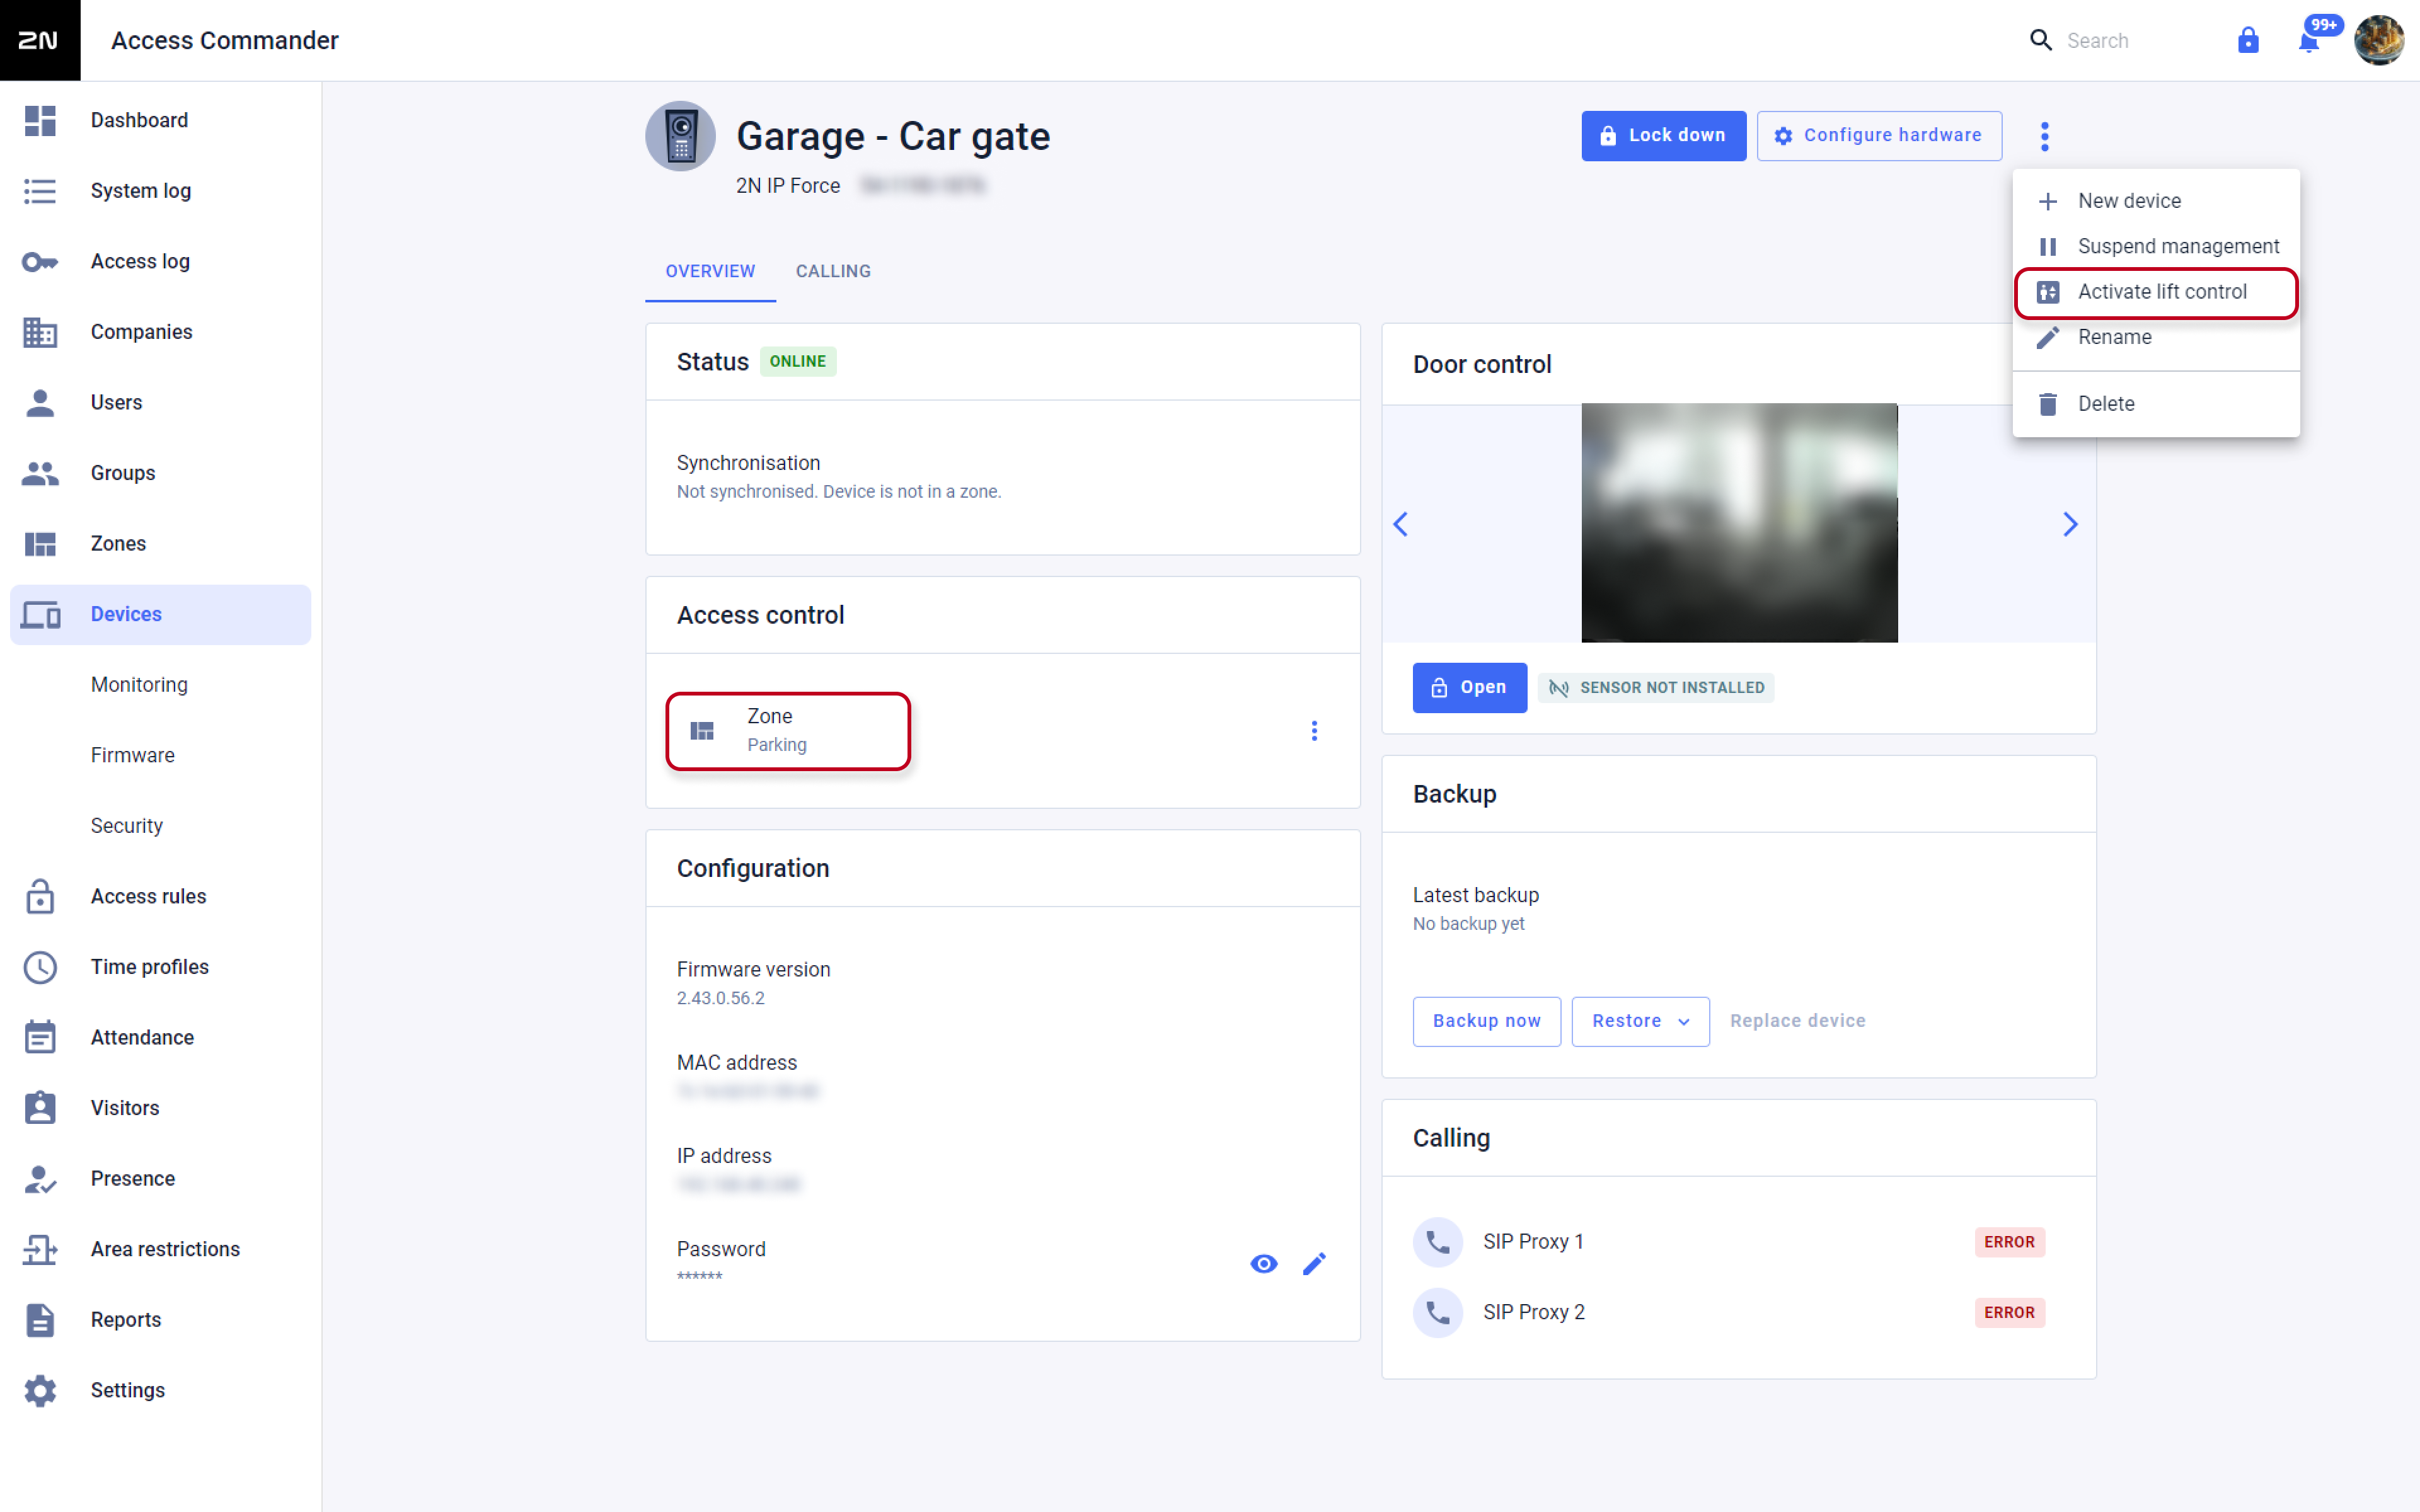
- Then go to this Zone’s detail and enable License Plate Authentication.

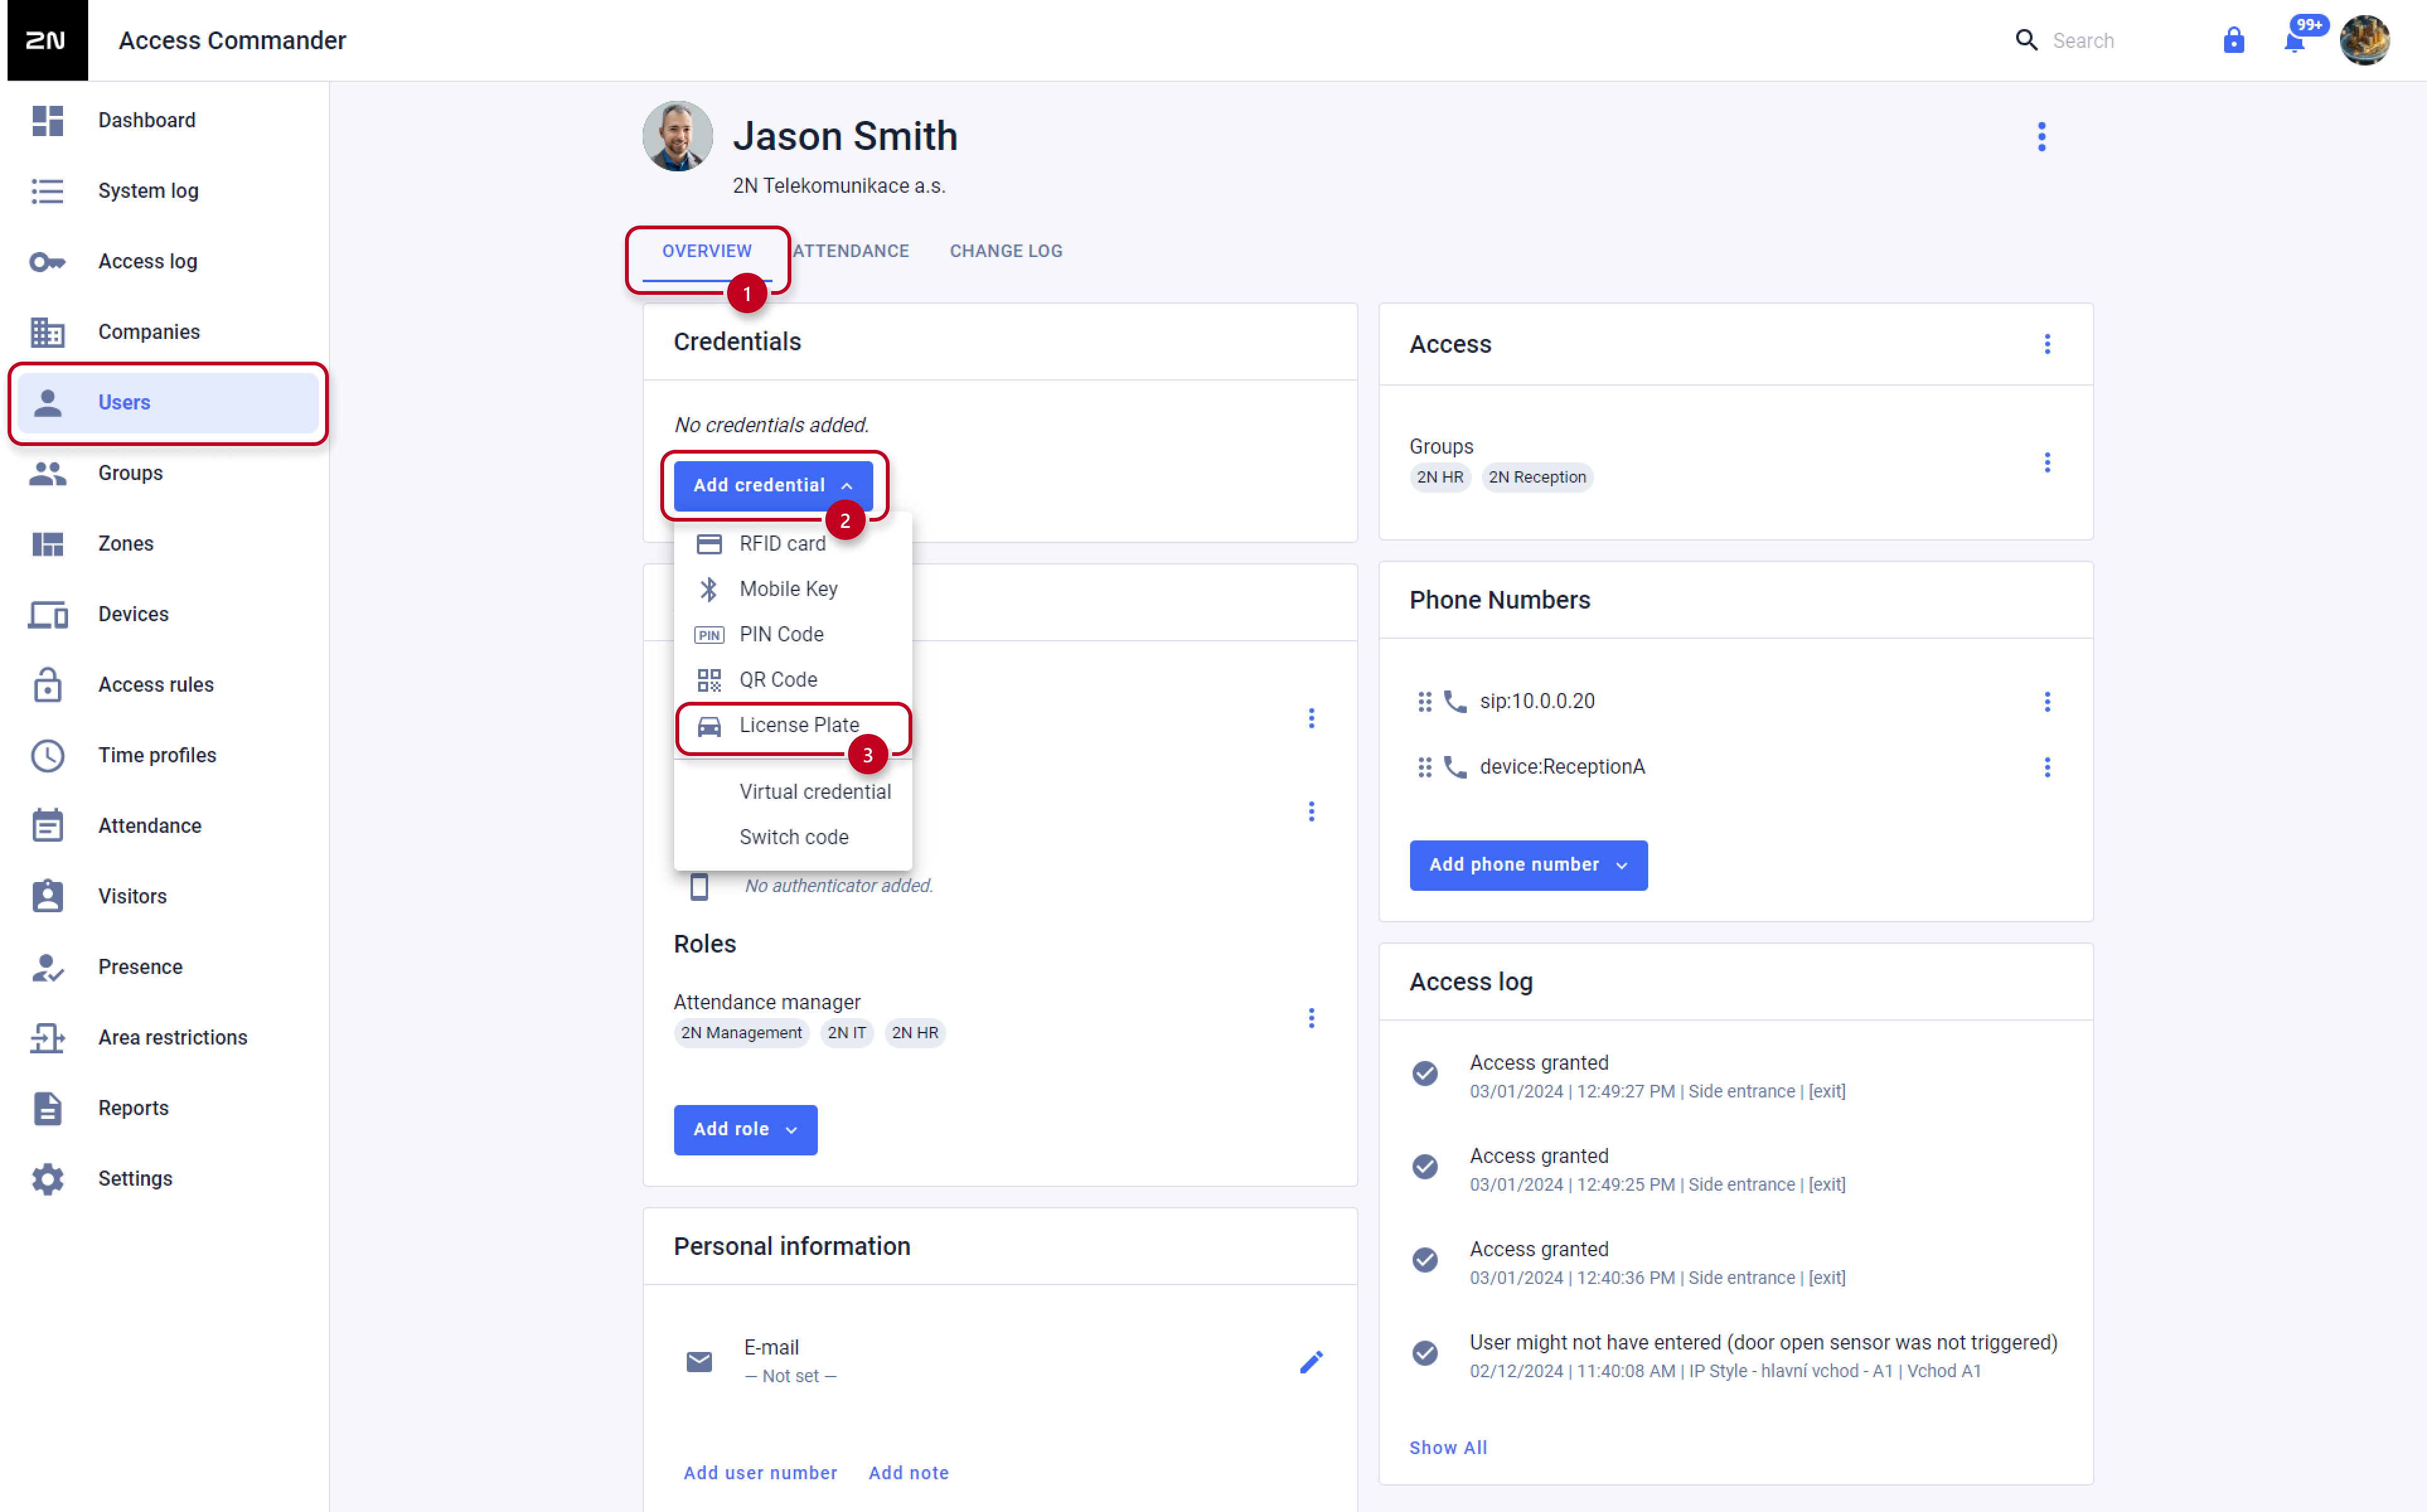
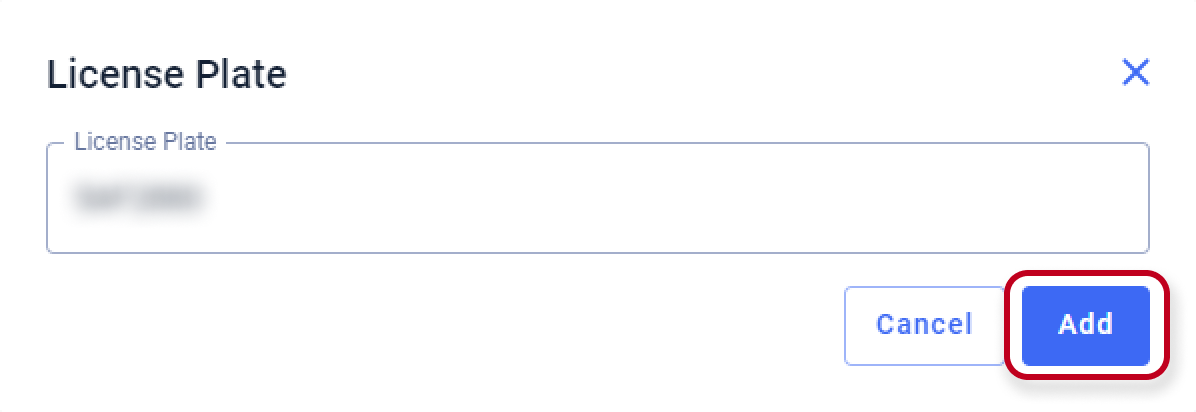
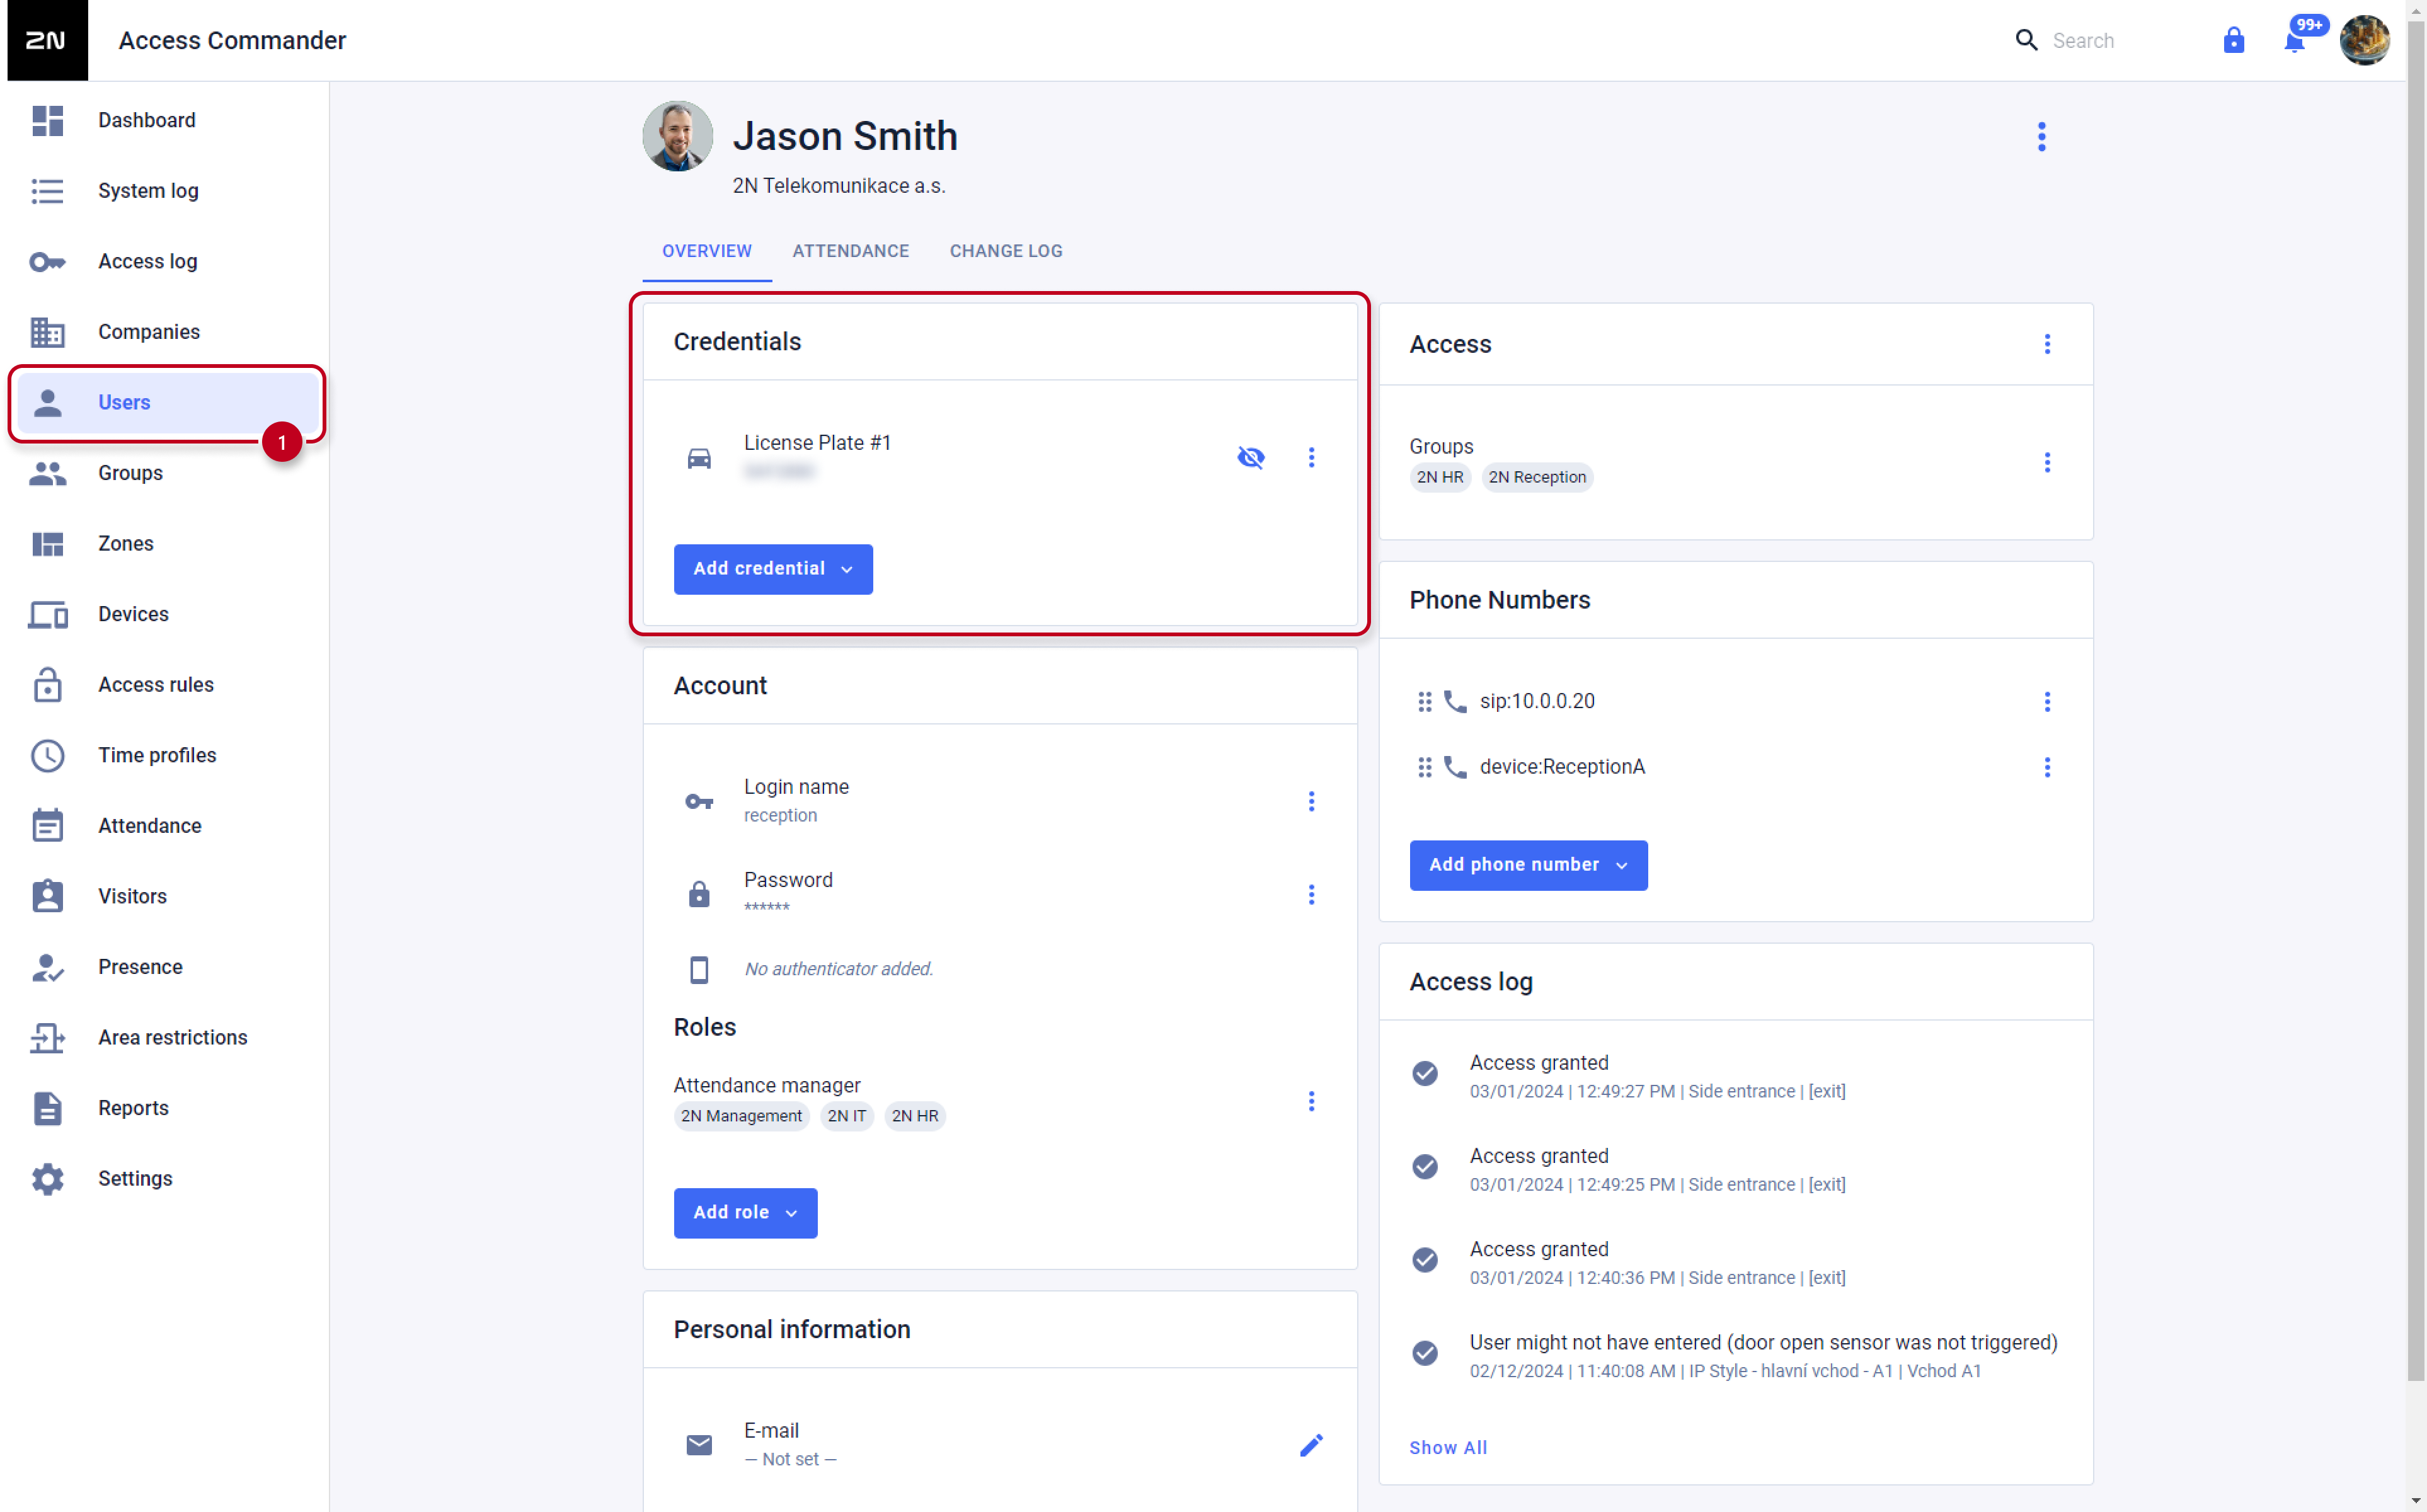
- Users can have their license plates assigned under Overview → Credentials → License plate, click ADD, enter one or more license plates, and confirm by clicking create.
- Verify that this user is assigned to the correct group

and create an Access Rule for it.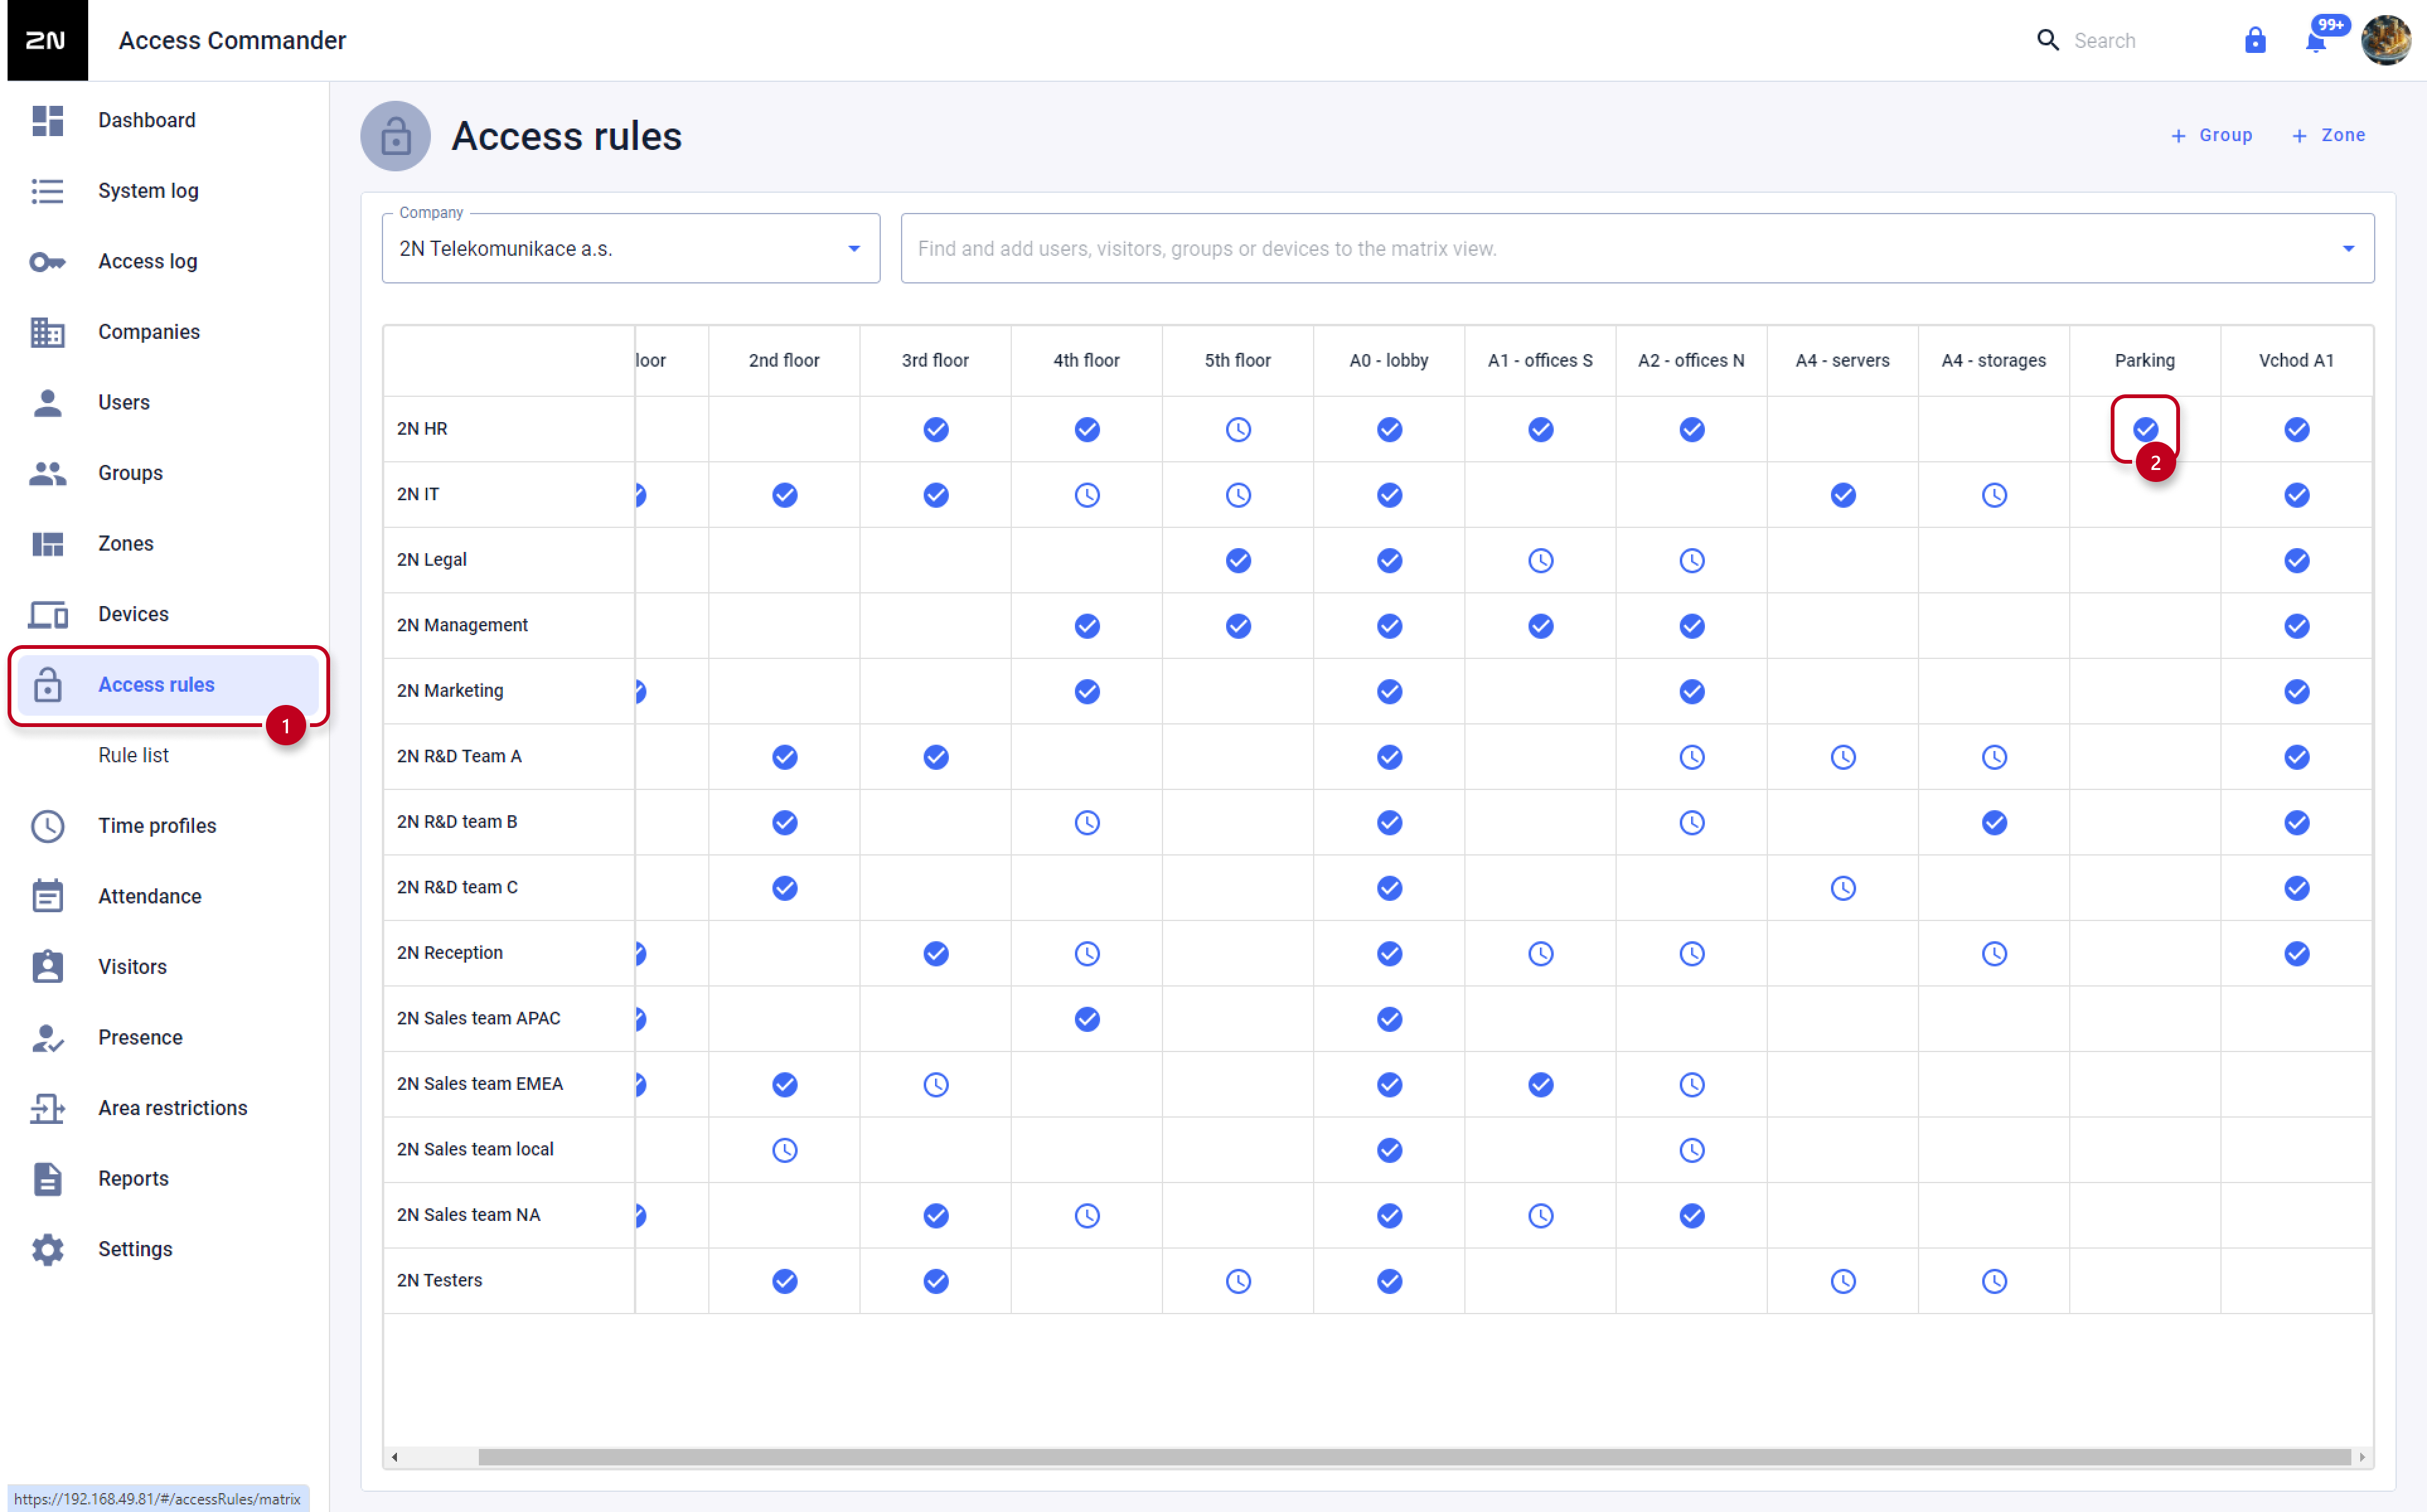
- Optionally, if you’d like to get photos of recognized license plates, you can create + CAM LOGS. Name the log accordinglyand after creaion select the Car license plate recognised
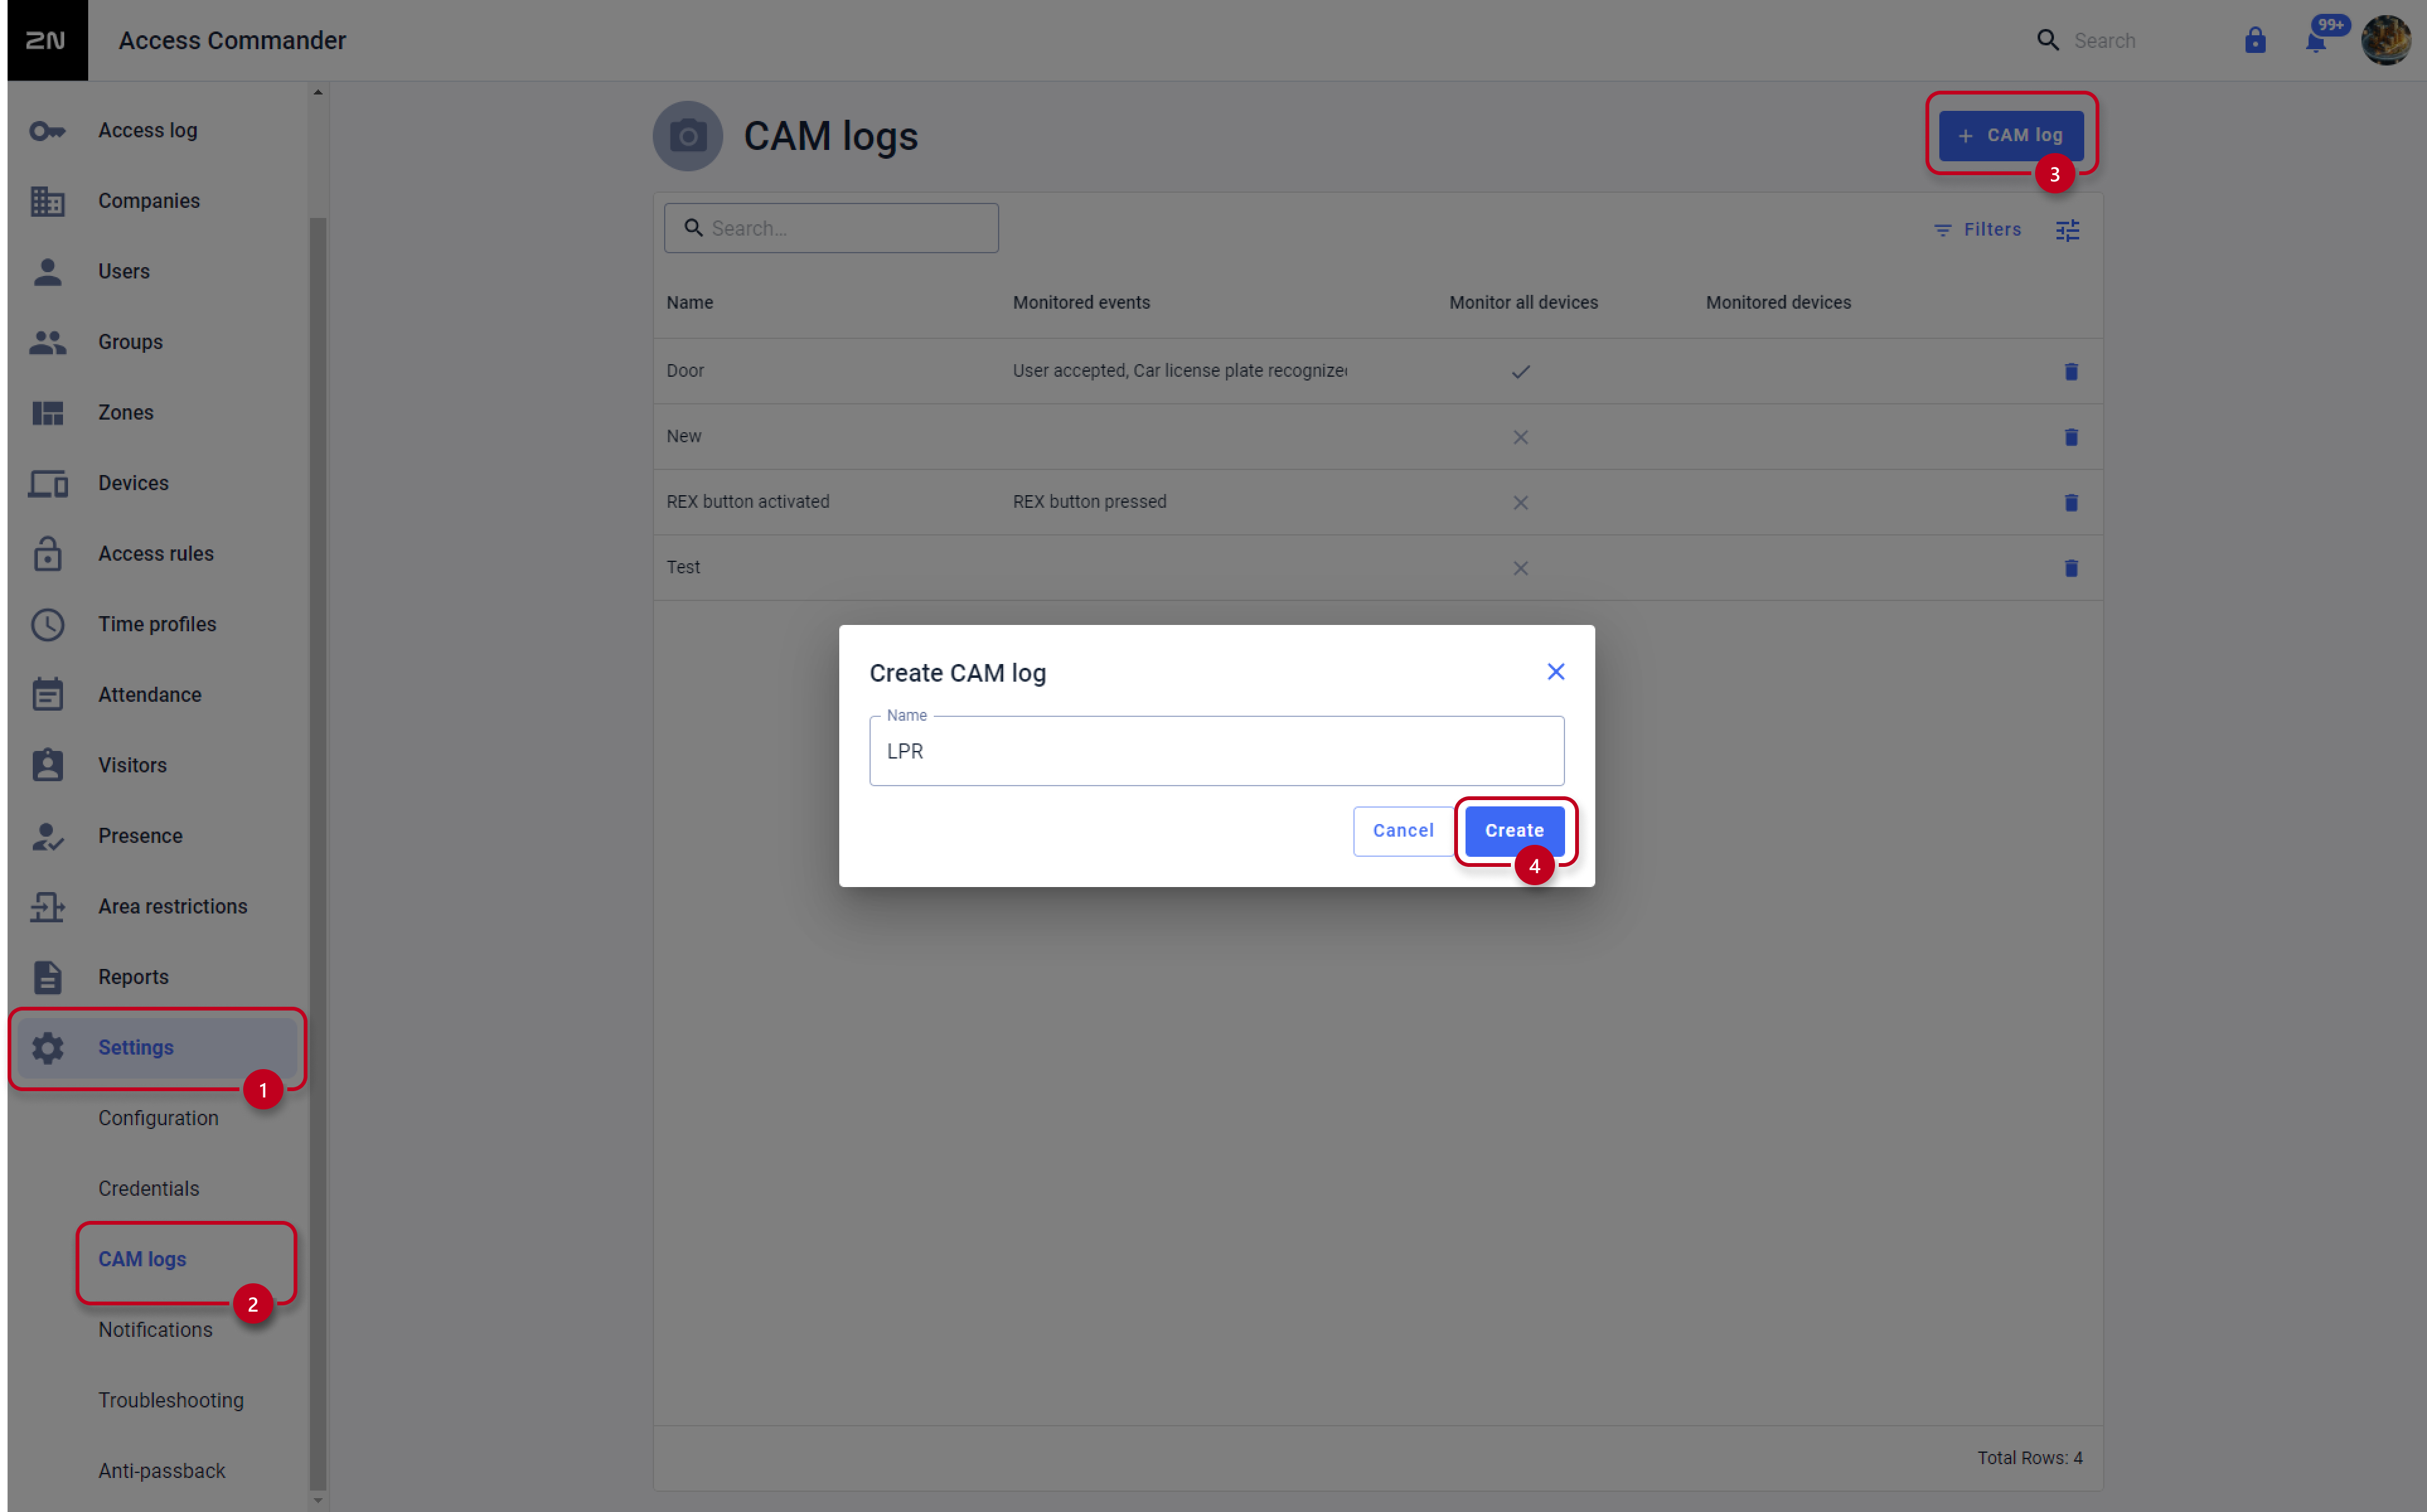
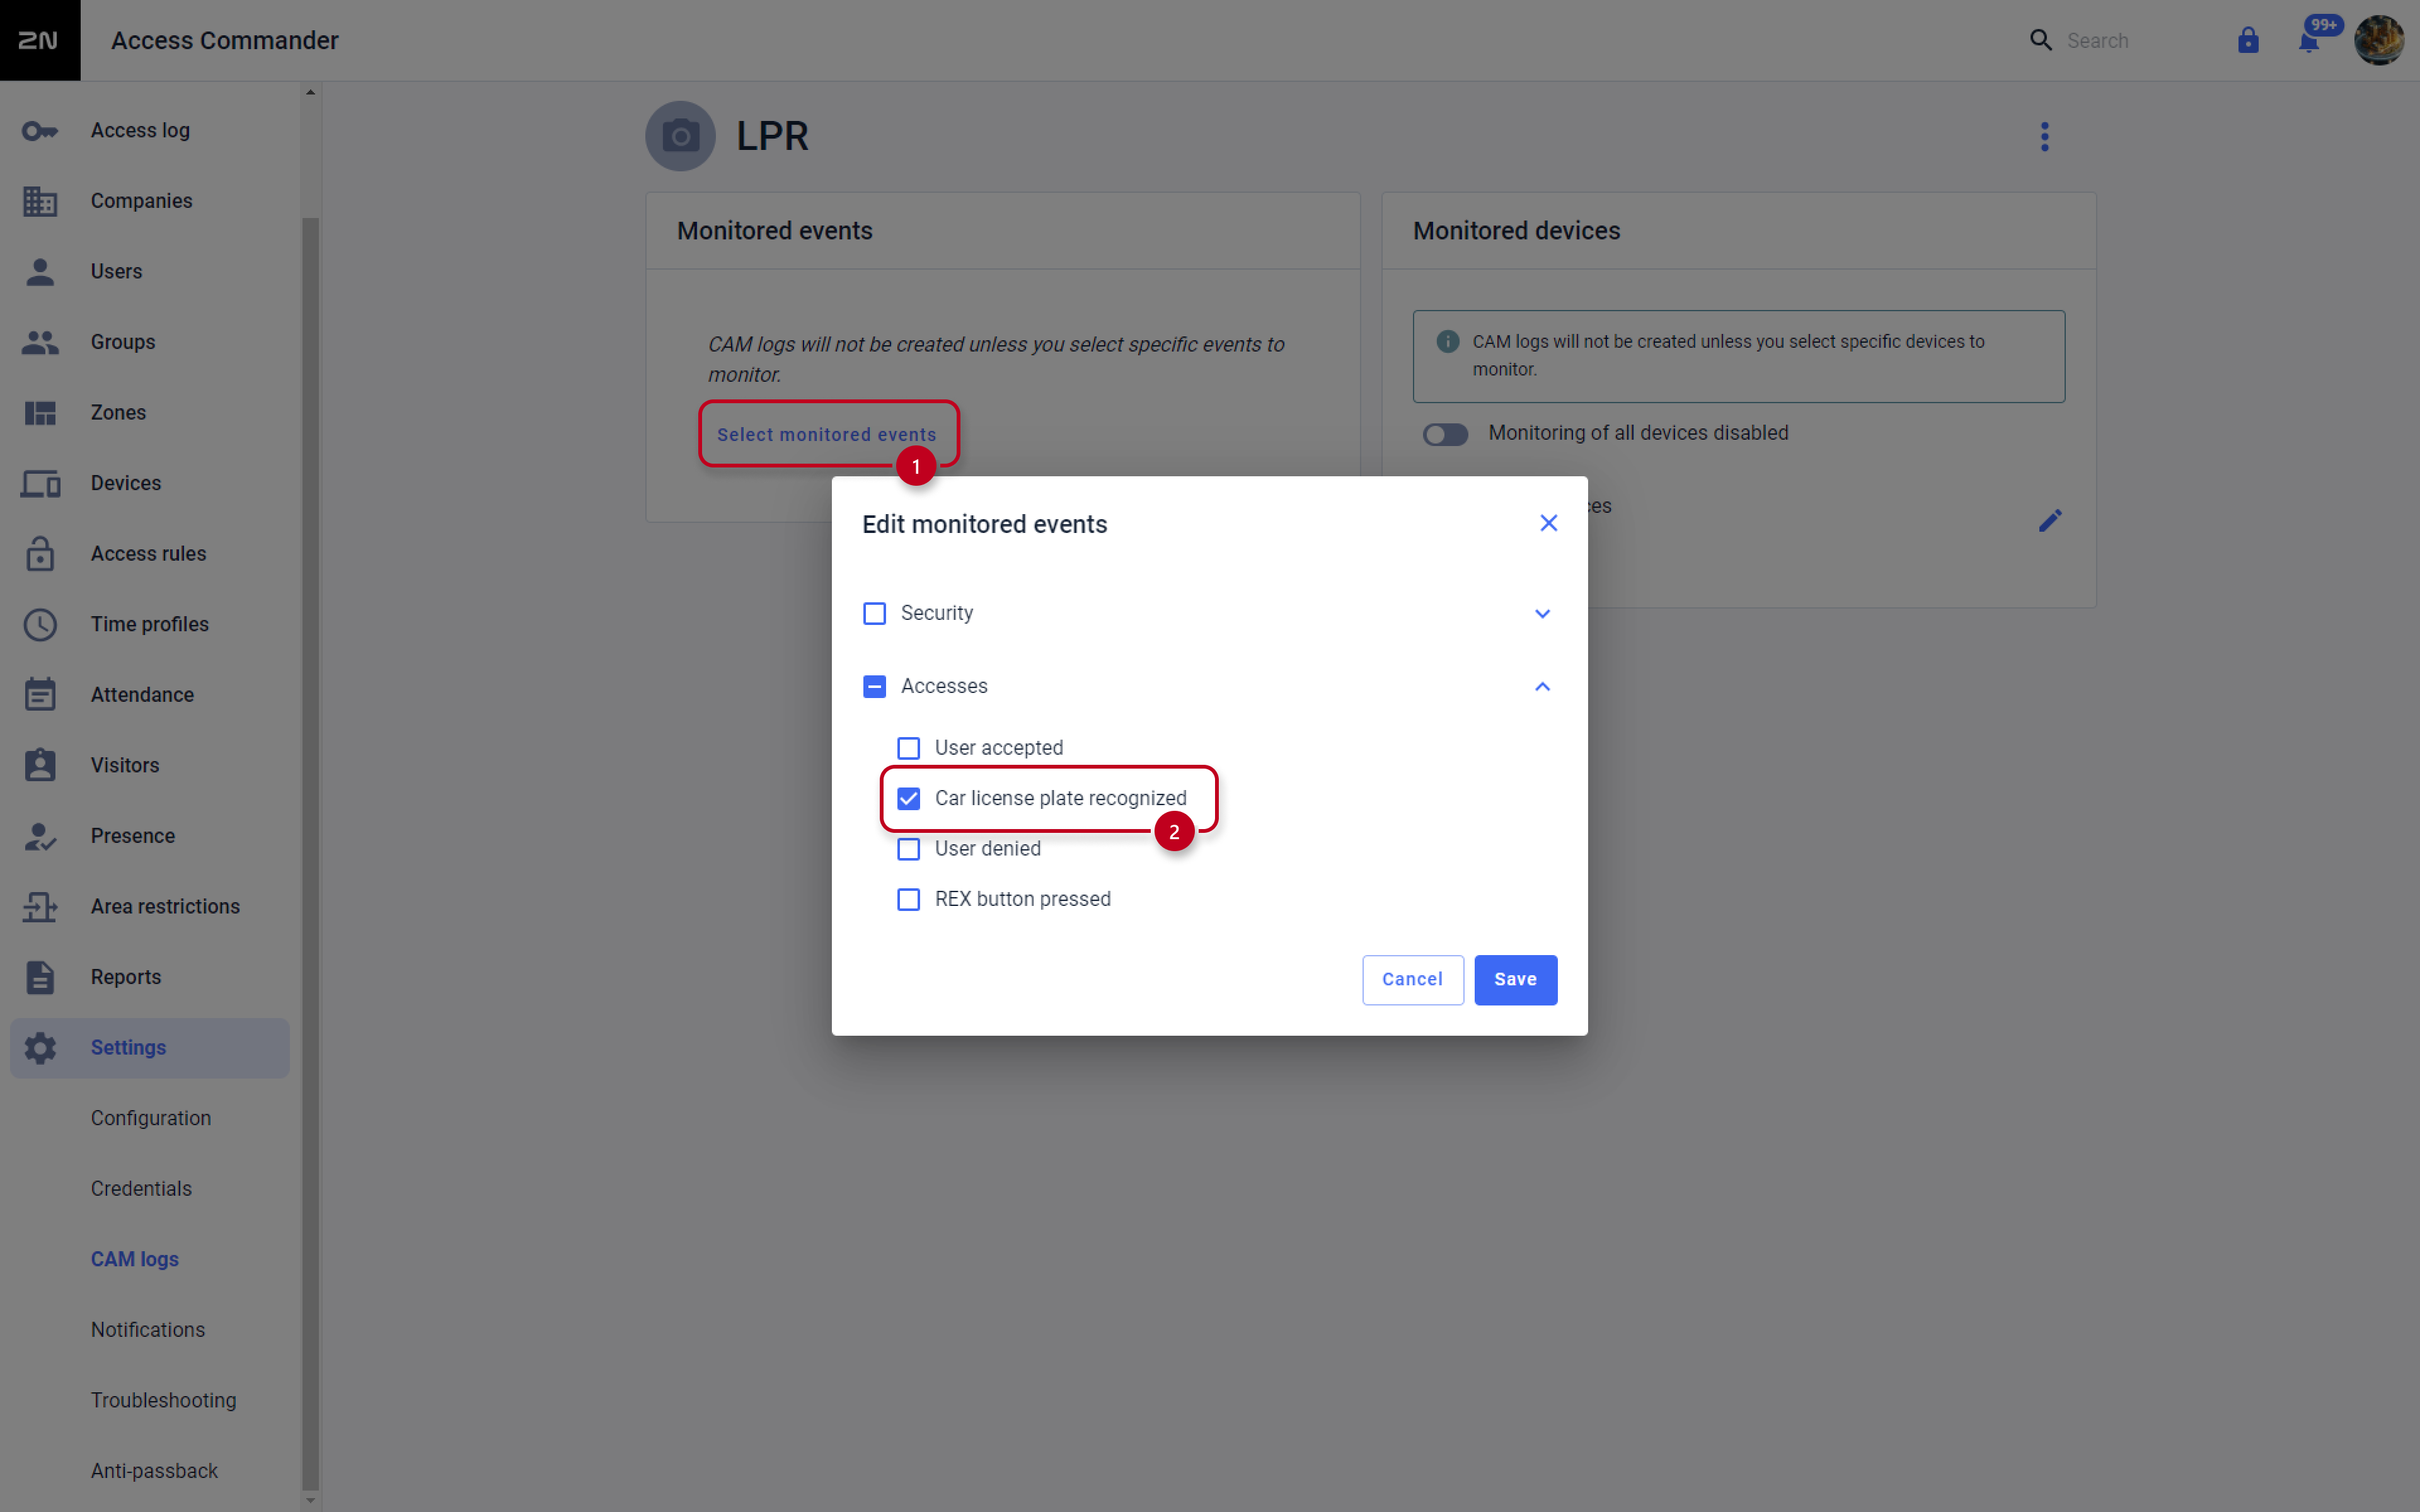
Then ADD all devices you want to receive photos from to this CAM Log.
- Once everything is configured, Access Logs will show up once a license plate is recognized.

You can expand its details and if there are CAM Logs available, you will see this small icon.
Once you click it, you should see an overview of all attached photos.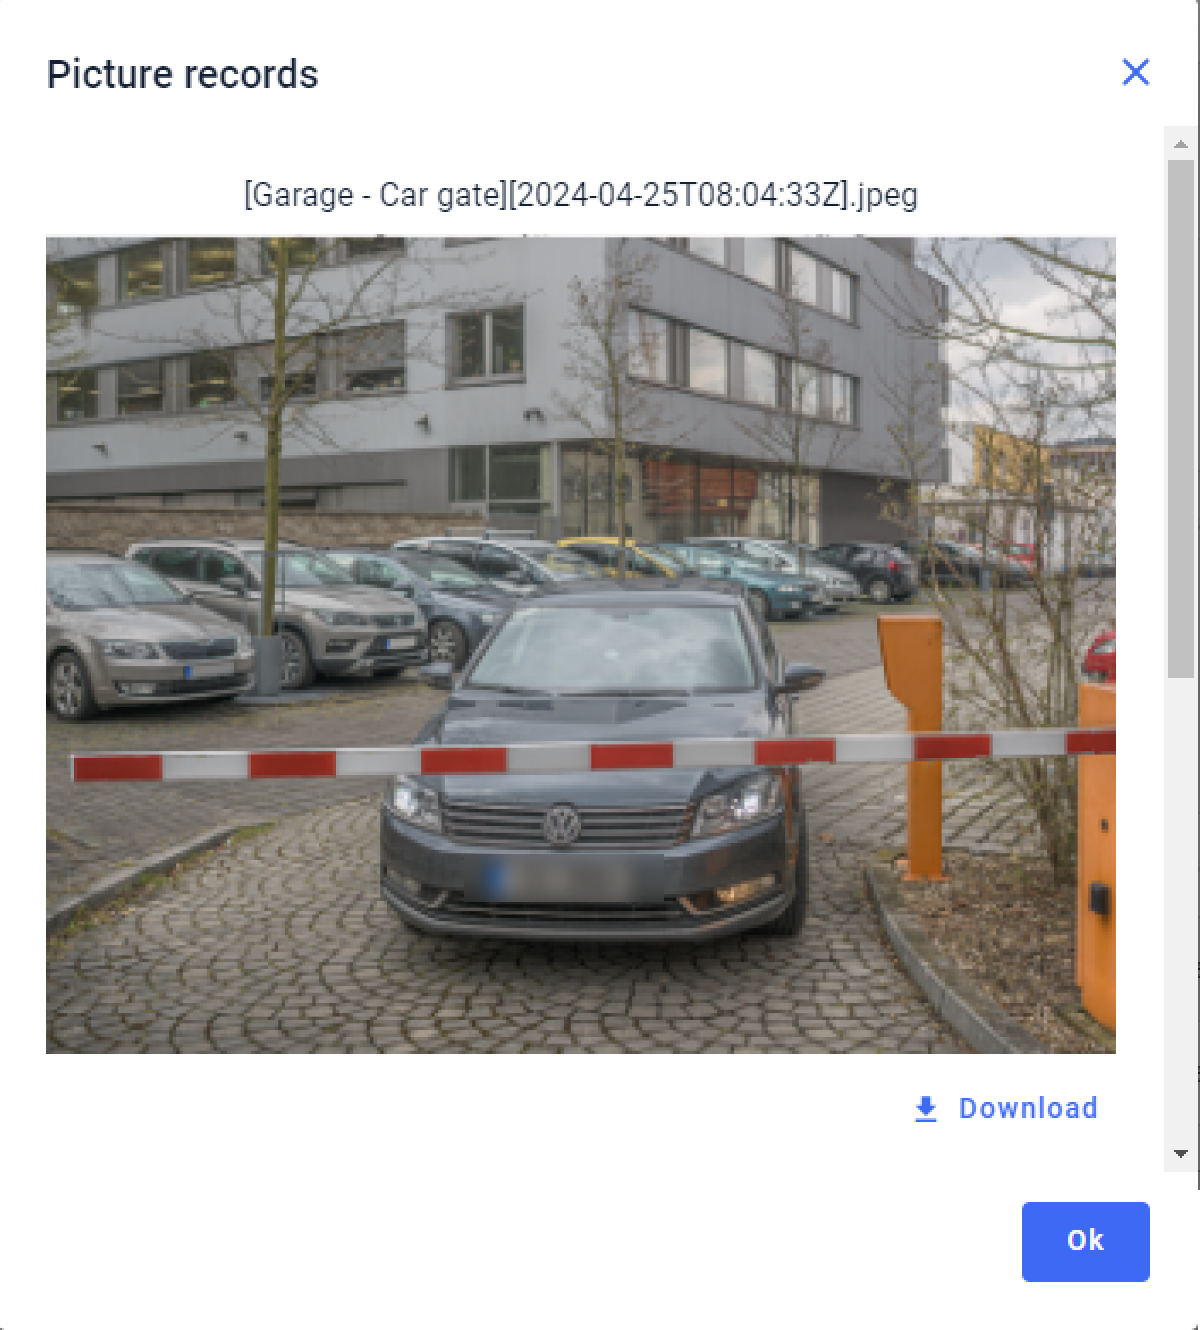
Version 2.7 or older
When a 2N device is connected to 2N® Access Commander, then most of its settings are managed by it. Thus, LPR settings will be managed by 2N® Access Commander, but still you have to configure the device’s HTTP API credentials as those are device dependent.
- Configure your 2N® Access Commander as you normally would. Then open details of the device you already prepared for LPR
and make sure it has Lift Control turned off and that it’s assigned to the proper zone.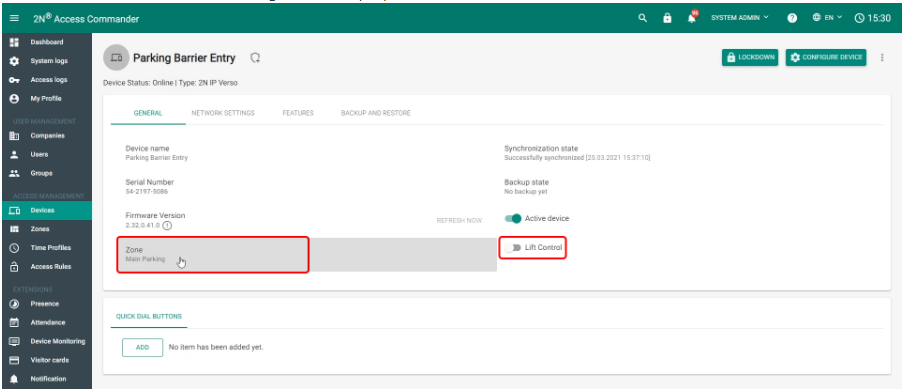
- Then go to this Zone’s detail and enable License Plate Authentication.

- Users can have their license plates assigned

under Accesses>Car License Plates, click ADD, enter one or more license plates, and confirm by clicking create.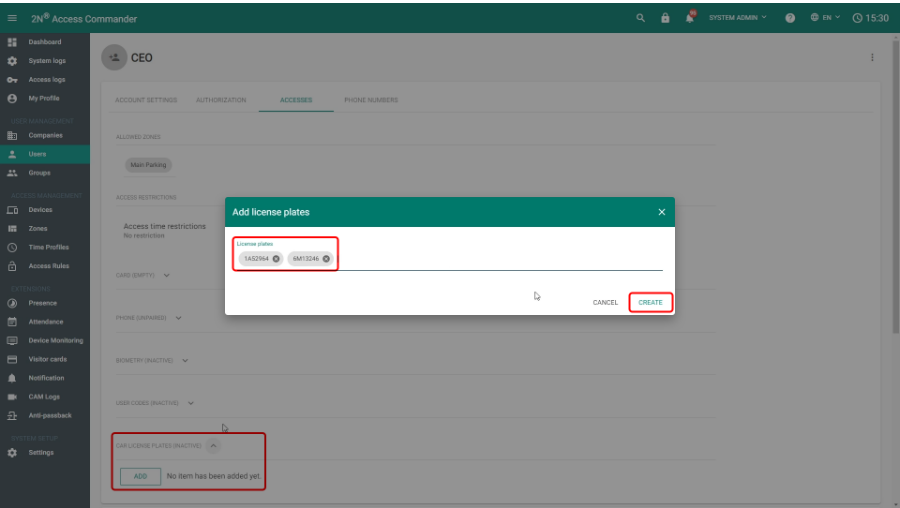
- Verify that this user is assigned to the correct group

and create an Access Rule for it.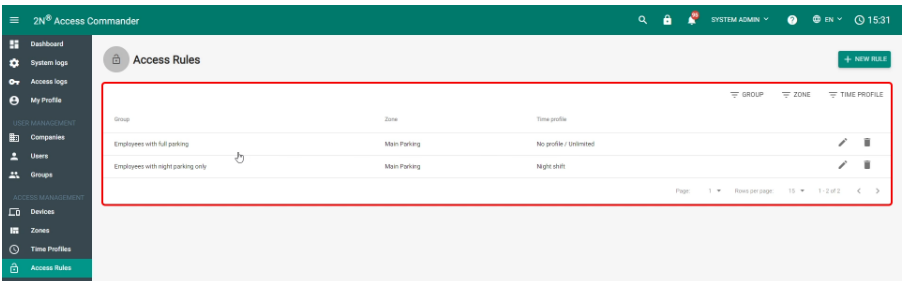
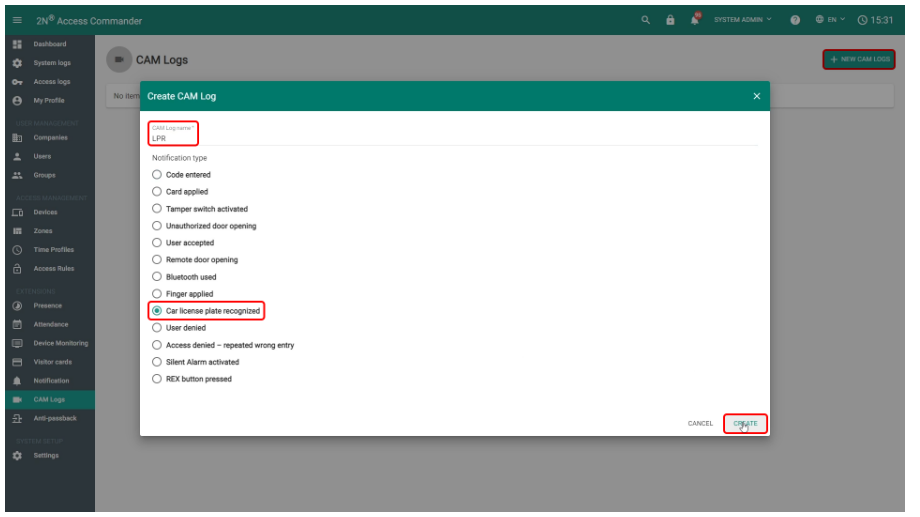
- Optionally, if you’d like to get photos of recognized license plates, you can create + NEW CAM LOGS. Name the log accordingly, select “Car license plate recognized” and click create.
Then ADD all devices you want to receive photos from to this CAM Log.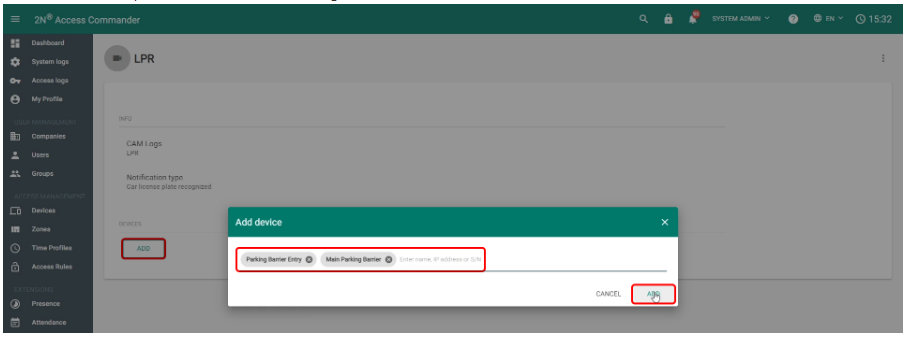
- Once everything is configured, Access Logs will show up once a license plate is recognized.

You can expand its details and if there are CAM Logs available, you will see this small icon.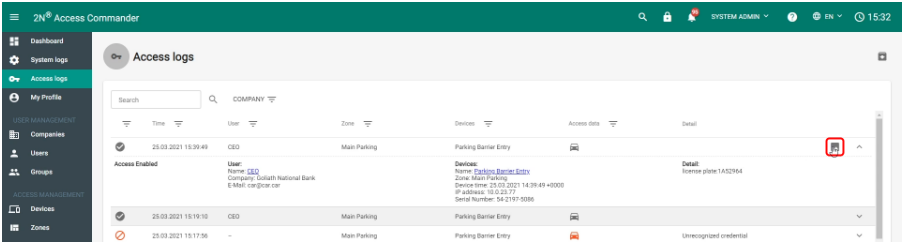
Once you click it, you should see an overview of all attached photos.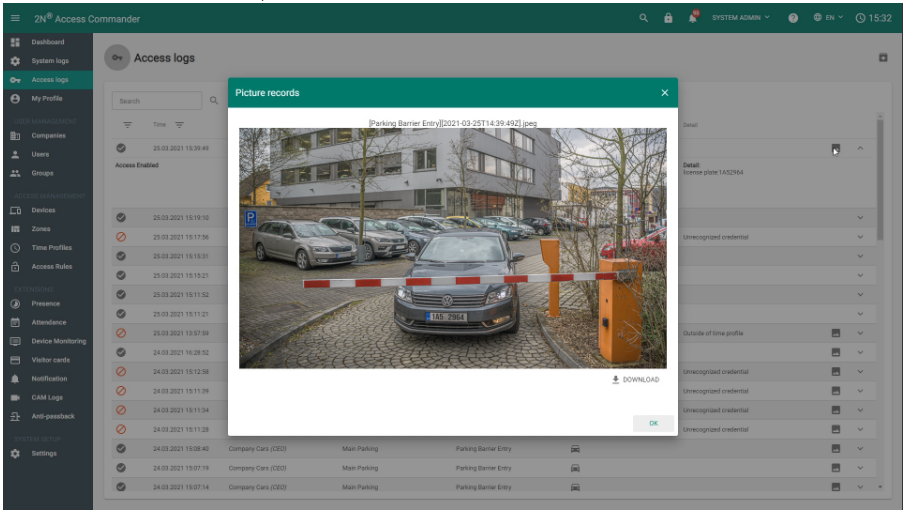
Last update
2022-12-22
- Firmware v2.37
Devices used
- 2N® IP Verso
- AXIS P1375-E Network Camera
Compatible 2N devices
2N® IP Style
2N® IP Verso
2N® LTE Verso
2N® IP Solo
2N® IP Base
2N® IP Force
2N® IP Safety
2N® IP Vario
2N® IP Video Kit
2N® IP Audio Kit
2N Access Unit 1.0
2N Access Unit 2.0
2N Access Unit M