Ethernet port - 2N® SmartCom PRO ETH configuration
1. In the very first step you should read the manual, which you can find on 2N Telecommunications website
2. Connect 2N® SmartCom PRO ETH version (next just SmC+ETH) via RS232 cable and open 2N SmartCom configuration tool. In case you are using RS232/USB converter you need to use appropriate virtual COM port on your PC. The correct number of this virtual COM port can be found in "Device manager" in your operating system. Default communication Speed is set to 115200bd/s. Once you change speed of RS232, then you will need to "Load configuration" with that speed, see (Pic. 1). Keep in mind all parameters, in enclosed pictures there are only examples.
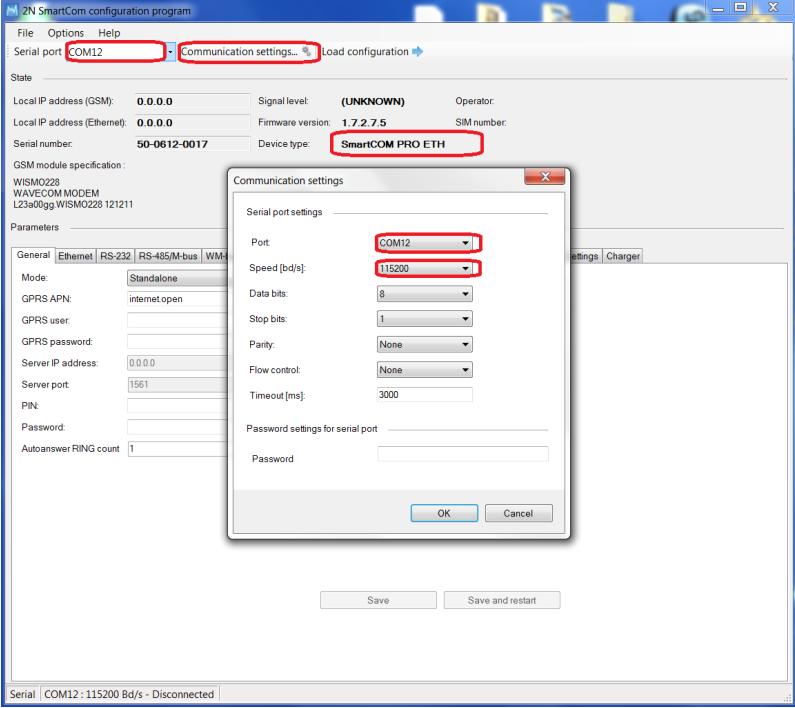
Pic. 1
3. To configure Ethernet port, go to tab "Ethernet", where you will do all the settings. LED diode has got two modes. Which mode will be used depends on switching "LED signalization" parameter. LED diode is placed close to SIM holder.
Now you need to decide whether the SmC+ETH will obtain IP address from DHCP server or set the static IP address, see (Pic. 2).
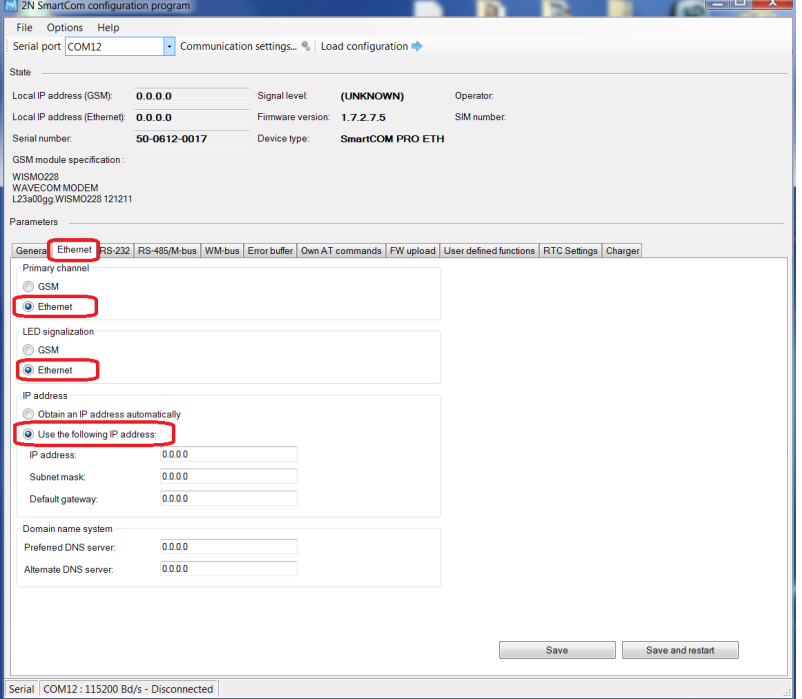
Pic. 2
4. You have to "Save and restart" the device in order to apply changes in IP settings, (Pic. 3), when LED diode starts shining, the SmartCom is ready to be used again! You can "Load configuration" because of verifying IP address from DHCP server (Pic. 4).

Pic. 3
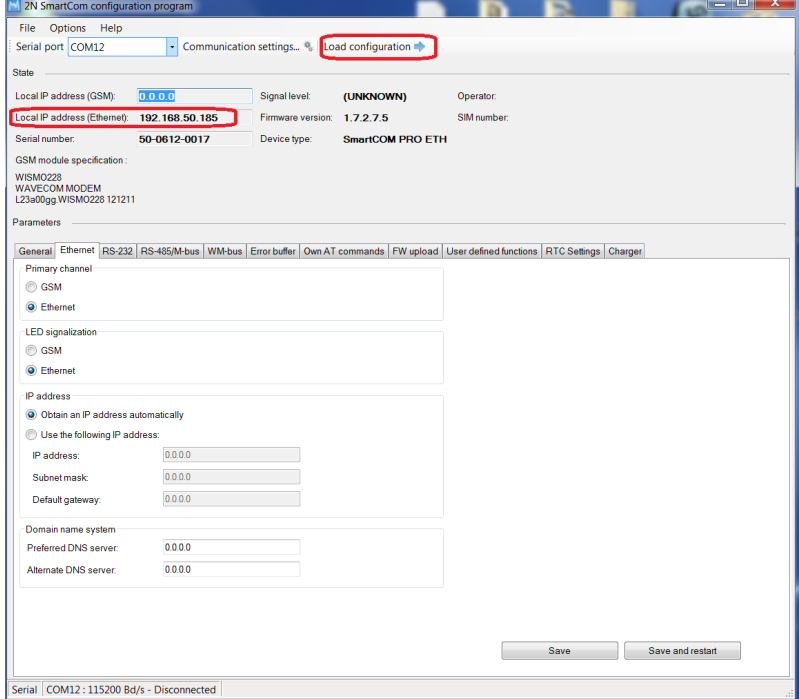
Pic. 4
5. Once you know SmC+ETH unit IP address, you can do any reconfiguration remotely via telnet client. Putty client is used in this example. To reach the configuration mode of the unit set IP address and port 10000, see (Pic. 5).
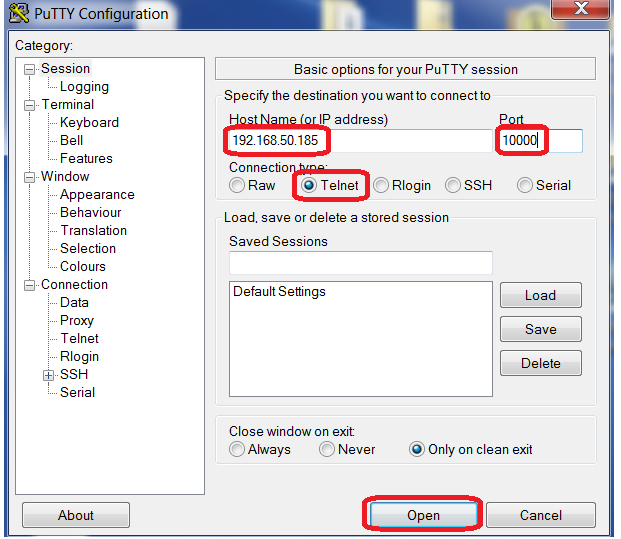
Pic. 5
6. AT command at^sceth? enables you to display current setting and at^sceth=? will show you all the options you can use as you can see on (Pic. 6). On (Pic. 7) you have whole list of supported AT commands which are listed in the manual, section 9.2.
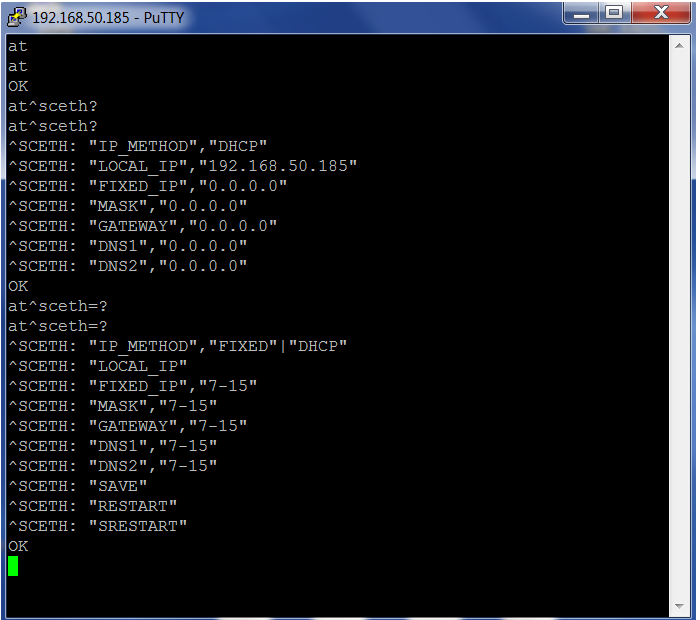
Pic. 6
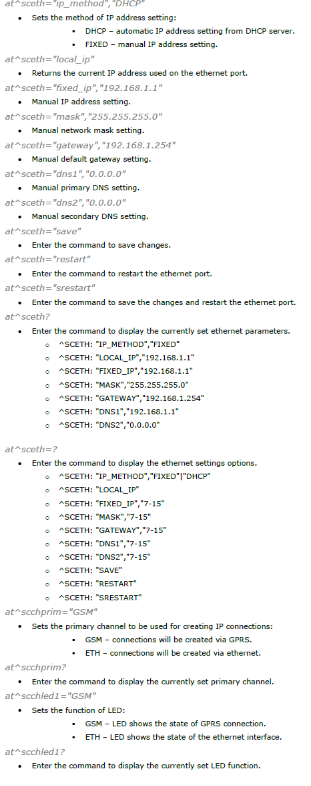
Pic. 7