Difference between Standalone and TCP Client mode in 2N® SmartCOM (PRO)
2N® SmartCOM (PRO) terminal can be used and configured in two different modes – the first one is "Standalone" mode and the second one is "TCP client" mode. It is important to know when these modes can be used, what the differences between them are and how you can configure them.
The main idea of Standalone mode is that 2N® SmartCOM works as a server to which clients get connected (transparent TCP – serial port transmission). In TCP client mode 2N® SmartCOM connects and retransmits data from its ports to selected server.
Standalone mode
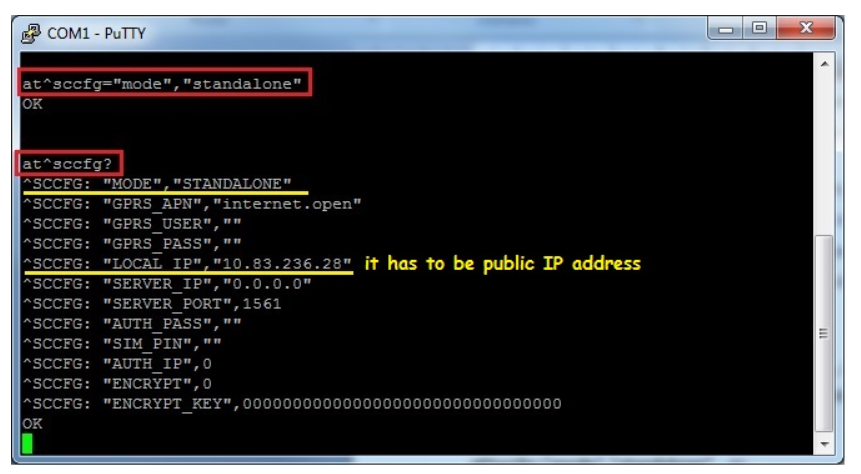
Before you start to set the unit to Standalone mode you can just type a command mentioned below this paragraph to double check currently set interface values. The output looks like the one in the next picture.
at^sccfg?
After that if you need to change a mode in your unit to Standalone, enter one of following AT commands (use serial connection to the terminal via RS-232 cable or Telnet connection via Putty):
at^sccfg="mode","standalone"
or
at^sccfg="mode",3
Then if your unit is in the standalone mode and has been already installed somewhere on remote side it is very useful to access it via IP protocol (for further configuration, relays control, inputs measuring, etc.). In this case it is recommended to use a program (such as Putty or Hyperterminal) which supports Telnet connection to specific IP address and port. Public IP address has to be assigned to your 2N® SmartCOM unit. Once this condition is met you can access three ports which serve different interfaces and have different use:
- Port 10000 – thanks to this port you can configure the unit, control the output relays and measure quantities on the input circuits.
- Port 10001 – this port works as a data pipe to port RS-232 and retransmits all RS-232 events to GPRS.
- Port 10002 – this port is very similar to previous one and works as a data pipe to port RS-485 or M-Bus (depends on the type of unit you have). This port retransmits all RS 485 events to GPRS.
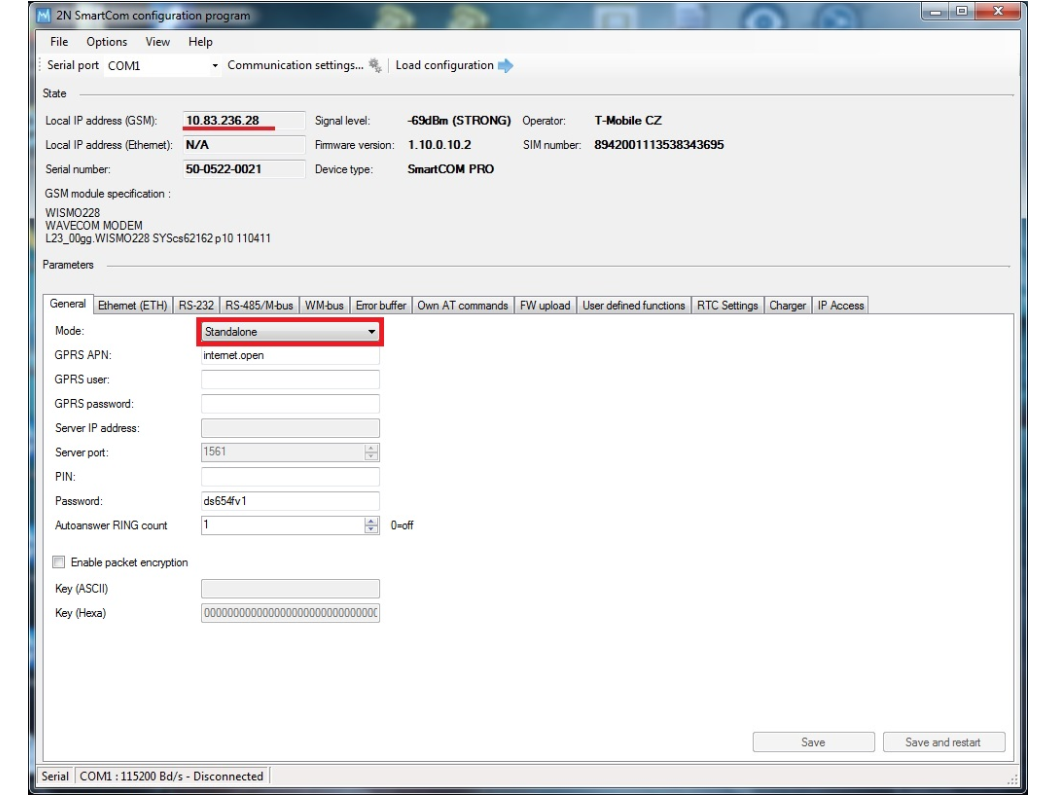
Note: You can also use our program called Smc Terminal Config Program for configuration which is available on our web for free.
TCP client mode
2N® SmartCOM in TCP client mode needs to be always connected to 2N® SmartCOM Server which collects data from terminal unit and can send them to some 3rd party application via API interface (it is good if you want e.g. graphical outputs from read out units). Once you want to set your terminal to TCP client mode then you have to enter one of two following commands:
at^sccfg="mode","tcpclient"
or
at^sccfg="mode",1

After that you have to specify several other parameters which are necessary for successful interconnection between terminal unit and 2N® SmartCOM Server. All these parameters and appropriate commands are described in User Manual (the link below) but the most important commands are also described in this FAQ.
4.2 List of Supported AT Commands
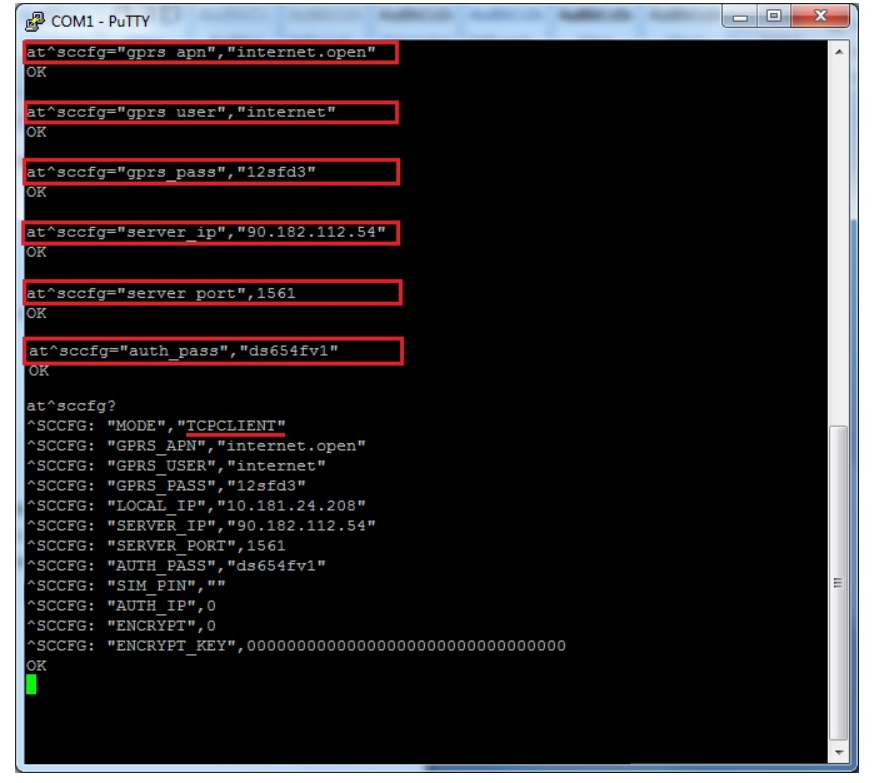
a) Set the APN to your mobile provider (for data connection) – there is configuration for O2 CZ in the example:
at^sccfg="gprs_apn","internet.open"
b) Set username and password for authentication by the provider (if it is required). Most providers don´t use the authentication.
at^sccfg="gprs_user","internet"
at^sccfg="gprs_pass","12sfd3"
c) Set the IP address of 2N® SmartCOM Server to which the unit will be connected. It should be public IP address. Then specify also a server port to which the unit should be connected. Finally specify authorisation password for this server connection.
at^sccfg="server_ip","90.182.112.54"
at^sccfg="server_port","1561"
at^sccfg="auth_pass","ds654fv1"
All other parameters and commands such as encryption mode settings for unit – Server communication, PIN settings, etc. are described in the User manual (the link is above).
In TCP client mode are terminal units connected to the server and you can very easily manage them via 2N® SmartCOM Control Panel tool. For further information about Control Panel and also about Server read our User Manual:
2N® SmartCOM Server can also help you with FW upgrade for terminal units because it can be done automatically via server. You will just upload the appropriate FW version into a server and then select terminals to which you want to upload this FW. Next you can run e.g. different scripts on the server to read out specified values from terminals.