Avaya Aura Platform
Content
About
Avaya Aura® Platform is Avaya's core communications platform delivering company-wide, people-centric collaboration and supporting full unified communications and contact center solutions for midsize to large enterprises. Leveraging a revolutionary SIP architecture, Avaya Aura Platform simplifies complex communications networks, reduces infrastructure costs, and quickly delivers voice, video, messaging, presence, and Web applications to users in every location.
Version R6
Tested with
Avaya Aura Platform | 2N IP Intercom | Registrations | Calls |
|---|---|---|---|
| R6.2 | 2.8.0.17.2 |
Settings
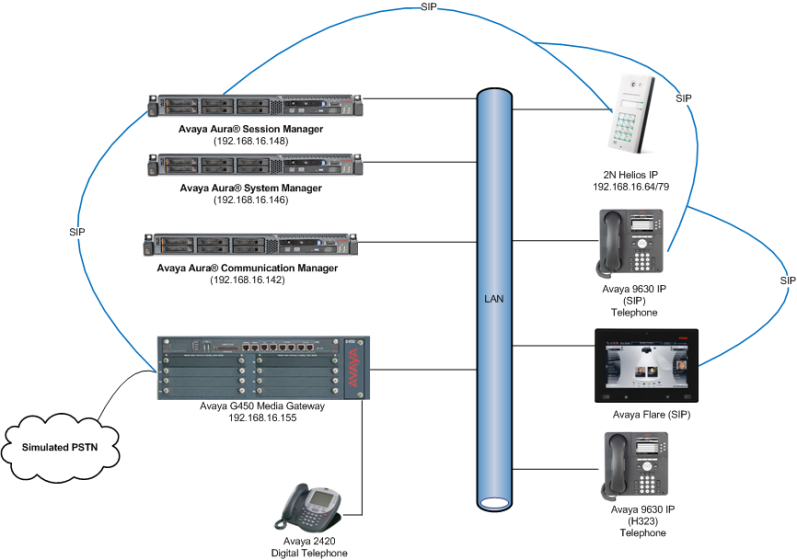
The picture below illustrates a test configuration that was used to compliance test the interoperability of 2N IP intercom with Session Manager and System Manager. The configuration consists of Communication Manager configured with Communication Manager Messaging, System Manager and Session Manager. Communication Manager has connections to one-X Communicator(H.323), 9630 IP(H.323) deskphone and 2420 Digital Telephone. Session Manager has SIP registrations with Flare, 2N IP intercom and 9630 IP(SIP) deskphone. An ISDN-PRI trunk connects Communication MAnager to the PSTN. The 2N® IP Eye application is also installed on a PC in order to receive the video streaming from 2N IP intercom.
 |
- The configuration changes in this section for Communication Manager are performed through the Site Administration tool and via the System Manager web interface. The parameters in all steps are in the default settings and are supplied for reference. For all other provisioning information such as provisioning of the trunks, call overage, extensions, and voicemail.
- The procedures belong to the following areas:
- Configure Signalling Group
- Configure IP Codec Set¨
- Configure SIP User
- Configure Endpoints for IP Video
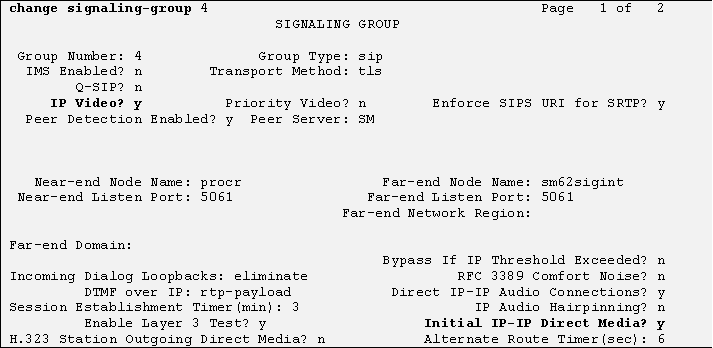
Configuration of Signalling Group
- Is is assumed that a trunk and signalling group are configured between Communication Manager and Session Manager. Enter the command change sig x where x is the relevant signalling group number. Ensure that the following settings are set in order to enable video for the endpoints:
- IP Video?: Set to y
- Initial IP-IP Direct Media?: Set to n
 |
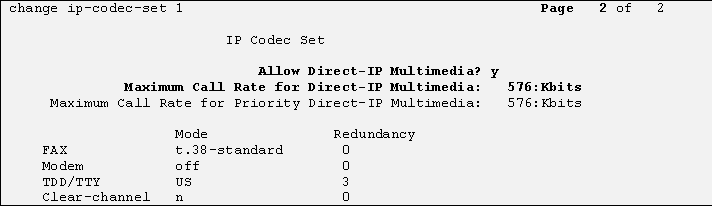
Configuration of IP Codec Set
- The IP Codes set has to be configured with the codecs for use by IP endpoints and video must be enabled. Enter the command change ip-codec-set x where x is the relevant codec set and set the Audio Codec to be used on Page1. In the example below, codecs G.711A, G.711MU and G.729 are configured.
 |
- Cotinue to Page 2, ensure Allow Direct-IP Multimedia is set to y and Maximum Call Rate for Direct-IP Multimedia is set to 576:Kbits.
 |
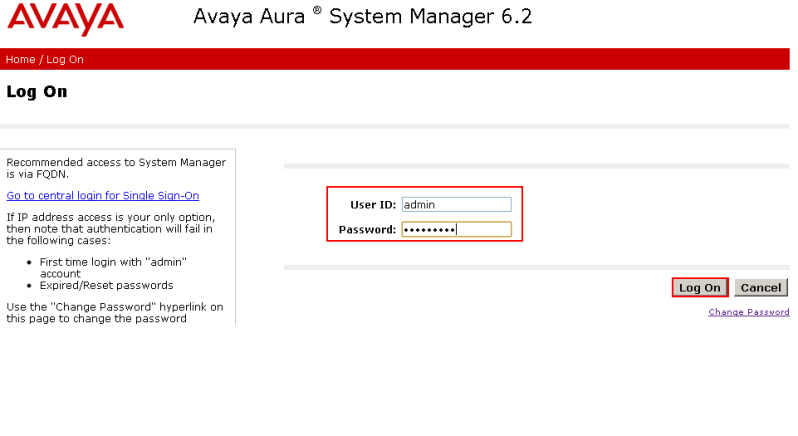
Configuration of SIP User
- A SIP user must be added for each 2N IP intercom endpoint required. Navigate to the System Manager web interface, in this case https://192.168.16.146/SMGR and log in with the relevant credentials.
 |
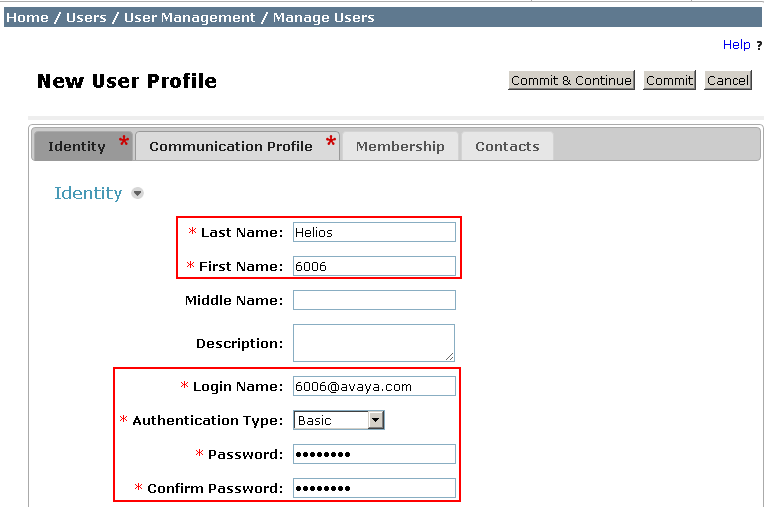
- Click User Management → Manage Users → New enter an identifying Last Name and First Name, enter an appropriate Login Name, set Authentication Type to Basic and administer a password in the Password and Confirm Password fields.
 |
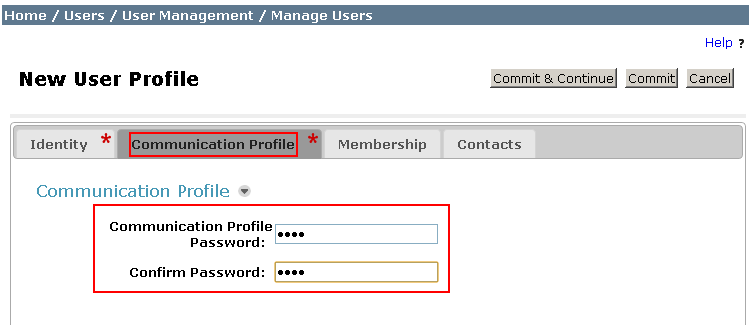
- Click on the Communication Profile tab and enter and confirm a Communication Profile Password, this is used when logging in the SIP endpoint occurs.
 |
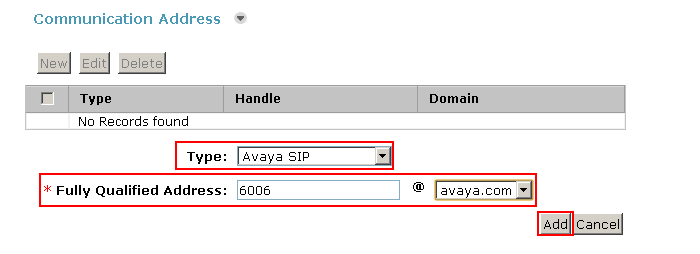
- On the same page, scroll down and under Communication Address click New, select Avaya SIP from the Type drop down box and enter the Fully Qualified Address of the new SIP user. Click Add when done.
 |
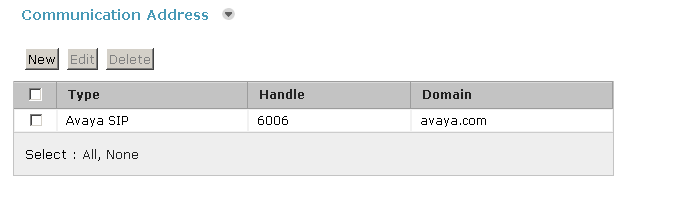
- The Communication Address will now appear already added.
 |
- Continue to scroll down on the same page, enter the Primary Session Manager, Origination Application Sequence, Termination Application Sequence and Home Location relevant to the implementation.
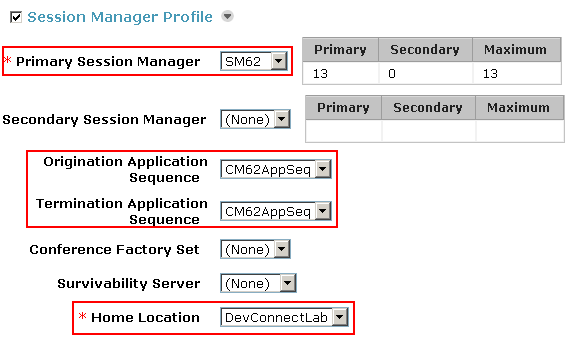 |
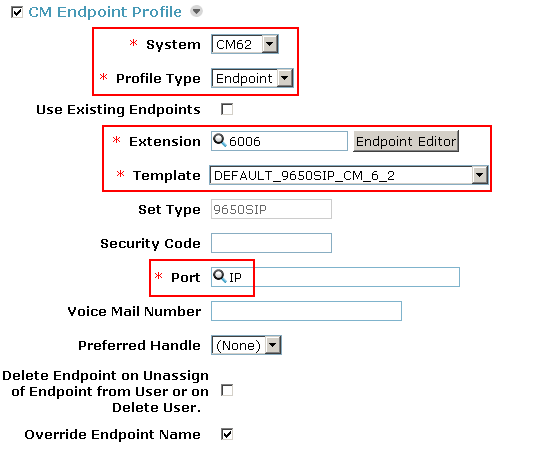
- Scroll down to the page to the CM Endpoint Profile section. Select the Communication Manager system from the System drop down box, select Endpoint as the Profile Type, enter the Extension number that you wish to use, select DEFAULT_9650SIP_CM_6_2 as the Template and ensure IP is configured as the Port, click Commit(not shown) when everything is done. Repeat this for every SIP extension required.
 |
Configuration of Endpoint for IP Video
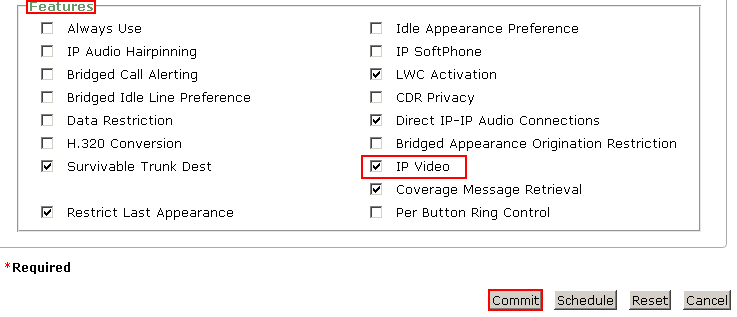
In order to use IP video, the corresponding endpoints must be configured with the appropriate feature. From the System Manager web interface click Communication Manager → Endpoints → Manage Endpoints, place a tick in the box next to the endpoint on which IP Video is required and click Edit.

- Click the Feature Options tab(not shown), scroll down to the Features section and place a tick in the IP Video tick box, click Commit when done.
 |
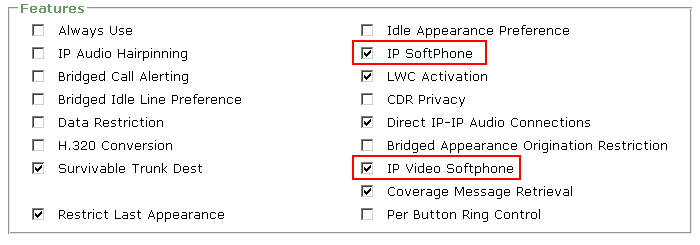
- Where administering a user for One-X Communicator, ensure that a tick is placed in IP Softphone and IP Video Softphone tick boxes as shown below.
 |
- The following steps detail the configuration for 2N IP intercom using the Web Interface. The steps include the following areas:
- Launch Web Interface
- Administer SIP Settings
- Administer Codecs
- Configuration of Quick Dialing Buttons
- Configuration of Miscellaneous Settings
- The factory default Settings for DHCP is on.
Launch Web Interface
- Access the 2N IP intercom web interface, enter http://<ipaddress> in an Internet browser window where <ipaddress> is the IP address of 2N IP intercom. Log in with the appropriate credentials.
Administration of SIP Settings
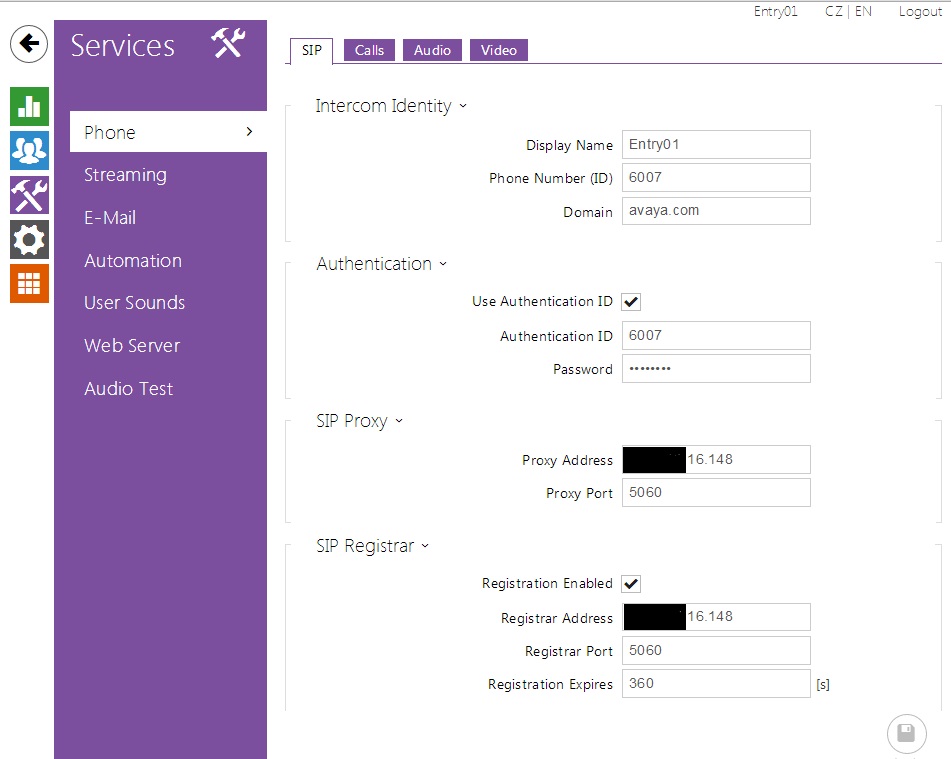
- Select Advanced Settings → SIP Settings from the left menu. In the User settings section, configure the following:
- Display name: Enter the desired name.
- User ID: Enter a user extension administered from Section of configuring Add SIP Users.
- Domain: Enter the IP address of the Session Manager.
- Use auth ID: Select Yes.
- Password: Enter the Communication Profile Password from Section of configuring Add SIP Users.
- In the SIP proxy settings section configure the following:
- Proxy address: Enter the IP address of Session Manager.
- Proxy port: Enter 5060(default).
- In the SIP registration section configure the following:
- Register 2N IP intercom: Select Yes.
- Register address: Enter the IP address of Session Manager.
- Register port: Enter 5060(default).
- Retain the default values for the remaining fields. Click the disk icon (not shown) to save it when you are done.
 |
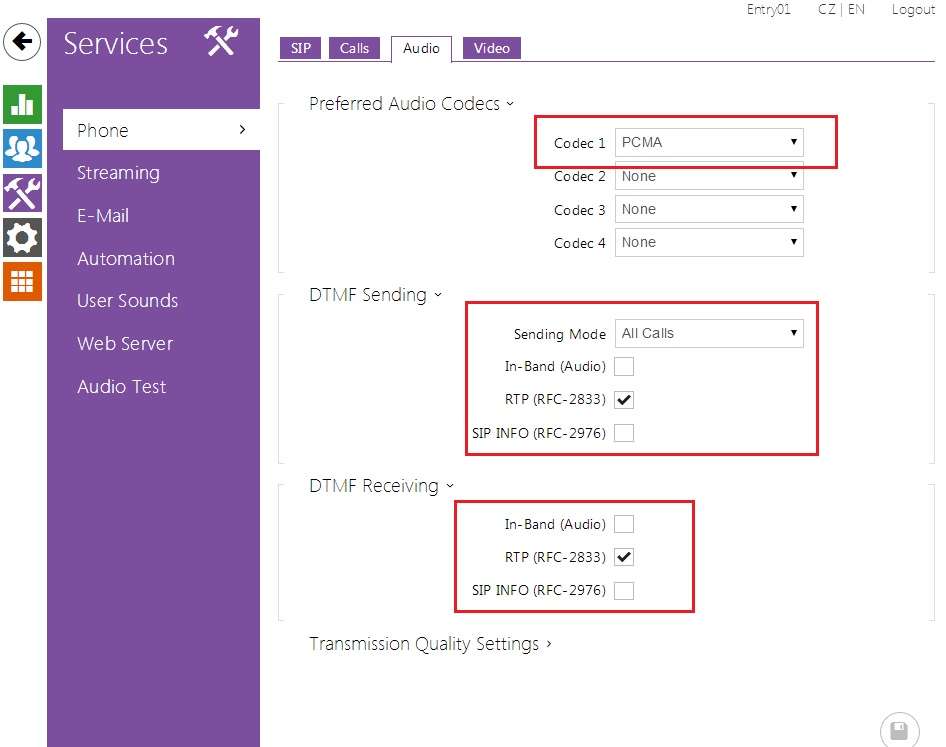
Administer Codecs
- Click Advanced Settings → Audio Codecs from the left menu to configure the audio codecs. In the Preferred audio codecs section enable and prioritize the codecs as per requirement. To enable DTMF using RFC2833, set Receive via RTP and Send via RTP to Yes. Click the save icon(not shown) when it is completed.
 |
- Select Advanced Setting → Video Codecs from the left menu to configure the video codecs. In the Preferred video codecs section enable and prioritize the codecs as per requirement. Ensure the Video Bitrate is less than or equal to the Maximum Call Rate for Direct-IP Multimedia configured in Section configuration of IP Codec set, set the H.264 payload type(1), H.264 payload type(2) and H.263+ payload type as shown. Ensure Polycome compatibility mode is set to On.
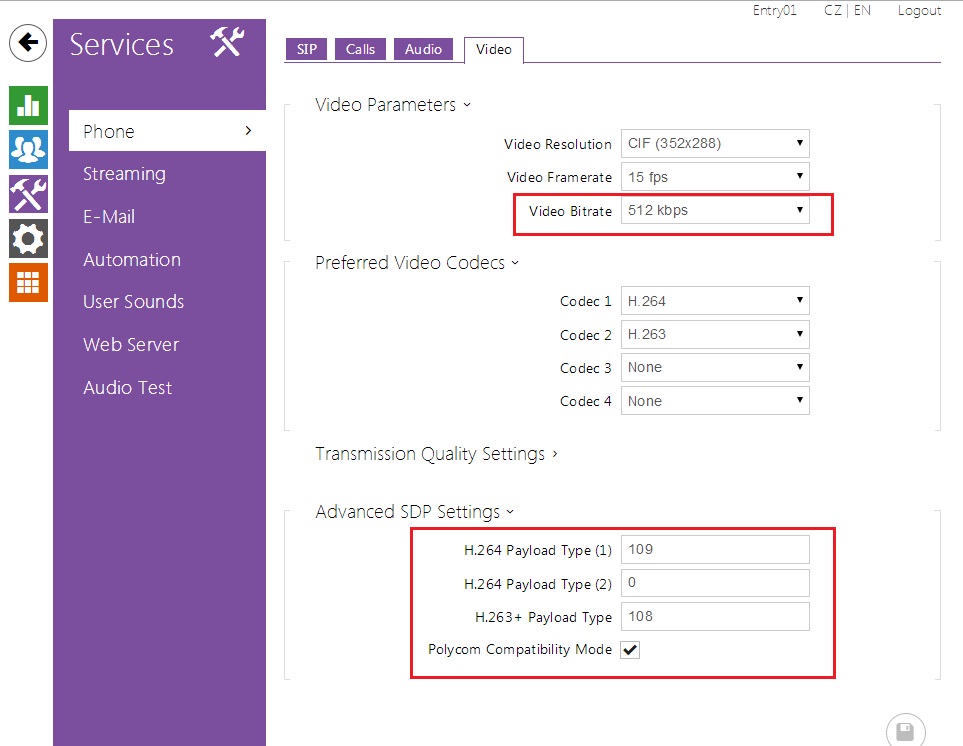 |
Configuration of Quick Dialling Buttons
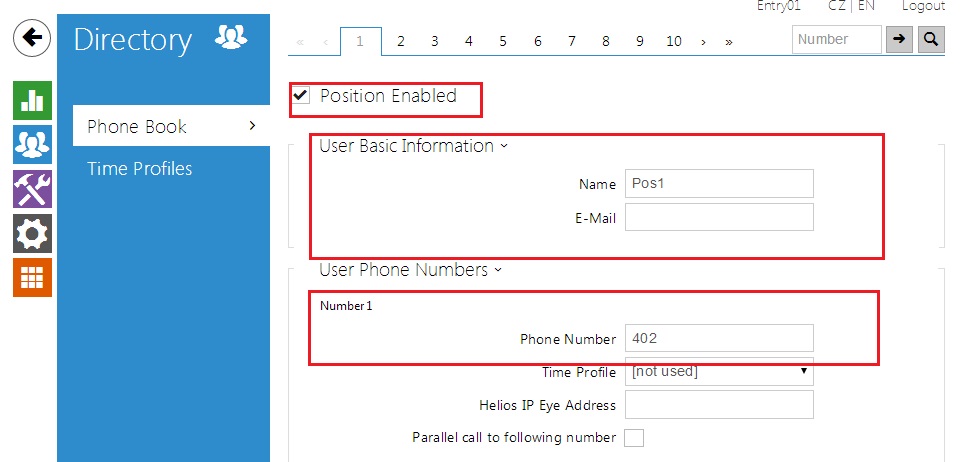
- Select Basic Settings → Phone book from the left menu and select one of the positions (e.g. 1 to 10 as shown below in the picture) to configure it. The position number corresponds to the Quick Dialling Button on the 2N IP intercom. For example the following shows the configuration for Position 1.
- Position enabled: Select Yes.
- Position name: Enter a descriptive name.
- Number 1: Enter the number for calling when the button is pressed, for example a virtual station routing to a cover path and cover answer group.
 |
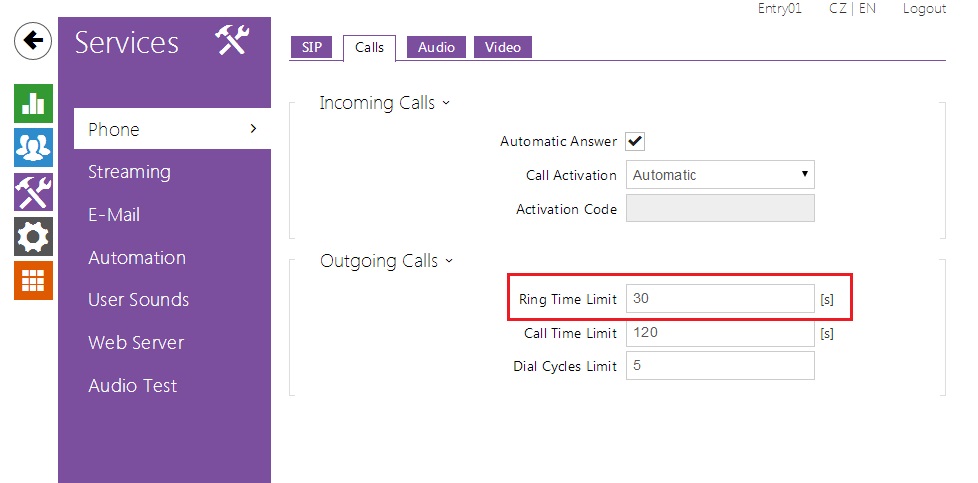
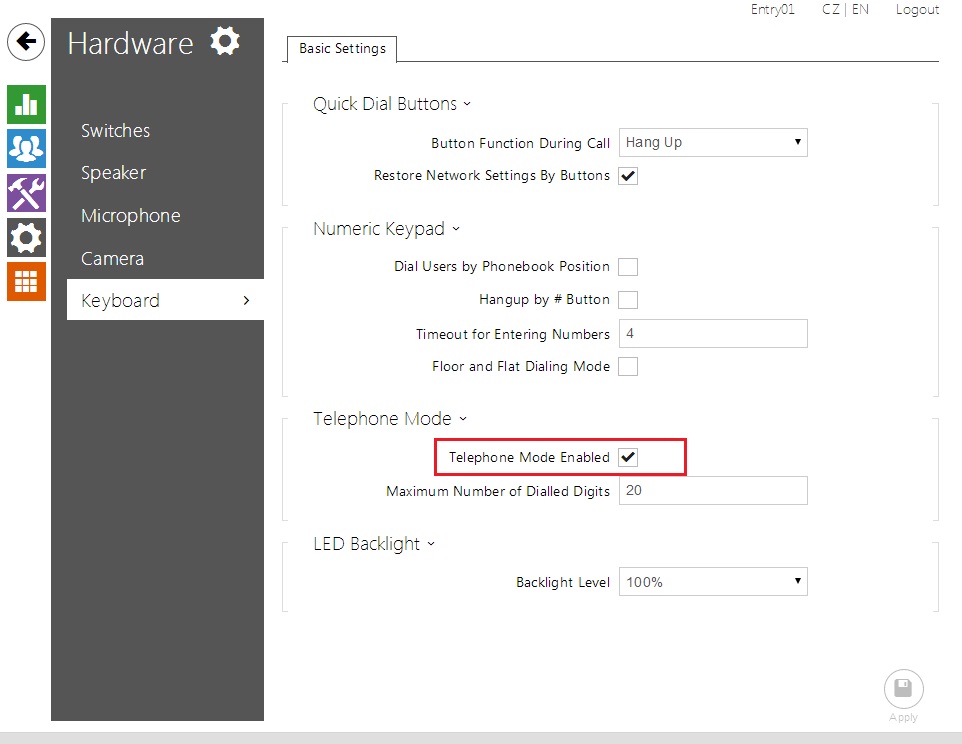
Configuration of Miscellaneous Settings
- Select Advanced Settings → Miscellaneous from the left menu. To allow 2N IP intercom to ring all the users in a cover path configure the Ring time limit with a value that is equal to or greater that the No Answer Time (secs) value multiples by the number of users in a cover path. Optionally, set Enable telephone mode to Yes to allow 2N IP intercom to call any number by using the keypad.
 |
 |
- This section provides the tests that can be performed to verify correct configuration of Session Manager and 2N IP intercom.
Verification of Session Manager SIP Registration
- From the System Manager web interface click Session Manager → System Status → User Registrations. Verify that 2N IP intercom endpoints are successfully registered as shown below.
 |
Verification of 2N IP intercom
- From the 2N IP intercom web interface select Information from the left menu. Verify that the Registration state shows Registered. Place a call to another phone as to verify basic call operatio
Used Symbols
![]() - Verified with video
- Verified with video
![]() - Work with limitation
- Work with limitation
![]() - Incompatible
- Incompatible