Cayuga
Content
About
Cayuga consists of various services that communicate with each other within a closed network and over the Internet. Installations are possible on multiple computers, and an unlimited number of servers, clients and devices can be added to the system. In addition, the database can be installed at multiple distributed sites (multicore) to ensure network independence.
The system essentially consists of server applications and client applications.
- One or more server applications manage the connected devices and databases, providing the clients with the required data.
- A client application has a user interface that makes one or more modes available to the user (see below). Multiple client applications can access a single server application.
https://www.qognify.com/products/cayuga/
Version 6
Tested Functions
| Cayuga | IP Intercom Version | Scan device | Video from IP Intercom | Audio from IP Intercom | Audio to IP Intercom | Switch control | Events from IP Intercom |
|---|---|---|---|---|---|---|---|
R17 (6.17.1_09) | 2.34.2.43.9 | ||||||
6.8.1.160, 6.8.1.142 | 2.19.0.28.5 | N/S | |||||
6.7.1.215 | 2.15.0.24.3 | N/S |
2N IP Intercom Settings
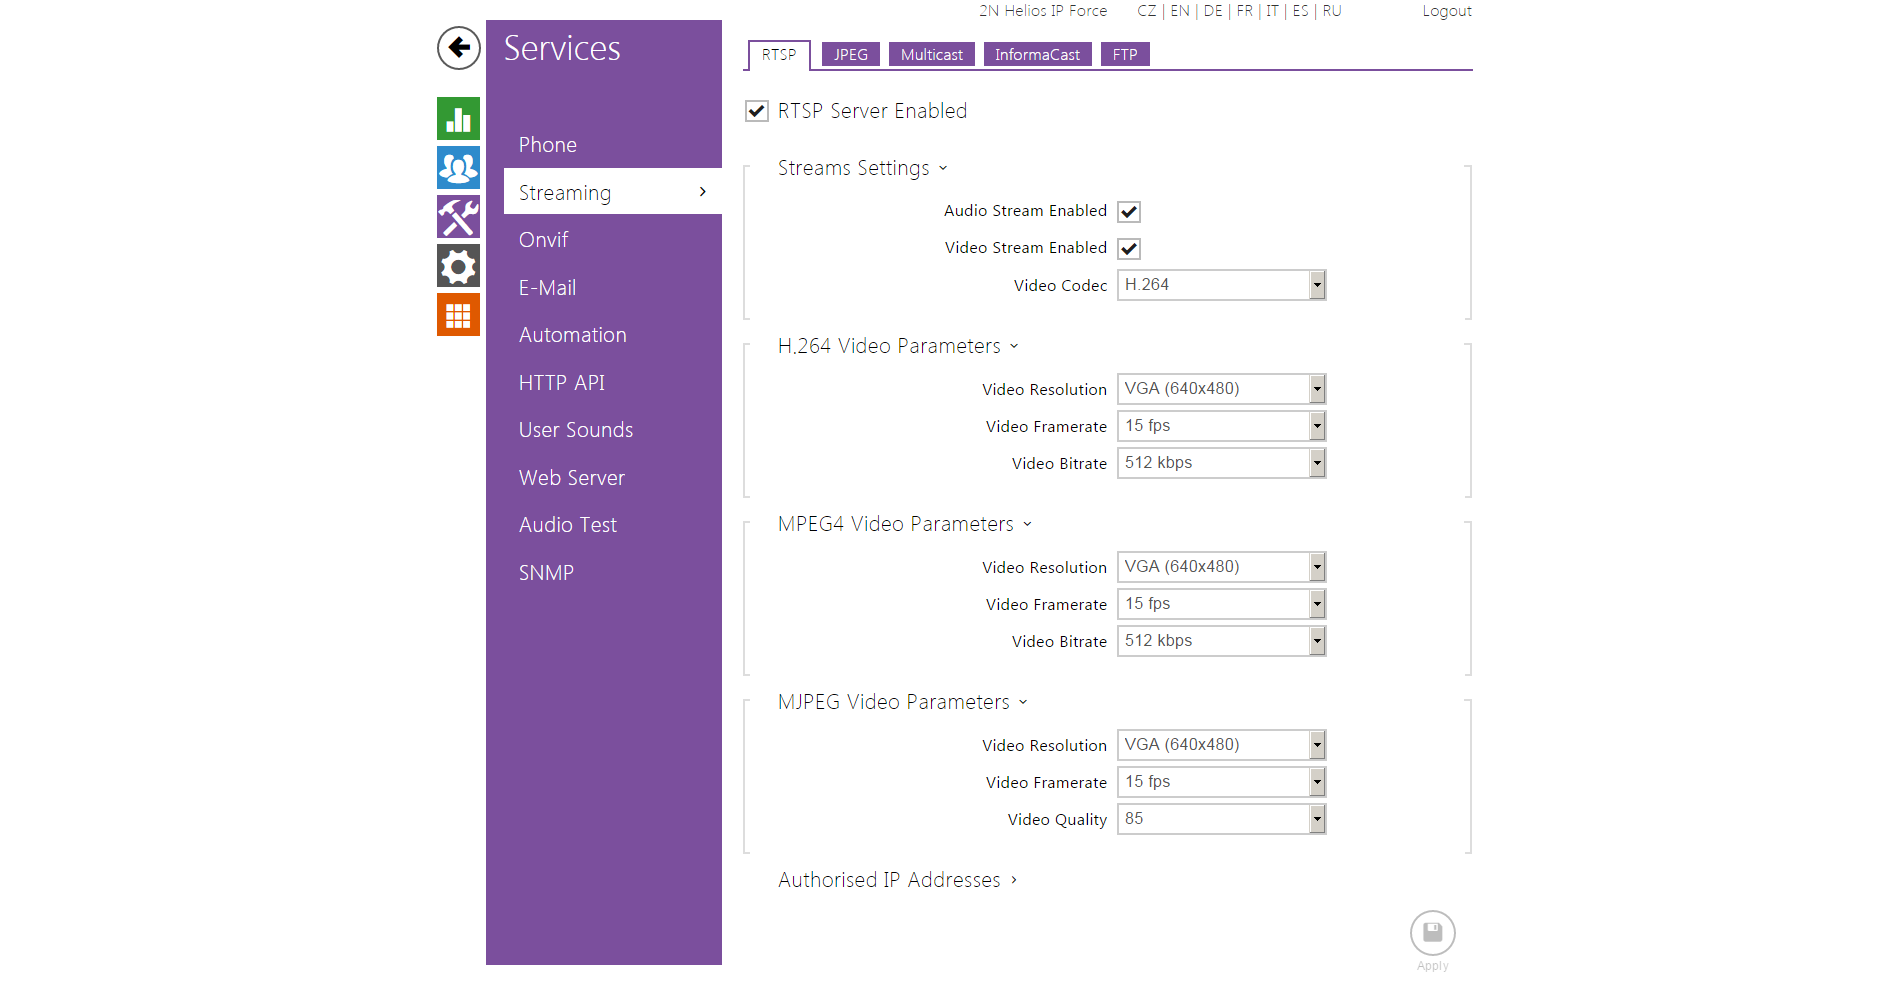
Enable parameter RTSP Server Enabled in menu Services / Streaming.
 |
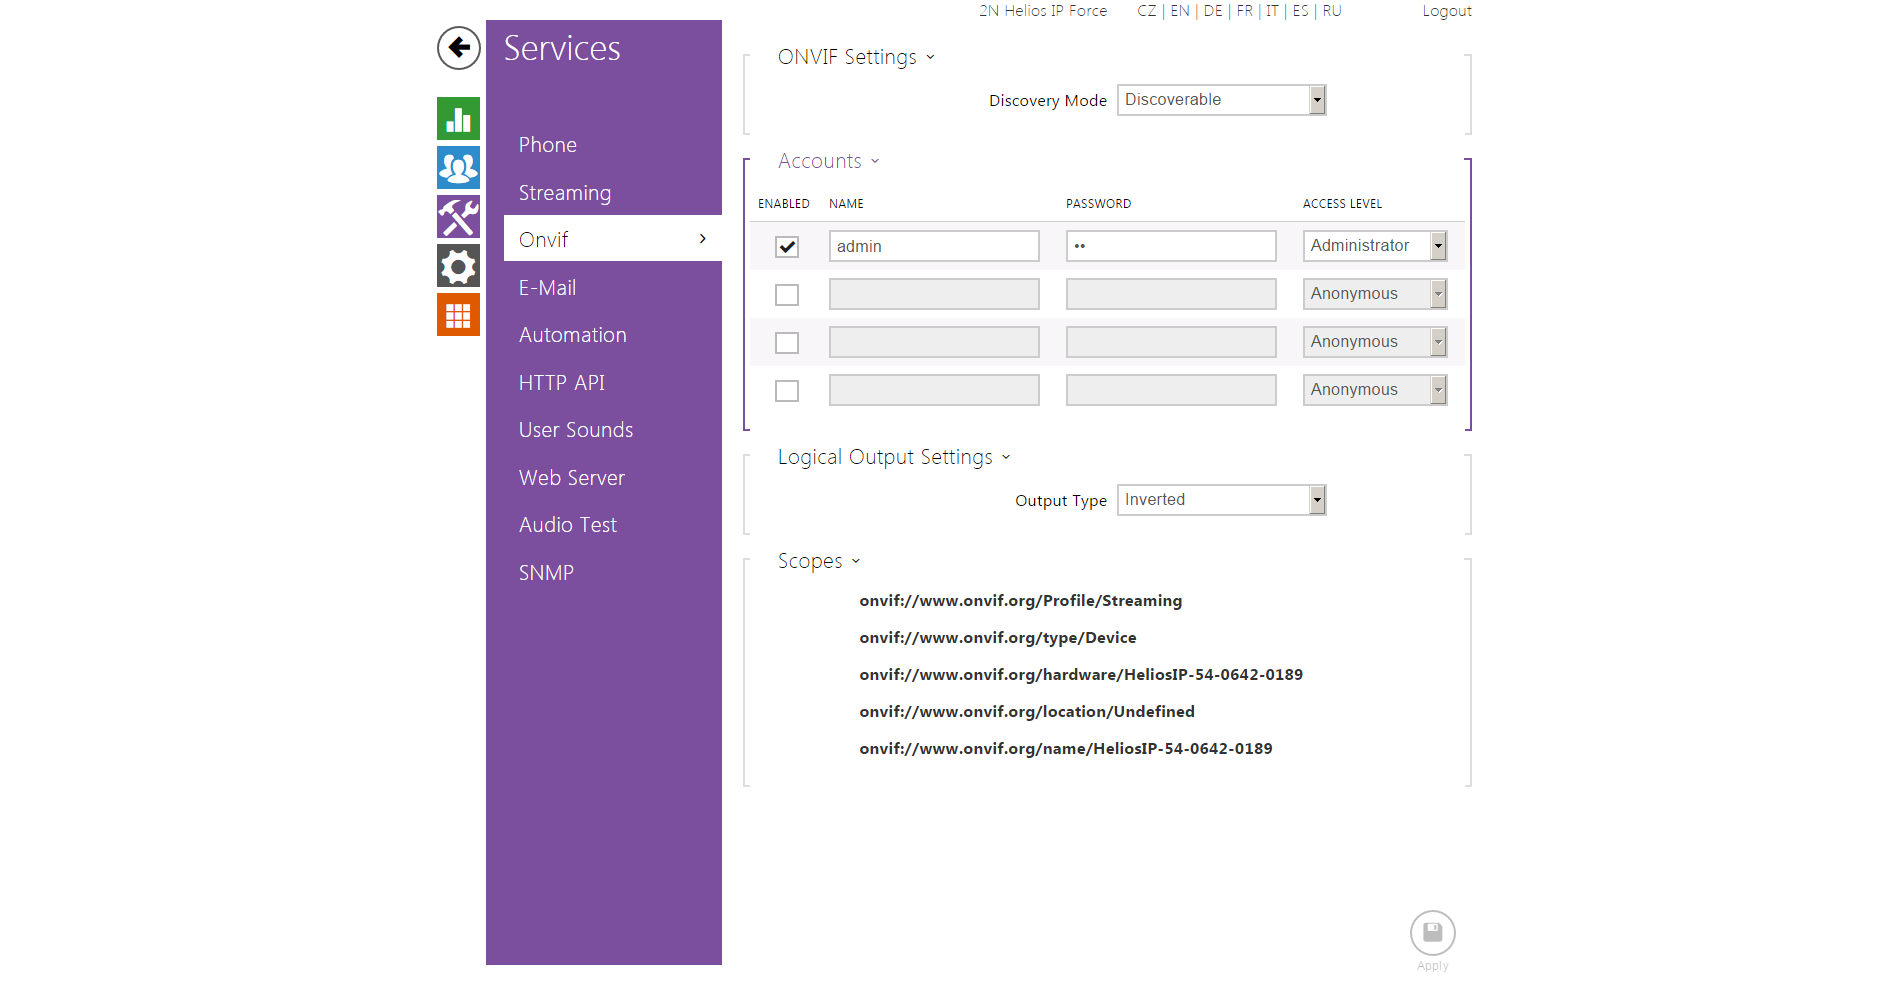
Enable Onvif and set authorisation data in menu Services / Onvif.
 |
 |
Tested Features
Start the Qognify Cayuga client and connect to your server using the credentials of the client administrator (which is completely separate from the previously discussed server administrator) given to you by your distributor / system integrator or use the default login (username: administrator / password: pass). Click the Configuration mode icon on the mode bar.
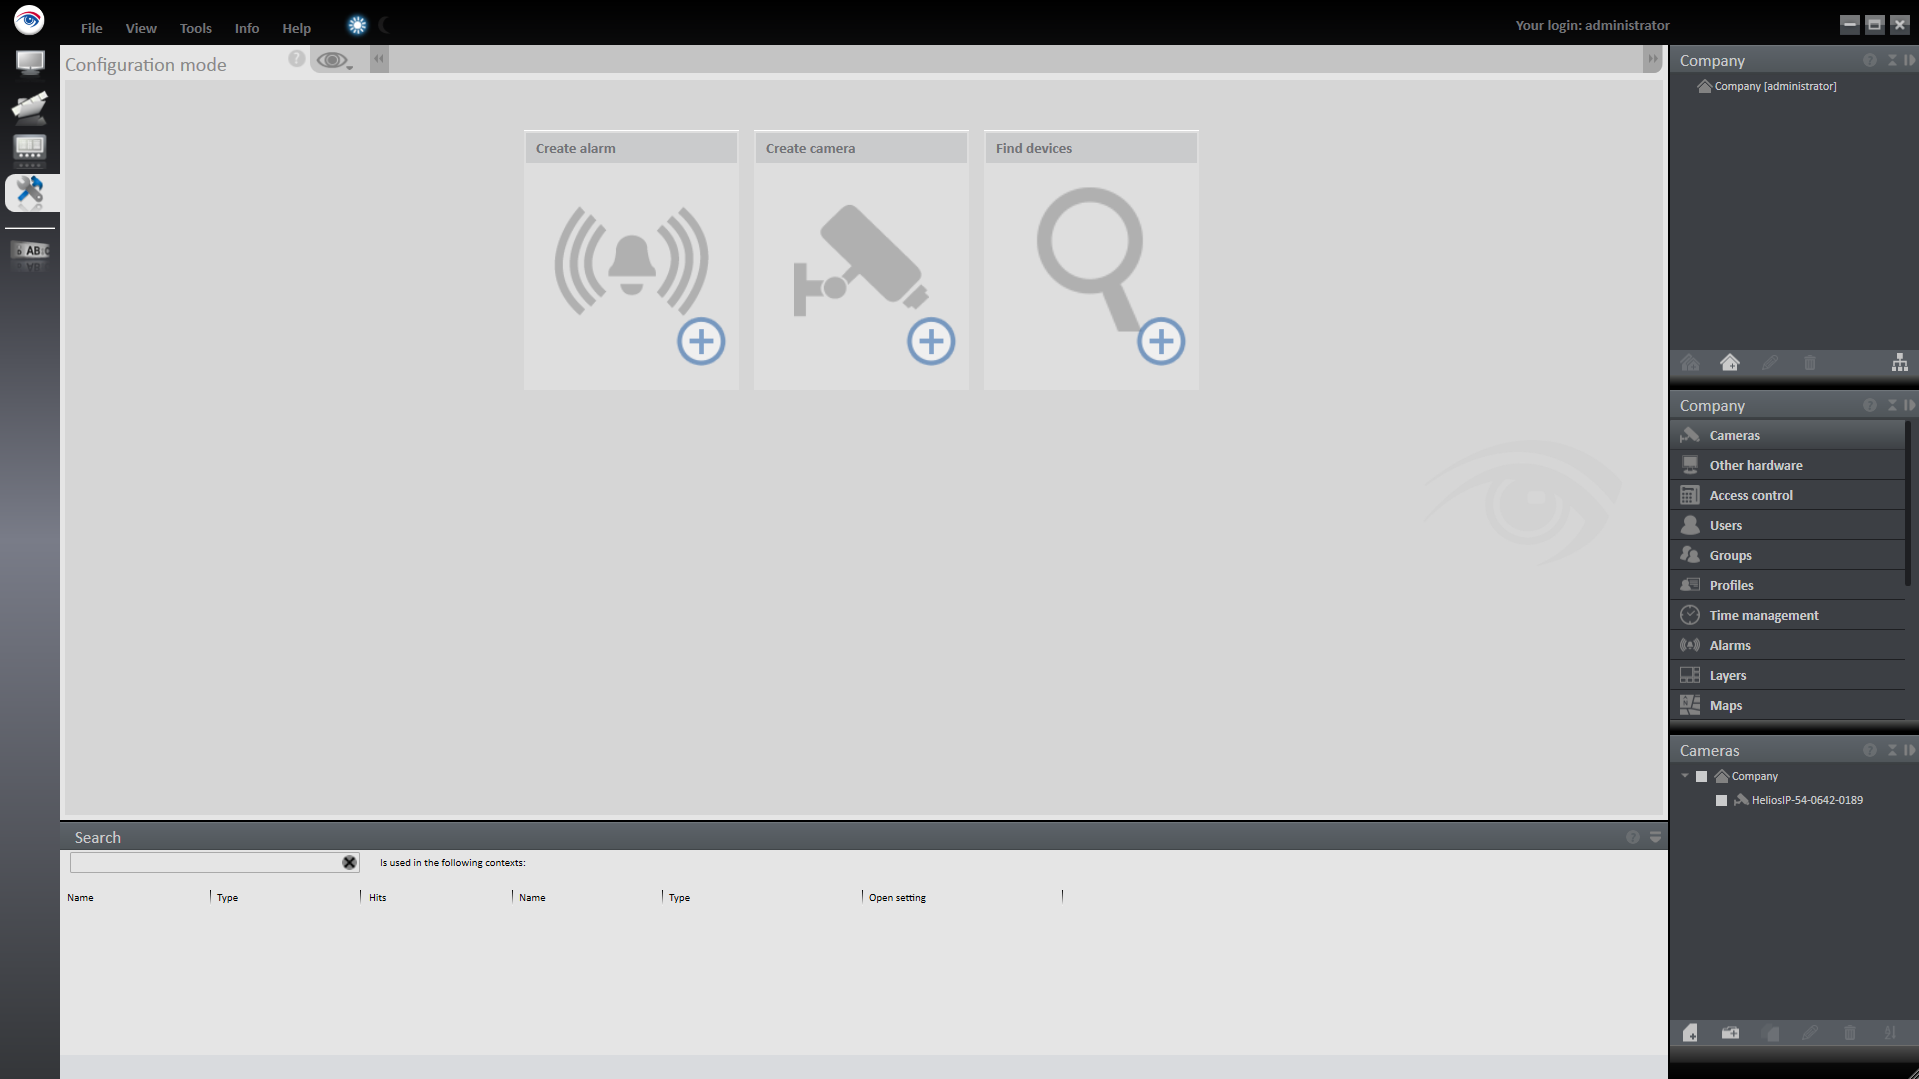 |
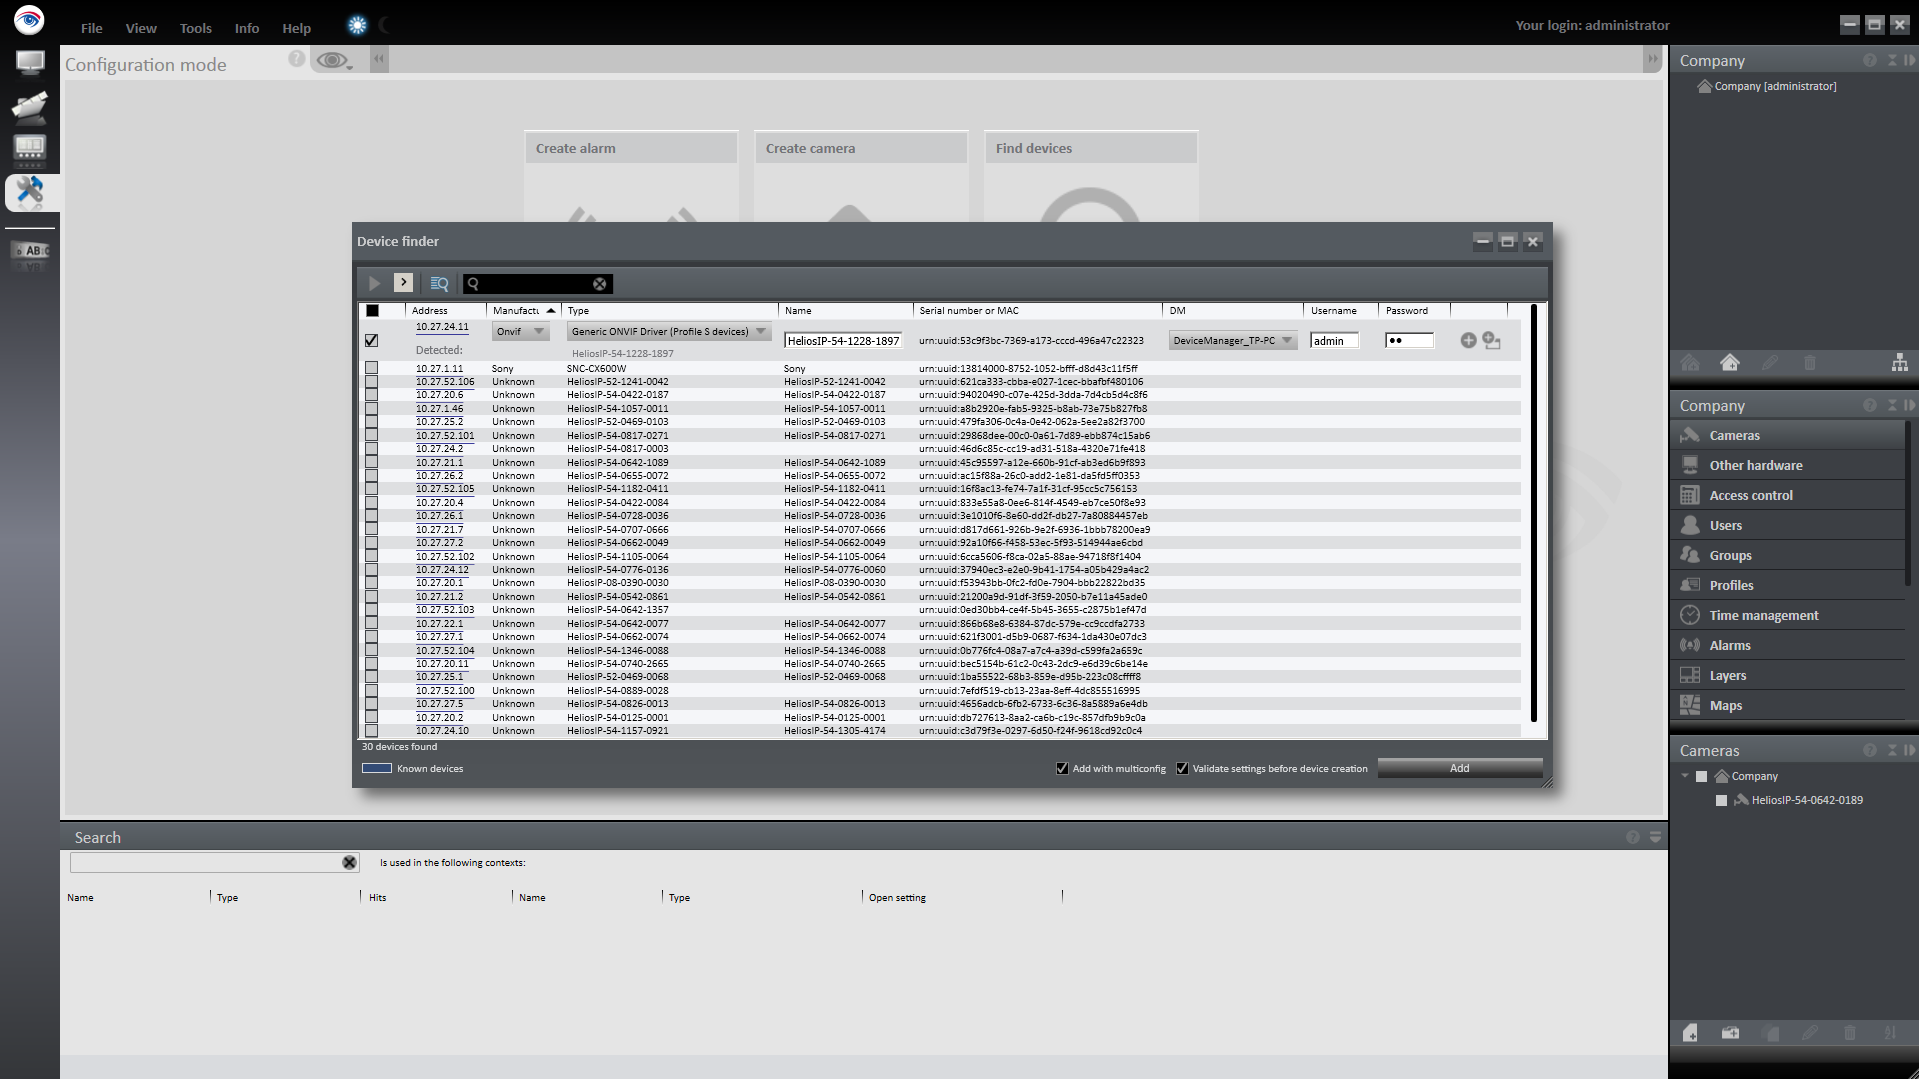
Choose Find devices and this opens the Device finder menu. In the Device finder menu, select your camera, choose the manufacturer, the model and enter camera's username and password, then click Add. The new camera is displayed in the camera overview.
 |
Select the camera in the overview. The settings of the camera are displayed in the main window. Select or deselect the camera. If necessary, change the camera ID and adapt the ID of the associated camera to the hardware.
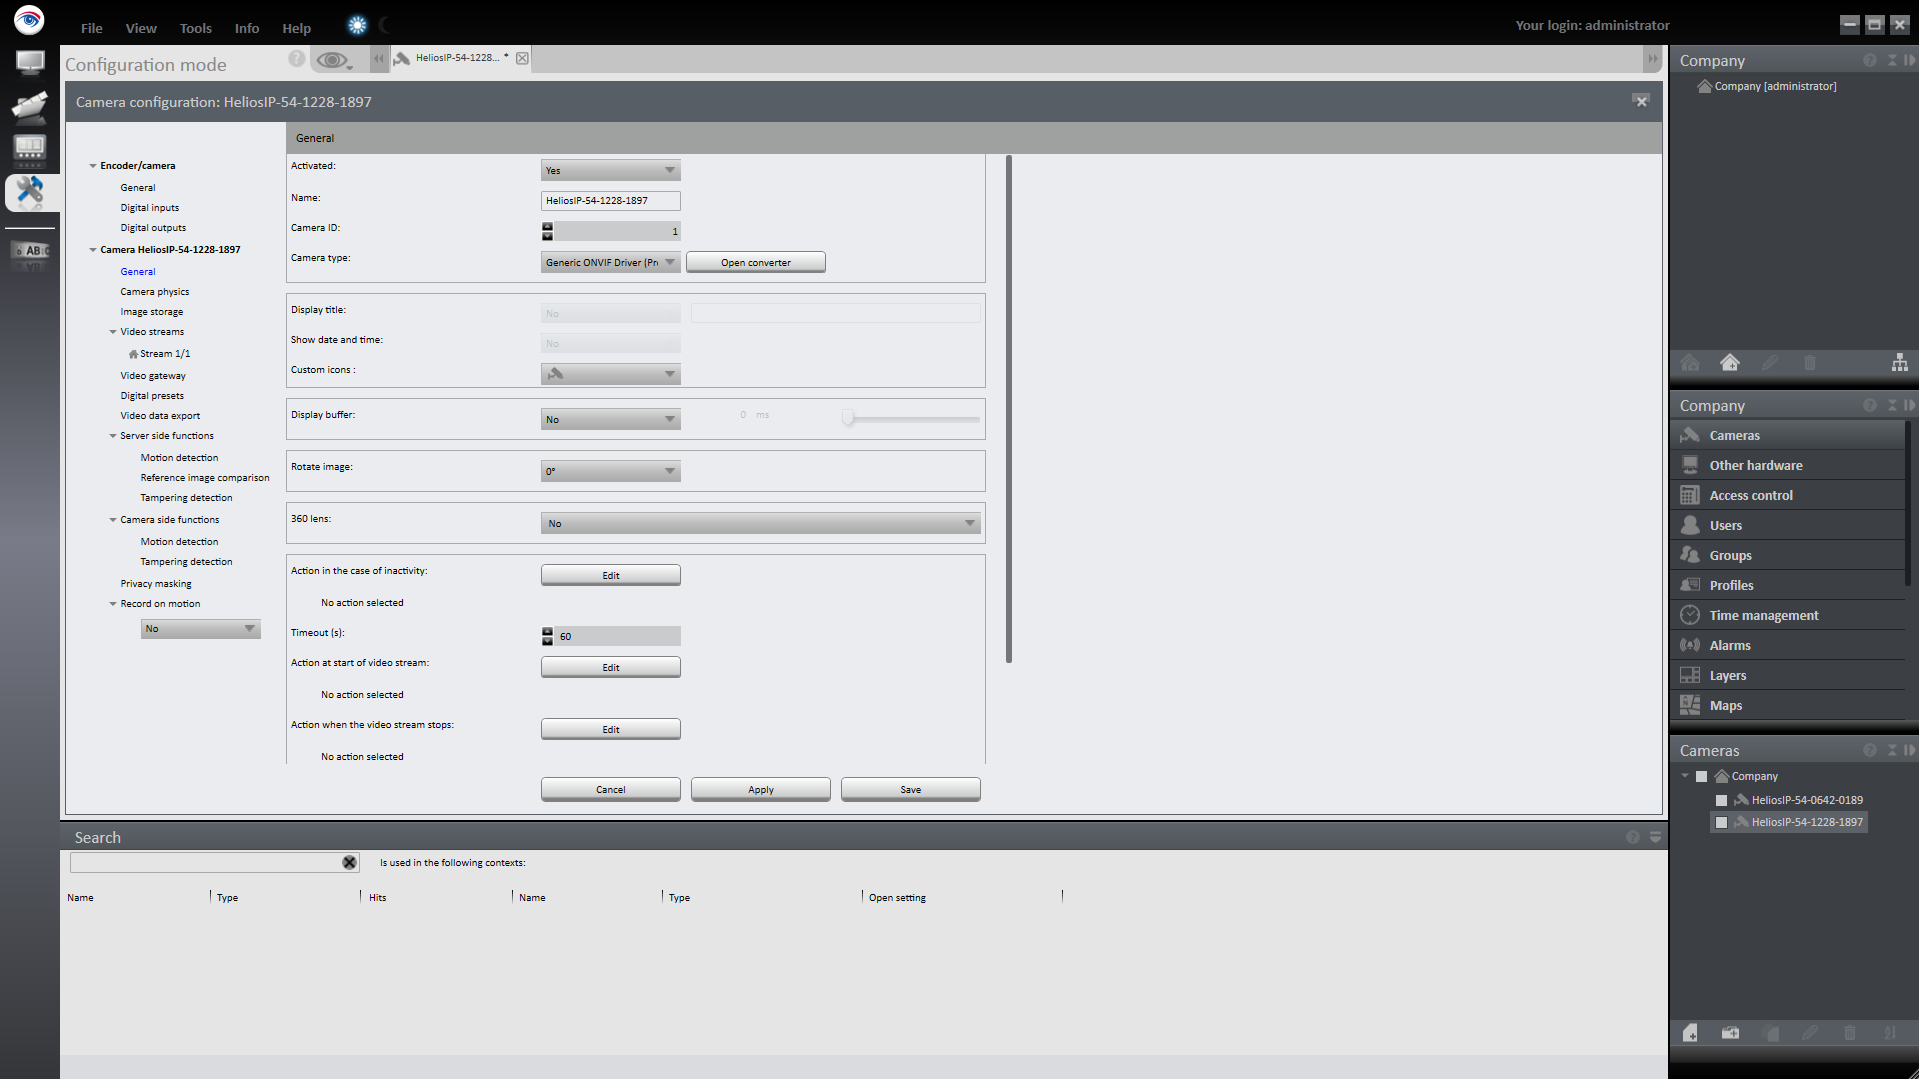 |
In the video streams you can specify and configure different profiles for the transmission of image data. The software creates a base profile during installation. Select the type of the video stream. The selected video codec is displayed. MPEG-4/H.264 streaming is manufacturer-specific and is therefore not supported by all cameras. Select the transmission mode. Select the transmission of audio signals. Specify the frame rate (fps) and image quality (as a percentage of the best possible quality) separately for standard and alarm recording. Apply the set values if you want to make further settings. Save the set values to apply the values and conclude input.
 |
 |
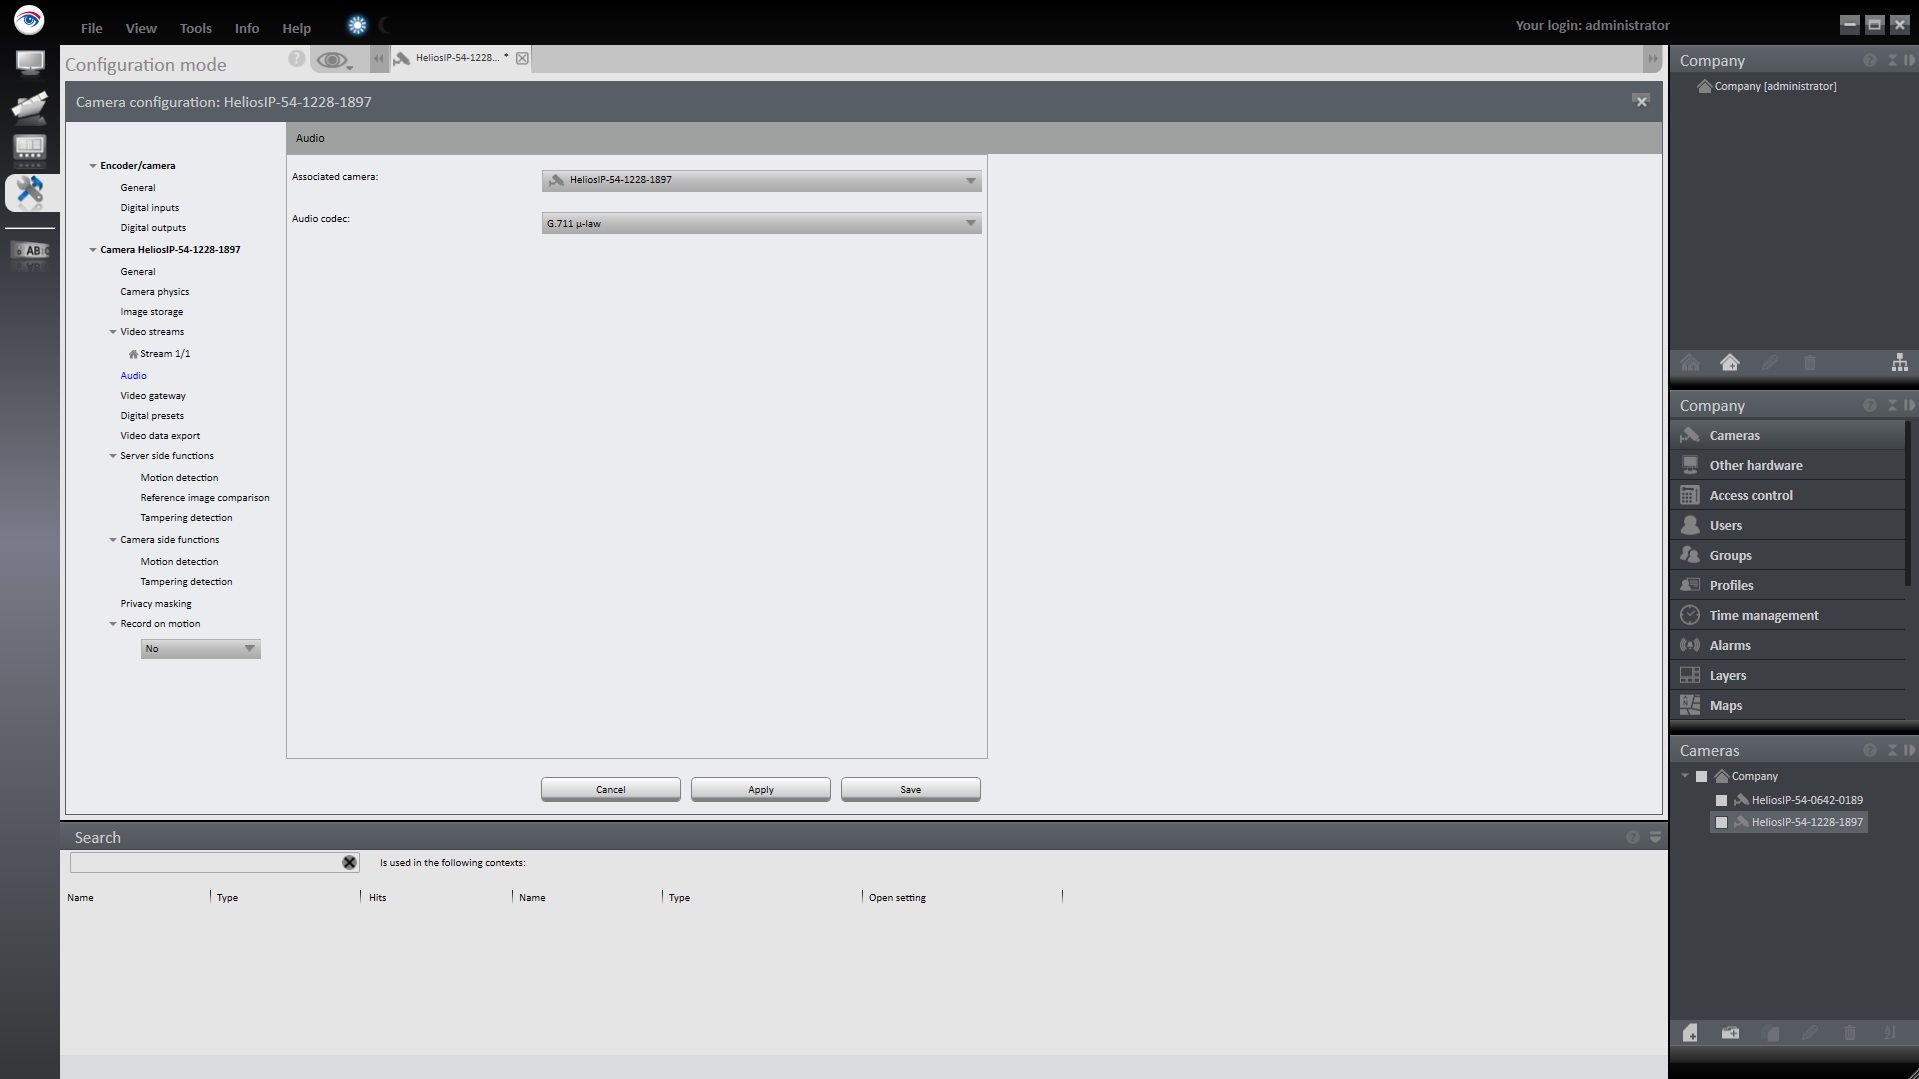
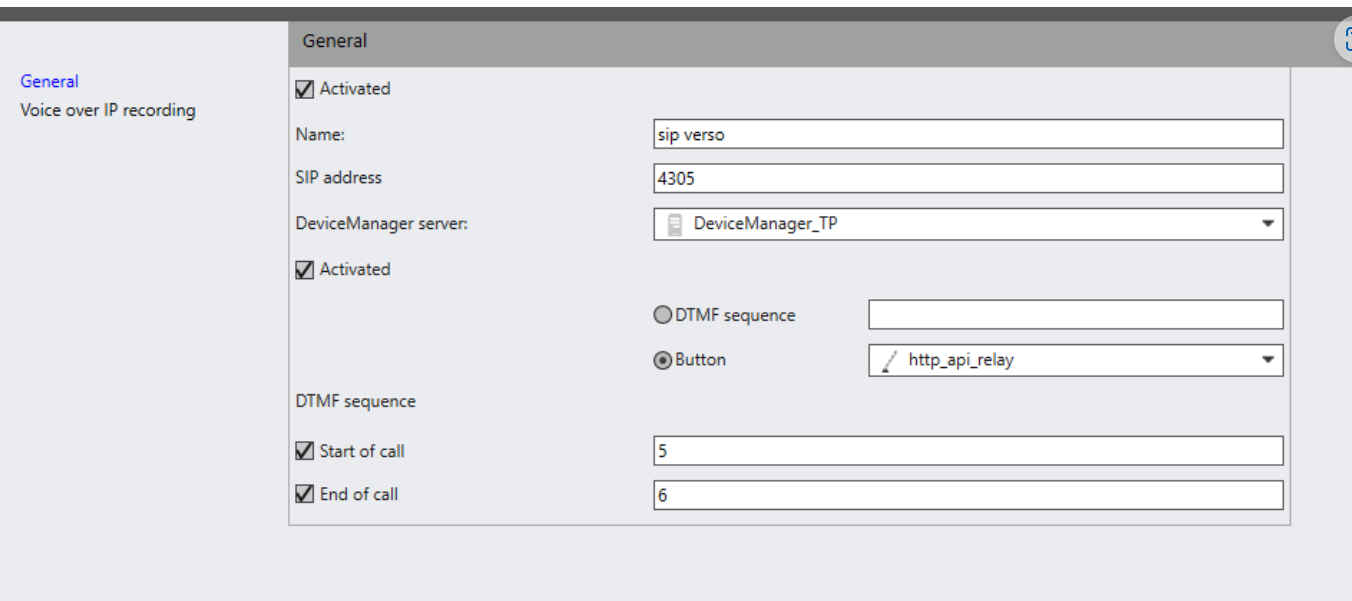
In the Camera configuration / Video streams select the transmission of audio signals.
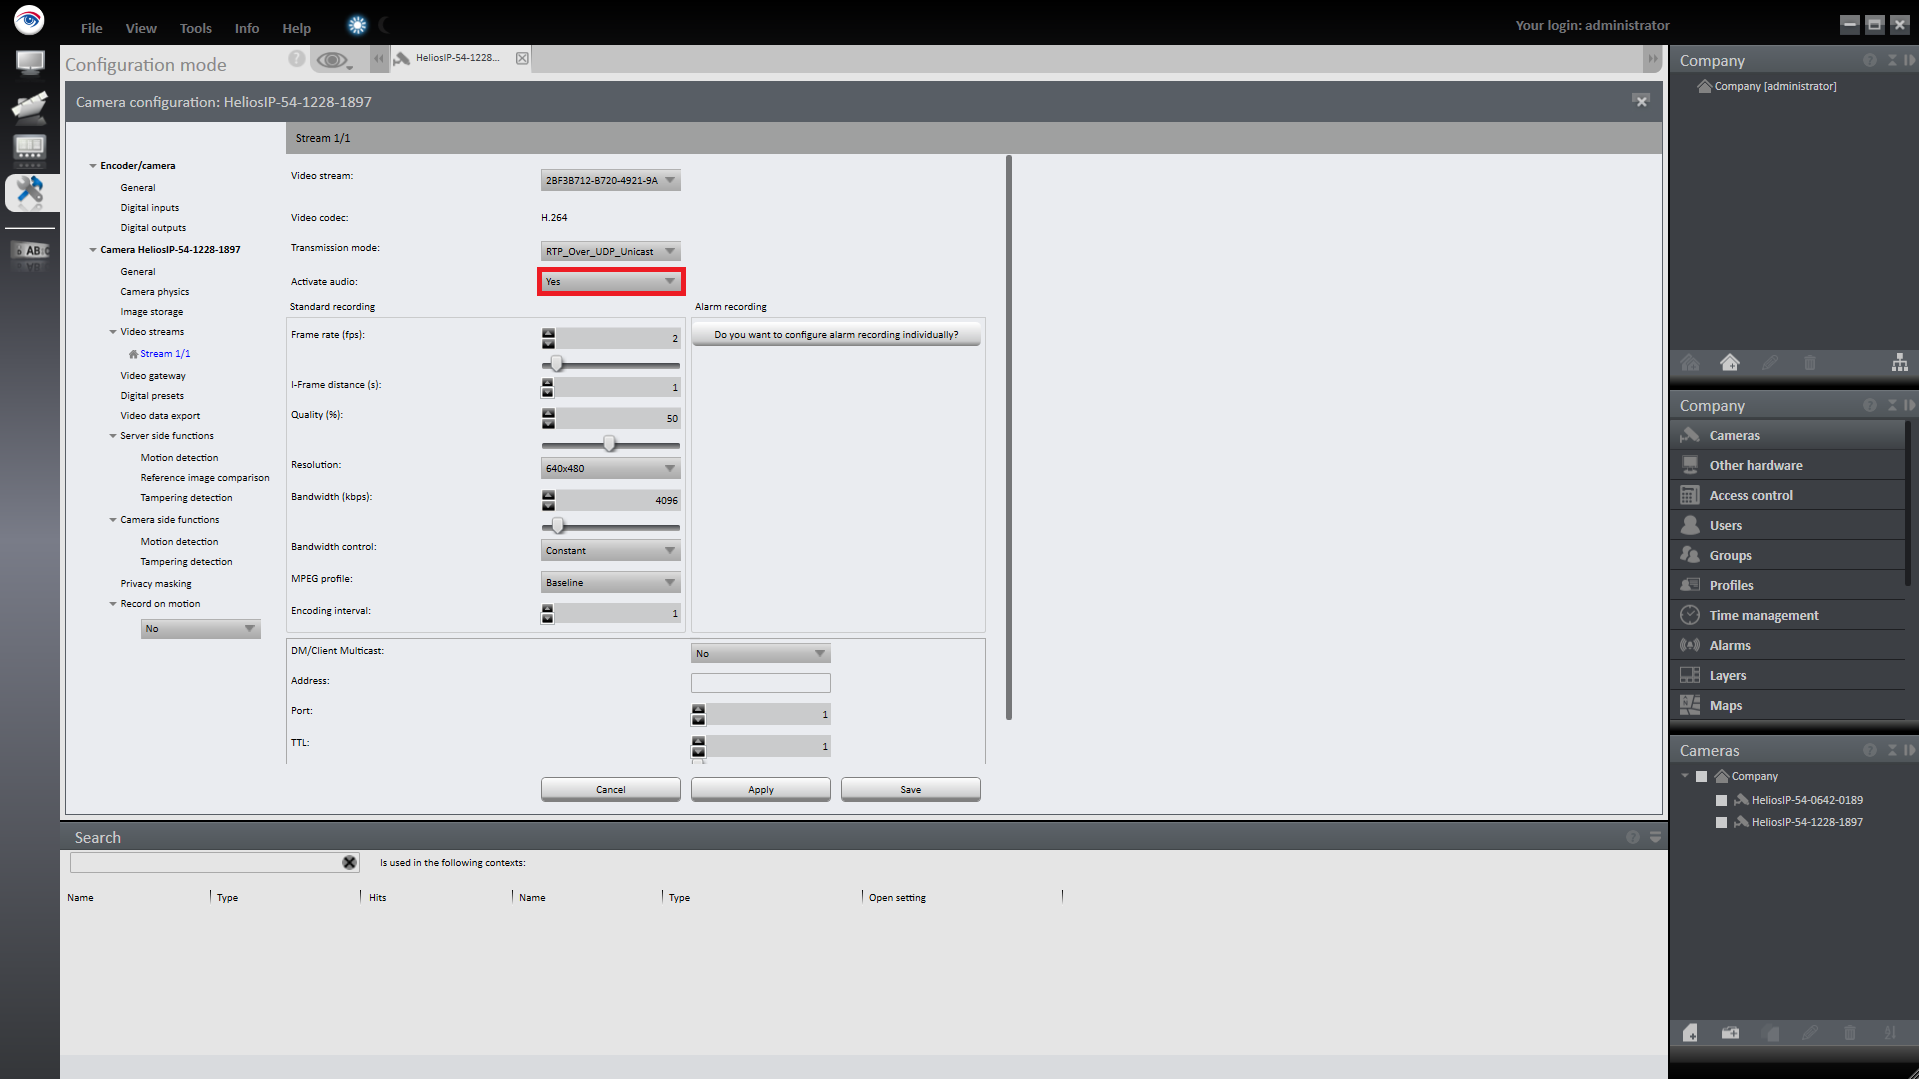 |
Select a suitable audio codec for the camera to specify sound transmission. The voice quality for the G711 codec in VoIP corresponds roughly to the sound quality of the ISDN standard. Apply the set values if you want to make further settings. Save the set values to apply the values and conclude input.
 |
 |
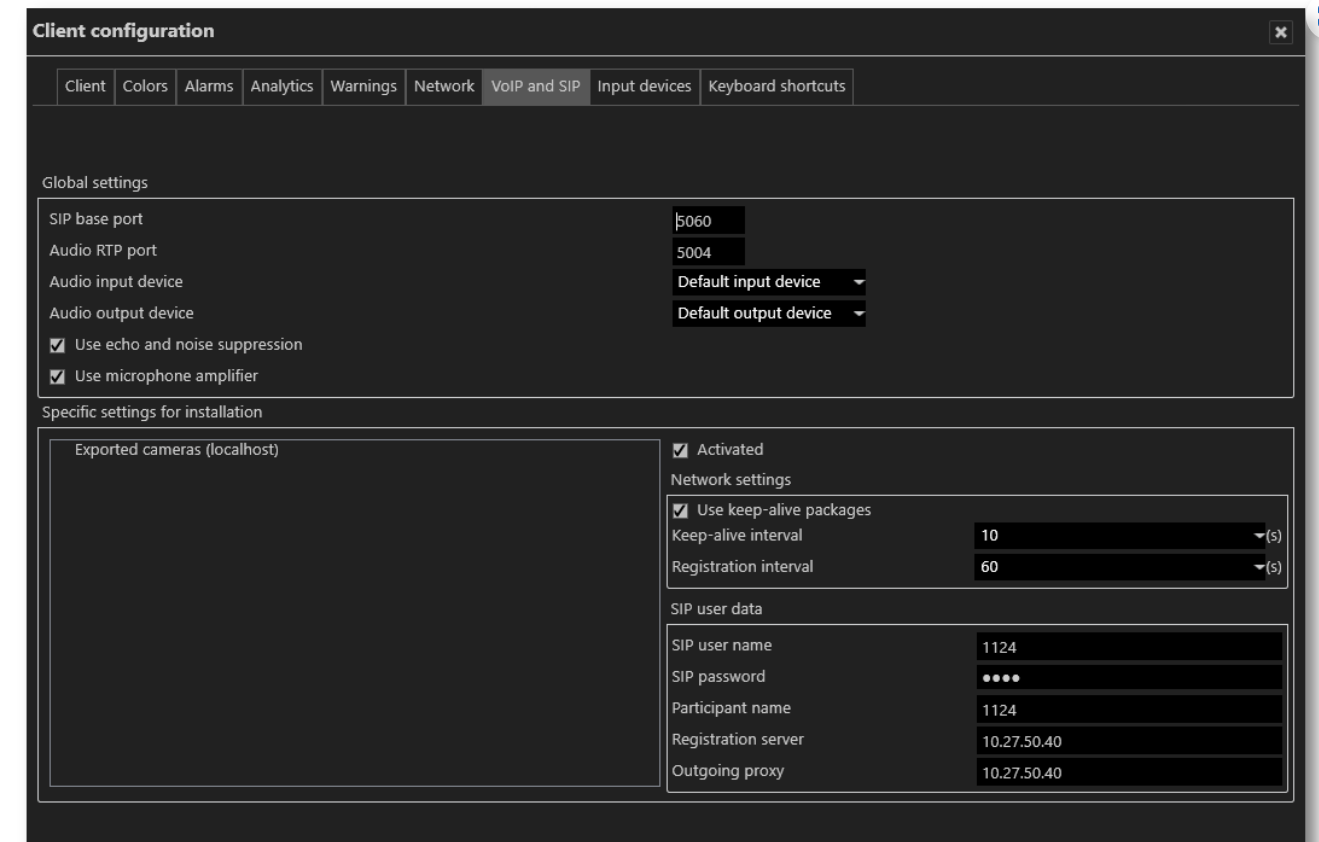
-only works if the client is arranged by the PBX
Set up VoiP and SIP in the clinet configuration
 |
 |
 |
 |
 |
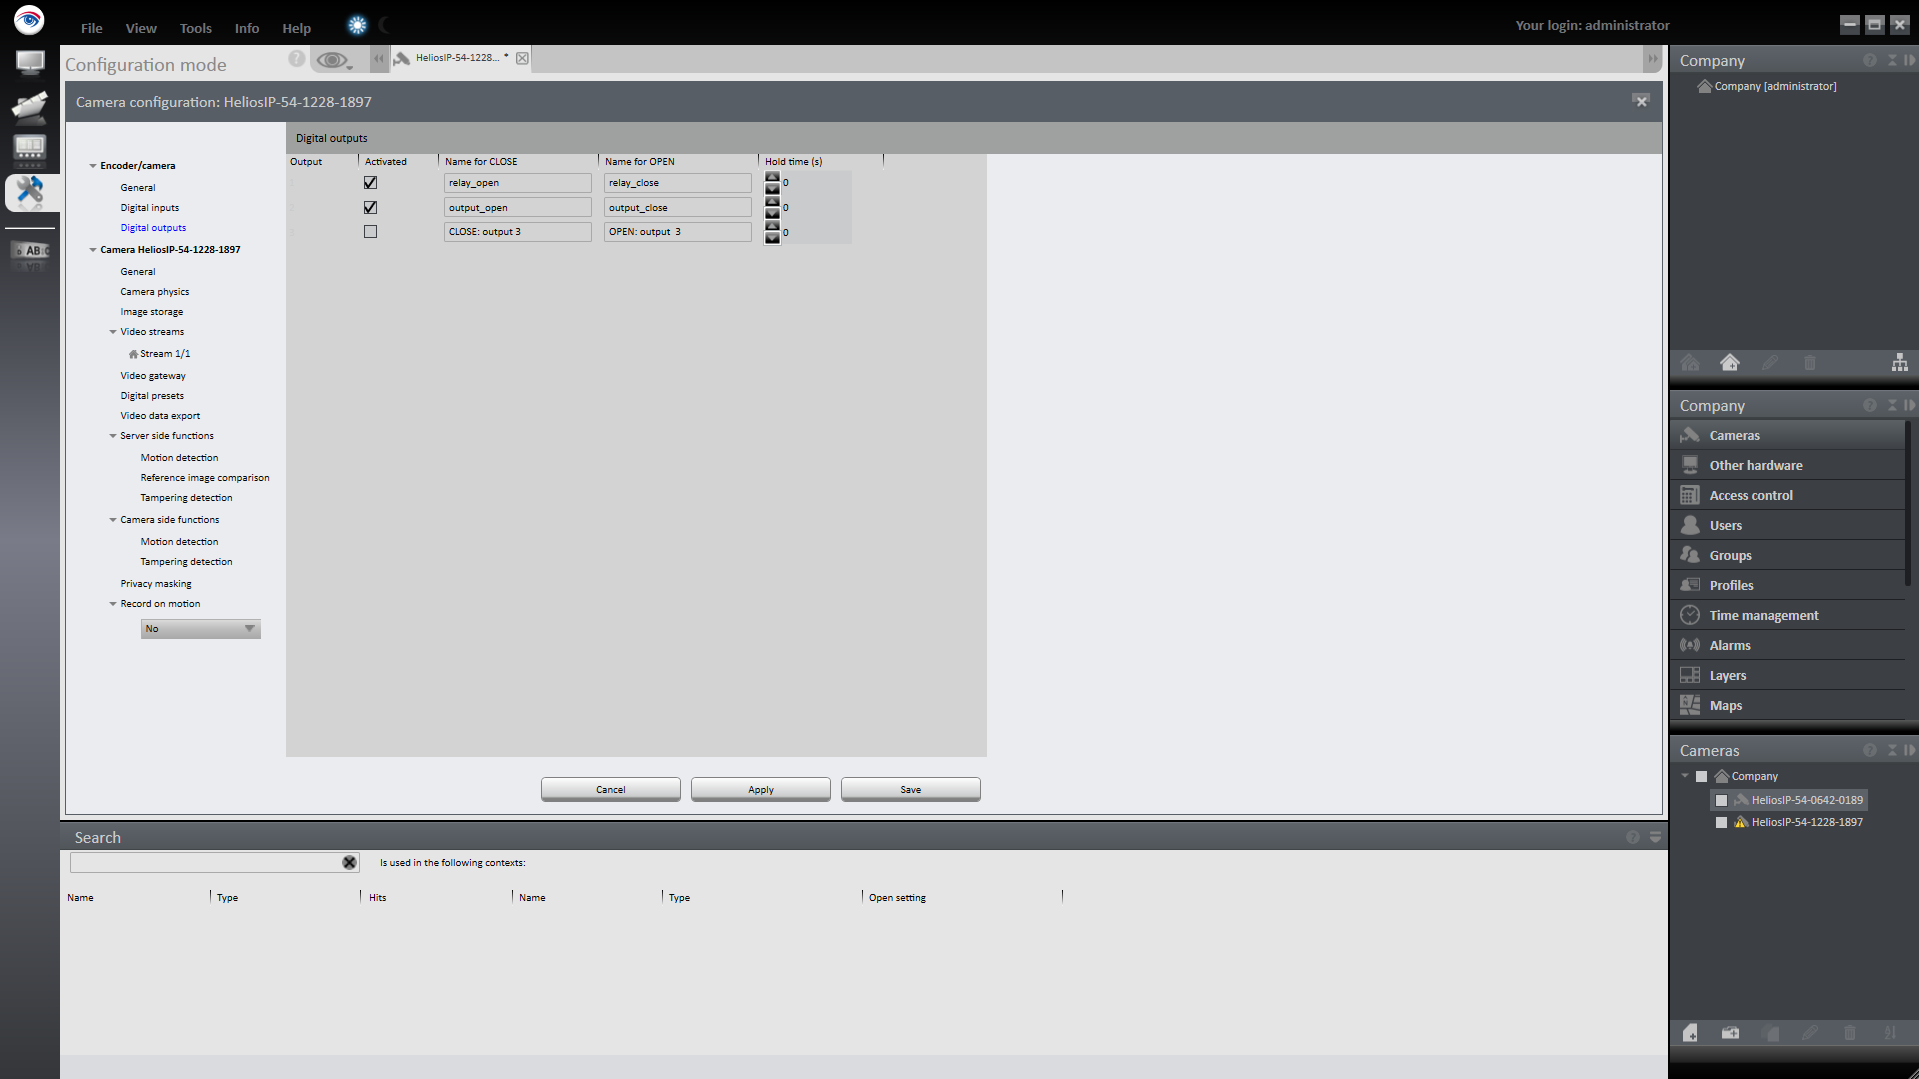
In the Camera configuration / Digital Outputs select the digital outputs and specify unique names for Name for CLOSED and Name for OPEN. Specify the hold time for the time (in seconds) within which an output is opened or closed (0 = infinite). Apply the set values if you want to make further settings. Save the set values to apply the values and conclude input.
 |
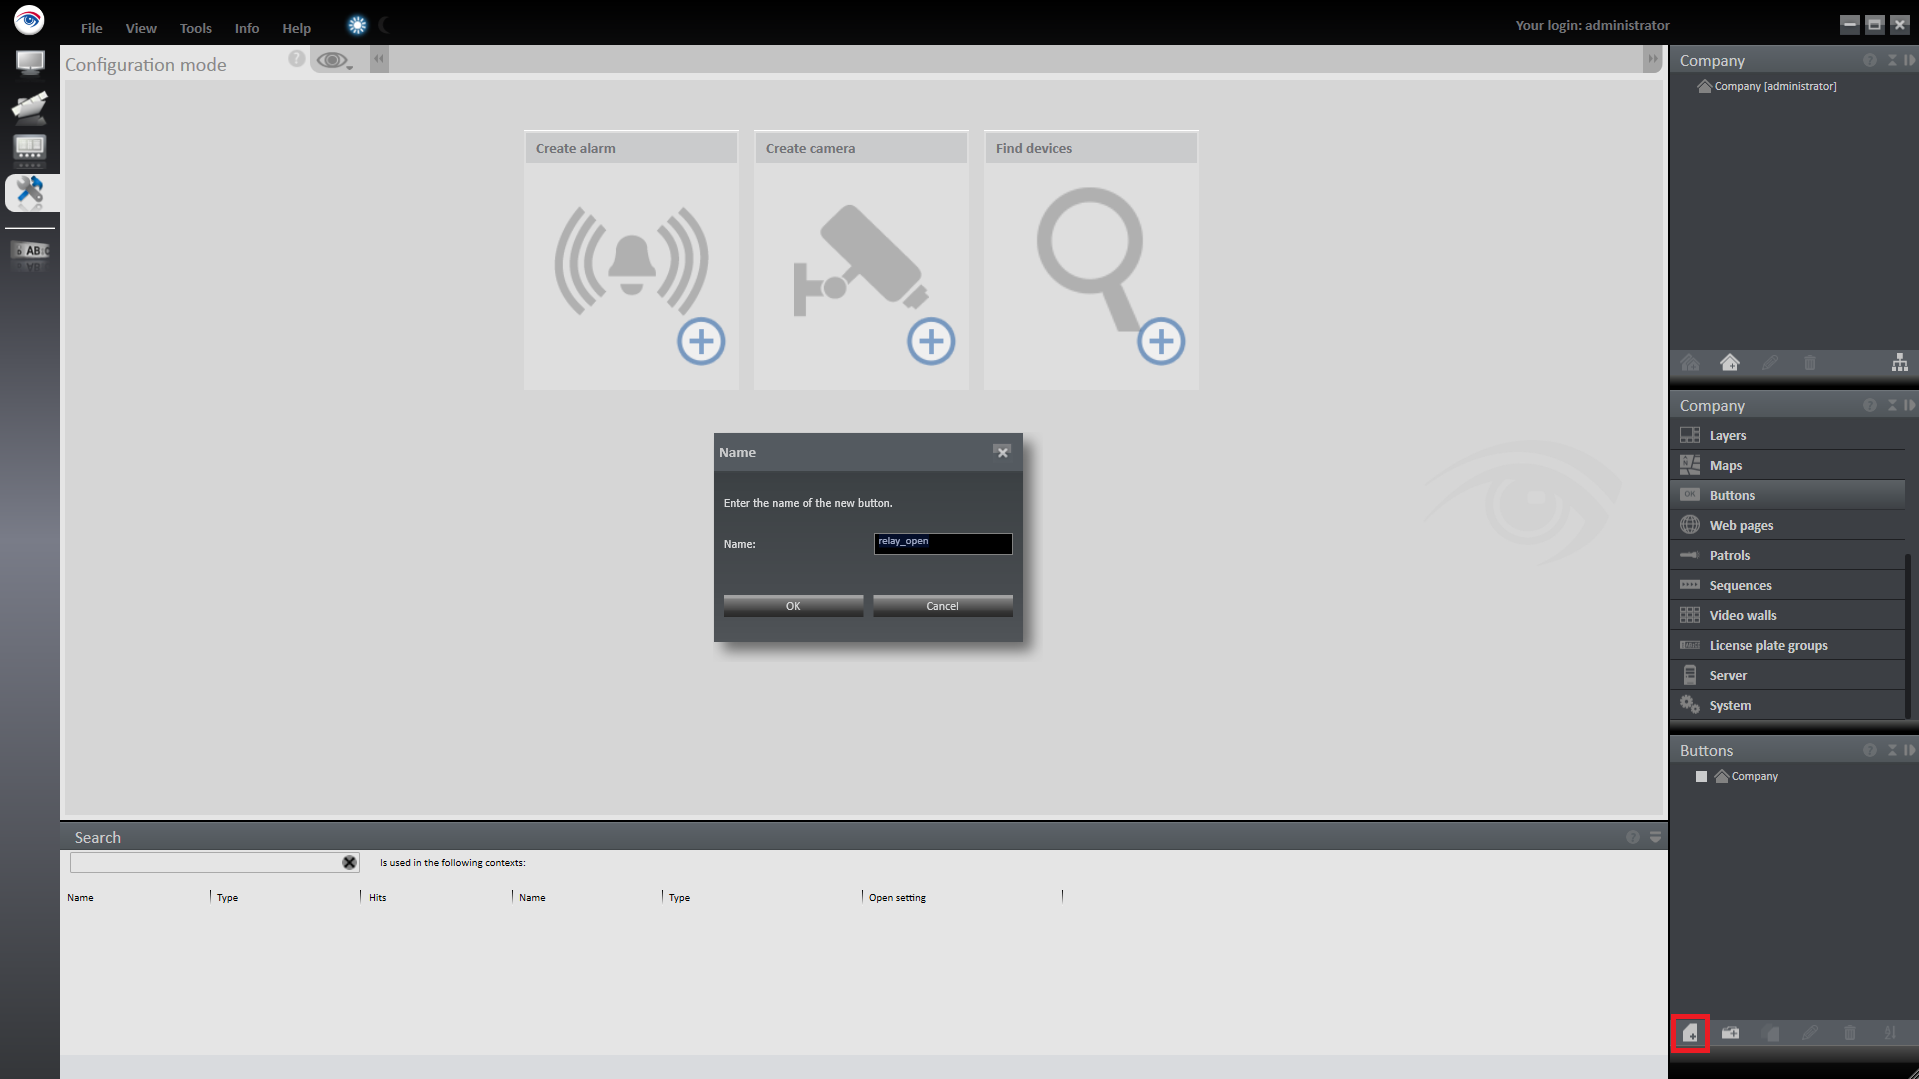
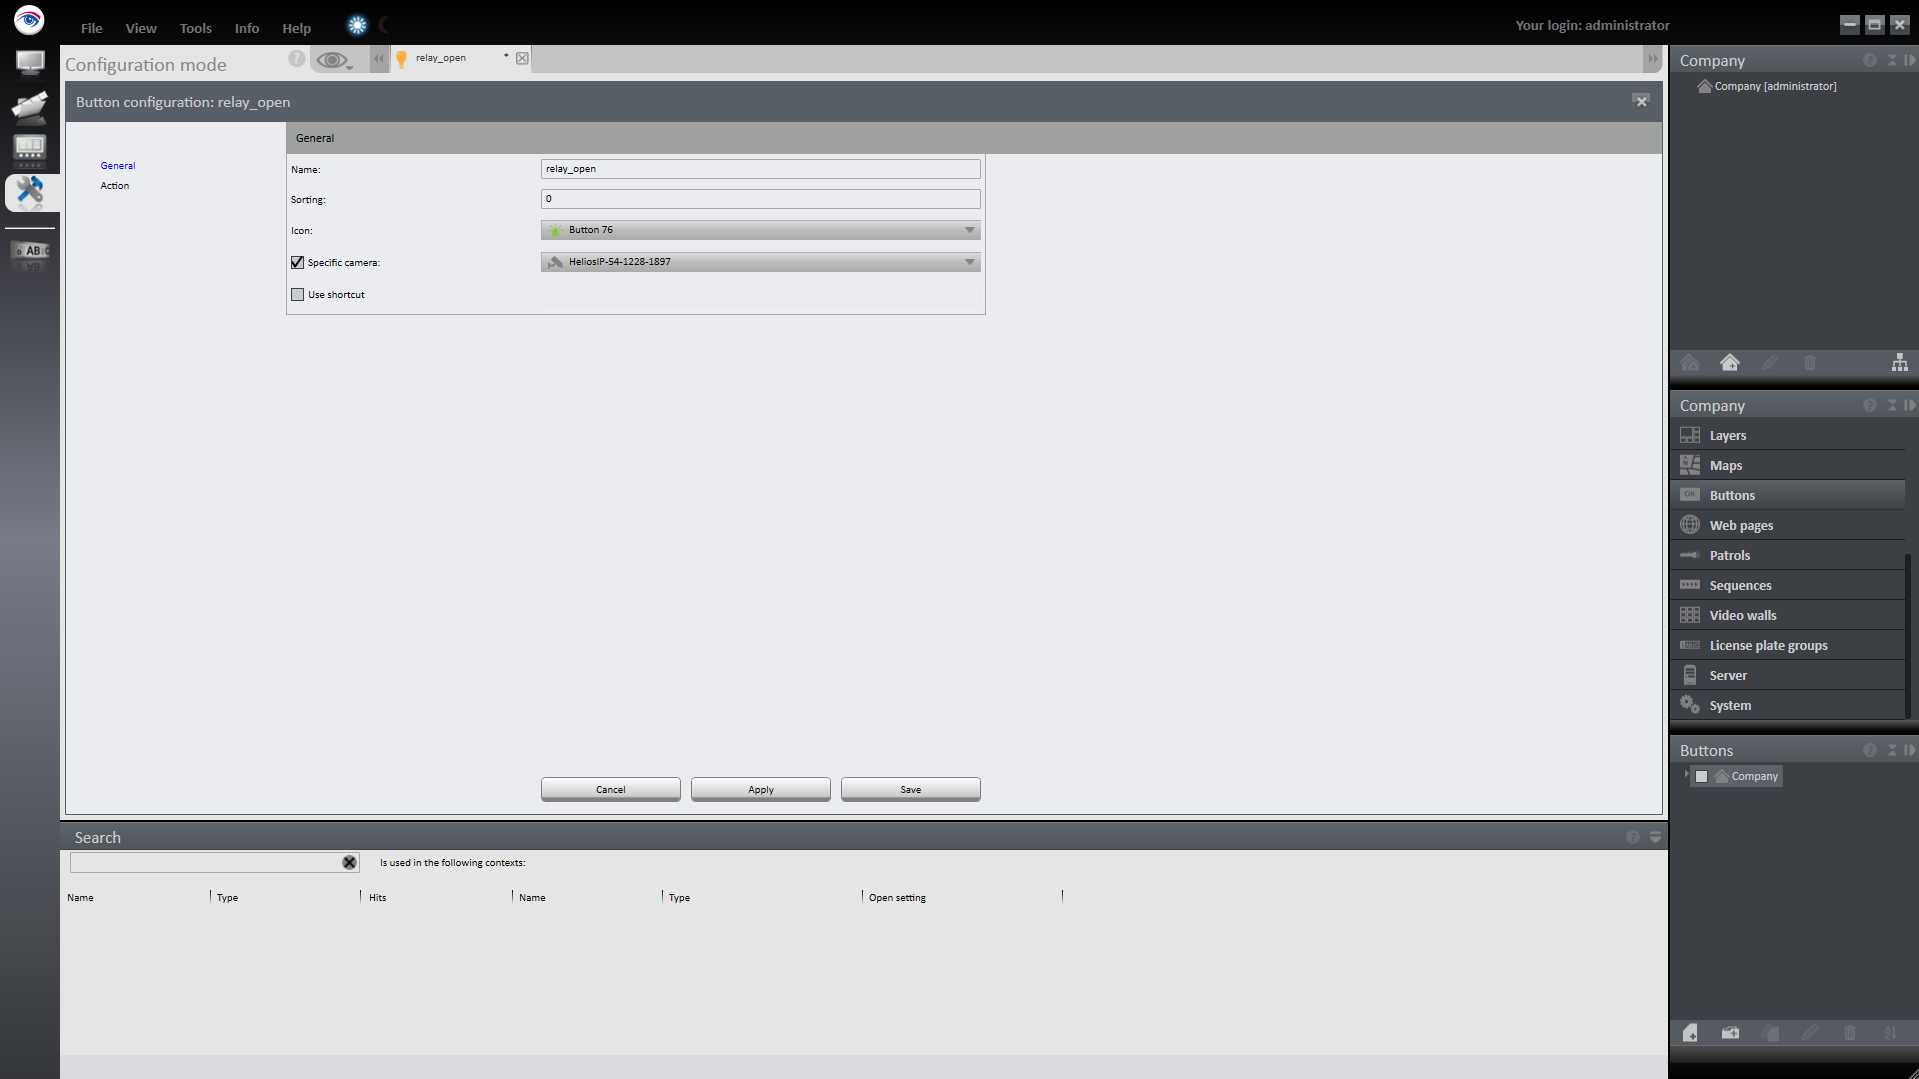
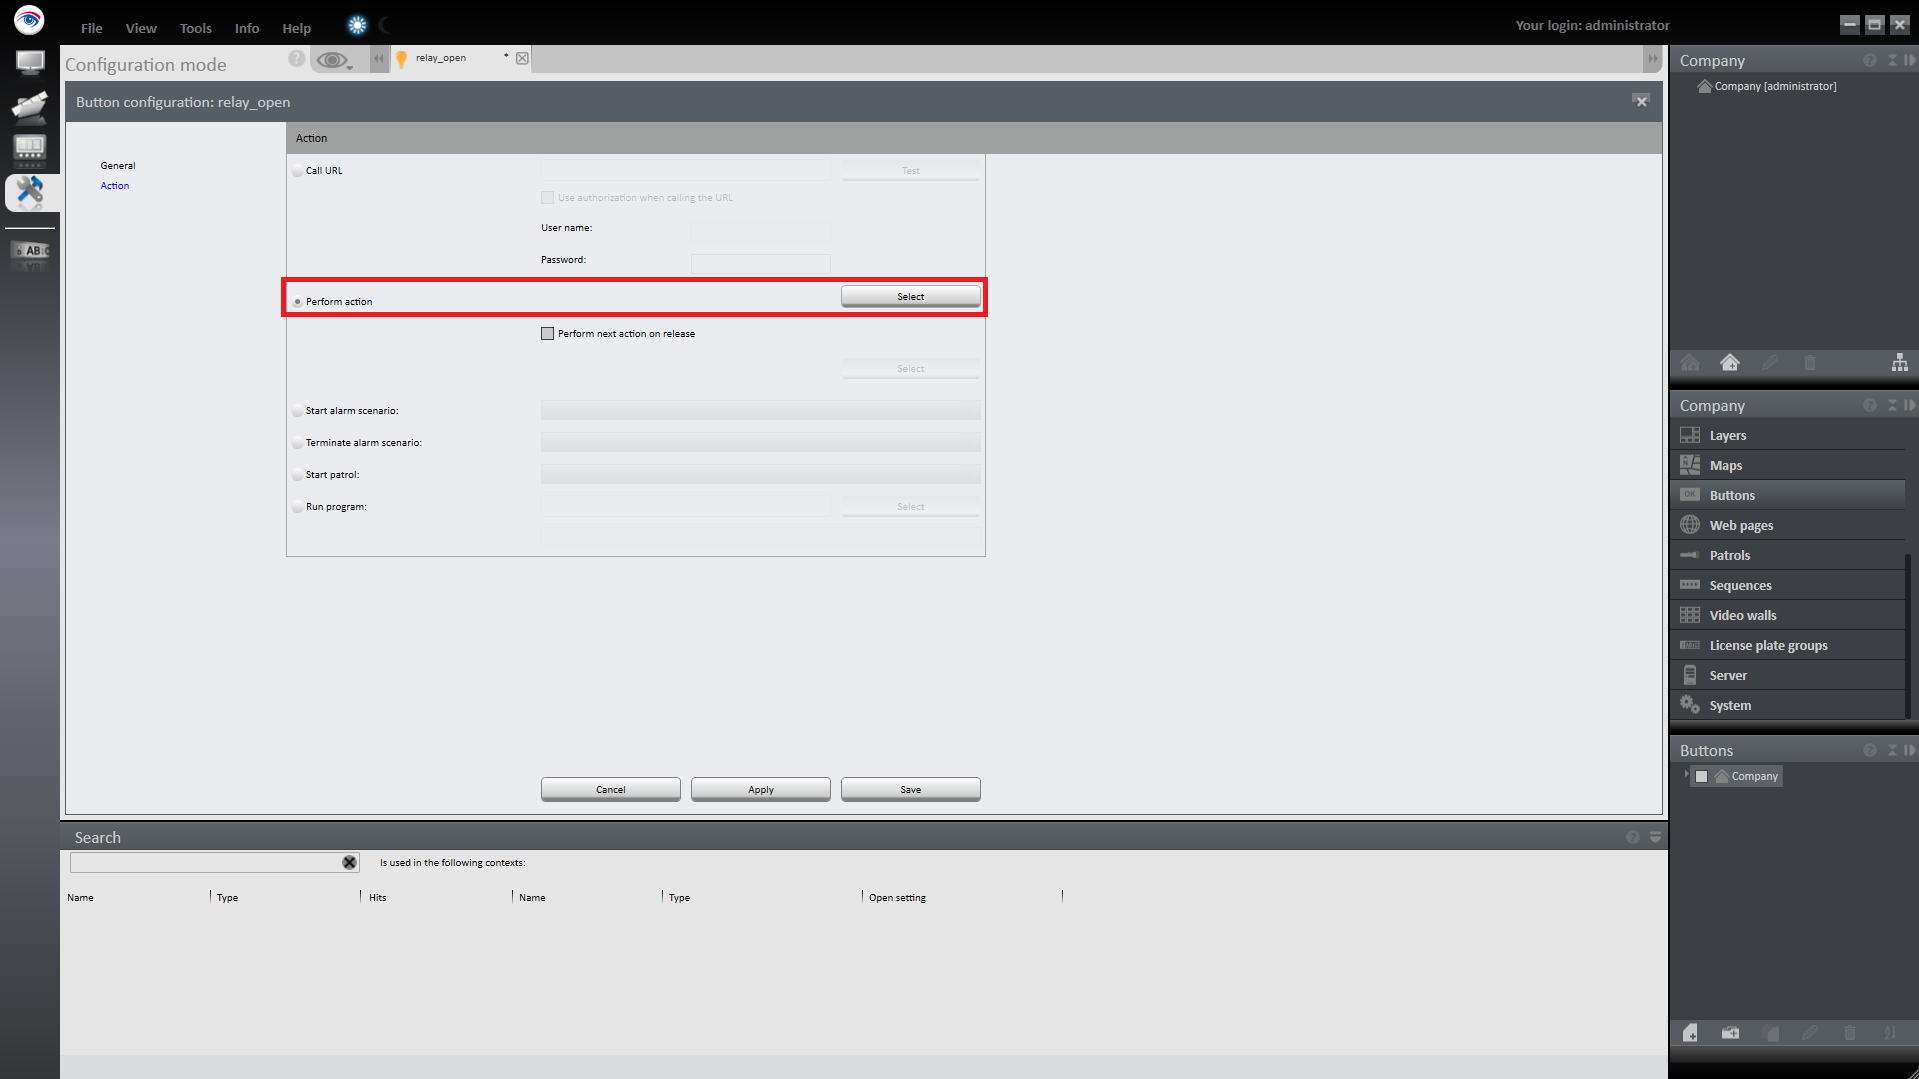
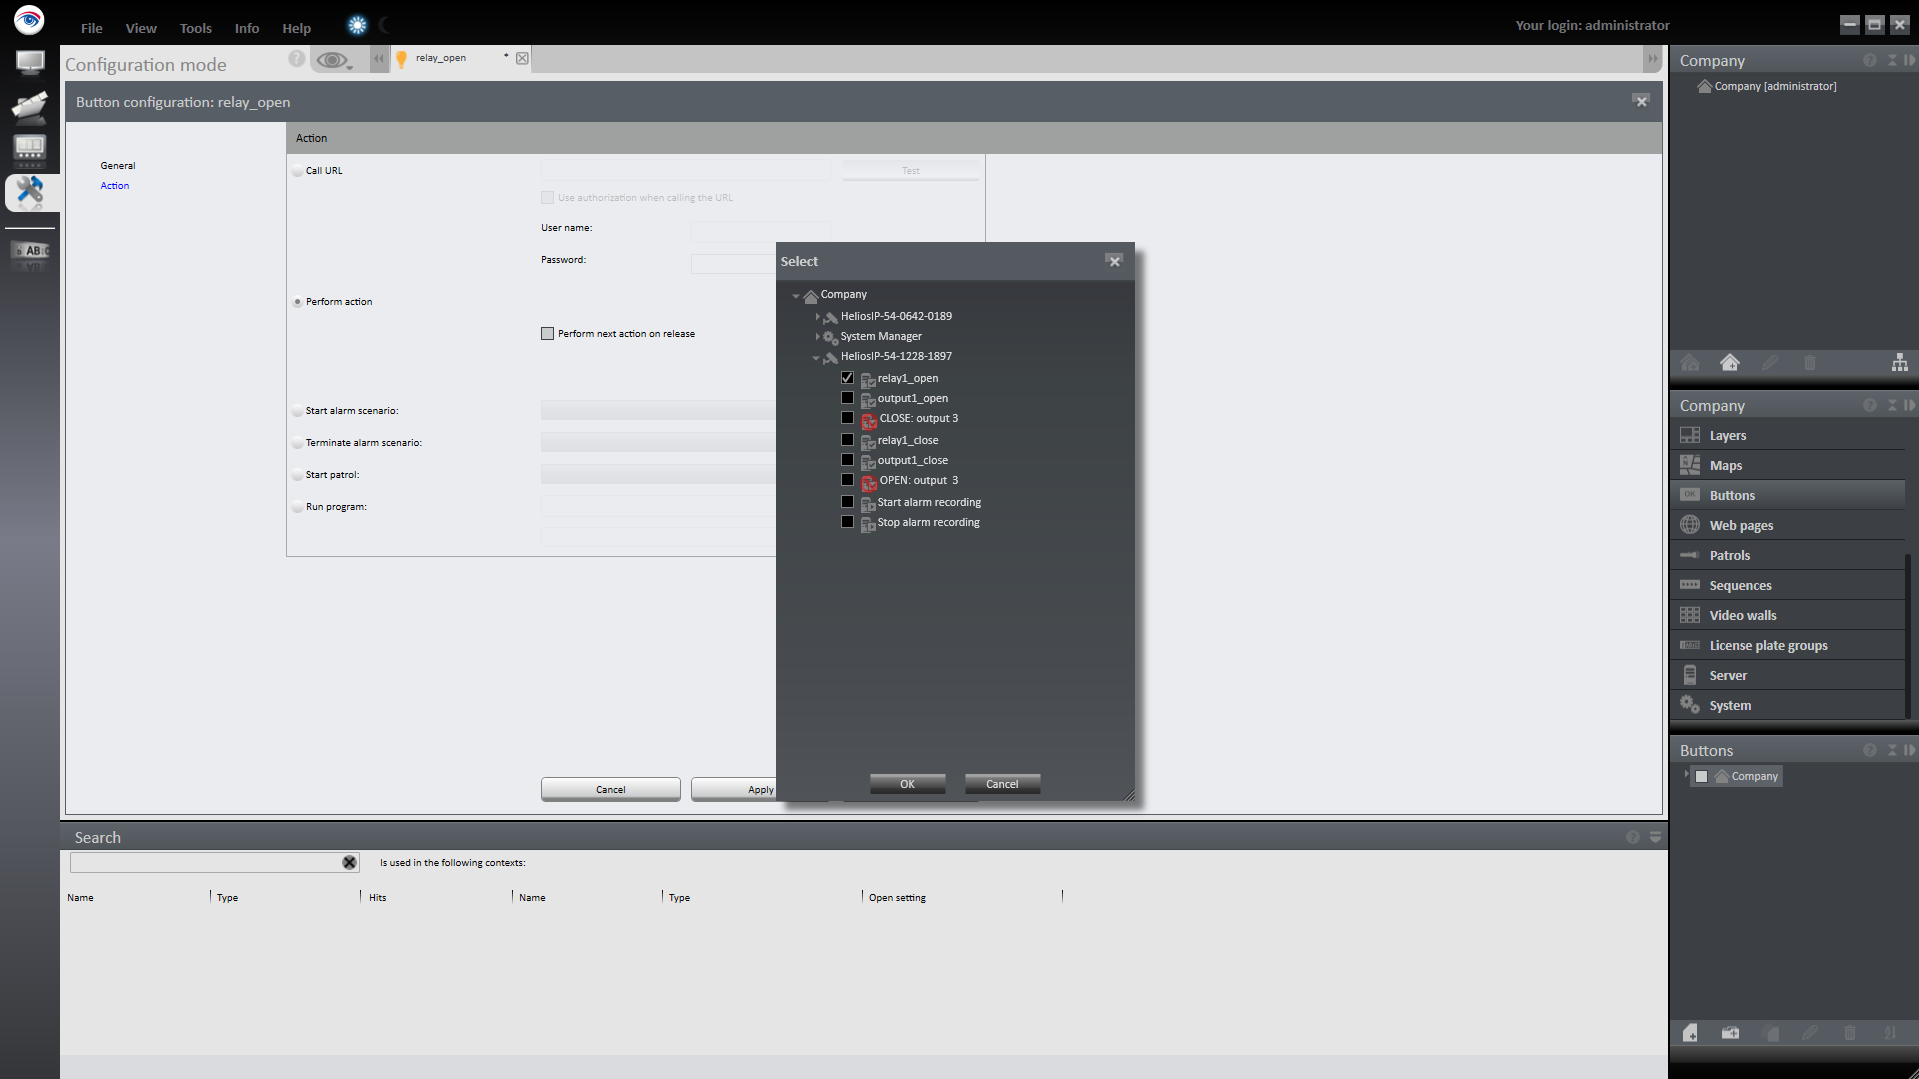
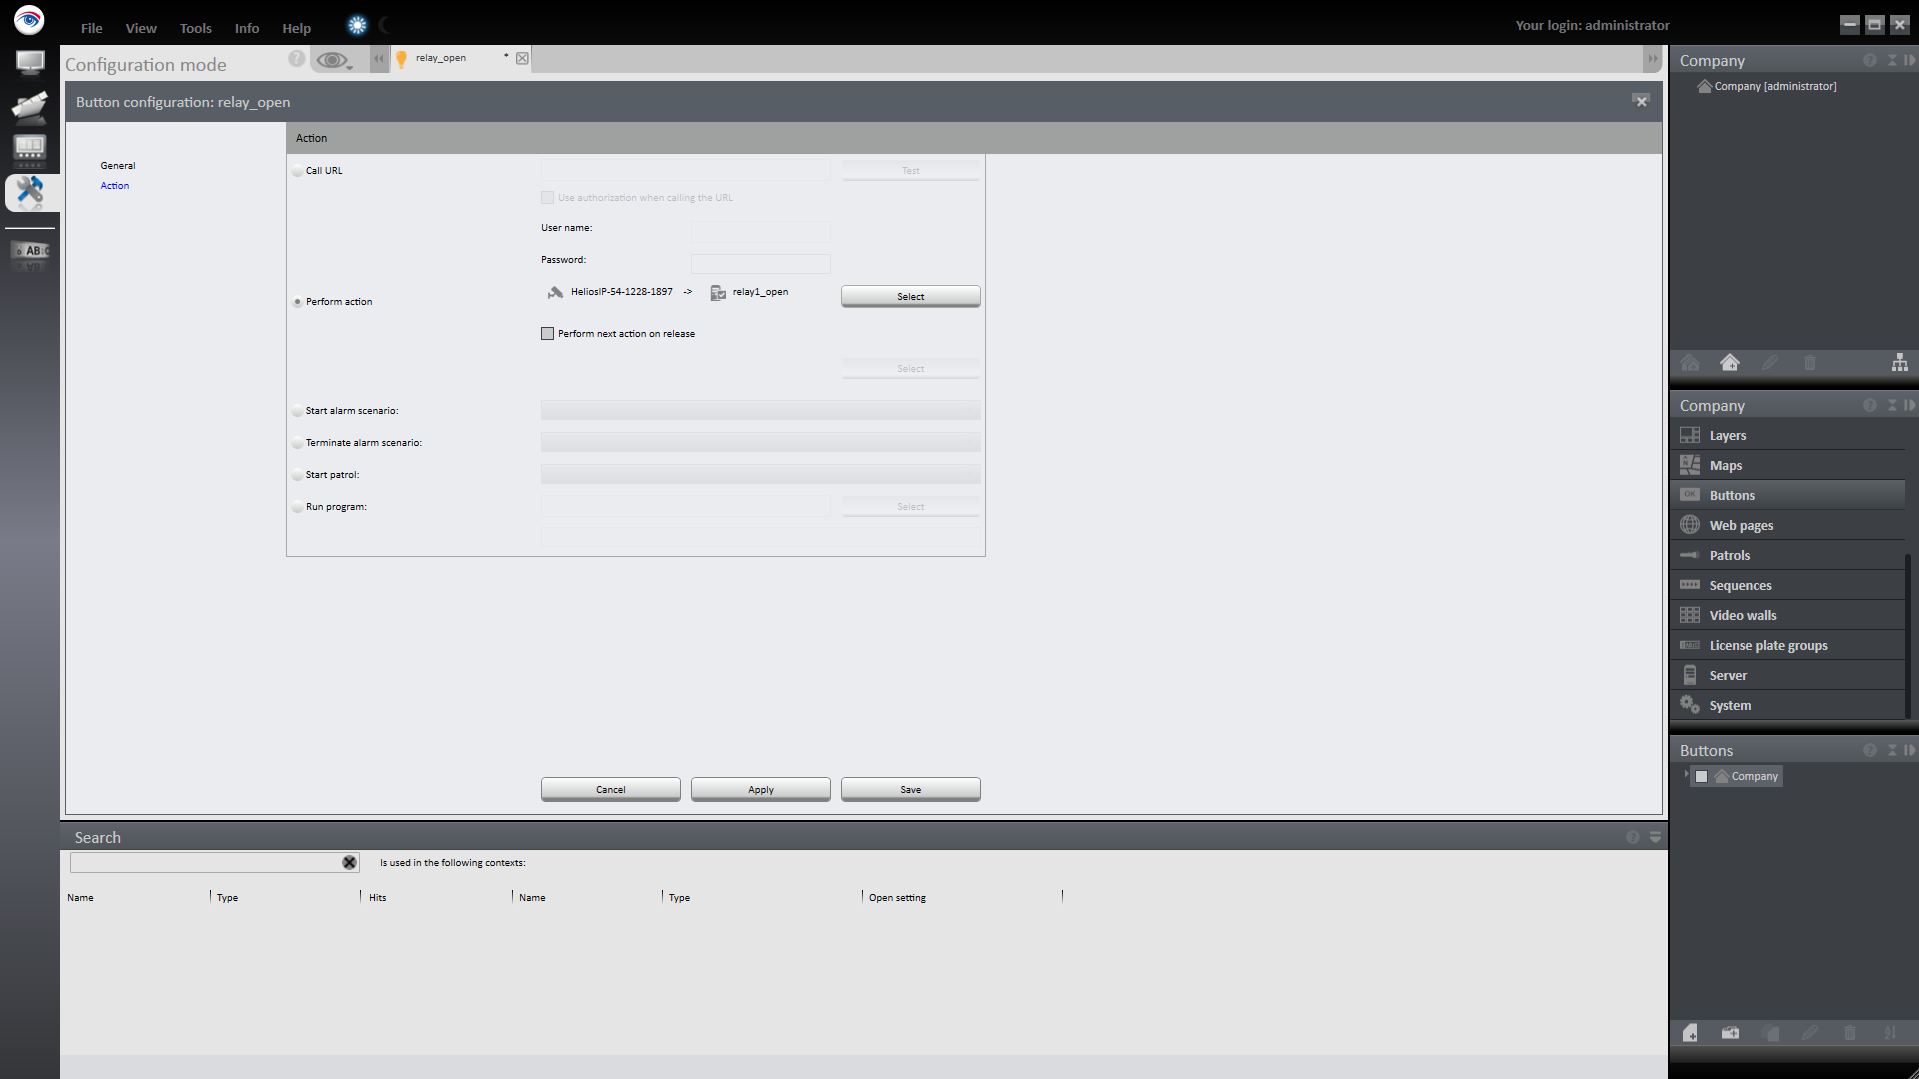
Select Buttons on the Administration tab. Create a new button, enter the name for the new button and click OK to accept the name.
 |
 |
 |
 |
 |
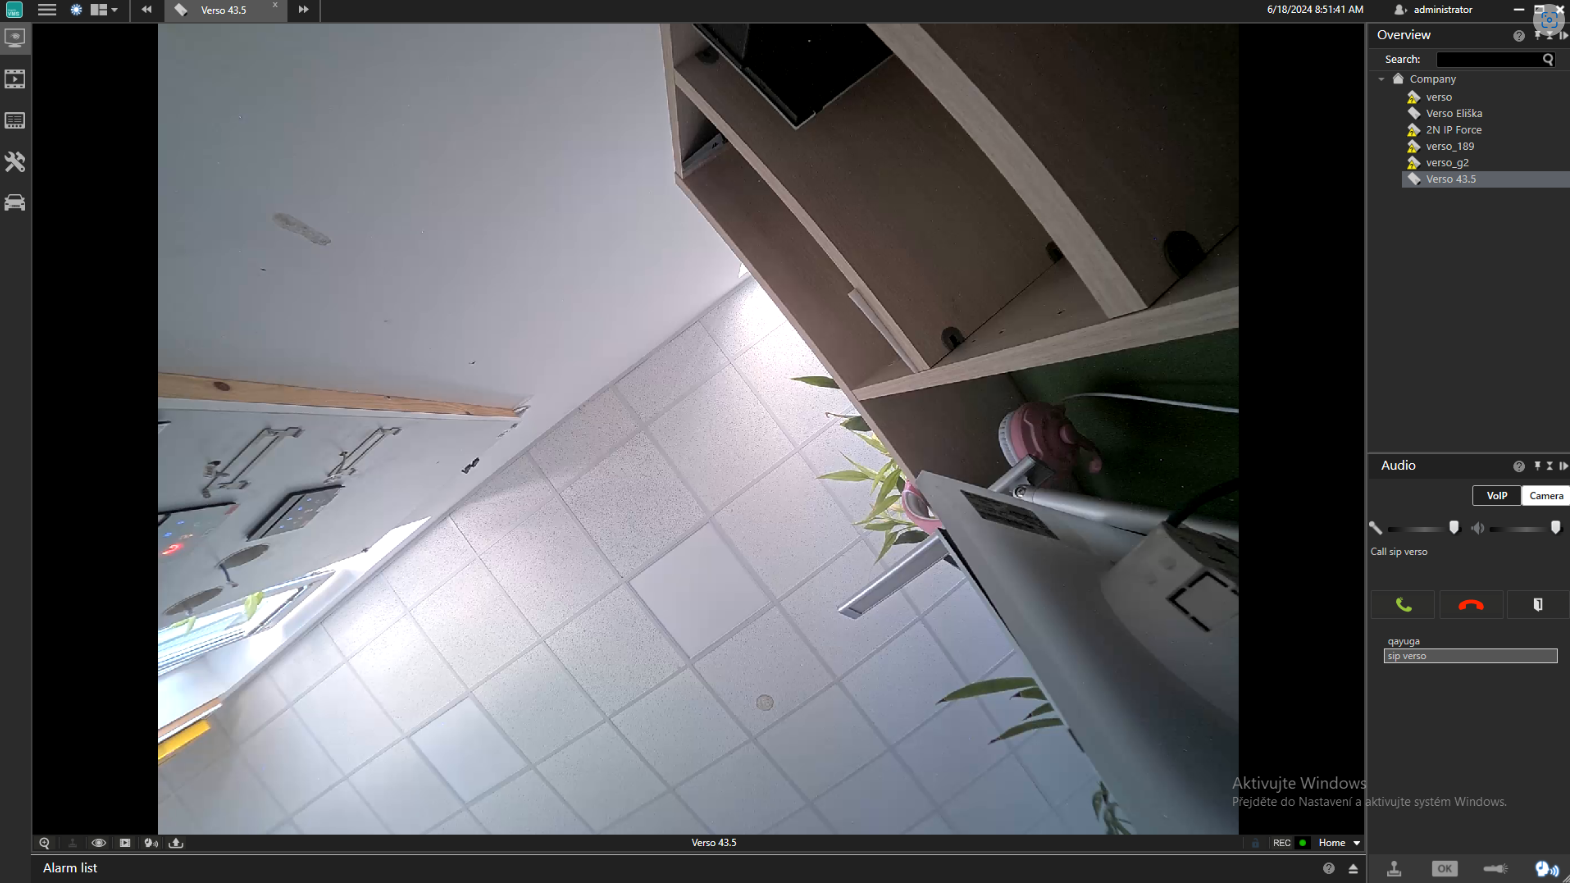
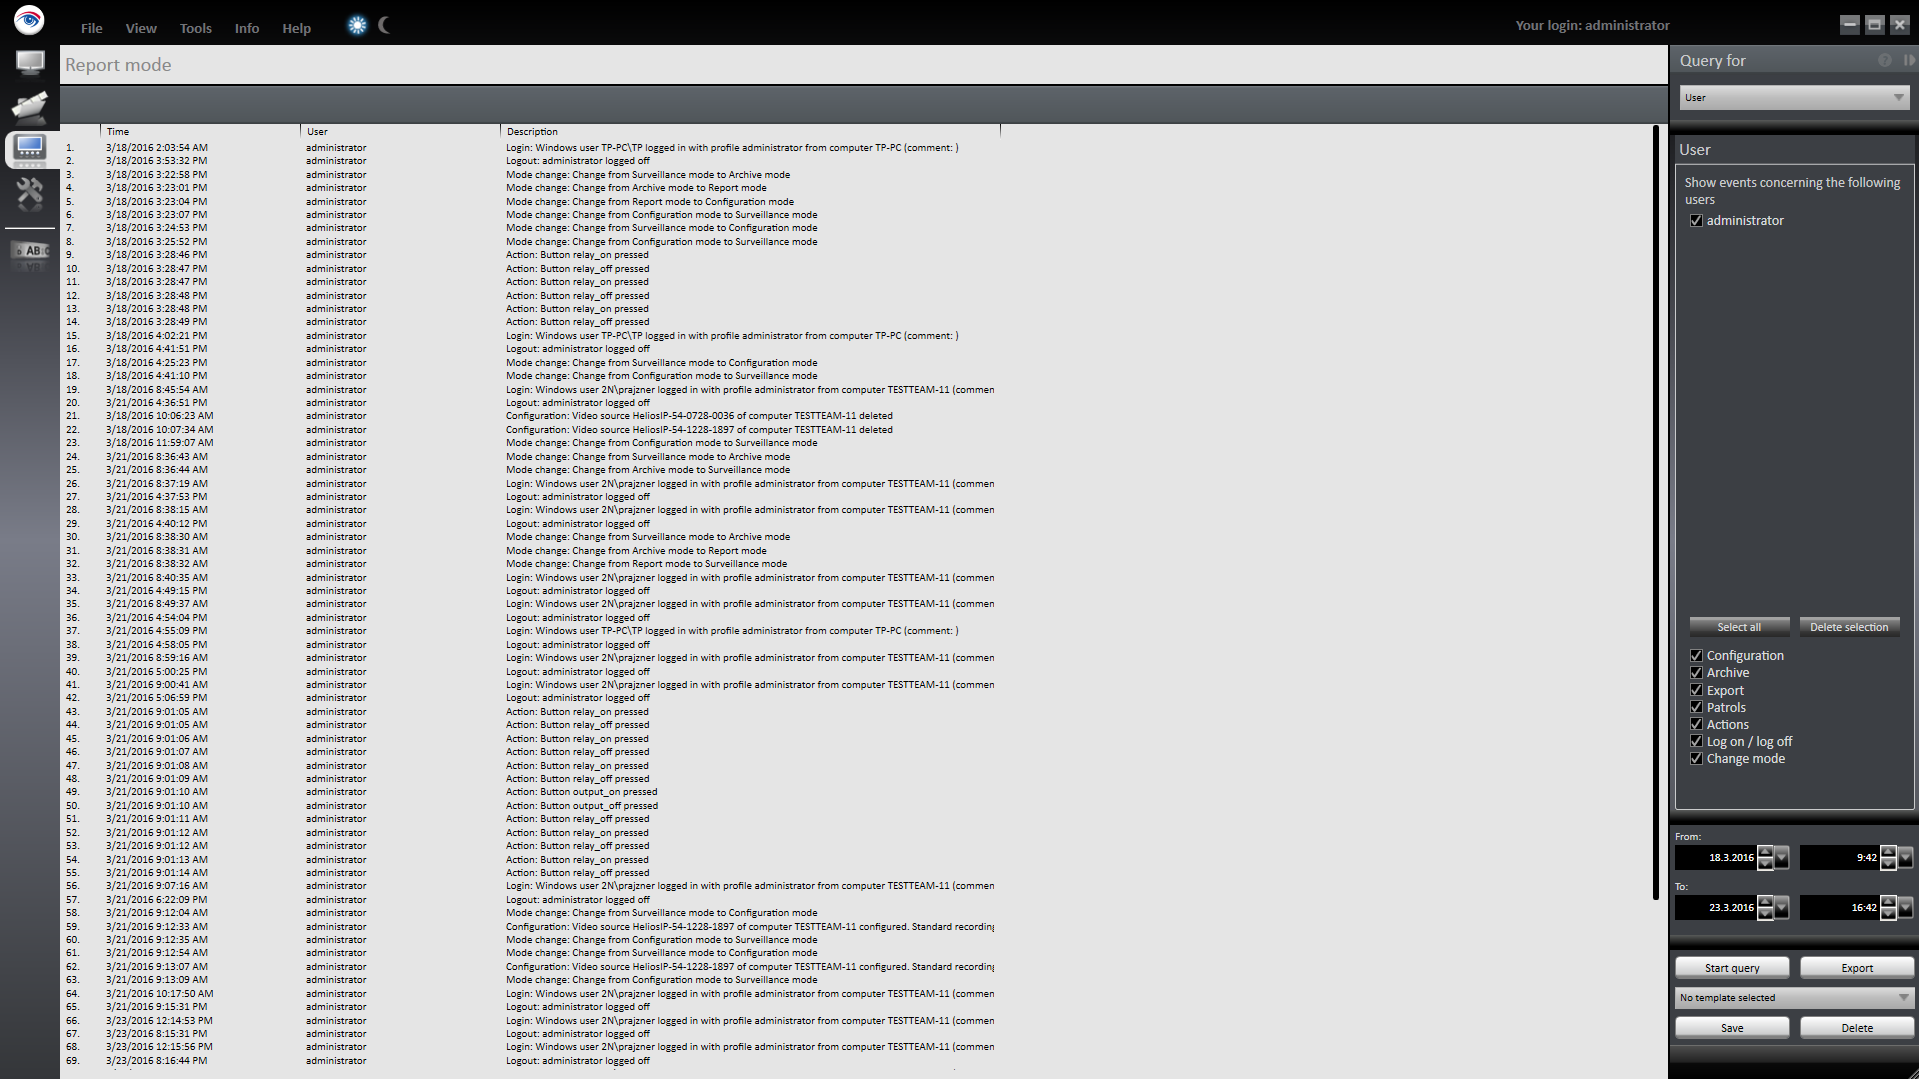
The event analysis facility gives you an overview of the events that have occurred in the form of a list. Distinctions are drawn between user events, alarm events and system messages. In addition, the camera usage of users can be tracked. To switch to the event analysis facility, click the Event analysis icon on the mode bar. Click a column header in the main window to sort the events in ascending or ascending order on the basis of the column's category (data/time, alarm, description). For filtering the analysis to filter the events on the basis of specified criteria, select the type of event you are searching for on the control bar. You can choose between the following events: Alarms (events that occur), Users (display of events that concern specific users), Camera usage (display of events that concern a specific camera), System messages (display of events that concern specific services). Select the desired events, specify dates and times to define the time period and start the query. Only the events that meet the selected criteria are displayed in the main window.
 |
Used Symbols
![]() - Compatible
- Compatible
![]() - Work with limitation
- Work with limitation
![]() - Incompatible
- Incompatible