Siemens Siveillance TM Video
Content
About
SiveillanceTM Video is a powerful IP video management software (VMS) designed for deployments ranging from small and simple to large-scale and high-security. Its single management interface enables the efficient administration of the system including multiple cameras and security devices.
www.siemens.com/siveillance-video
Version 2025, 2023, 2020, 2018
Tested Functions
| Siemens SiveillanceTM Video | 2N IP Intercom Version | 2N® Access Commander | Scan device | Video from 2N IP Intercom | Audio from 2N IP Intercom | Audio to 2N IP Intercom | Switch control | Events from 2N IP Intercom | |
|---|---|---|---|---|---|---|---|---|---|
| 2025 | 2.48.0.72.1 | ||||||||
| 2023 R2 | 2.41.0.54.3 | 2.8 | |||||||
| 20.3a | 2.32.0.41.2 | 2.0 | | ||||||
| 12.1a | 2.24.0.33.7 | - | |
2N IP Intercom Settings
Enable parameter ONVIF/RTSP Server Enabled in menu Services / Streaming.
 |
Go to Service – Automation and fill function for alarm settings in Siveillance.
The port in Automation is numbered from 0. This means that in Automation the port number is 0, so in Siveilliance it will be port 1.
 |
Tested Features
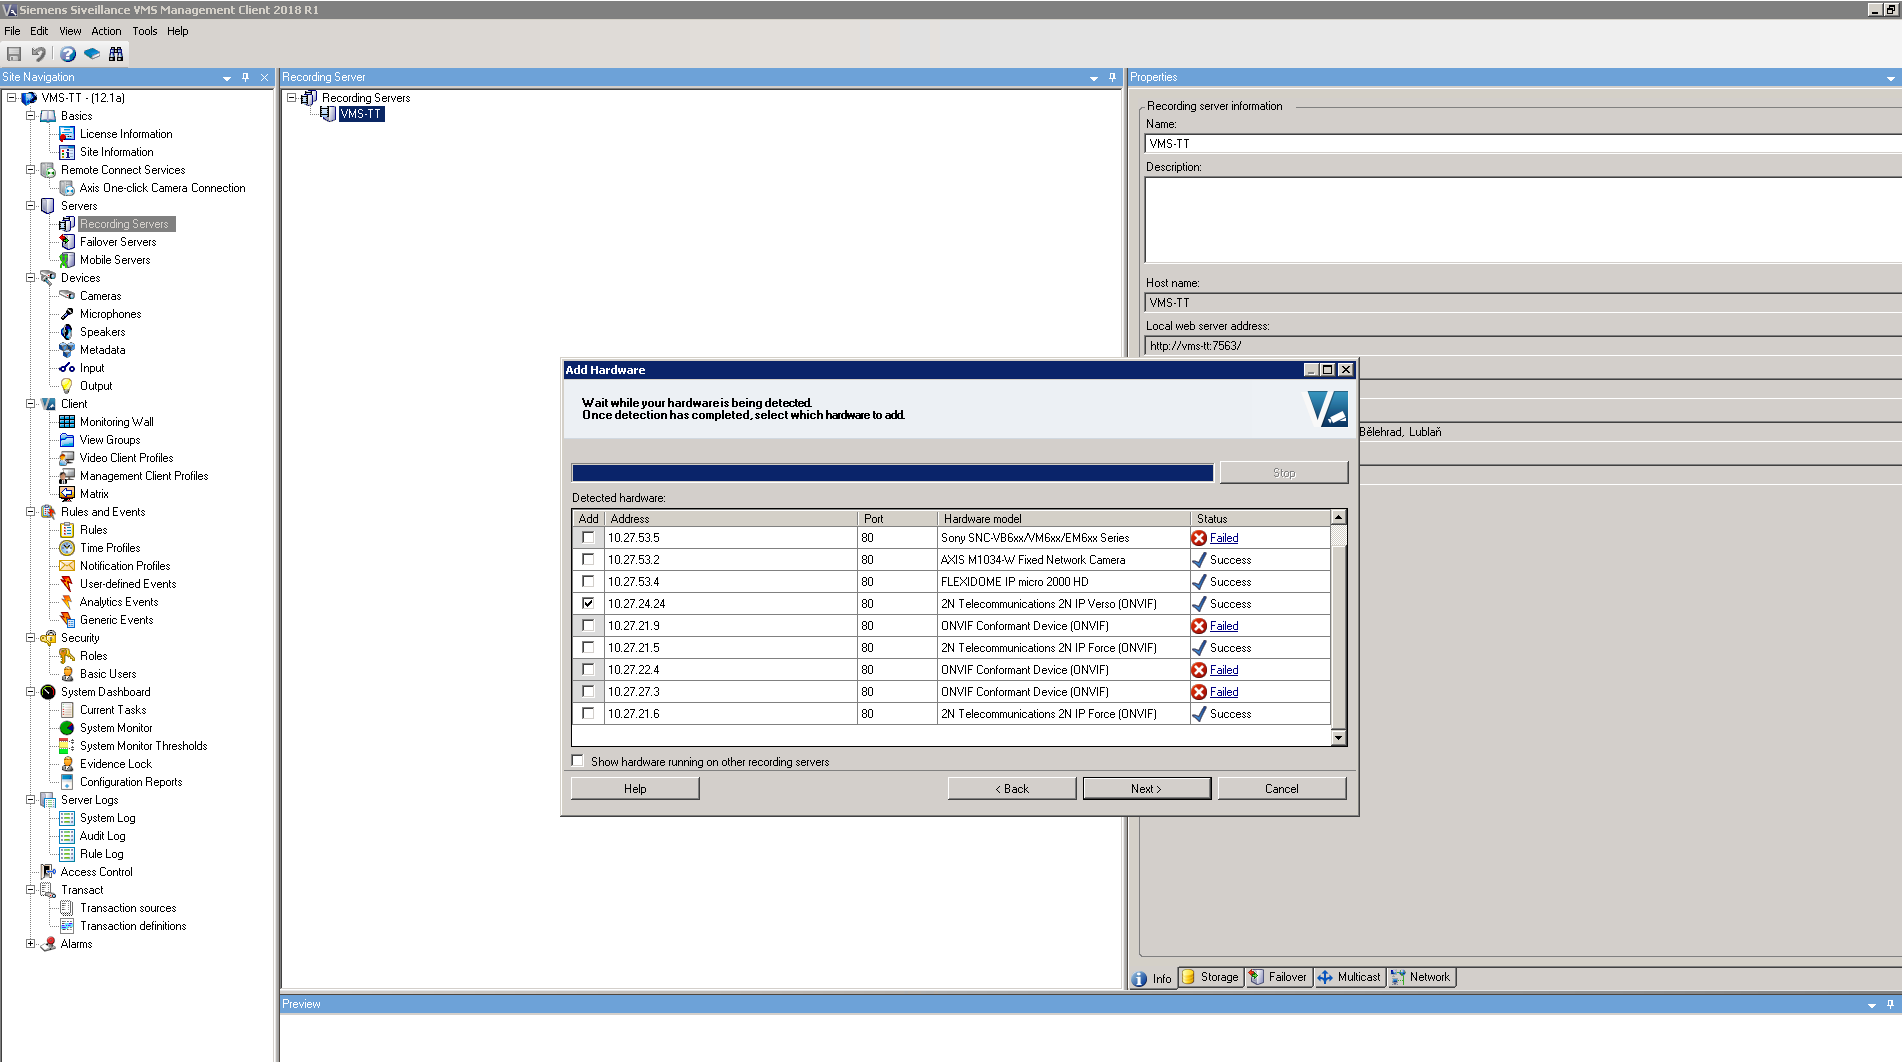
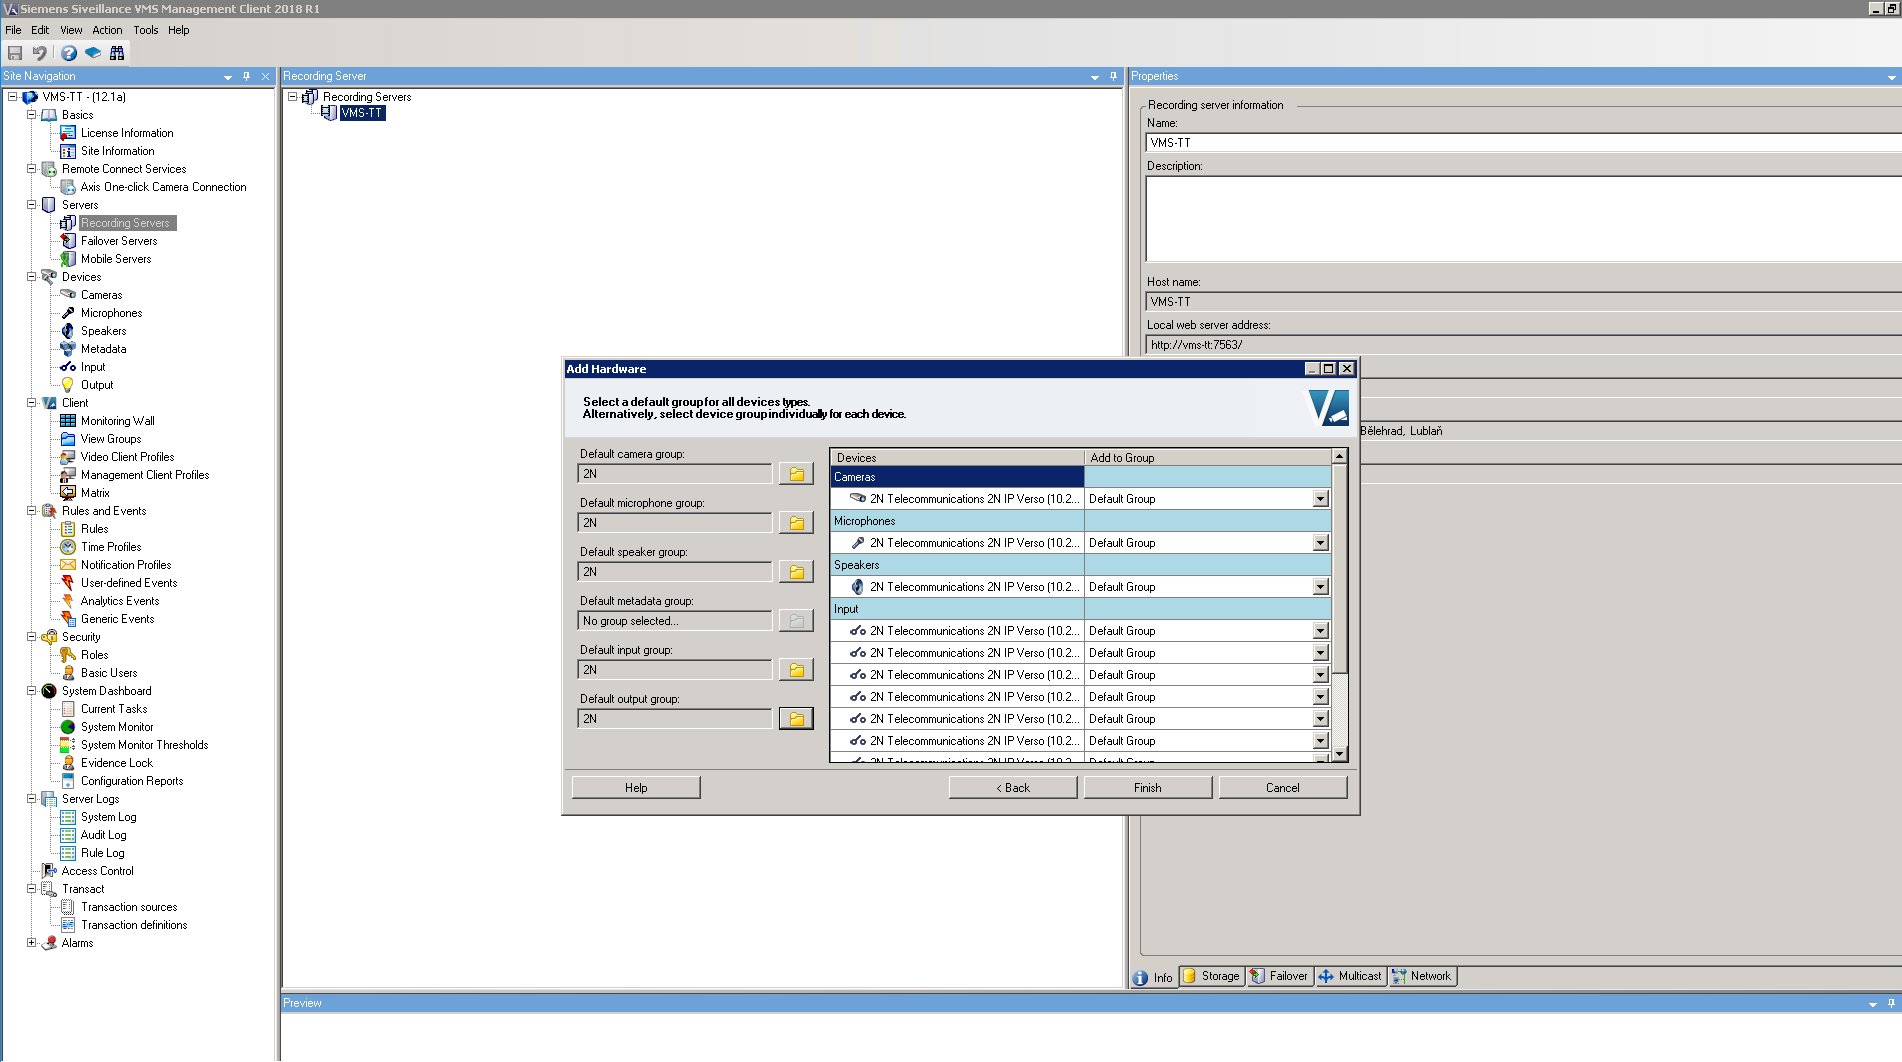
On the side of Siveillance server go to section "Servers/Recording servers". Do a right click on your recording server and choose "Add Hardware" (if server is not authorized yet, then you have to click on "Authorize first"). Now click on "Add" to add a new device fill credentials that you choosed for Onvif account in the intercom (in our case it is ONVIF/ONVIF). Then click on next.
 |
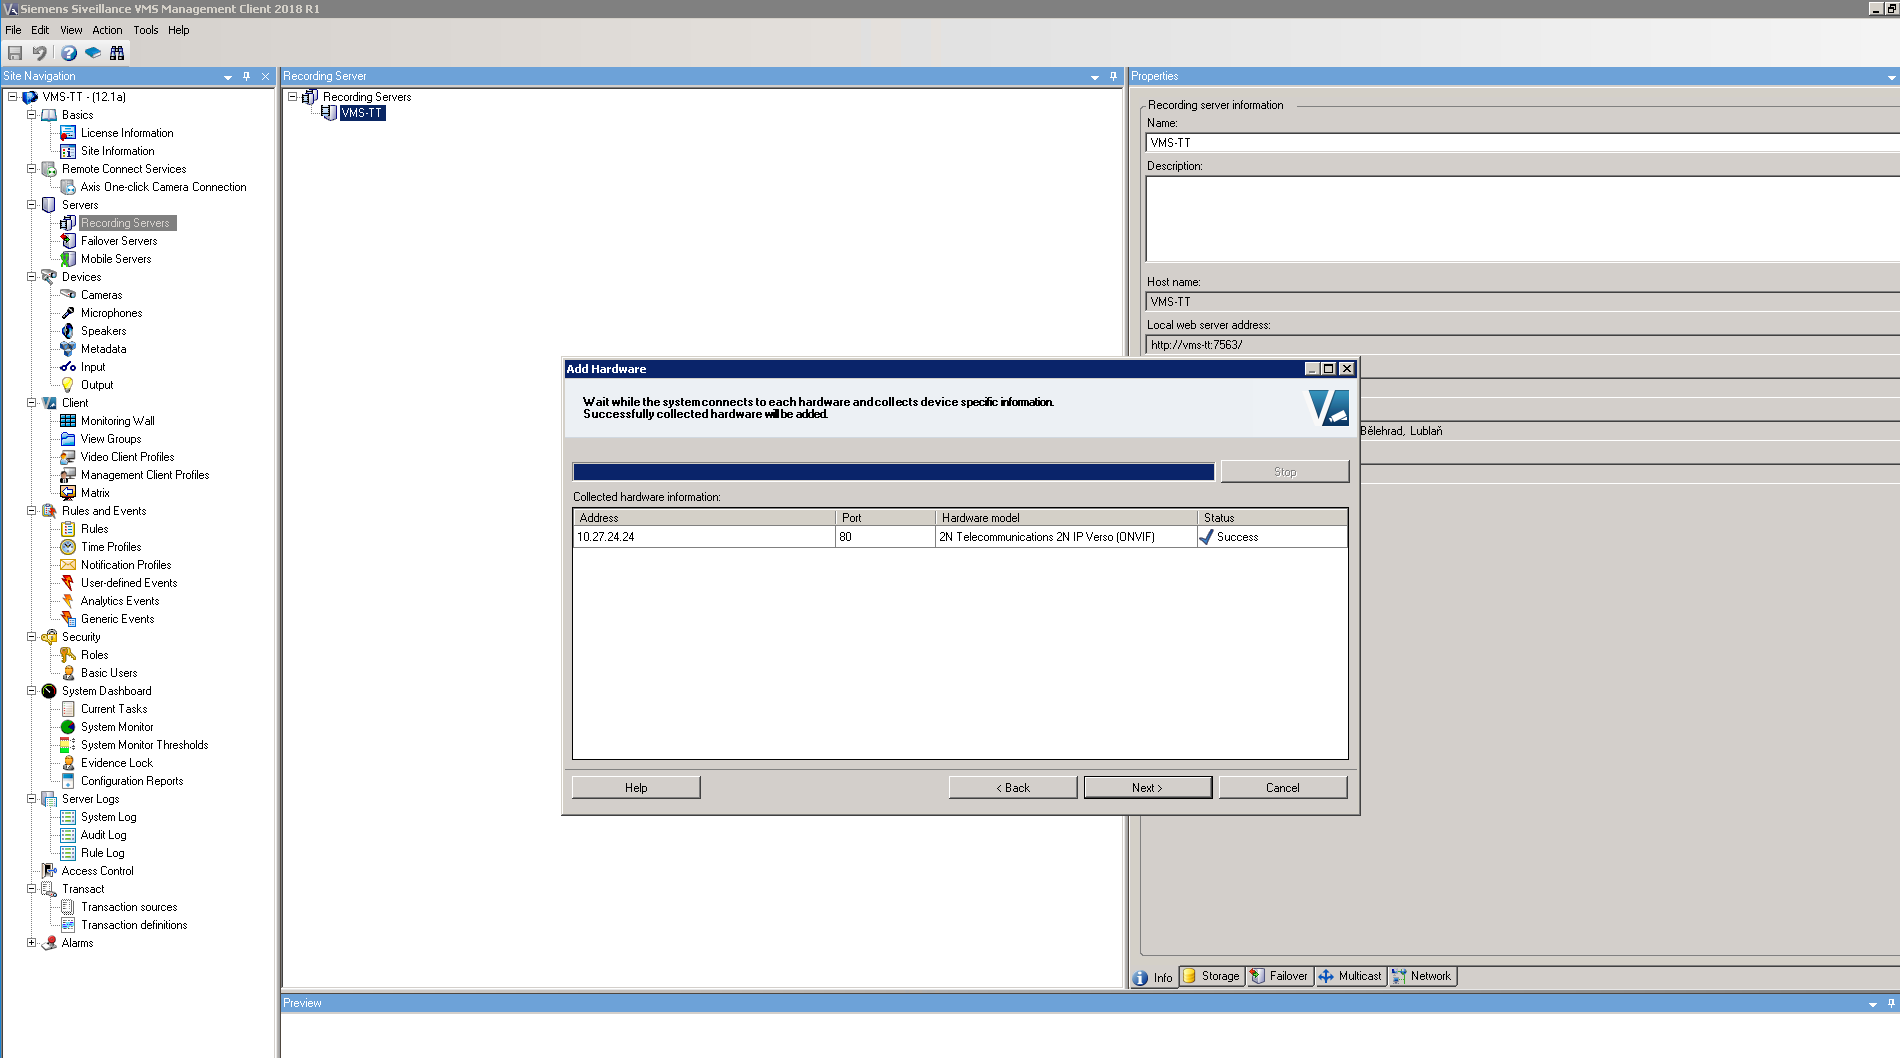
Now Siemens Siveillance VMS will search for ONVIF devices in your network, once the intercom will be found, it will appear with label "Successfull". If intercom is not checked, then please do so and click on "Next".
 |
 |
 |
 |
 |
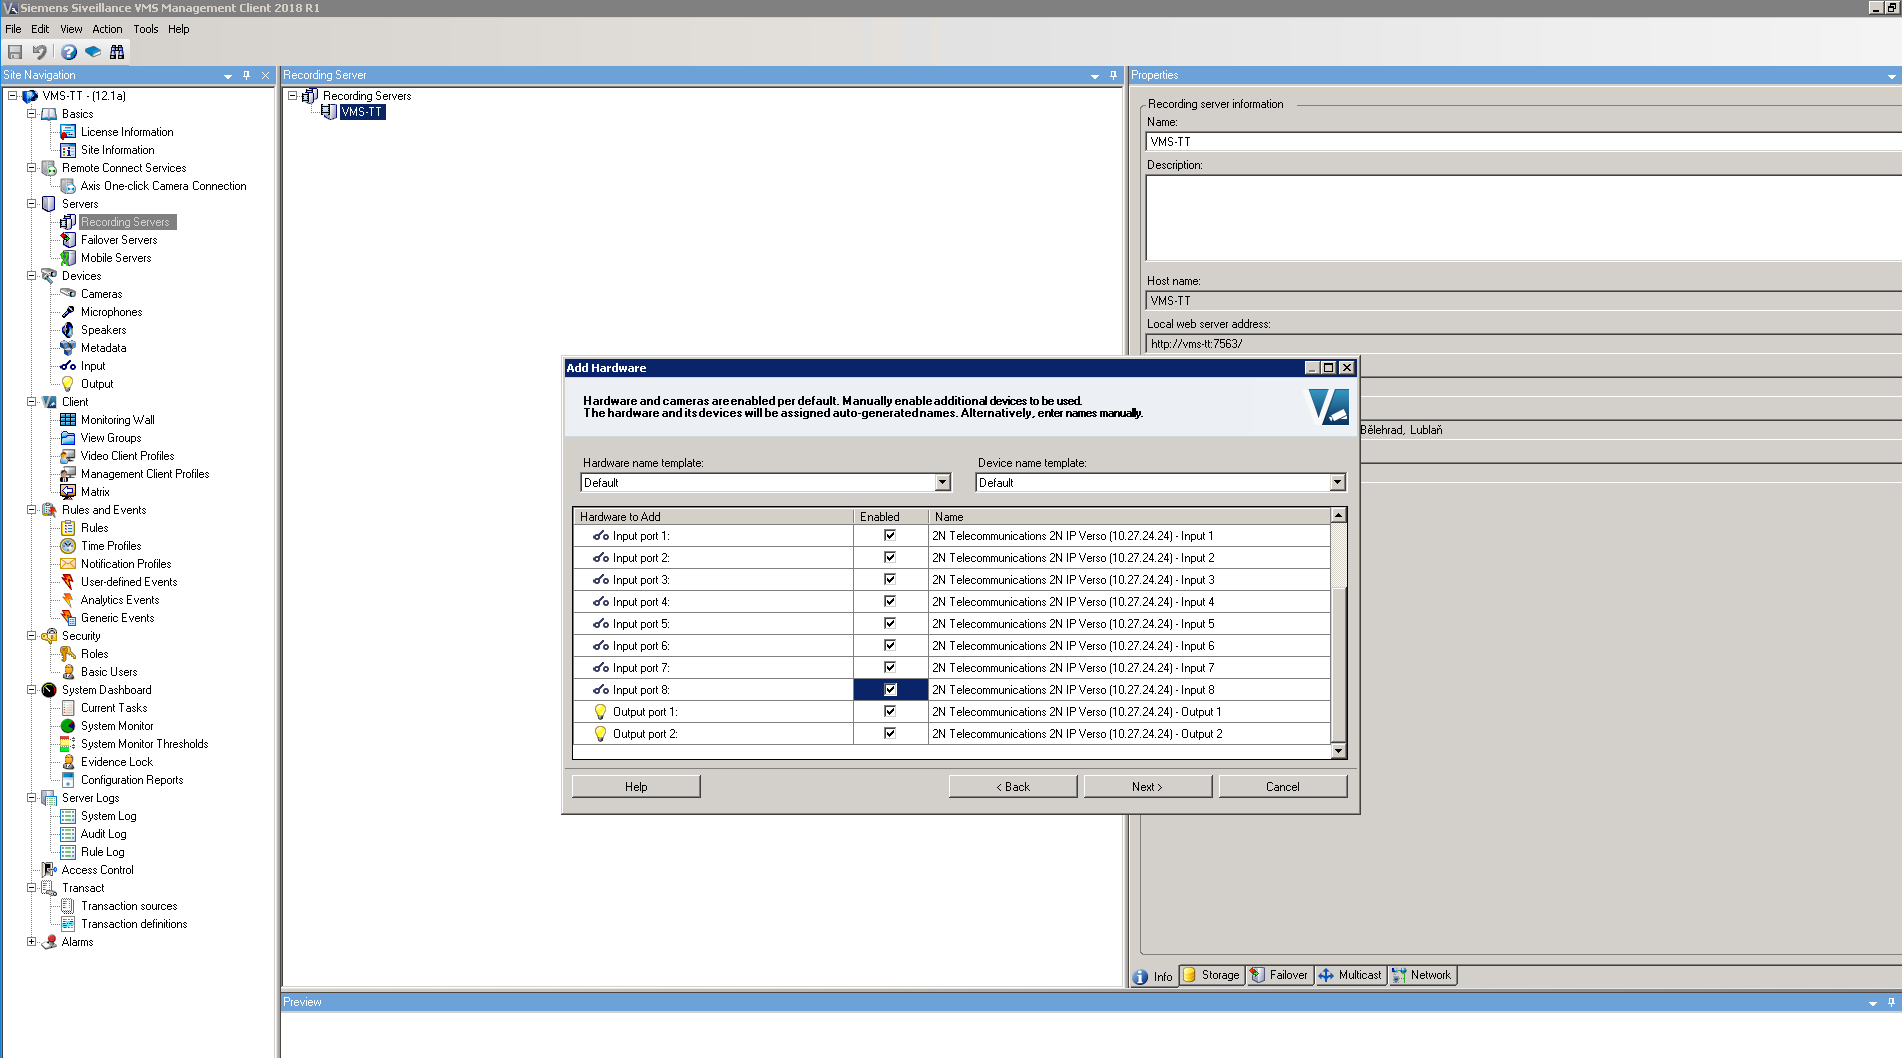
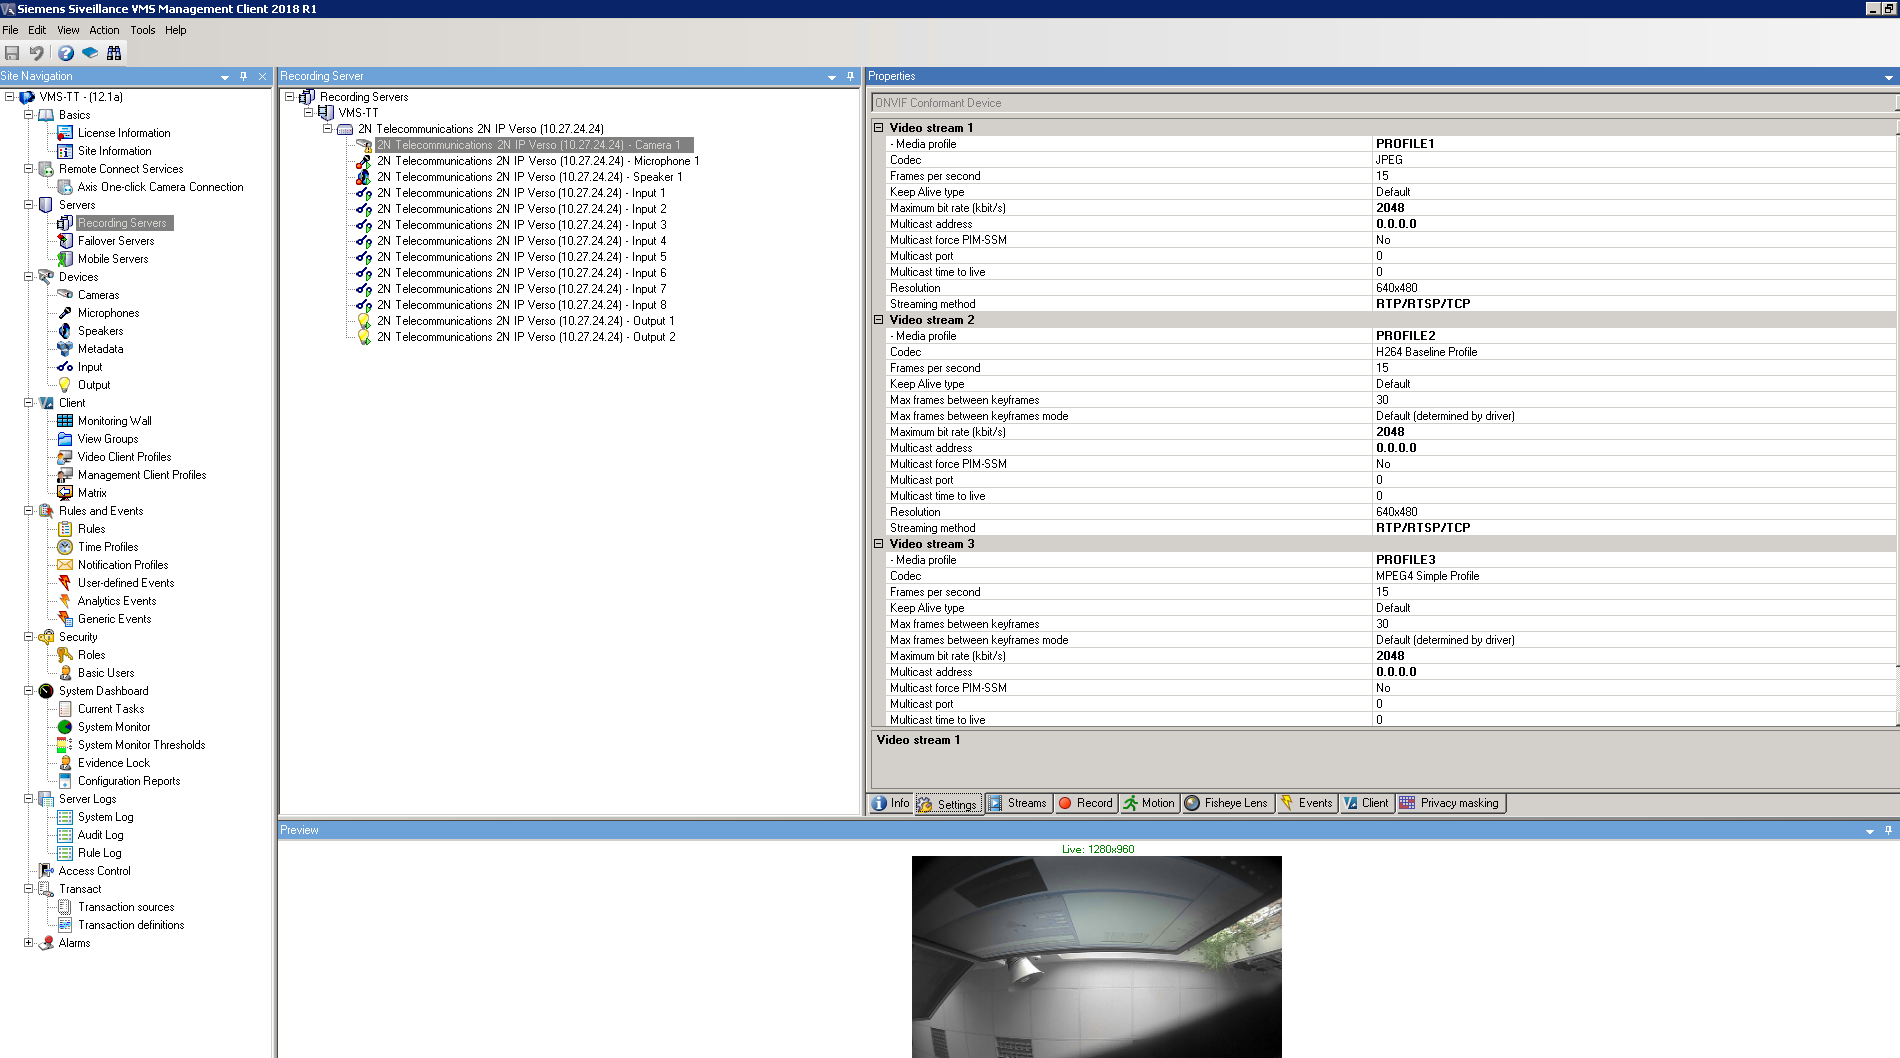
Now you can set video parameters, for example resolutions, codec ....
 |
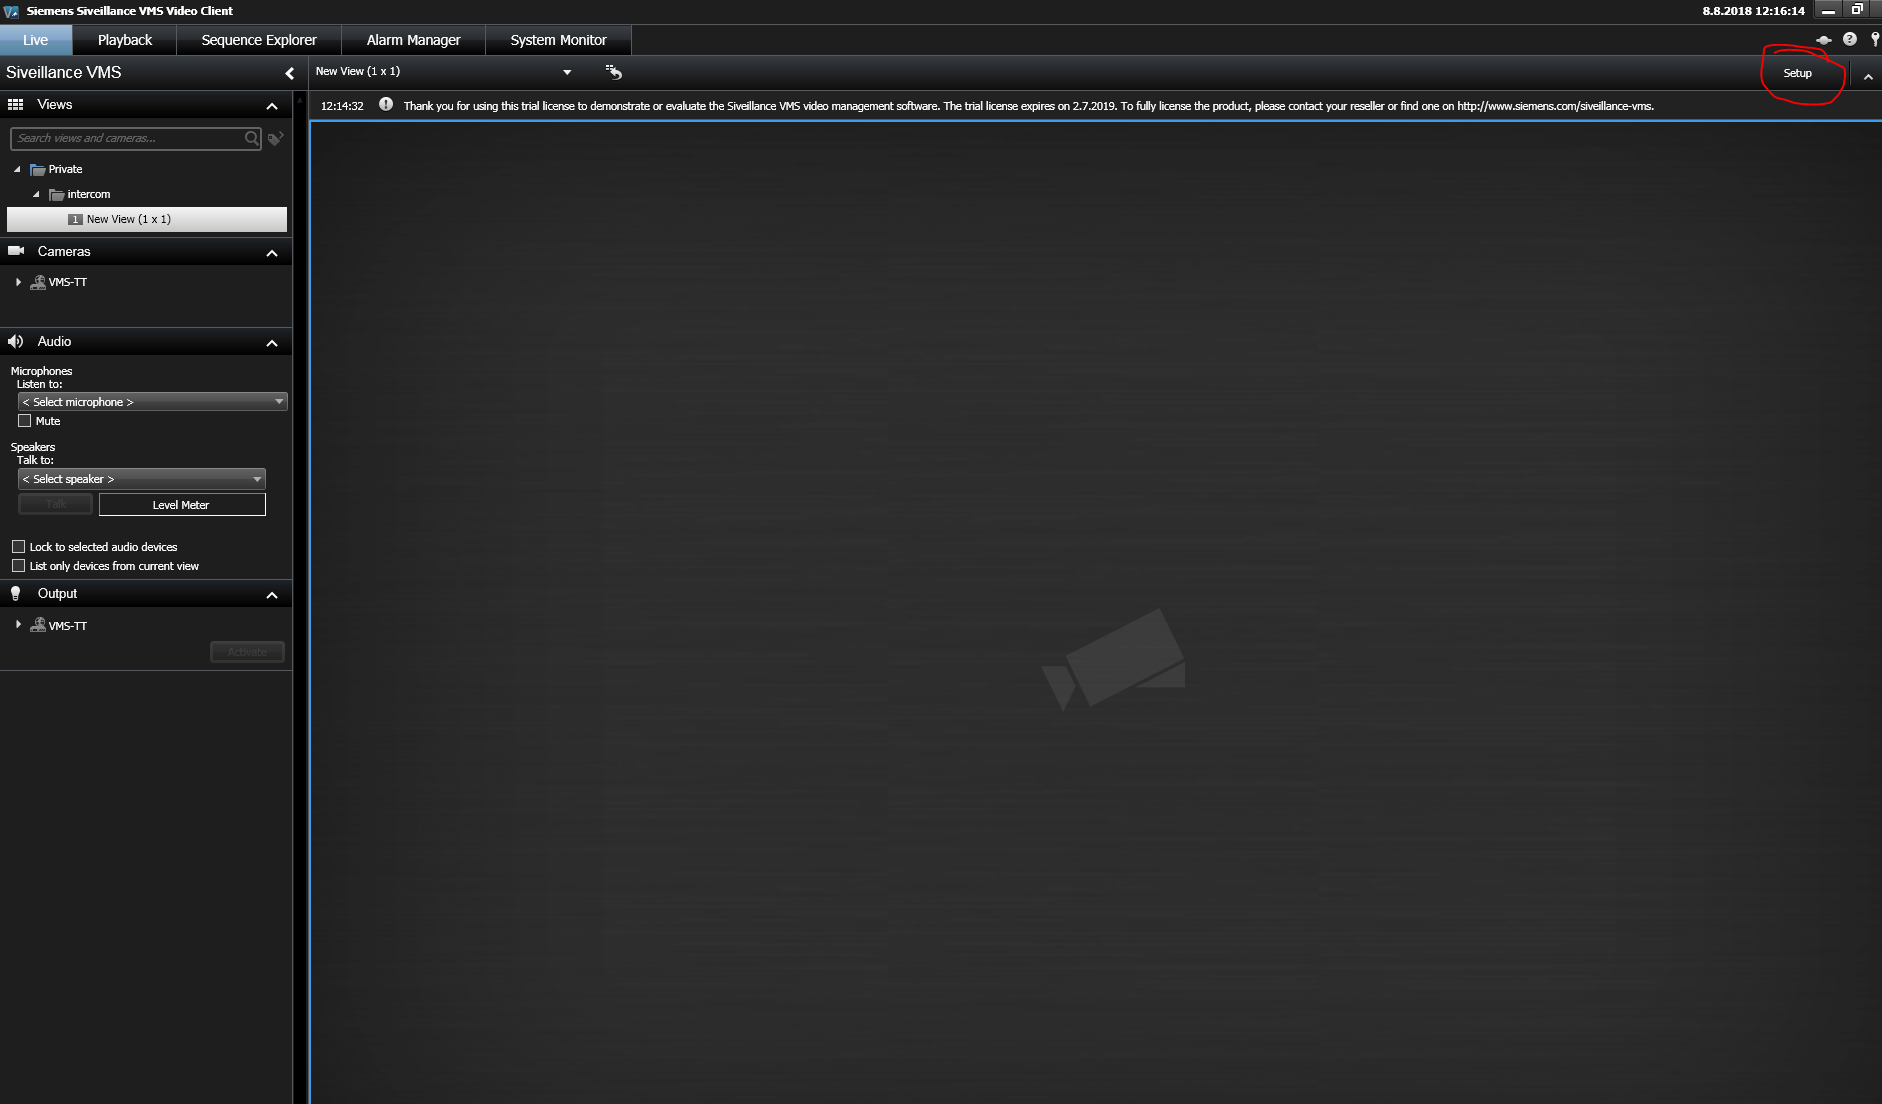
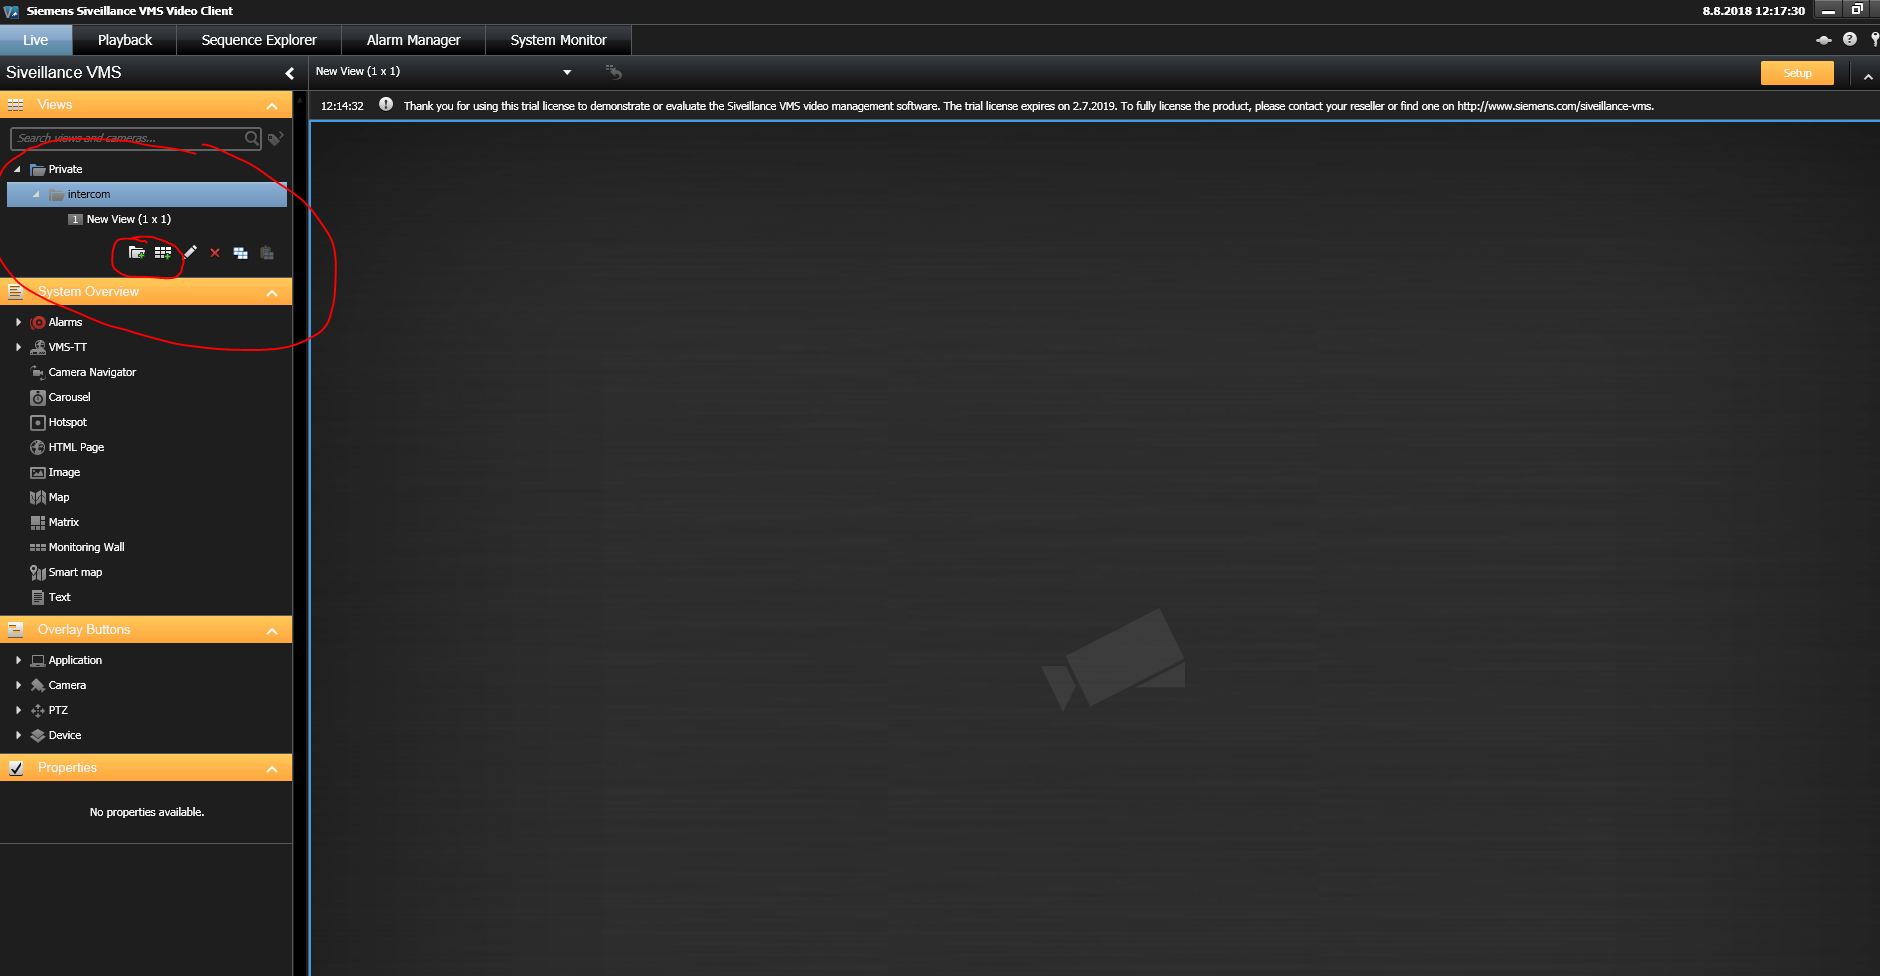
Double-click the shortcut icon XProtect Smart Client on the desktop. The login screen is shown. Type your user name in the User name box, and your password in the Password box. Click Login. After successful login you should add your camera. Go to menu Setup.
 |
 |
 |
In the Siveillance VMS Video Client you should hear audio from 2N IP Intercom. After you add your camera, drag selected camera and drop it into your View from the camera tree. And then you can hear audio from 2N IP Intercom.
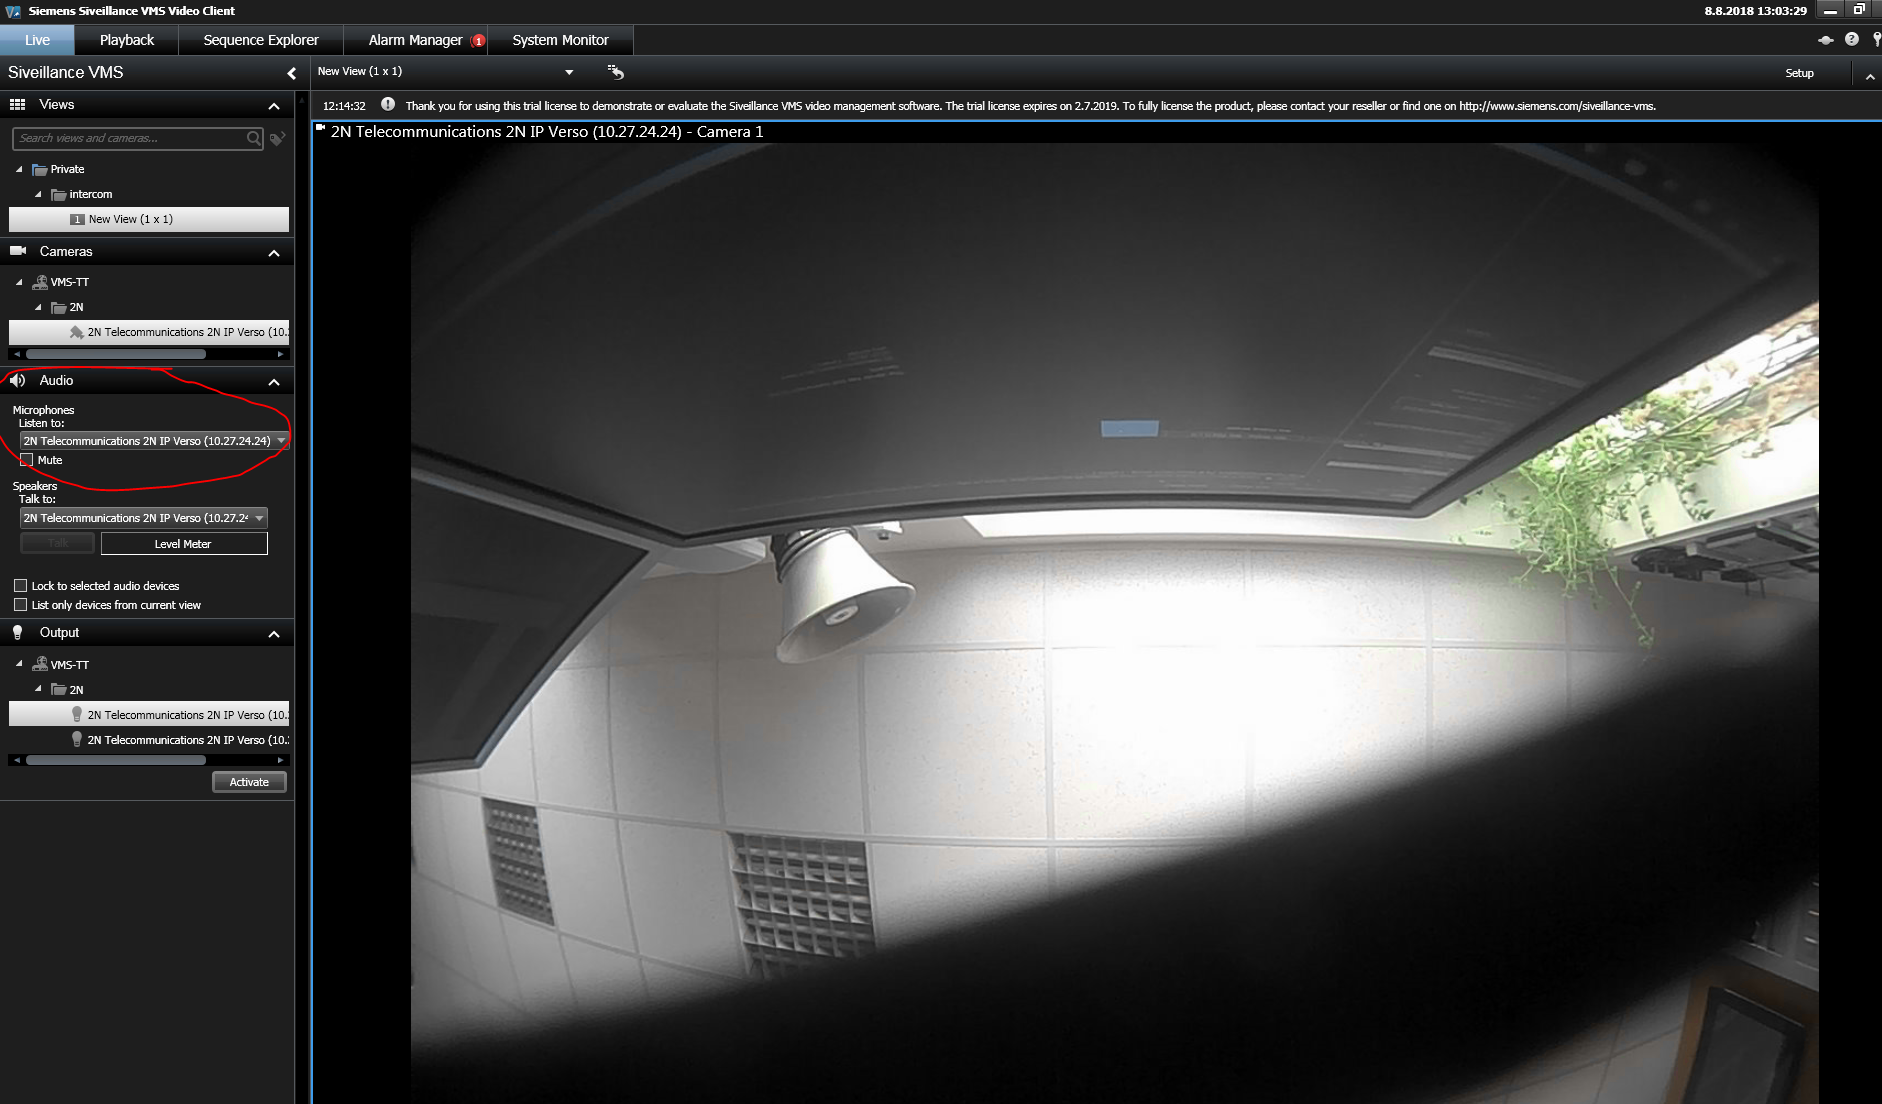 |
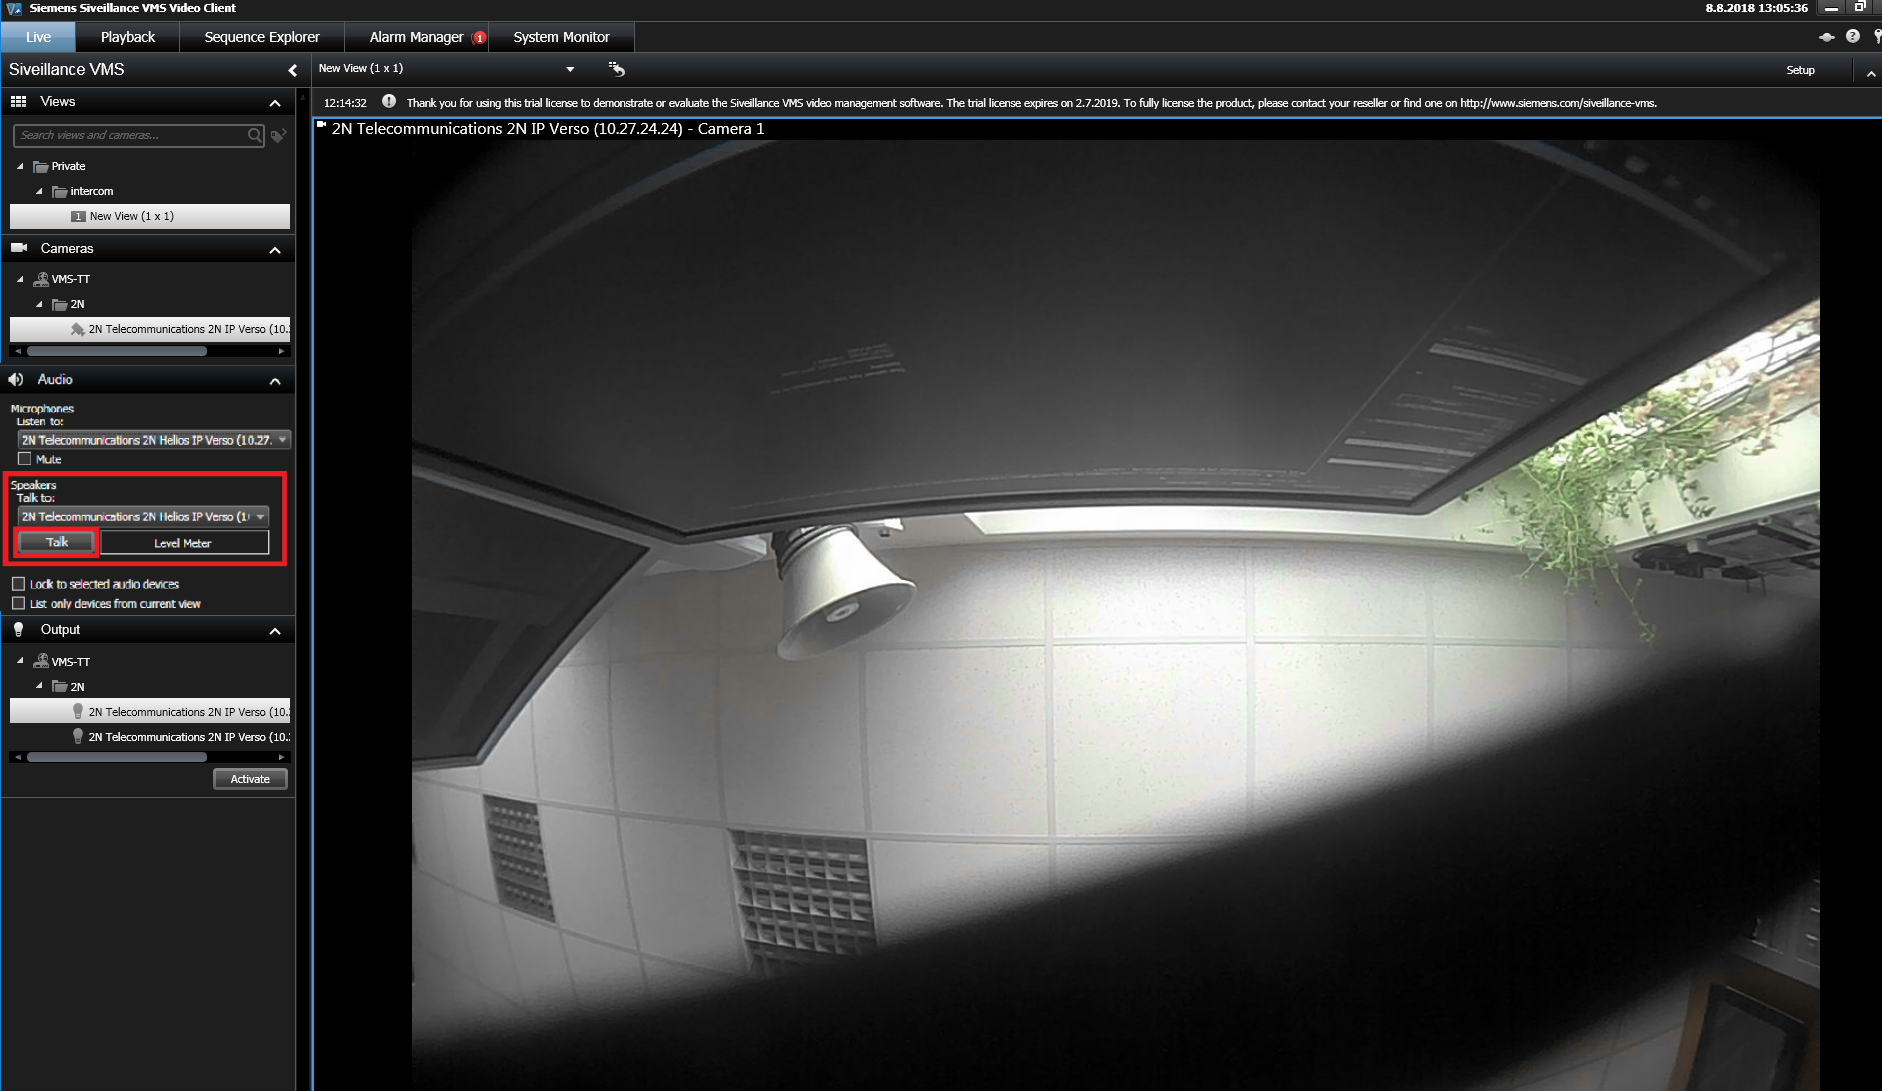
In the Siveillance VMS Video Client you should talk to 2N IP Intercom. After you add your camera, drag selected camera and drop it into your View from the camera tree. And then you can press button and talk.
 |
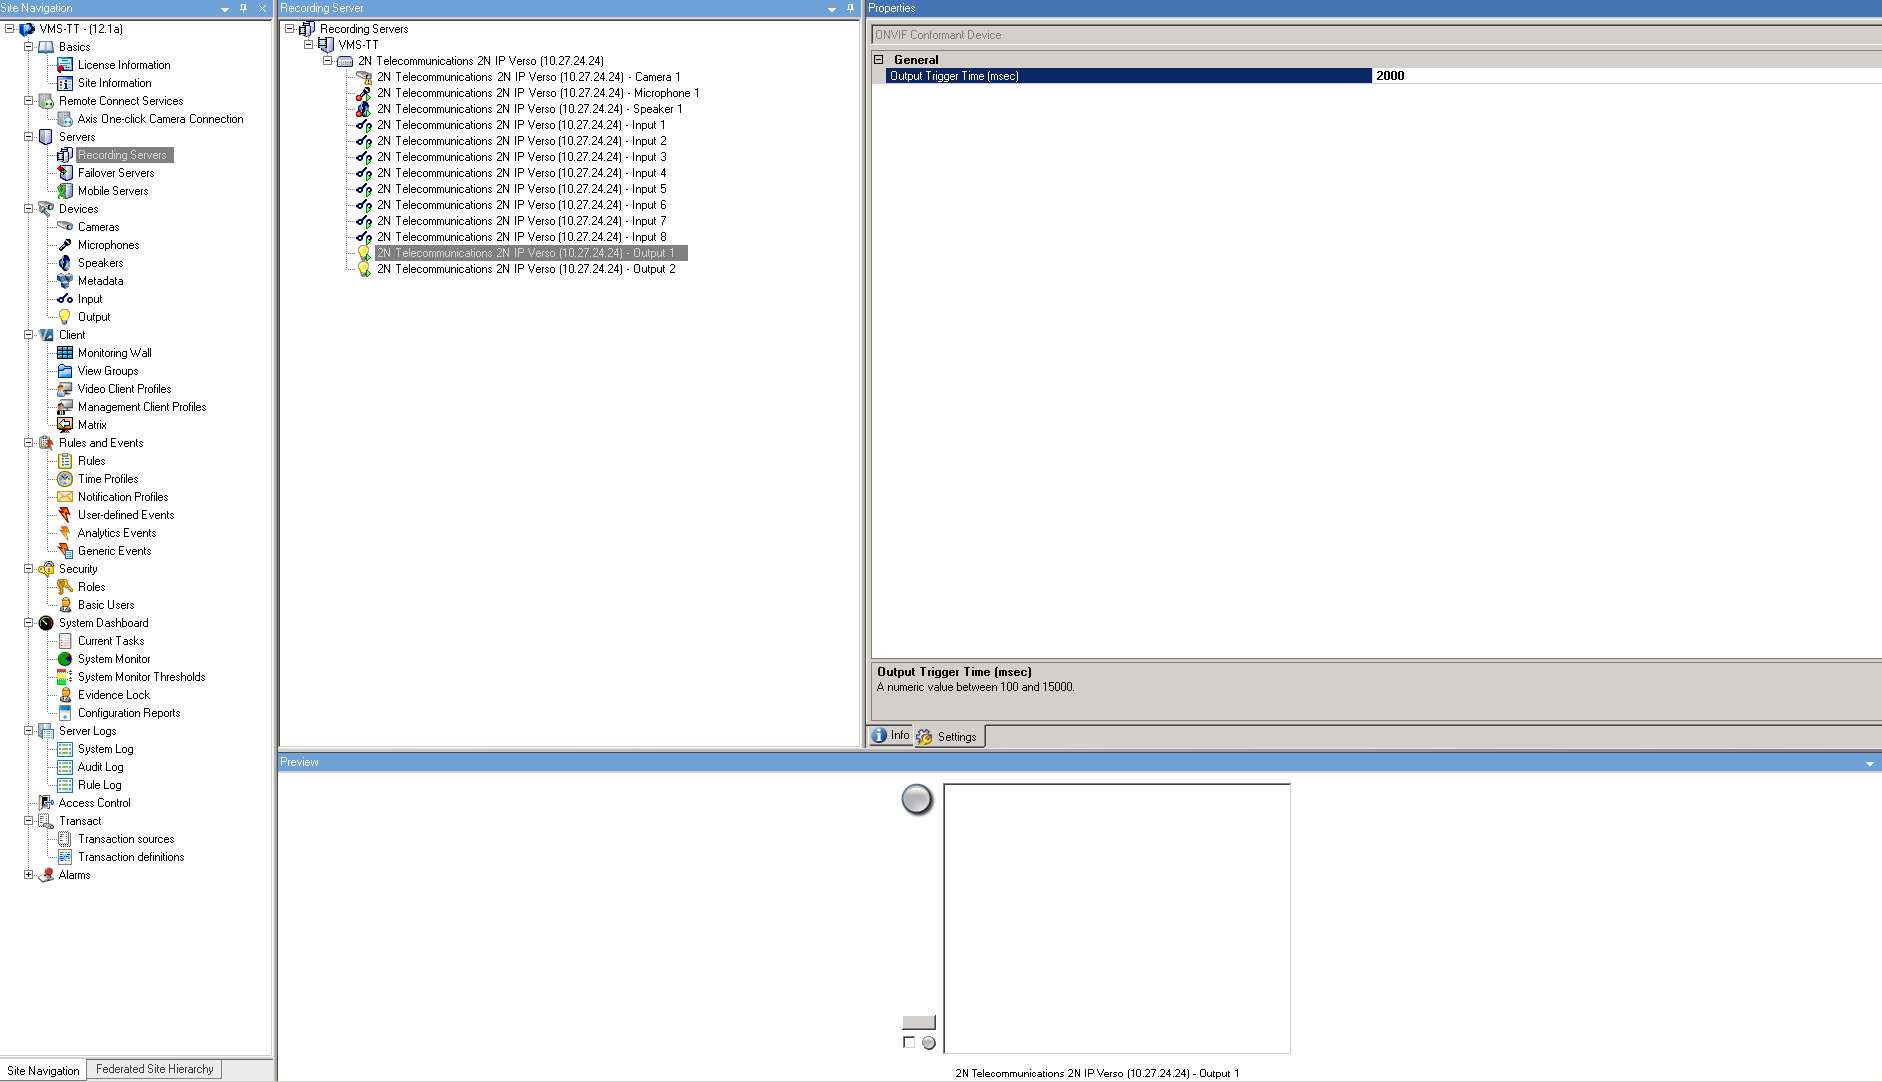
In the Siveillance VMS Management Client you can set Output Trigger Time for your Outputs.
 |
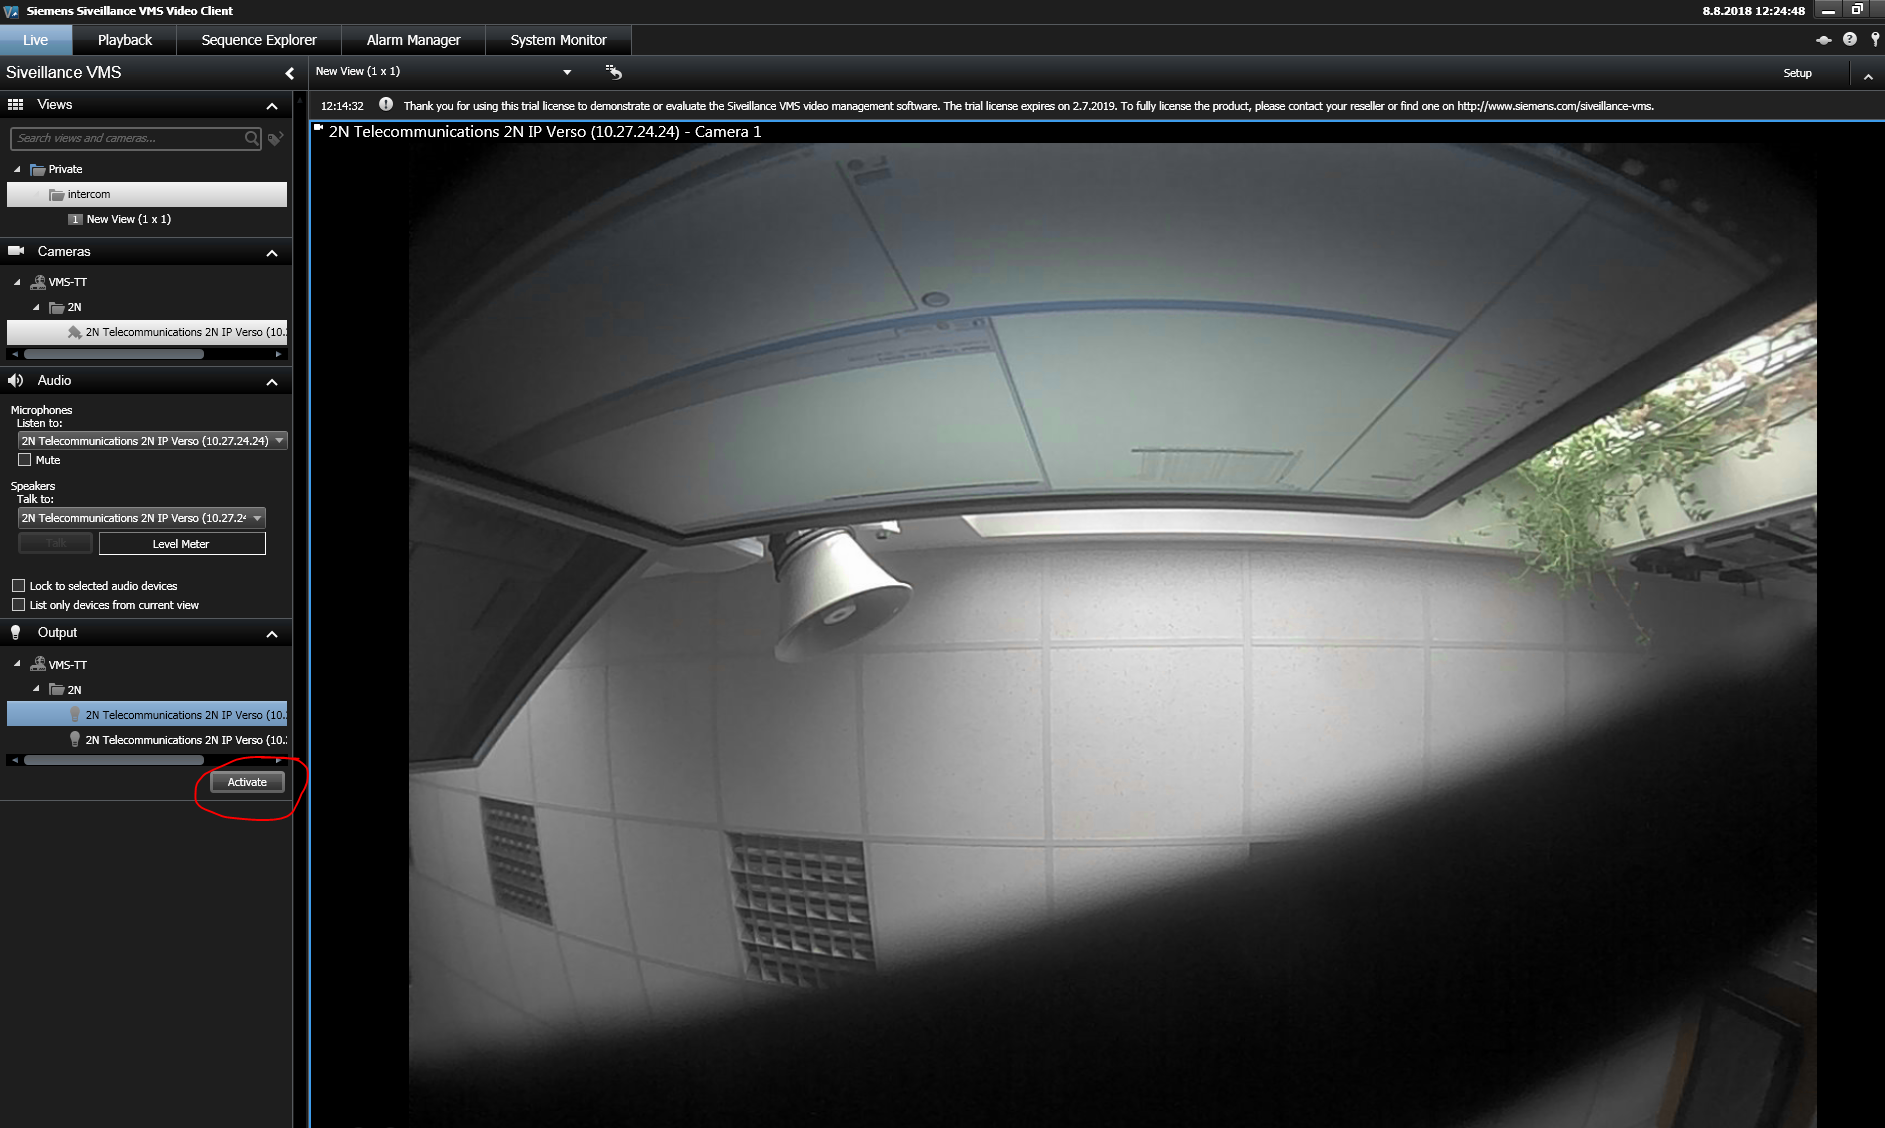
And in the Siveillance VMS Video Client you should set outputs of 2N IP Intercom. After you add your camera, set one of Digital outputs 2N IP Intercom and with the active the output.
 |
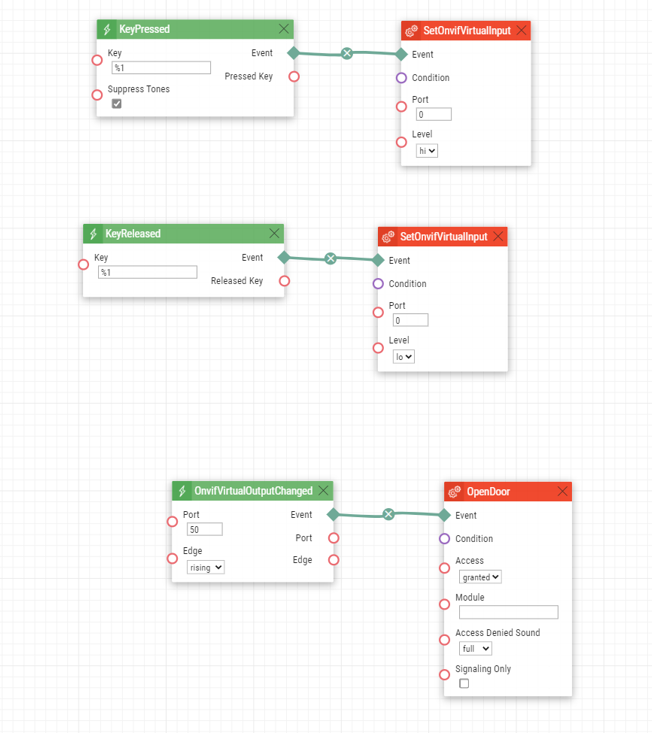
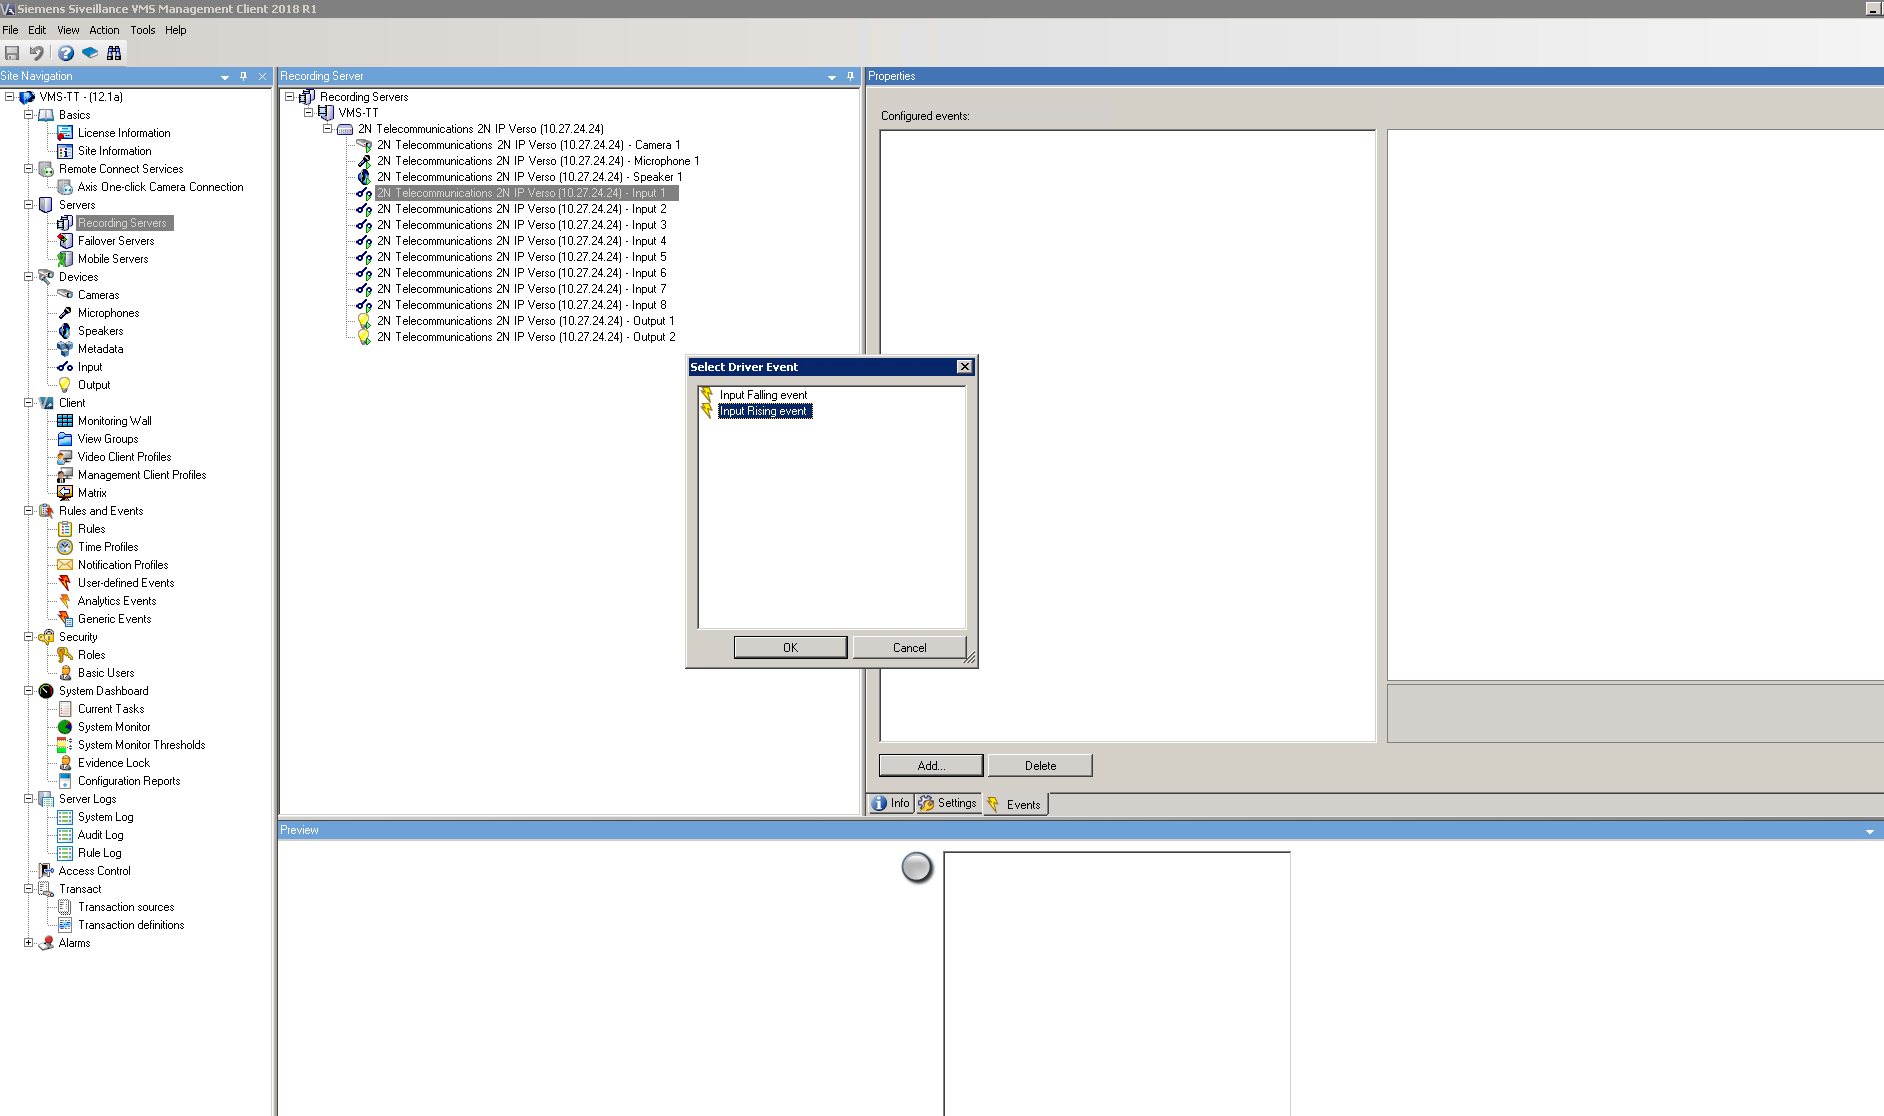
As an example an alarm raised when 2N IP Intercom digital input is activated will be configured. Alarm will be raised when a Hardware Input Event is registered in Siveillance VMS. Add Input Rising Event and Input Falling Event for correct function alarm.
 |
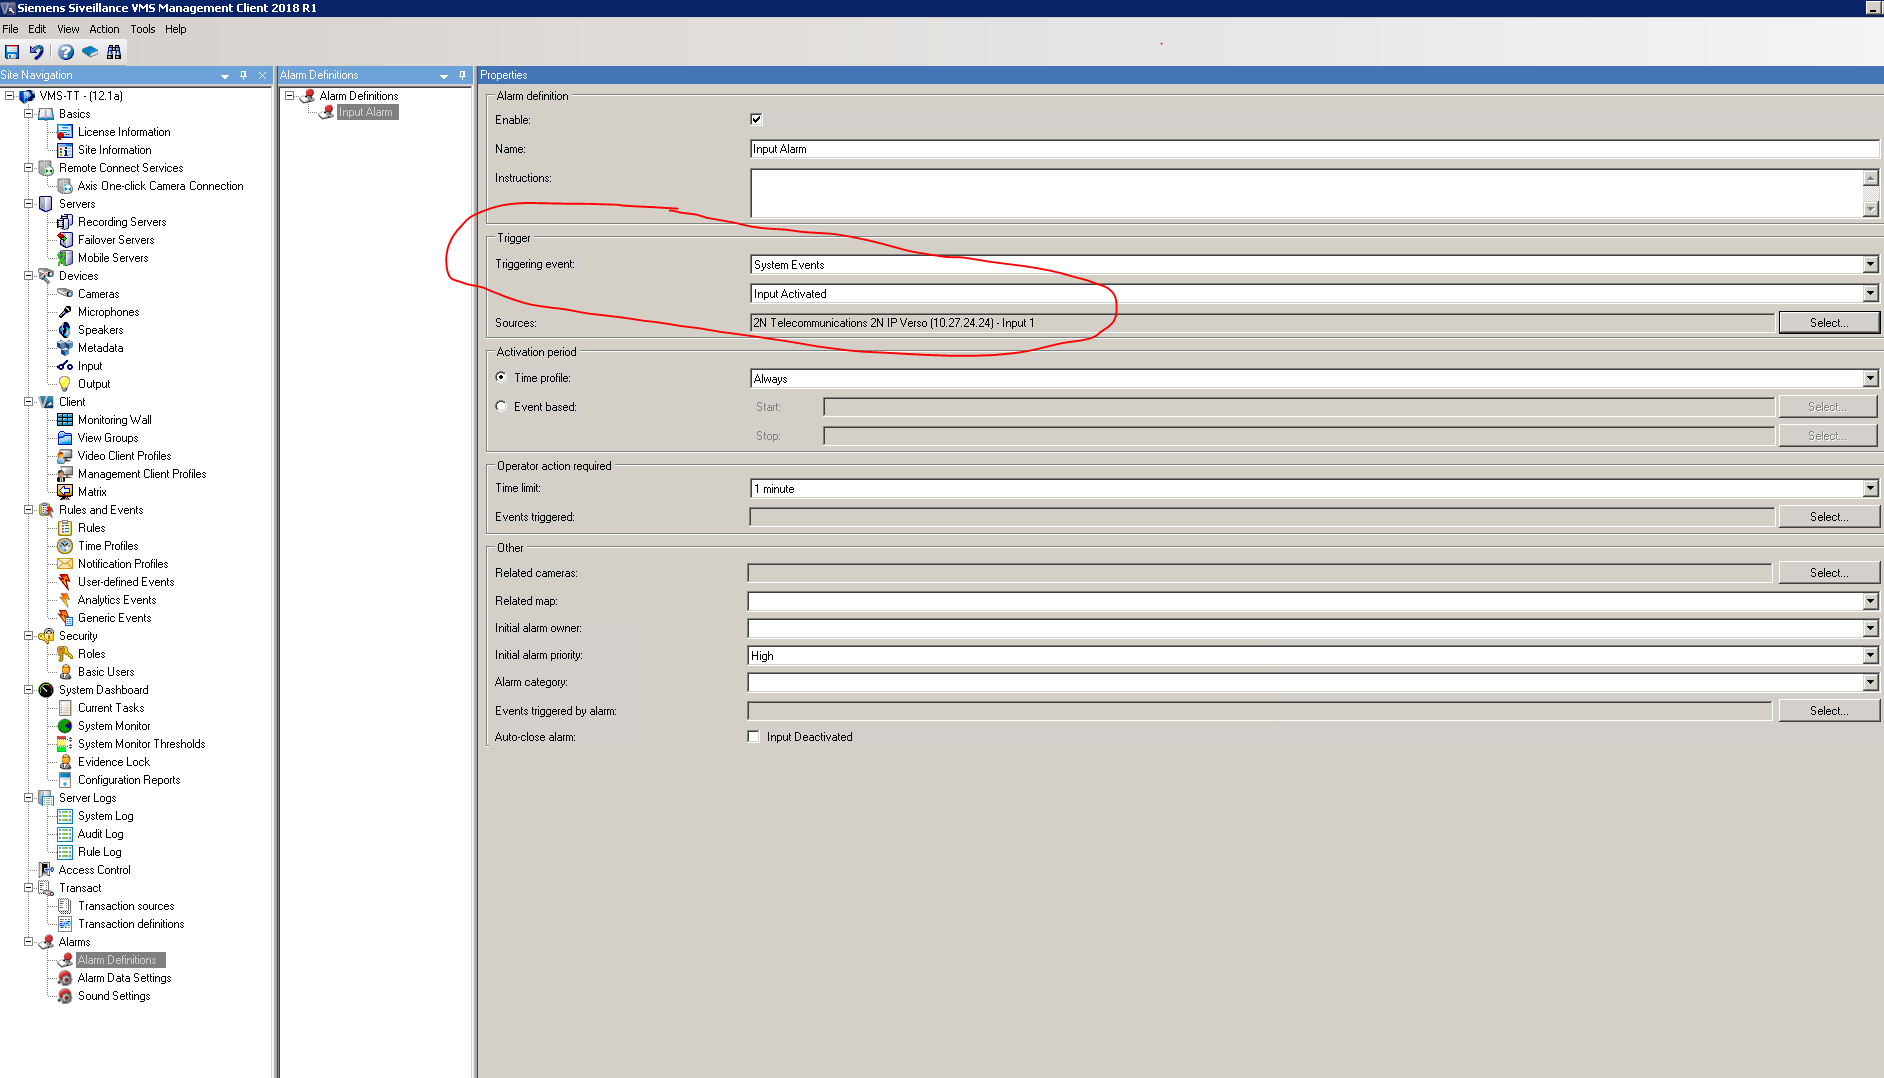
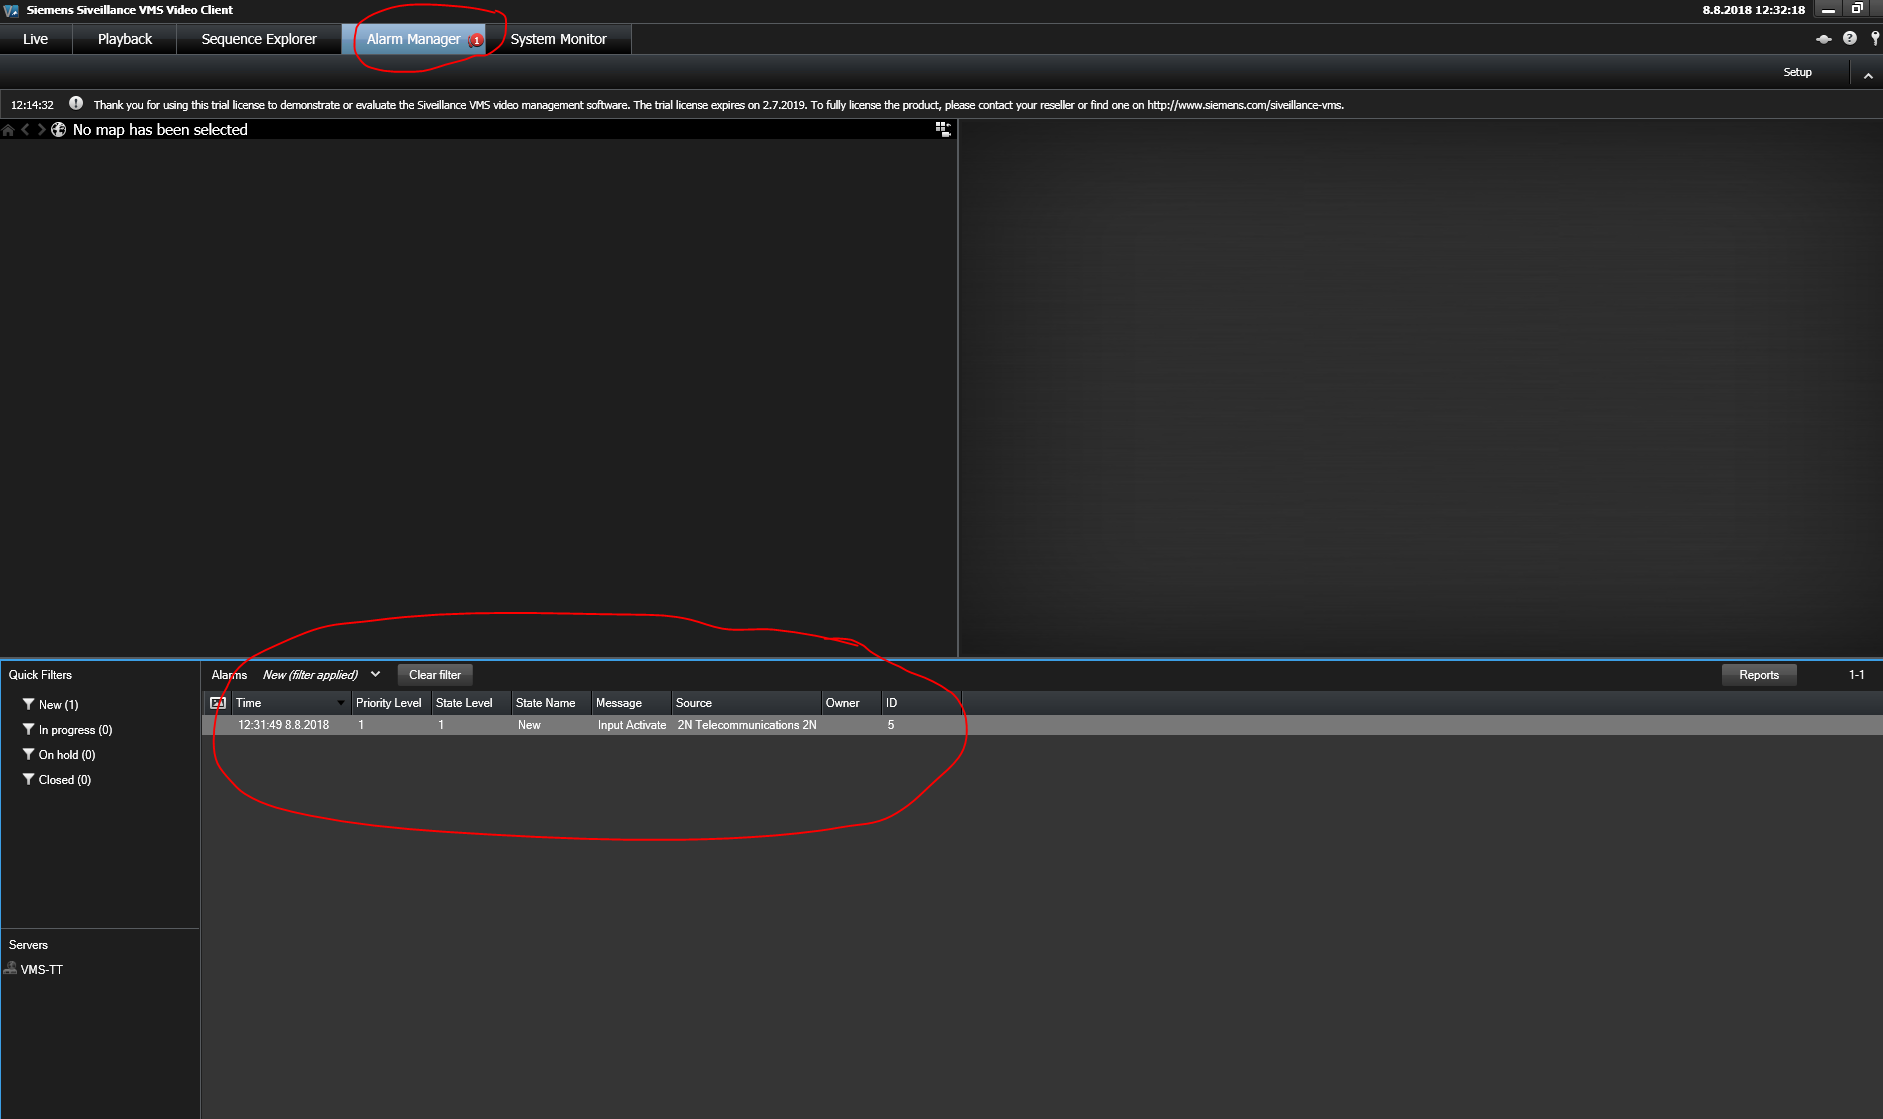
Now new Alarm Definition is to be created. Select Create New Alarm, set the parameters for input and click to Save.
 |
 |
The Access Request Notifications plugin is meant to integrate in Siveillance Video. Once the plugin is well configured with a specific camera, microphone, and a triggering event, then it is possible to show pop-up windows in the Video Client with live video and audio feed. For example, this can be useful to establish an audiovideo communication between Video Client and an intercom.
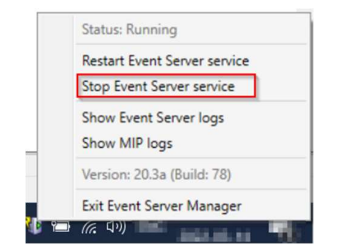
1. Ensure that Management Client is closed, and Event Server service is stopped before going further.
You can stop the Event Server service by right-clicking on its icon and select the stop command:
 |
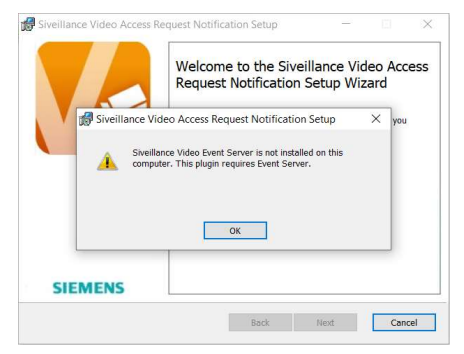
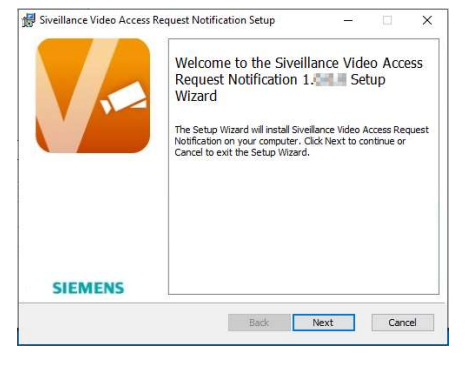
2. Run the Siveillance.Video.Access.RequestNotification.Install.msi from the folder you have extracted
The plugin must be deployed only on a computer where Event Server is installed. If this is not the
case, this message will pop-up and the installation will abort.
 |
 |
5. Click Install:
The plugin will be installed in this directory:
C:\Program Files\Siemens\MIPPlugins\Siveillance.Video.Access.RequestNotification, click Install
6. Once the installation process is completed, click Finish
7. Start Event Server service to load the plugin
 |
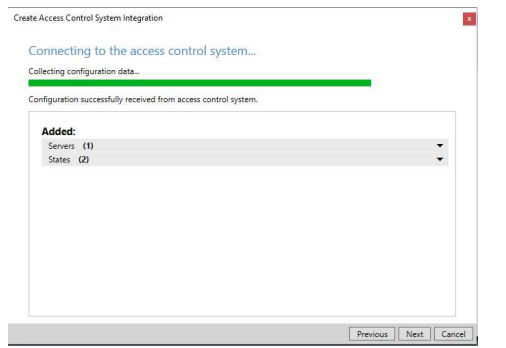
1. Once the Plugin is installed on the Siveillance Video Event Server, the Access Control instance can be created on the
Management Client by right clicking the Access Control root node and click Create new
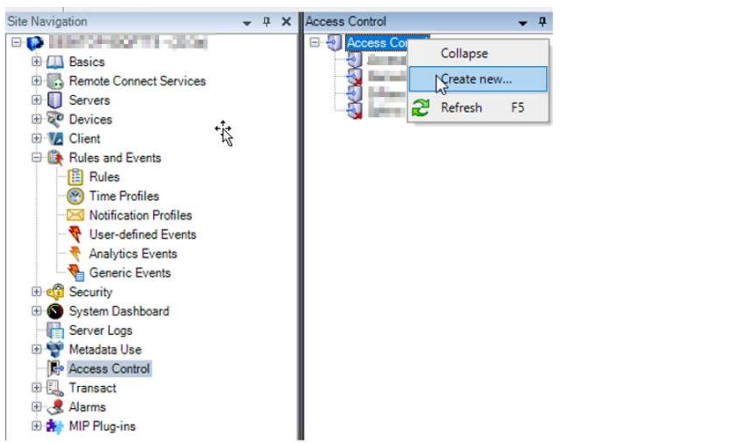 |
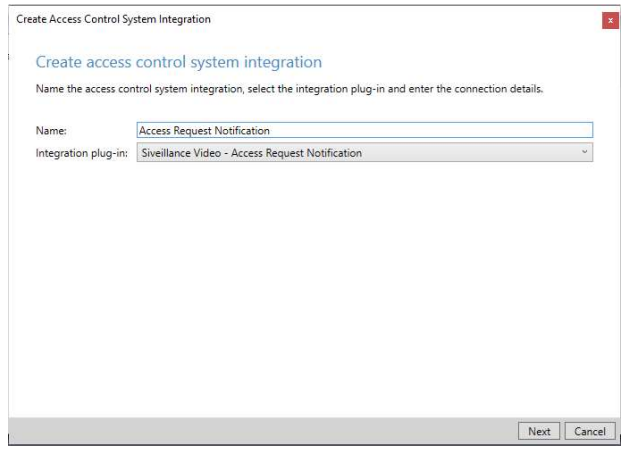
2. A wizard will pop up which will guide you through the plugin creation process.
a. Enter a name for the instance of the plugin you wish to create
b. Select the integration plug-in from the drop-down box. You will find a plugin named “Siveillance Video -
SiPass integrated”. Click Next
 |
then click Close to close the wizard.
 |
other access control functionalities are irrelevant. You can ignore some of these tabs:
|

1. To create a new Access request notifications, you must select an Access request notifications instance in the Access
Control middle pane
|
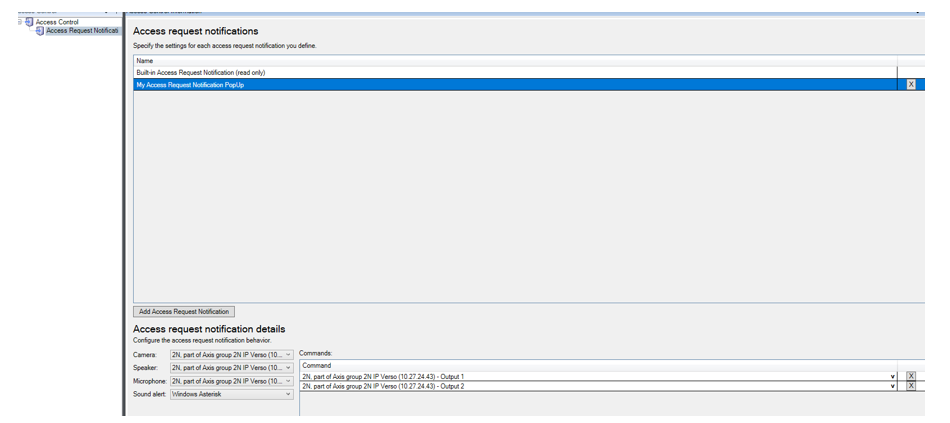
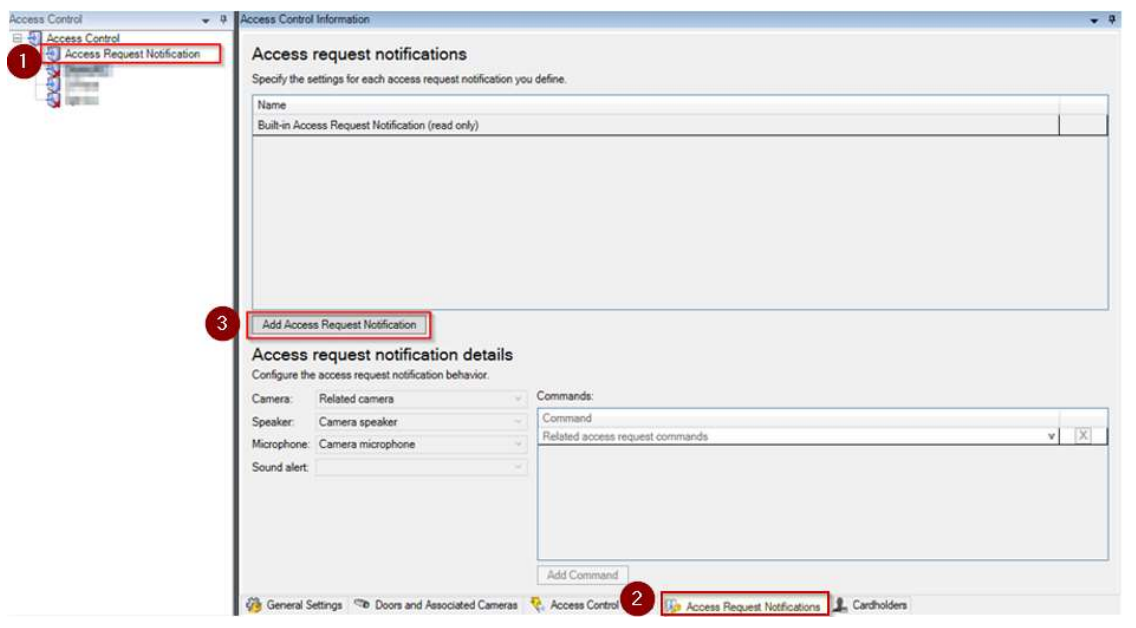
2. Select Access Request Notifications tab at the bottom of the property page
3. By clicking on the Add Access Request Notification button, a new empty row will appear below the list of Access
request notifications.
a. You can choose a name for this new pop-up configuration
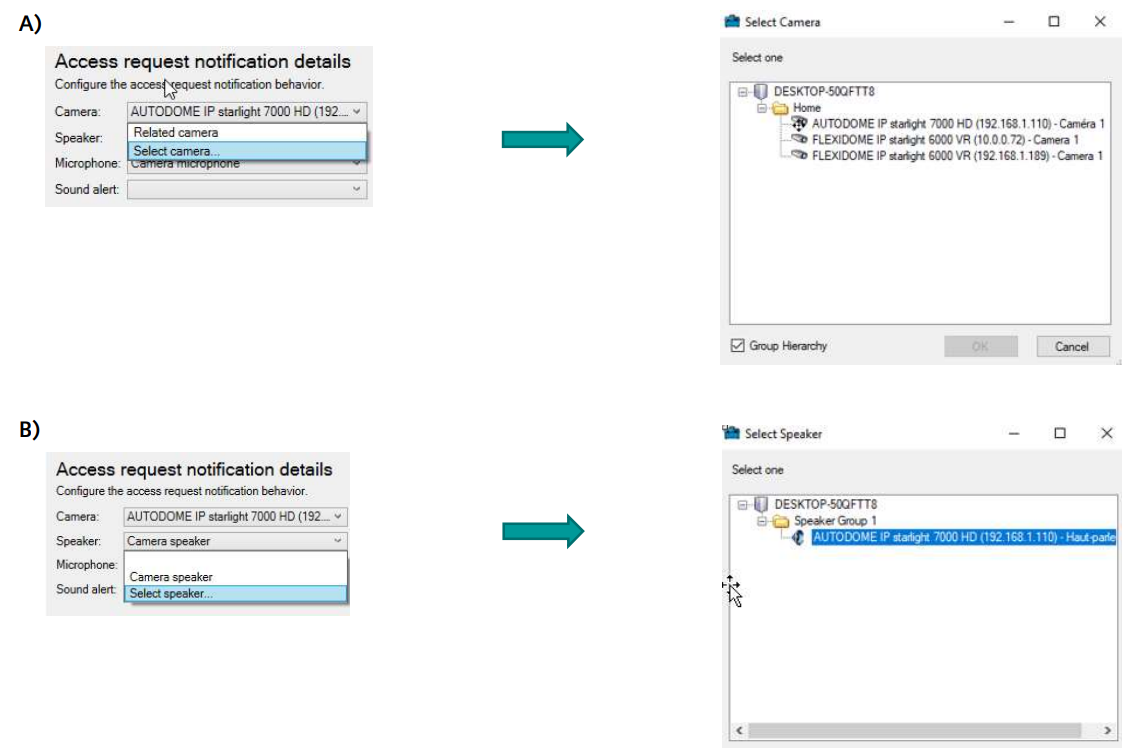
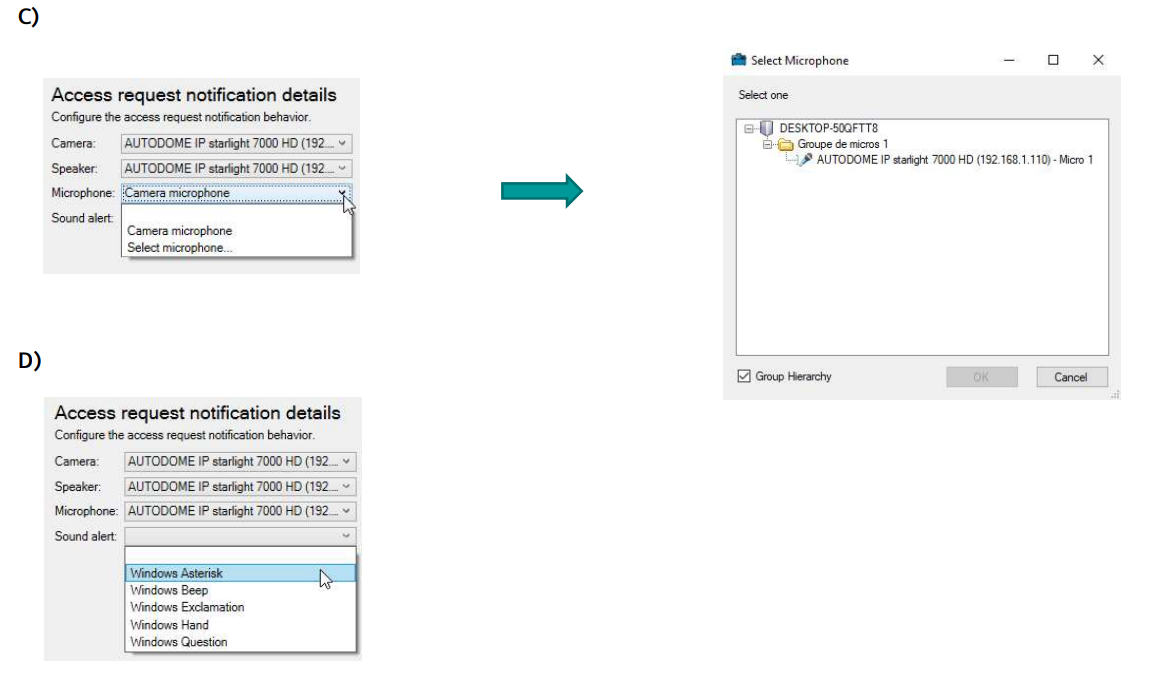
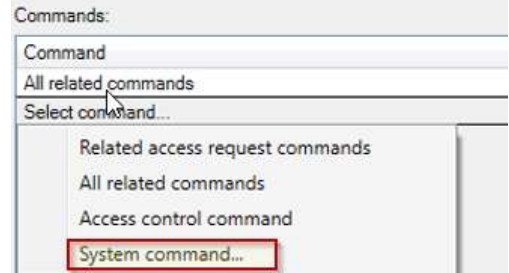
b. A the bottom of this window, four drop-down list are available for the pop-up configuration.
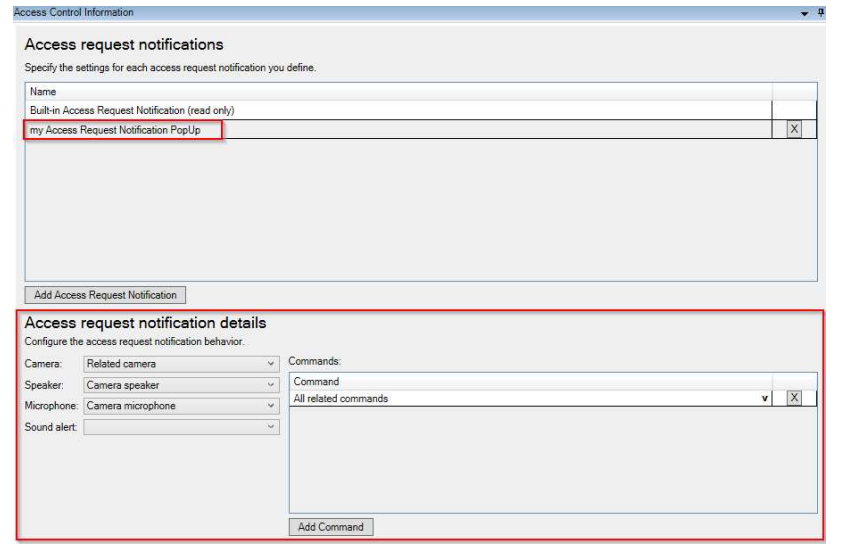 |
microphone, and (D) a sound alert (heard on the PC when the pop-up will be triggered)
|
 |
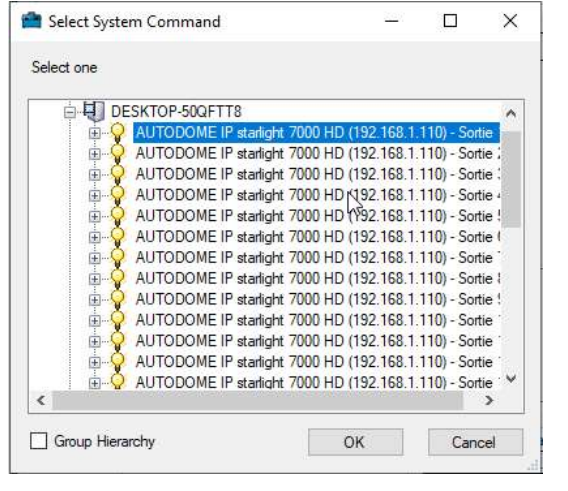
7. By clicking Add Command, a new window will open where you must select System command...
 |
 |
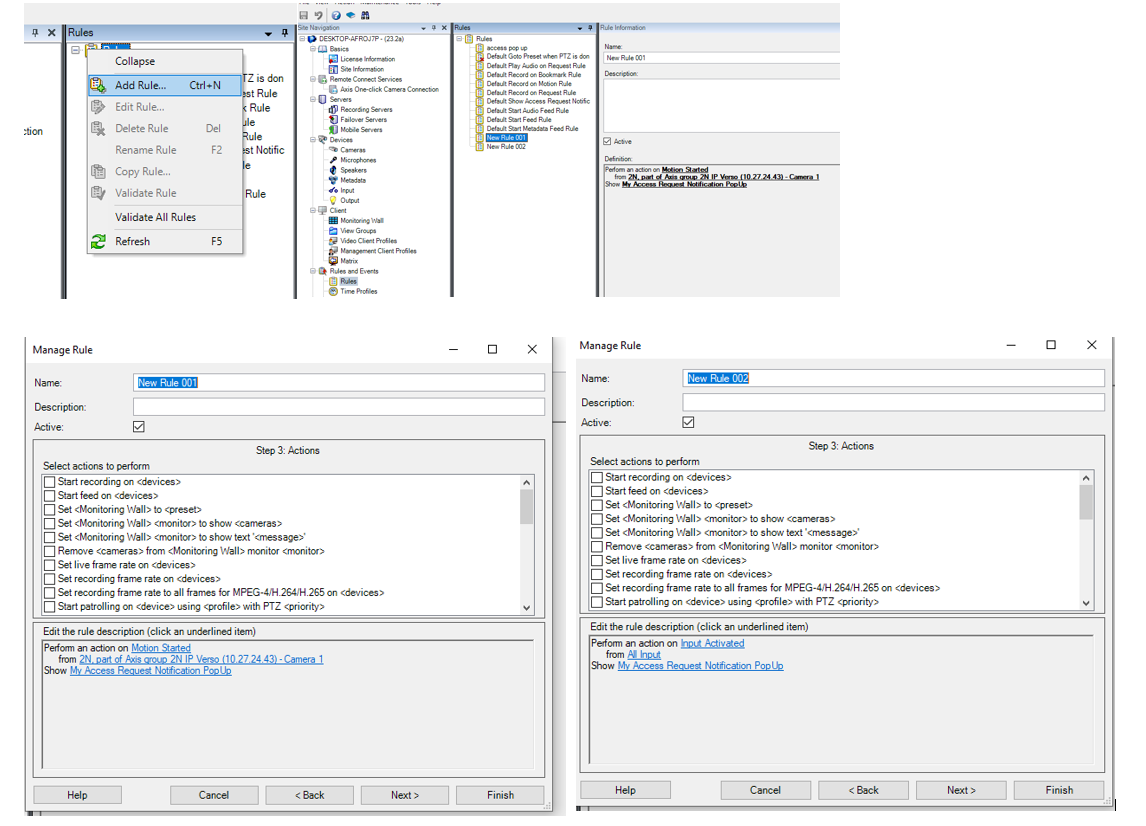
The final step is to create a new rule that will trigger your Access request notification pop-up! You must choose Show as the Action of your rule
ADD a New rules For step 3, click Finish
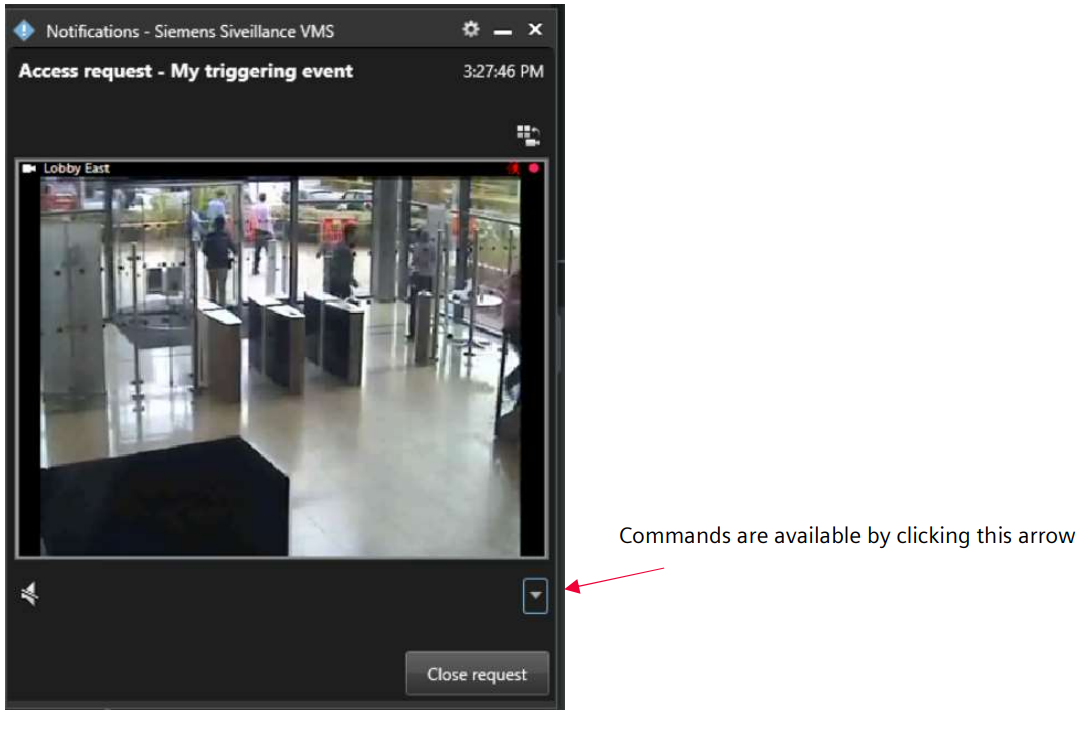
Viewing the pop-up windows
When the rule that you have created is triggered in Siveillance Video Event Server, then your Access request notification
pops up in the Video Client. Different options can be available on the window depending on your configuration:
 |
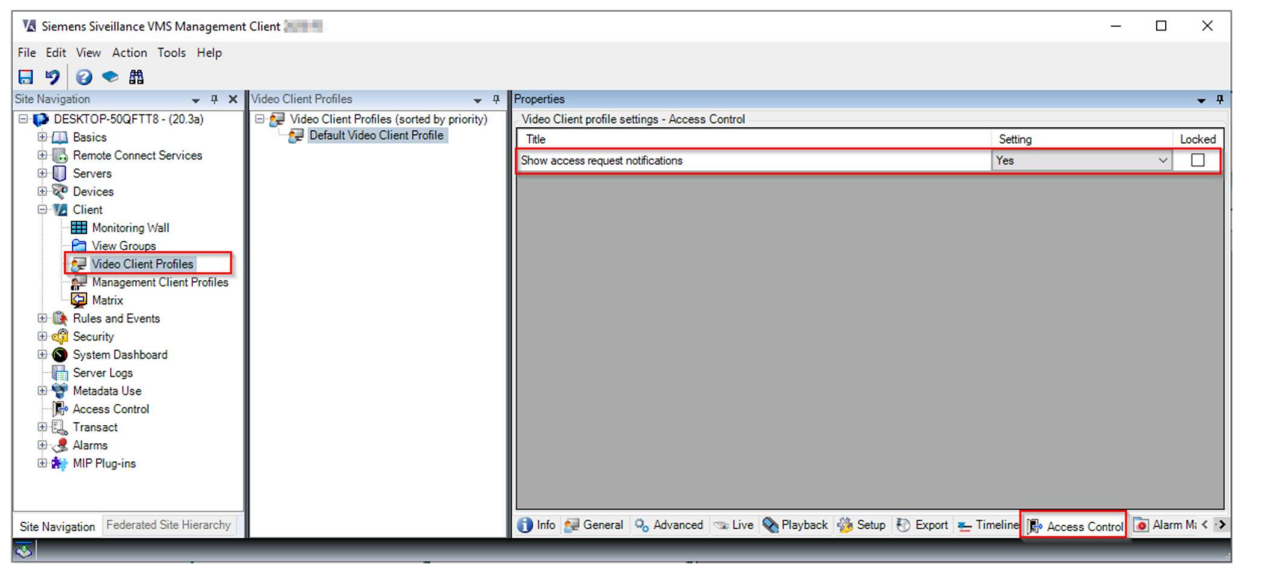
Video Client settings
In Video Client settings panel, you can turn on or off Access request notifications or choose to use the configuration set in
Video Client Profile (Follow server):
 |
 |
Used Symbols
![]() - Compatible
- Compatible
![]() - Work with limitation
- Work with limitation
![]() - Incompatible
- Incompatible