Nx Witness

Content

About

Version 4

Version 3

Used Symbols

About

Nx Witness VMS is an open IP video management system(IPVMS) designed to find, view, record, and manage IP video cameras as well as integrate quickly with 3rd party systems and devices.

http://www.networkoptix.com/nxwitness/

Version 4

Tested Functions

Nx WitnessVersion Helios IPScan deviceVideo from HIPAudio from HIPAudio to HIPSwitch controlEvents from HIP
4.1.0.31.3982.30.0.39.4(tikot)(tikot)(tikot)(chyba)(tikot)(tikot)

4.0.0.29987

2.29.0.38.6

(tikot)(tikot)(tikot)(chyba)(tikot)(tikot)

2N Helios IP Settings

Check the ‘RTSP Server Enabled’ and Audio/Video Streams as below, then choose your preferred Video Codec from the drop down menu, also ensuring that the ‘UDP Unicast Enabled’ box is checked.

Navigate to the ONVIF section of the intercom settings. Set Discovery Mode to “Discoverable” and create user with Administrator rights.
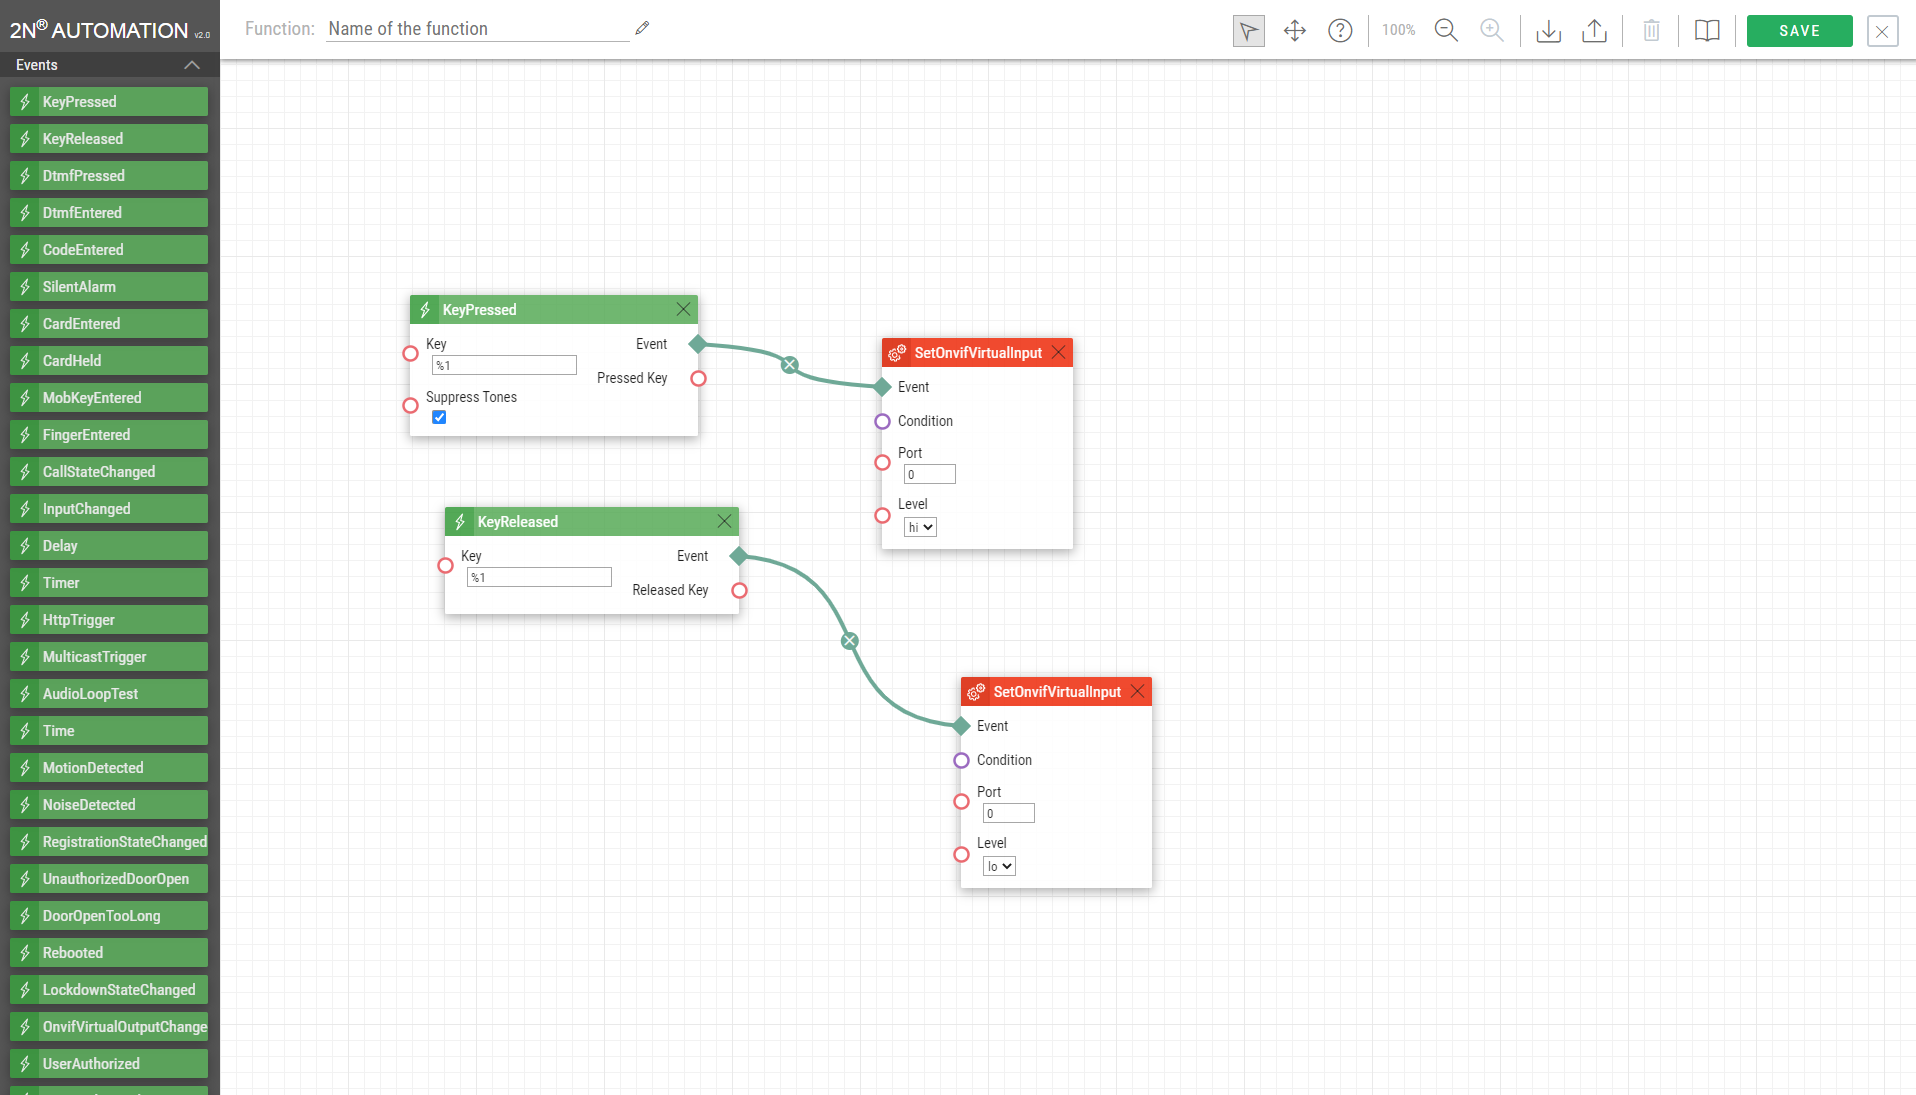
Go to Service – Automation and create function for alarm settings in Nx Witness.

Tested Features

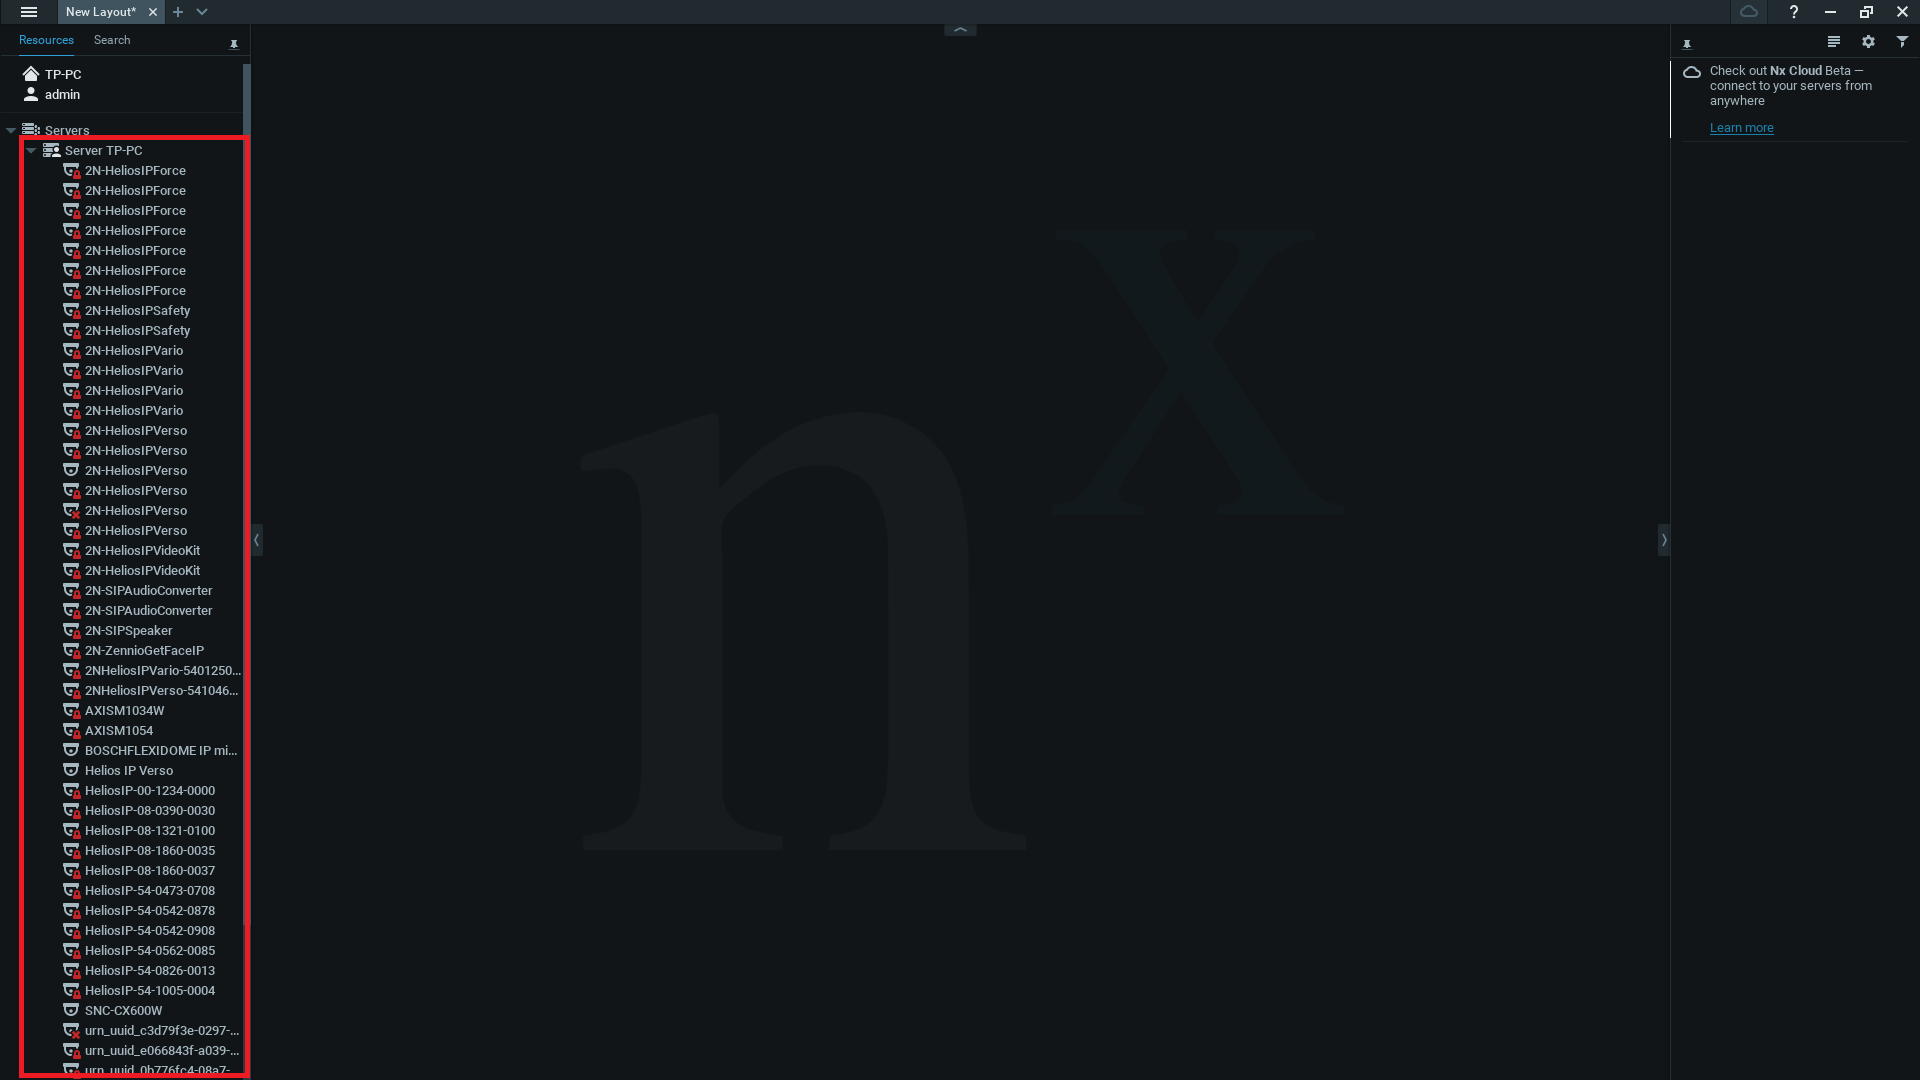
The intercom should now be visible in the available cameras list, thanks to ONVIF discovery. Locate the intercom that you wish to add to the layout.

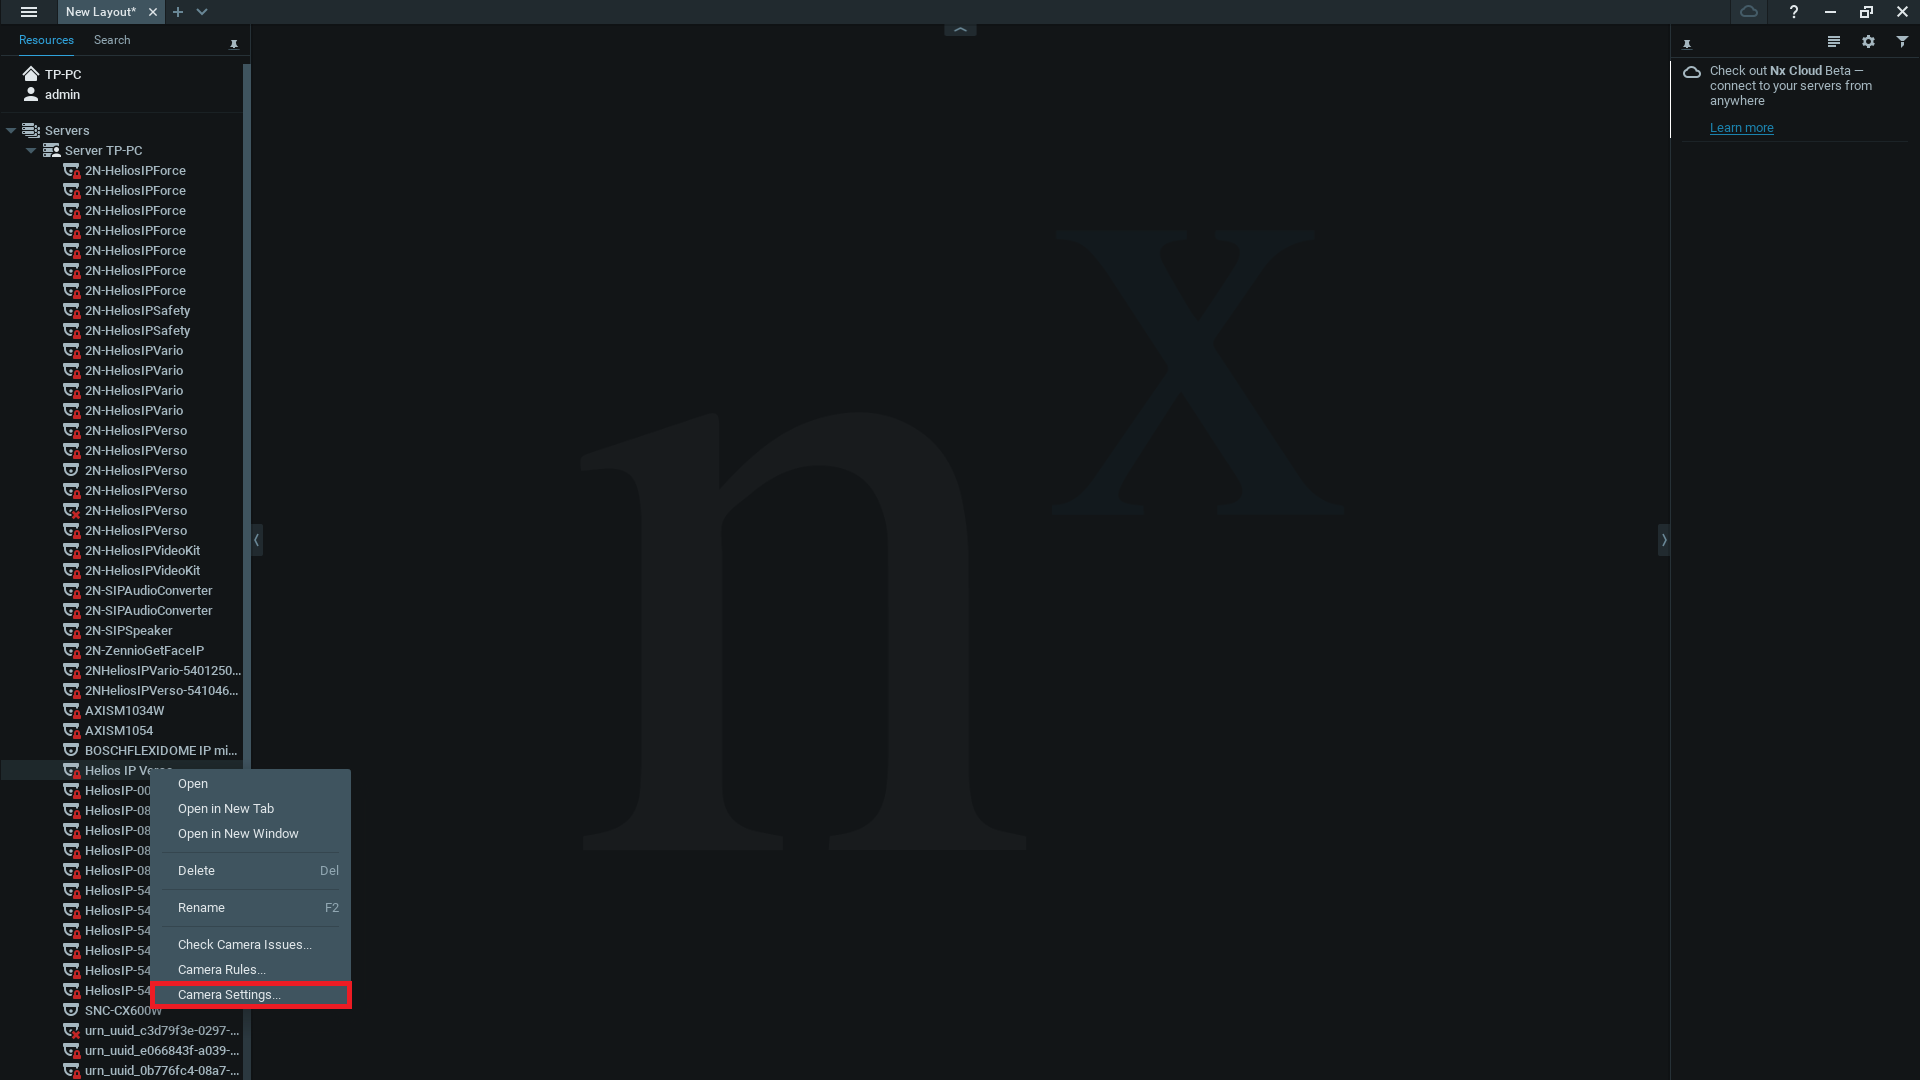
Right click on your camera and select ‘Camera Settings’ to configure.

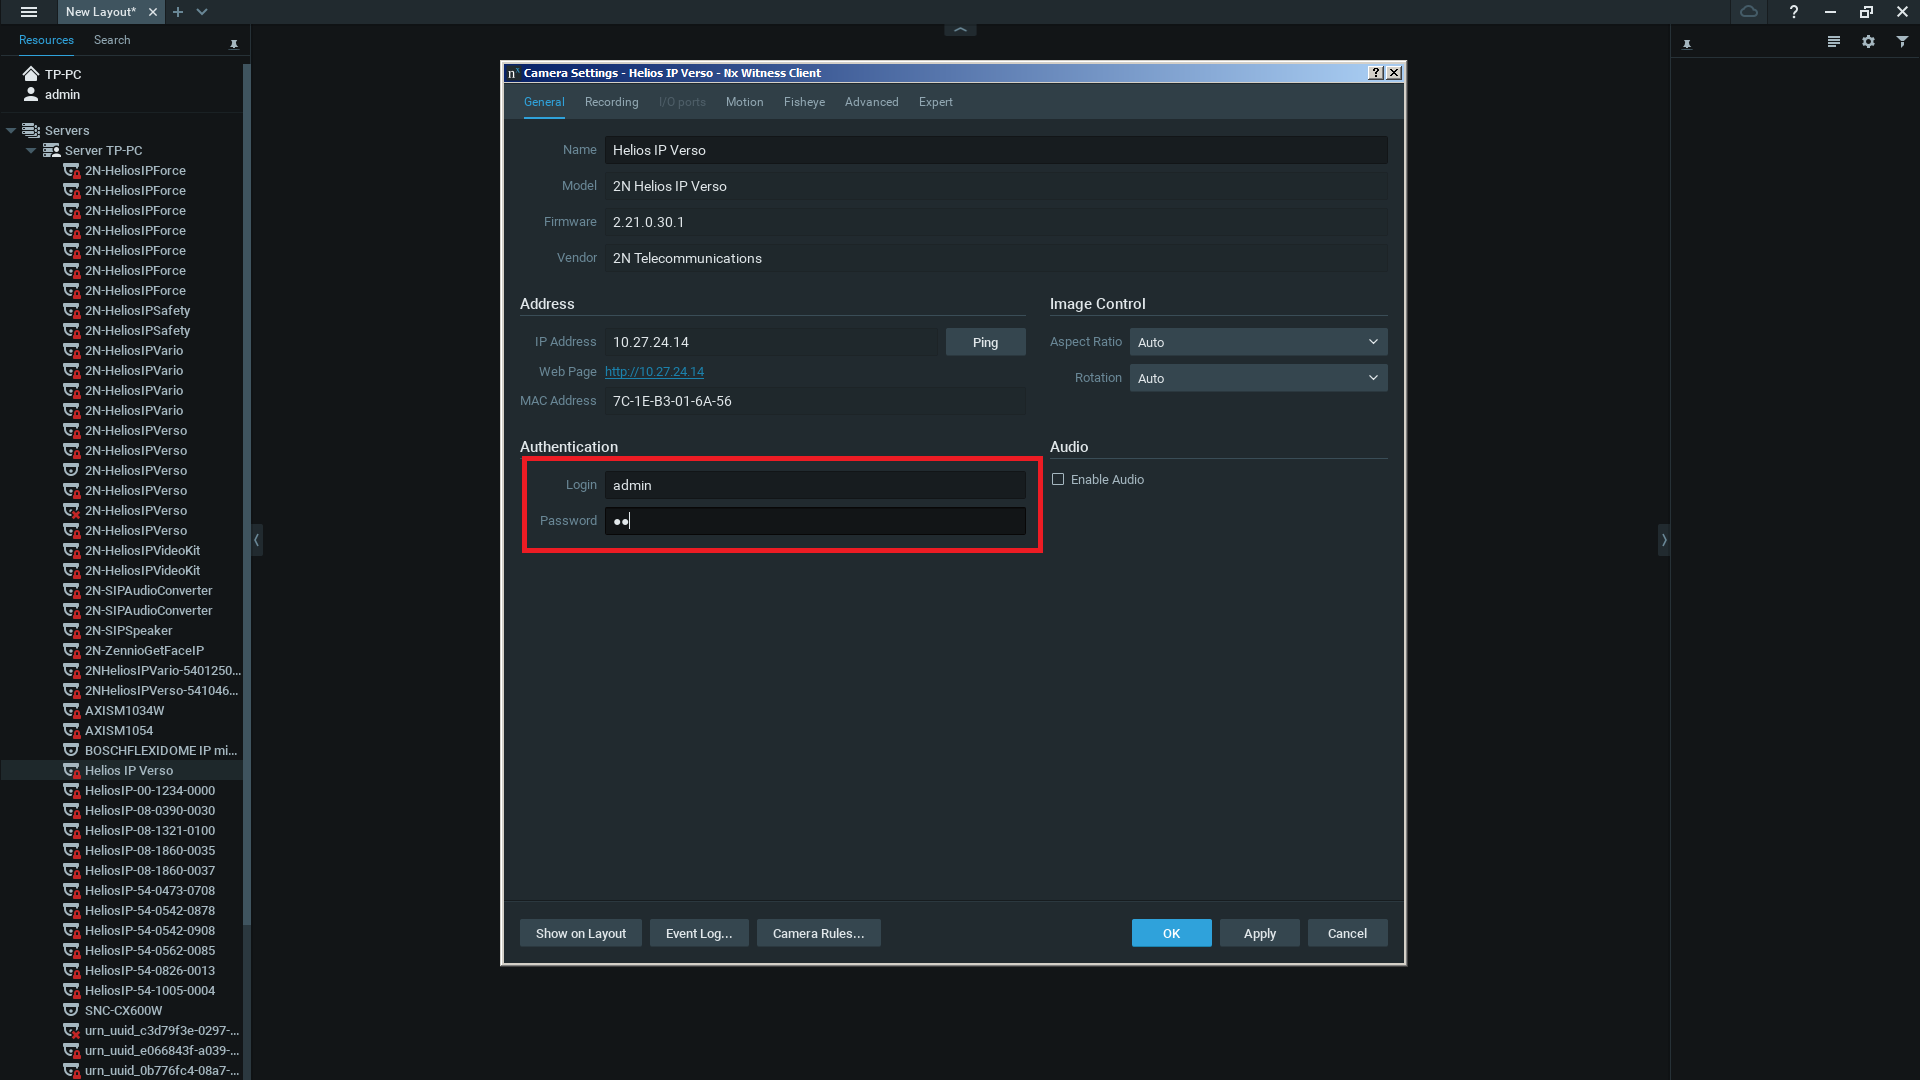
With the camera settings window open complete the login and password window to match the ONVIF account settings in the intercom. Click the OK button to save settings.
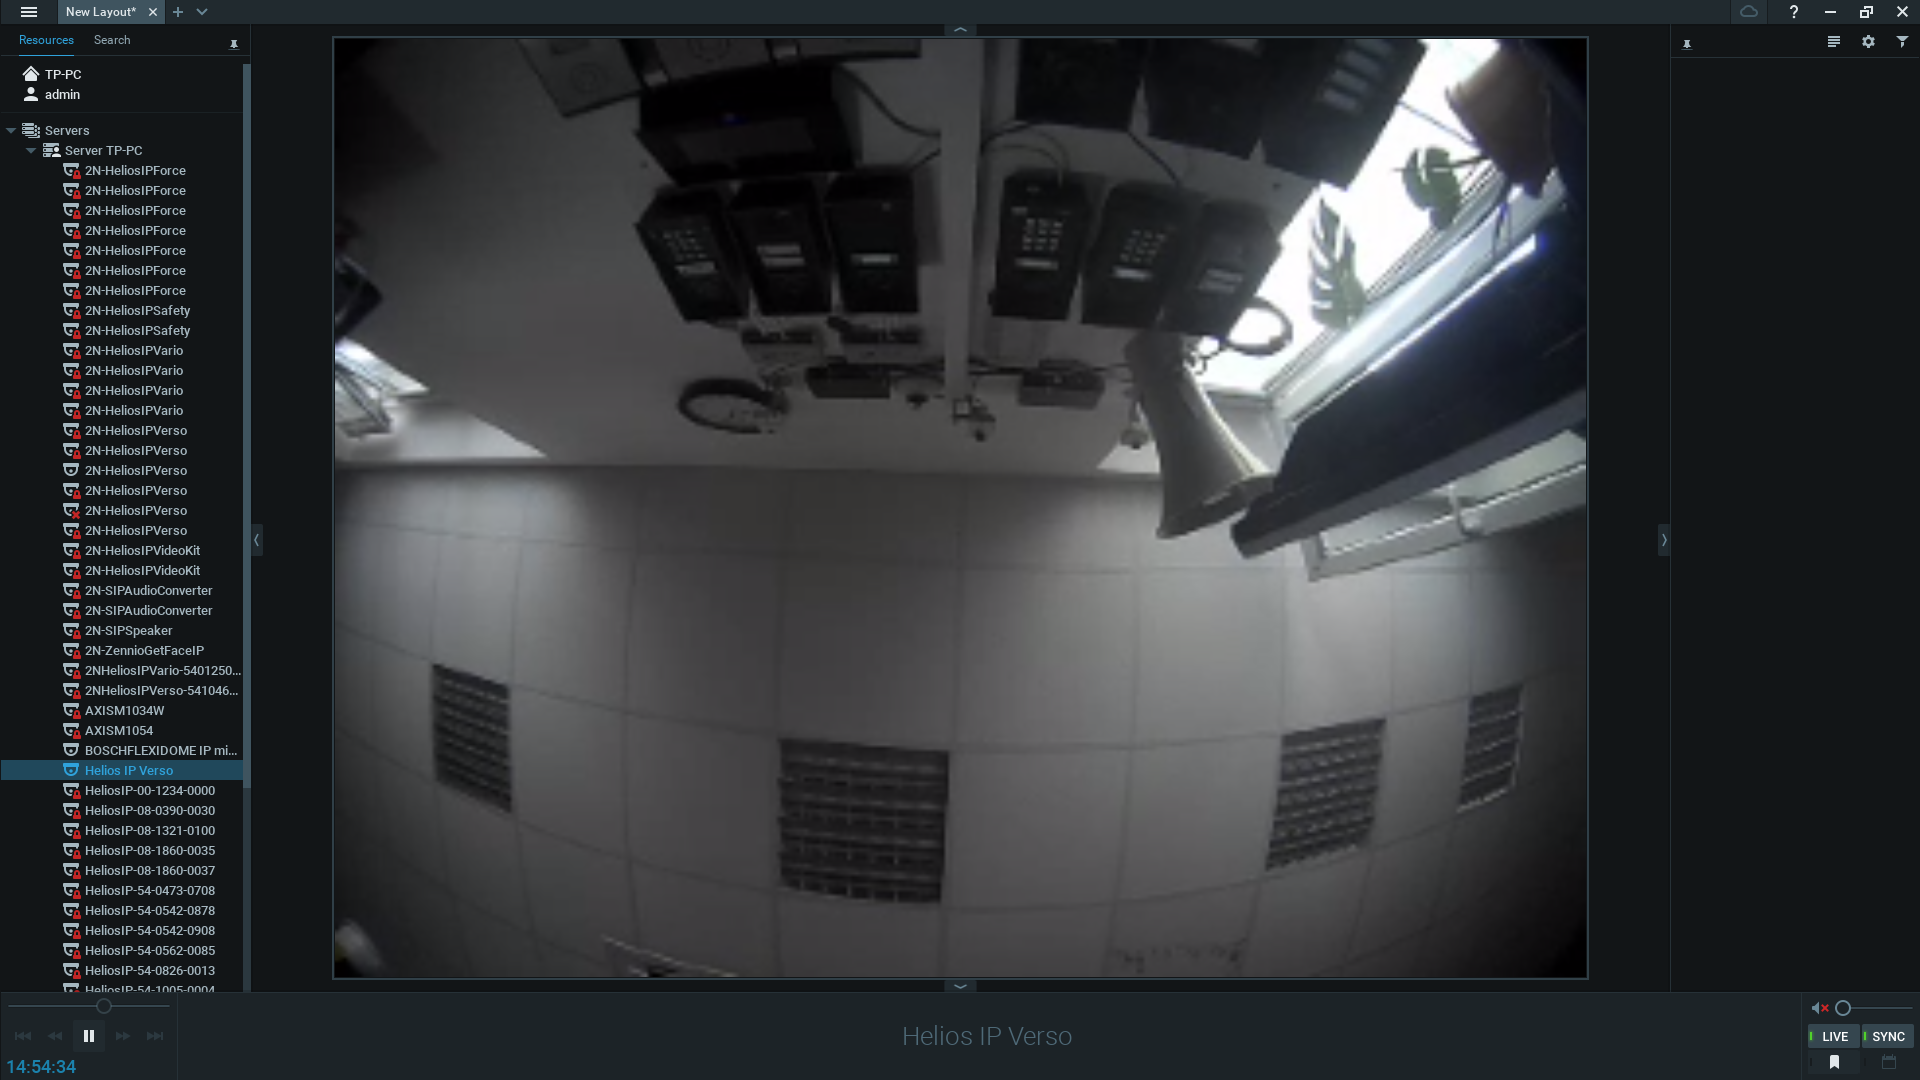
Drag the intercom camera stream into the layout from the device list just like any other camera. You can now view and record the stream as per any camera added to Nx Witness.

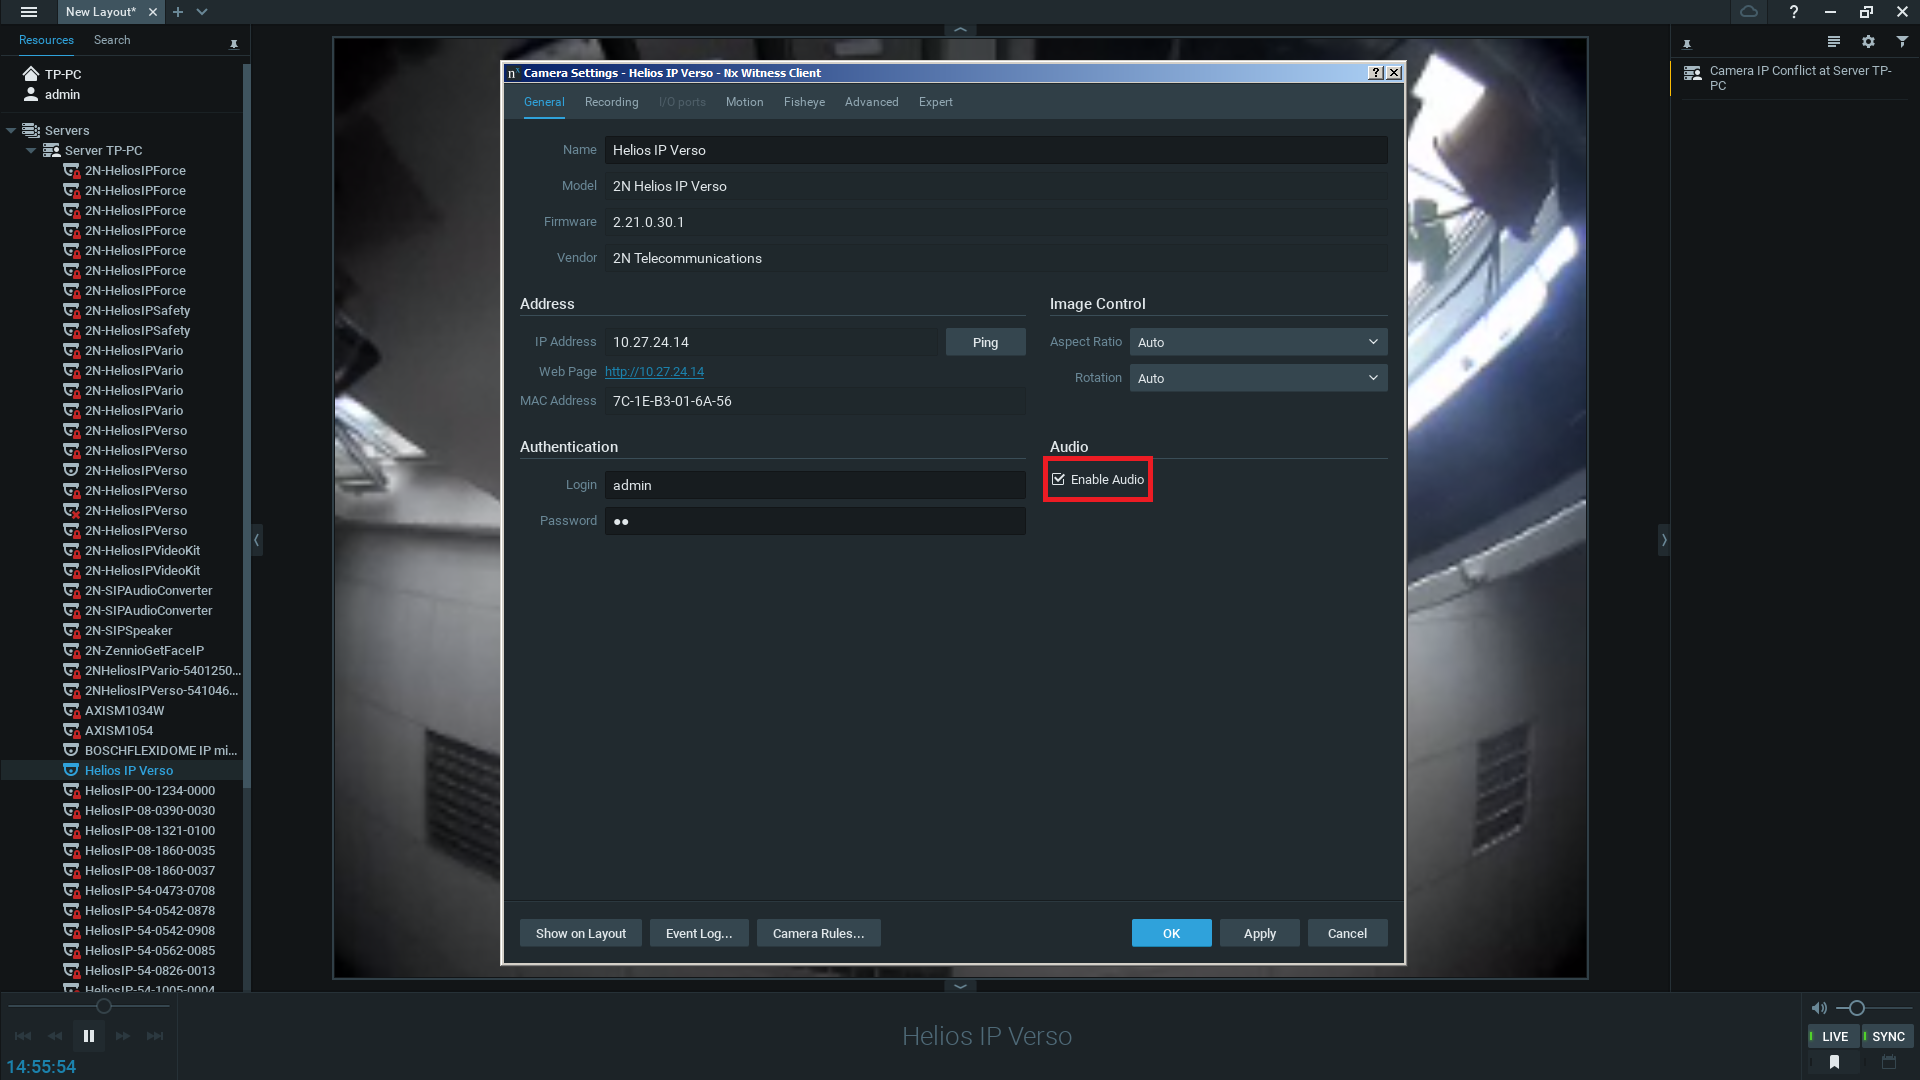
Right click on your camera and select ‘Camera Settings’ to configure. Enable Audio and click the OK button to save settings.

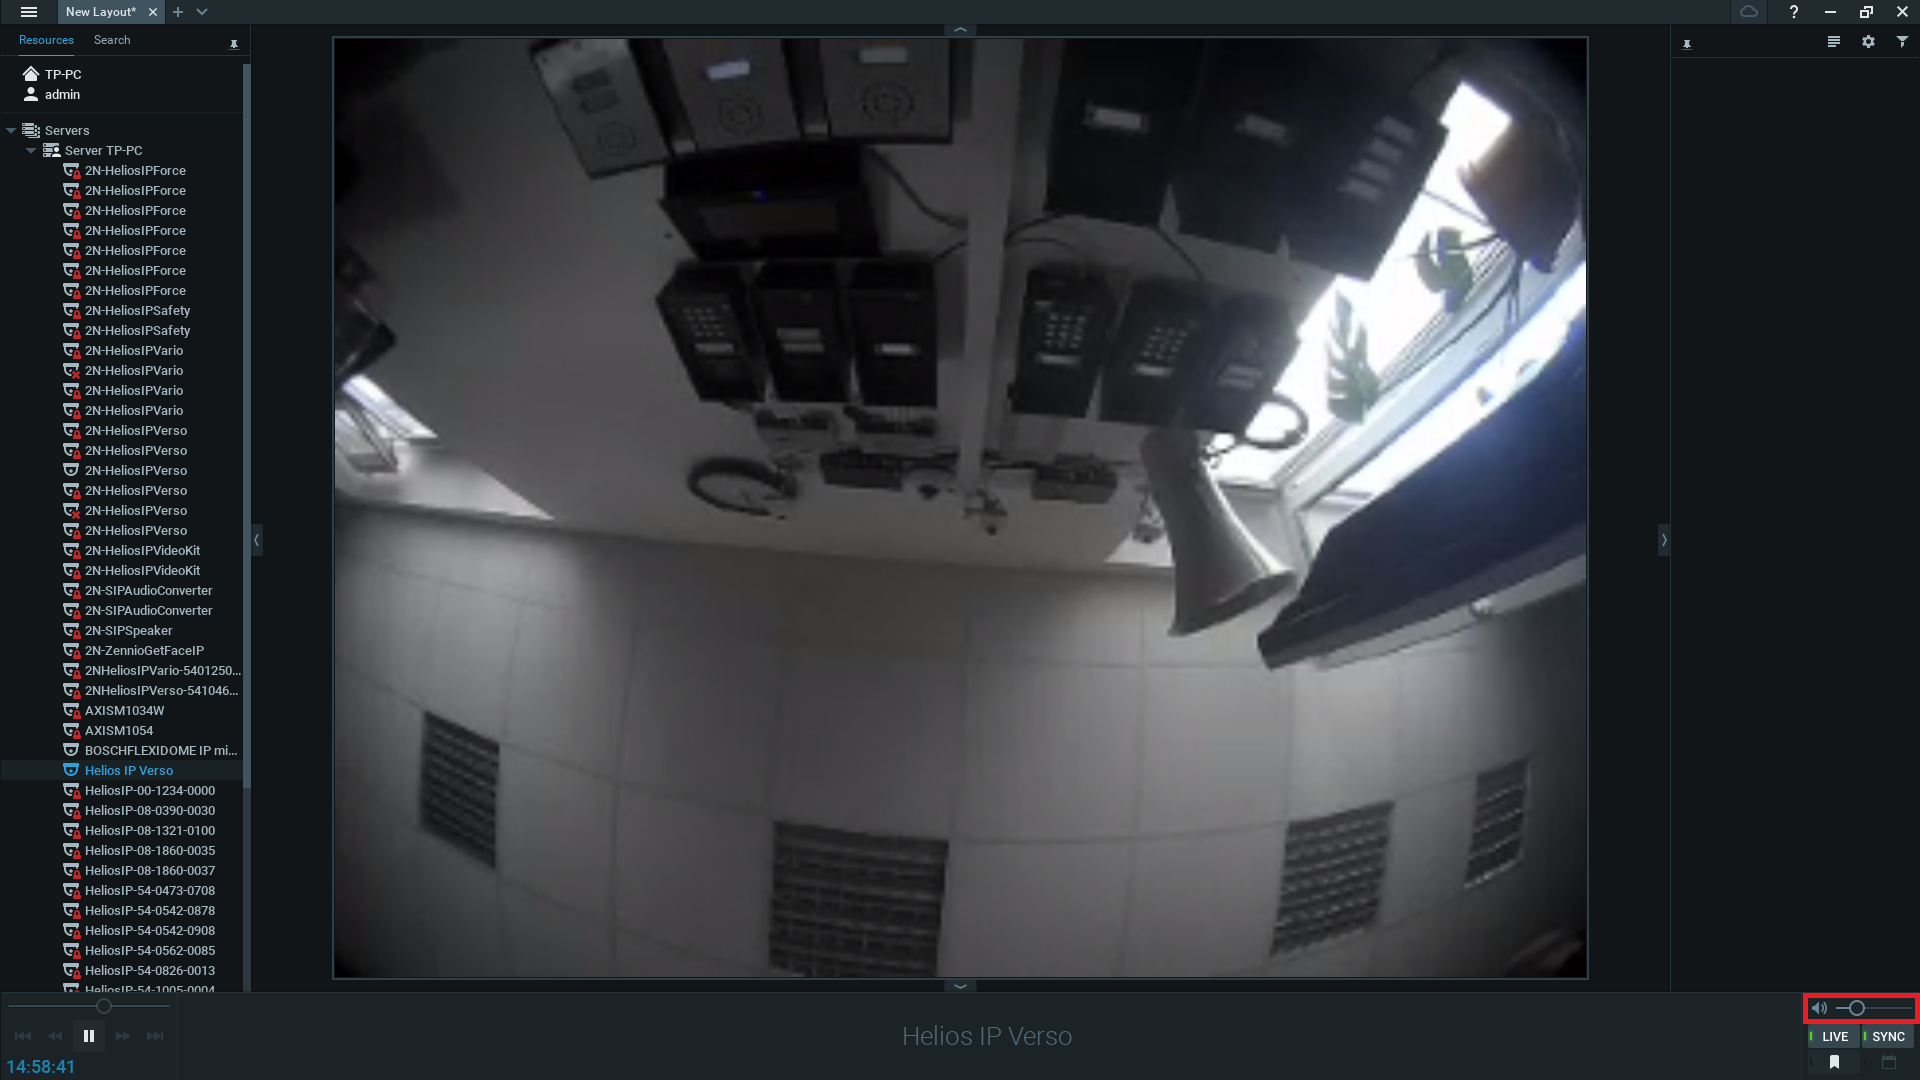
Drag the intercom camera stream into the layout from the device list just like any other camera. In Live view or in recording. You can set audio volume in Live View at lower rightmost corner of Nx Witness.

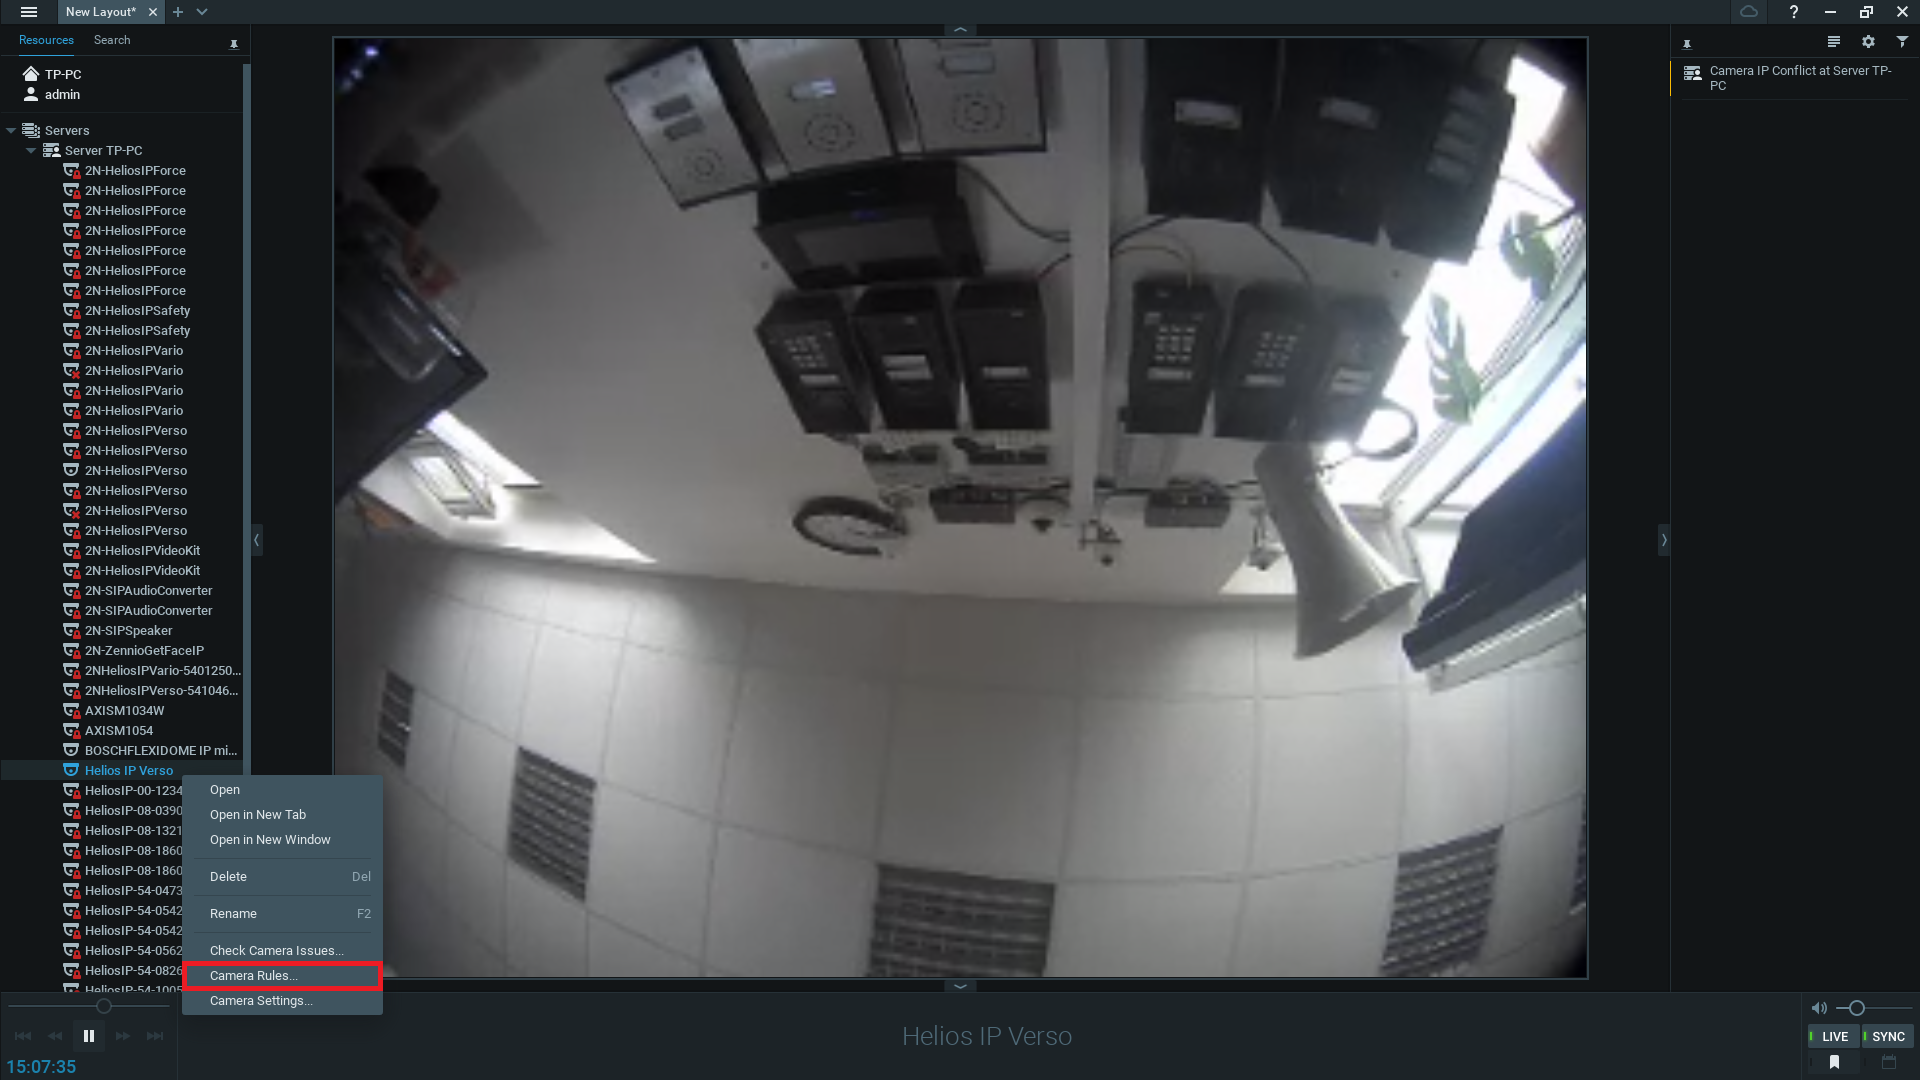
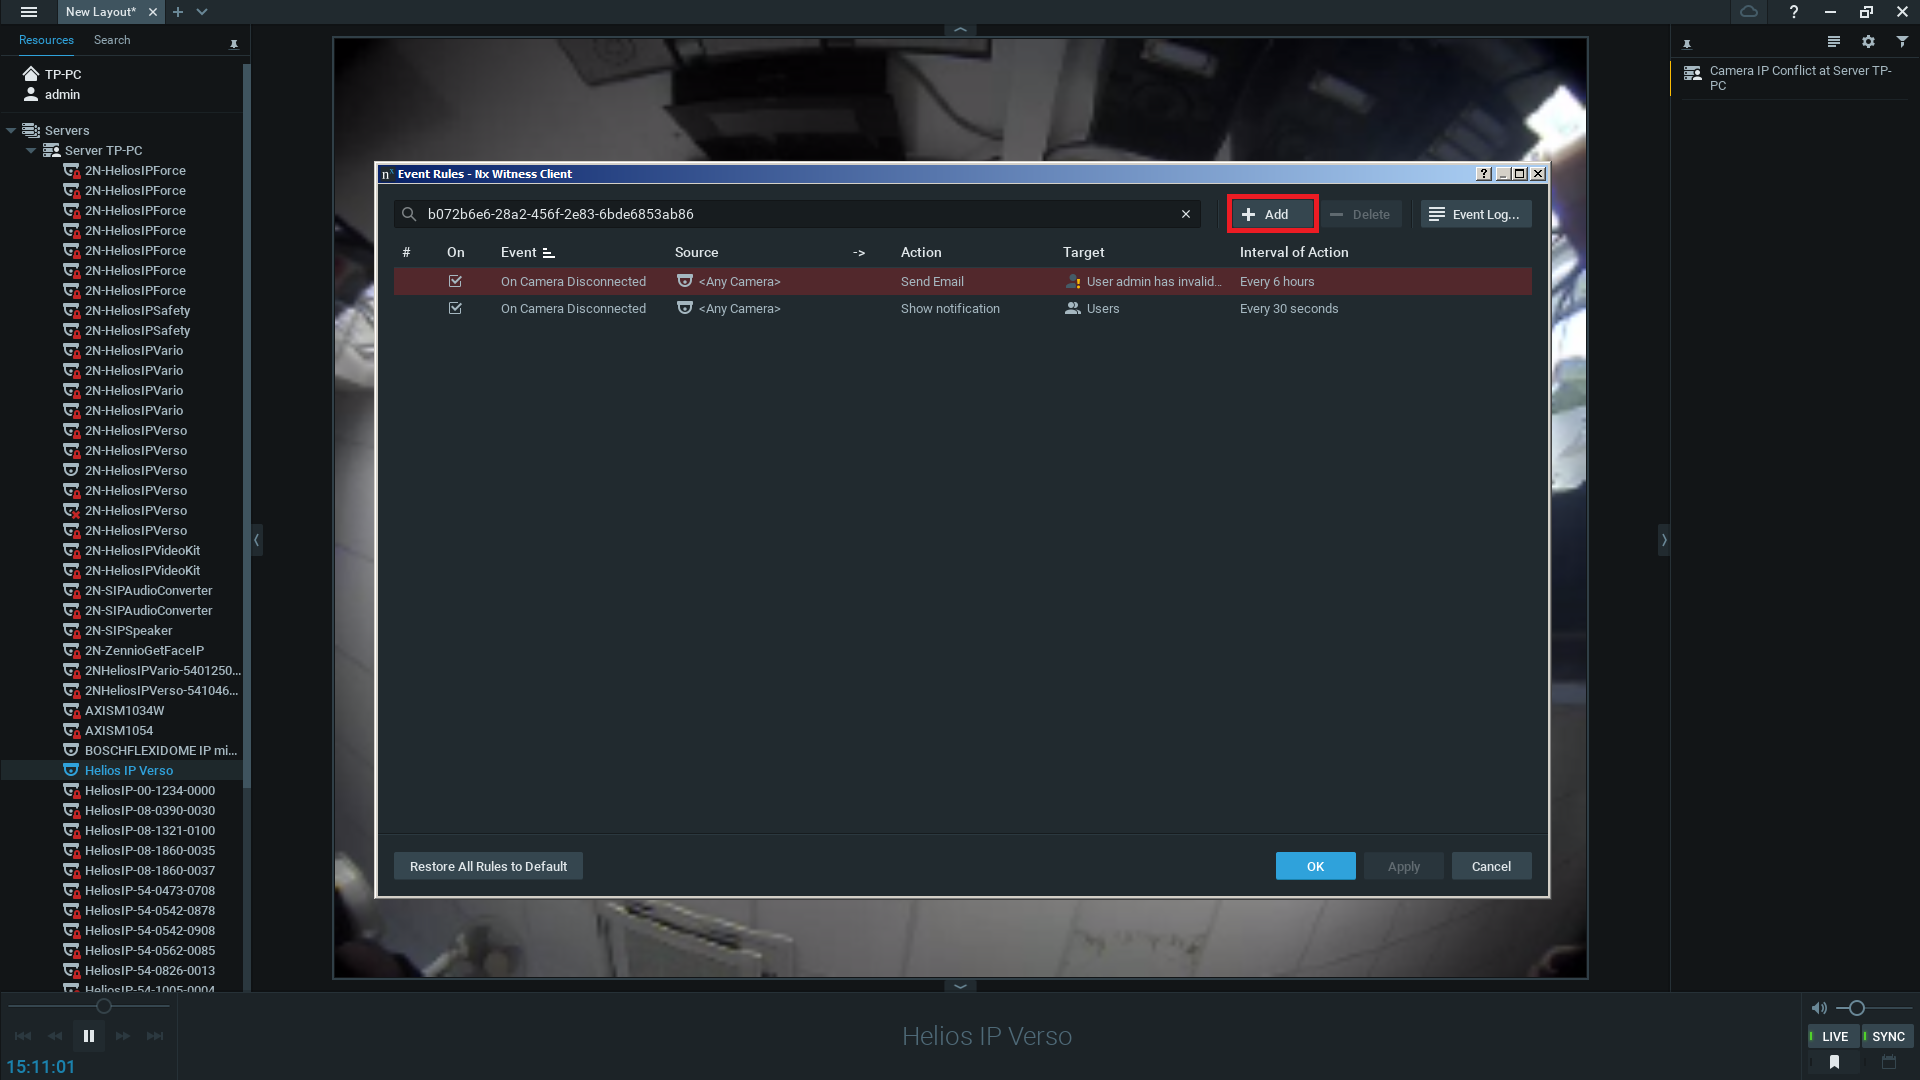
Right click on your camera and select ‘Camera Rules’ to configure.

Click on Add to new rule.
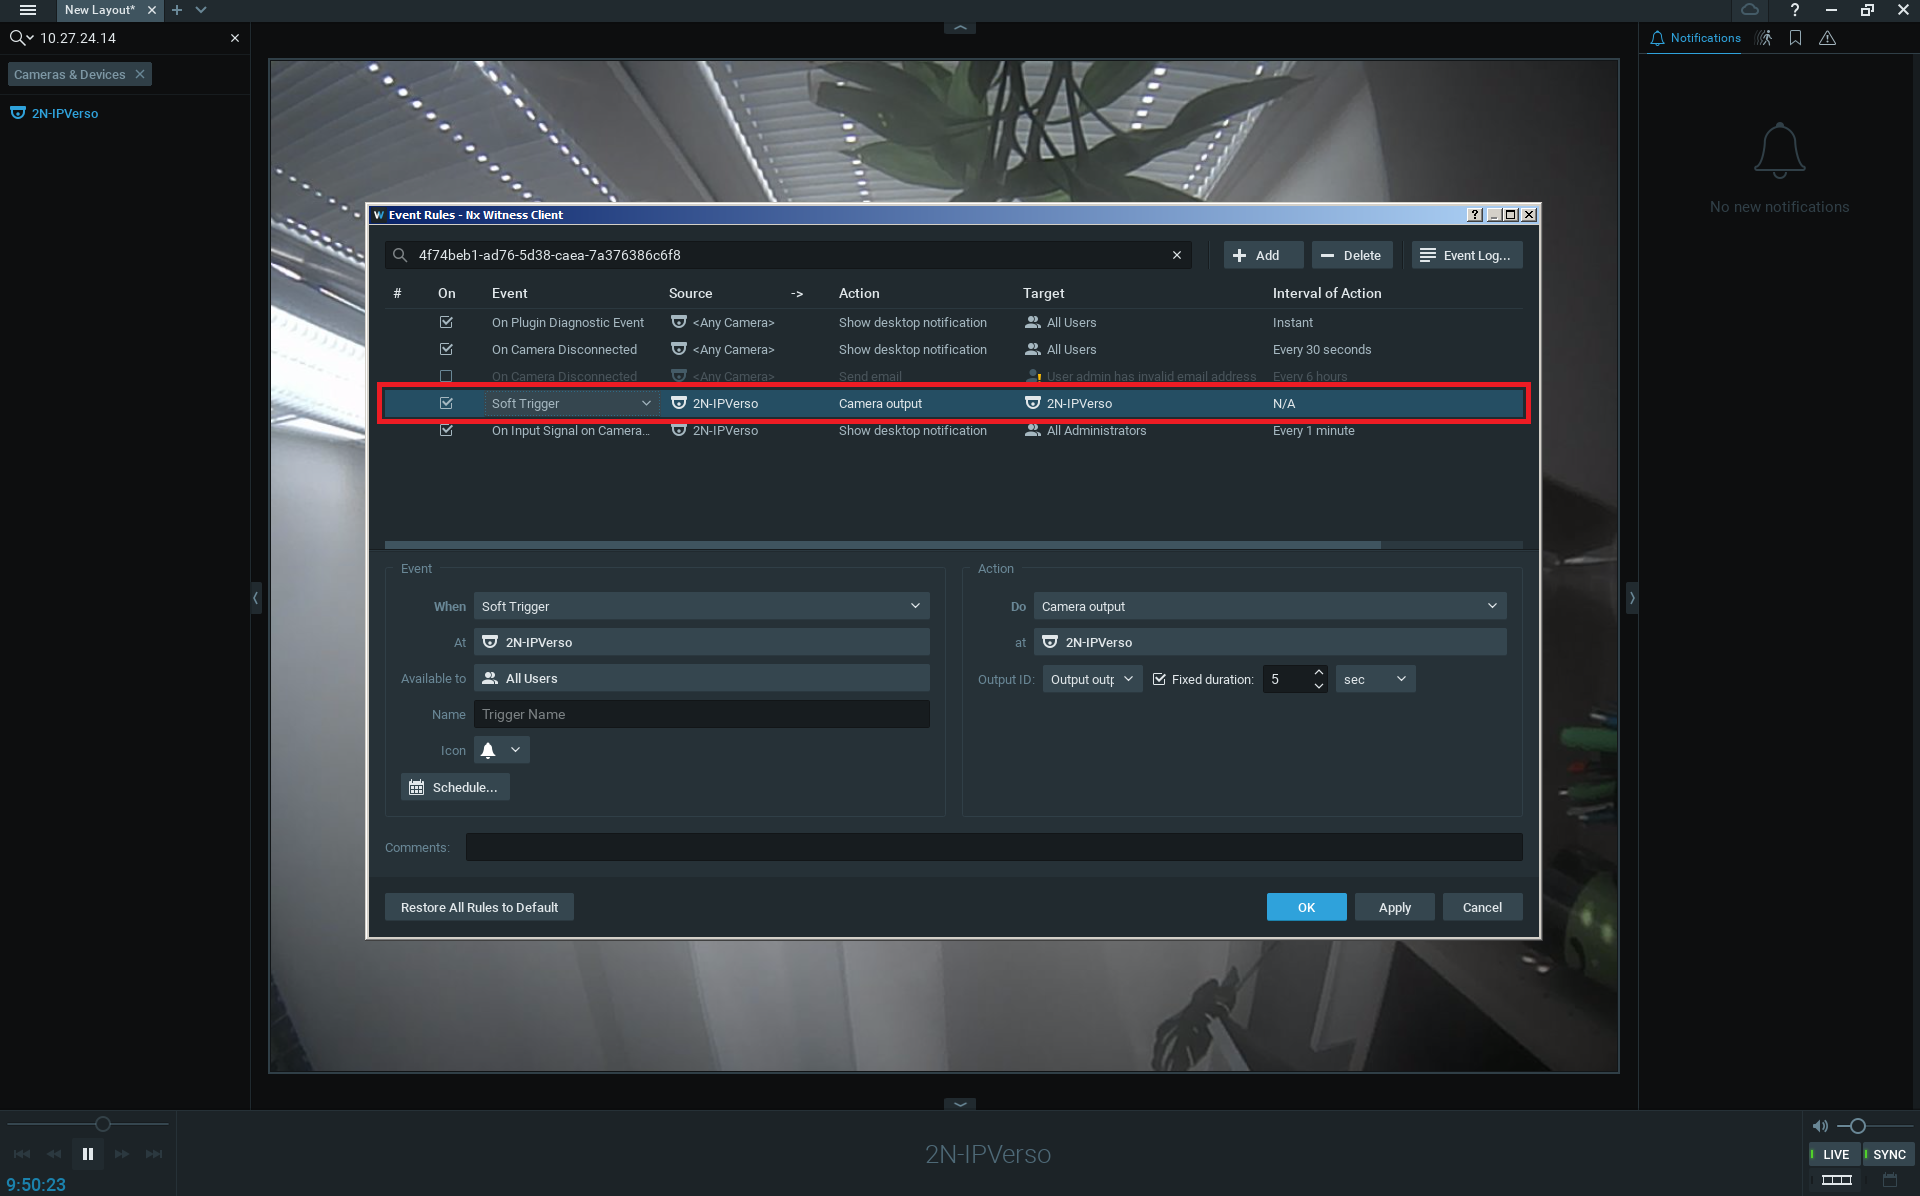
Set Event (Soft Trigger), Device, Action and ID Output and save them.
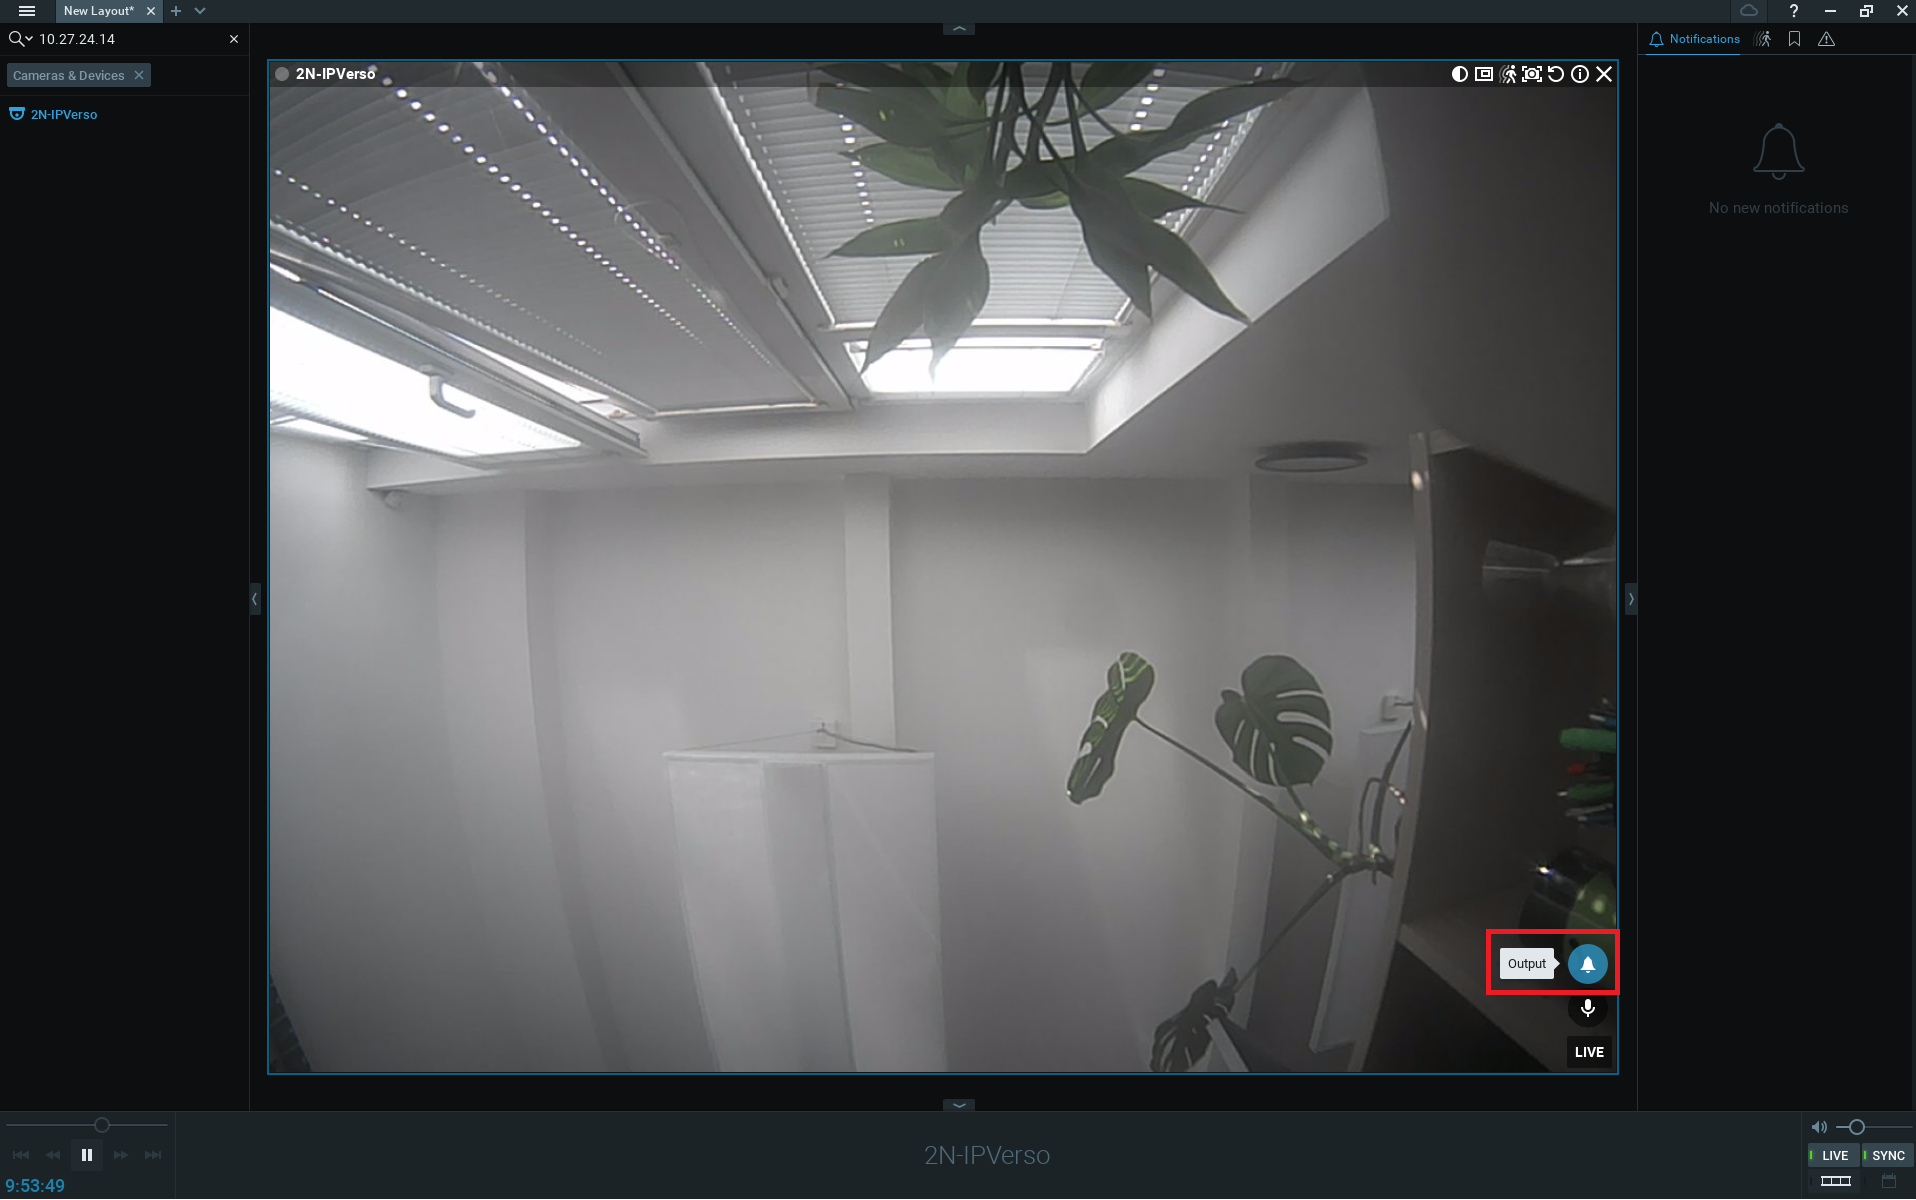
Now you can change level of output device via the button on your screen.

Right click on your camera and select ‘Camera Rules’ to configure.

Click on Add to new rule.
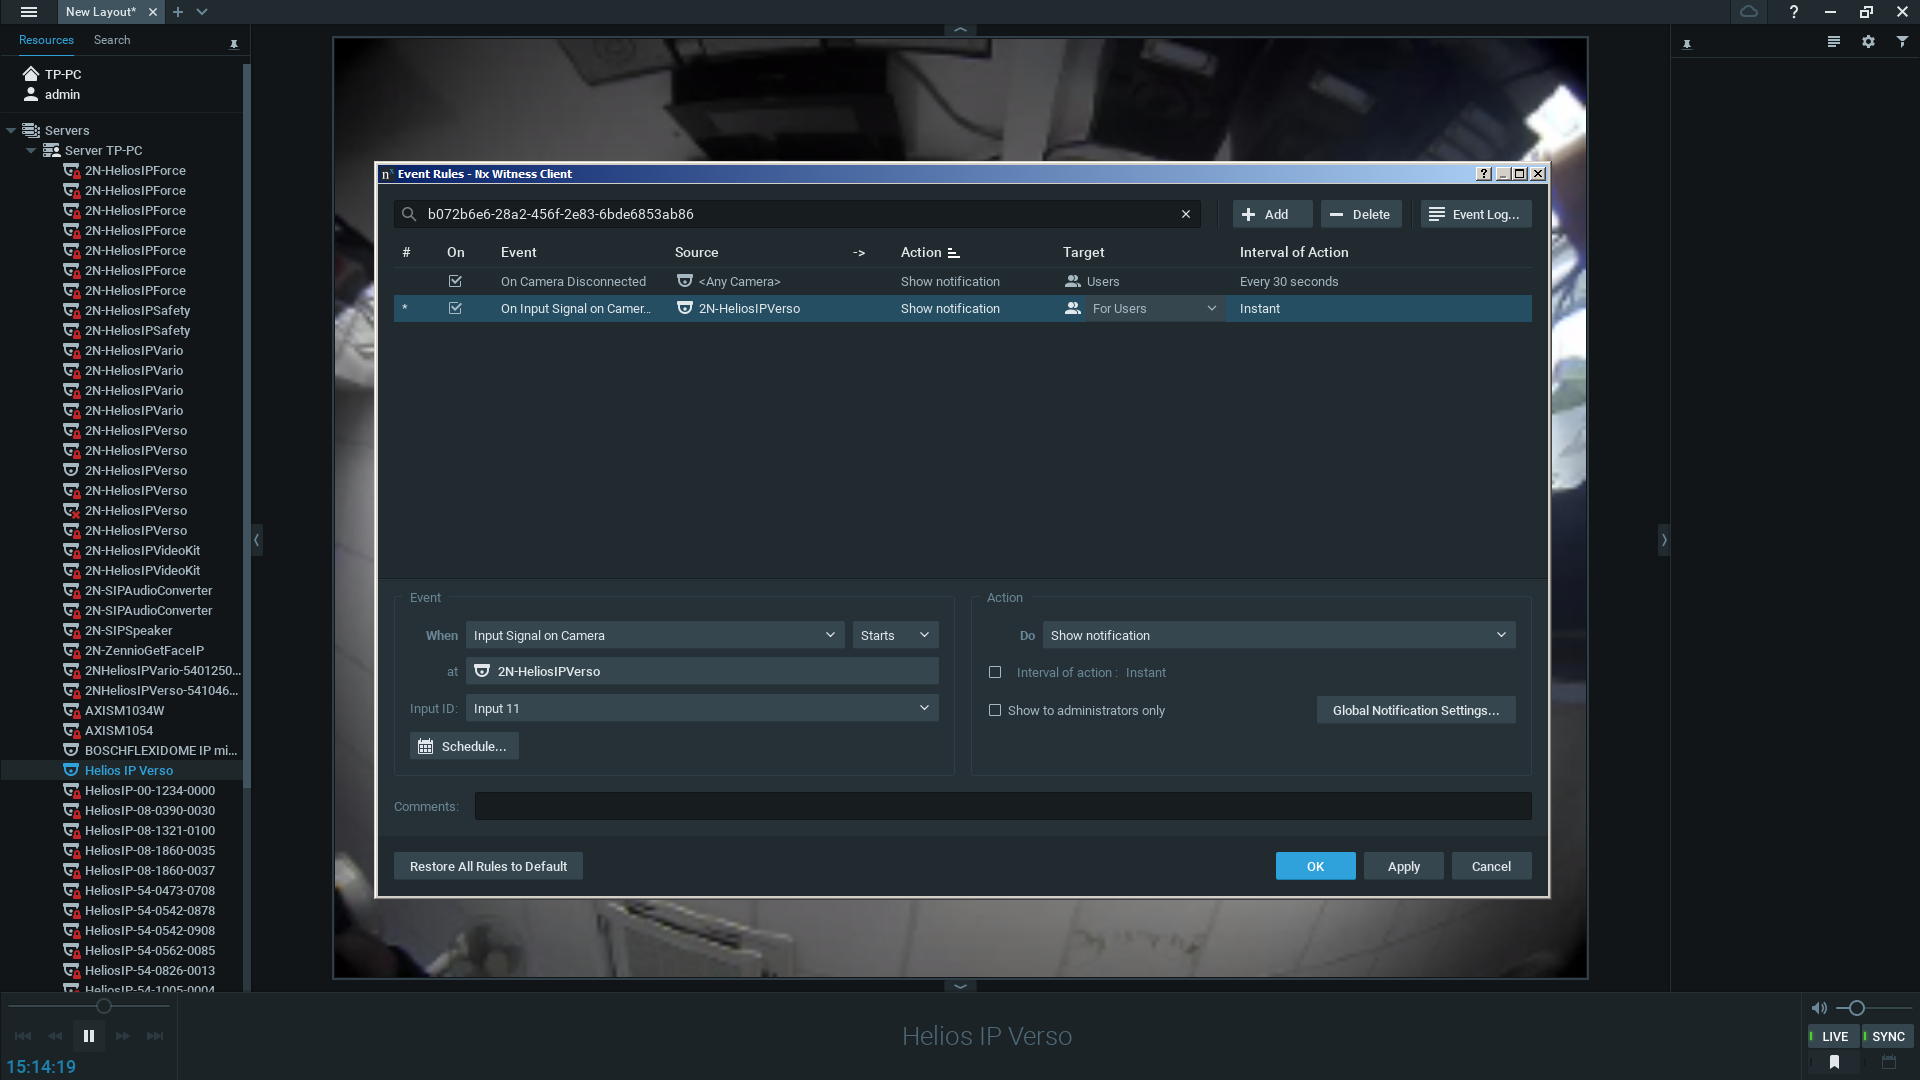
Set Event, Source, Action, Target and Interval of Action and save them.
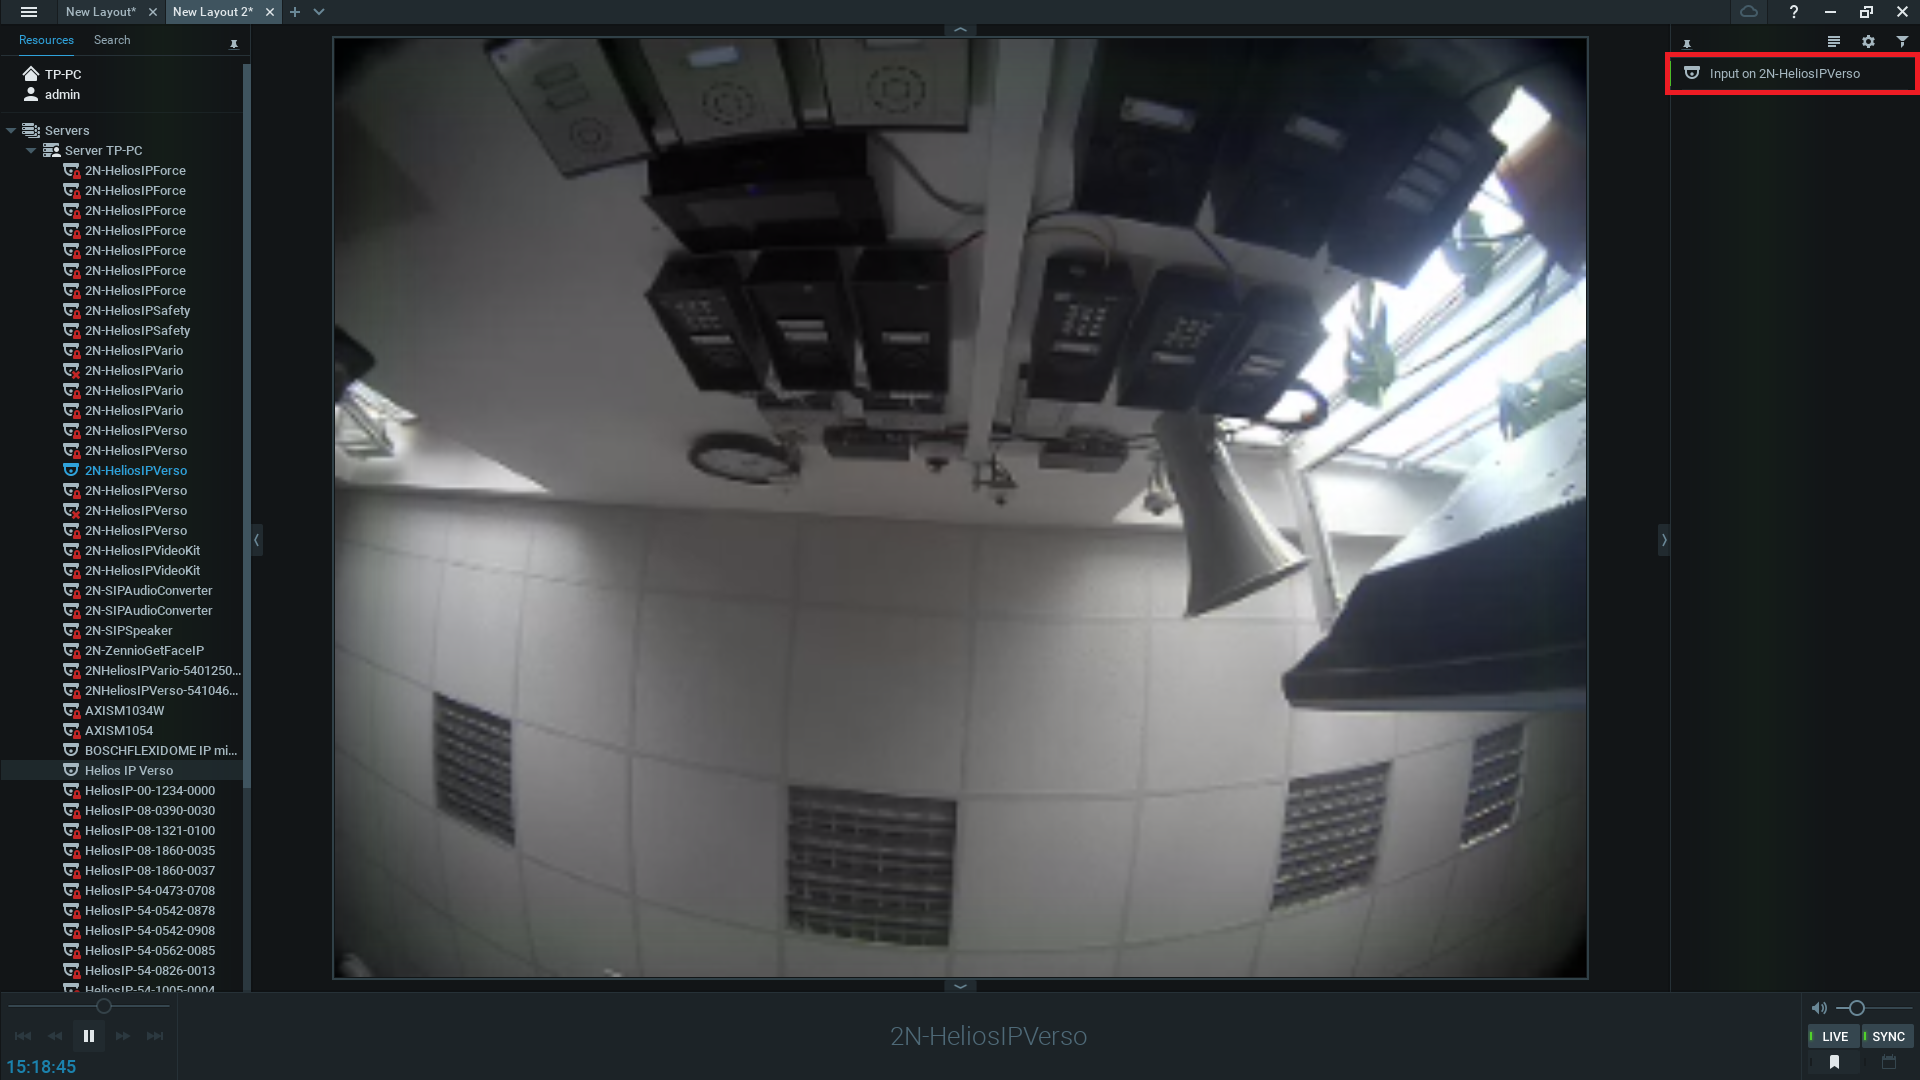
After you change Input Signal on Camera, Nx Witness show notification of event.

Version 3

Tested Functions

Nx WitnessVersion Helios IPScan deviceVideo from HIPAudio from HIPAudio to HIPSwitch controlEvents from HIP

3.0.0.15297

2.19.0.28.5

(tikot)(tikot)(tikot)N/SN/S(tikot)

2N Helios IP Settings

Check the ‘RTSP Server Enabled’ and Audio/Video Streams as below, then choose your preferred Video Codec from the drop down menu, also ensuring that the ‘UDP Unicast Enabled’ box is checked.

Navigate to the ONVIF section of the intercom settings. Set Discovery Mode to “Discoverable” and create user with Administrator rights.

Tested Features

The intercom should now be visible in the available cameras list, thanks to ONVIF discovery. Locate the intercom that you wish to add to the layout.

Right click on your camera and select ‘Camera Settings’ to configure.

With the camera settings window open complete the login and password window to match the ONVIF account settings in the intercom. Click the OK button to save settings.
Drag the intercom camera stream into the layout from the device list just like any other camera. You can now view and record the stream as per any camera added to Nx Witness.

Right click on your camera and select ‘Camera Settings’ to configure. Enable Audio and click the OK button to save settings.

Drag the intercom camera stream into the layout from the device list just like any other camera. In Live view or in recording. You can set audio volume in Live View at lower rightmost corner of Nx Witness.

Right click on your camera and select ‘Camera Rules’ to configure.

Click on Add to new rule.
Set Event, Source, Action, Target and Interval of Action and save them.
After you change Input Signal on Camera, Nx Witness show notification of event.

Used Symbols

(tikot) - Interoperable

(varování) - Work with limitation

(chyba) - Incompatible