Wavestore

Content

About

Version 5

Used Symbols

About

Wavestore is a sophisticated Digital Video Recording (DVR) system capable of recording analogue video, IP cameras, megapixel IP cameras, and audio. When recording analogue video signals, the state-of-the-art capture cards use the wavelet compression algorithm to reduce storage needs. The powerful software suite is designed for flexibility whilst maintaining ease of use. Although provided with a wealth of facilities, the Wavestore is simple to set up and operate, the controls being largely intuitive. Images are stored directly onto internal hard disks, and there are options to back up onto several other types of media.

http://www.wavestore.com/technologies/software

Version 5


Tested Functions

Wavestore2N IP Intercom versionScan deviceVideo from HIPAudio from HIPAudio to HIPSwitch controlEvents from HIP

5.48.33

2.11.1.20.4

(tikot)(tikot)(tikot)(chyba)(chyba)(chyba)

2N IP Intercom Settings

 Enable parameter RTSP Server Enabled in menu Services / Streaming.

Enable Onvif and set authorisation data in menu Services / Onvif.

Tested Features

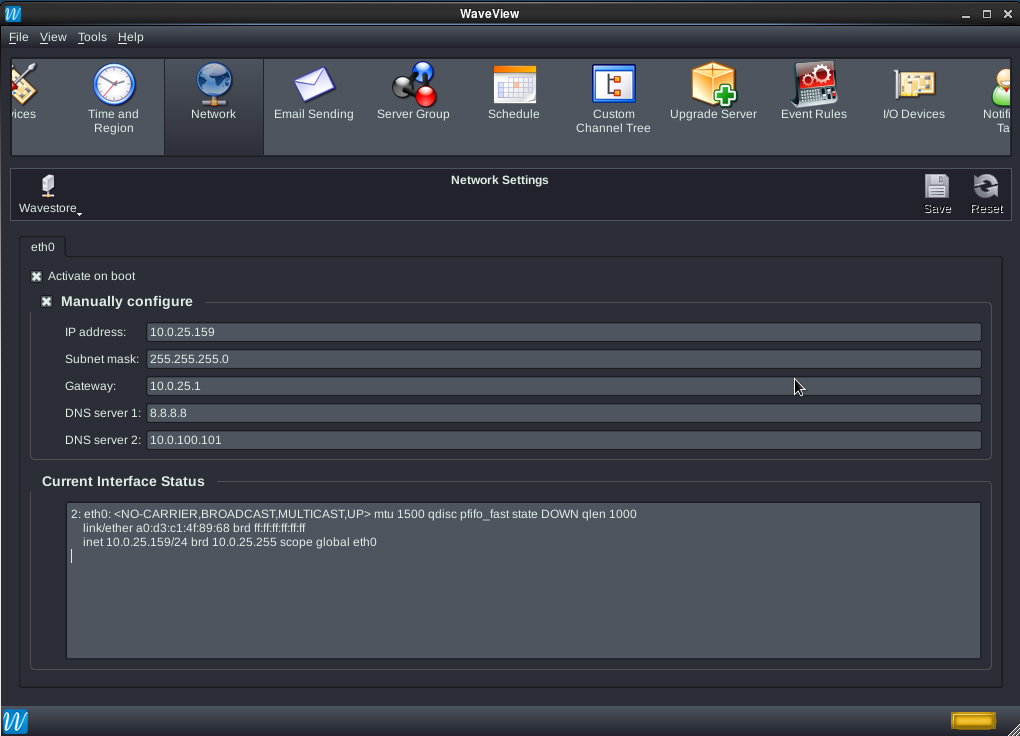
After the WaveStore server installation you can connect directly on the server via WaveView software as the part of basic configuration. To enter the setup menu you need to login as the default user: install/a (username/password) and change the View to Setup. As the first step is recommended to configure the network according to local network or use the DHCP server. When the network is properly installed you can connect remotely to this server via the same software. Please keep in mind, after any changes in the setting, allways click on SAVE icon.

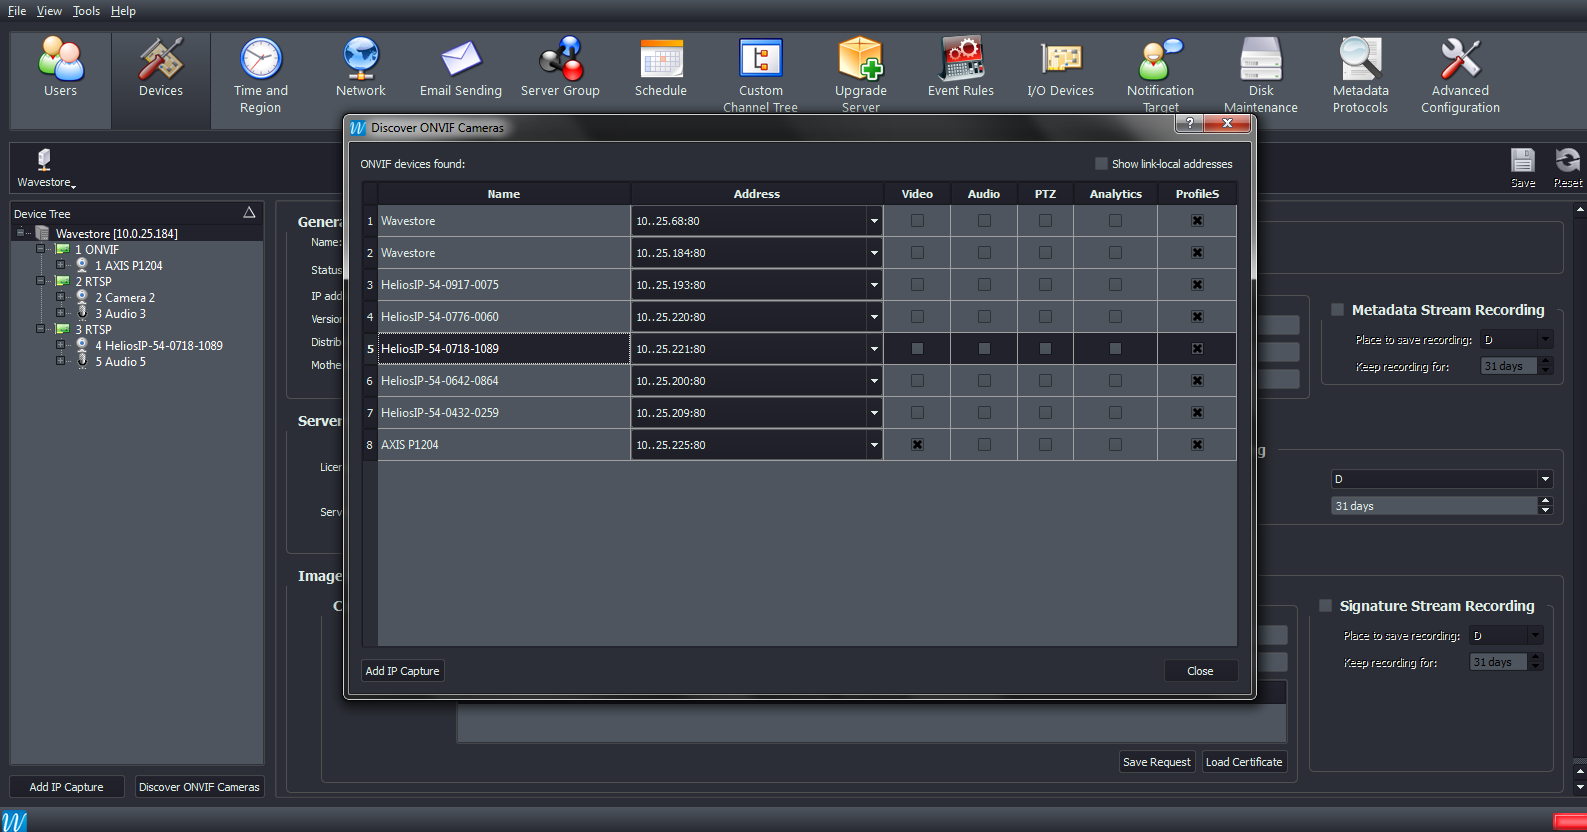
New device can be added in Devices section by a simple click on the button: Discover ONVIF Cameras or add Camera manually. Following window with discovered camera will appear. Select the camera in our case it will be the 2N IP intercom and click on the Add IP Capture button. Login screen to the particular camera appears, insert the login parameters.
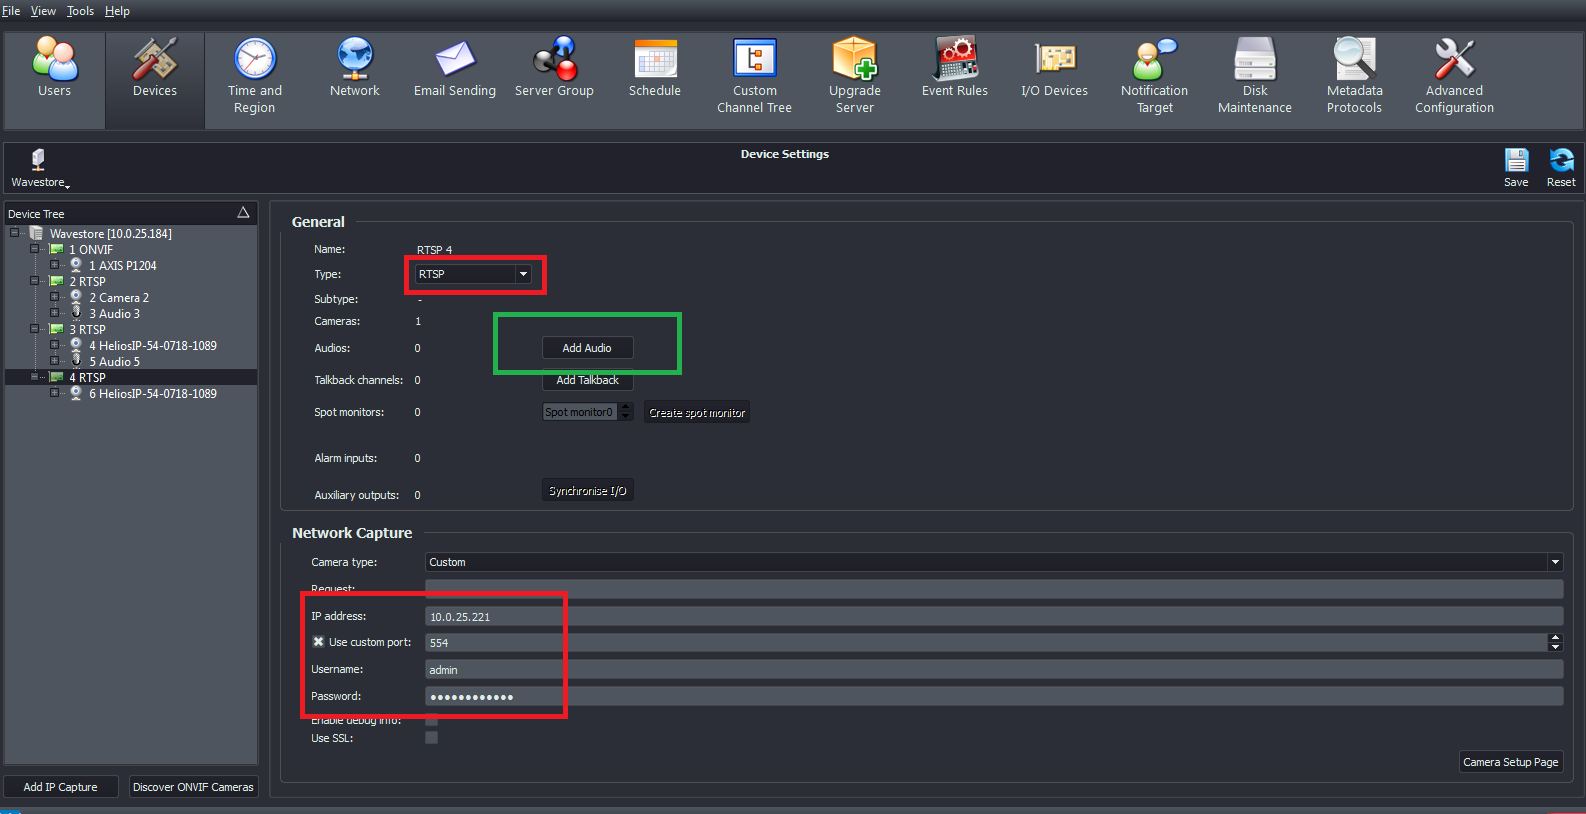
Now you can see 2N IP intercom in the Device tree. You need to change type to RTSP instead of ONVIF. In network capture setting set Camera type to Custom. Please check colomn IP address of the camera (whole address without port specification) and mark the option use custom port and fill 554.

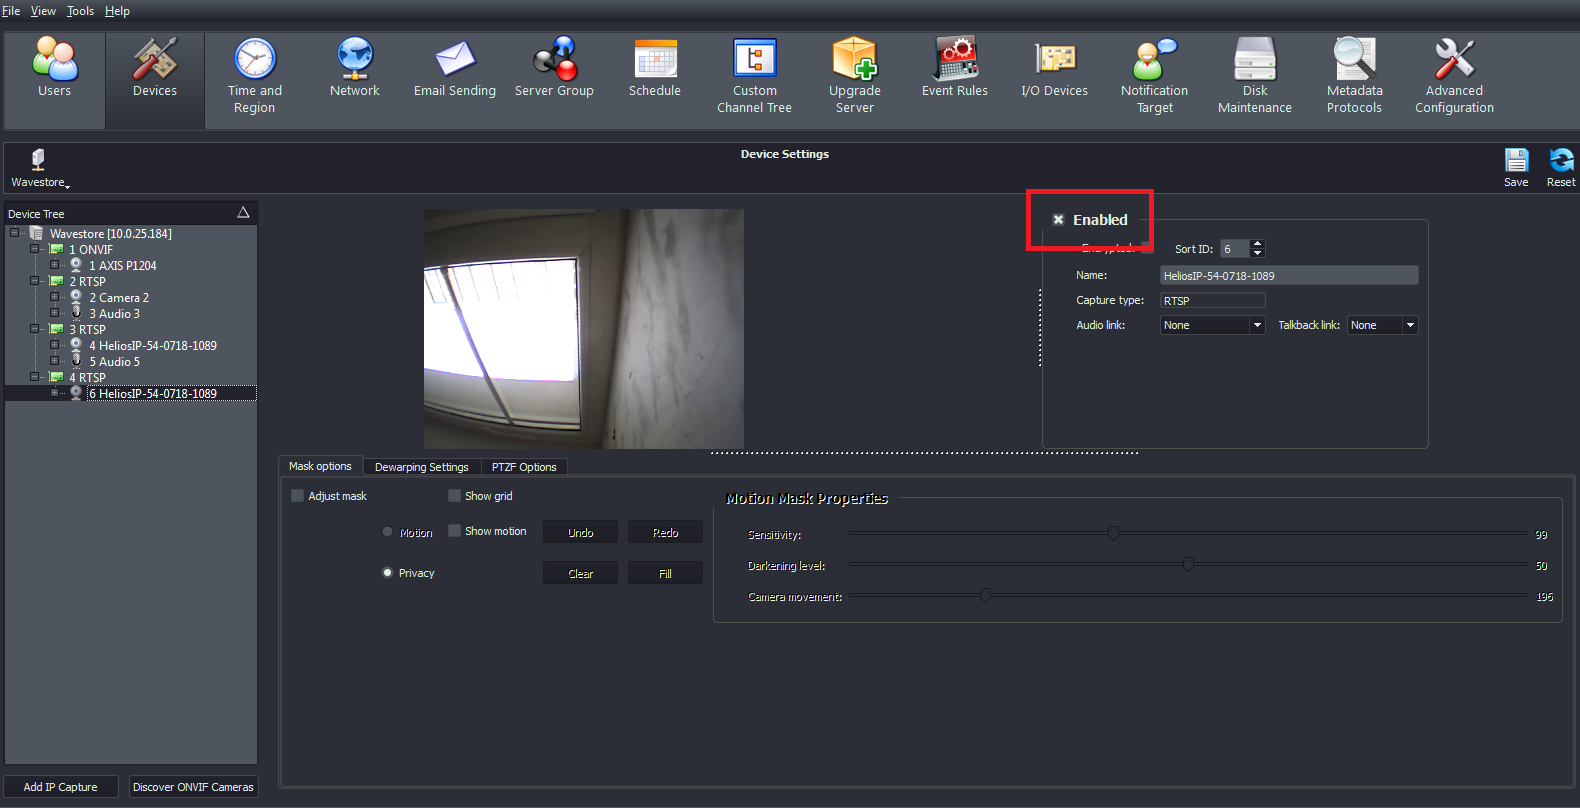
After this setting you can see list of paired devices in the table Device Tree. If the camera should be viewable by a common user it has to be enabled. Users can be managed in section Users. The default password "a" is attached to every new created user after first login it will appear the window for changing this password. So now you can see the video stream from 2N IP intercom.

If you also want to hear the audio you have to add audio track according to picture bellow (green rectangle).

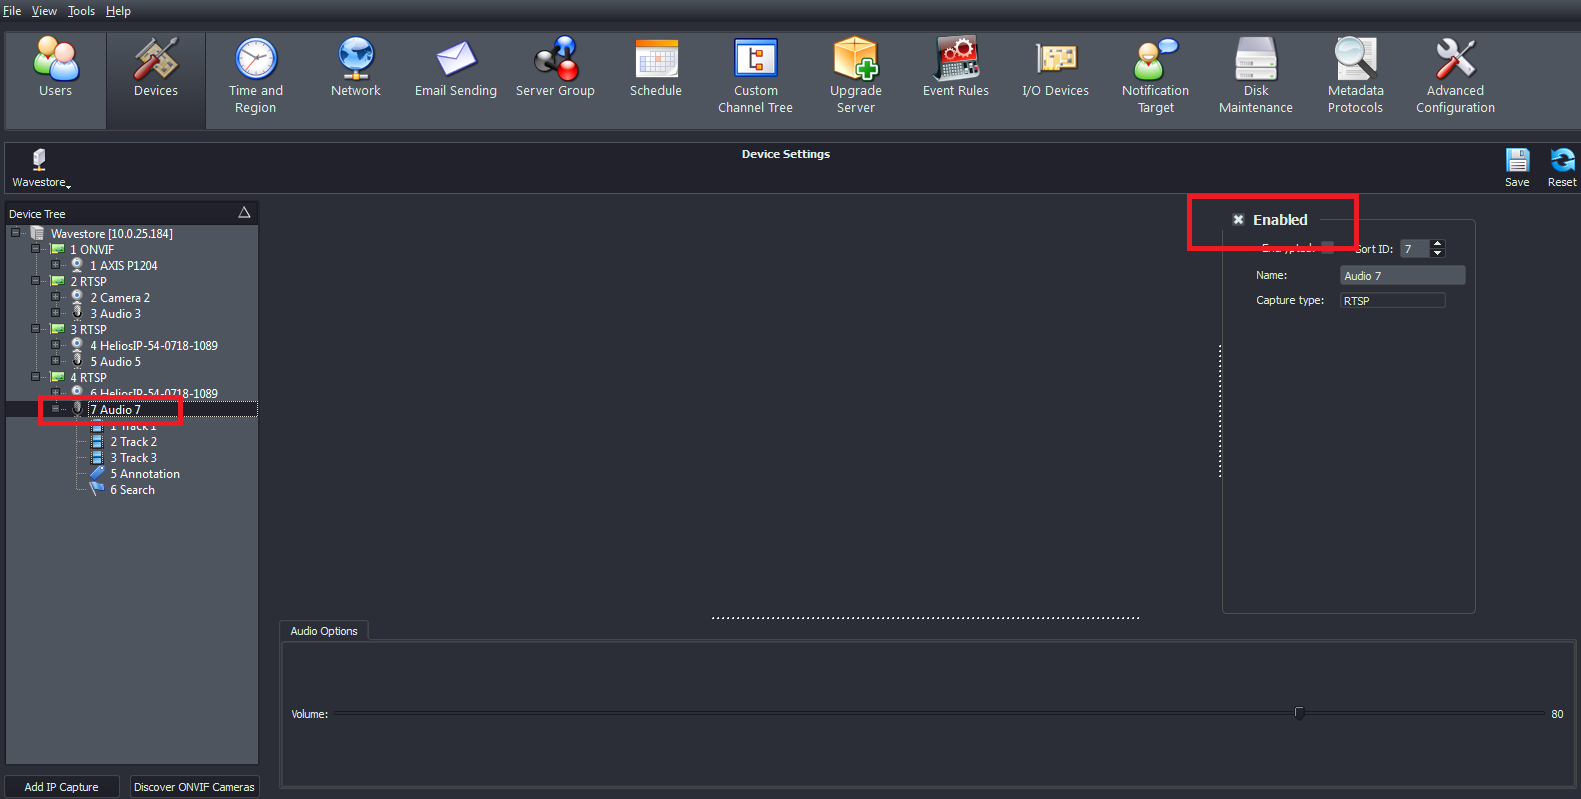
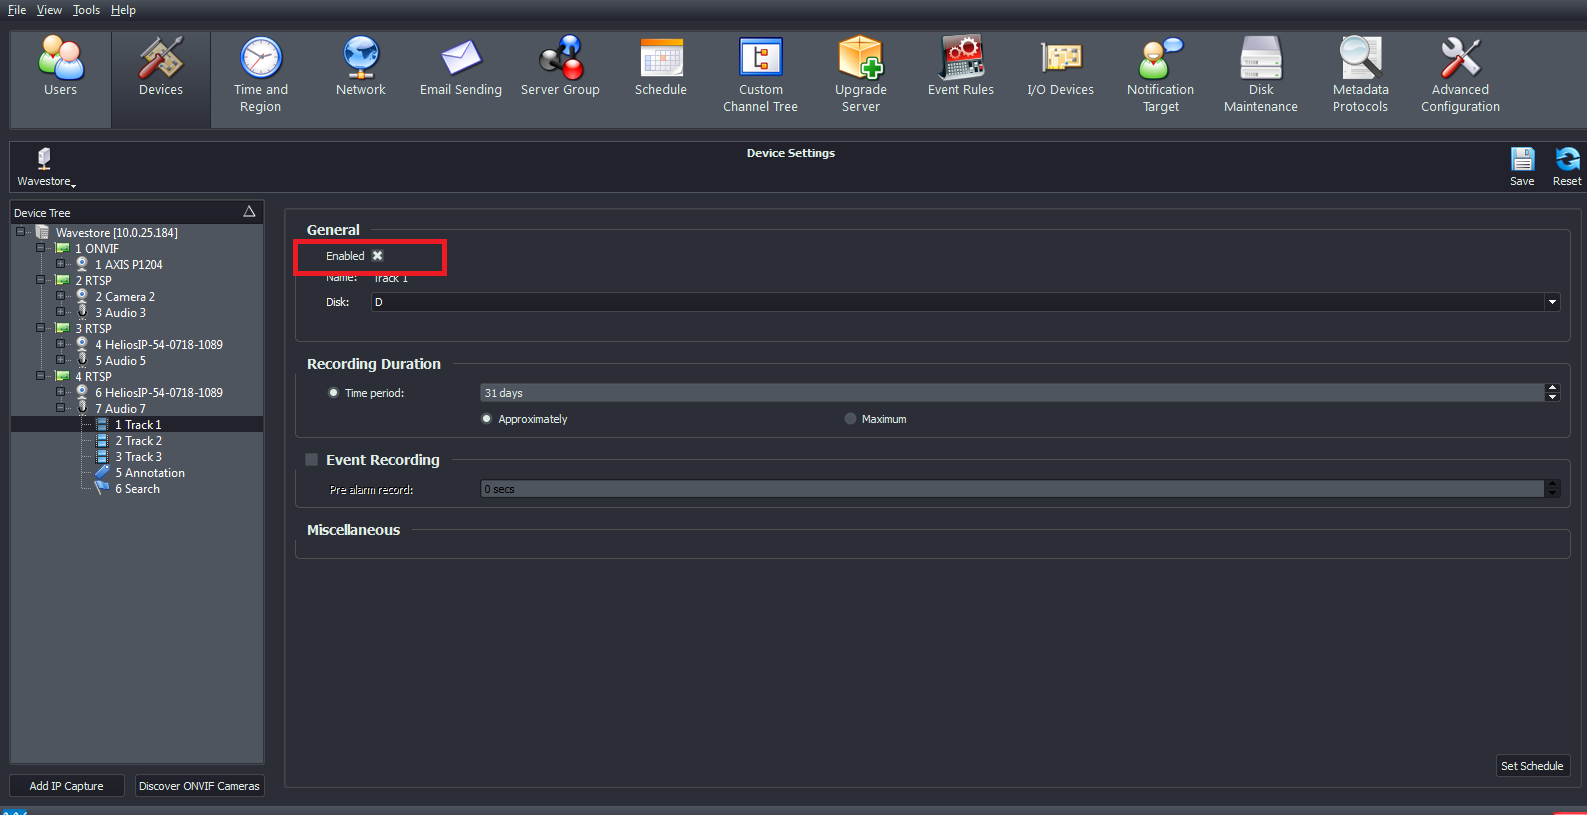
New Audio track will appear in Device tree under particular device. You have to enable AUDIO and audio Track too, according to pictures bellow.


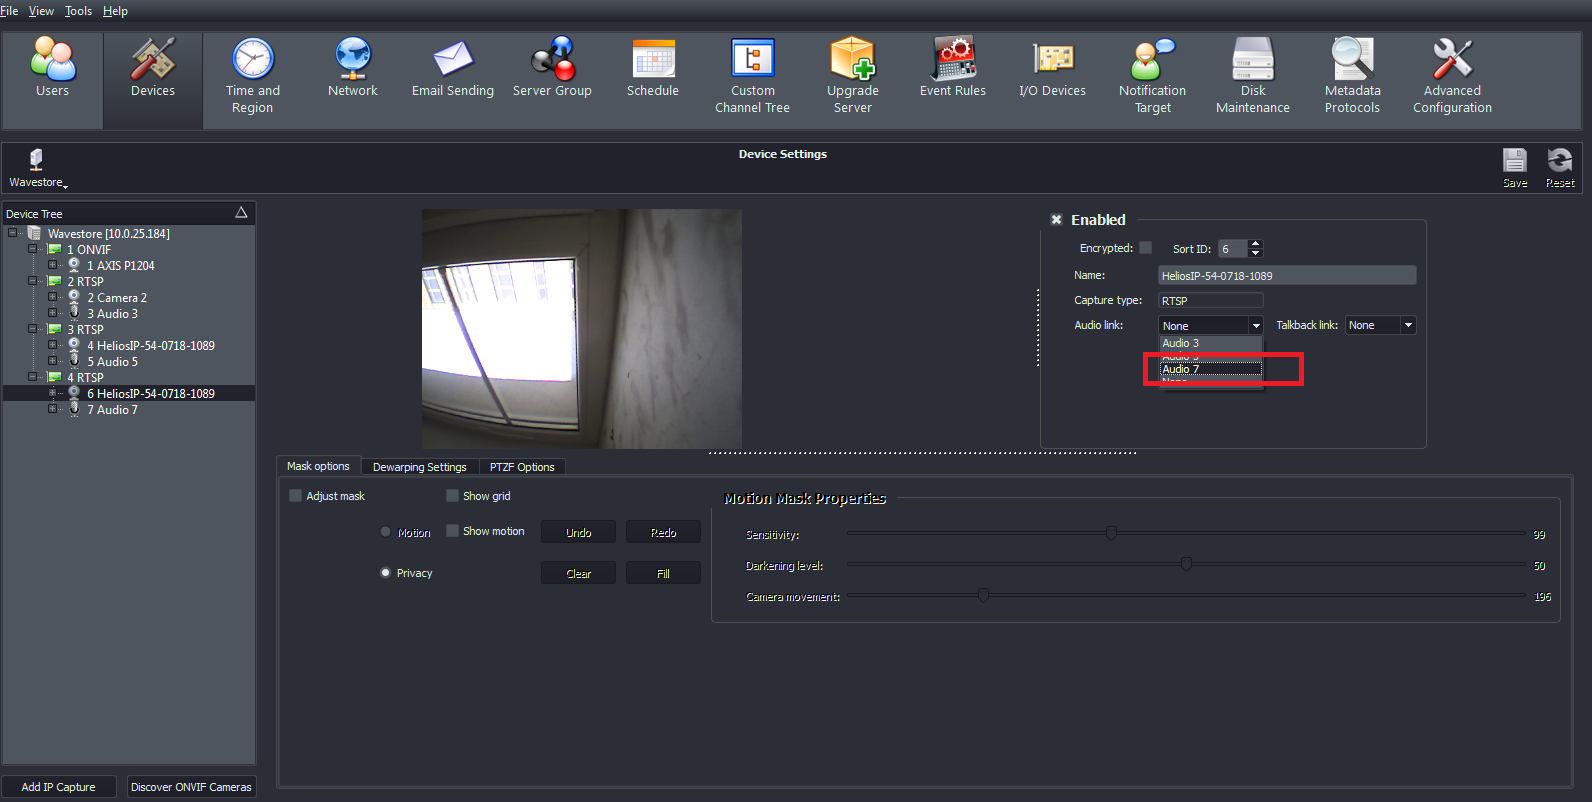
Last thing is to pair Video and Audio tracks. This can be done in video track settings by a selecting one of Audio link.
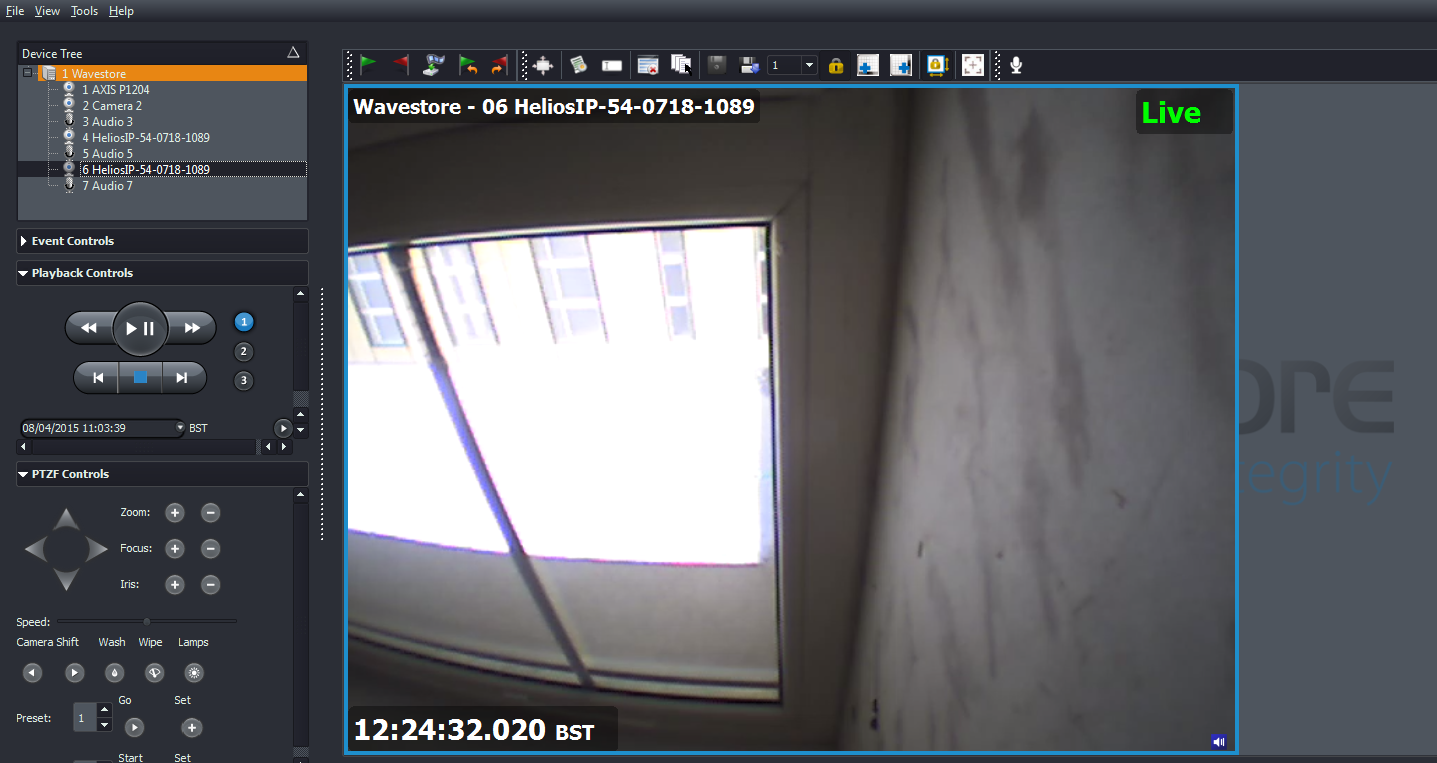
After all this settings you can see Video and hear the audio from 2N IP intercom also from the Main page.

Used Symbols

(tikot) - Compatible

(varování) - Work with limitation

(chyba) - Incompatible