2.2 Mechanical Installation
2N® IP Style is designed for surface or flush mounting. Additional accessories are required for each type of installation, which are not part of the main unit package.
The recommended height is 100–150 cm for standard installations and 100–120 cm for disabled persons from the floor to the device camera level. The installation height may vary depending on the device use.
2N® IP Style Main Unit Installation
It is assumed that the chassis (2.2.1 Chassis Installation) or the flush mounting box (2.2.2 Mounting Box Installation) and all of the required cables have been installed. The recommended length of the accessible cables is 35 cm.
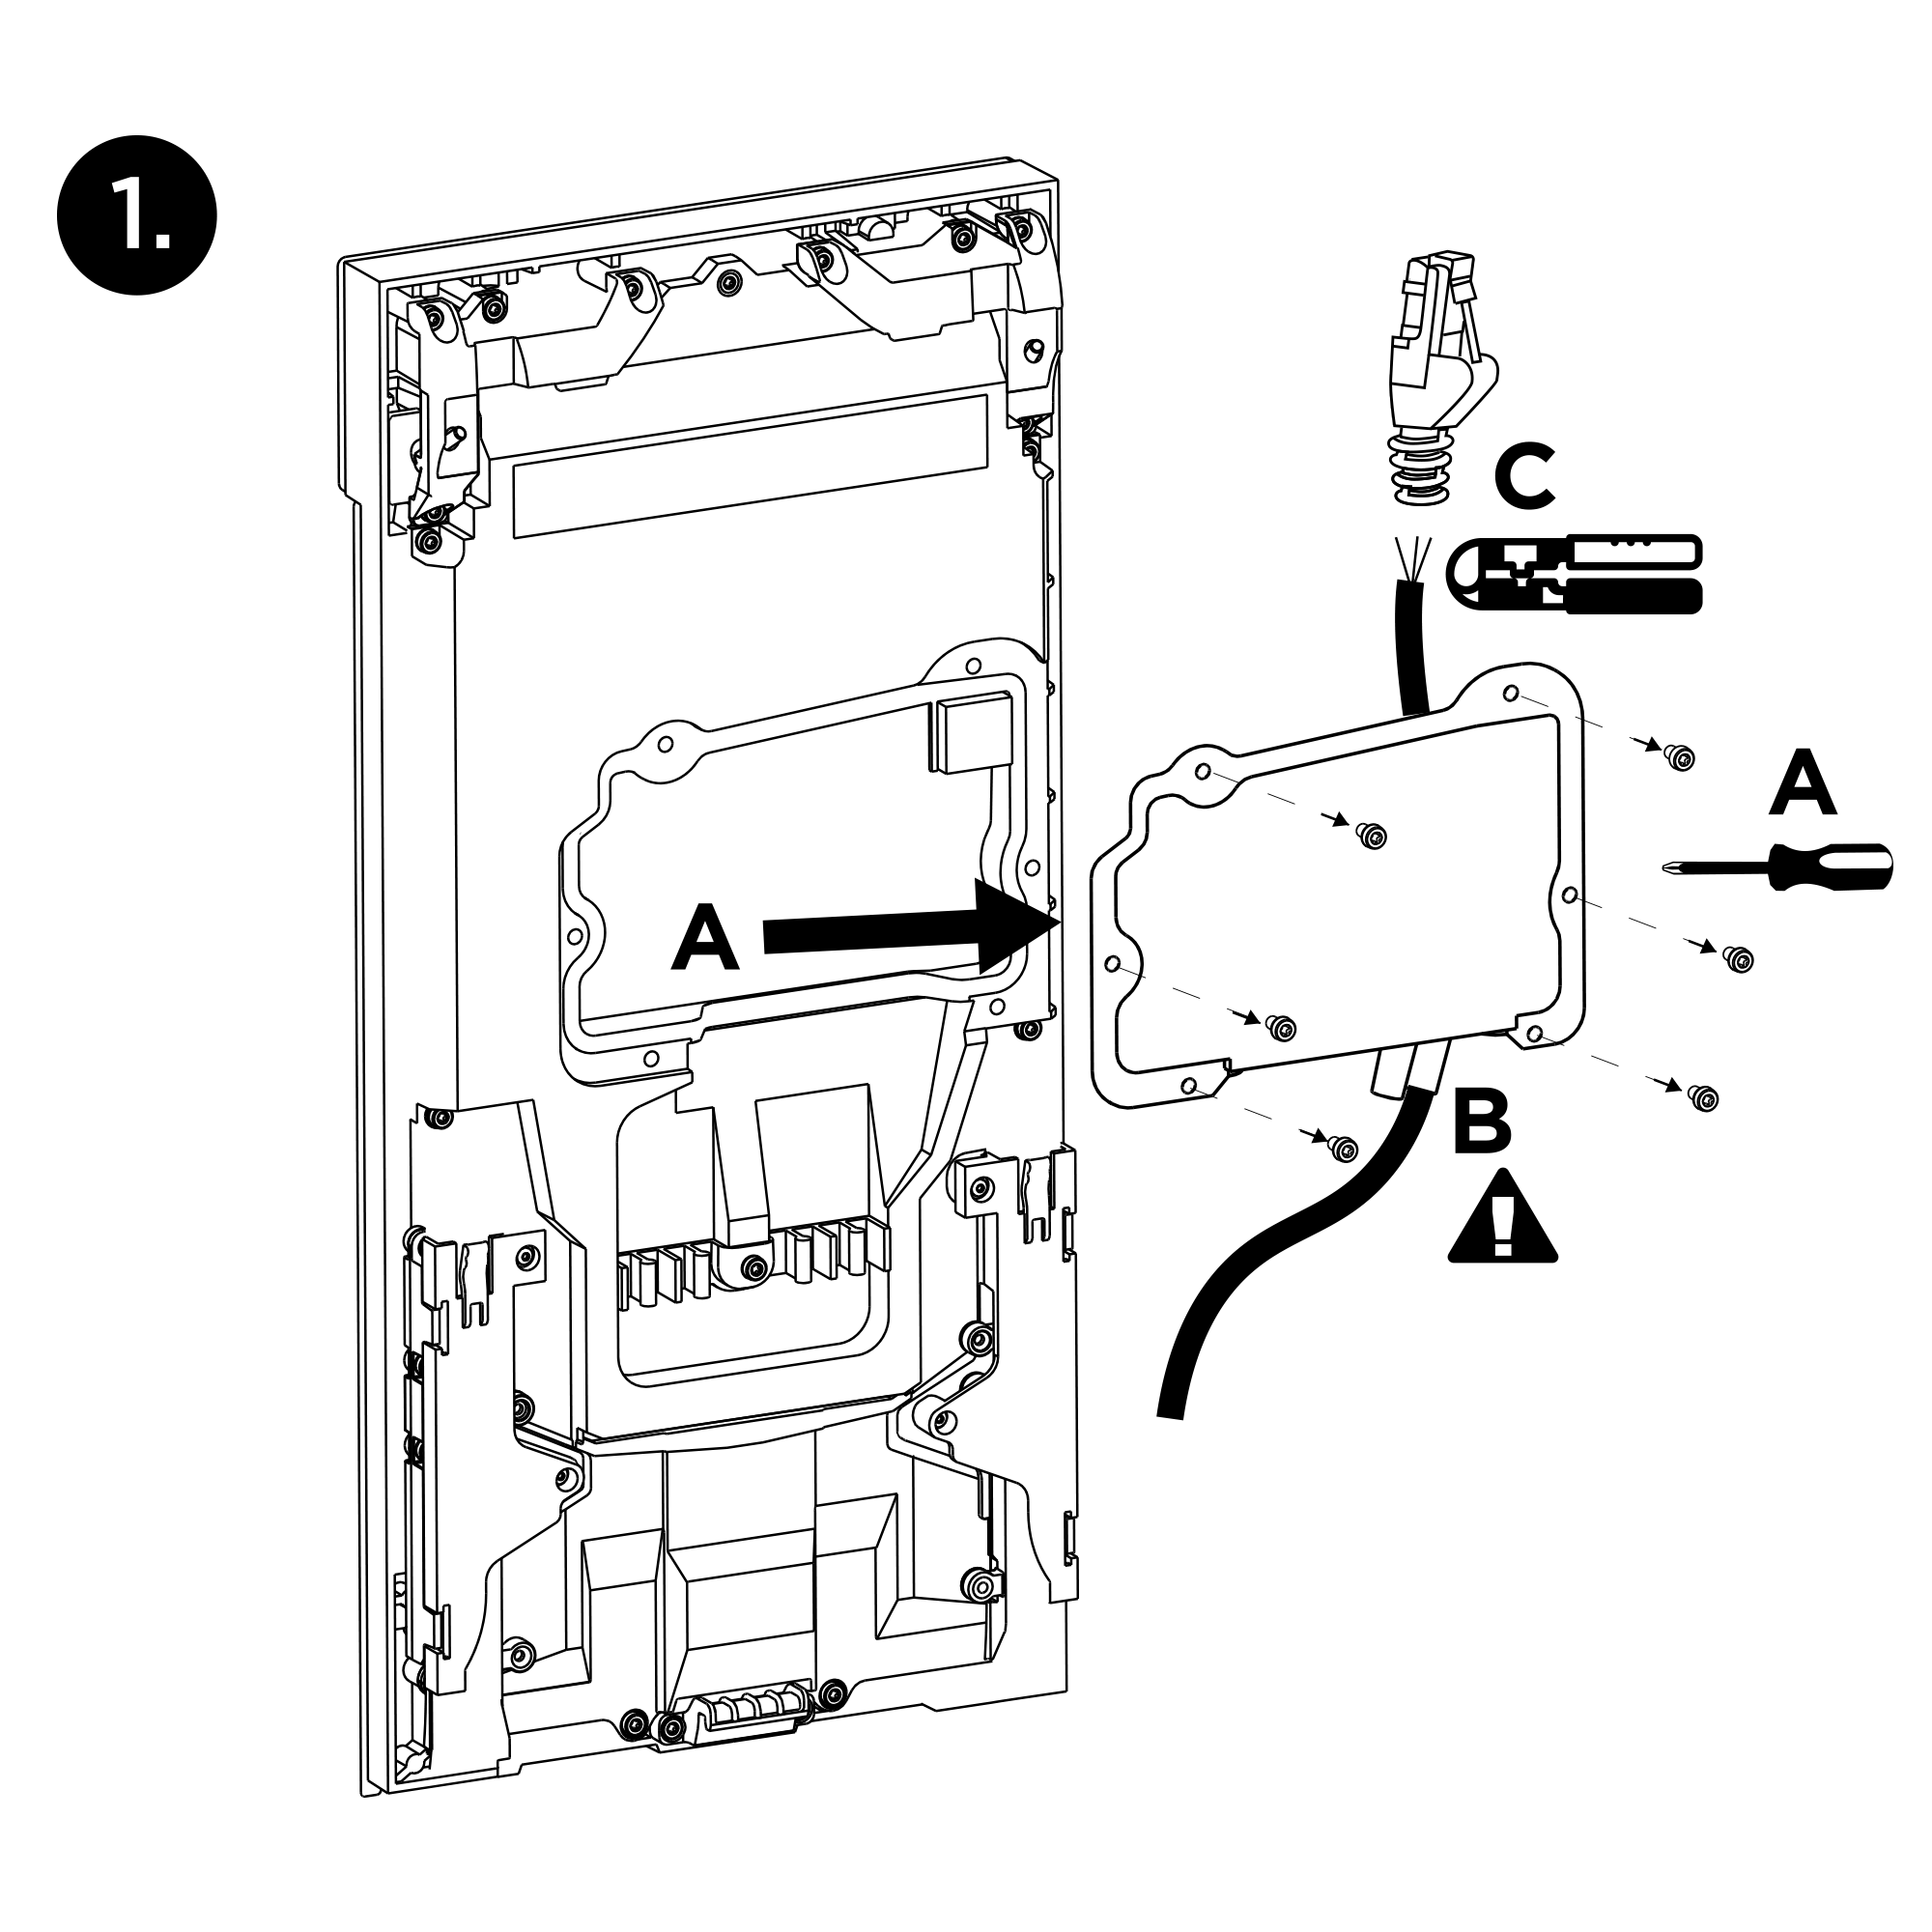
Unscrew the connector cover on the back of the device. Thread all of the unterminated cables (i.e. without terminals, end pieces, etc.) through the bushing on the inside of the connector cover. After threading the cables through the bushing, fit the required end pieces (1).
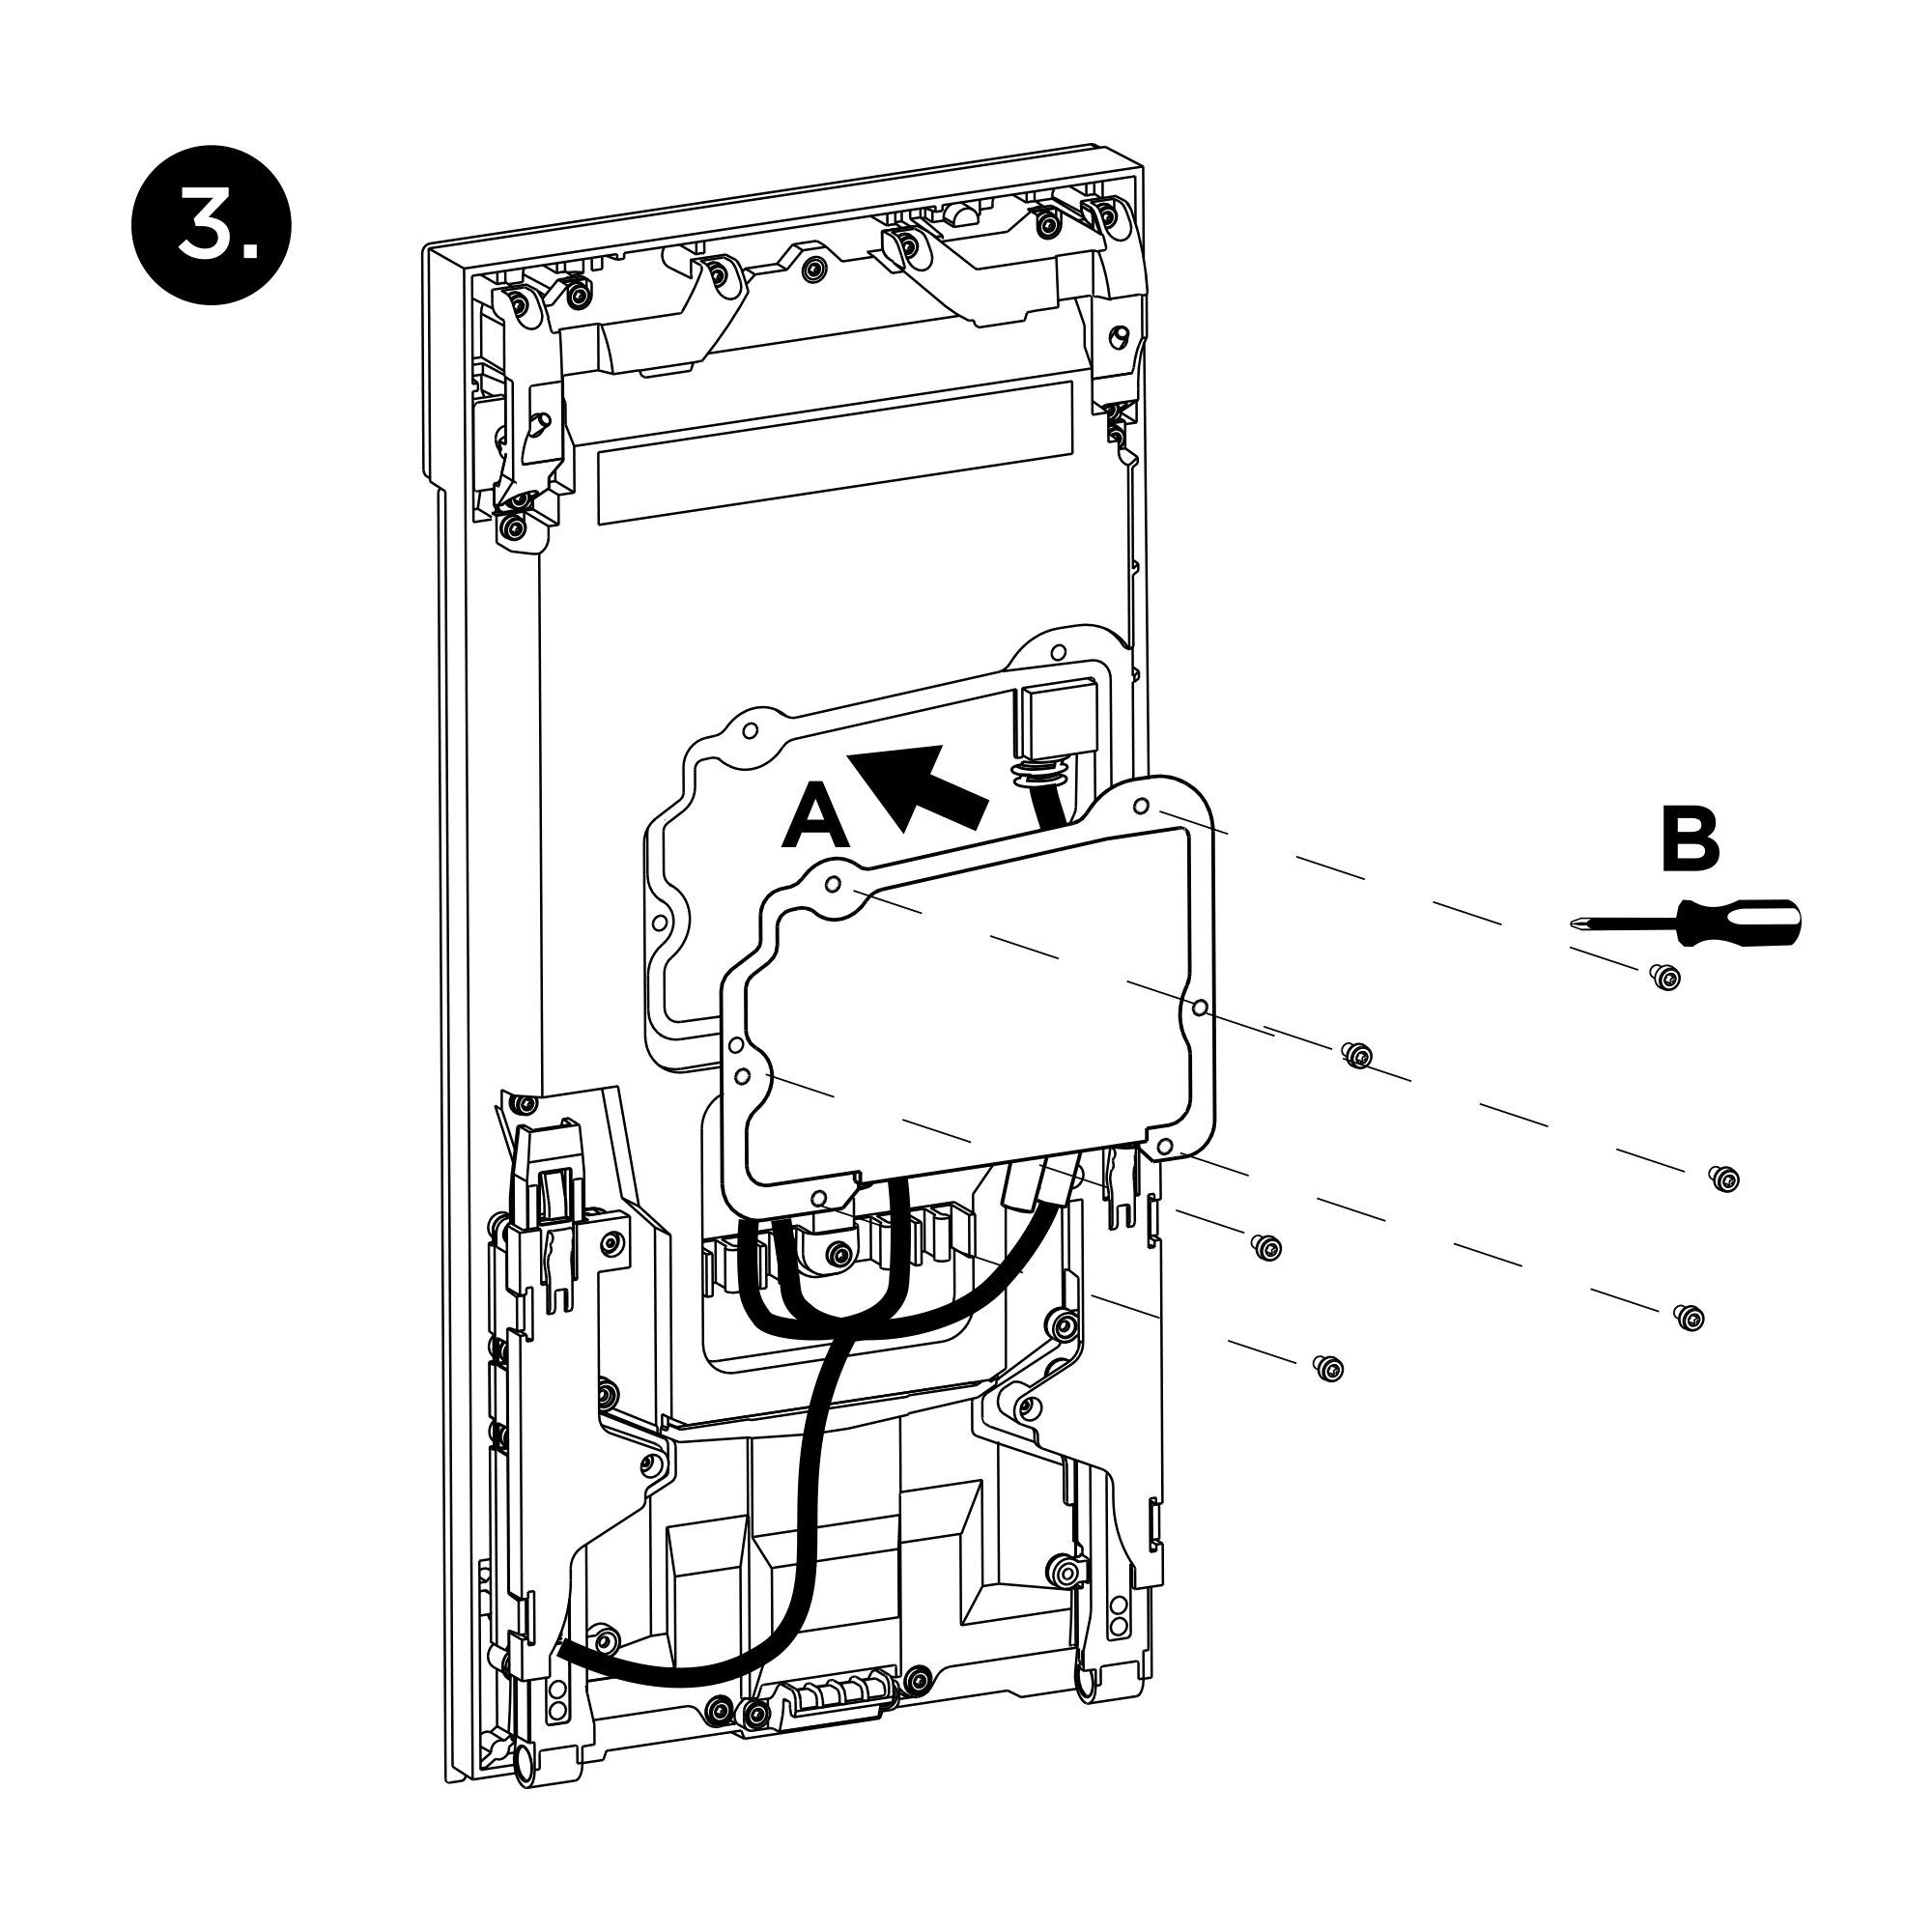
Fold out the mounting bracket located at the bottom of the chassis or flush mounting box. Fit the profiles on the device back onto the mounting bracket and slide them down to the lowest possible position, anchoring the device by snapping it into place (2A).
Connect all the cables to the device (2B). The mounting bracket provides sufficient support for cable installation and so it is unnecessary to support the device in any way.
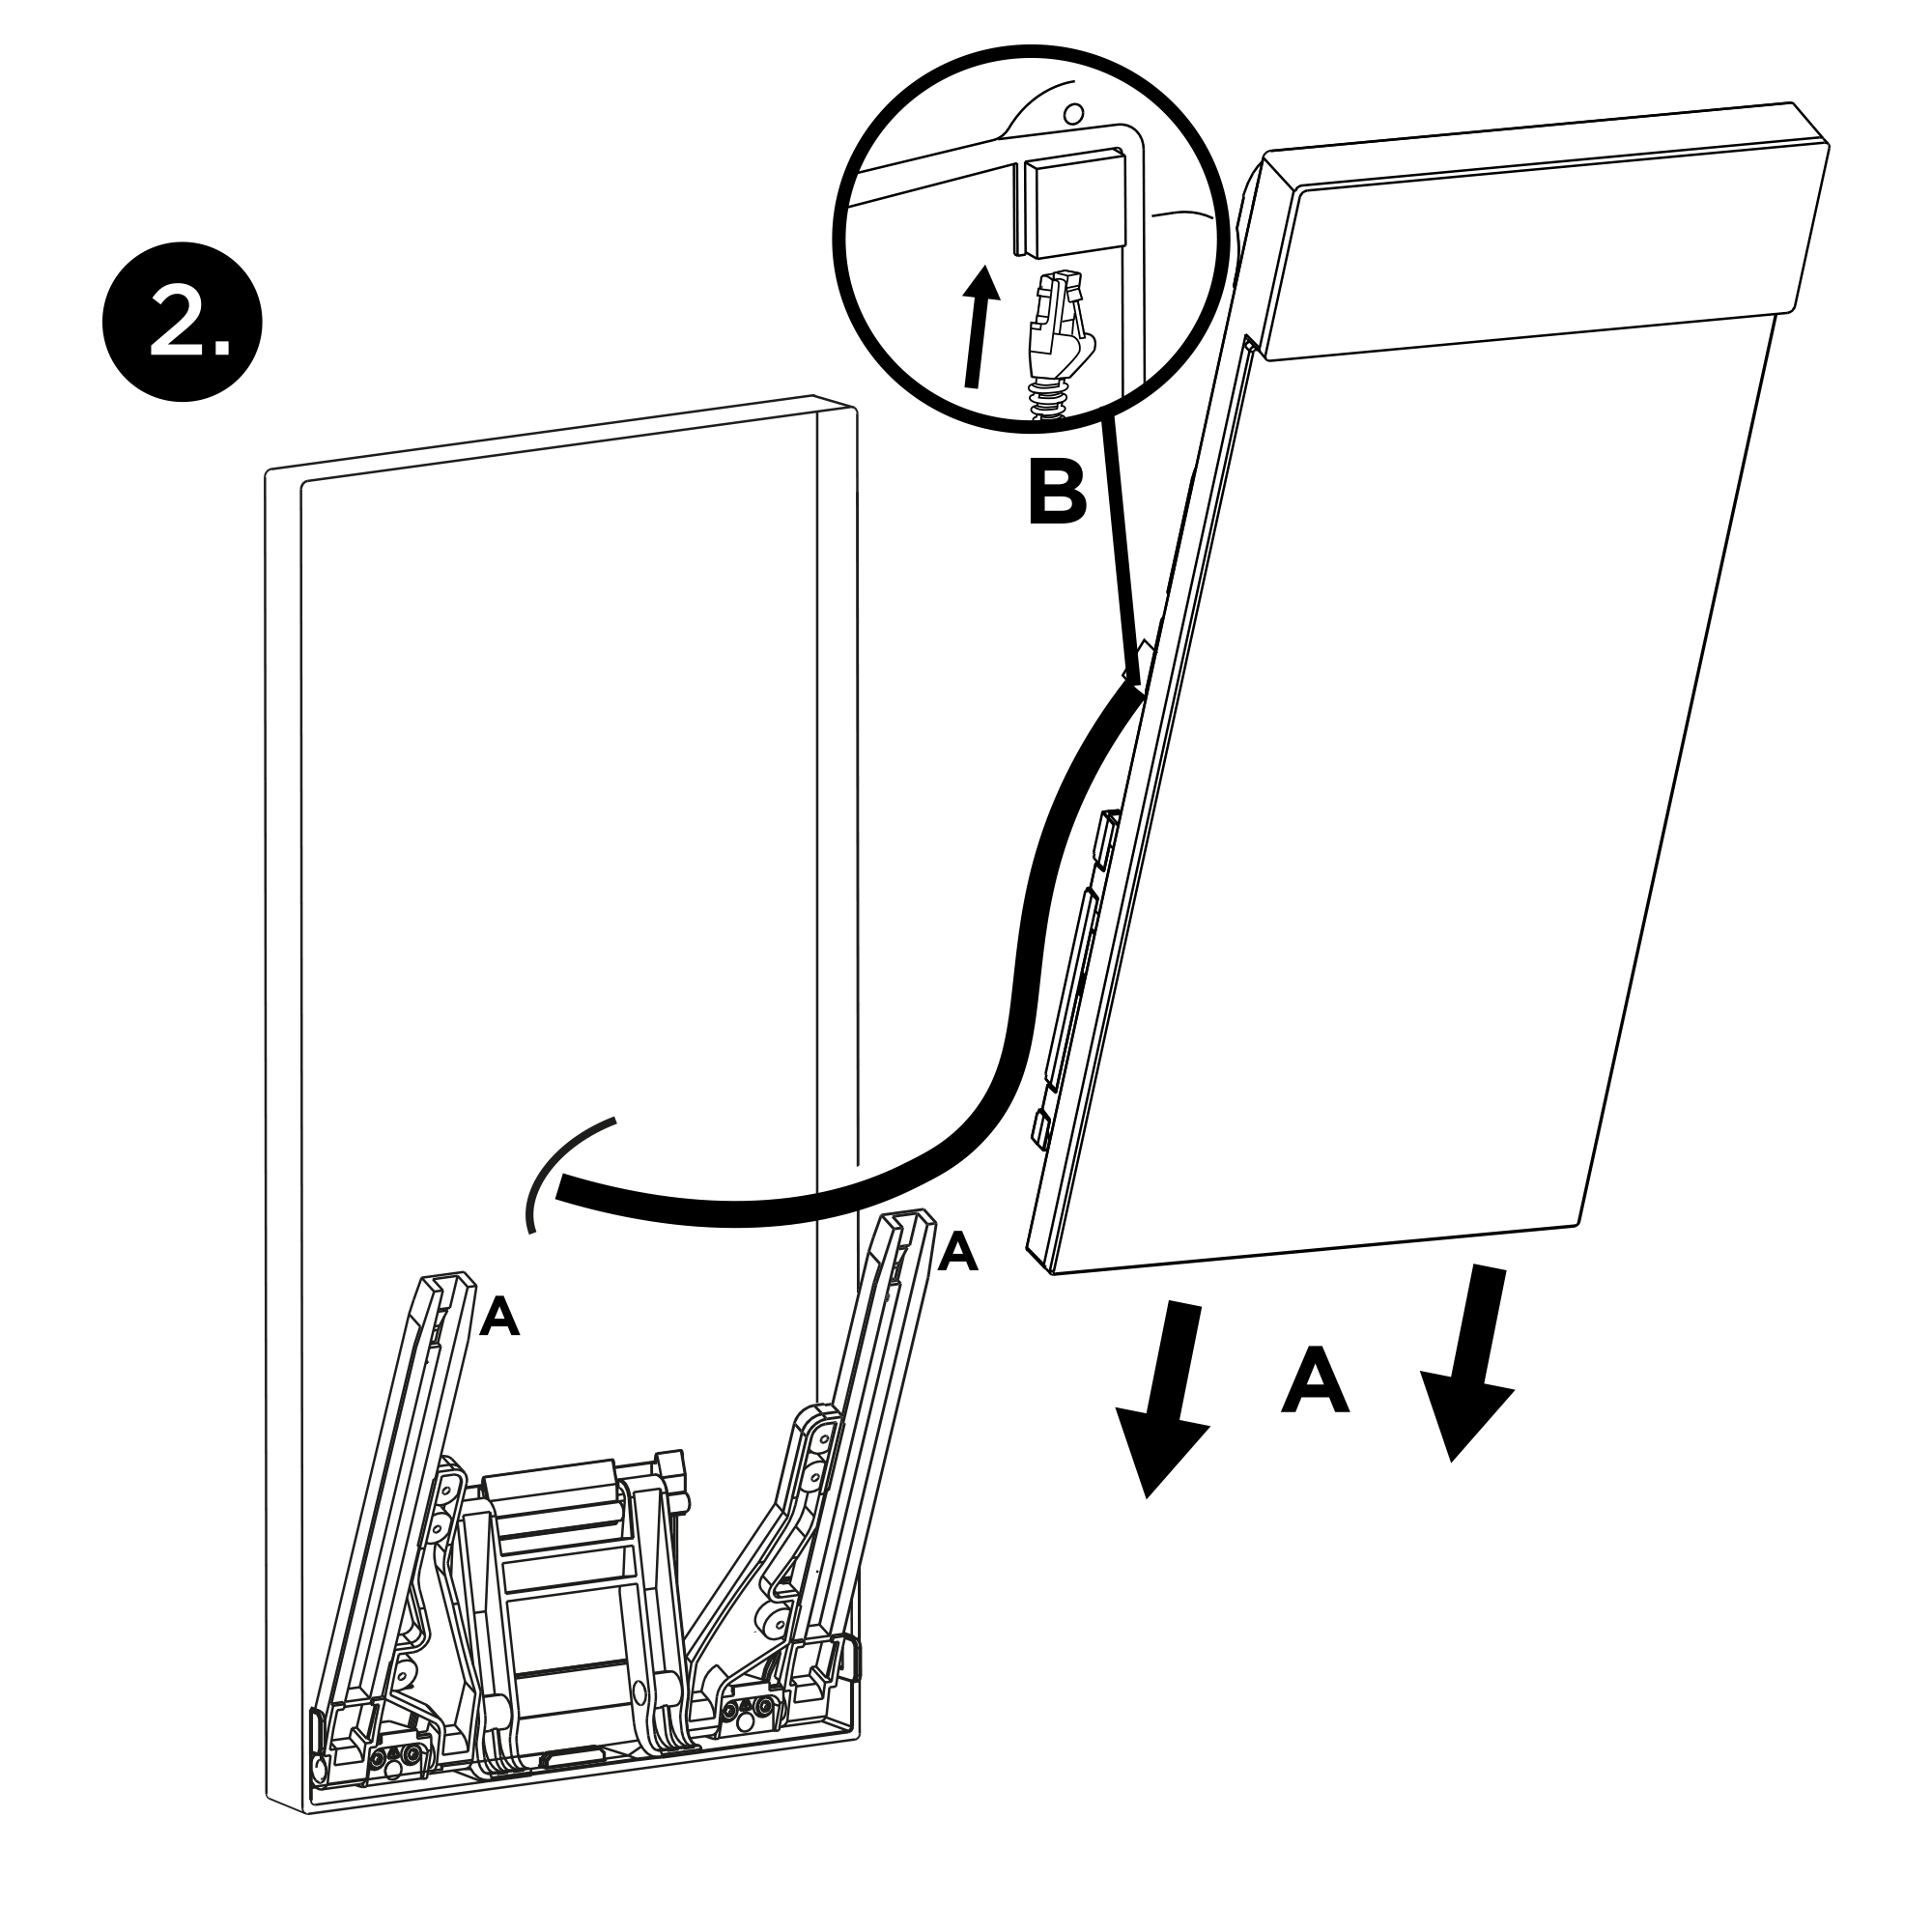
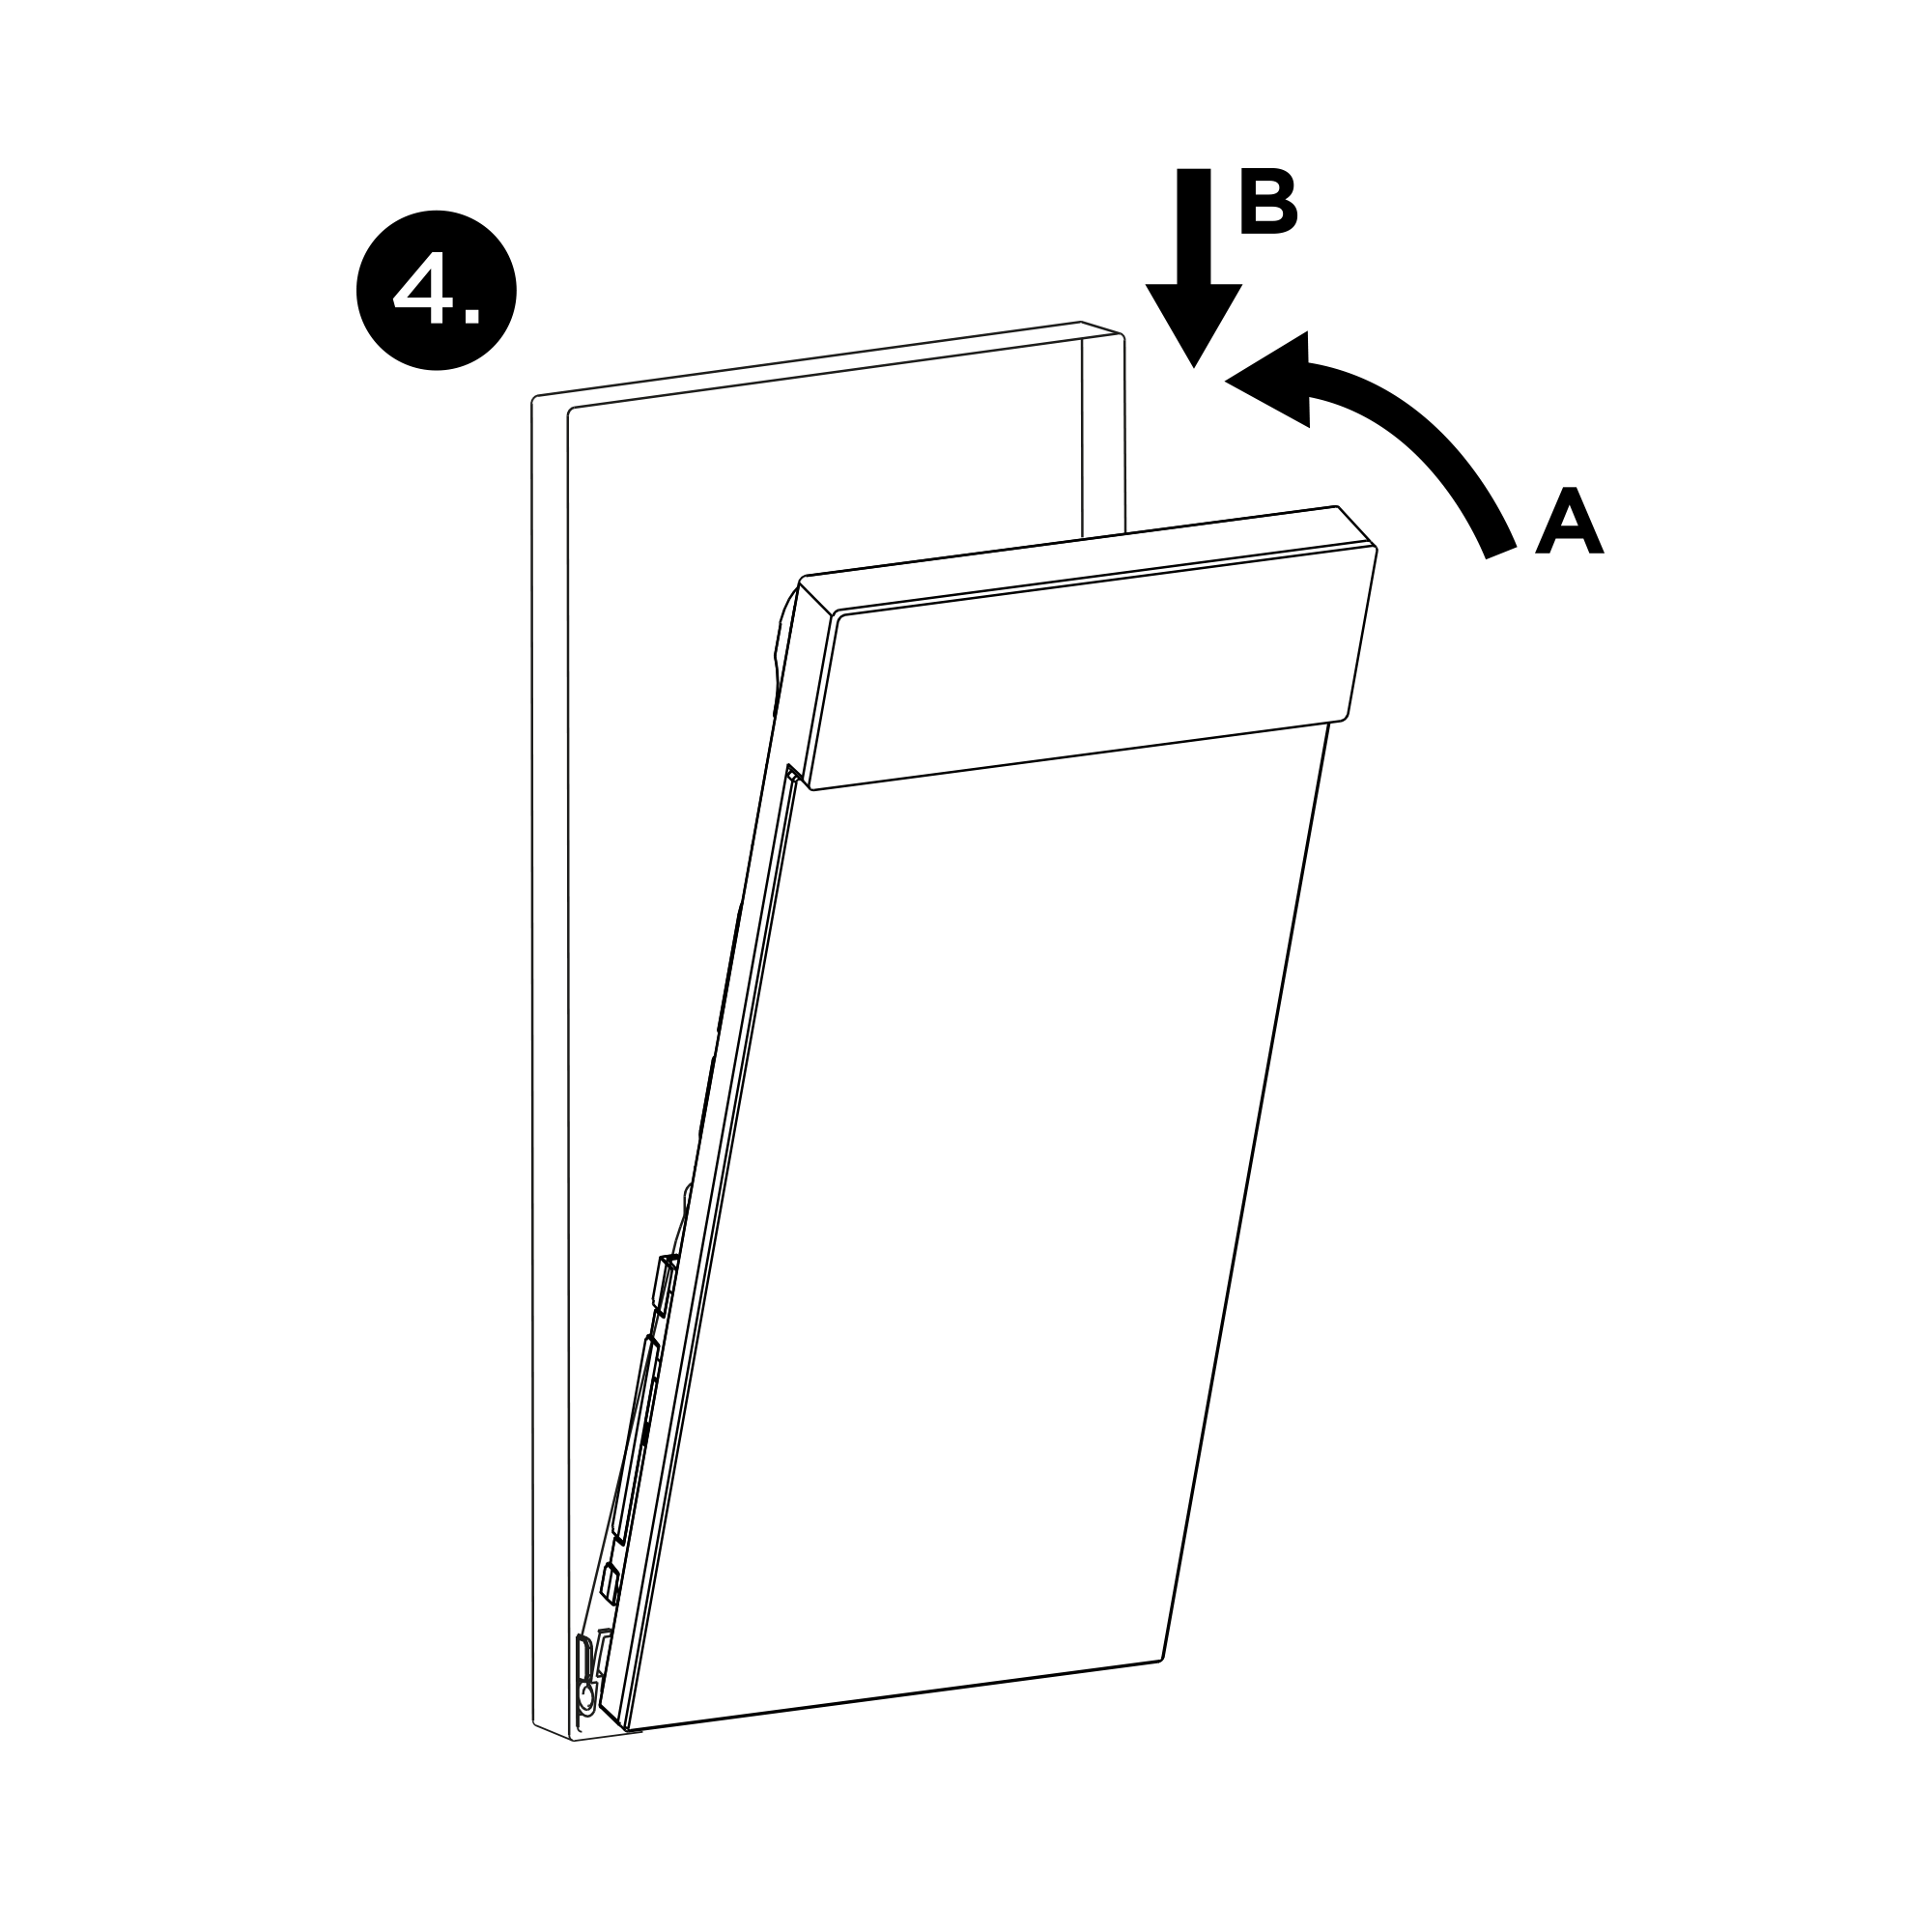
After connecting and securing the superfluous cabling in the clips (3A), screw the connector cover back on (3B), fold in the device towards the chassis or the flush mounting box (4A) and then press downwards (4B) to seal the installation.
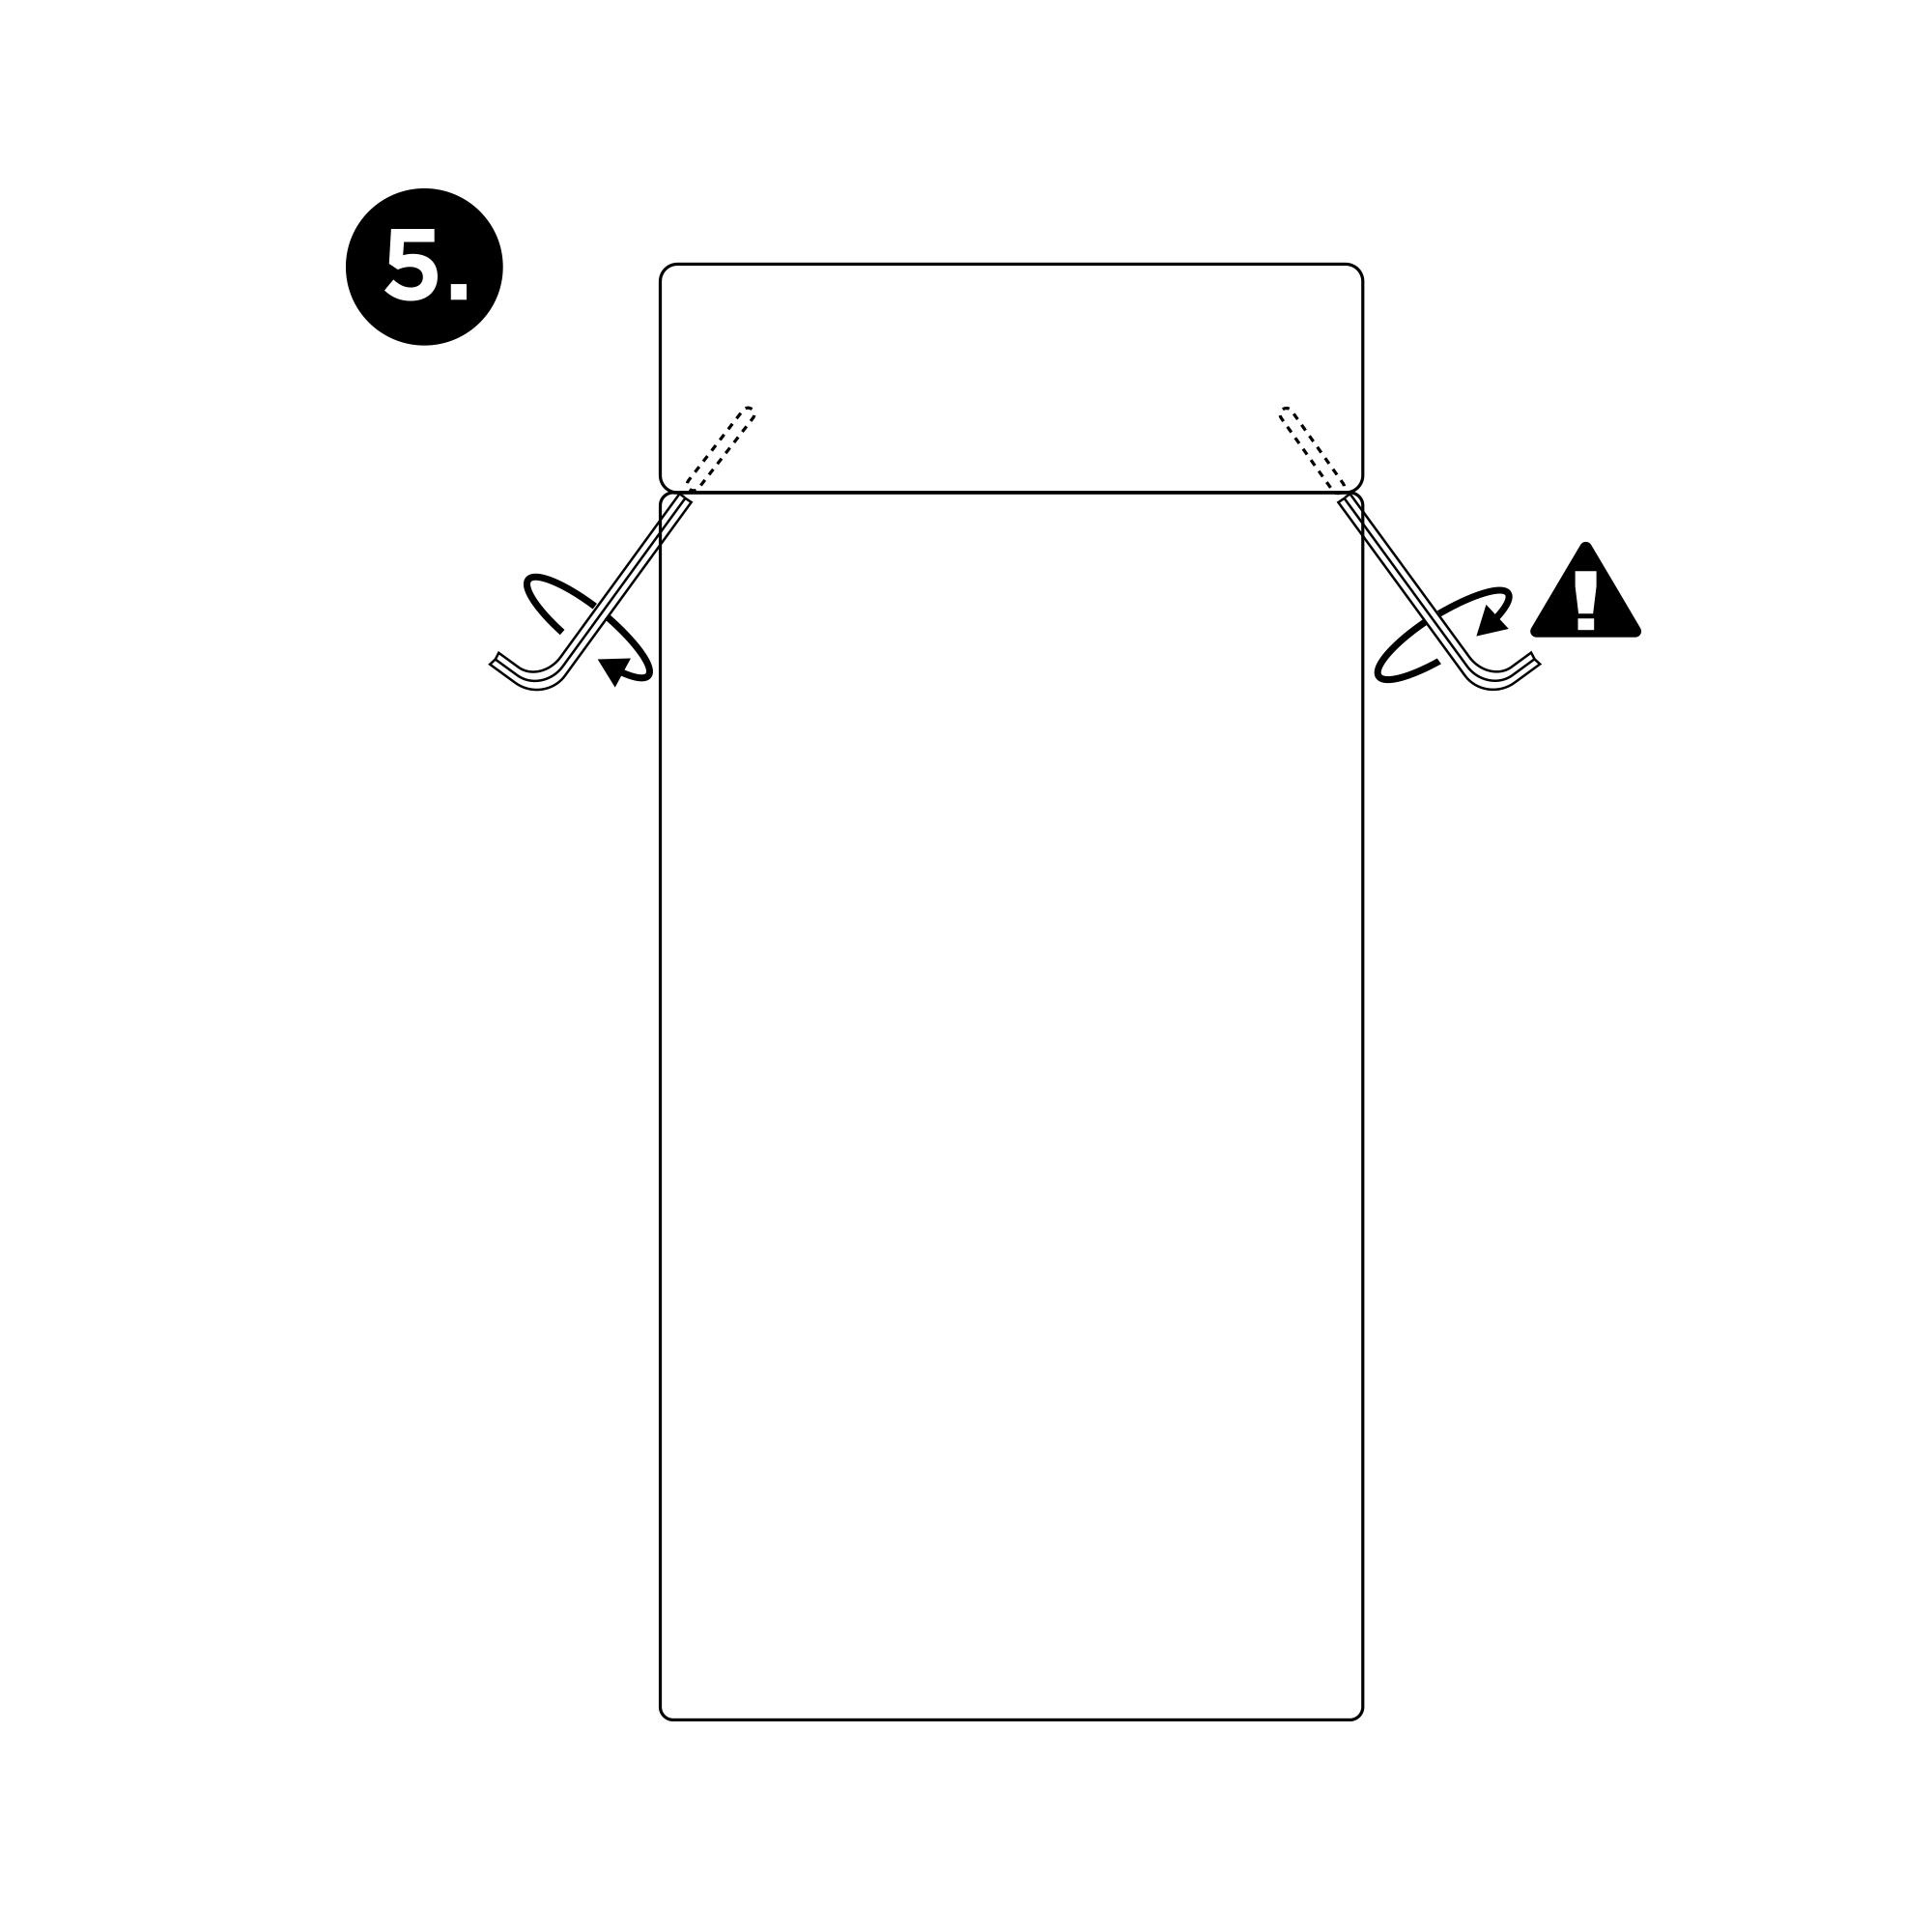
Now all you have to do is lock the position by tightening the two screws inside the device using an Allen key (5).
General Mounting Principles
Tip
- Select flush mounting where possible. This makes the product elegant looking, more vandal resistant and more secure.
- You are advised to purchase the flush mounting boxes and chassis in advance and commission a building company to do the masonry for you, for example.
Caution
Before starting the mechanical installation on a selected place, make sure carefully that the preparations associated with it (drilling, wall cutting) cannot damage the electrical, gas, water and other existing wires and pipes.
- The warranty does not apply to the product defects and failures arisen as a result of improper mounting (in contradiction herewith). The manufacturer is neither liable for damage caused by theft within an area that is accessible after the attached electric lock is switched on. The product is not designed as a burglar protection device except when used in combination with a standard lock, which has the security function.
- When the proper mounting instructions are not met, water might get in and destroy the electronics. The intercom circuits are constantly under voltage and water infiltration causes an electro-chemical reaction. The manufacturer‘s warranty shall be void for products damaged in this way!
Caution
- Make sure that the diameters of the dowel holes are accurate. If the diameters are too large, the dowels may get loose. Use the mounting glue to secure the dowels if necessary.
Make sure that the depths of the dowel holes are accurate!
Do not use low-quality dowels to avoid their falling out of the wall!
- Surface mounting always poses a problem where the installation is exposed to potential vandalism (such as public garages, etc.). In this case, use steel anchoring elements instead of the dowels and screws included in the delivery.
- Make sure that the mounting surface is flat with a maximum inequality of 0.5 mm. (e.g. prefabricated boards, glass, cut stone, etc.). If this is not the case, level the wall surface.
- Any intentional mechanical damage to the device (drilling, main unit tampering, etc.) results in a loss of warranty.
Warning
- We do not recommend that 2N® IP Style be installed on sites exposed to long-time direct sunlight to avoid overheating.
- Once overheated, the device is switched off and will be switched on automatically after it gets colder.

