2.7 2N® Voice Alarm Station
Description
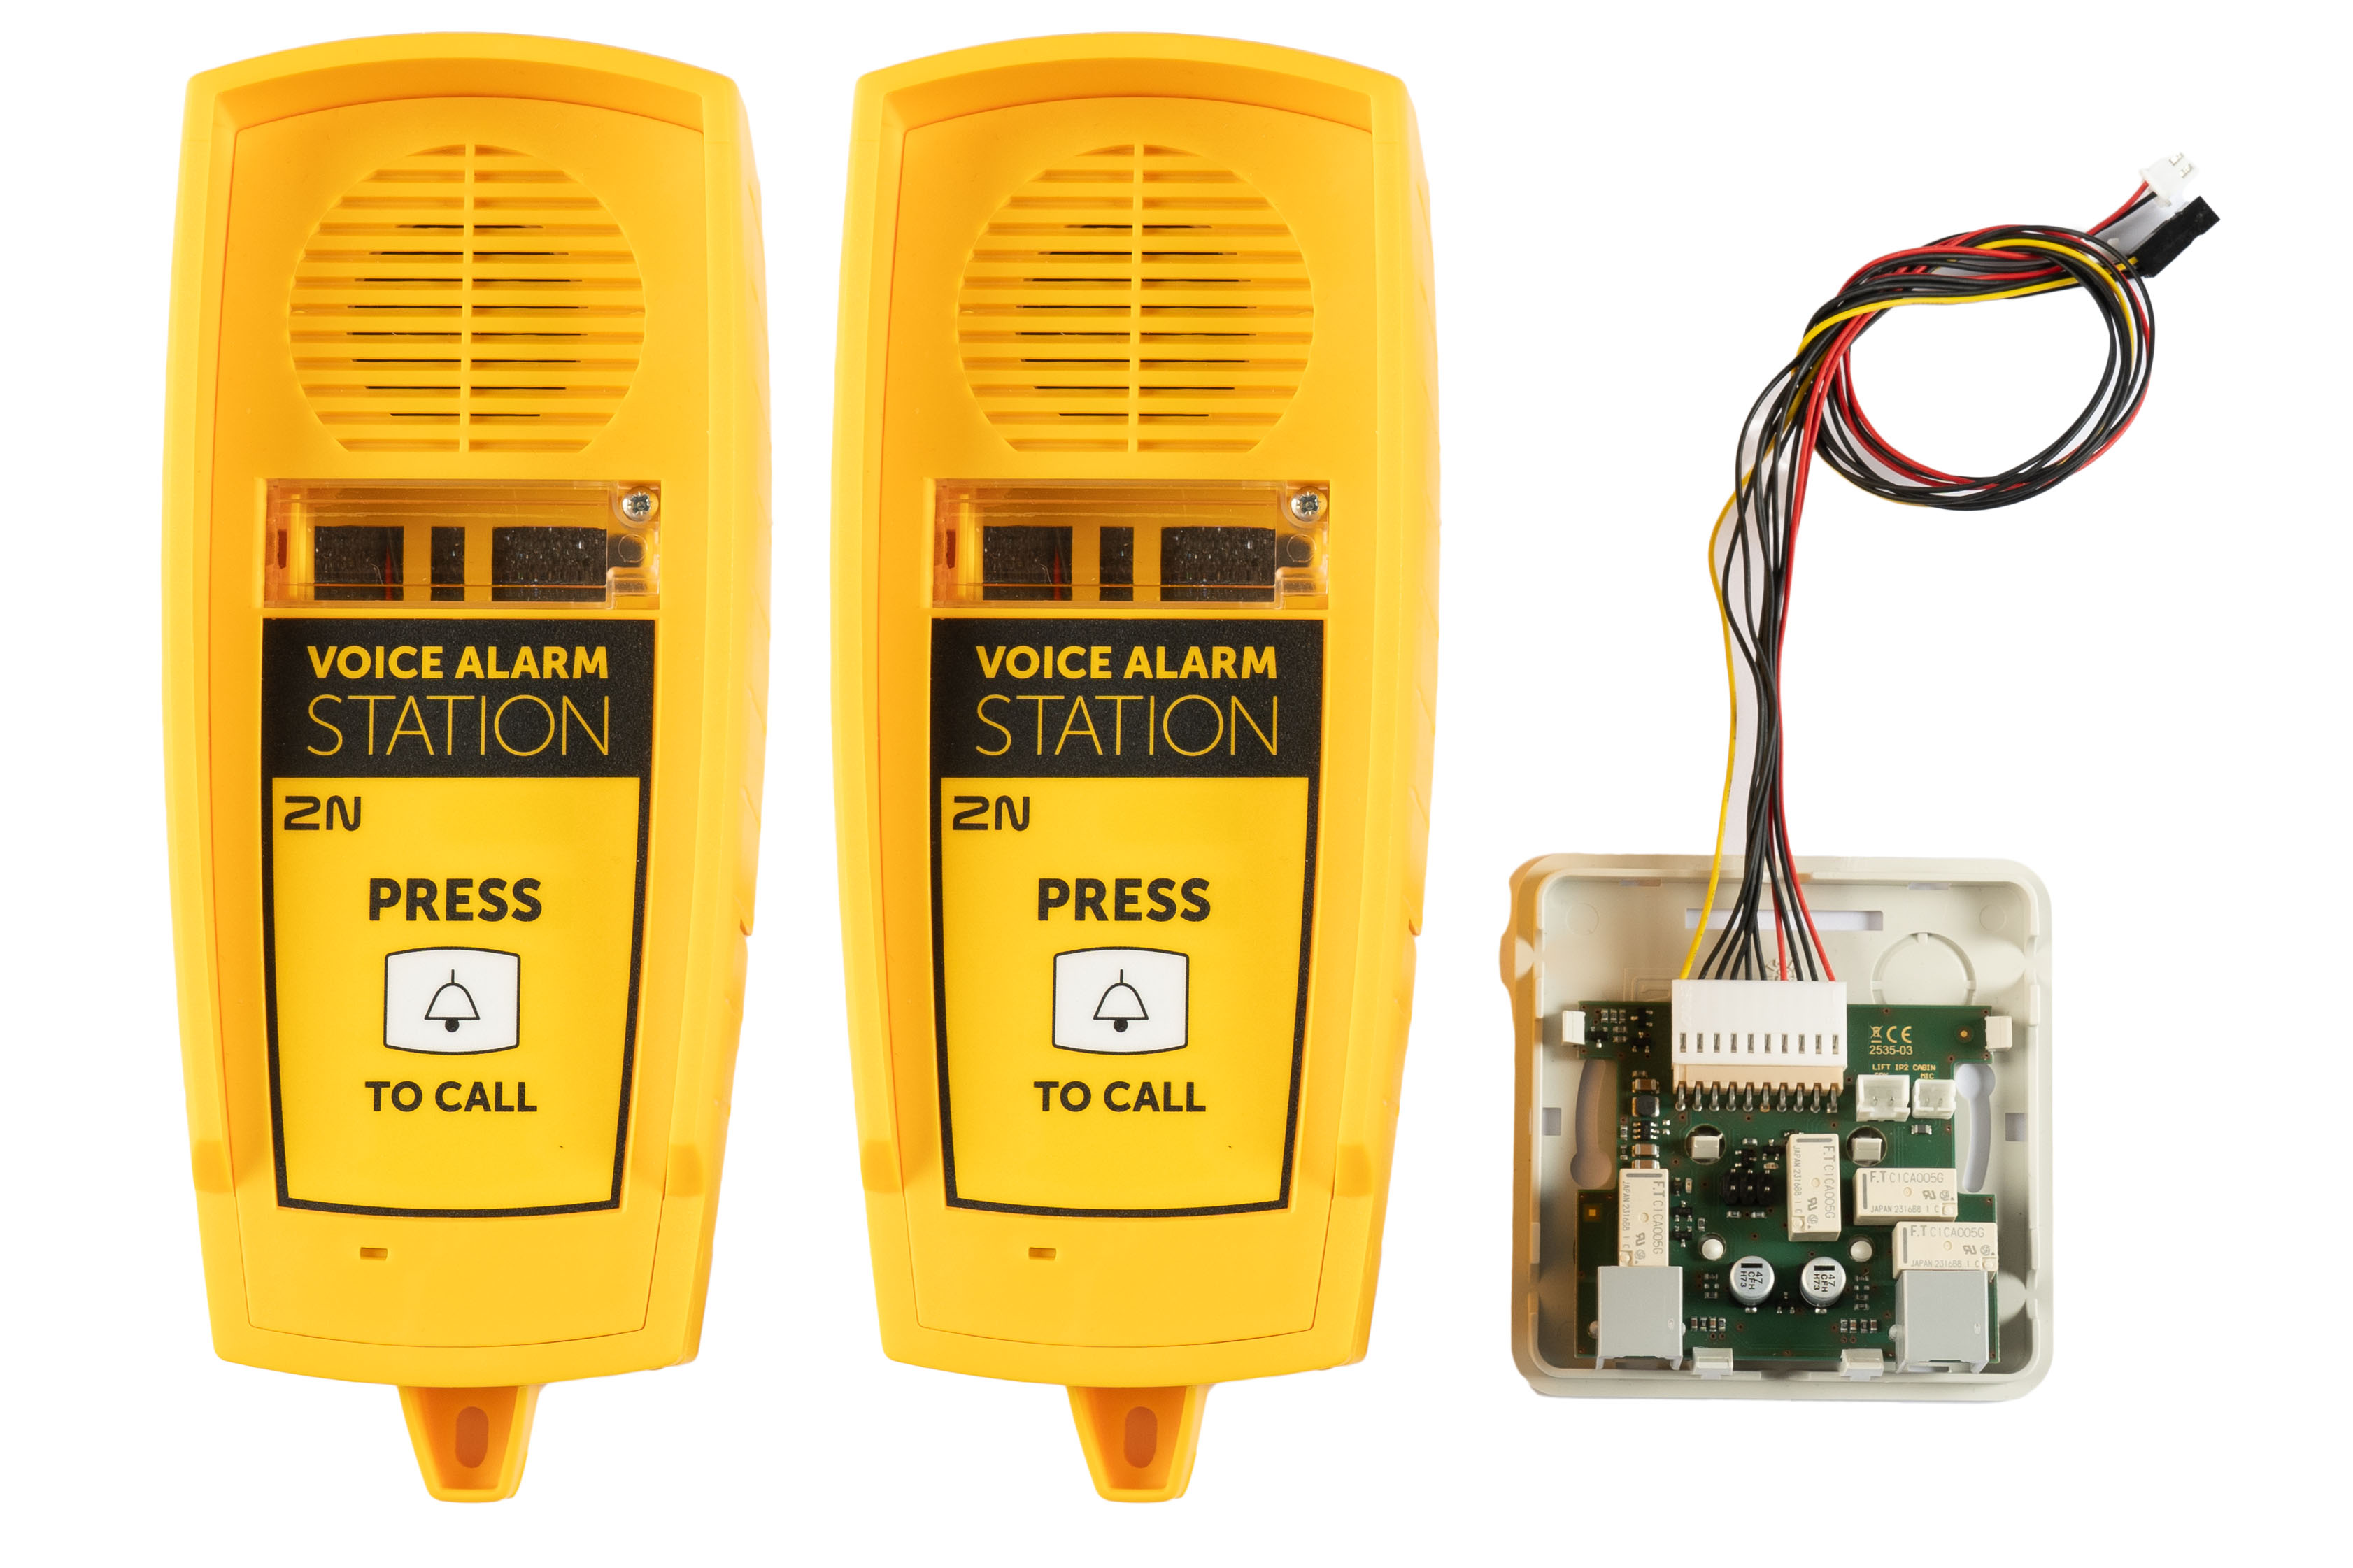
2N Voice Alarm Station extends 2N LiftIP 2.0 to include an audio unit on the cabin roof and under the cabin. It is fitted with its own microphone, speaker and emergency button. A switch is used for interconnecting 2N LiftIP 2.0 and one or two audio units.
Dimensions
Audio unit – 2N Voice Alarm Station: 225 x 87 x 67 mm
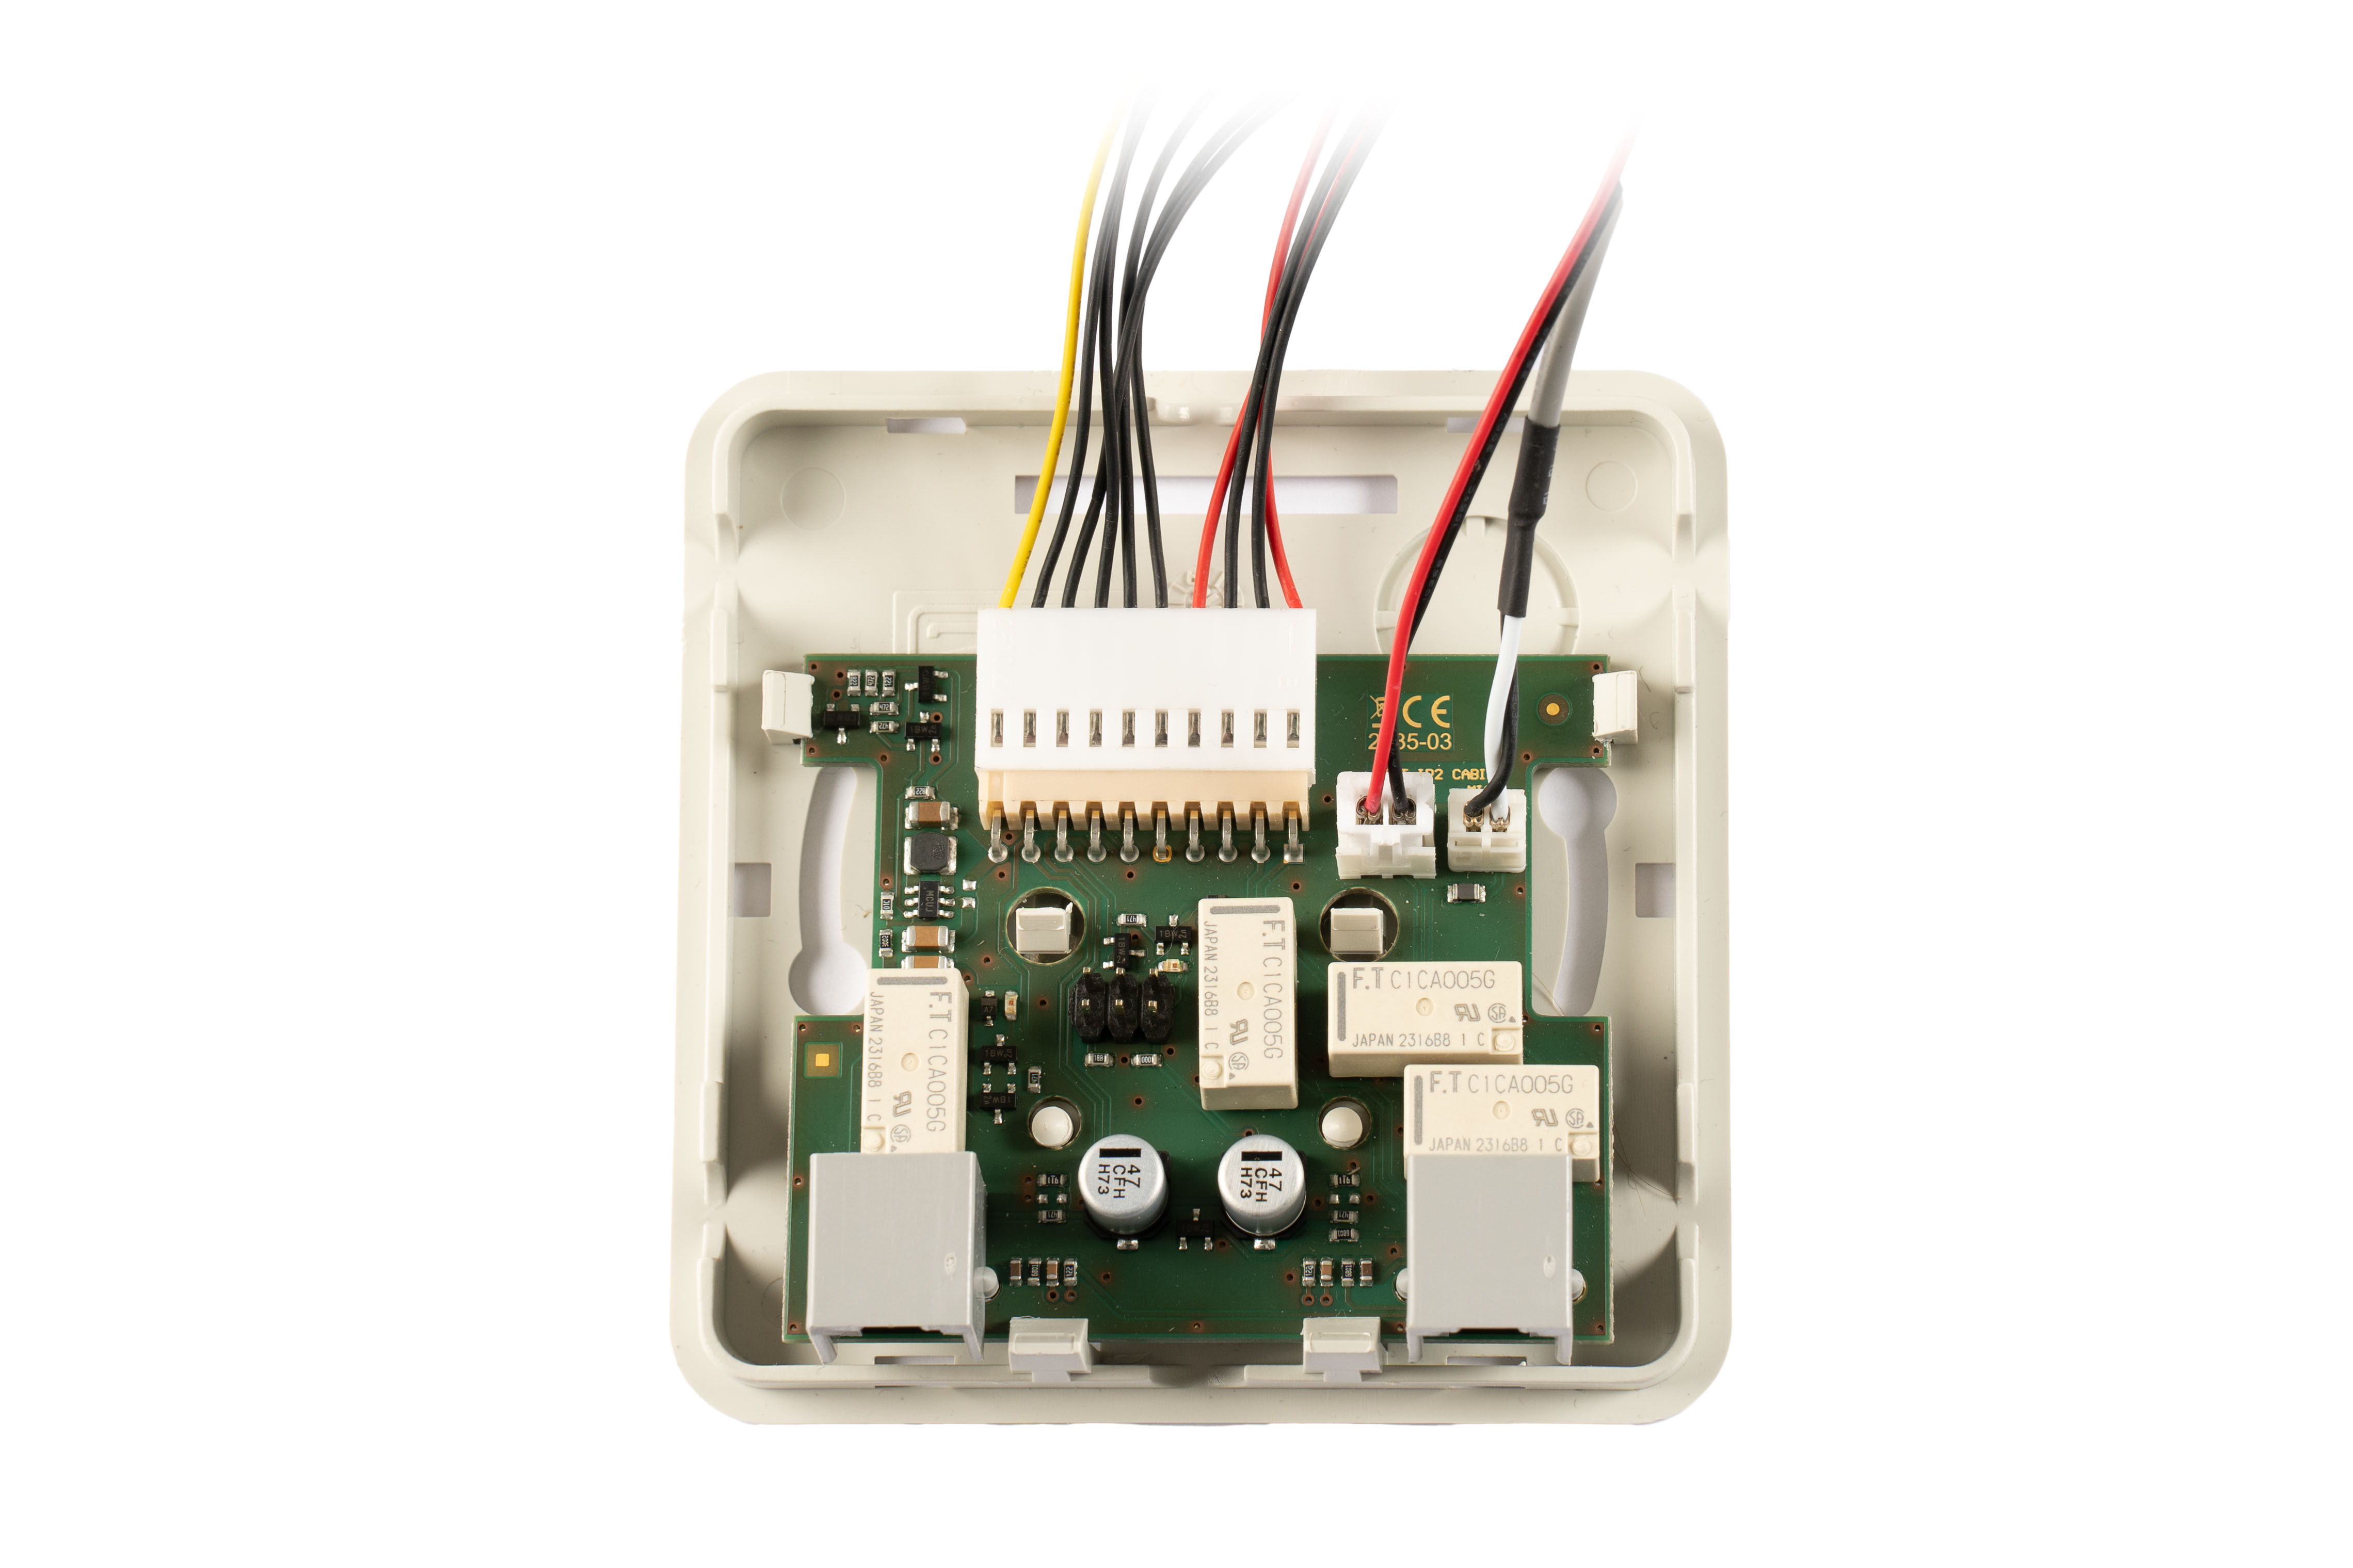
Switch: 81 x 81 x 30 mm
Mounting
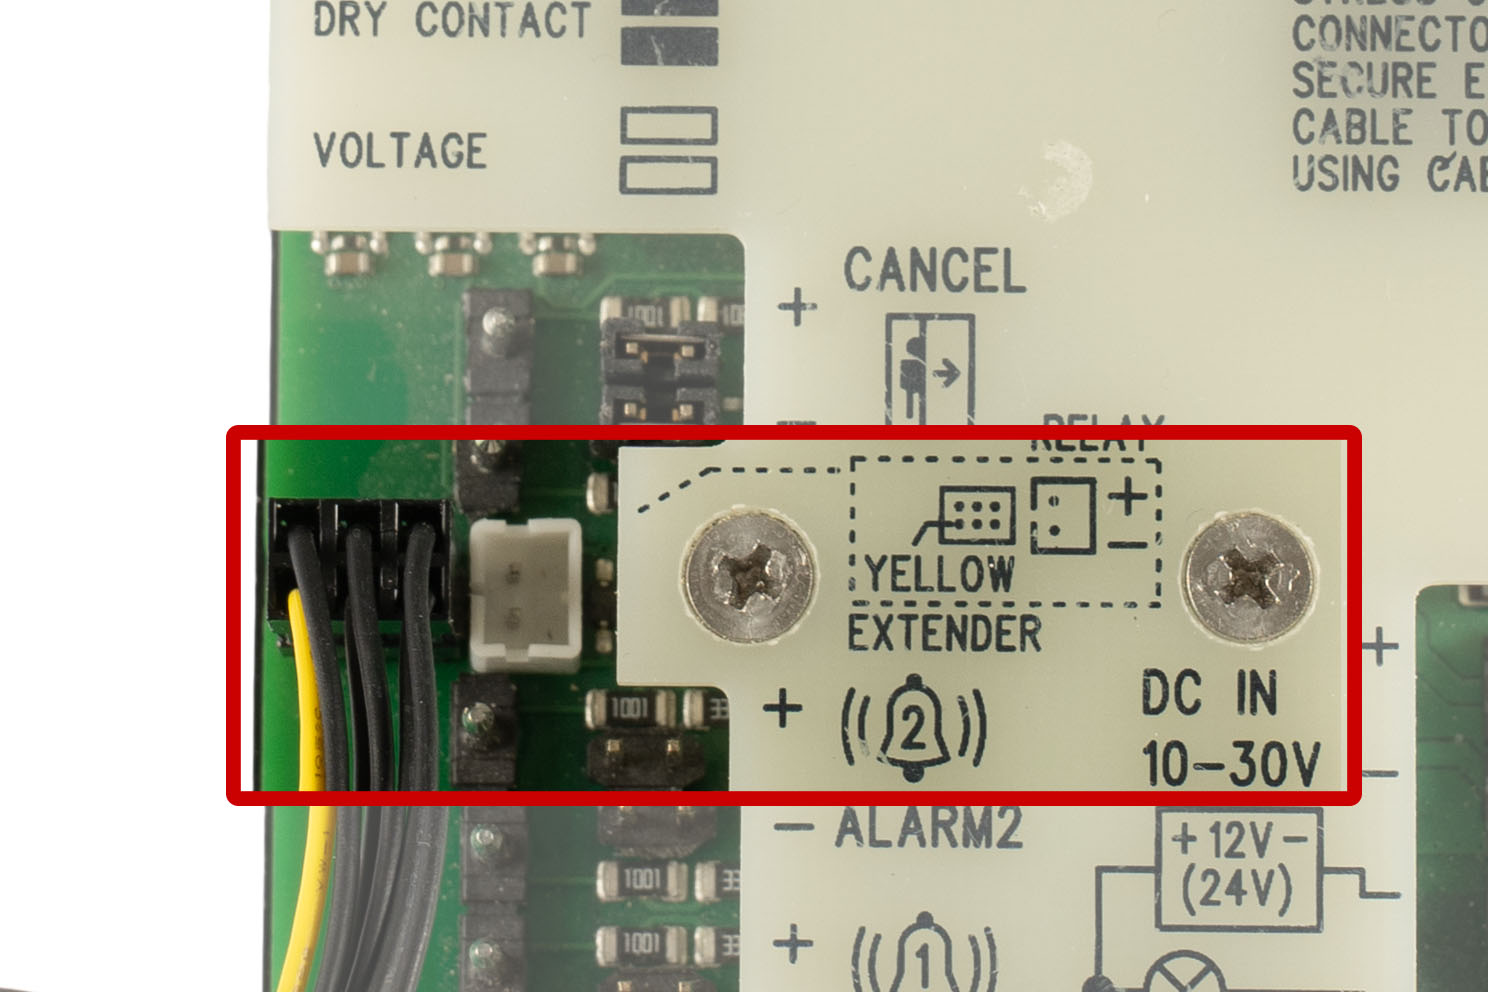
To install 2N Voice Alarm Station, disconnect 2N LiftIP 2.0 from the power supply (DC 10–30 V or PoE). Put the 6-pin switch interconnecting cable plug on the 6-pin EXTENDER connector on 2N LiftIP 2.0. Keep the proper orientation of the yellow wire.
Warning
- To install 2N Voice Alarm Station, disconnect 2N LiftIP 2.0 from the power supply (DC 10–30 V or PoE).
- Make sure that all the connector pins are mounted properly.
- Keep the correct EXTENDER connector wiring (yellow wire).
- An incorrect connection can damage the module.
Disconnect the speaker and microphone from the connectors (external microphone if available) on 2N LiftIP 2.0.
Caution
The external microphone connection/disconnection state does not change during operation. The valid external microphone state is only detected when the device is started/restarted.
Connect the switch interconnecting cable connectors into the 2N LiftIP 2.0 microphone and speaker connectors (the microphone and speaker connectors have different sizes and are mounted according to the pictograms on the 2N LiftIP 2.0 cover, so they cannot be confused).
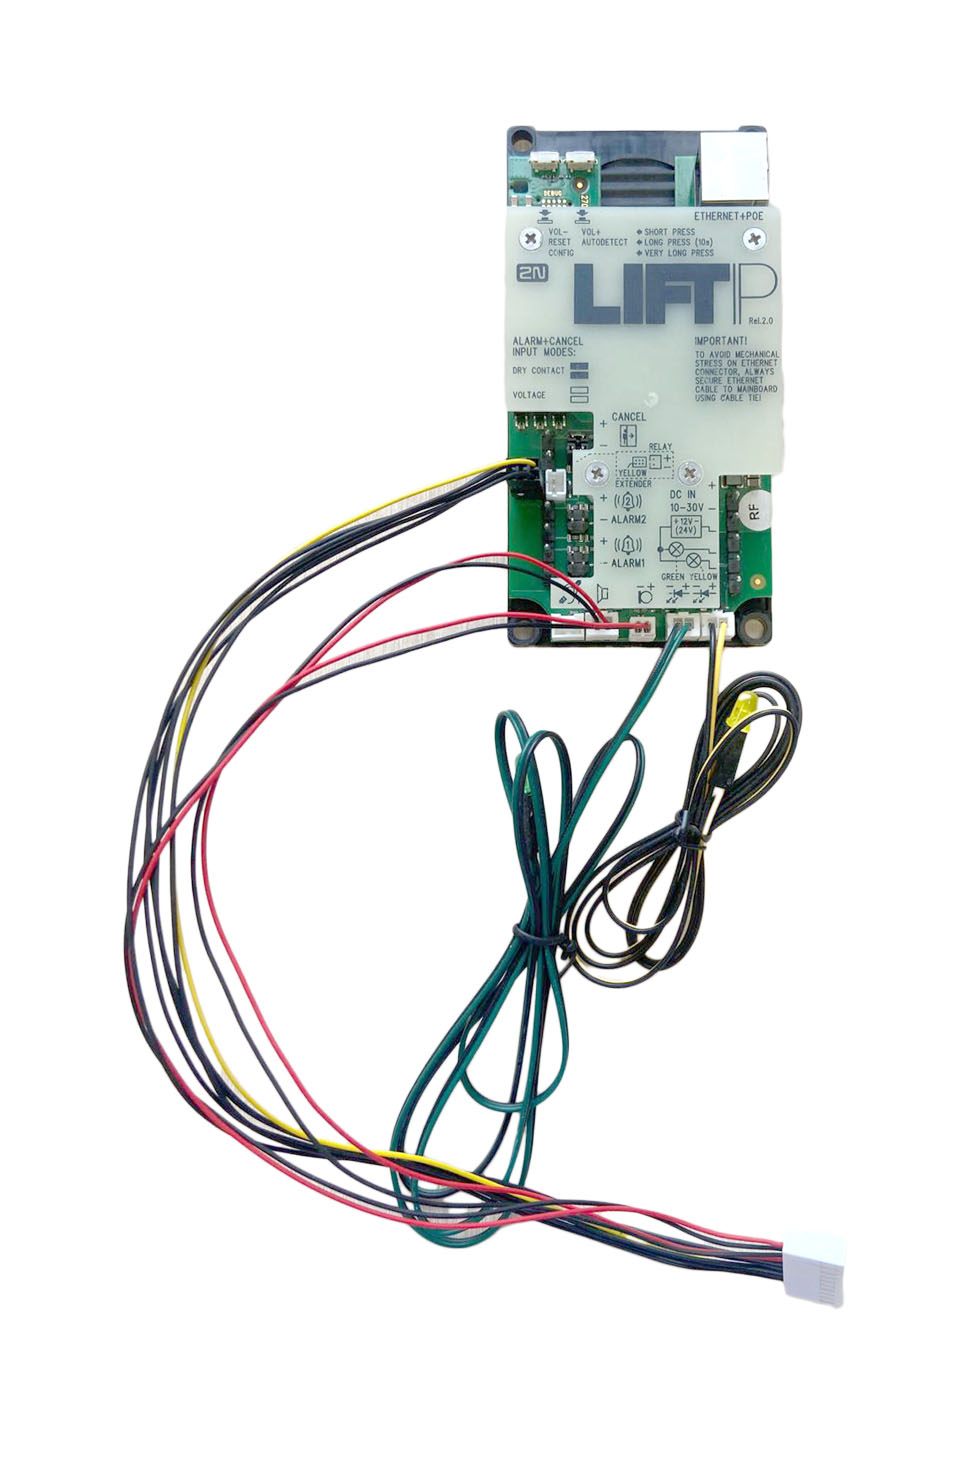
Remove the switch cover. Slide the interconnecting cable plug onto the 10-pin switch connector to interconnect the switch and 2N LiftIP 2.0.
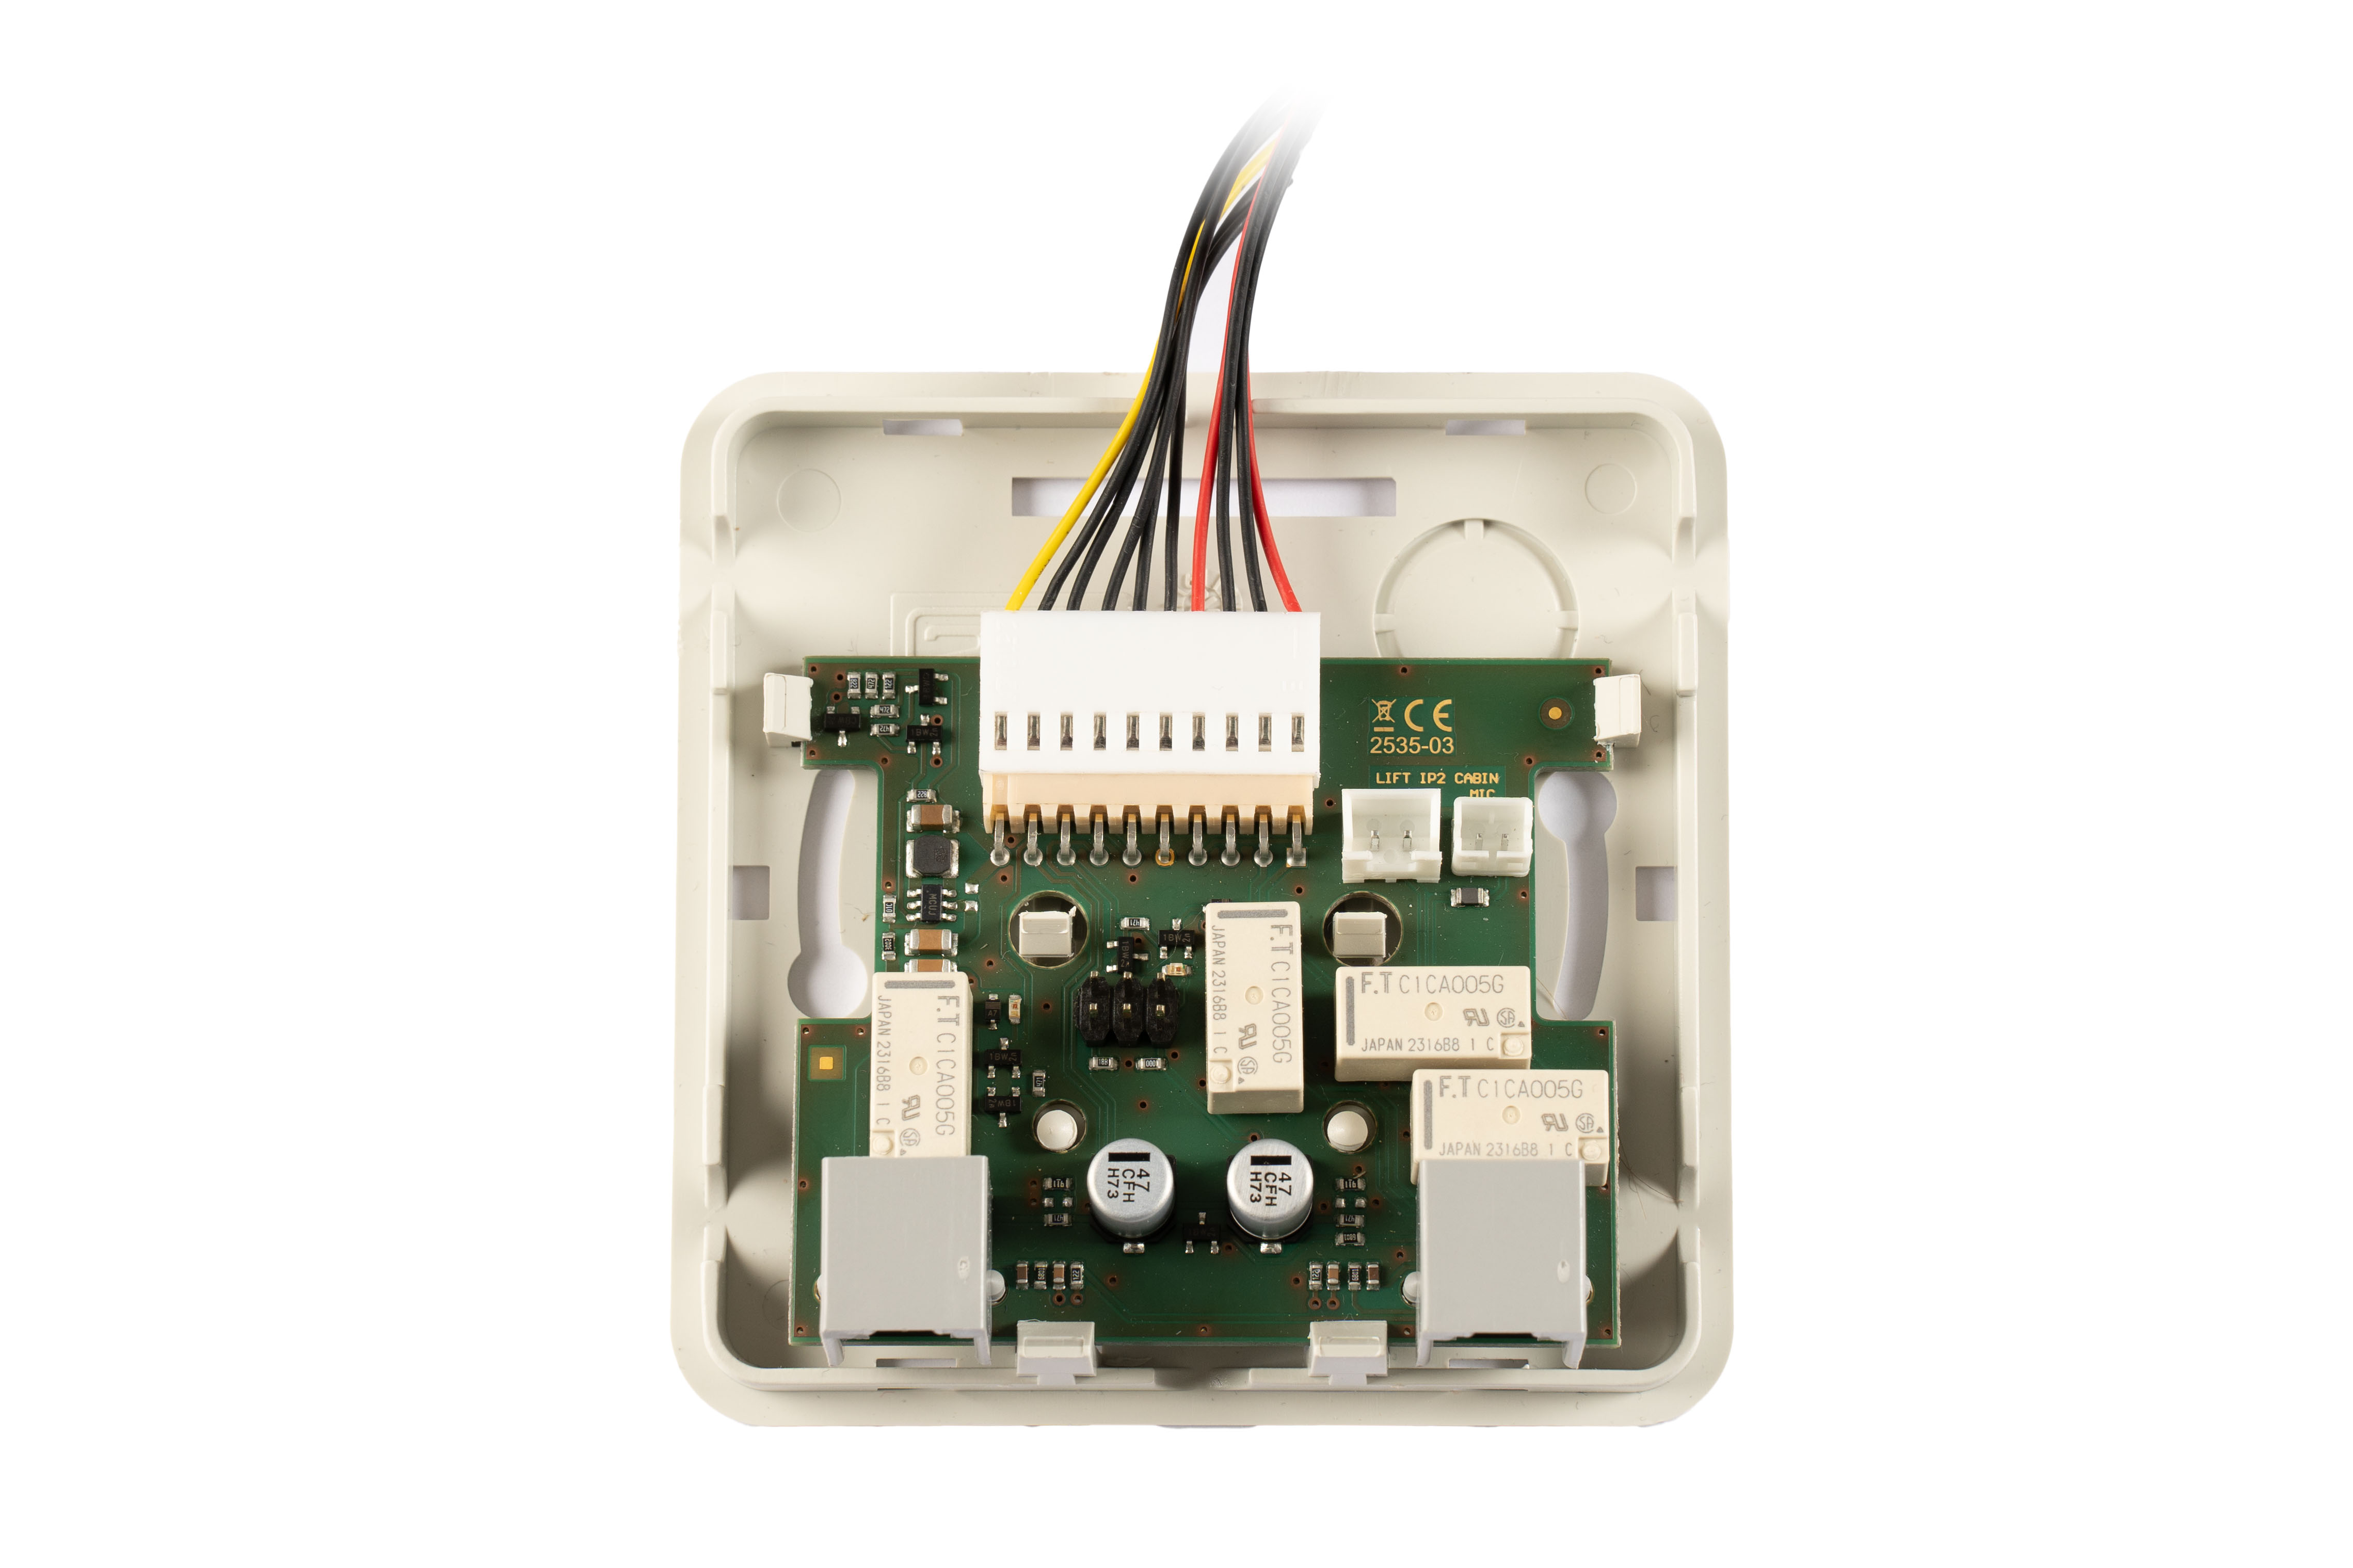
Connect the microphone and speaker, previously disconnected from 2N LiftIP 2.0, into the switch connectors. The connectors are marked SPK for the speaker and MIC for the microphone.
Caution
If you use the 2N LiftIP 2.0 cable version, then connect the microphone on the cable into the MIC connector on the switch, otherwise this connector remains unmounted.
Break out a cable installation hole in the switch cover upper edge. Depending on the installation method, you can alternatively lead the cables through a hole broken out in the right-hand upper corner of the switch cover back side. Having installed the cables in either way, replace the switch top cover. There is one RJ-12 connector on each side of the switch bottom part for audio unit connection. Use the cable included in the audio unit package to interconnect the audio unit and the switch. Find the appropriate connector under a hinged cover on the right-hand side of the audio unit. Secure the hinged cover with the included screw after connecting the cable.
Once the mounting is completed, reconnect 2N LiftIP 2.0 to the power supply.
Note
The 6-pin connector on the switch board is only used for advanced diagnostic hardware operations for servicing purposes and does not provide any function to a common user.
Configuration
Enter the 2N LiftIP 2.0 IP address into your Internet browser and complete the username Admin and password 2N, if these default login data have not been changed, to log into the web configuration interface. You can also retrieve the IP address using the 2N Network Scanner, which helps you locate all the 2N IP devices in the LAN and can be downloaded freely at 2n.com.
Upon login, complete the destination and user phone number for Alarm call 2 (Calls > Alarm calls > Alarm call 2) for proper routing. Also, set the count of call cycles in case the call is not confirmed.
Warning
If the Alarm call 2 destination is empty, no call can be set up.
Tip
- Procedure for logging into the 2N LiftIP 2.0 web configuration interface
- The Alarm call 2 events are written into the State > Events configuration menu.
Note
It is possible to have the same user set as for the ALARM1 button.
Operation
Press “Press to call” shortly on audio unit 2N Voice Alarm Station for activation. A call is set up to the alarm call destination defined in ALARM2 from 2N LiftIP 2.0.
Caution
The 2N Voice Alarm Station audio unit does not include a LED for connection establishing indication. A LED is on on the 2N LiftIP 2.0 audio unit to indicate call setup and connection confirmation.