3.2.1 Flush Mounting Box Installation of Device
2N® Clip can be installed into a KU 68 flush mounting box using a metal holder for EU (included in the package), the recommended height of a standard installation being 135 cm from the ground level. The installation heights may vary depending on the device use. The device can also be installed directly on a wall without a mounting box.
Warning
Having unpacked 2N® Clip, remove the metal holder for installation. Use both your hands at the same time to remove it safely. A careless removal and insufficient push might lead to a locking latch damage. Hence, follow the mentioned metal holder instructions below closely!
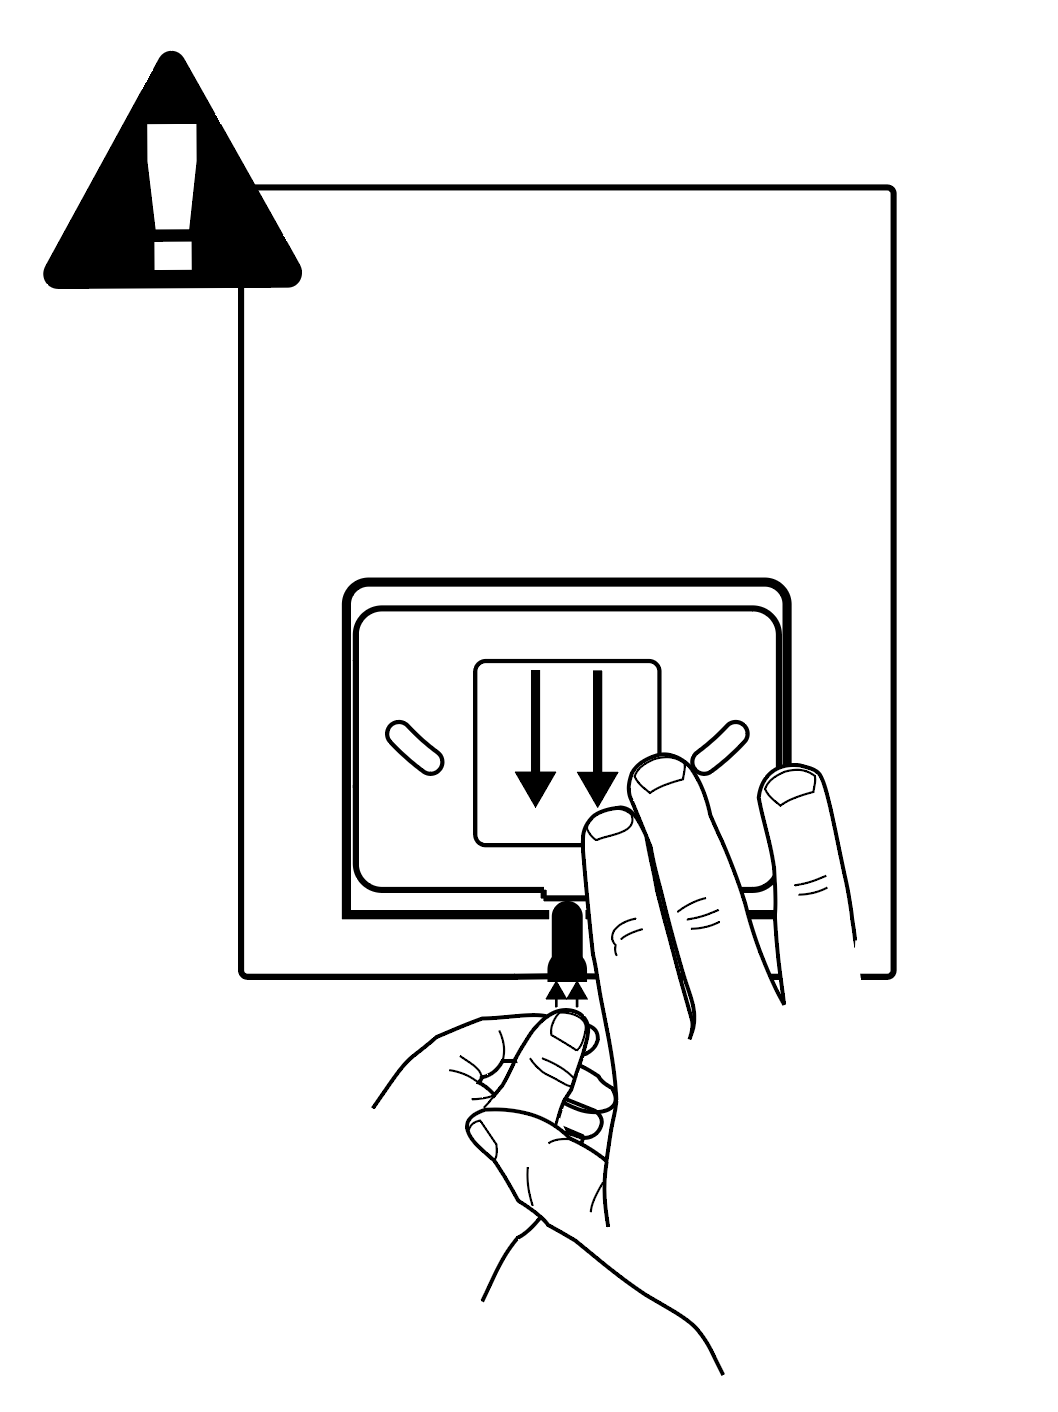 |
- Push the locking latch in the center of the device bottom edge with your left hand in such a manner that it bends sufficiently for the metal holder removal. Do not push the locking latch from the top. You might get injured while removing the metal holder.
- Grasp the metal holder with your right hand and slide it downwards for removal.
 |
 |
 |
 |
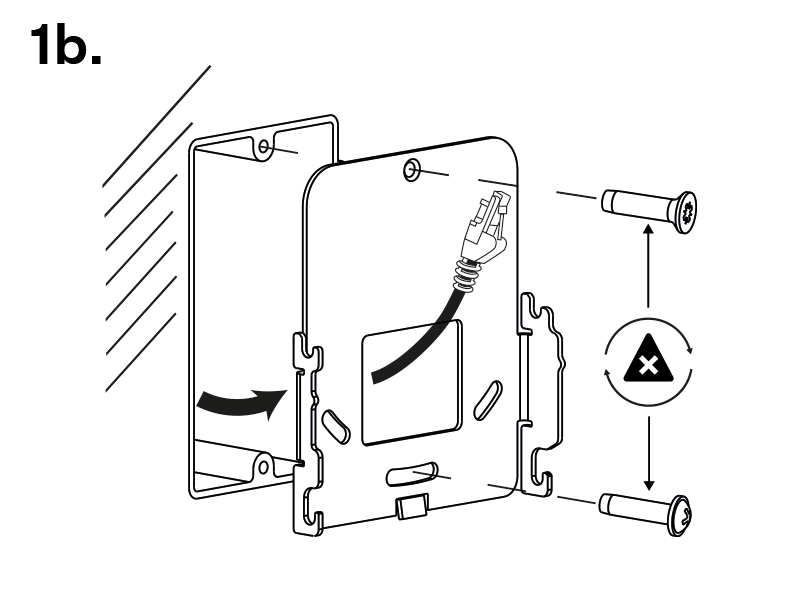
Draw the pre-prepared LAN connector leading from the wall through the metal holder. Make sure that it is properly oriented for device connection after mounting.
Tip
Make sure to ensure the proper orientation while installing the holder on the wall. To do this, mark the bulge profile on the holder bottom side.
Level the holder as required using a water level and drill it into the mounting box. The wall mounting screws are not part of the delivery, the included screws are only for the mounting box installation.
- Connect the LAN connector to the device.
-
- Put the device under the holder with its bottom edge first. Then put the device vertically on the wall keeping the device bottom edge under the holder.
- Slide the device gently downwards along the wall.
- Lock the latch to fit the device completely.
- Now the device is ready for basic operation. It is necessary to perform software configuration to achieve full functionality of the device.
You are advised to use a metal holder (not included in the package) for 2N® Clip installation in the USA. With the aid of this holder, the device can be installed into a universal US single-gang mounting box. The device can also be installed directly onto a wall without a mounting box.
 |
 |
 |
 |
- Draw the pre-prepared LAN connector leading from the wall through the metal holder. Make sure that it is properly oriented for device connection after mounting. If necessary, align the holder using a level and drill it into the mounting box or on the wall. The wall mounting screws are not part of the delivery, the included screws are only for the mounting box installation.
- Connect the LAN connector to the device.
-
- Put the device under the holder with its bottom edge first. Then put the device vertically on the wall keeping the device bottom edge under the holder.
- Slide the device gently downwards along the wall.
- Lock the latch to fit the device completely.
Now the device is attached properly. There is a slight distance between the device and the wall due to a rather big size of the metal holder, which is fully compliant with the installation instructions.
Now the device is ready for basic operation. It is necessary to perform software configuration to achieve full functionality of the device.