Occupancy Management in 2N® Access Commander since version 2.1
Since the version 2.1 the maximal occupancy in a certain area can be newly set and monitored in 2N® Access Commander.
How to set up an area to manage the occupancy
in the 2N® Access Commander's web interface go to the Area restrictions section, where click on the NEW AREA button in the upper right,
name it and confirm by clicking on CREATE: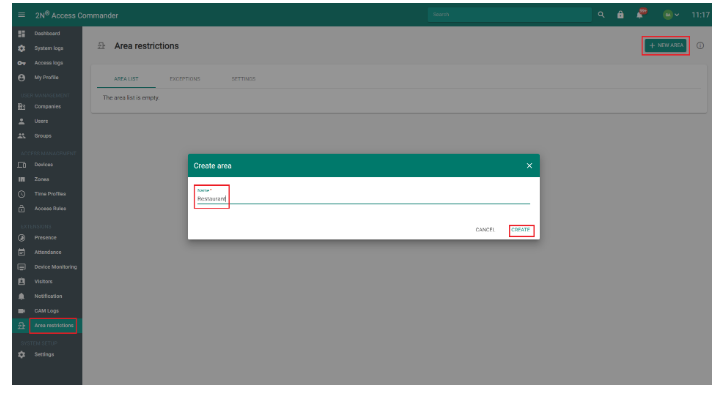
then click the on the ADD button at the bottom of the DEVICES tab and then select the device (containing a total of at least 2 access points) and confirm by clicking on ADD:

For instructions to defining access points see this FAQ: Access points - defining access points in 2N® Access Commander since version 2.1
Setting up the occupancy limit itself
- when the occupancy limit is reached, which can be set in the 2N® Access Commander's web interface in the Area restrictions section for the given area, you can choose between 3 "actions": a) happens nothing b) just a notification c) access denied
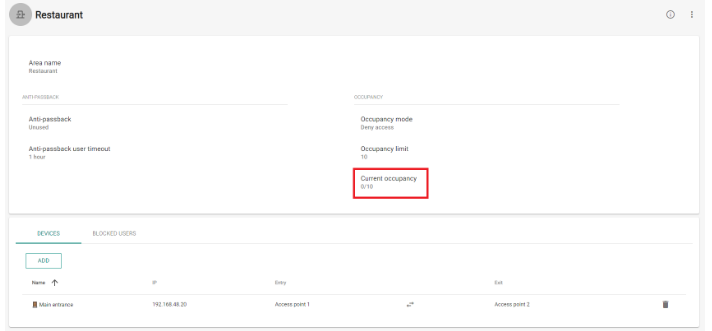
To set, click on the Occupancy mode field, where you enter the maximum number of people and the mentioned mode - then confirm by clicking on SAVE: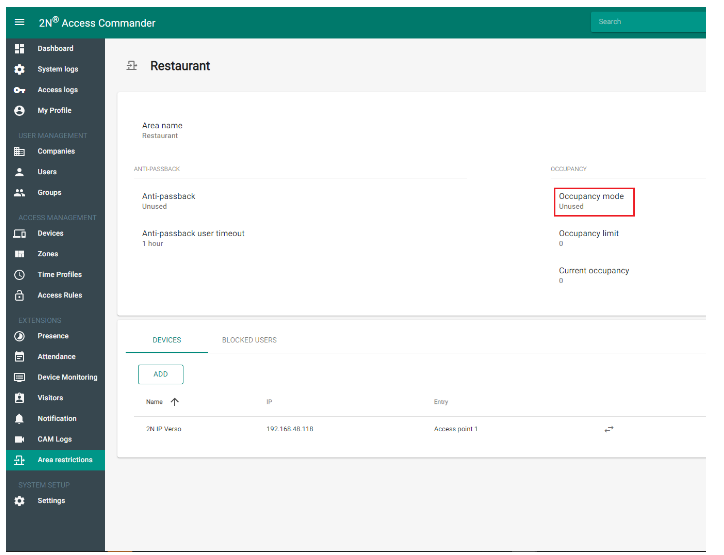

- in the given area then on the field Current occupancy we can immediately see how many people, out of how many are allowed in it, are there:
In the Area restrictions section on the EXCEPTIONS tab you can also select groups or users by clicking on the ADD button,
who will have access to the given area despite its full capacity (at the end we will confirm by clicking on ADD):
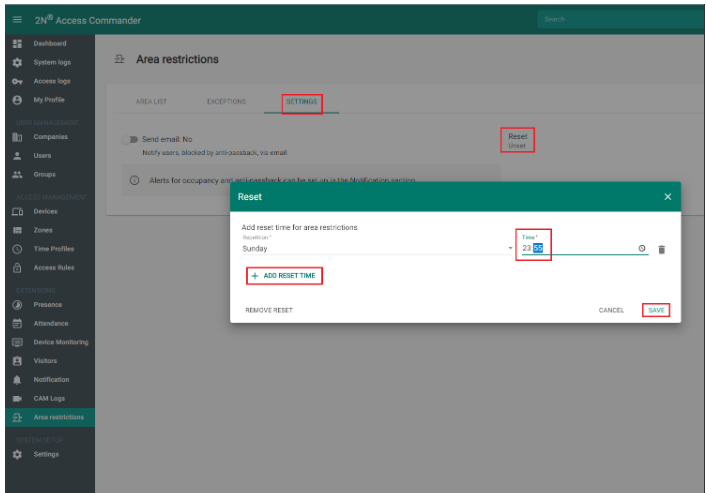
- on the SETTINGS tab it is possible to select, under the Reset field, by clicking on ADD RESET TIME, the day of the week and the time when the area restriction status will be reset - also the number of users located in the given area is reset. It is possible to remove the set "reset" in this window, as well. Then confirm by clicking on SAVE at the bottom right:
Anti-passback function within the Area restrictions
- In the 2N® Access Commander's web interface, in the Area restrictions section, in addition to the occupancy limit settings
there are now also settings for the "Anti-passback" function: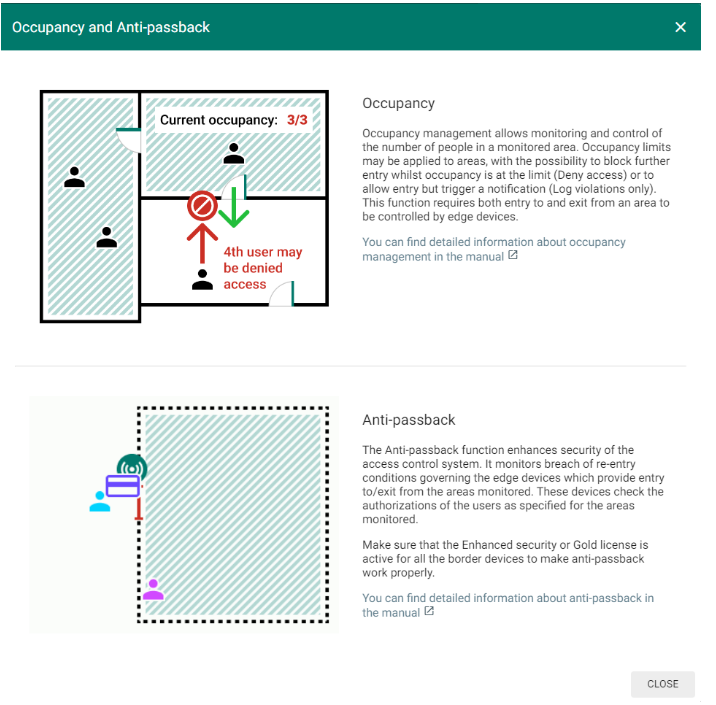
in the ANTI-PASSBACK field here after clicking on "Anti-passback" or on "Anti-passback user timeout" you can define the type of Anti-passback
(you can find more about Anti-passback in this FAQ: Anti-passback - how to configure in 2N® Access Commander )
and in the "User timeout" field (in the same window) also the time after which the user will be allowed to re-enter (after violating the conditions) the given area: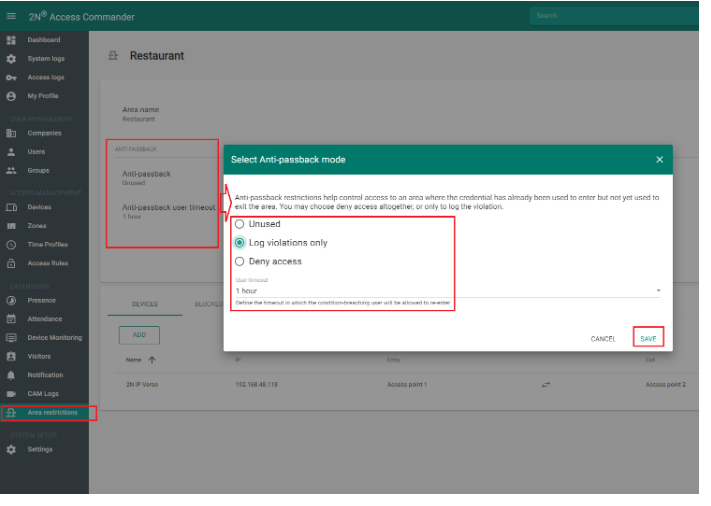
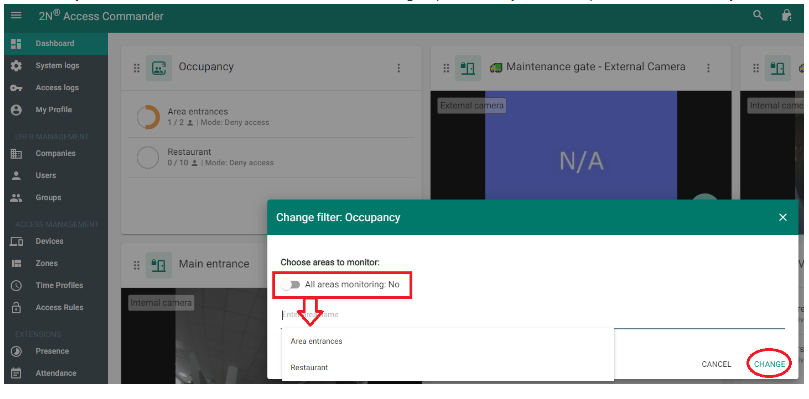
Widget of the function Occupancy
For general instructions to using widgets see the following FAQ: Dashboard and widgets (since the version 2.0) in 2N® Access Commander
in the Dashboard section you can add widget for monitoring of the Occupancy, where you can immediately see how the capacity of the created areas is filled.
After clicking on the three dot symbol you can go to change the filter or rename the widget: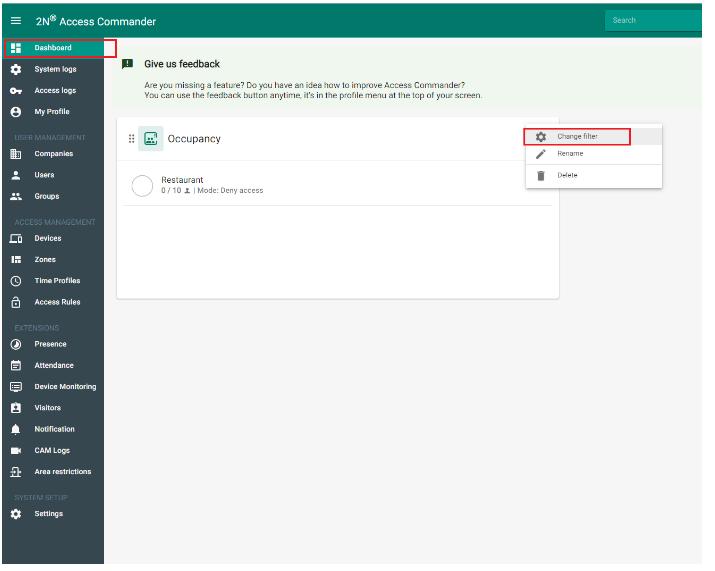
After clicking on Change filter you can select just one or some of the areas that will be on the widget.
To do this you have to deactivate the "All areas monitoring" option, firstly - see the picture below. Finally, we confirm by clicking on CHANGE: