My2N - Differences between site models and examples
When creating a new site on your My2N account and choosing a name for your site, there are 3 site models to choose from:
In this article, we will explain what a site model is suitable for what type of installation and how it works.
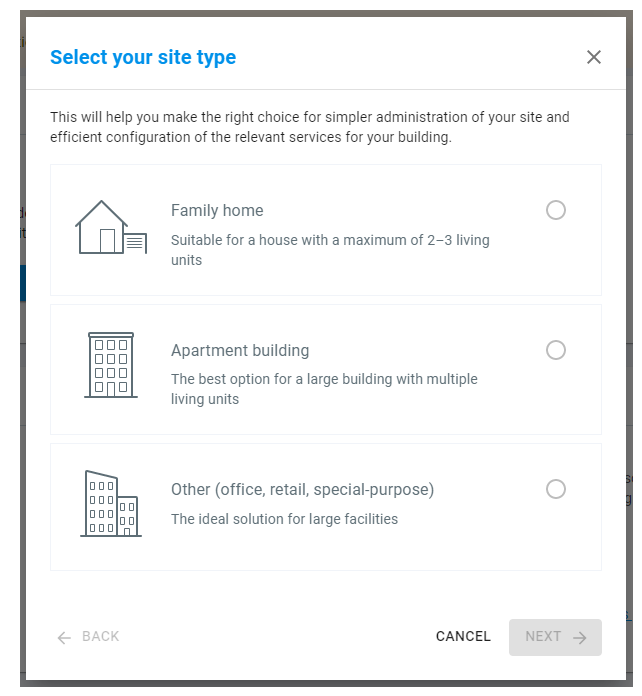
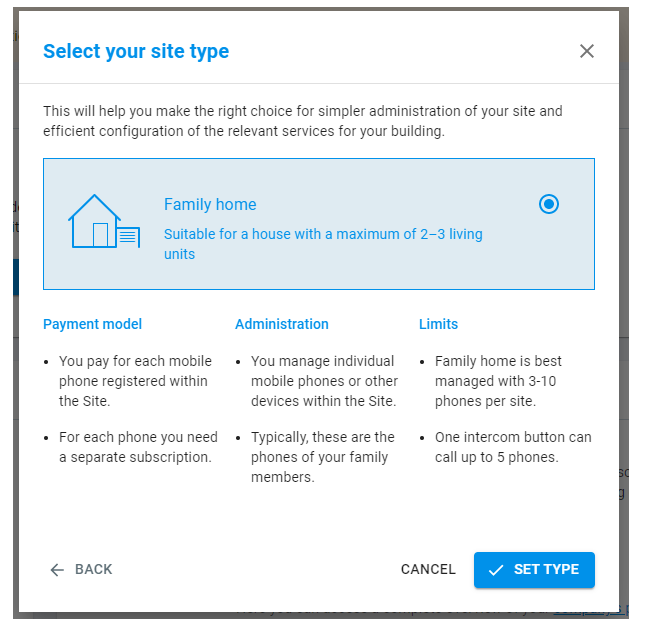
Family home
When you select the "Family home" site model you will see all the details about the site type (what is the Family home type good for, payment information, limits of the site type). The Family home site type is self-explained. It is suitable for a home with 2-3 living units.
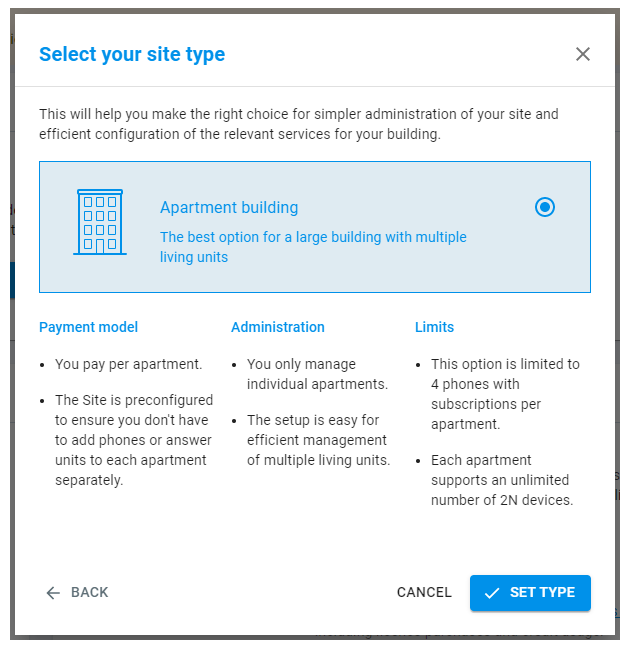
Apartment Building
When you select the "Apartment building" site model you will see all the details about the site type (payment model, administration, limits). The device limit per apartment is 4 smartphones or 3rd party devices, to which the site admin needs to purchase the subscription. The 2N answering units are free of charge. Every answering unit (2N answering unit, smartphone or 3rd party device) must be assigned to an apartment.
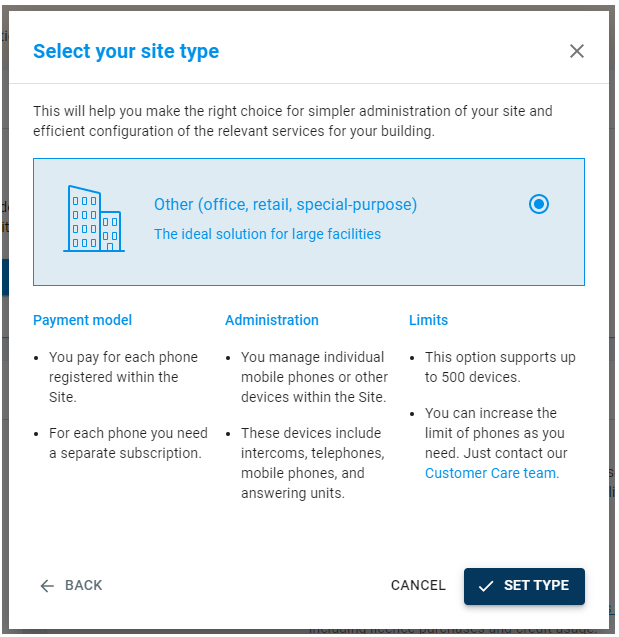
Other (office, retail, special-purpose)
When you select the "Other" site model you will see all the details about the site type (what is the Other site type good for, payment information, limits of the site type). The Other site type can be used for some office buildings or warehouse places with some gatehouses. This option supports up to 500 devices.
Examples
Family home
Here's an example of a family with 1 intercom at the door (2N® IP Base), 1 indoor answering unit (2N® Indoor View) and 2 smartphone devices.
1) After adding the intercom and the answering unit you can add the smartphones. When adding the smartphone, you can assign them to specific users. In our case, we will create Pamela and Jim Smith.
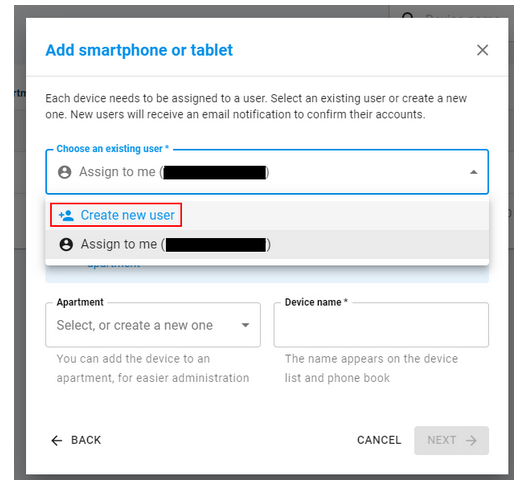
Adding a smartphone/tablet
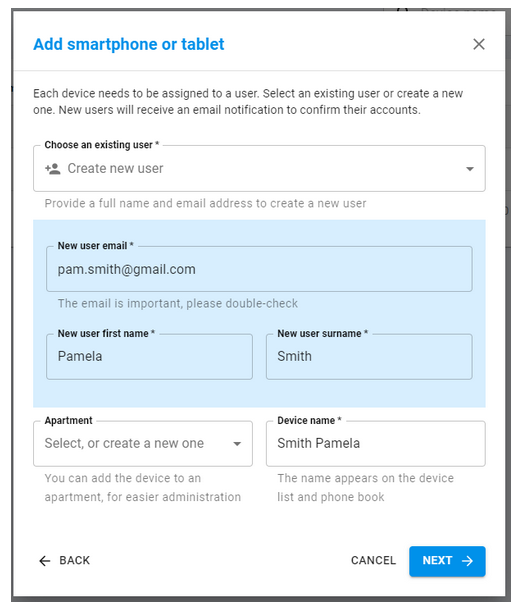
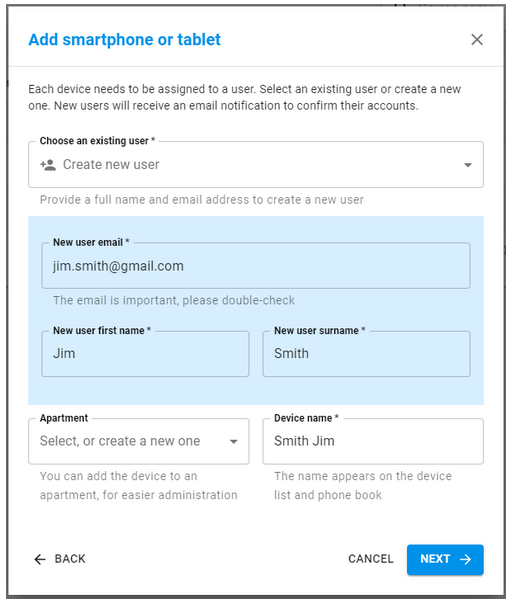
Creating Pam Smith Creating Jim Smith
2) You can then make those users a Site admin with the payment permissions in the "Site users -> User -> User detail" section. After that, you can simply fill in the Billing info and purchase a subscription in the correct sections of the My2N Site page.
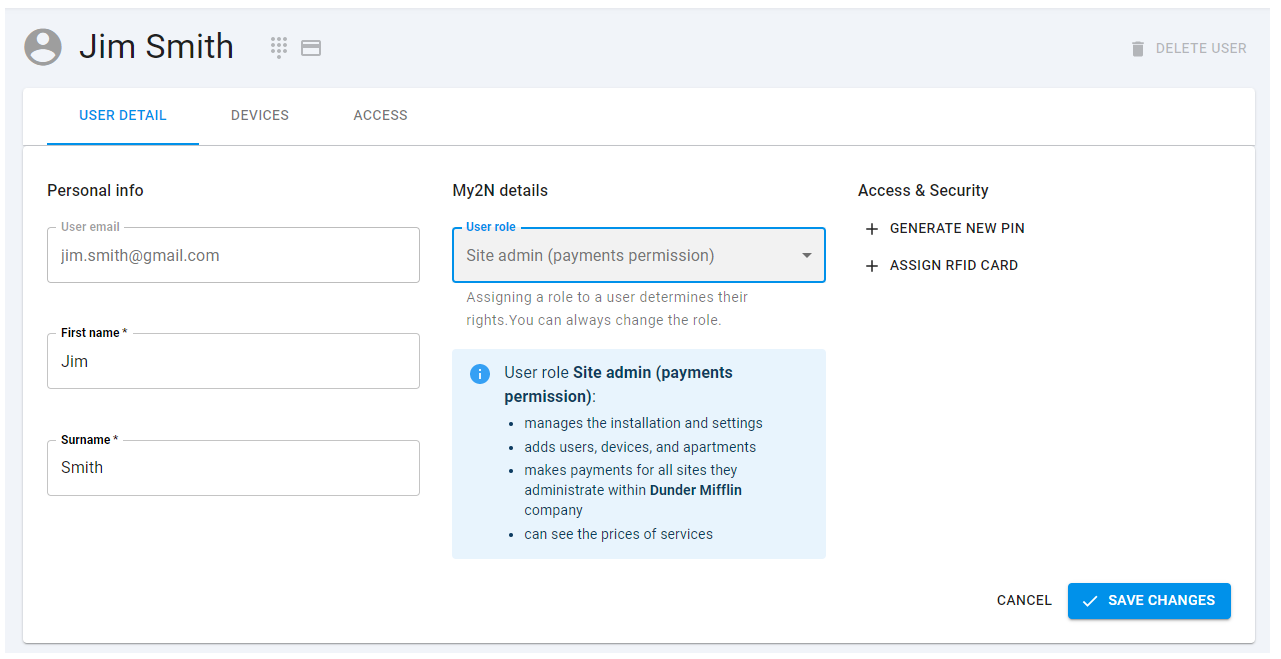
Site role settings
Once you have those things set up you only need to set the Call settings in on the intercoms device page. Simply choose the name of the call button, assign the answering devices and save the settings. Also, set the switch codes in the section "Switch codes" if you want to be able to trigger the switches of the intercom.
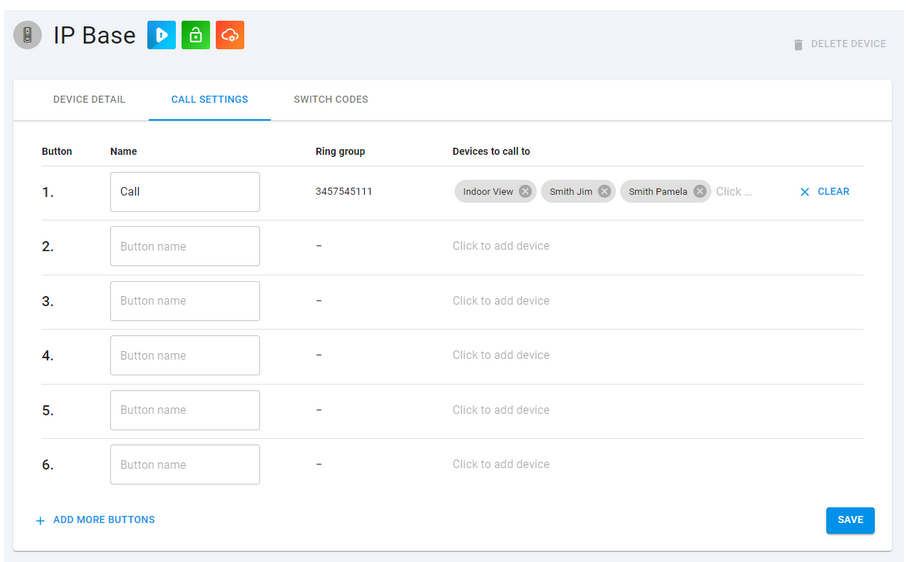
Call settings of the intercom
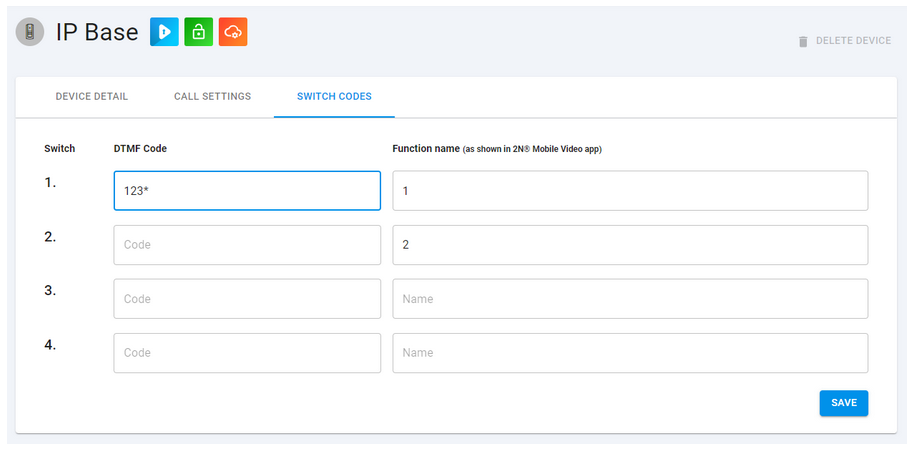
Switch settings of the intercom
Apartments
Here you can find an example, where the apartment building has 3 intercoms at each entrance point (2N® IP Base, 2N® IP Uni, 2N® IP Verso), and 8 apartments (4 floors with 2 apartments on each floor).
1) Add your intercoms to the site. The intercoms can't be assigned to an apartment because they are common for all apartments. They belong to the building. You can see the intercoms on the devices list.

2) Create the apartments. Set the floor number and a number of the apartment.

3) Now you can add answering units and smart devices and assign them to the correct apartments. In the case of the 2N answering units, you need to set the connection mode to Cloud as well as enable the Mobile Video service.

Adding 2N answering unit

Setting Cloud mode for the 2N answering unit

Adding a smartphone
4) Once you have added all answering units and smartphones, you can see the list of apartments and the number of devices active in them. As you can see, both Halpert and Scott apartments have 2 devices, but in Halpert apartment, only 1 green box is filled and in Scott apartment 2 green boxes are filled. That is because the 2N Indoor answering unit in Halpert apartment doesn't count since the 2N answering units have a free subscription. The information is about smartphones and 3rd party devices that require a subscription.

5) The last step is to configure the call setting of each intercom. You can also create a different phonebook to restrict Mobile Video access to certain intercoms (Phonebook - How to setup alternative phonebook).

Other (office, retail, special-purpose)
Here's an example of an office building with 2 entrances with 1 intercom on at each door (2N® IP Base and 2N® IP Verso), 1 indoor answering unit (2N® Indoor View) and 1 smartphone device.
1) After adding the intercoms and the answering units you can add the smartphones. When adding the smartphone, you can assign them to specific users. In our case, we will create a user called Receptionist.

In the case of the 2N answering unit, you need to set the connection mode to Cloud as well as enable the Mobile Video service.

2) Once you have all devices added the only thing that we need to do is set the Call settings and Switch codes on the intercom device page. Simply choose the name of the call button, assign the answering devices and save the settings. Also, set the switch codes in the section "Switch codes" if you want to be able to trigger the switches of the intercom.

Device list

Call settings

Switch codes