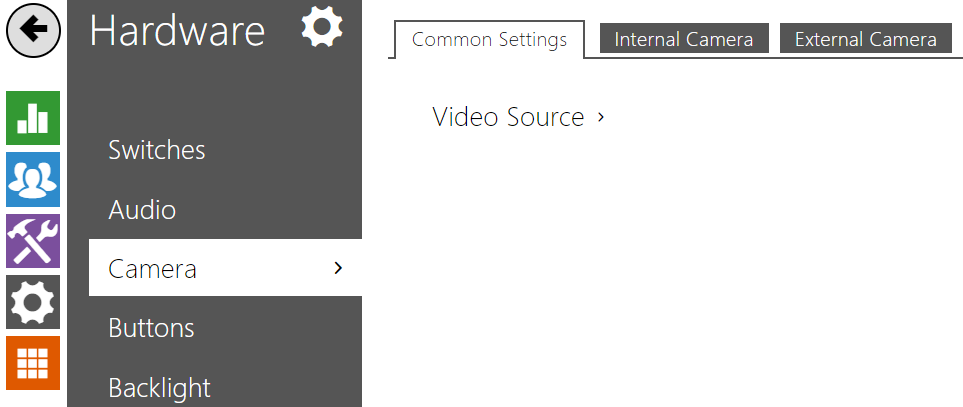
5.5.3 Camera
 |
This menu is only available in the 2N IP intercom models that are equipped with an internal camera or can be connected to an external camera. The camera signal can be streamed directly into the call via a videophone, sent by E-mail, streamed via ONVIF/RTSP to another device (a video surveillance device, e.g.), or simply HTTP downloaded from the intercom in the JPEG format.
The following video signal sources can be used:
- an internal integrated camera or external analog camera (2N IP Video Kit only)
- a standard external IP camera supporting RTSP stream with codecs MJPEG (640 x 480 max resolution) or H.264 3.0 (640 x 480 Base Line Profile max resolution). The recommended framerate is 15 frames per second in either case. Higher frame rates may result in undesired effects (less smooth playing).
The Camera menu helps you set such camera parameters as brightness, color saturation and external IP camera login data if necessary. Refer to the Services / Phone, Services / Streaming and Services / E-Mail menus for the video call/streaming parameters.
Common Settings
 |
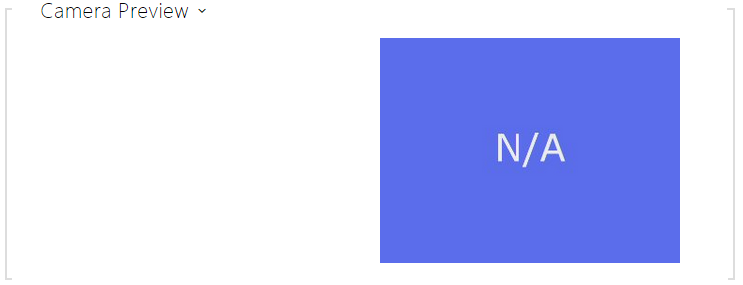
- Default video source – set default camera source. Choose between the internal camera (or an analog camera connected to the intercom) or an external camera. The change of the default video signal source is applied to the RTSP stream and HTTP API. In 2N IP Eye it is required to enable the external camera manually, even when there is no internal camera present in the device. If no internal camera is connected to the intercom, External IP camera can only be selected. If the external camera is not connected or configured properly, N/A is displayed on a blue background.
- Live Preview – display a live preview from a 2N IP intercom camera.
Internal Camera
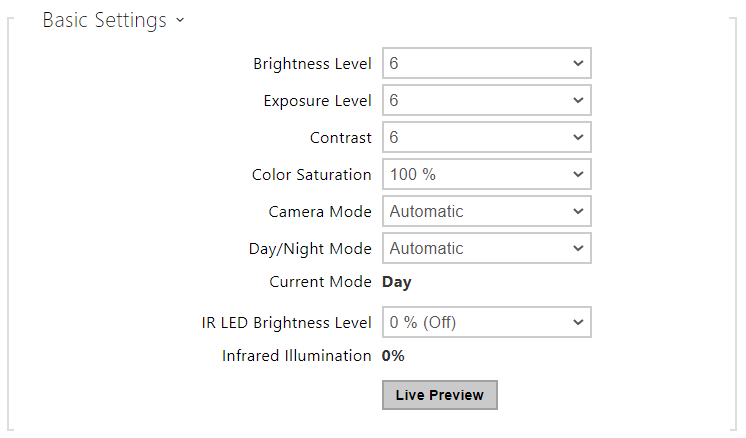 |
- Brightness Level – set the camera image brightness. This setting allows brightening or darkening the entire image.
- Exposure Level – set the camera image exposure compensation. This allows prioritizing correct exposure in bright (lower values) or dark areas of the image (higher values).
- Contrast – set the camera image contrast.
- Color Saturation – set the camera image color saturation.
- Camera Mode – set the appropriate combination of exposure mode and power line frequency if flicker is visible in the camera image. Choose variable image flicker cancellation modes for indoor sites illuminated by artificial light. Or, set direct sunshine suppression for outdoor applications.
- Automatic Framerate Decreasing – enable automatic frame rate decreasing under worsened illumination conditions to improve image quality by lowering the frame rate.
- Image Trimming – the 2N IP Force camera view angle allows you to scan the largest area possible. Use this parameter to enable automatic camera image trimming to eliminate the (sometimes annoying) view of the intercom frame. Disable this function to get the maximum possible view angle. The parameter is available in the 2N IP Force models only.
- Day/Night Mode – set to Always Day to enable the IR suppression filter and disable IR illumination. Set to Always Night to do the opposite and turn the image black and white. Automatic mode switches between the two based on ambient light levels.
- Current Mode – display the currently selected camera mode (day/night). In the day mode, the camera uses an IR suppressing filter and infrared illumination is disabled. In the night mode, the IR suppressing filter is disabled and infrared illumination is on.
- IR LED brightness level – set the IR LED brightness level. IR illumination is only used in Night Mode, which is automatically activated in low ambient light conditions by default. The IR LED brightness level settings are only available in the 2N IP Style, 2N IP Verso and 2N IP Force with HD camera models.
- IR Illumination – display the current IR LED brightness level percentage. The level can automatically be decreased below the set value so that the maximum power consumption cannot be exceeded (typically, when multiple extenders are connected and PoE supply is used).
- Live Preview – display a live preview from a 2N IP intercom camera.
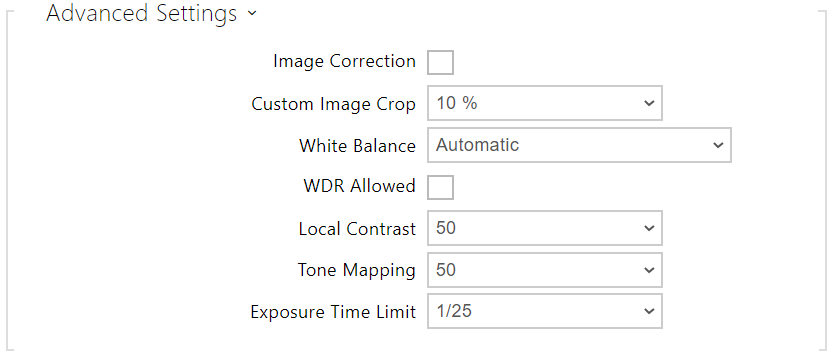 |
- Image Correction – enable fisheye lens correction.
- Custom Image Crop – sets default centered scene crop (margins are symmetrically cropped).
- White Balance – set the fixed white balance according to the prevailing light source where the automatic white balance is insufficient (an improperly chosen white balance method leads to an undesired image discoloration).
- WDR Allowed – you are advised to enable WDR (Wide Dynamic Range) in case there are very dark places as well as highly illuminated spots on the scene. The WDR ensures that the whole scene is seen.
- – set a higher level to increase the contrast of the boundary between the bright and dark spots on the scene.
- Tone Mapping – set a higher level to increase the contrast of the boundary between the bright and dark spots on the scene.
- Exposure Time Limit – set the maximum time span for an image to be exposed and created. Where more light is available, the shutter does not have to be open for the whole time and the camera sets a shorter shutter speed automatically.
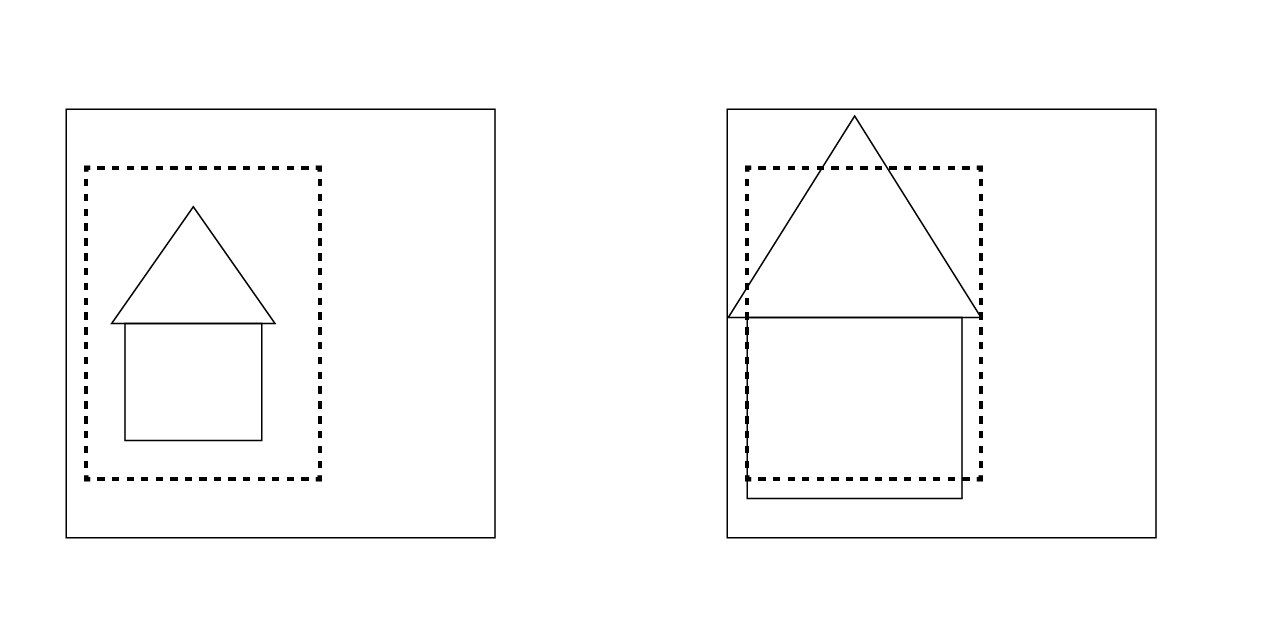
Caution
- Having changed the Custom image crop parameter for devices with the ARTPEC-7 chip set, check the limits of the motion detection and privacy masking areas, which will change spatially, see the picture.
 |
 |
Note
- This setting is only available in the models equipped with an external analog camera input.
- Video Input – choose one of the analog camera inputs. You can change the input by automation via the Action.SetCameraInput during operation.
- Video Standard – set the video standard for the camera connected. Modify the value only if the automatic video standard detection does not work well (Auto value).
 |
- Motion Detection Enabled – enable automatic motion detection via an internal camera. Motion is detected by monitoring of a brightness change in the selected image section in time. When objects move within the camera range, the selected part of the image detects an activity, which can be expressed in percentage. If the activity exceeds the upper limit, motion is detected and indicated as long as the activity drops below the lower limit. Select the sensitivity thresholds and detection area according to the requirements and installation site conditions.
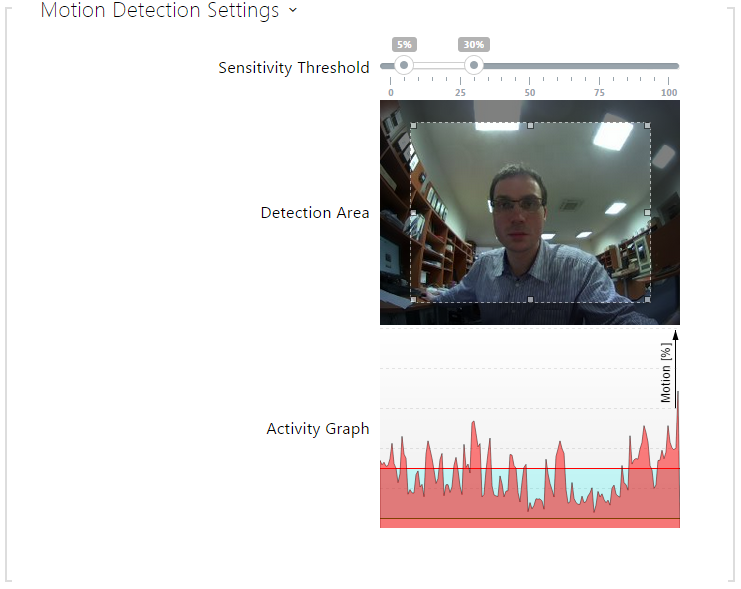 |
- Sensitivity Threshold– set the lower and upper sensitivity and hysteresis limits for the motion detecting algorithm.
- Detection Area – set the rectangular detection area in the image.
- Activity Graph – display the activity history (image brightness changes) including the upper/lower sensitivity thresholds.
Motion Detection and Privacy with ARTPEC-7 Equipped Devices
 |
- Motion Detection Profile 1/2 Enabled – enable automatic motion detection from an internal camera image. Motion detection is based on a change of the brightness component in the selected image section in time. Any movement within the camera detection area results in a change of a certain part of the image. If the activity exceeds the upper sensitivity threshold, motion is indicated. Motion is indicated until the activity drops below the lower sensitivity threshold.
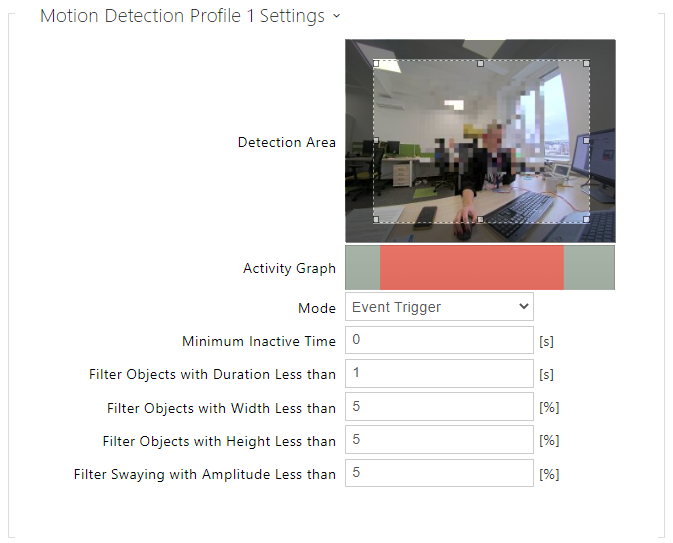 |
- Detection Area – set the rectangular detection area in the image.
- Activity Graph – displays motion detection history on a timeline. Green means no motion, gray means motion was detected but does not meet the filters' settings, red means motion was detected and meets the filters' settings.
- Mode – select a way of motion detection which generates a motion event record. Each mode is designed for specific scenarios and purposes.
- Event Trigger – instantaneous, nonrecurring movements are captured. An example is taking a snapshot whenever someone enters the room or an object moves near the device. The motions to be ignored are defined using the filters below.
- Upload – a motion event is generated at motion detection, which is automatically prolonged by 30 seconds. If another motion event occurs during the additional 30 seconds, the motion detections will be combined into a single event. This mode provides continuous coverage and avoids generation of multiple short events. This mode is suitable for security or monitoring purposes (ONVIF).
- Face Presence Detection – motion is detected and recorded whenever a face appears in the detection area. This mode can generate motions events even if static face images appear in the area.
- Incoming Person Detection – moving persons are detected and recorded. This mode eliminates motion events generated by the static face image detection.
- Minimum Inactive Time – set the minimum duration between two motion detection events. This prevents too many events from occurring in quick succession.
- Filter Objects With Duration Less Than – set the minimum time during which motion has to be detected continuously for the motion detection event to be generated. The setting range is 1 to 5 s, 0 disables this filter. The motion must meet other conditions set in this section.
- Filter Objects With Width Less Than – set the minimum width of objects to be detected in relation to the whole camera image width for the event to be generated. The setting range is 1 to 100 %, 0 disables this filter. The motion must also meet the other conditions set in this section.
- Filter Objects With Height Less Than – set the minimum height of objects to be detected in relation to the whole camera image height for the event to be generated. The setting range is 1 to 100 %, 0 disables this filter. The motion must also meet the other conditions set in this section.
- Filter Swaying With Amplitude Less Than – set the minimum amplitude of swaying objects in relation to the whole camera image width/height that has to be exceeded for the object to be detected (the setting has no influence on non-swaying objects). The setting range is 1 to 20 %, 0 disables this filter. The motion must also meet the other conditions set in this section.
Caution
- In ARTPEC-7 equipped devices, moving objects are evaluated even beyond the active zone including the set filters (if Custom Image Crop is enabled, objects are evaluated even in the cropped image parts that cannot be seen in the preview). The objects that enter the active area trigger a detected motion event. For example, if the time filter is set to 5 s, any object moving beyond the active area for 10 s triggers a detected motion the moment it enters the active area, because it has met the filter condition beyond the active zone. The object keeps being detected even if it leaves the active zone and having re-entered the active area, it triggers the event instantaneously (unless it leaves the camera image area completely and is 'forgotten').
 |
- Privacy Masking Enabled – enable privacy masking to mask an image section with the green color or mosaic.
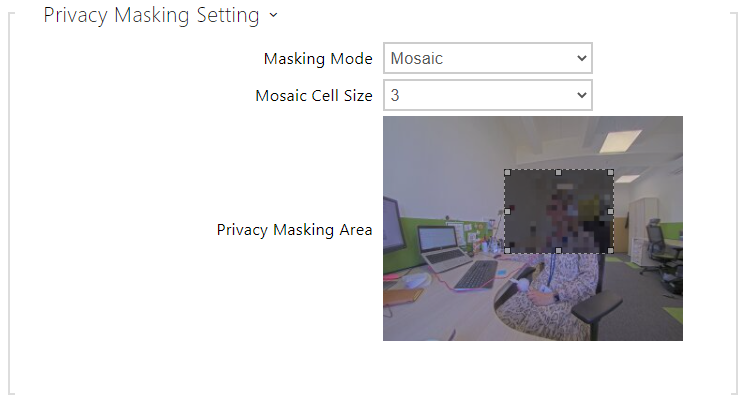 |
- Masking Mode – set the colormosaic for the masked area.
- Mosaic Cell Size – set the mosaic cell size in the masked area.
- Privacy Masking Area – set the privacy masking area position and size.
Caution
- Privacy masking may limit other functions, e.g. QR code reading or motion detection. We do not recommend the use of privacy masking together with the aforementioned functions.
External Camera
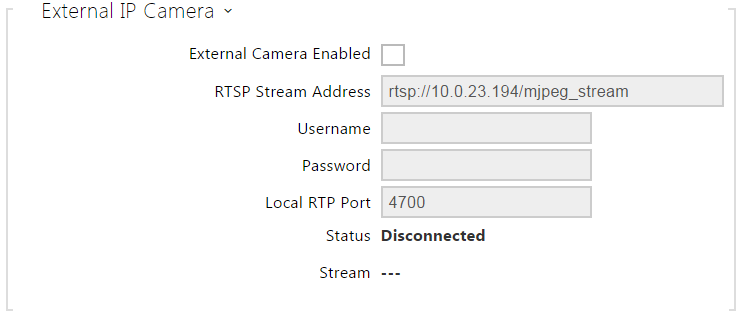 |
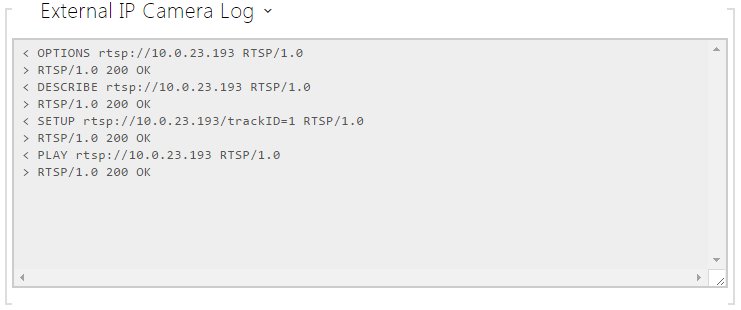
- External Camera Enabled – enable RTSP stream download from the external IP camera. Complete the valid RTSP stream address or the username and password to make the function work properly.
RTSP Stream Address – enter the IP camera RTSP stream address: rtsp://camera_ip_address/parameters, refer to the parameter table below. The parameters are specific for the selected IP camera model. If you choose another 2N IP intercom for the external camera, enter http://ip_address/mjpeg_stream or http://ip_address/h264_stream.
Parameter Description Values / Example vcodec Video Codec
vcodec=h264 for codec H.264
vcodec=mjpeg for codec MJPEGvres Video Resolution vres=640x480 for VGA
fps Video Framerate fps=15
(1 to 30 fps, MJPEG video codec limit is 15 fps).
vbr Bitrate vbr=768 for 768 kbps audio Audio - audio=1 (enabled)
- audio=0 (disabled)
zipstream Zipstream - zipstream=off (disabled)
- zipstream=low
- zipstream=medium
- zipstream=high
- zipstream=higher
- Username – enter the username for the external IP camera authentication. The parameter is obligatory only if the external IP camera requires authentication.
- Password – enter the external IP camera authentication password. The parameter is obligatory only if the external IP camera requires authentication.
- Local RTP Port – set the local UTP port for RTP stream receiving.
 |
 |