5.5.2 Audio
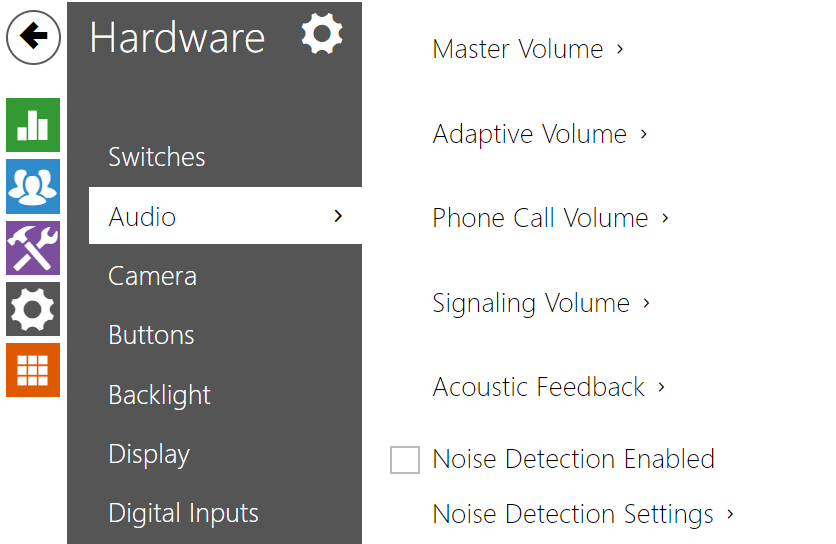 |
All the 2N IP intercom models are equipped with a speaker or power amplifier output to which an external loudspeaker can be connected. Set the phone call and state signalling volume control in this configuration section. Set the Master volume to control the master volume of the device: volume of calls, signalling tones, etc. Set this parameter according to the ambient noise level. If the noise level is not constant, use the Adaptive mode to increase the master volume temporarily depending on the ambient noise level.
Model | Master Volume |
|---|---|
IP Style | −12 dB .. +8 dB (2 x 4 W) |
IP Vario | −10 db .. +0 dB (150 mW) |
Force/Safety 1W | −12 dB .. +6 dB (1 W) |
Force/Safety 10W | −12 dB .. +20 dB (10 W) |
IP Uni | −12 dB .. +6 dB (1 W) |
IP Verso | −8 dB .. +8 dB (2 W) |
IP Verso 2.0 | −16 dB .. +6 dB (2 W) |
IP One | −16 dB .. +2 dB (2 W |
| IP Solo | −8 dB .. +4 dB (2 W) |
| IP Base | −8 dB .. +8 dB (2 W) |
| Audio/Video Kit | −10 dB .. +10 dB |
| SIP Speaker | −10 dB .. +10 dB |
| SIP Speaker Horn | −16 dB .. +16 dB |
List of Parameters
 |
- Master volume – set the master volume based on the desired call volume, then adjust other sound volumes as needed. This setting affects the volume of all sounds.
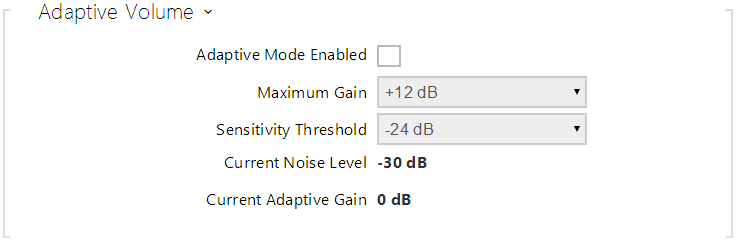 |
- Adaptive mode enabled – enable Adaptive Volume mode, which gradually increases the device volume based on the difference between the measured Current Noise Level and selected Sensitivity Threshold, up to the set Maximum Gain value. This setting further increases Master Volume.
- Maximum gain – set the Maximum Gain that can be applied on top of the Master Volume once the Current Noise Level surpasses the Sensitivity Threshold.
- Sensitivity threshold – set the ambient noise threshold that determines when the volume starts increasing.
- Current noise level – display the current ambient noise level.
- Current adaptive gain – display the current adaptive gain of the master volume. The value is determined by the difference of the Current noise level and Sensitivity threshold and never exceeds the Maximum gain value.
 |
- Ringtone volume – set the volume of the incoming call ringtone. The value is relative to the master volume.
- Call-progress tone volume – set the volume for dial, ringing, and busy tones. This setting will not be applied if ringback tones are generated externally. The value is relative to the master volume.
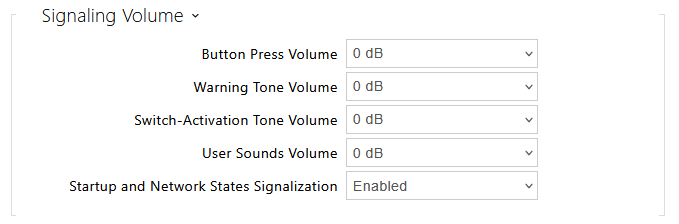 |
- Button Press Volume – set the Button Press Volume. The volume values are relative against the set master volume.
- Warning tone volume – set the volume of warning and signaling tones described in the Signaling of Operational Statuses section. The value is relative to the master volume.
- Switch activation tone volume – set the volume of switch activation tone. The value is relative to the master volume.
- User sounds volume – set the volume of user sounds played by automation. The value is relative to the master volume.
- Startup and Network States Signalization – Selects the audio signalization mode of the application startup and IP address acquired/lost.
- Enabled – The device plays audio signals each time the application starts and whenever the IP address changes.
- Disabled – No audio signals are played.
- Only once – The device plays the application startup and IP address acquired audio only once after boot. This is useful when the IP address changes frequently or intermittent connectivity issues occur, as repeated signaling might cause user discomfort.
 |
- Default audio input – set the default audio input (microphone, line input or audio module input) to be used for phone calls and audio streaming.
- Microphone input gain – set the microphone input gain.
- Line input gain – set the line input gain independently of the microphone gain value.
Tip
Only at 2N SIP Speaker Horn, 2N IP Audio Kit and 2N IP Video Kit is possible to configure microphone gain.
The microphone/line input gain setting is connected with the input signal level and type of external microphone installation. The wide gain range (0 to 39dB for a microphone input and −6dB to 24dB for a line input) should be sufficient for most installations. Set a value to ensure good audibility and eliminate excessive acoustic feedback at high loudspeaker volumes with subsequent signal saturation on the microphone/line input and thus acoustic echo cancellation (AEC) deterioration.
 |
- Acoustic feedback filter – set automatic suppression of acoustic feedback (typically whistling) between the intercom speaker and phone handset if located in close proximity to the intercom. This mode is disabled by default.
 |
- Noise Cancelling enabled (available for devices with ARTPEC processor, e.g. IP Style, IP Verso 2.0, IP Force 2.0, ....) – enables the noise suppression function.
This function removes unwanted noise from a speech audio signal. It operates on the principle of estimating the noise profile, which is then subtracted from the input signal. Neural networks are used for accurate estimation of this profile and for effective noise removal.
 |
- Noise Detection Enabled – enable automatic noise detection when the microphone signal level surpasses the set threshold. The alarm triggered by this can be processed using the automation event Event.NoiseDetected and linked to additional user actions.
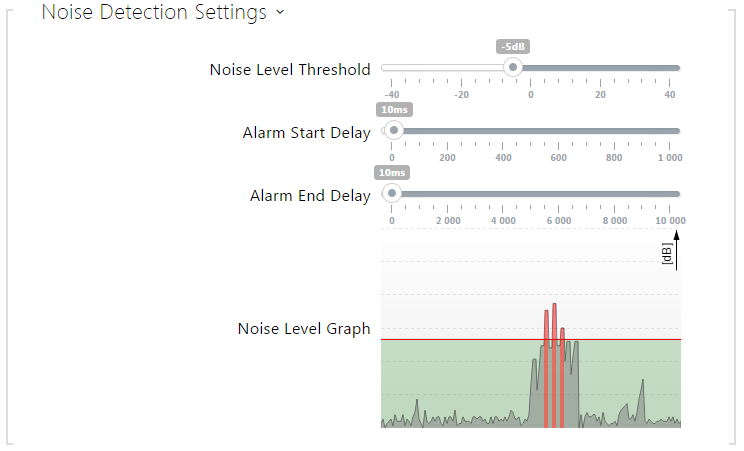 |
- Noise Level Threshold – set the microphone noise level threshold for alarm setting.
- Alarm Start Delay – set the time interval during which the signal must be above the threshold to start alarm.
- Alarm End Delay – set the time interval during which the signal must be below the threshold to stop alarm.
Noise Level Graph – display the signal level history. Red designates alarm activation.