5.6.5 Certificates
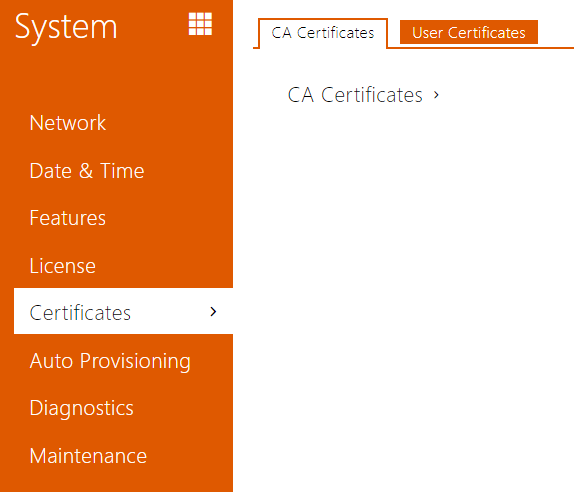 |
Some 2N IP intercom network services use the Transaction Layer Security (TLS) protocol for communication with other LAN devices to prevent third parties from monitoring and/or modifying the communication contents. Unilateral or bilateral authentication based on certificates and private keys is needed for establishing connections via TLS.
The following intercom services use the TLS protocol:
- Web server (HTTPS)
- E-mail (SMTP)
- 802.1x (EAP-TLS)
- SIP
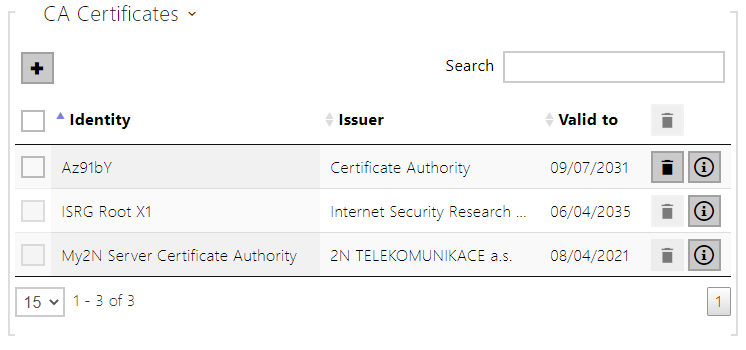
Sets of CA certificates can be uploaded to the 2N IP intercoms, which are used for identity verification of the device that the intercom is communicating with, and also of User certificates and private keys for communication encryption.
Each certificate-requiring service can be assigned one of the three certificate sets available; refer to the Web Server, E-Mail and Streaming subsections. The certificates can be shared by the services.
- 2N IP intercom accepts the DER (ASN1) and PEM certificate formats.
- 2N IP intercom supports the AES, DES and 3DES encryption.
- 2N IP intercom supports the following algorithms:
- RSA up to 2048bit user certificate keys; internally up to 4096bit keys (during connection – temporary and equivalence certificates)
- Elliptic Curves
Caution
- The CA certificates must use the X.509 v3 format.
Upon the first power up, the intercom automatically generates the Self Signed certificate and private key for the Web Server and E-Mail without forcing you to load a certificate and private key of your own.
Note
- If you use the Self Signed certificate for encryption of the intercom web server – browser communication, the communication is secure, but the browser will warn you that it is unable to verify the intercom certificate validity.
The current overview of CA and User certificate uploads is shown in the following two folders:
 |
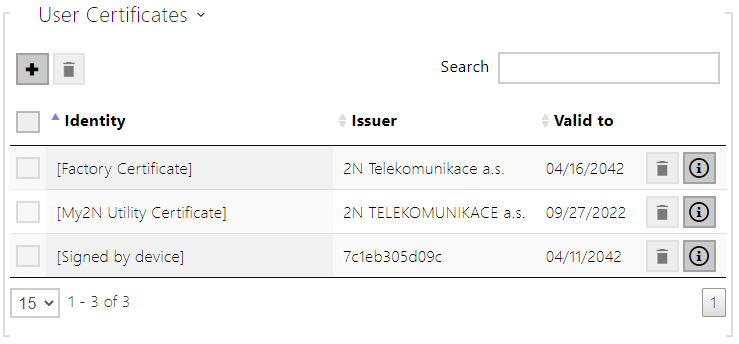 |
Press ![]() to upload a certificate saved on your PC. Complete the certificate ID in the dialogue box to select, edit or delete the certificate. Make sure that the ID is not longer than 40 characters and contains small and capital letters, digits and the '_' and '-' characters. The ID is not mandatory. Select the certificate (or private key) file in the dialogue box and push Load. Click
to upload a certificate saved on your PC. Complete the certificate ID in the dialogue box to select, edit or delete the certificate. Make sure that the ID is not longer than 40 characters and contains small and capital letters, digits and the '_' and '-' characters. The ID is not mandatory. Select the certificate (or private key) file in the dialogue box and push Load. Click ![]() to remove the certificate from the device. Press
to remove the certificate from the device. Press ![]() to show the certificate information.
to show the certificate information.
Caution
- The device changes the Self signed certificate into a new one after firmware update or restart. Check and compare the certificate displayed on the device with the web certificate for a match.
Note
- It is possible that a certificate with a private RSA key longer than 2048 bits will be rejected and the following message will be displayed:
- The private key file or private key password was not accepted by the device !
- For certificates based on elliptic curves use the secp256r1 (aka prime256v1 aka NIST P-256) and secp384r1 (aka NIST P-384) curves only.
CSR (Certificate Signing Request)
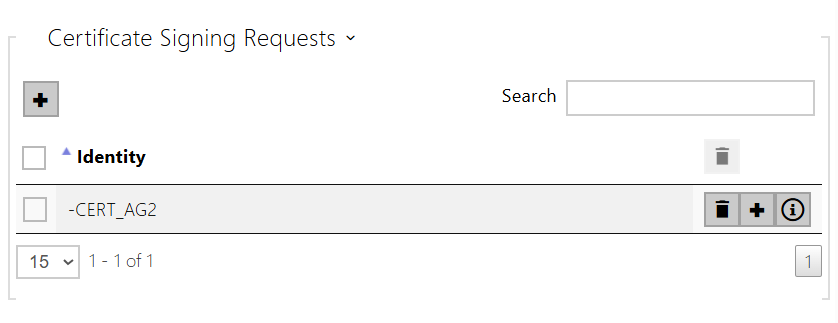 |
You can create a CSR (Certificate Signing Request) of your own in the web configuration interface to be submitted to the certification authority (CA) for signing. This process ensures that the certificate is properly paired with the private key generated when the CSR was created and is only stored in your device.
- Click
 to create a new Certificate Signing Request.
 - A dialog box opens for you to fill in the following:
- – name of the department/unit within the organization.
- – e-mail address of the contact person or certificate administrator.
Click Generate to create a Certificate Signing Request. Download and store safely the created CSR file.
- Submit the created CSR file to the certification authority (CA), which issues a digital certificate on its basis.
- Upload the issued digital certificate back to the CSR file in the web interface. Click
 in the given certificate request row for upload.
Press ![]() to remove the CSR. Press
to remove the CSR. Press ![]() to display the CSR parameters.
to display the CSR parameters.