Cisco CUCM
Content
About
Bring people together anytime, anywhere, and on any device with our integrated collaboration infrastructure for voice and video calling, messaging, and mobility.
Cisco Unified Communications Manager (Unified CM) provides reliable, secure, scalable and manageable call control and session management.
- Simplified provisioning and maintenance
- Comprehensive communications help boost productivity
- Embedded software capabilities support mobility - anywhere, with any content, on any device
- Multiple deployment models: public cloud, private cloud, on-premises and remote
Version 15
Cisco CUCM | 2N IP Intercom | Registrations | Calls |
|---|---|---|---|
| 15.0.1.10000-32 | 2.46 | ||
| 15.0.1.10000-32 | 2.44.0.57.3 |
Settings
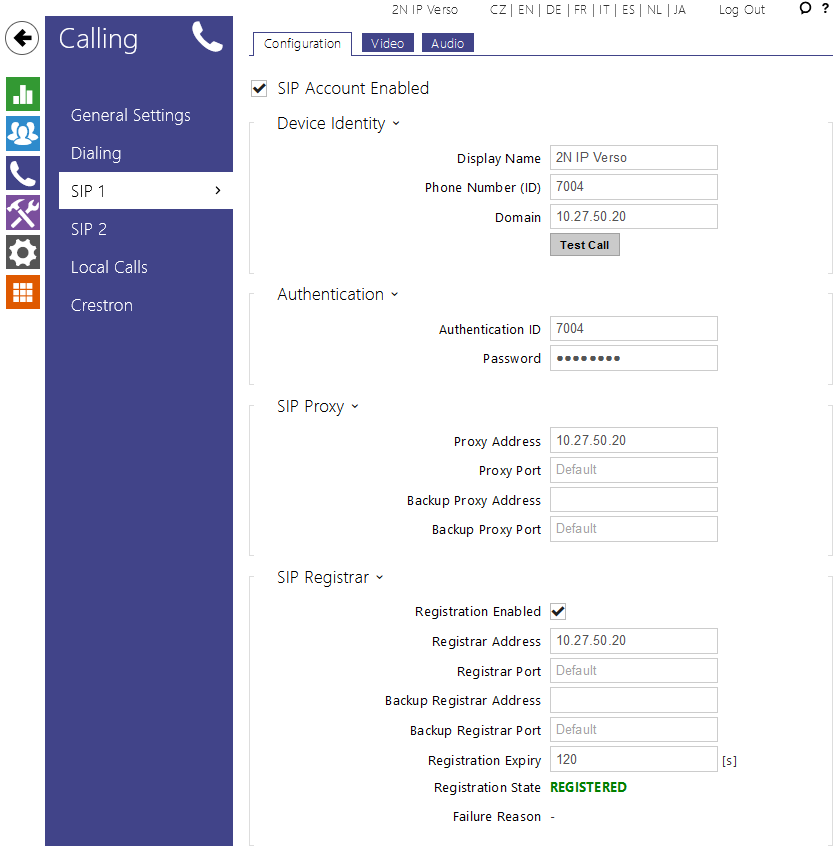
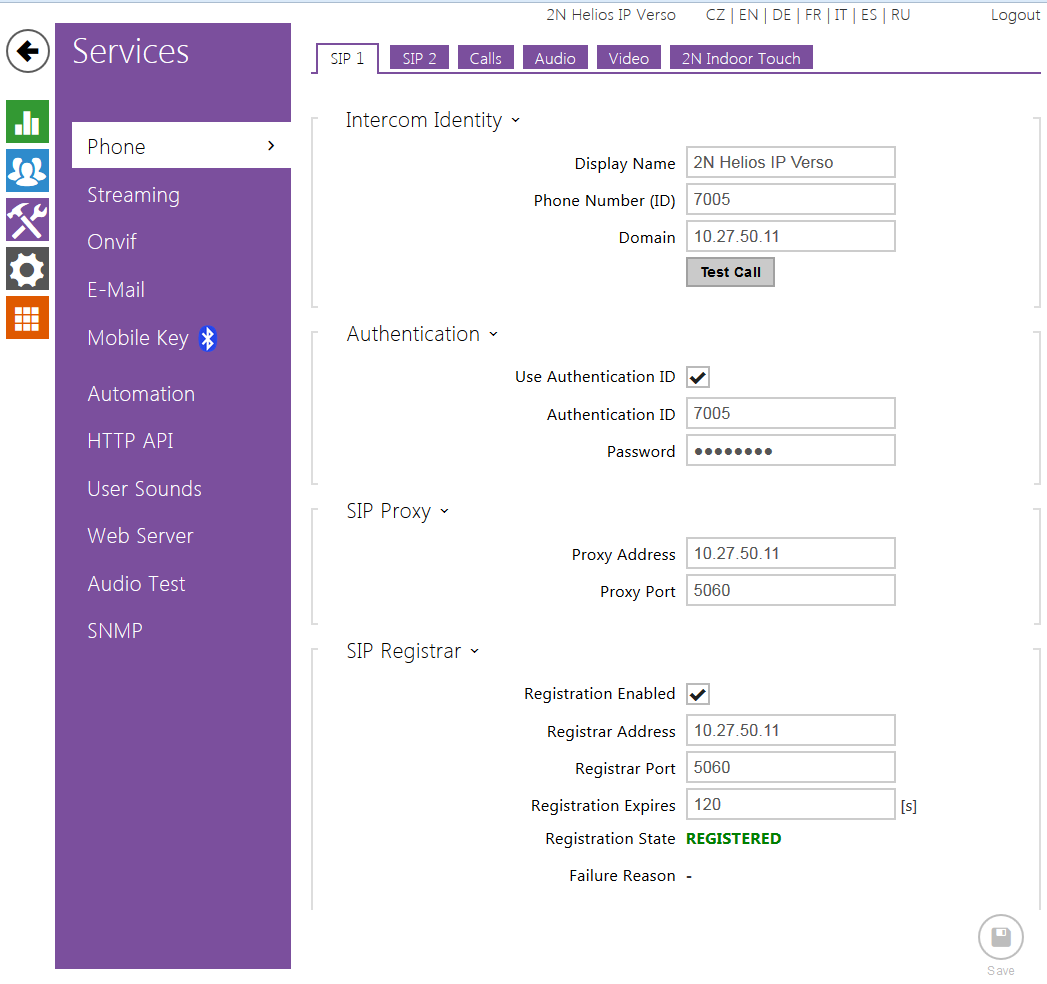
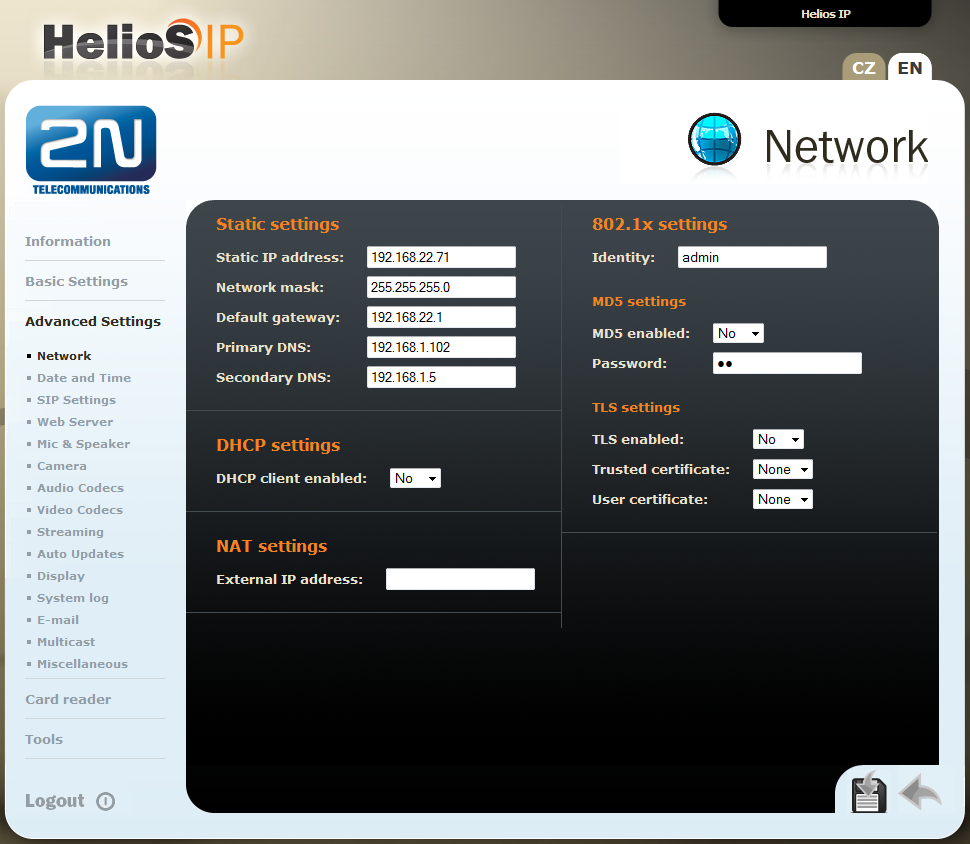
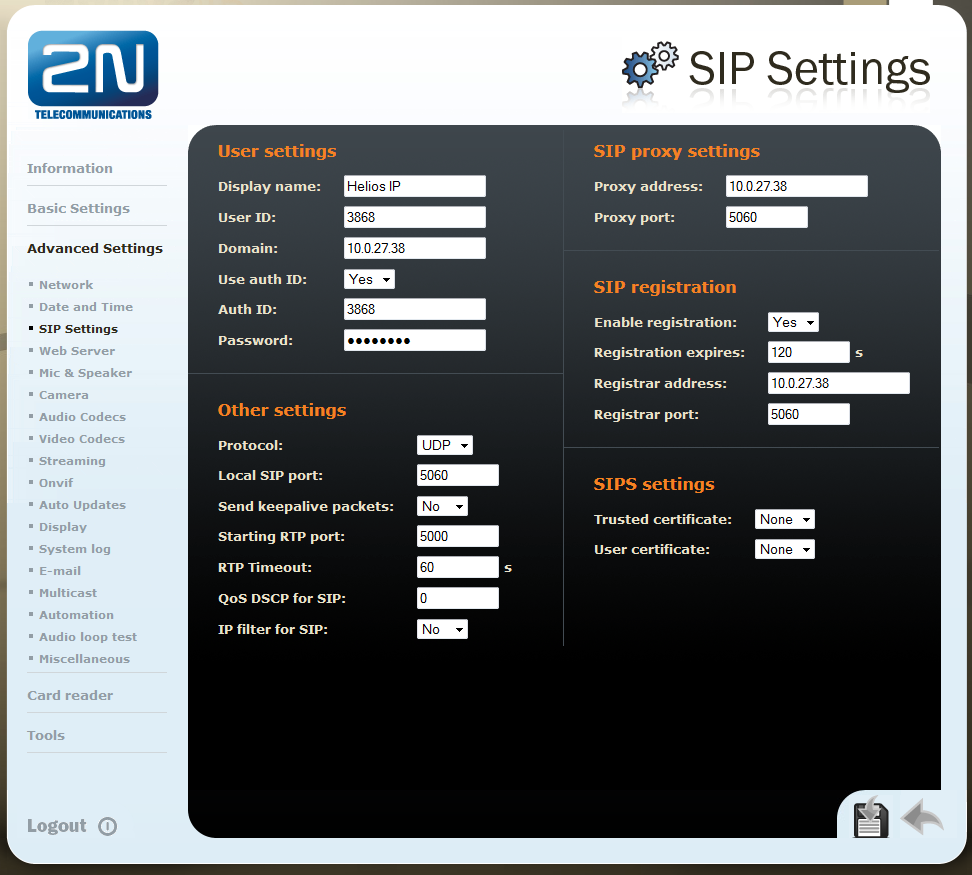
2N IP Intercom can be added as a SIP extension. We recommend using a static IP address for 2N IP Intercom .
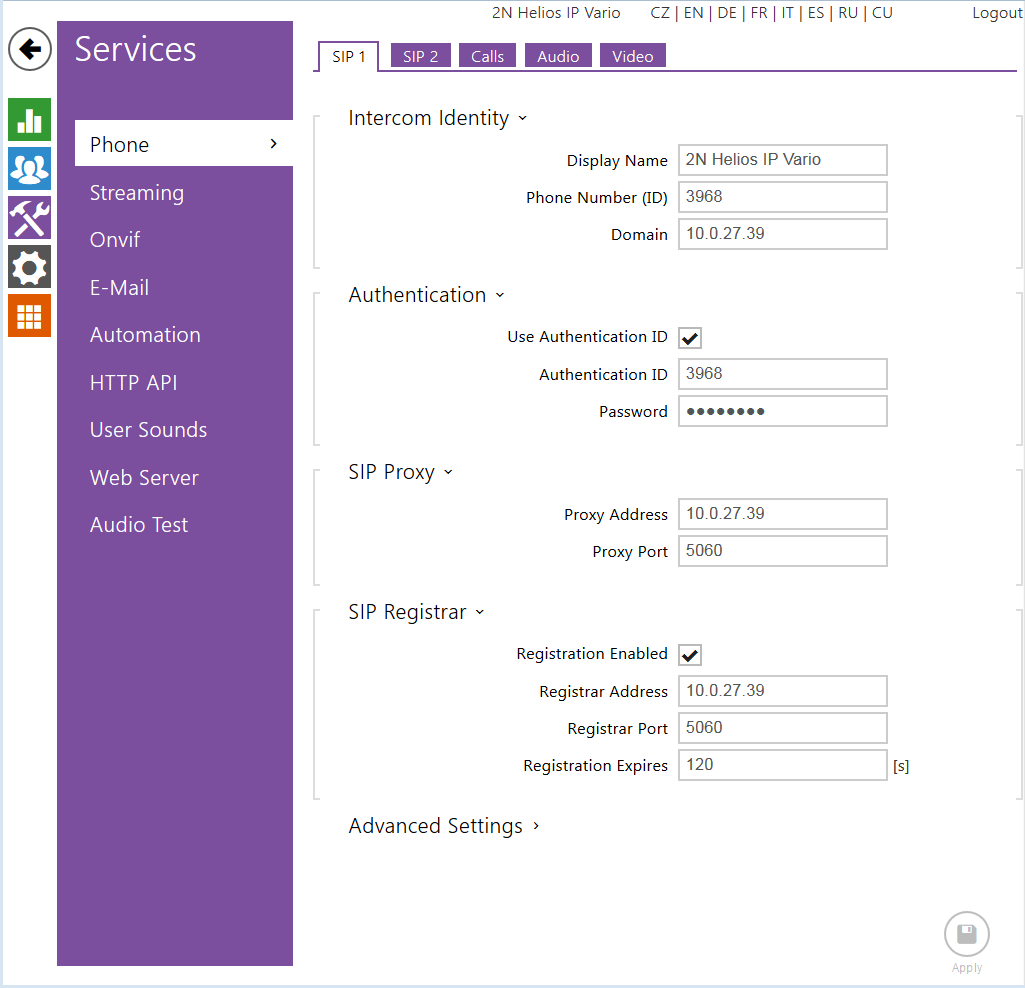
SIP Settings
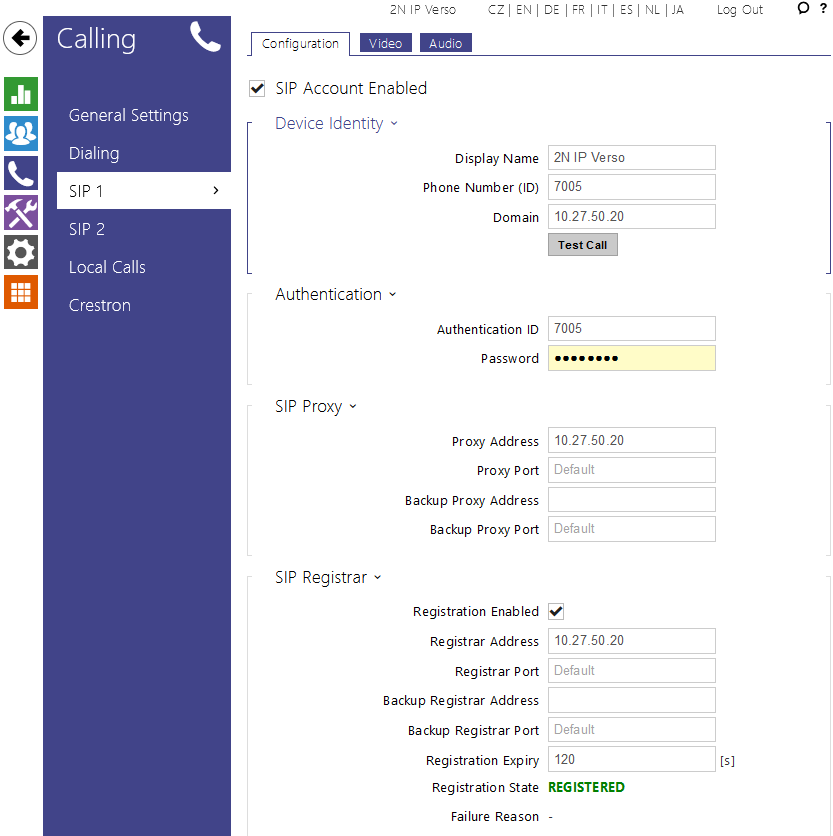 |
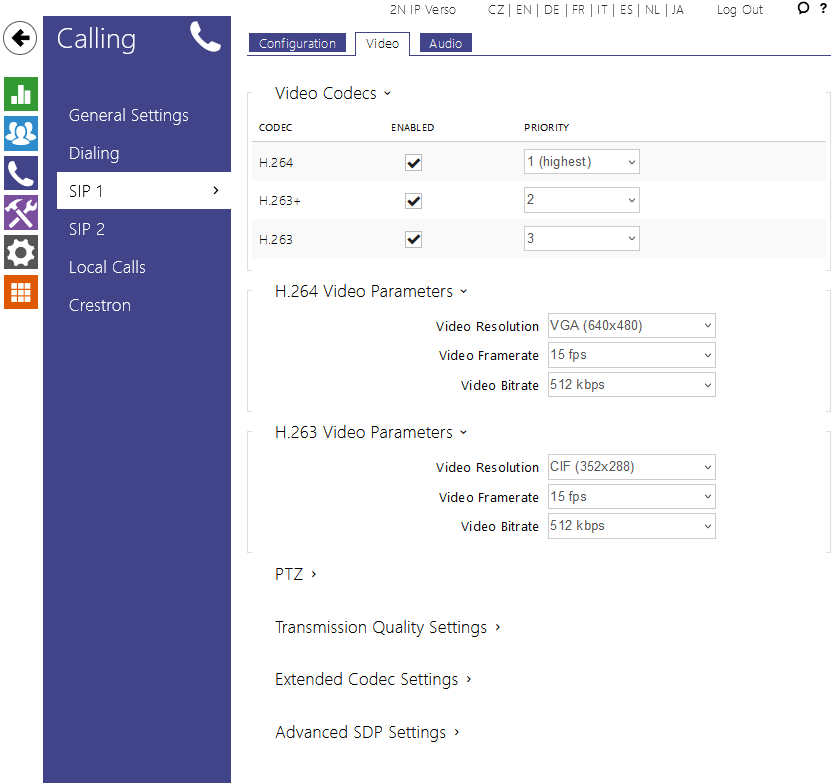
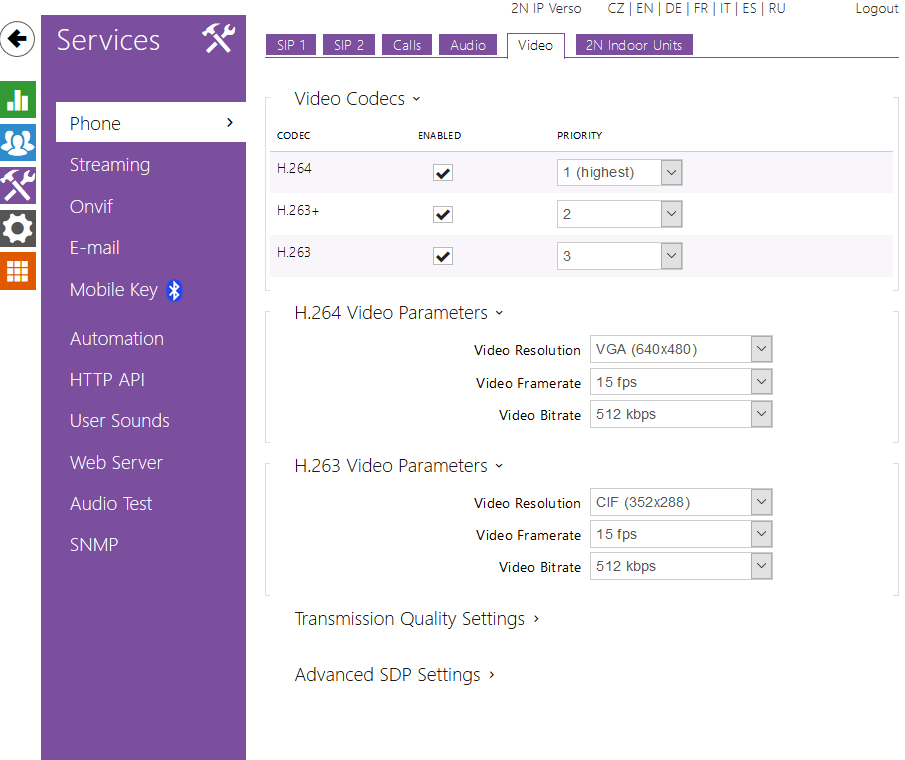
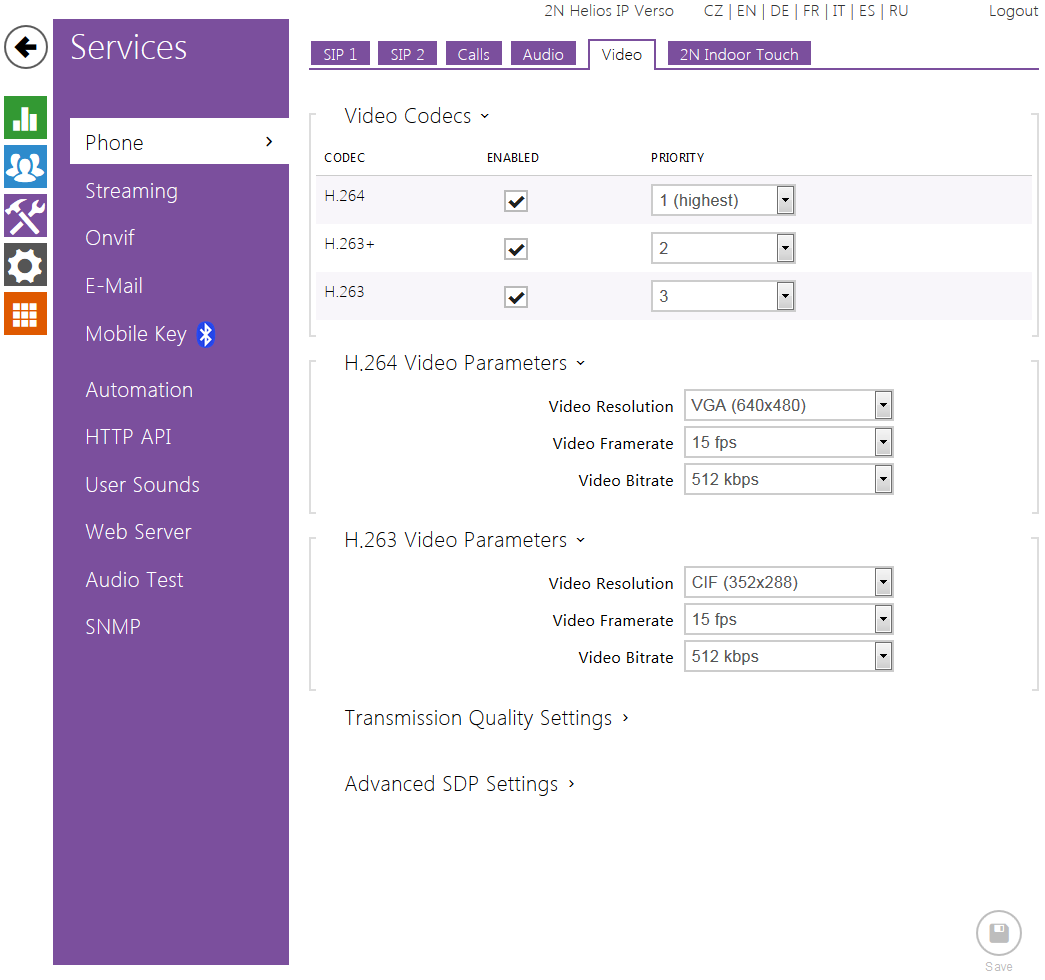
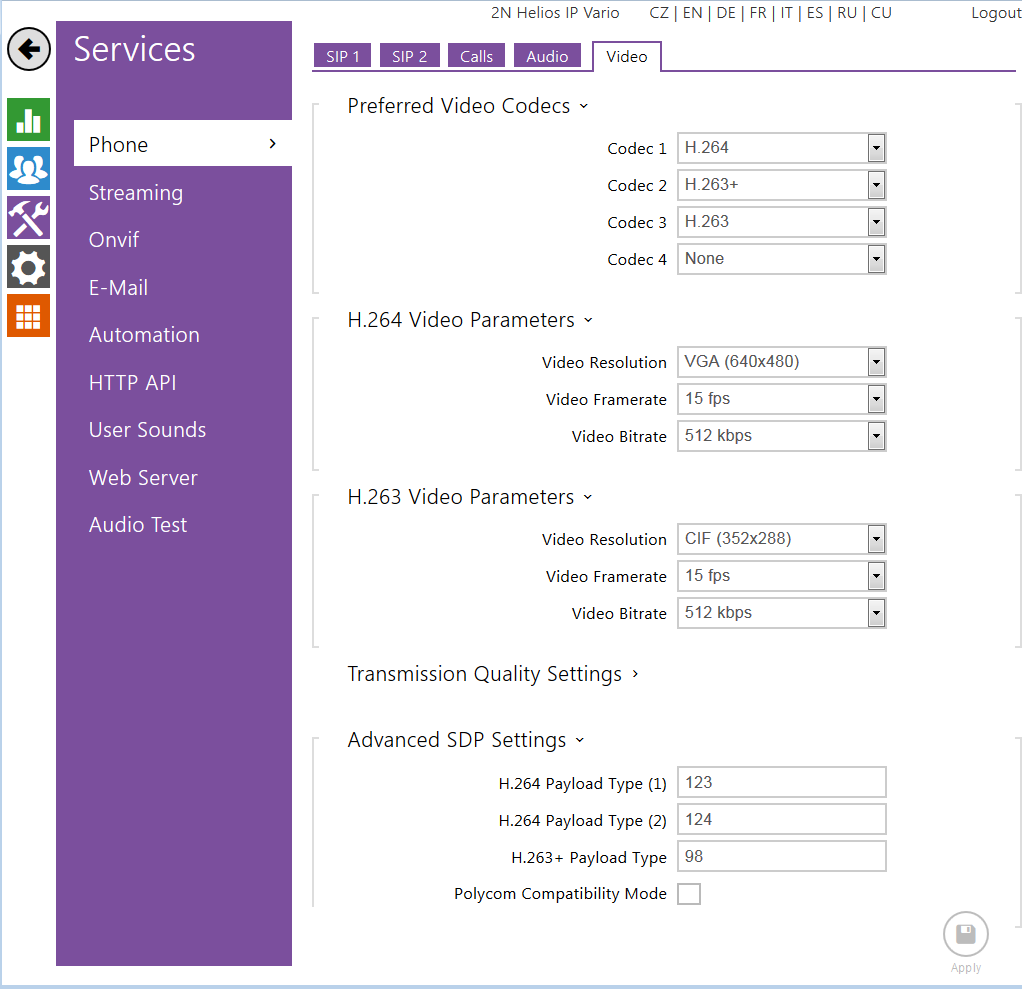
Video Codecs Settings
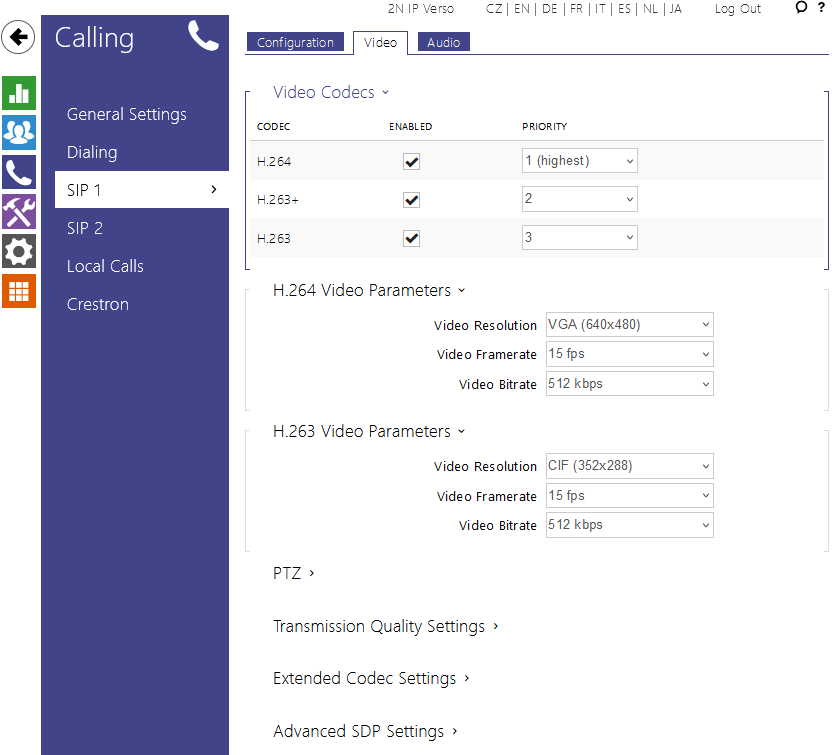 |
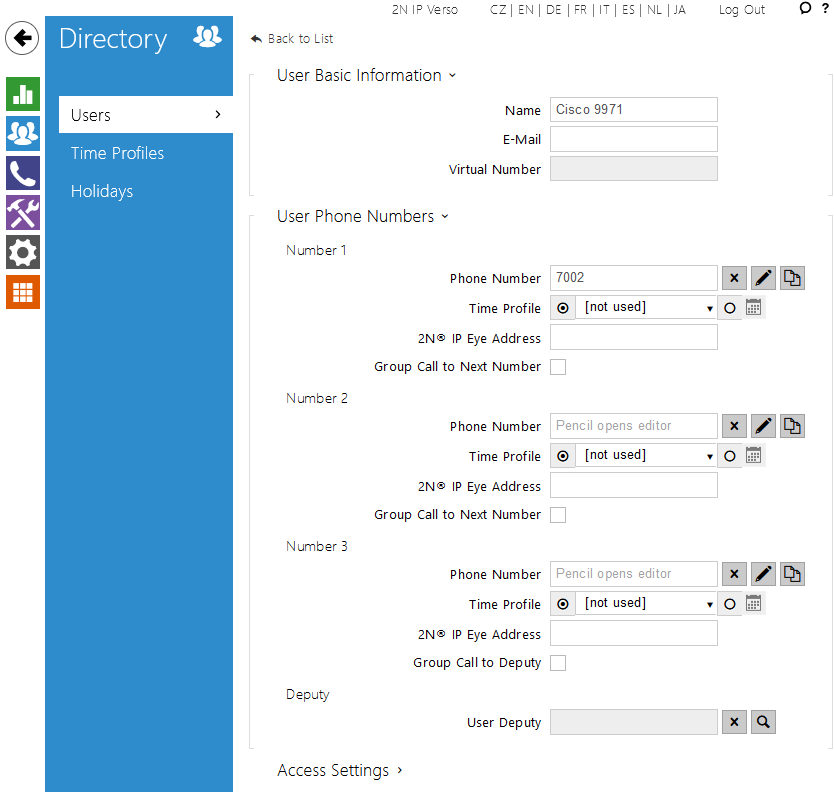
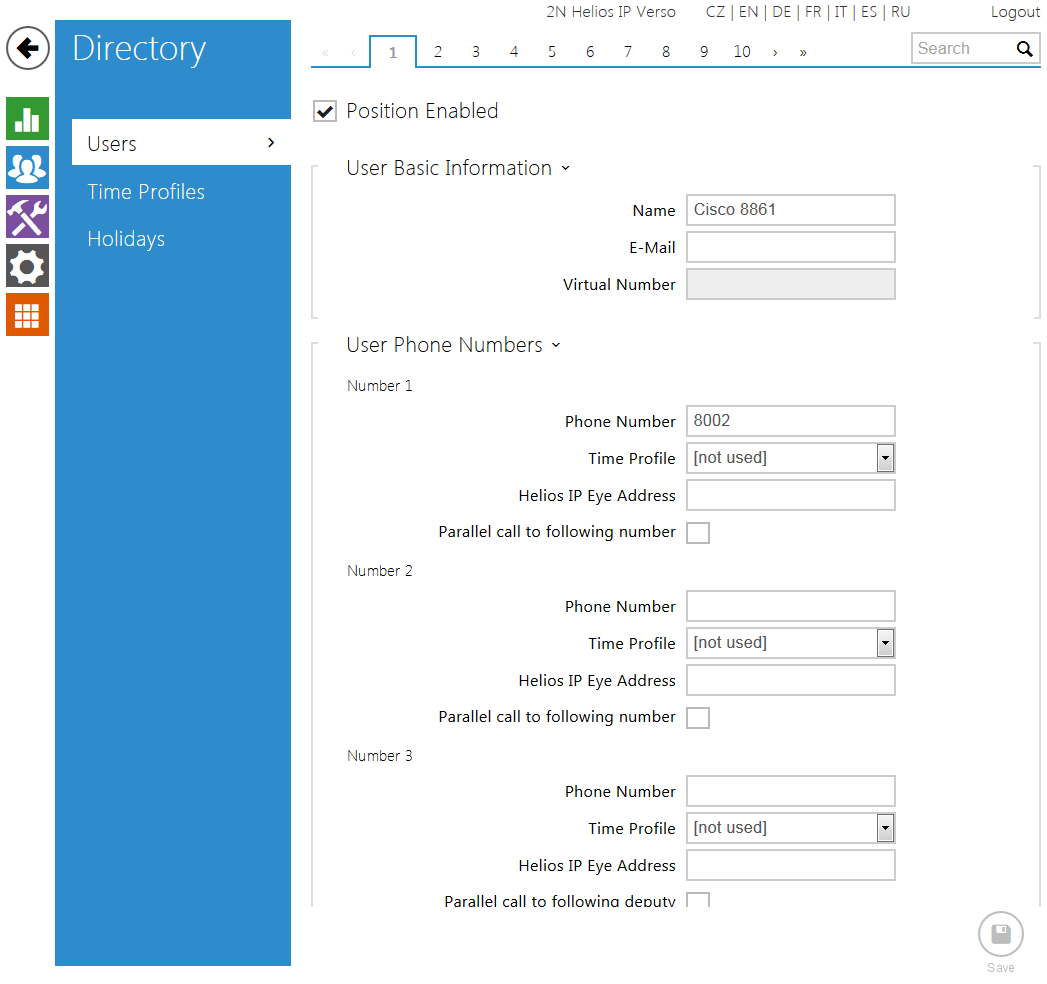
User Settings
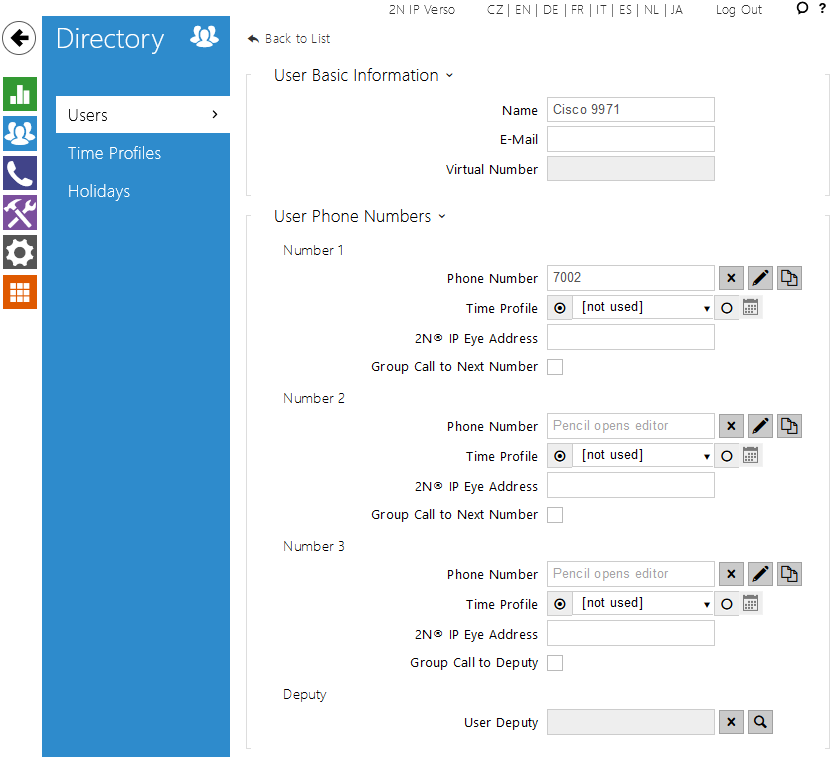 |
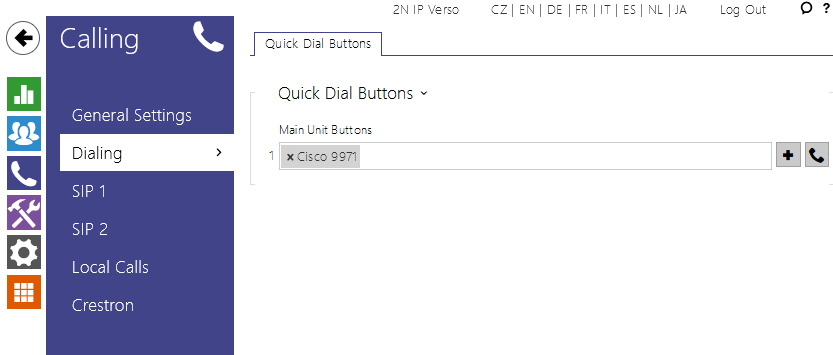
Quick Dial Button Settings
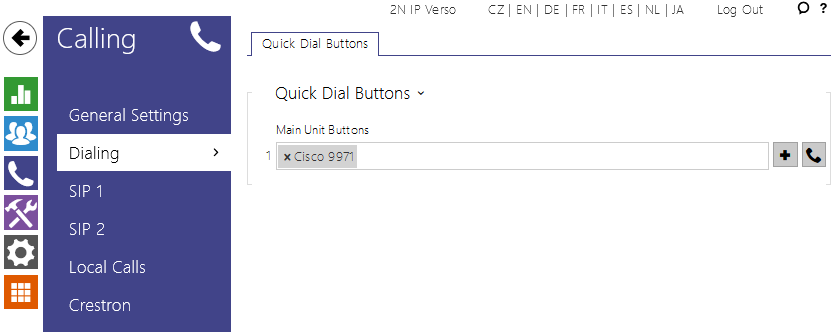 |
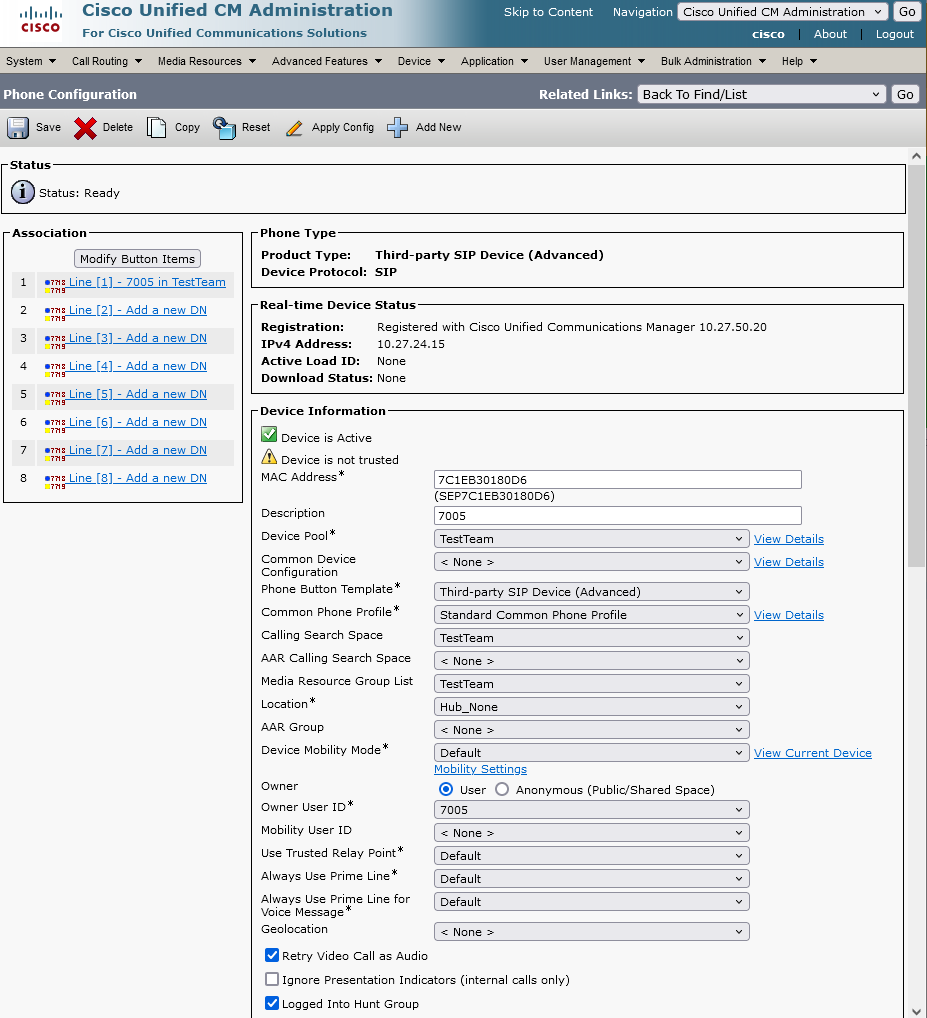
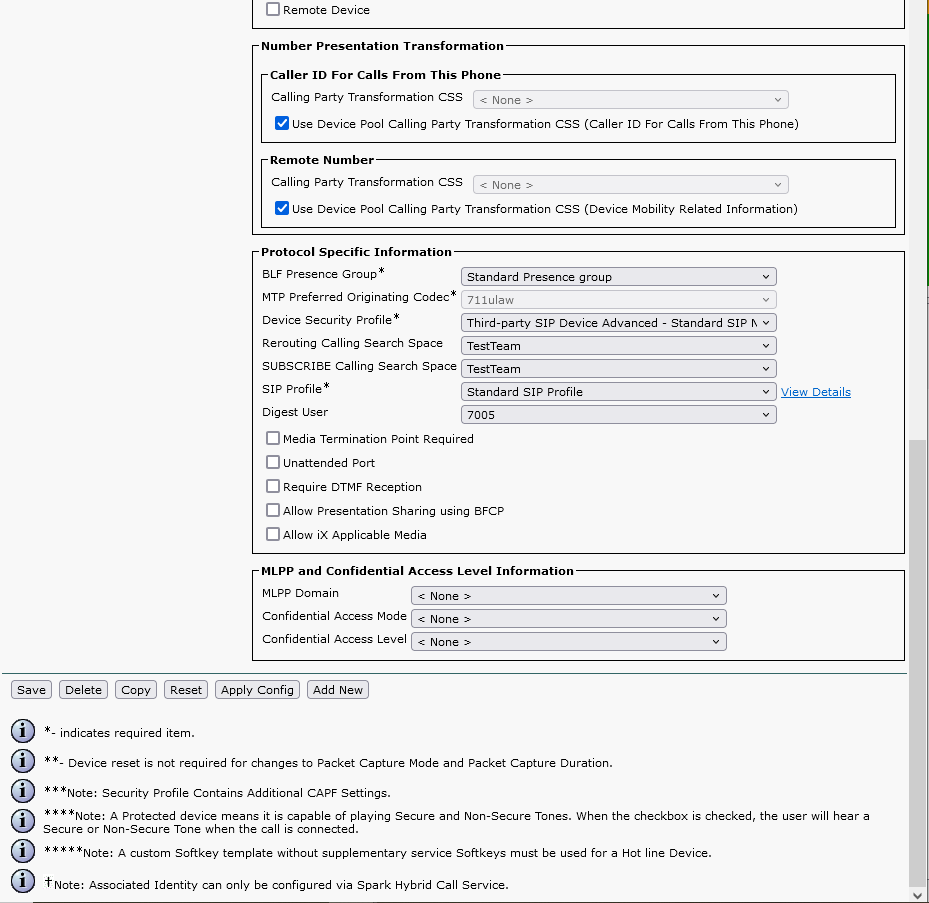
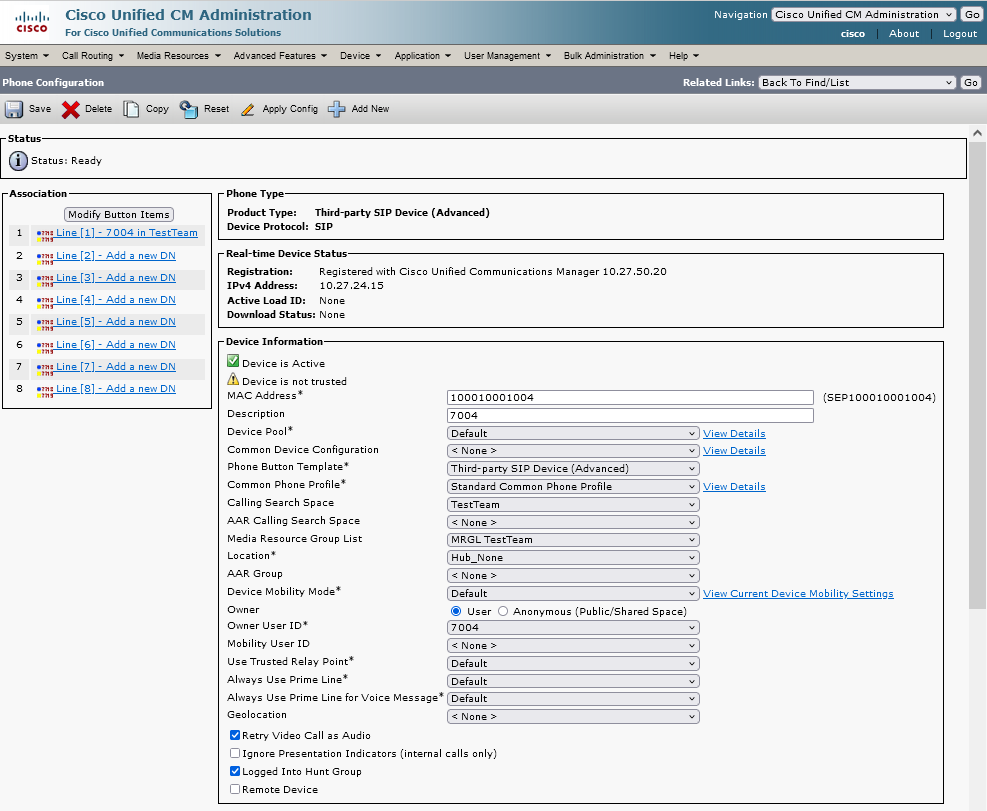
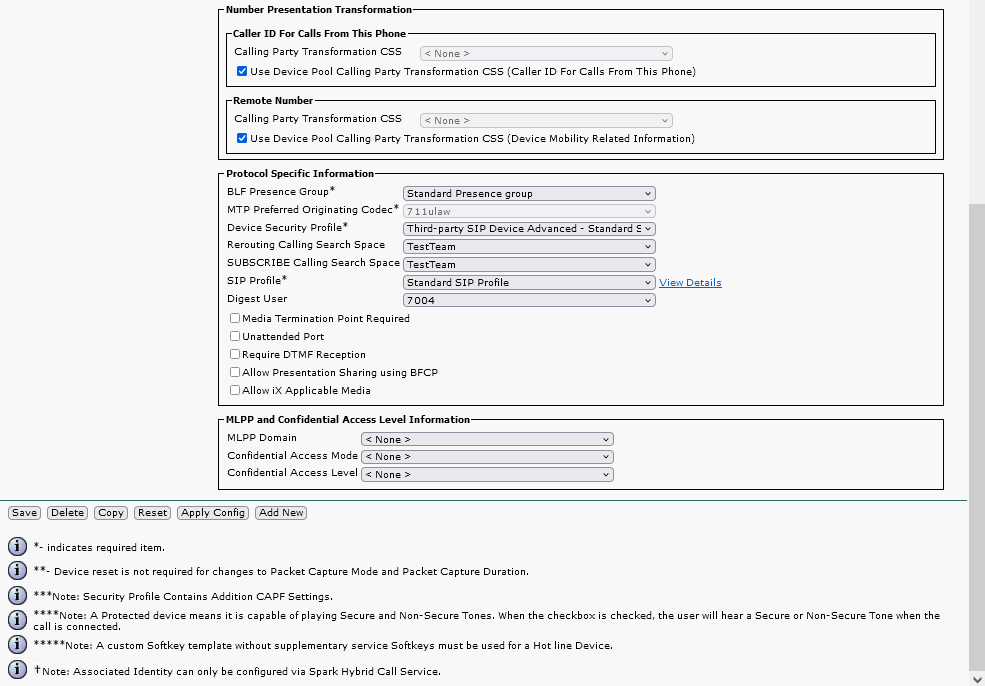
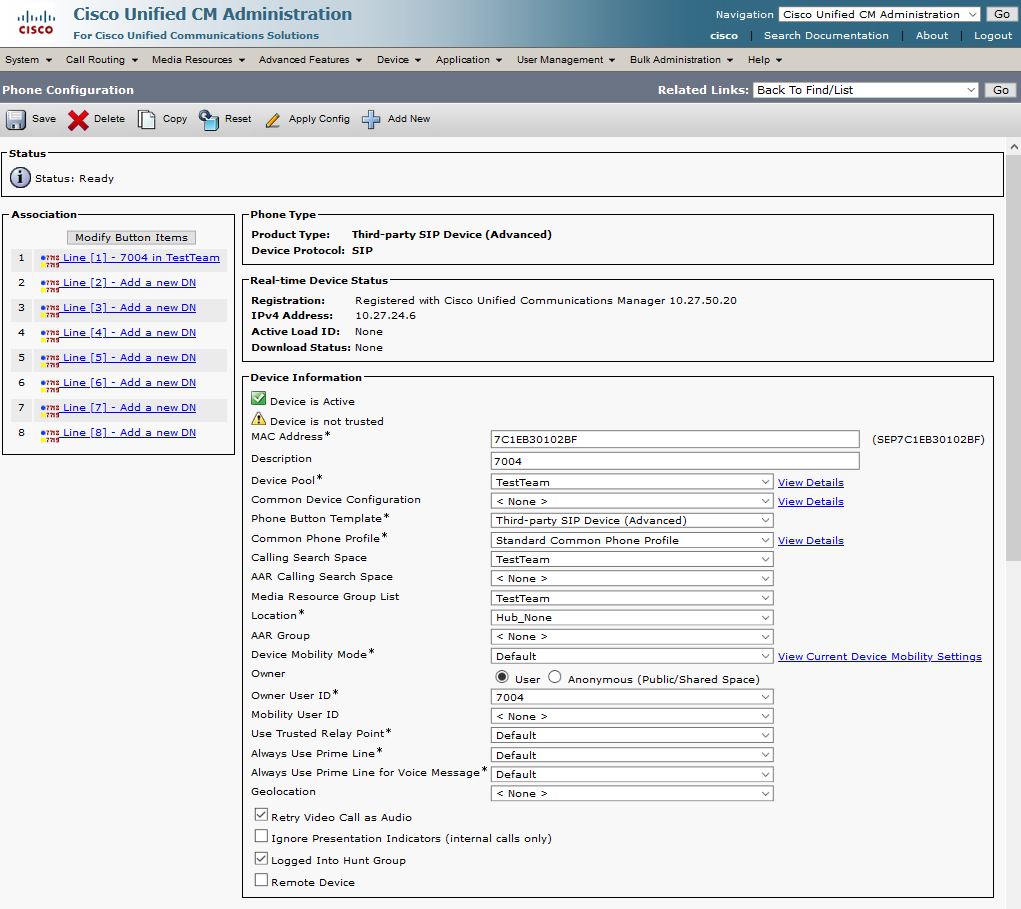
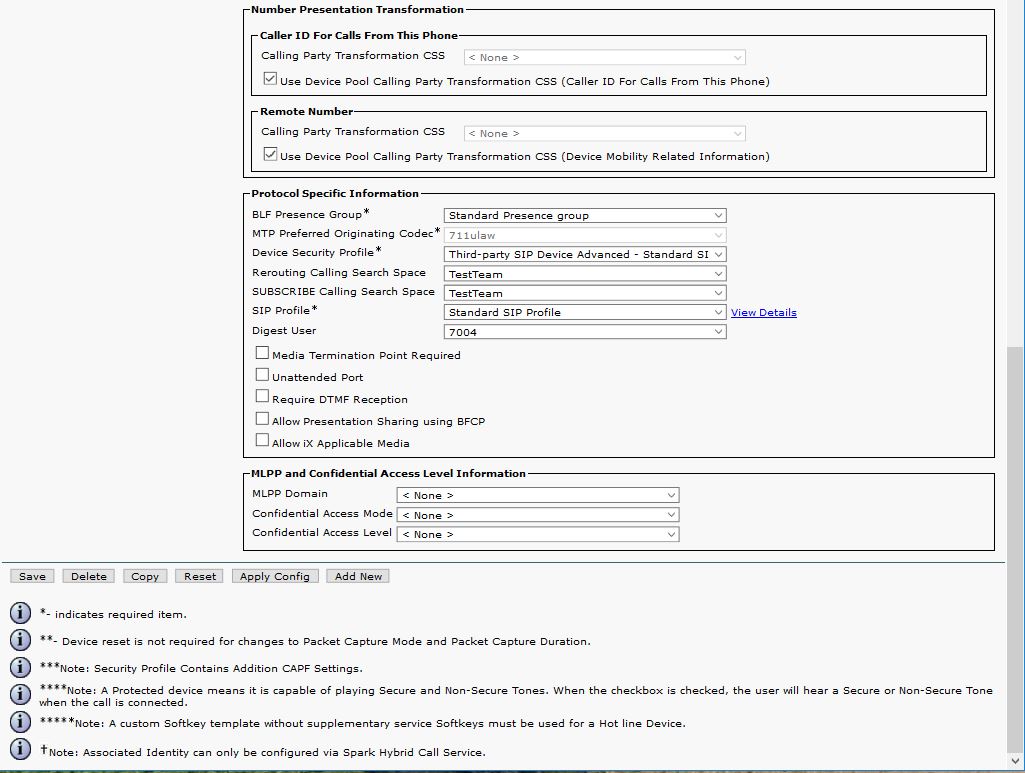
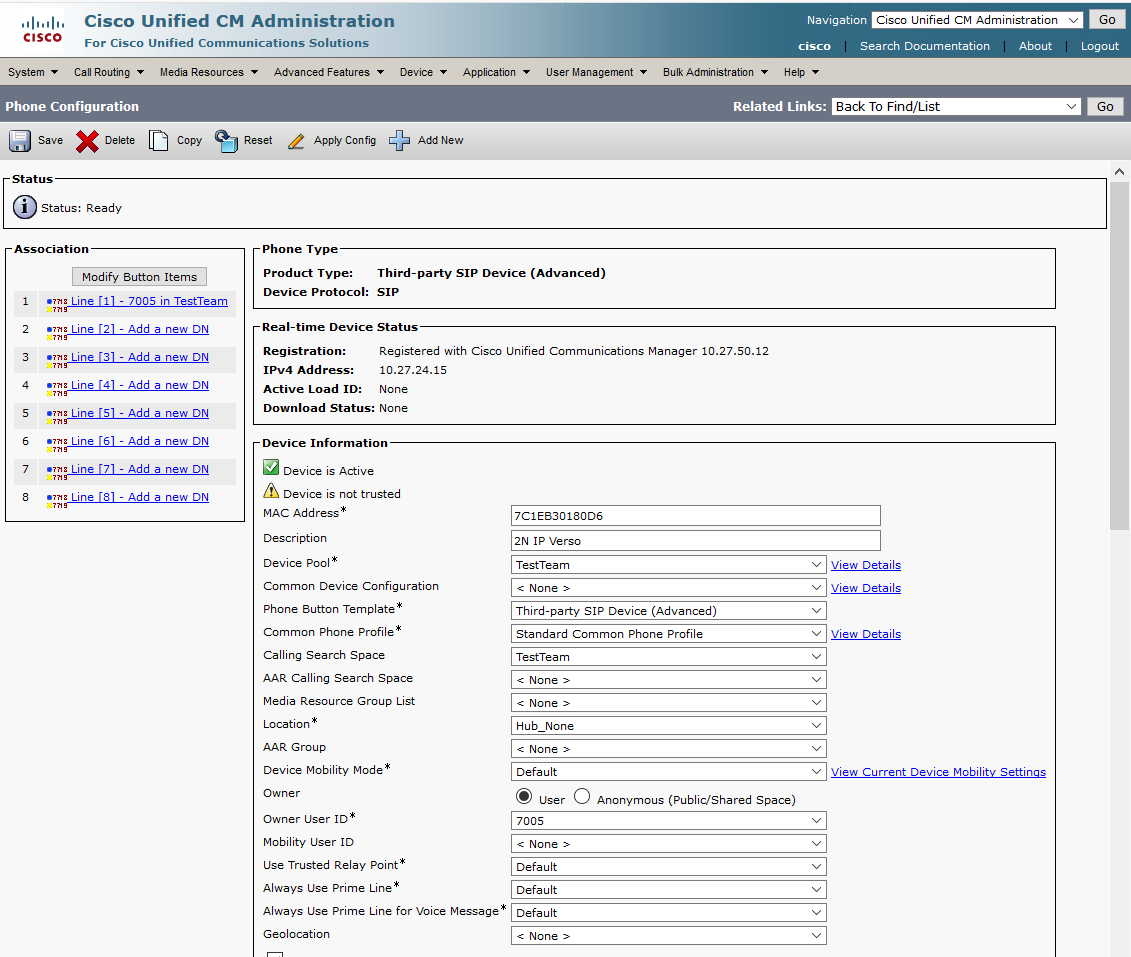
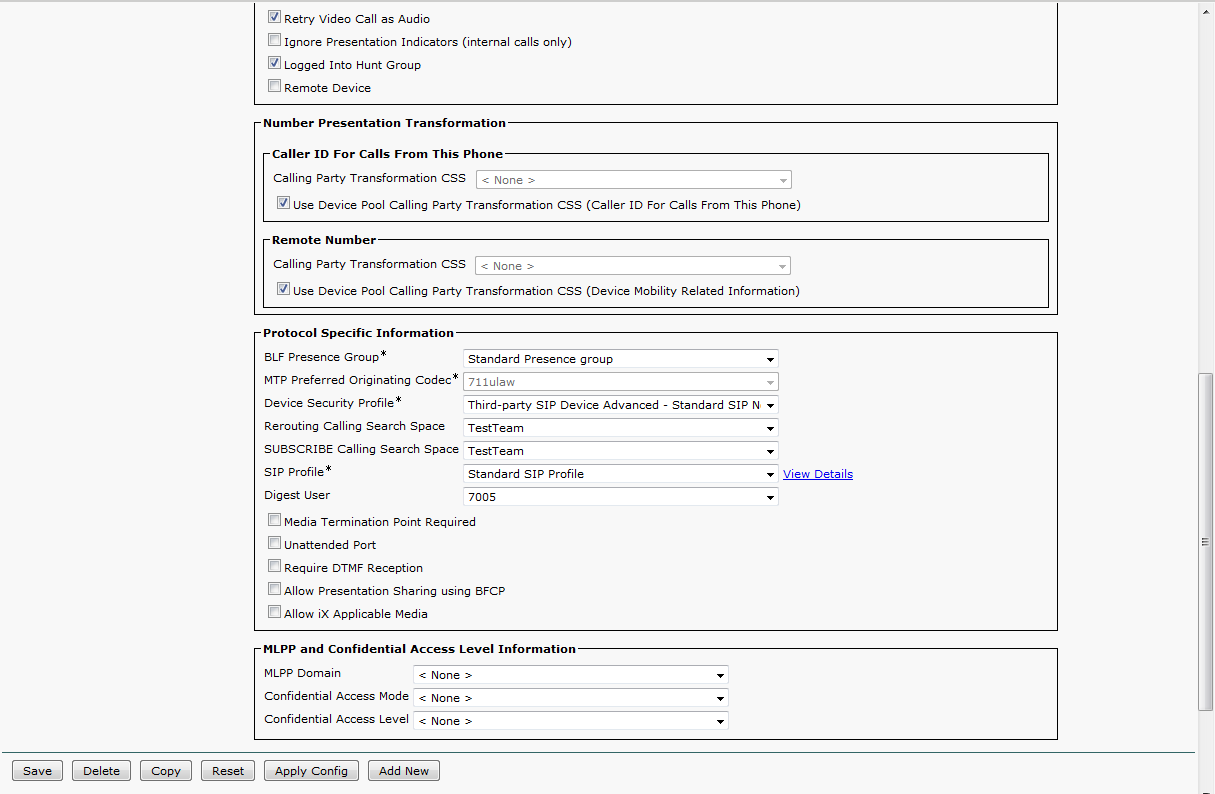
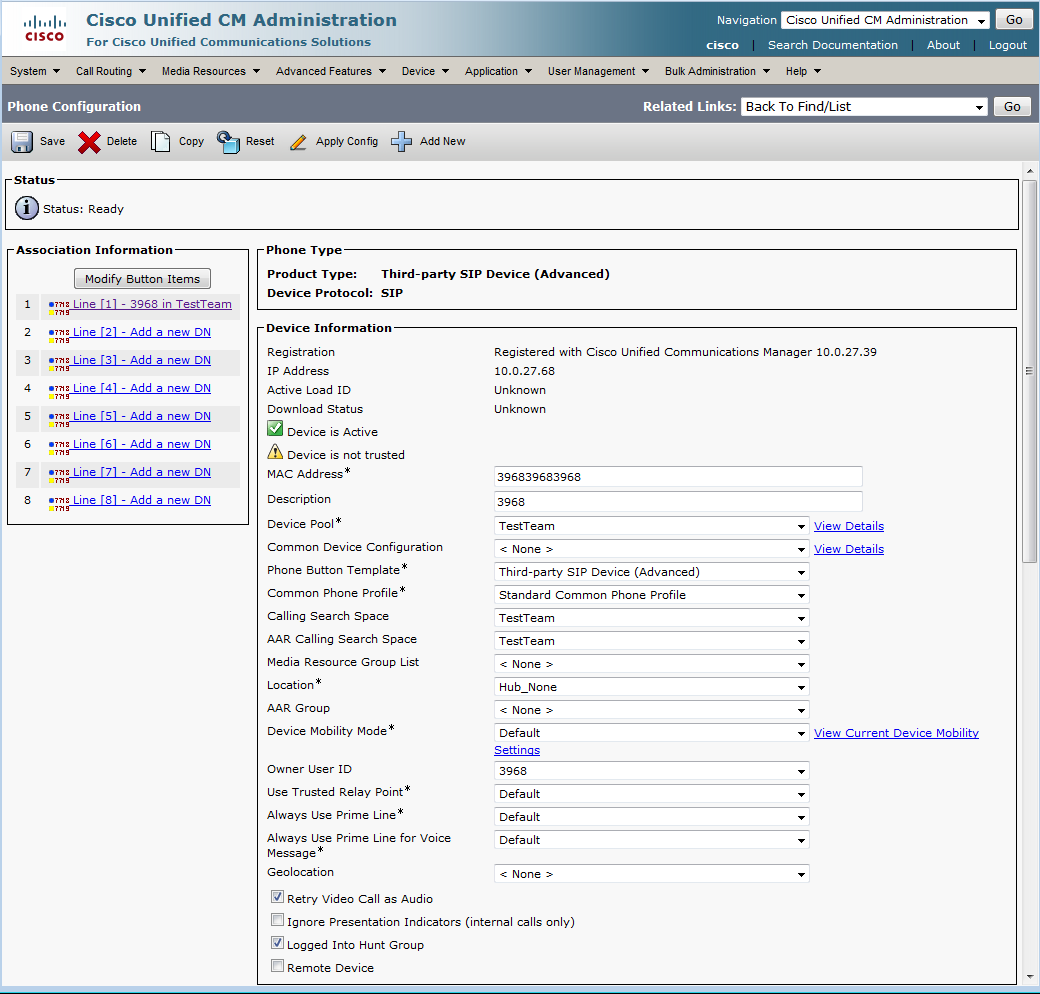
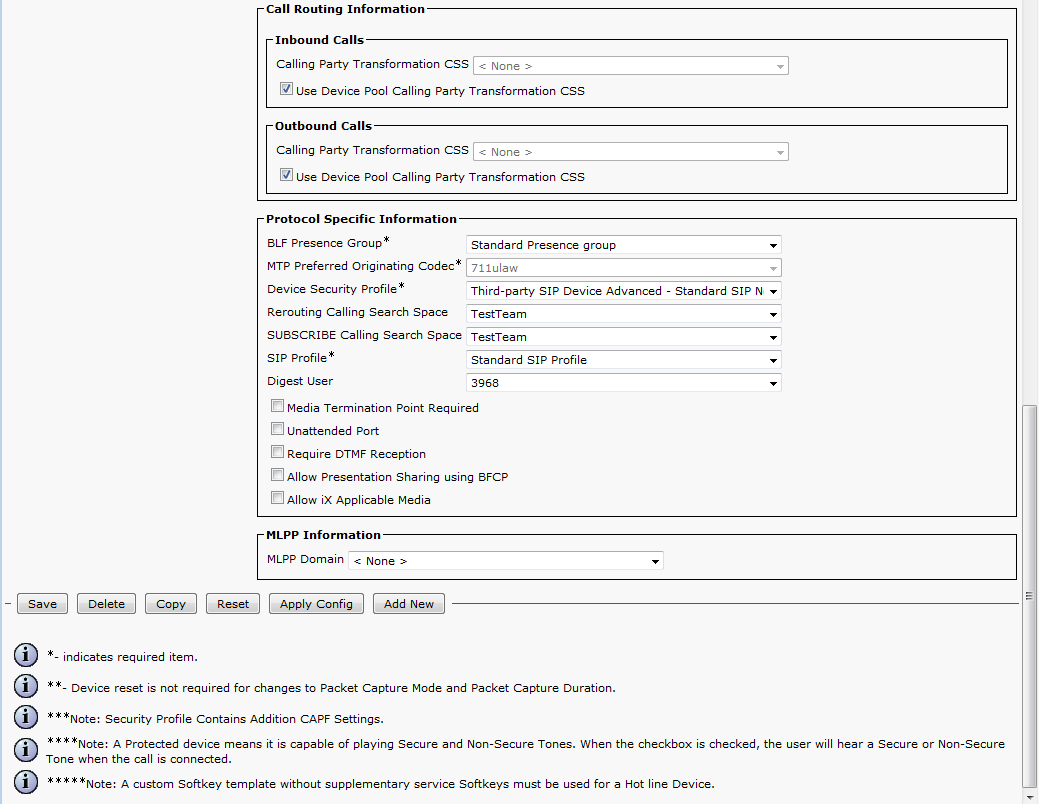
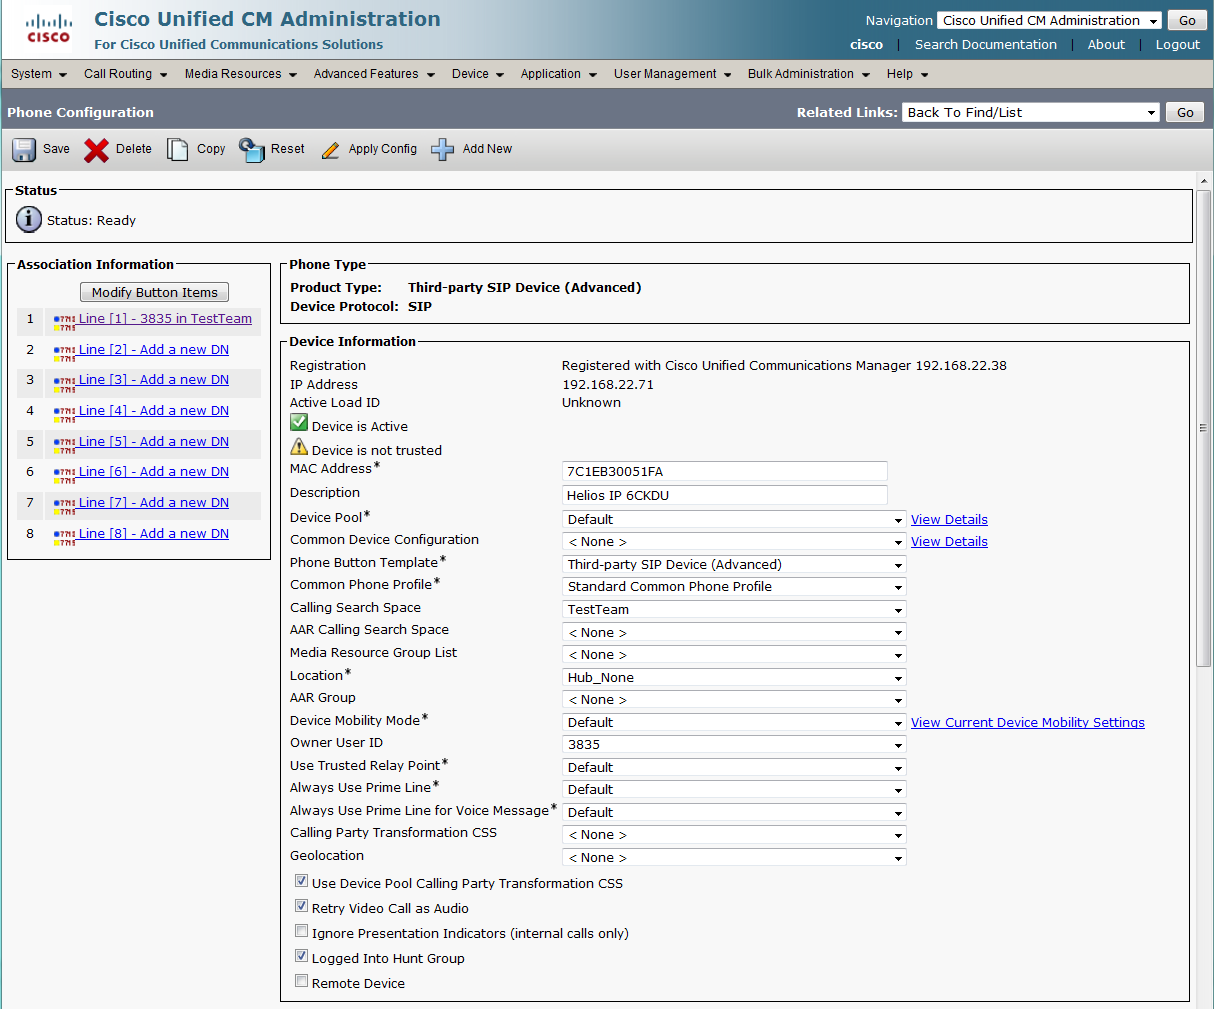
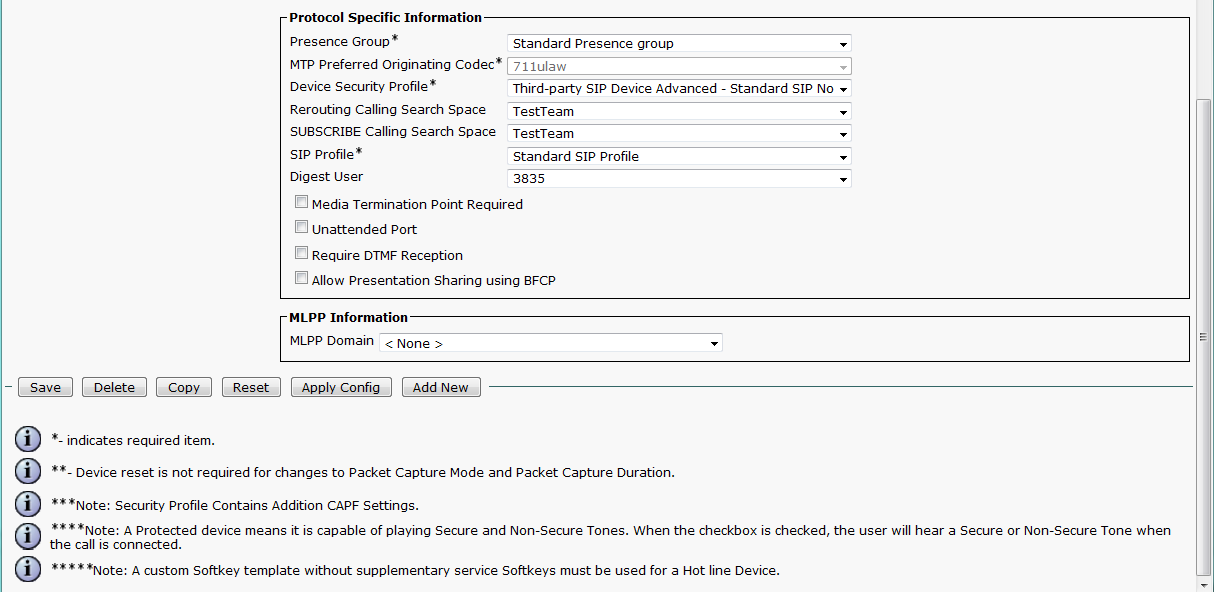
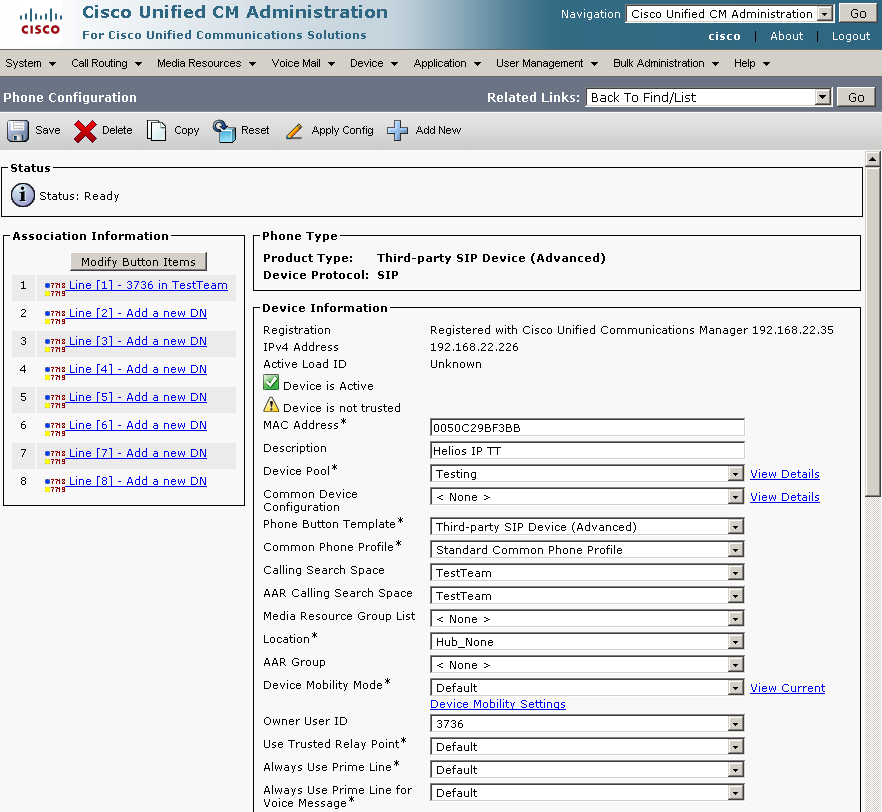
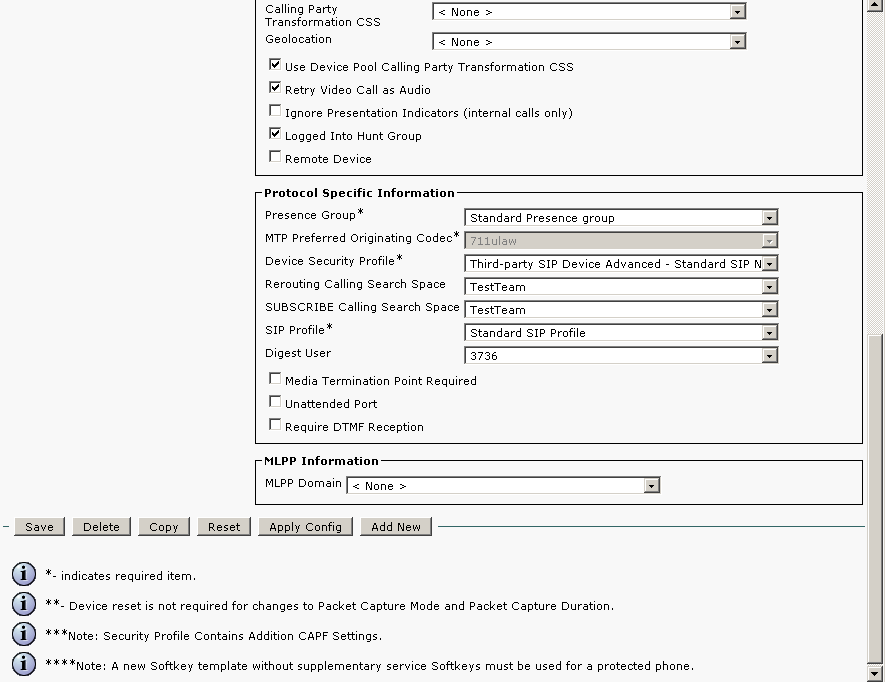
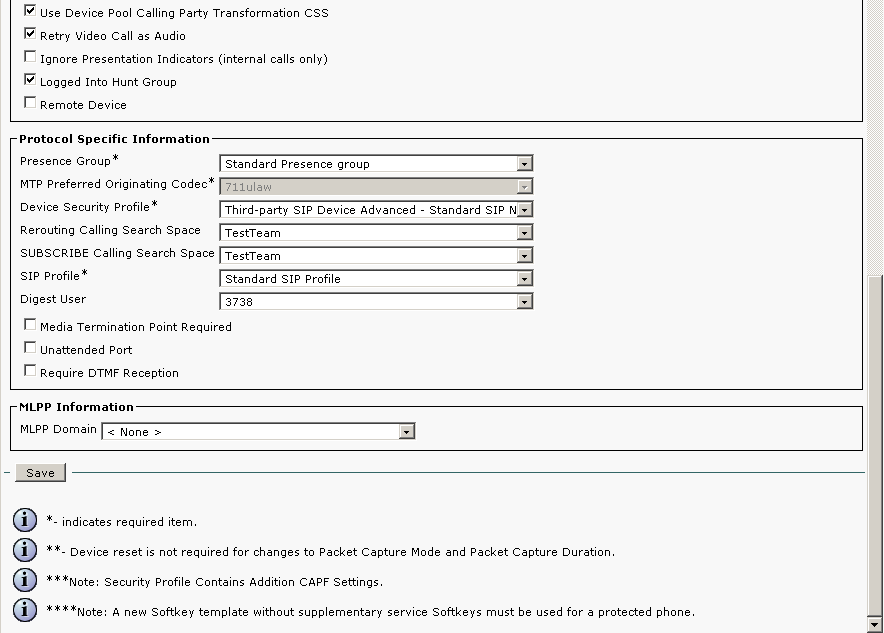
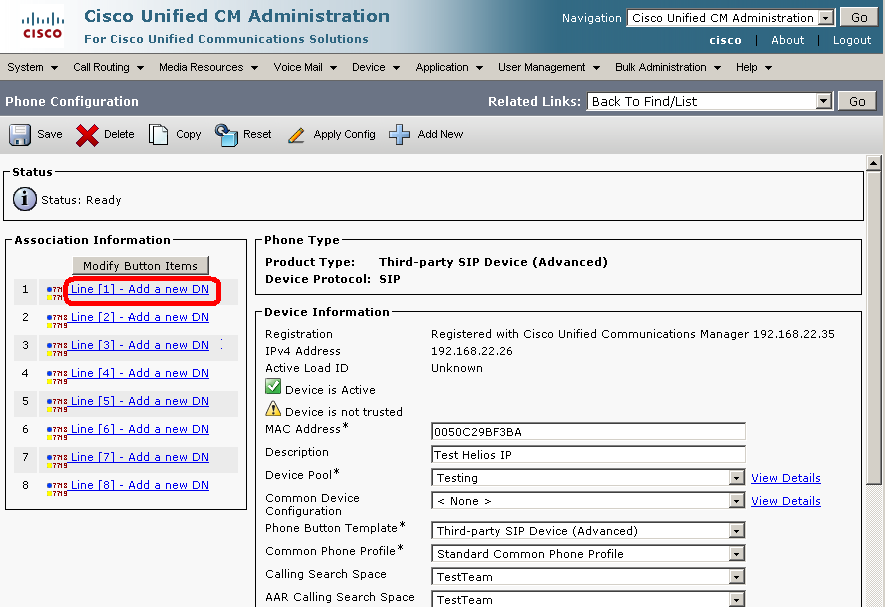
Device Settings
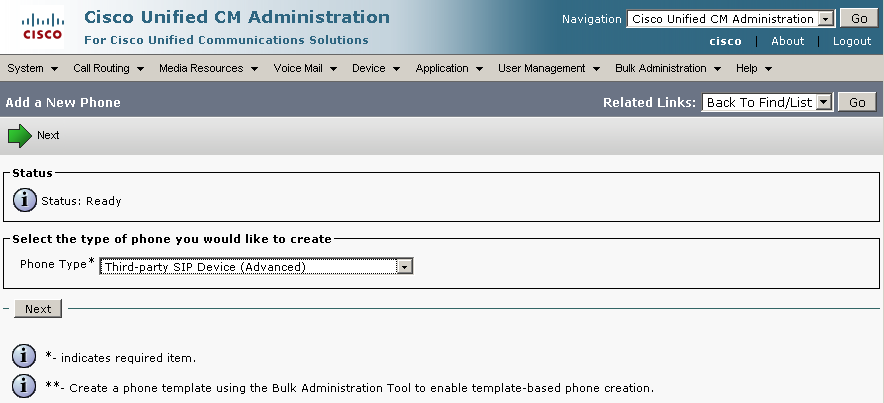
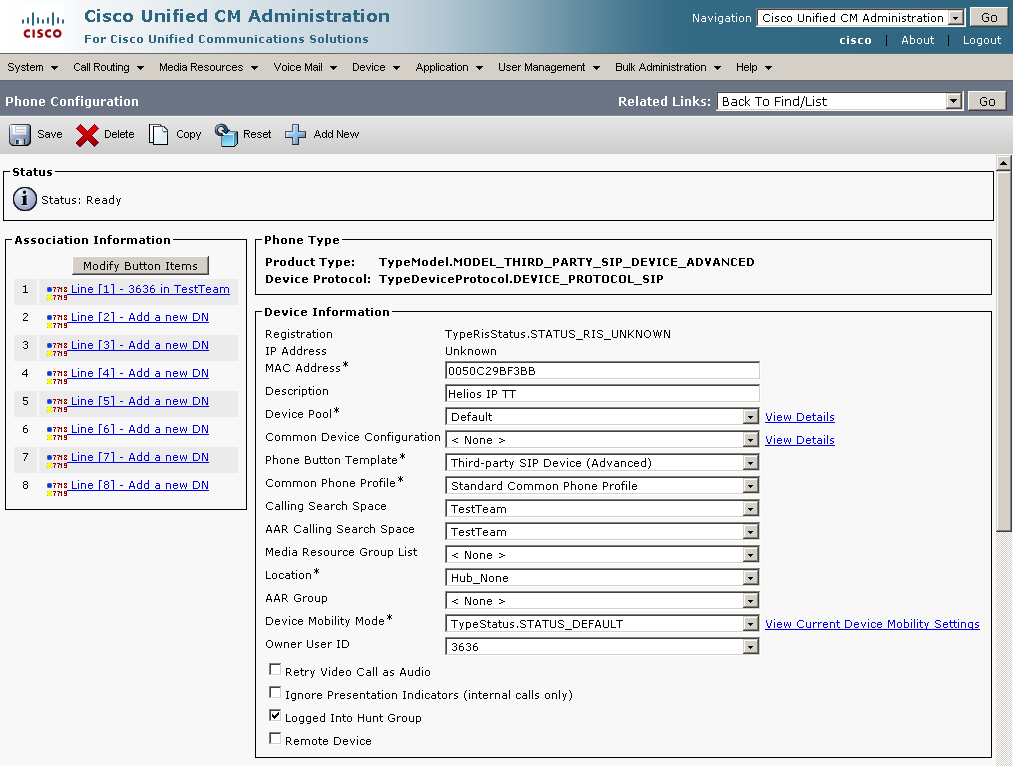
- 2N IP Intercom with a camera requires a Third-party SIP Device (Advanced) phone type.
- 2N IP Intercom without a camera can use Third-party SIP Device (Basic).
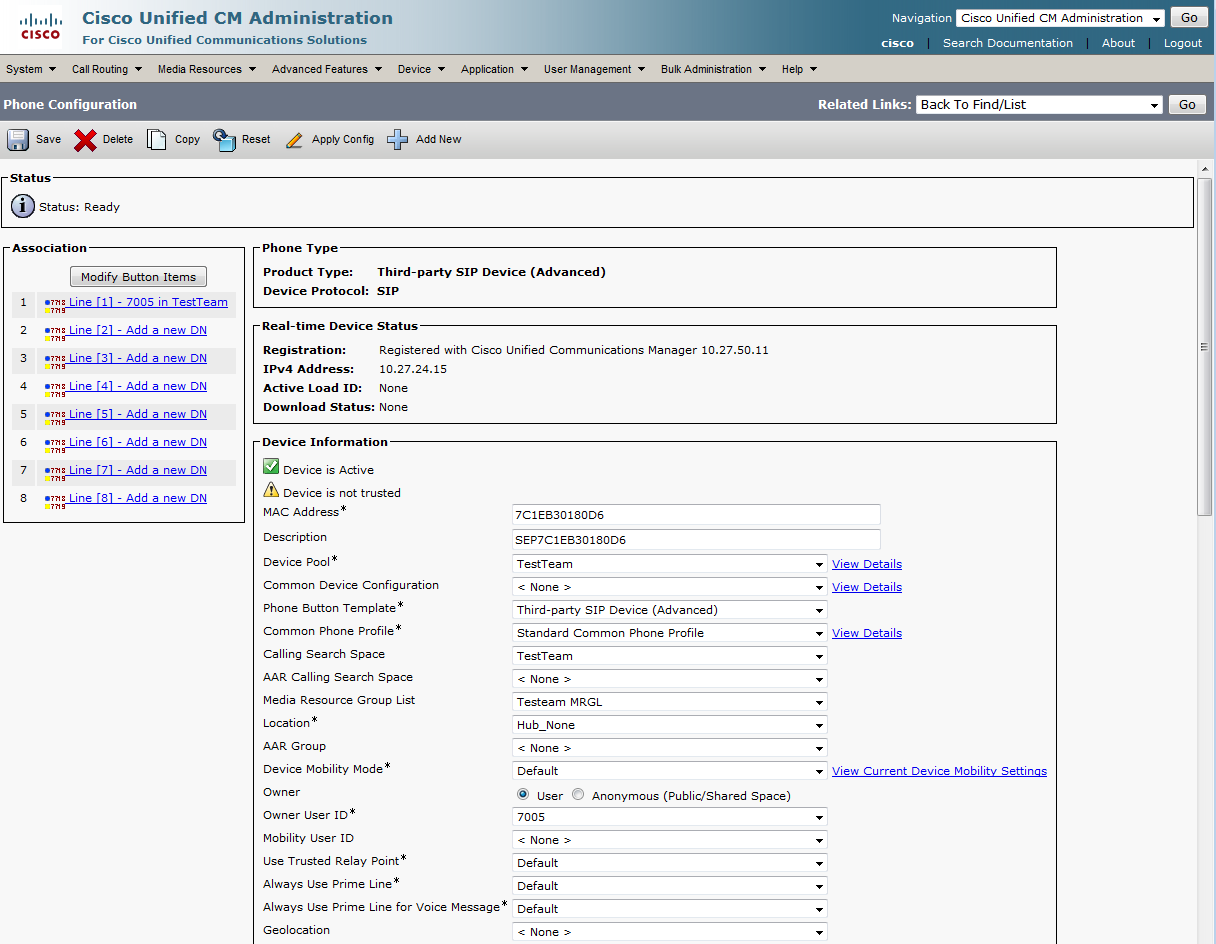
Menu Device / Phone
 |
 |
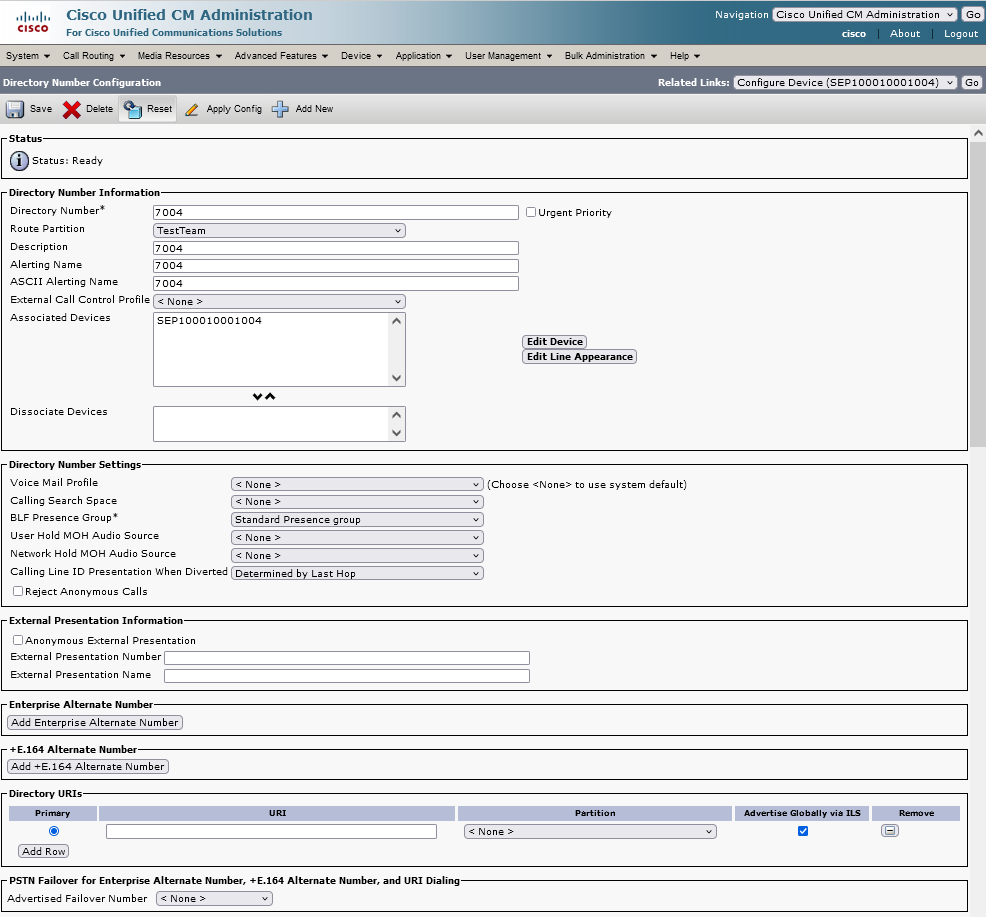
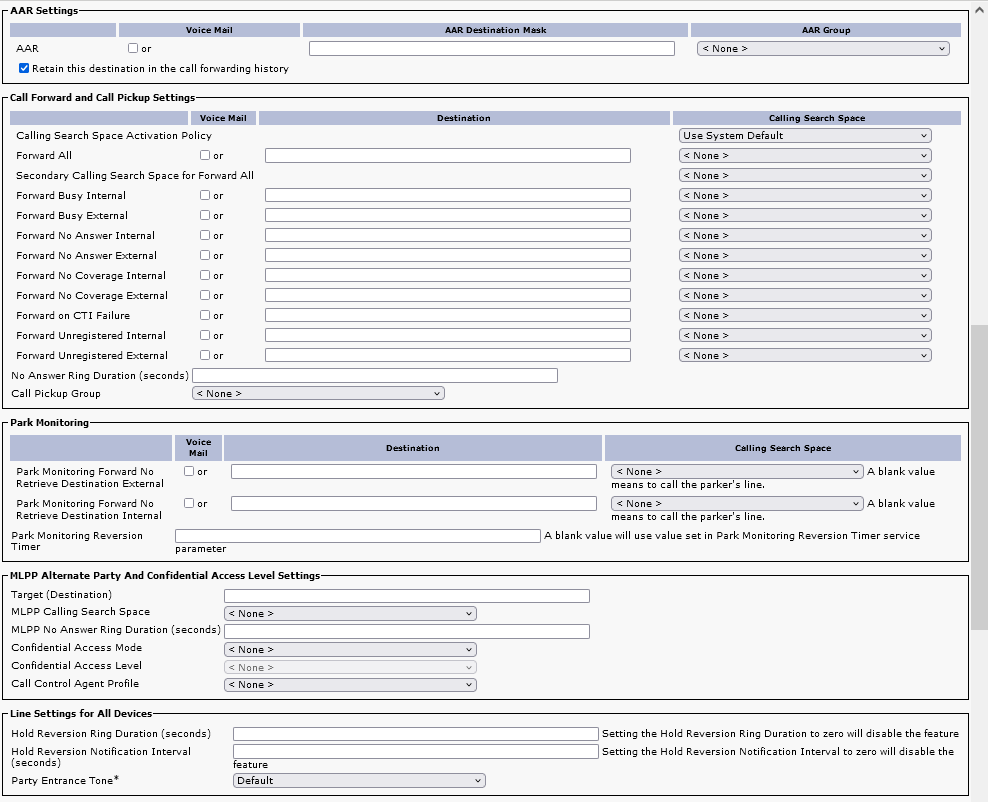
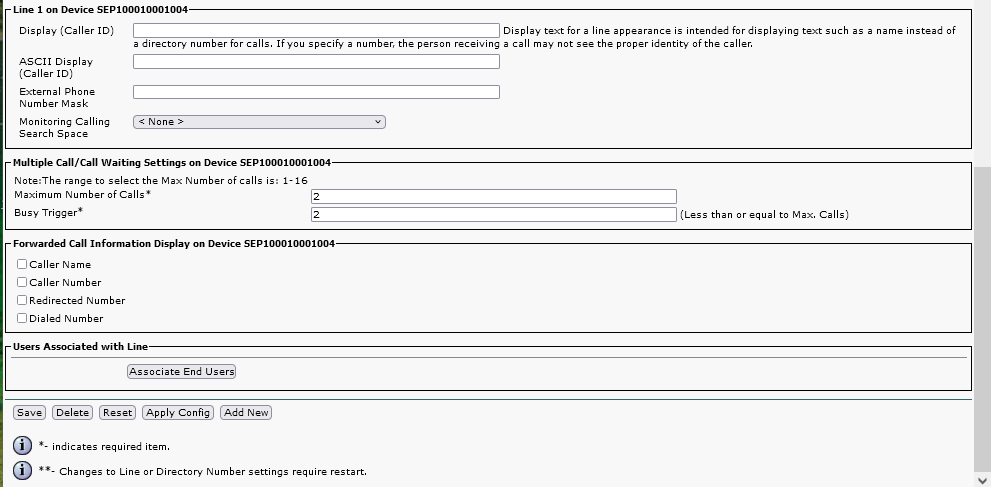
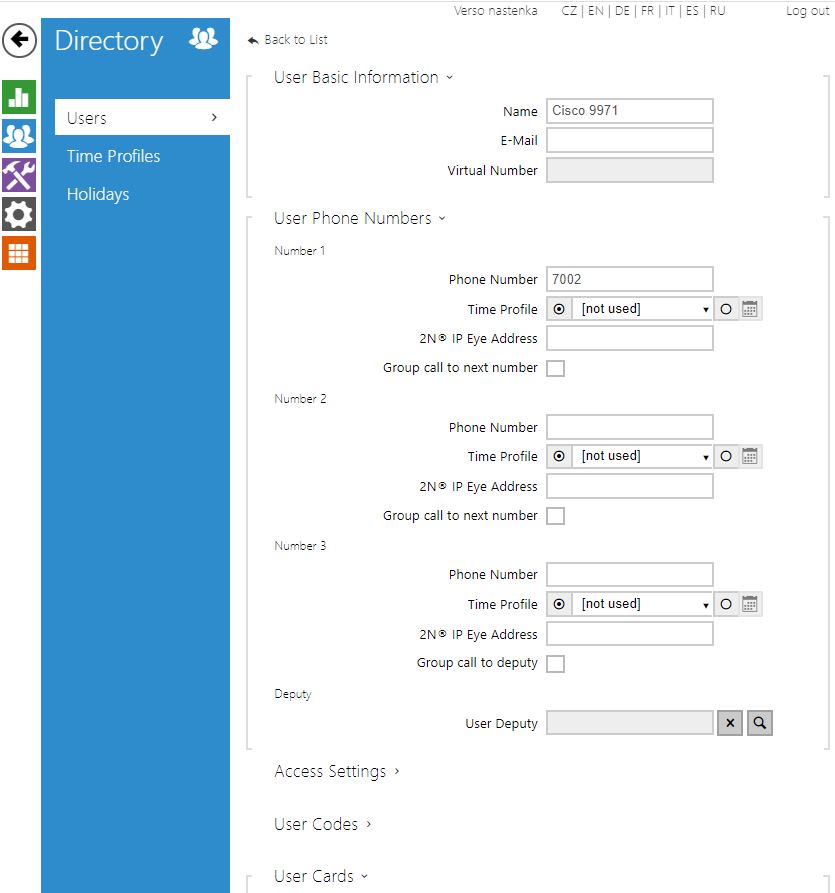
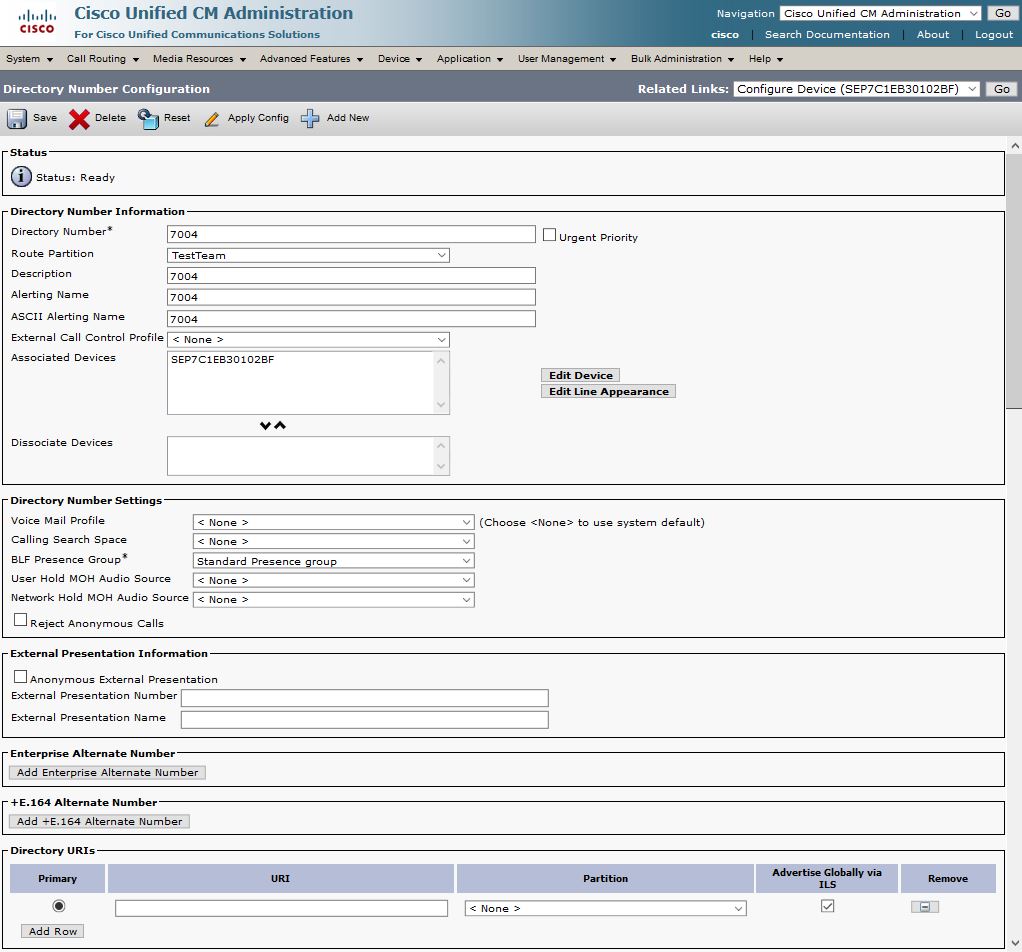
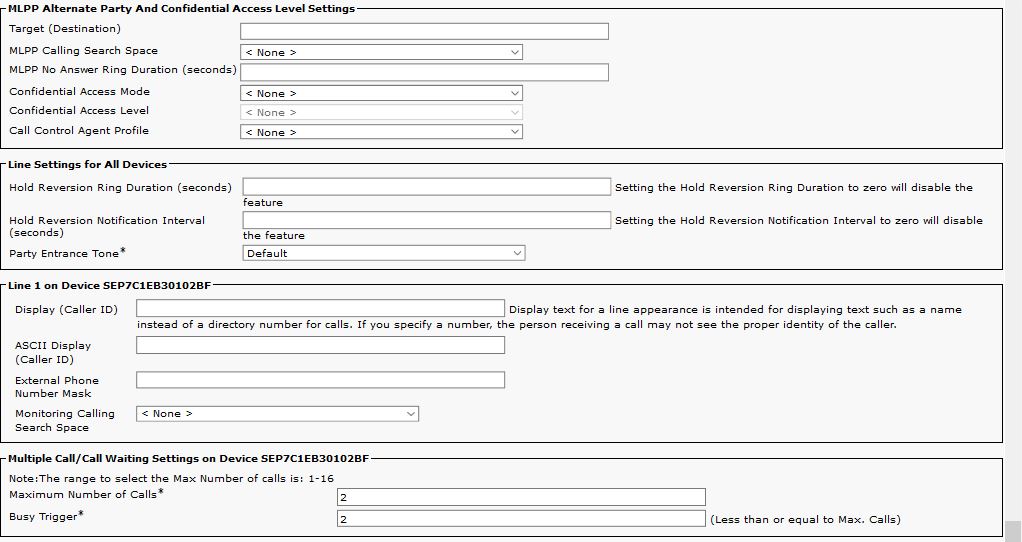
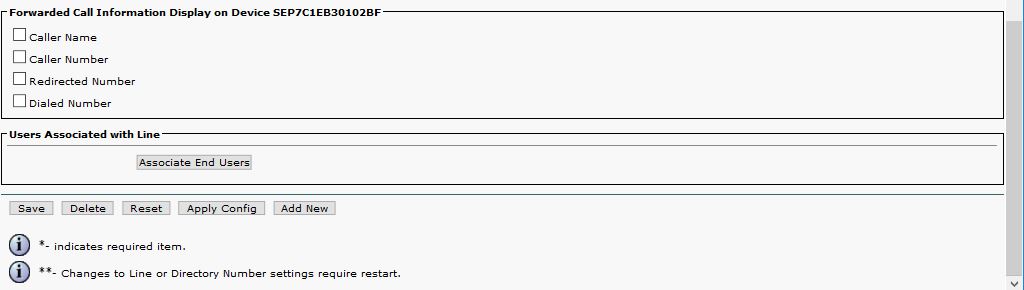
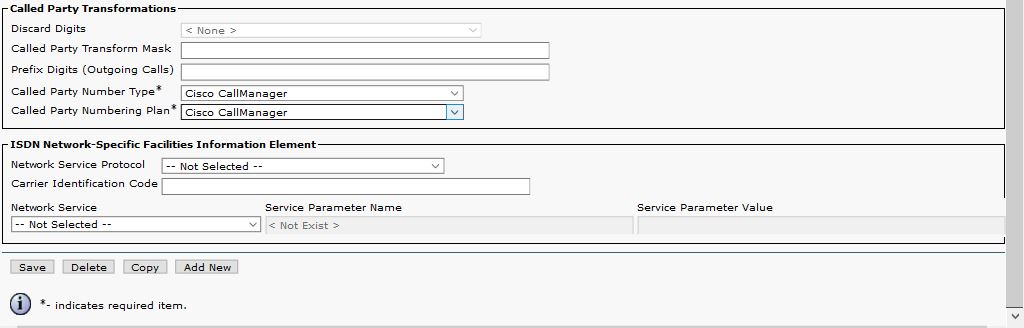
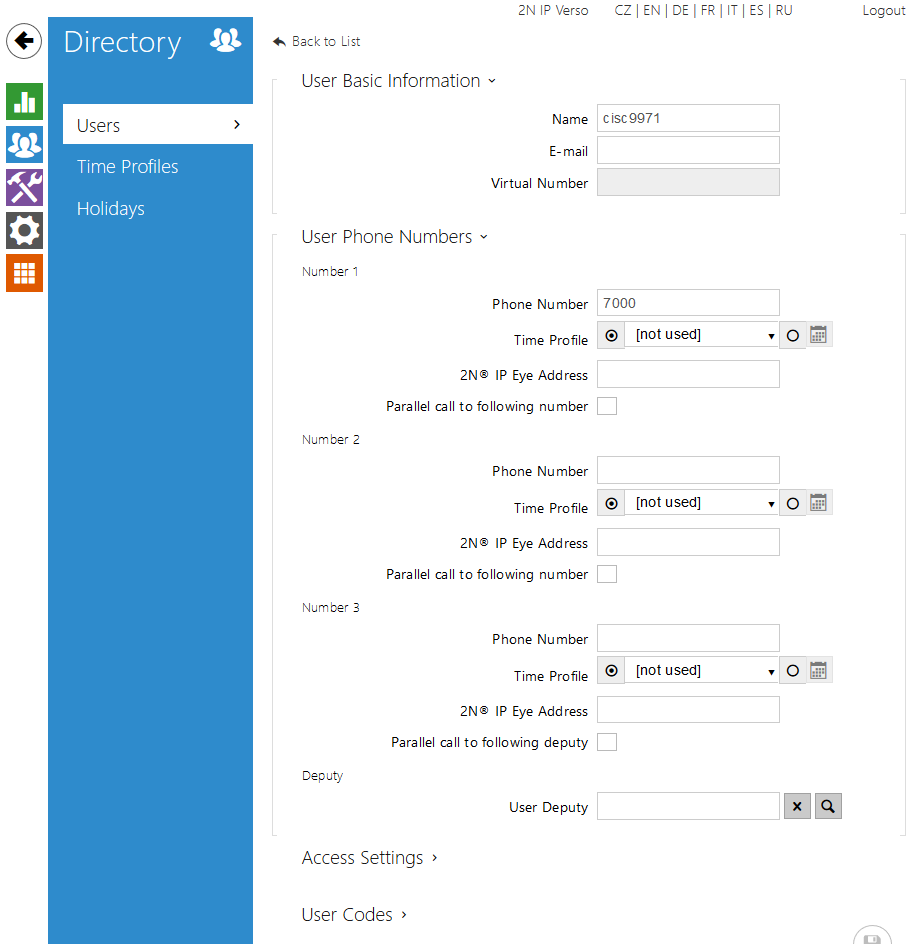
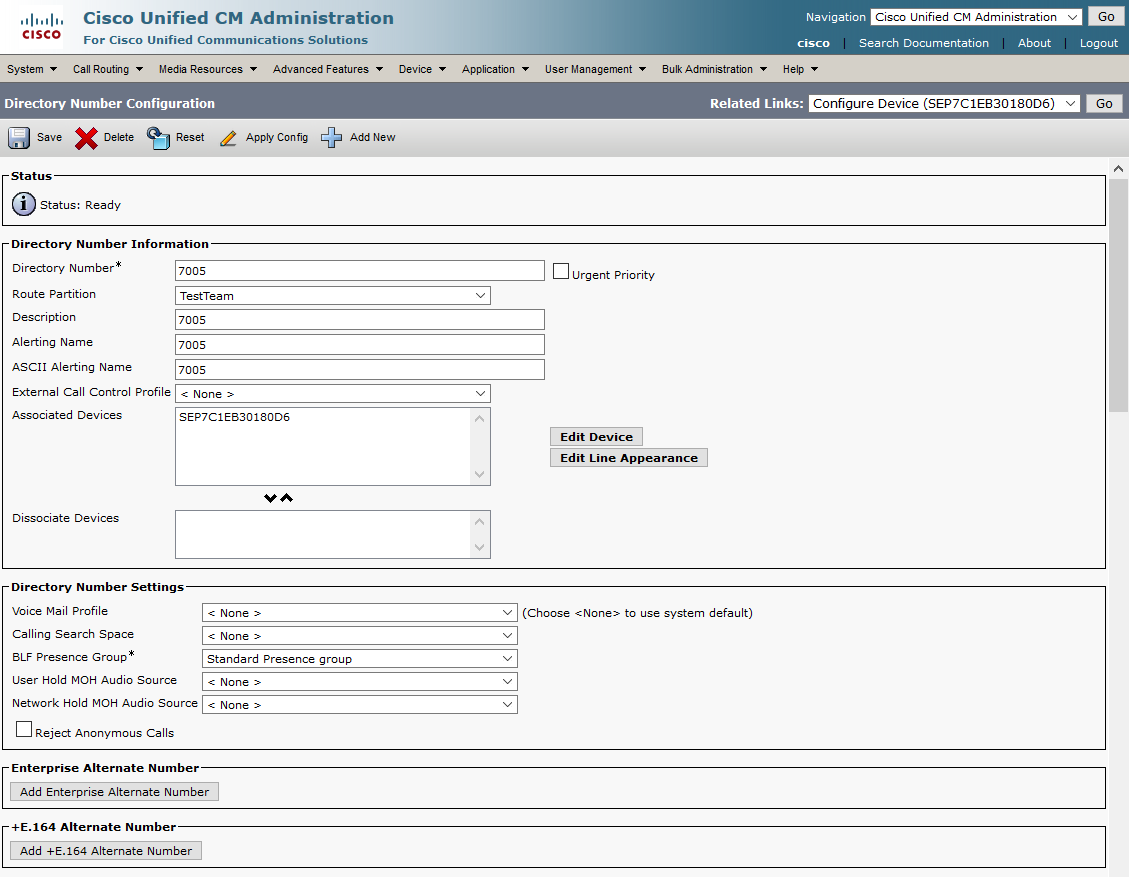
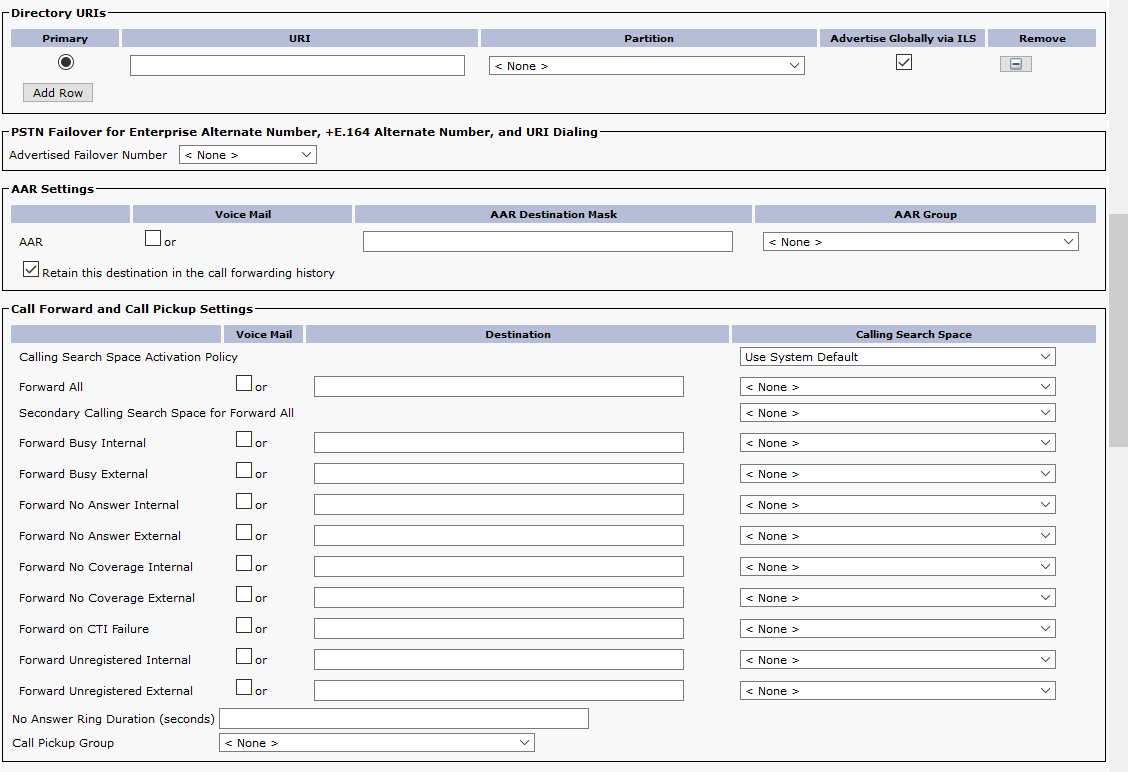
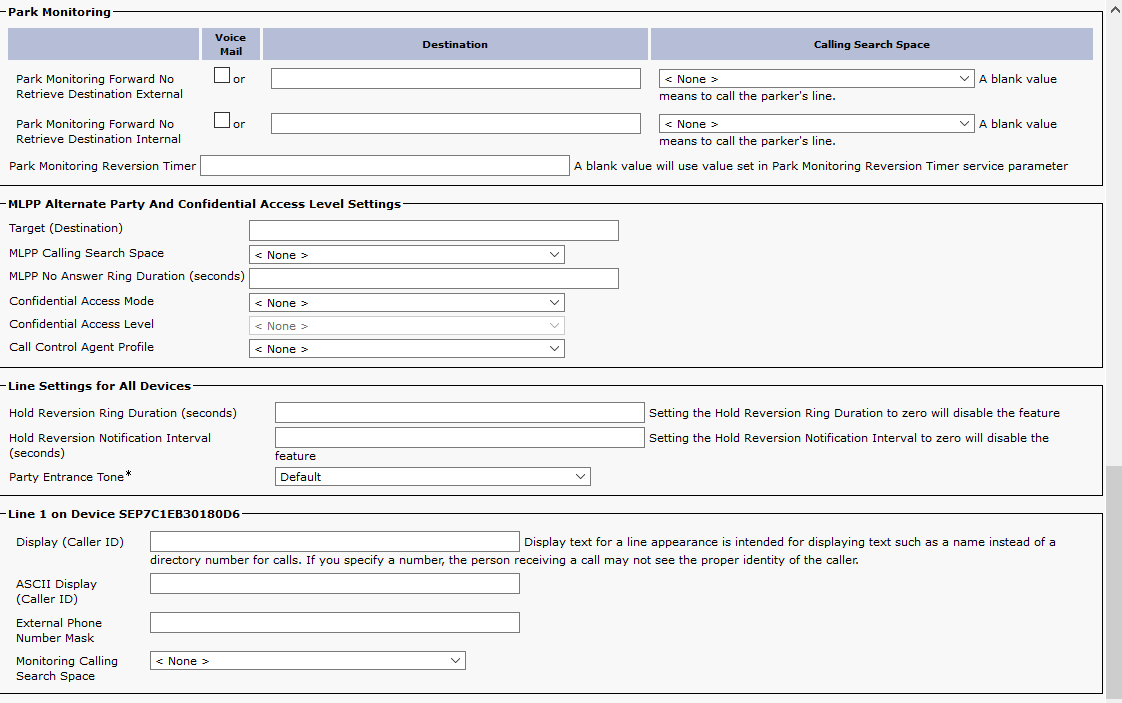
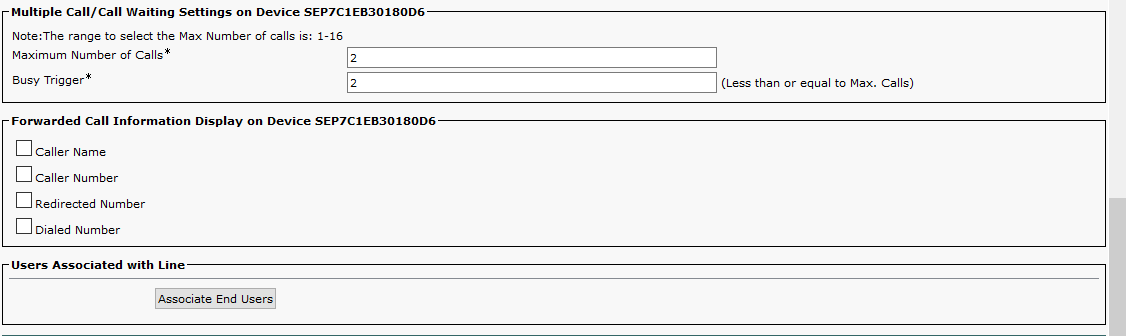
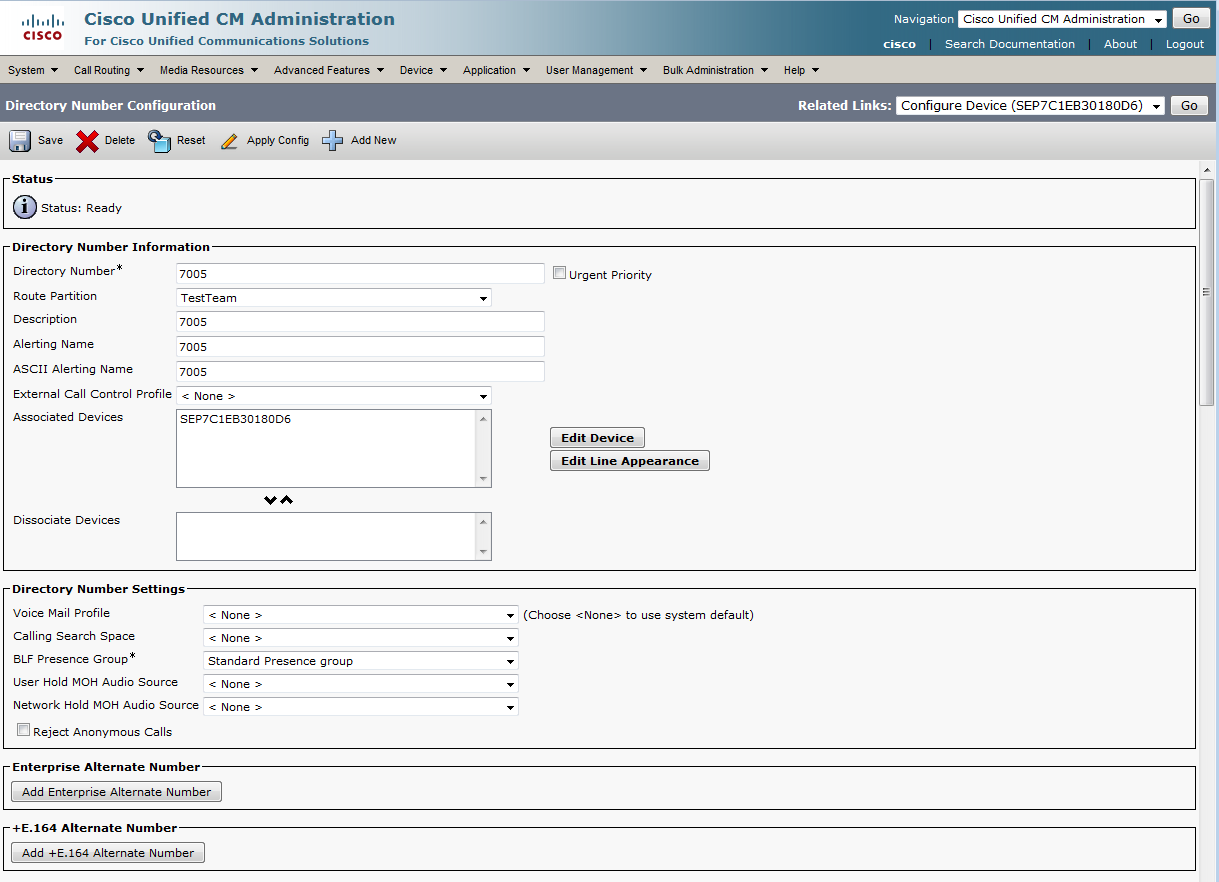
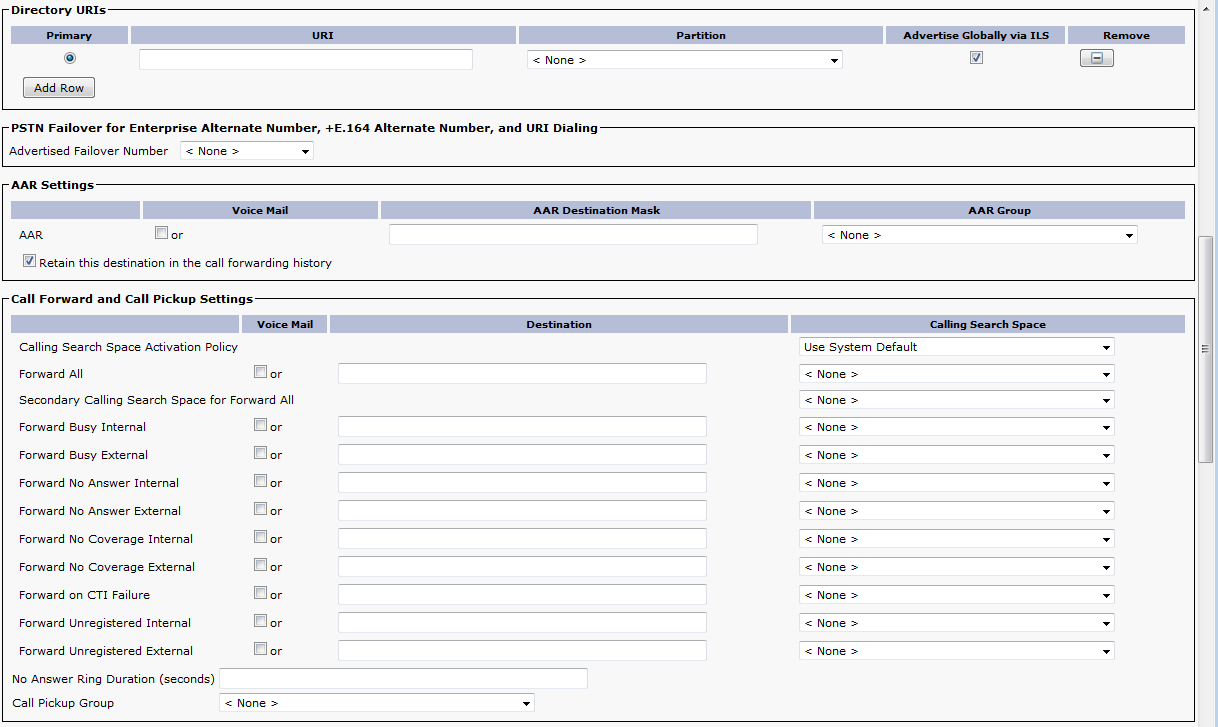
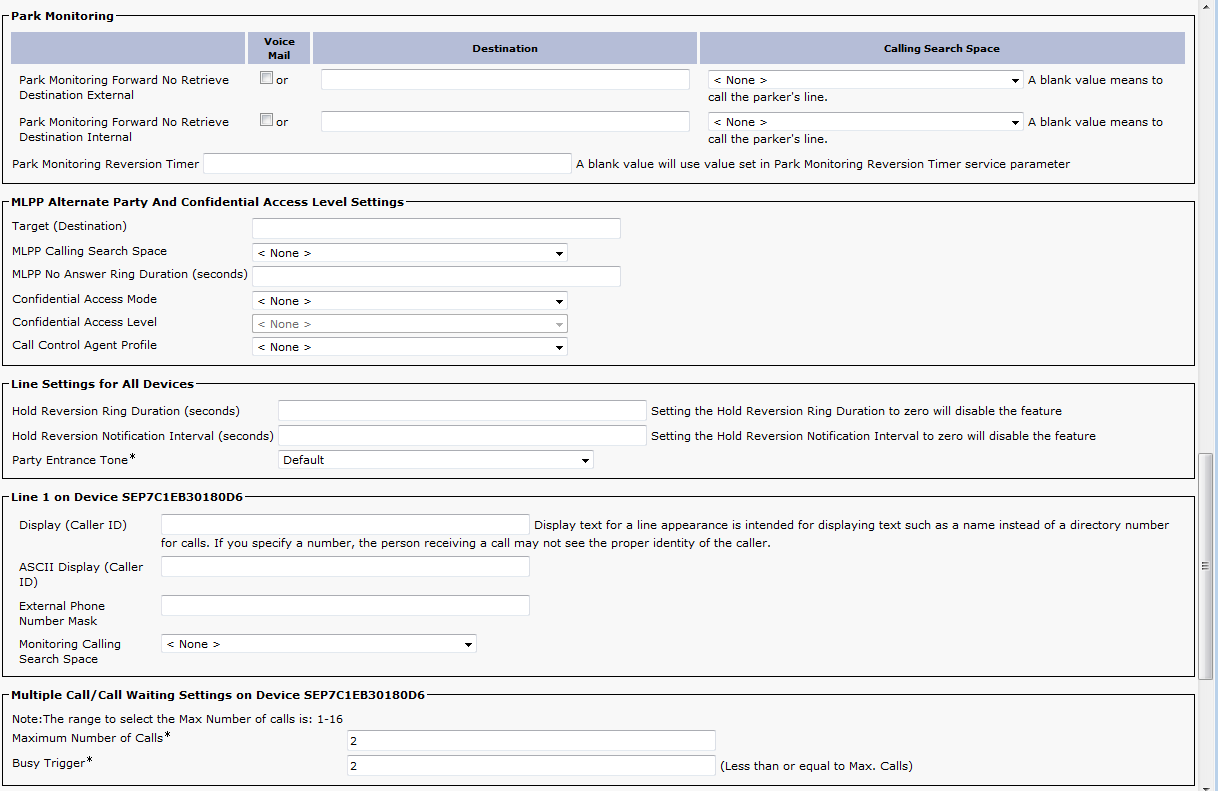
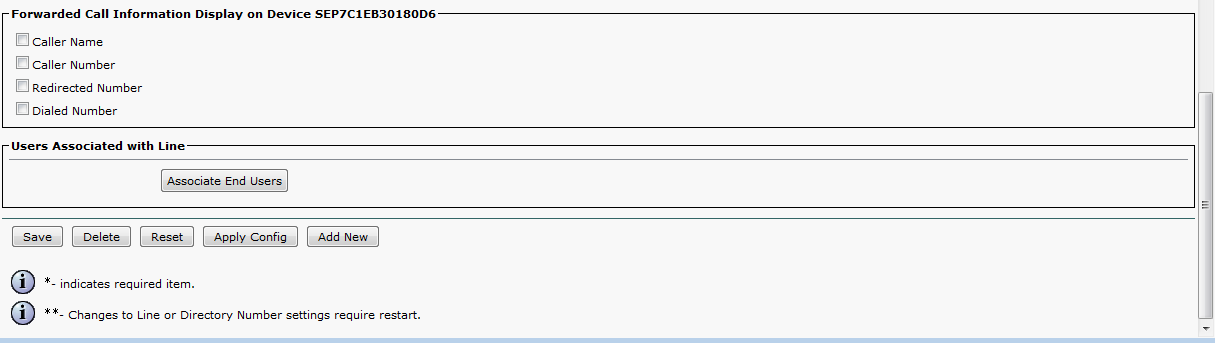
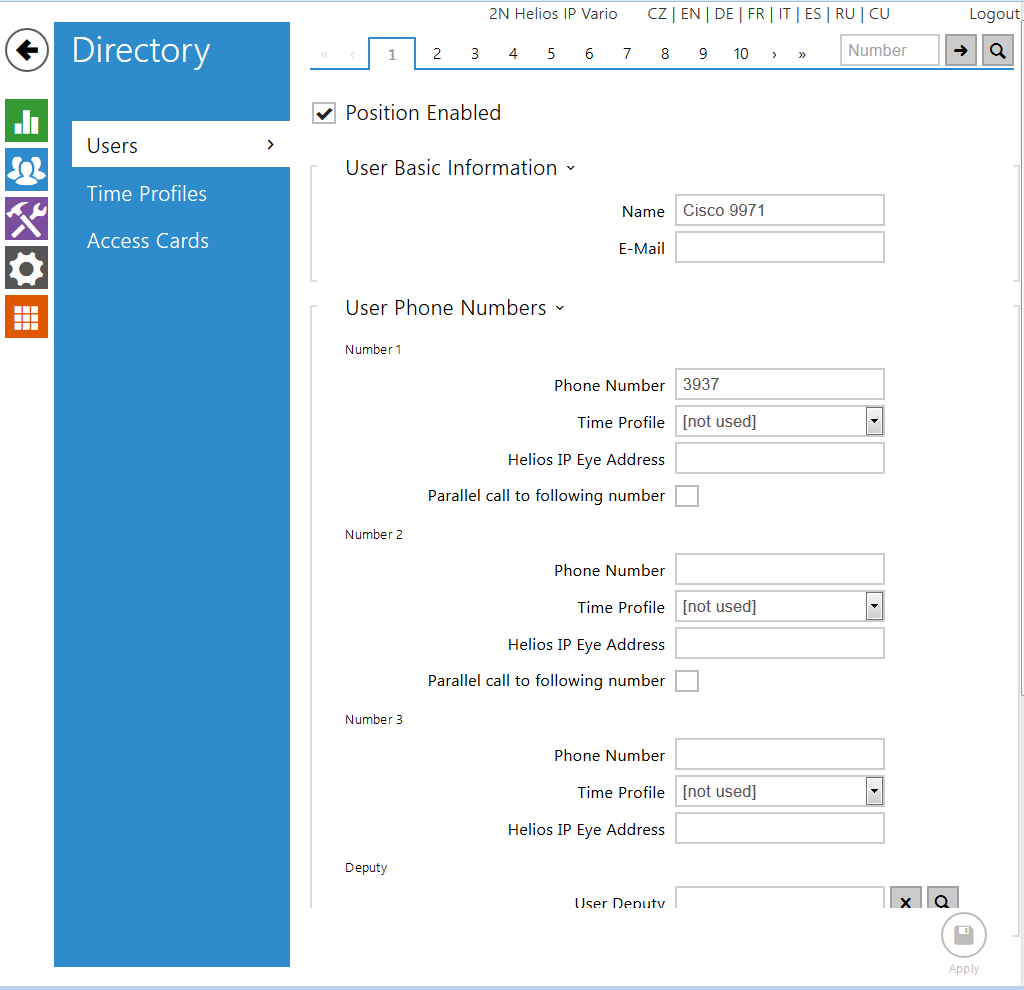
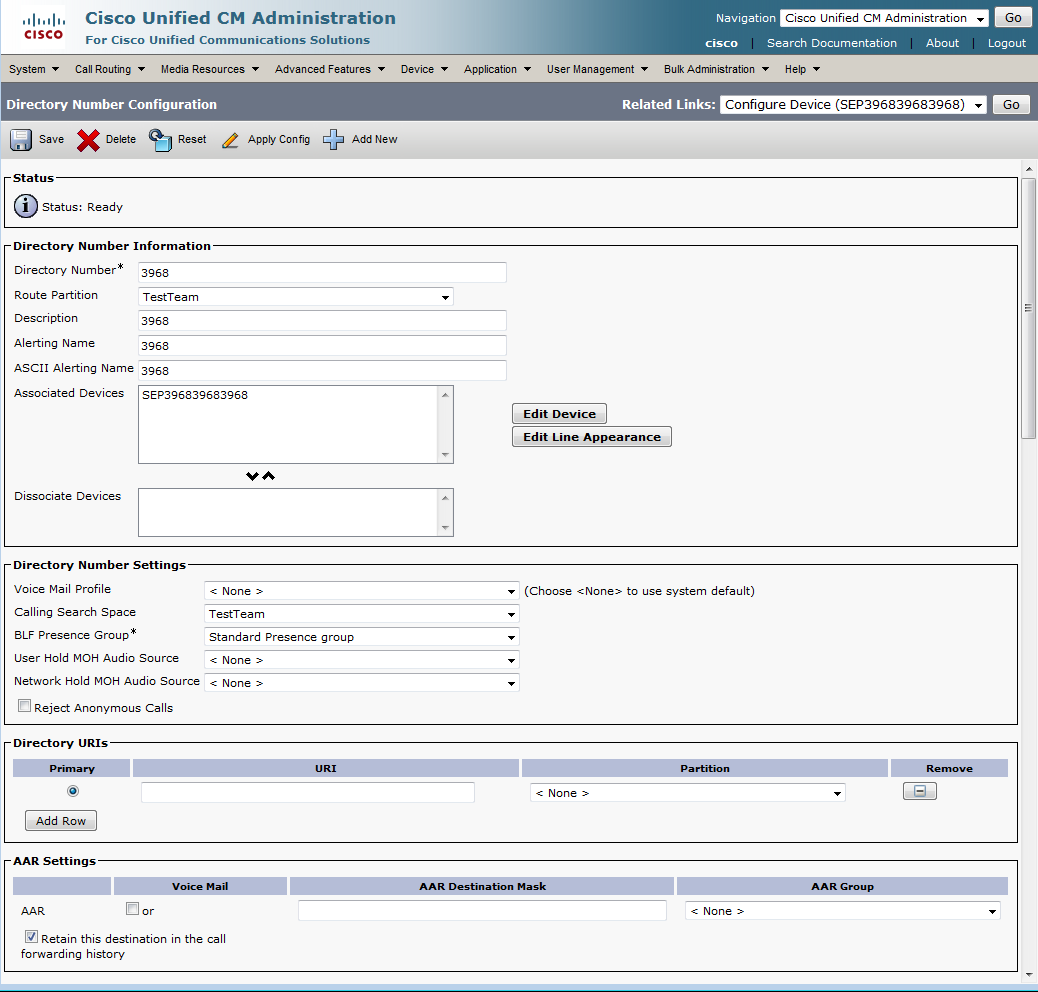
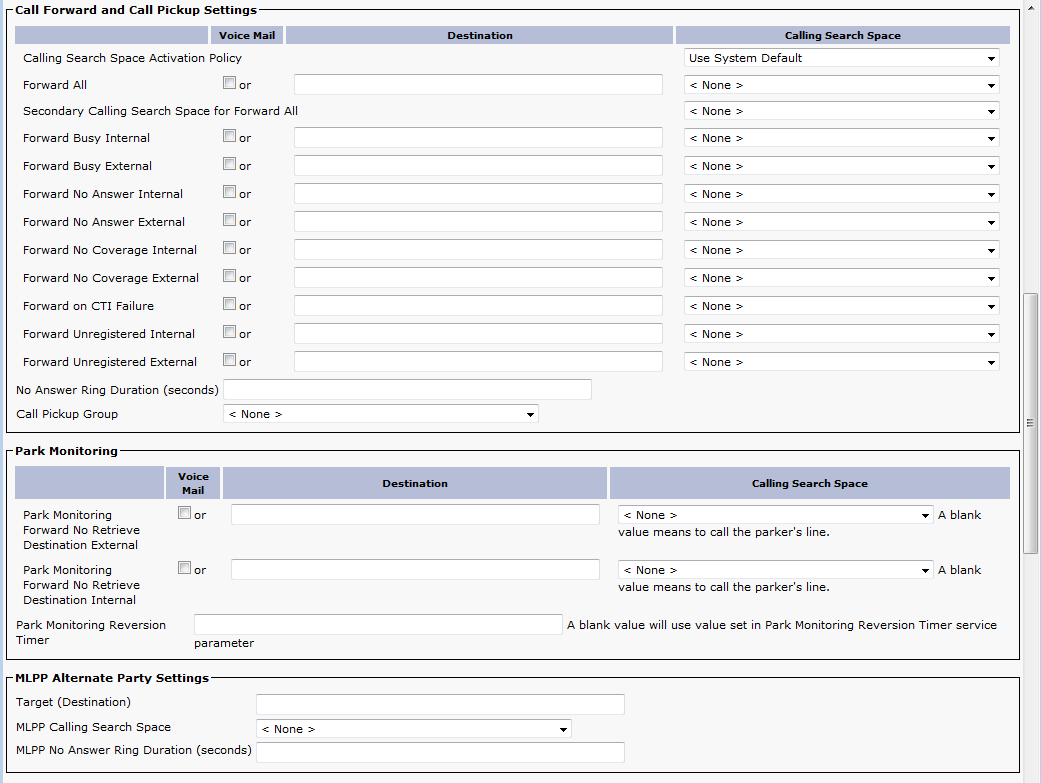
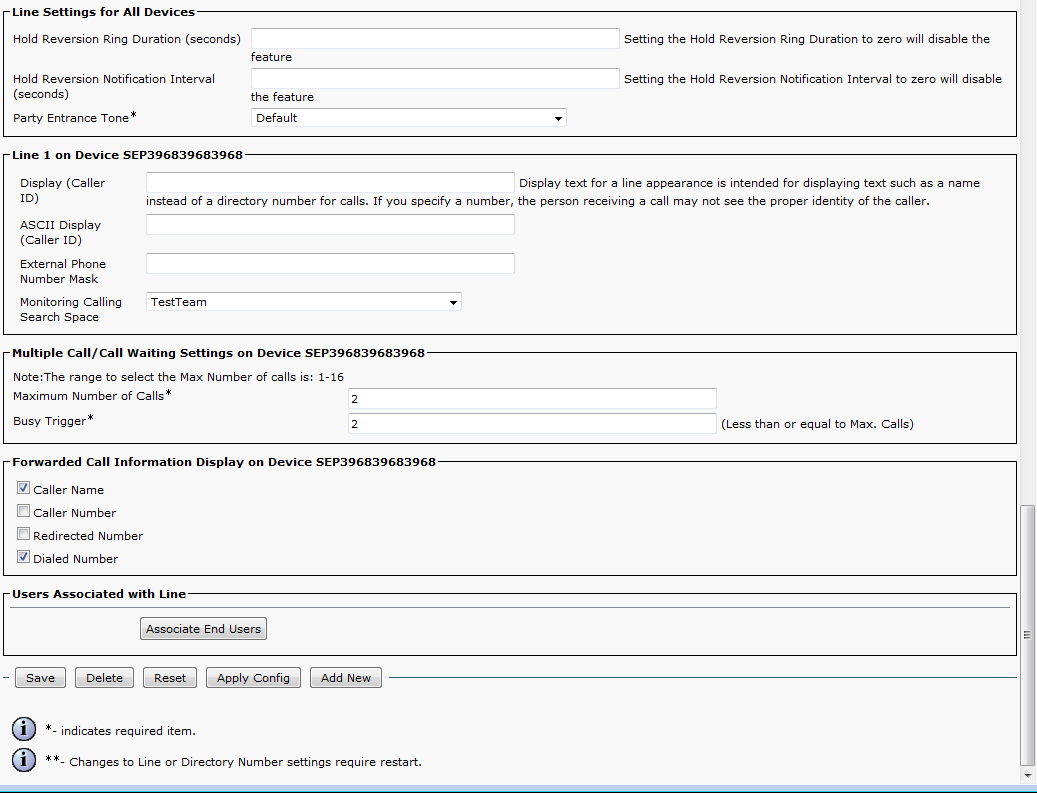
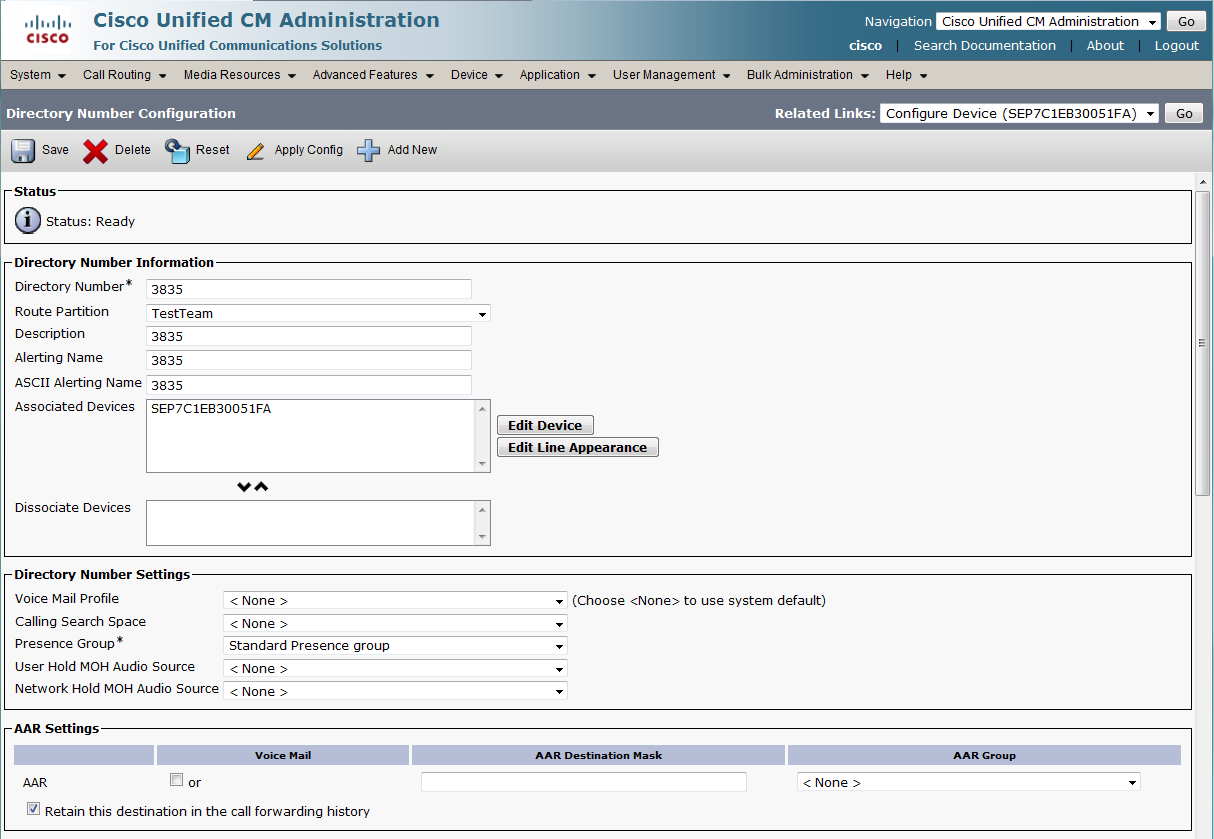
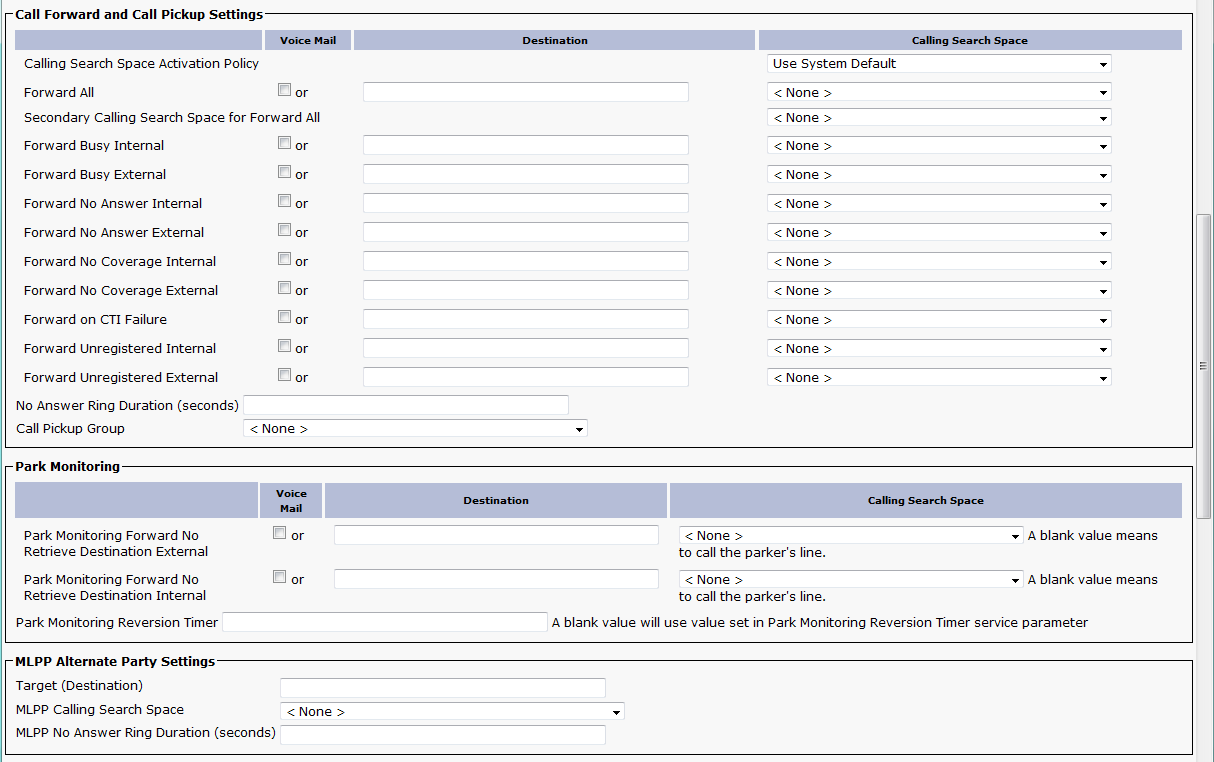
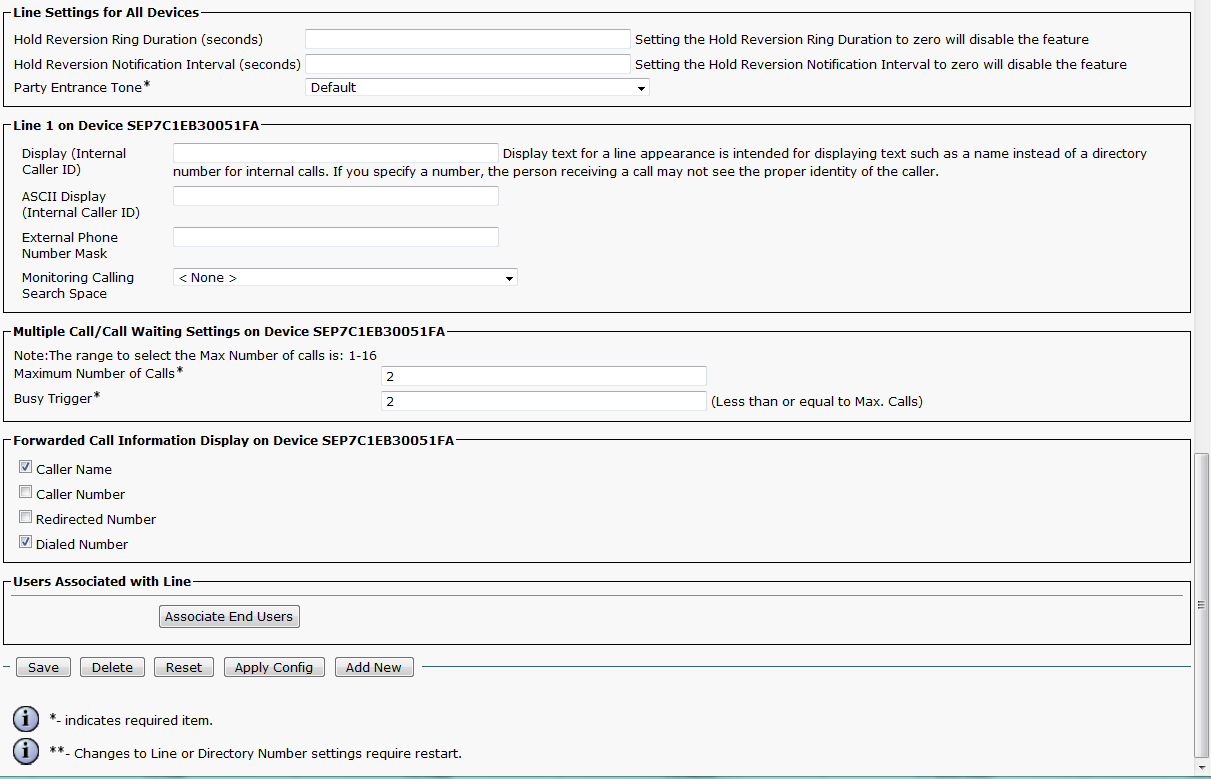
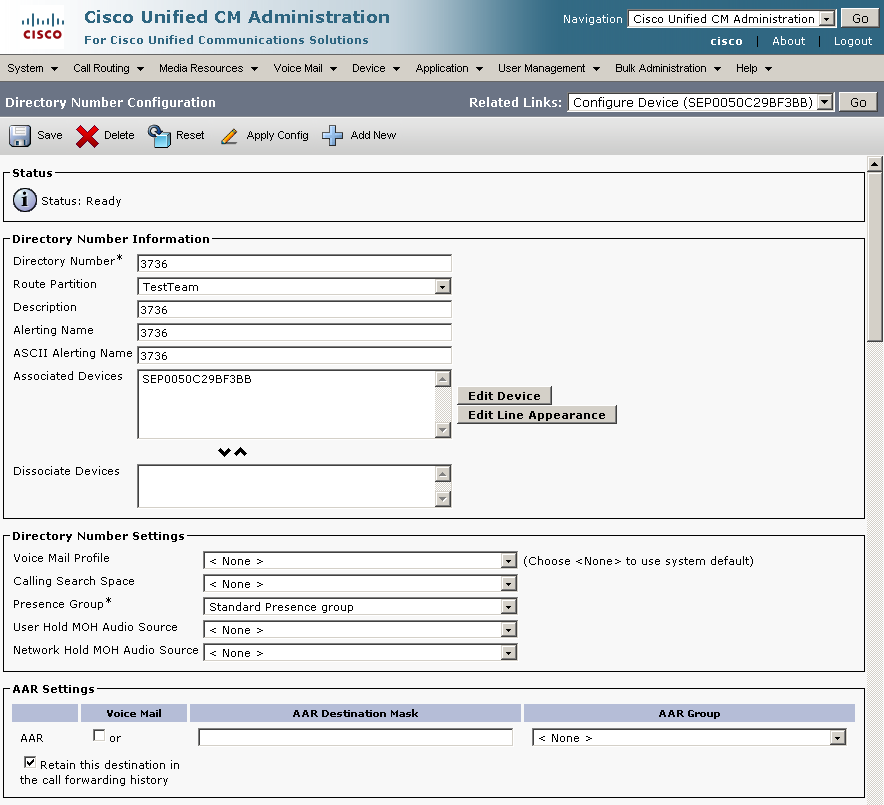
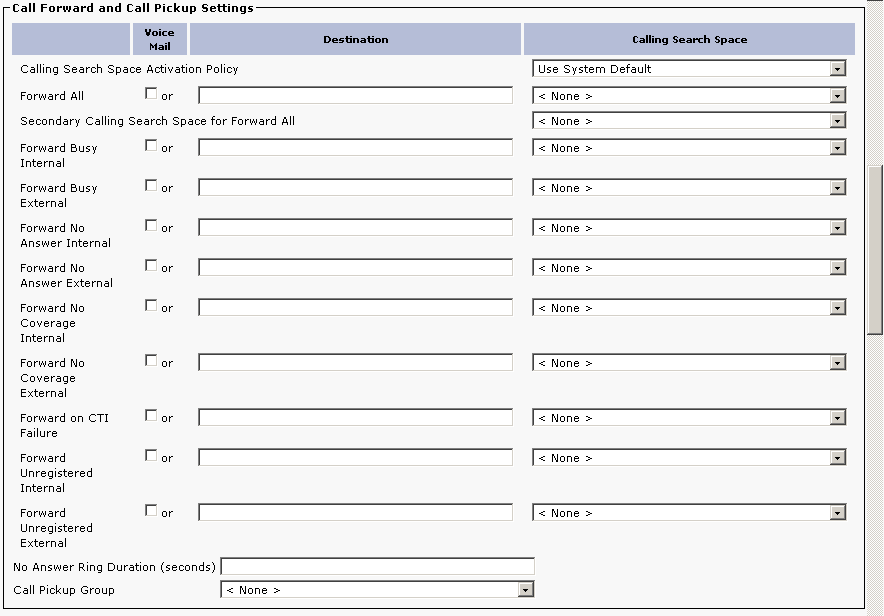
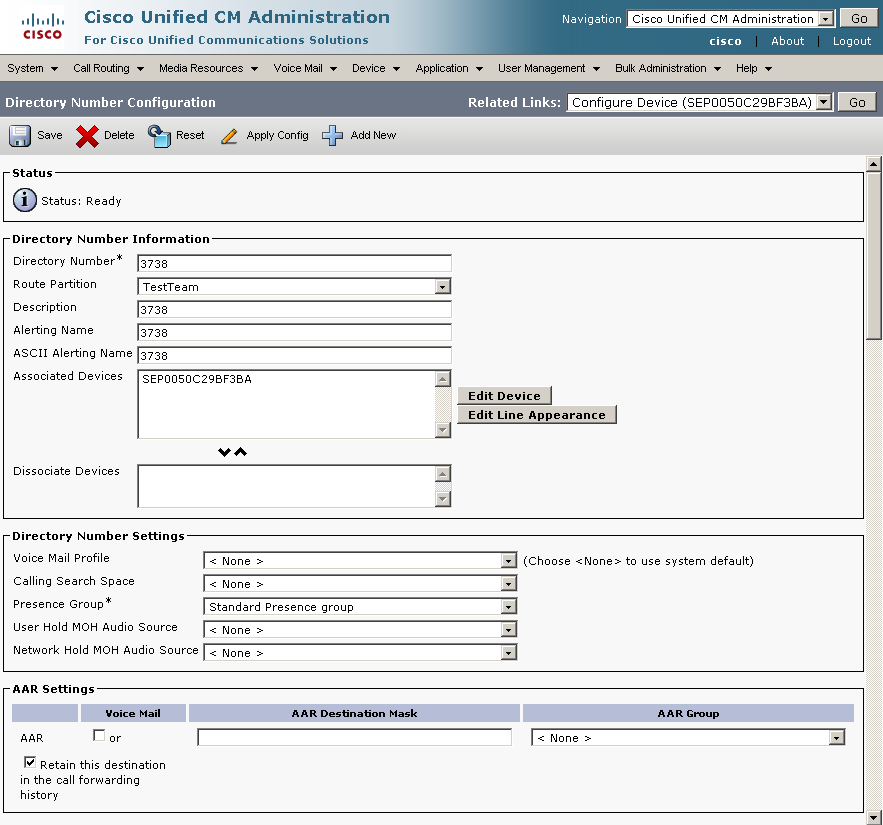
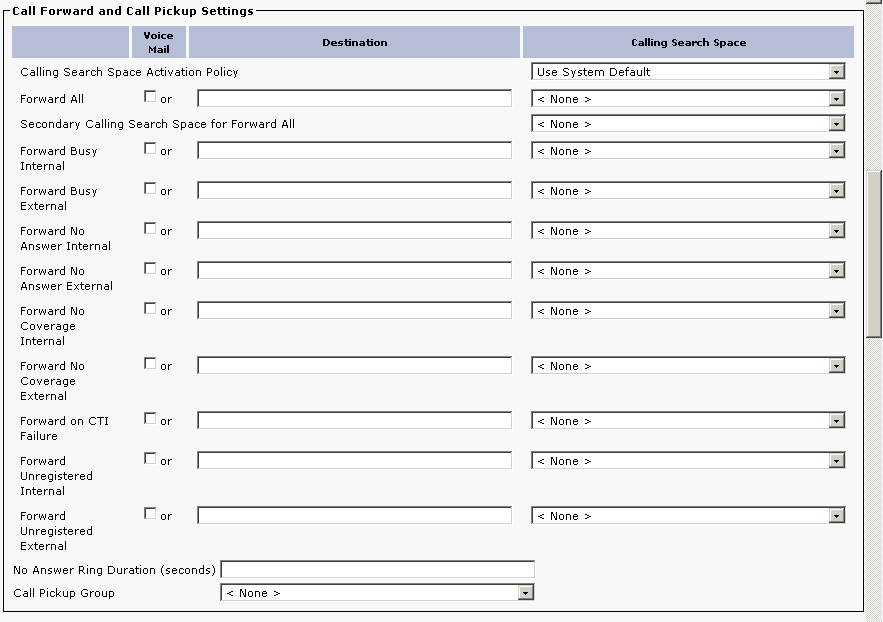
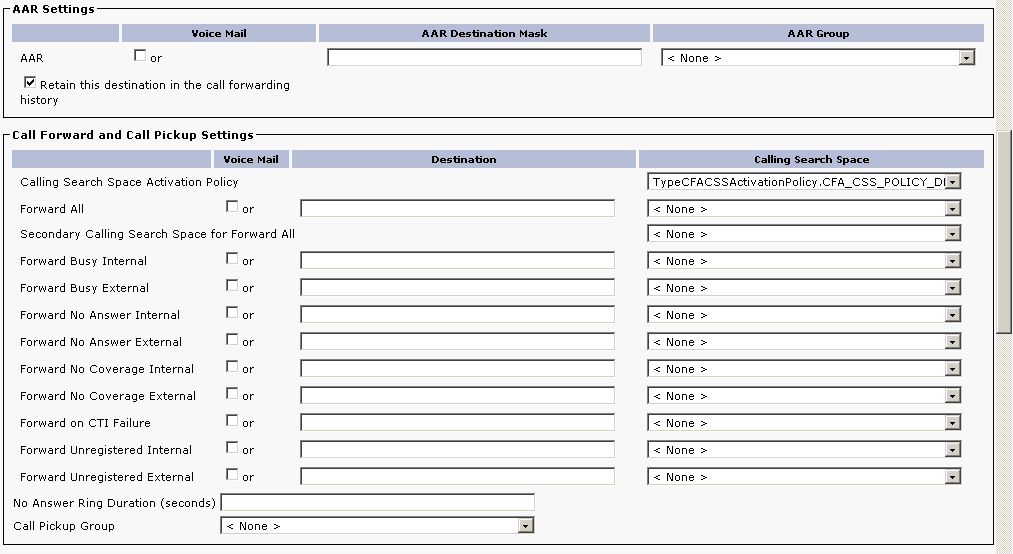
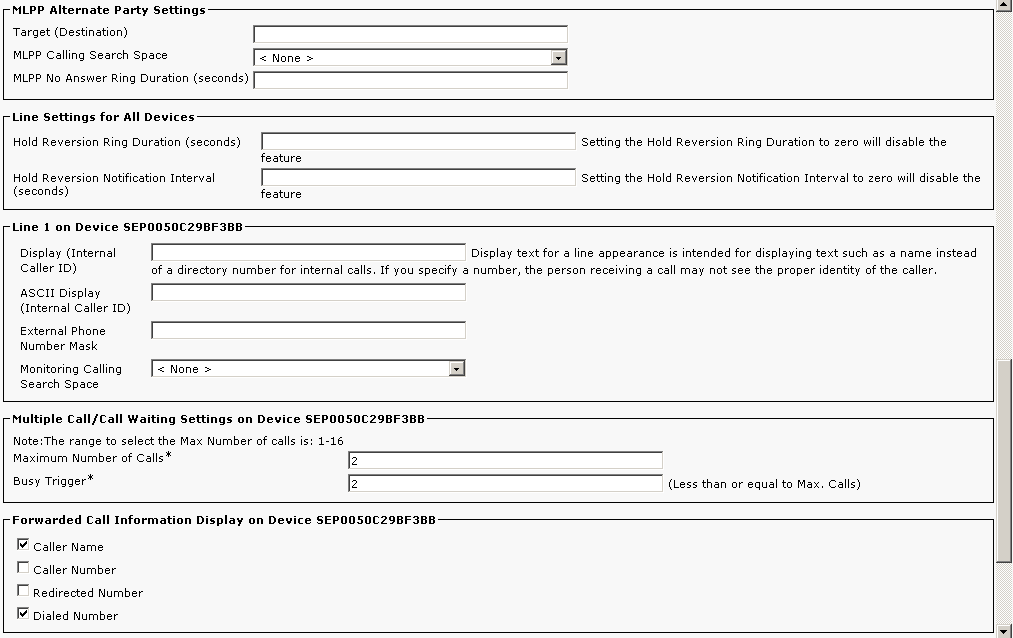
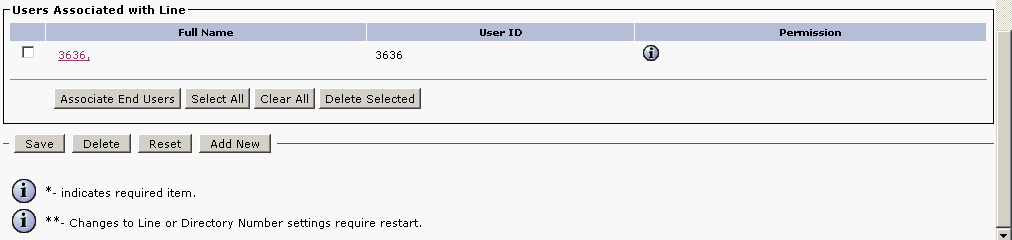
Directory Number Settings
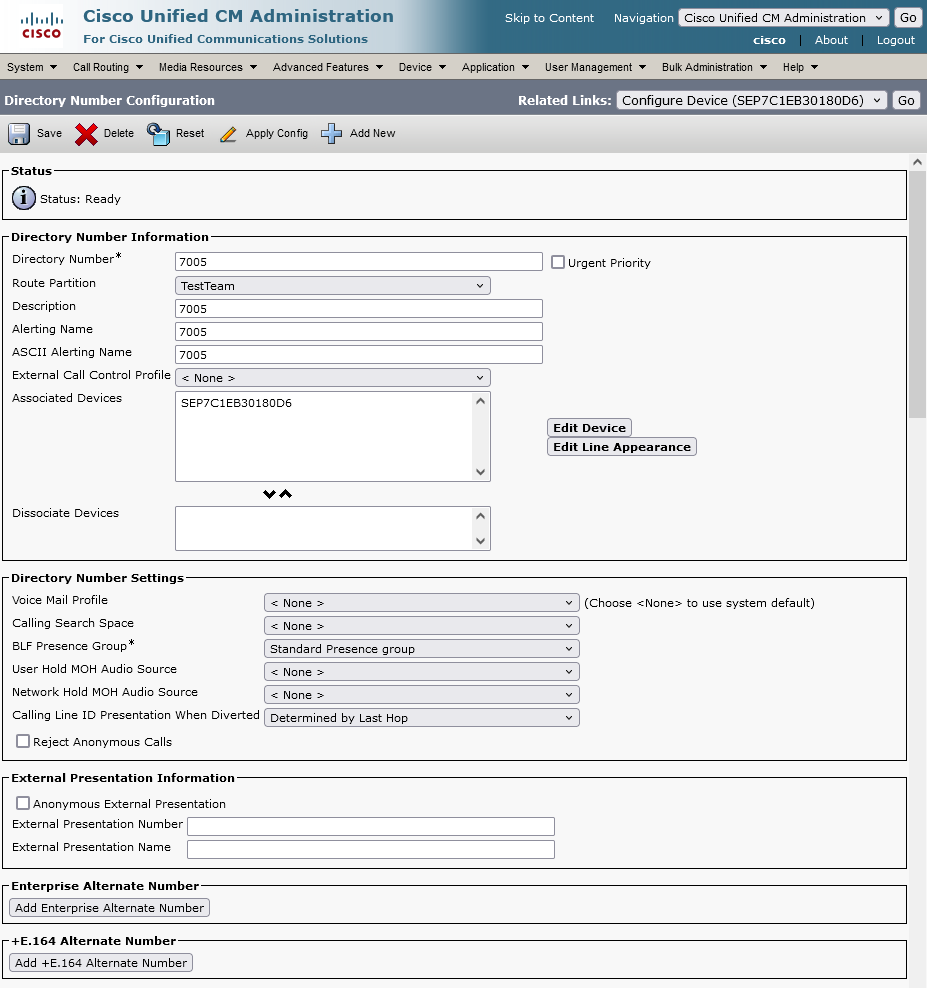 |
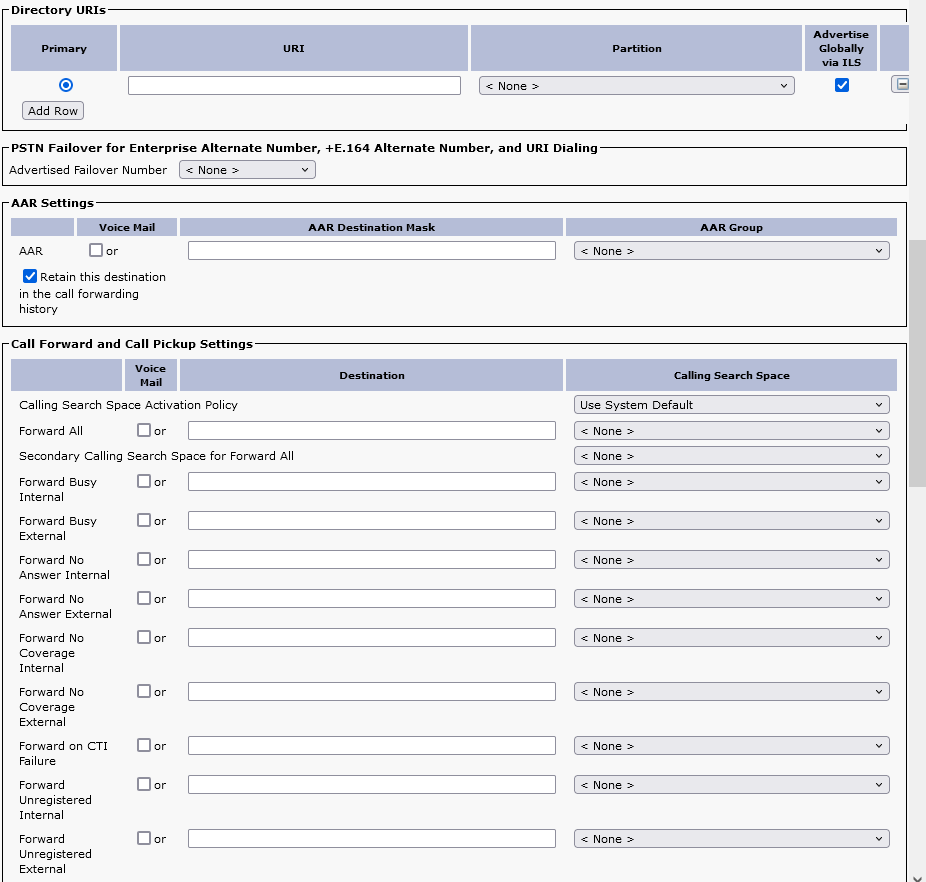 |
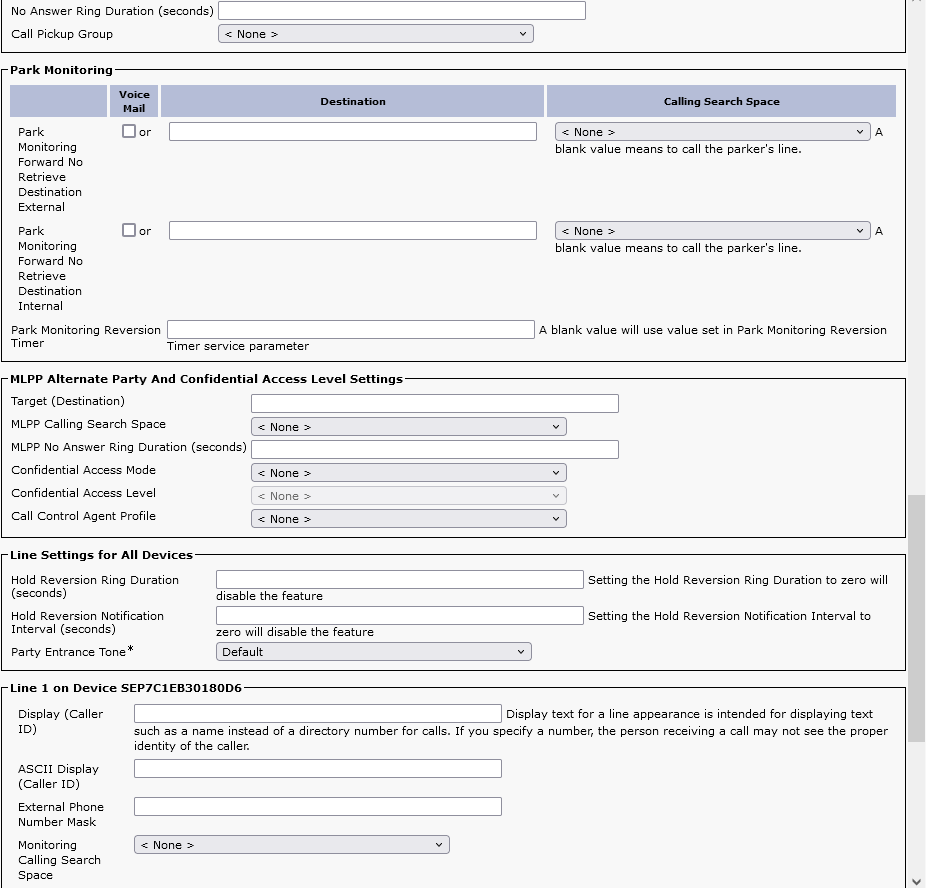 |
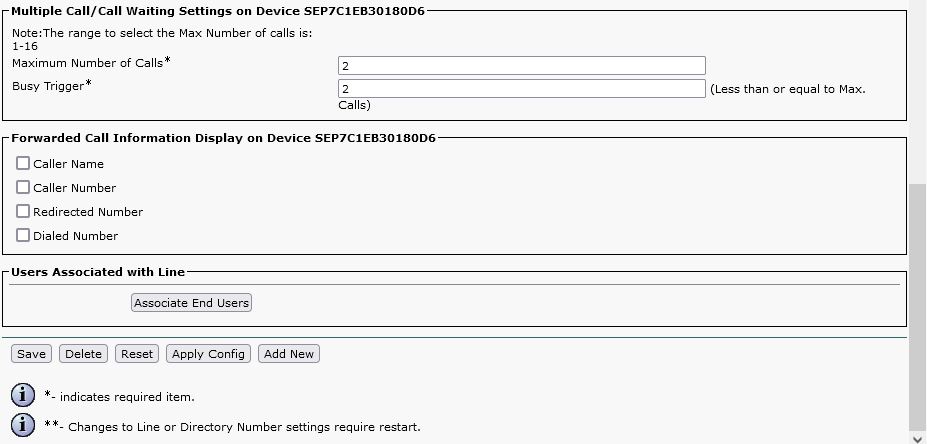 |
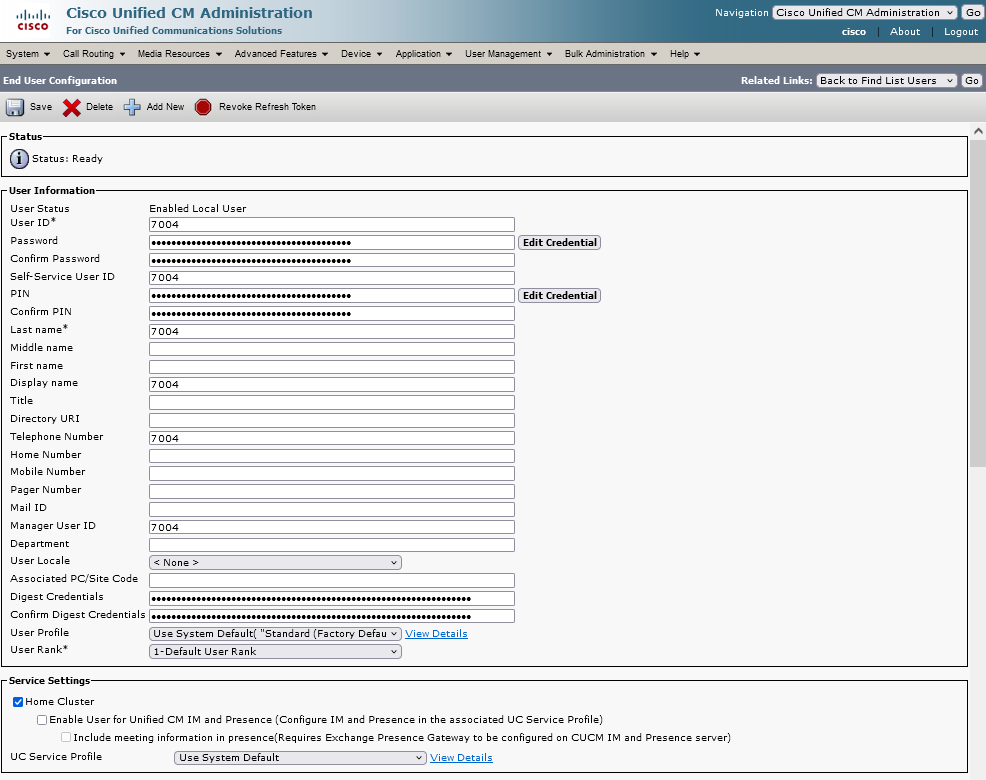
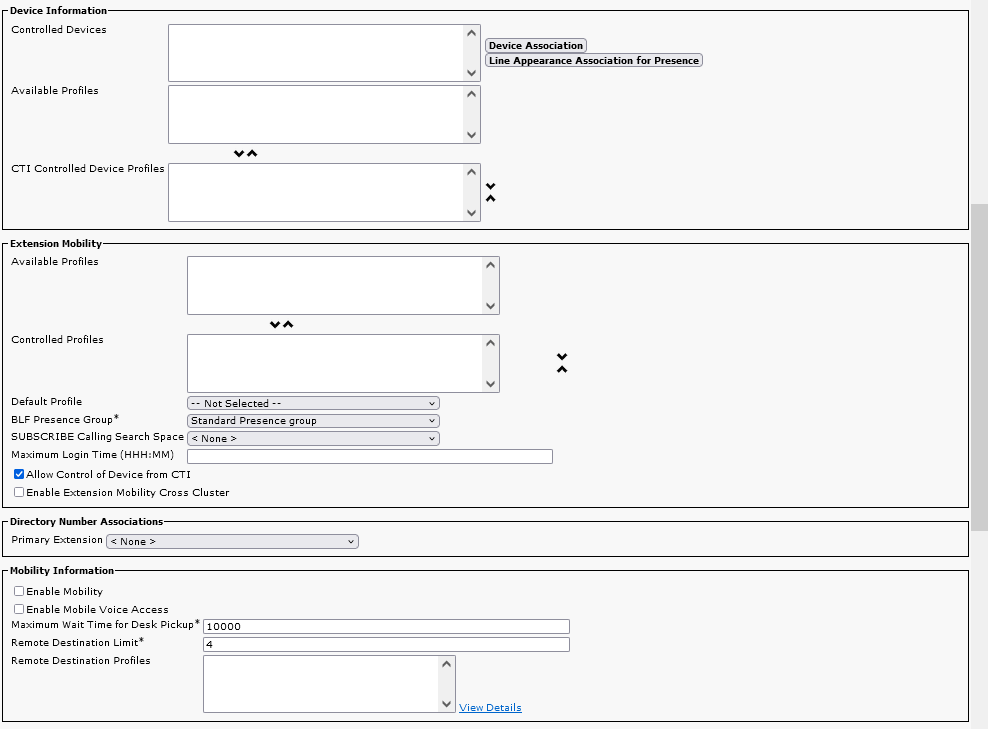
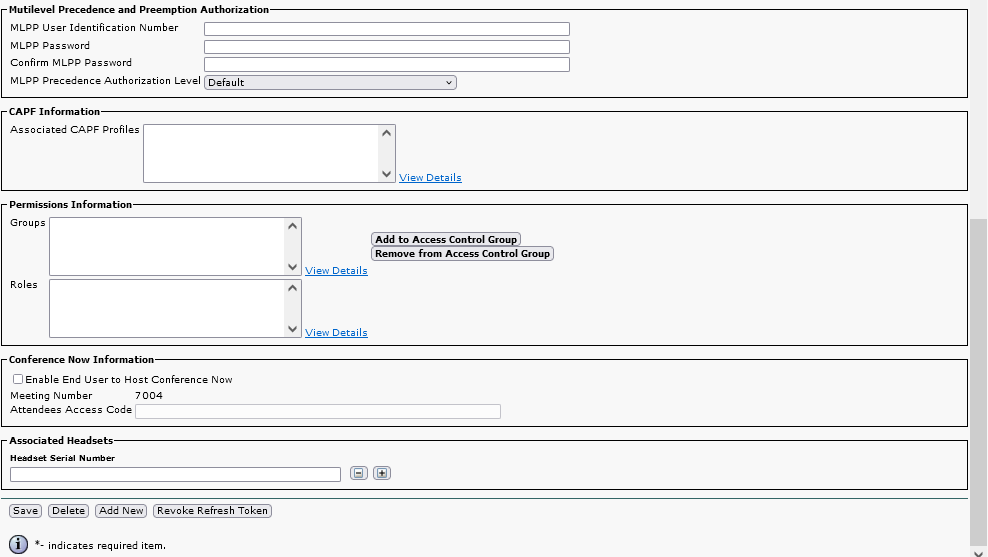
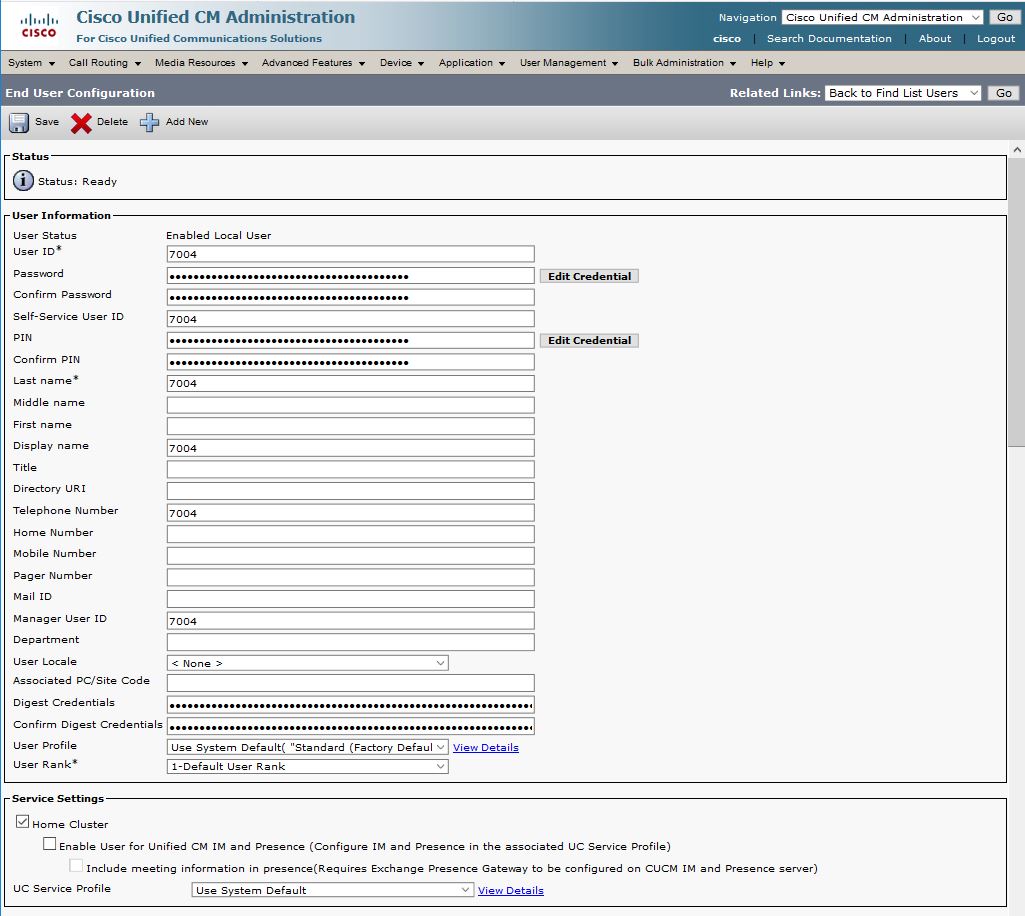
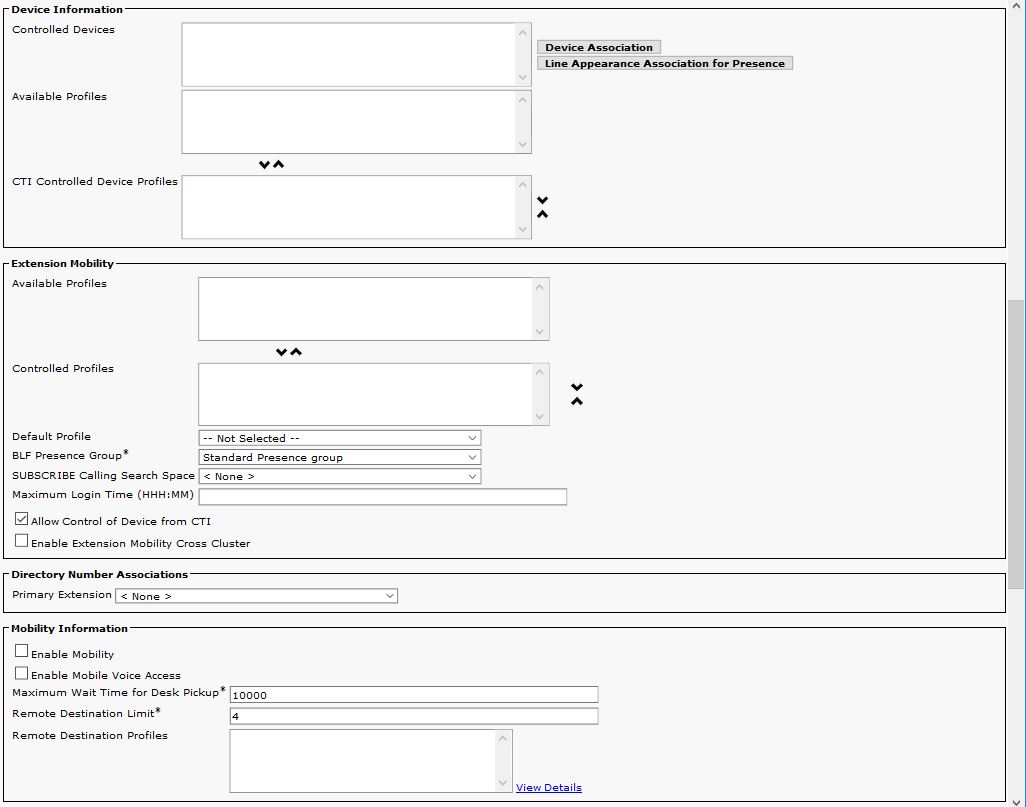
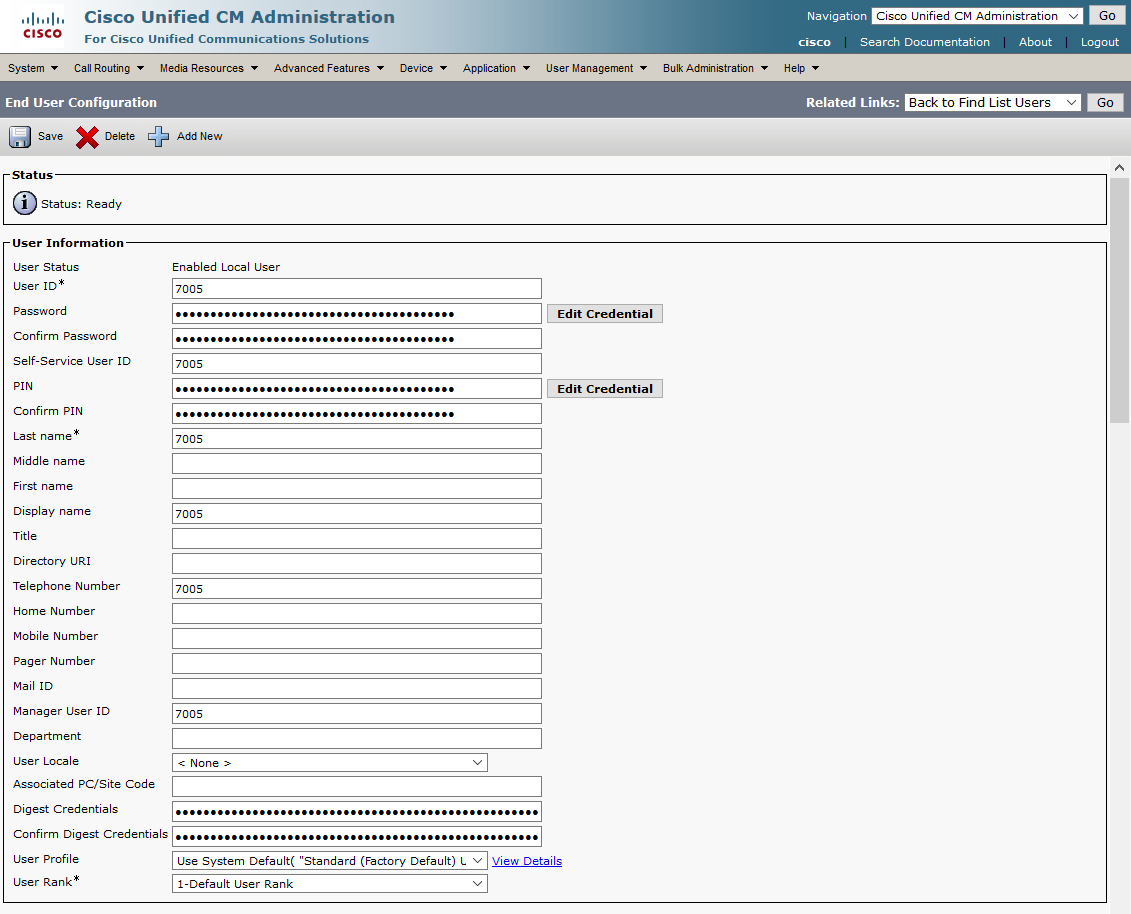
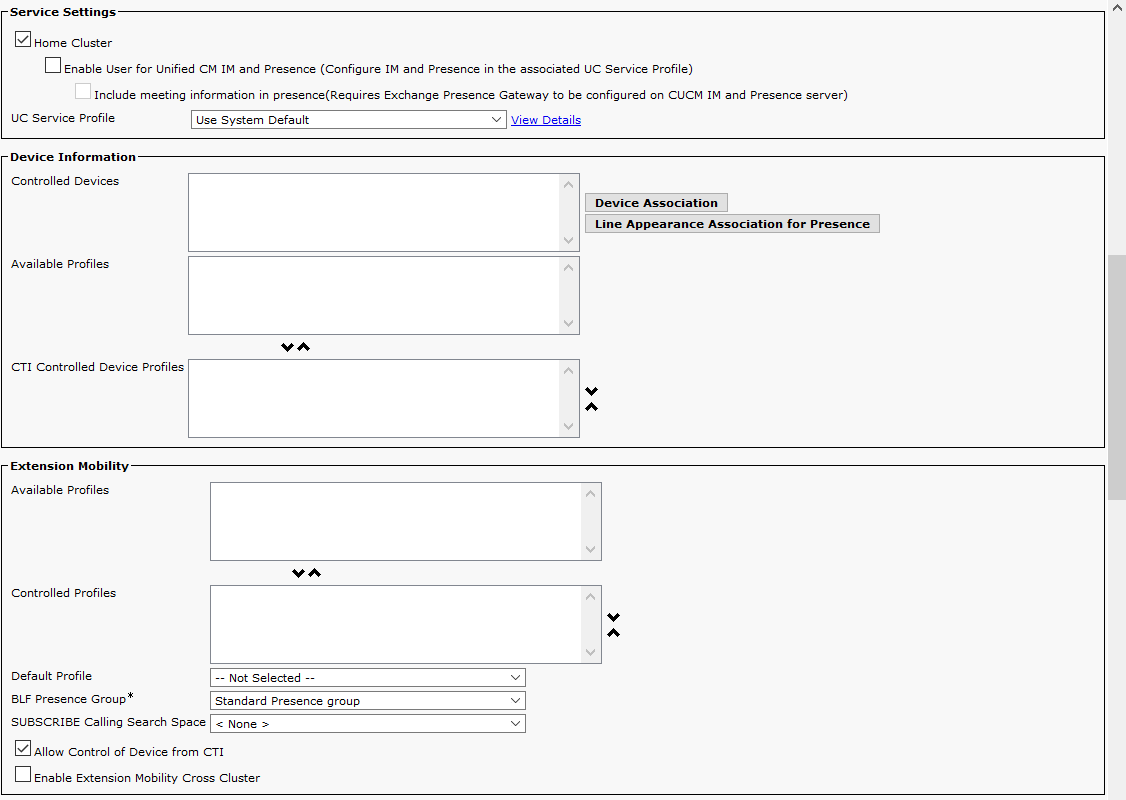
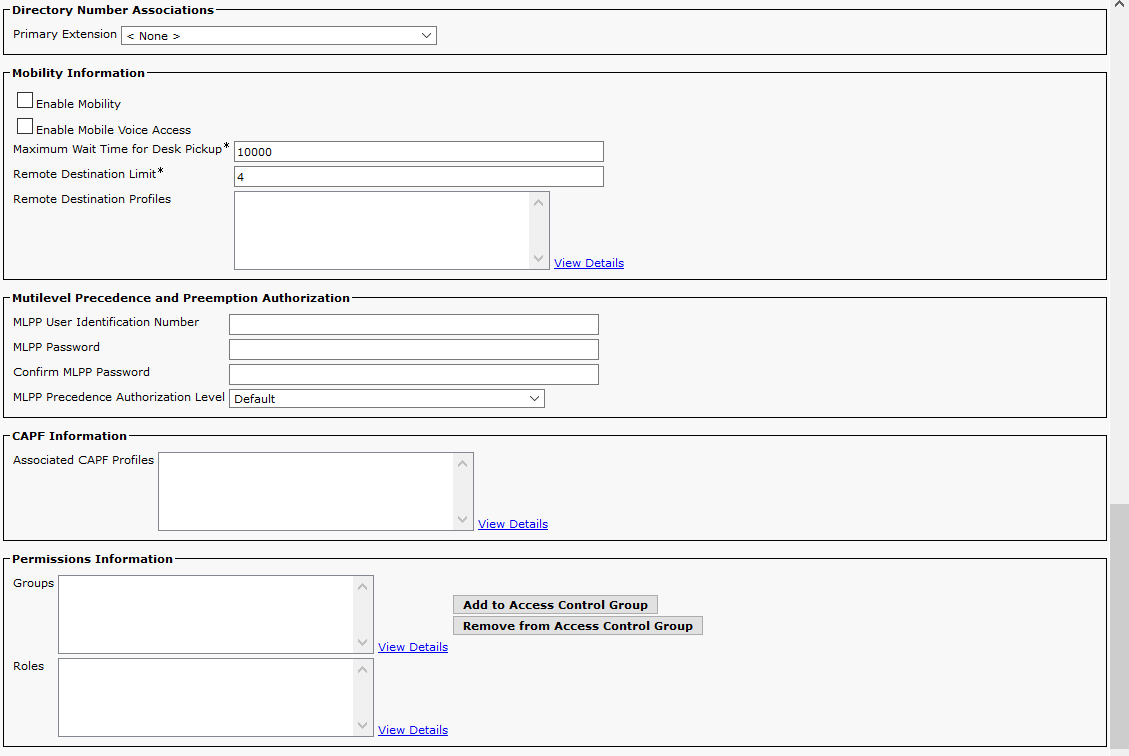
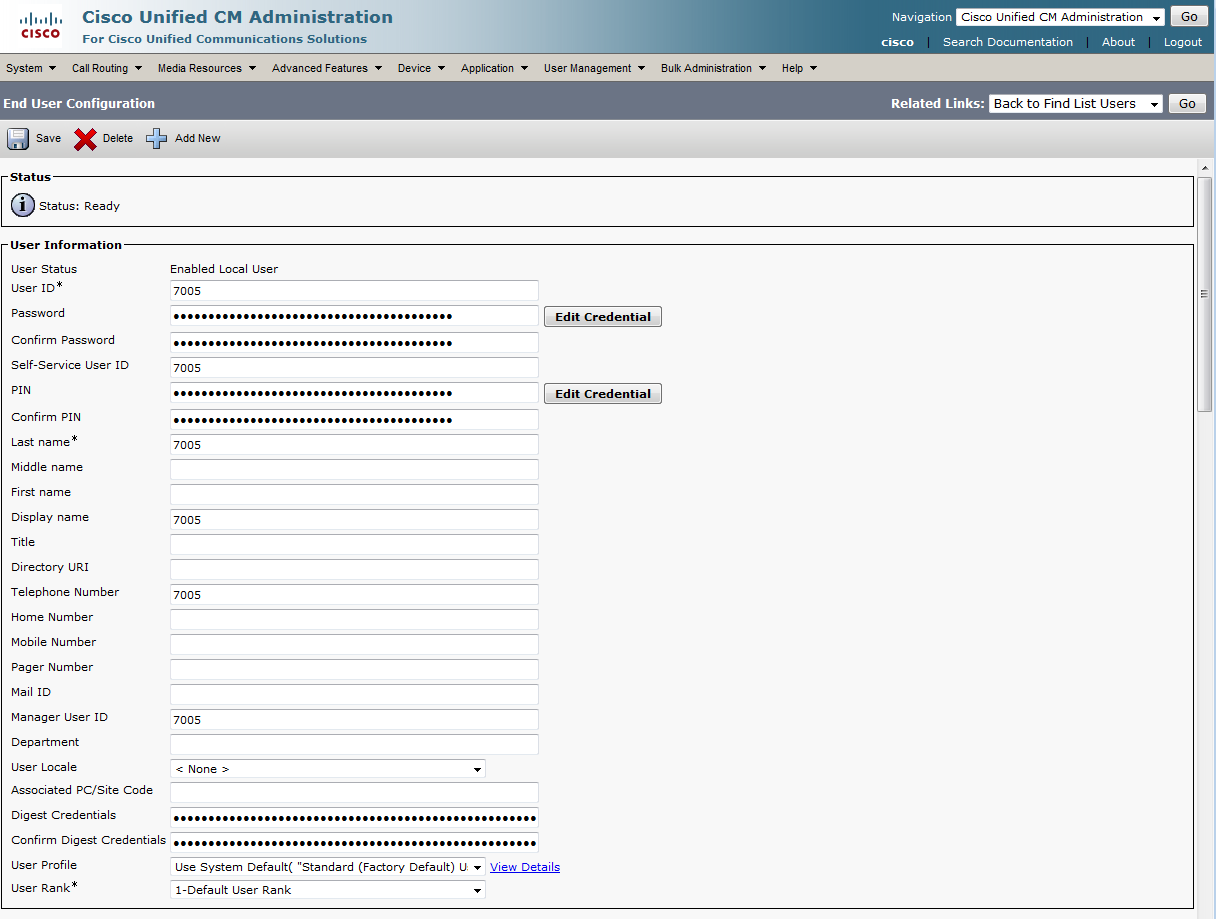
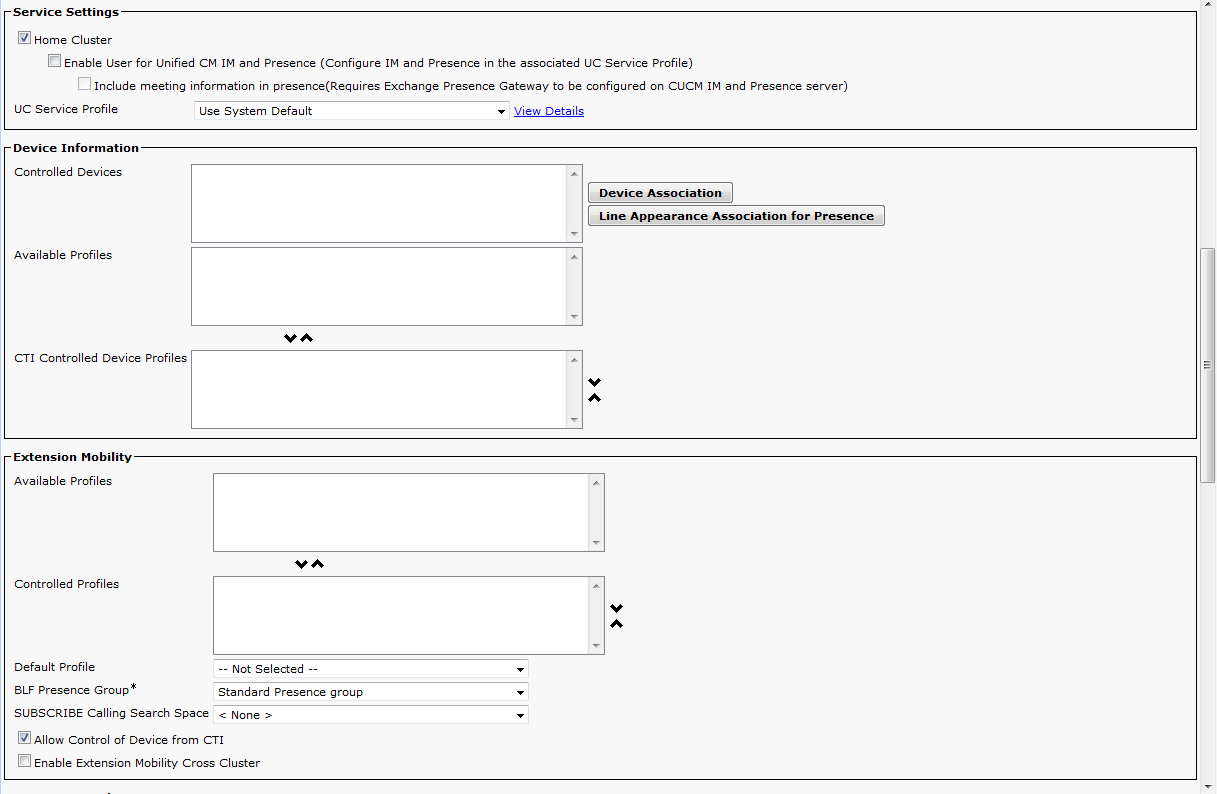
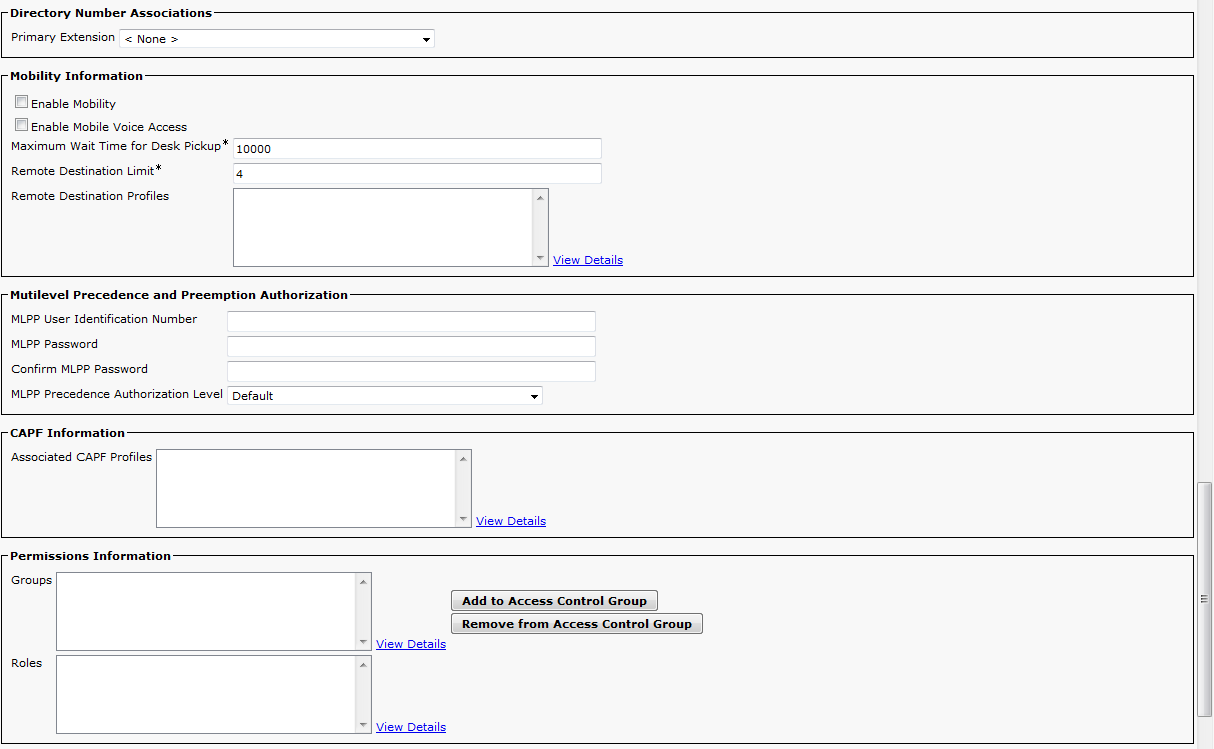
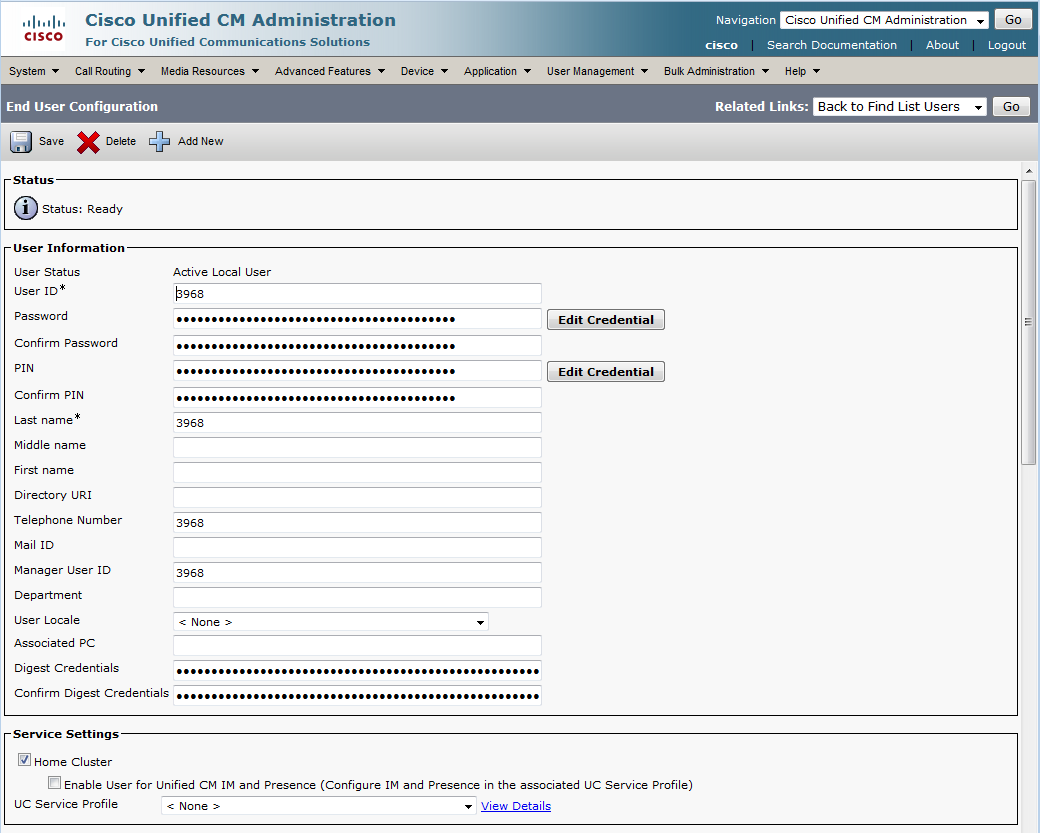
User Settings
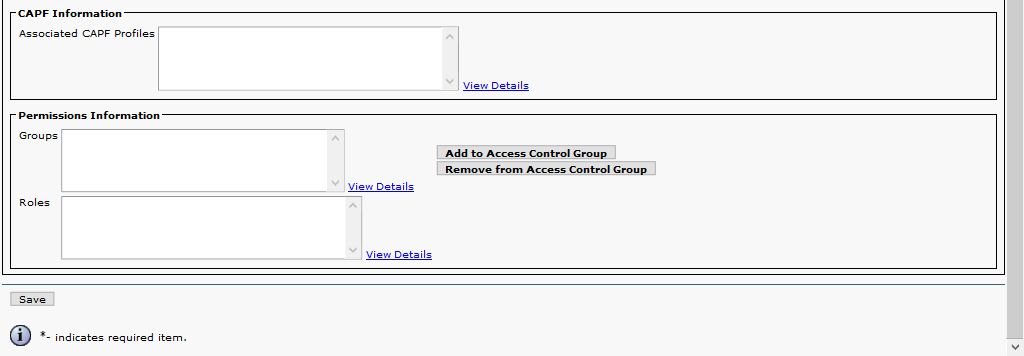
Menu User Management / End User
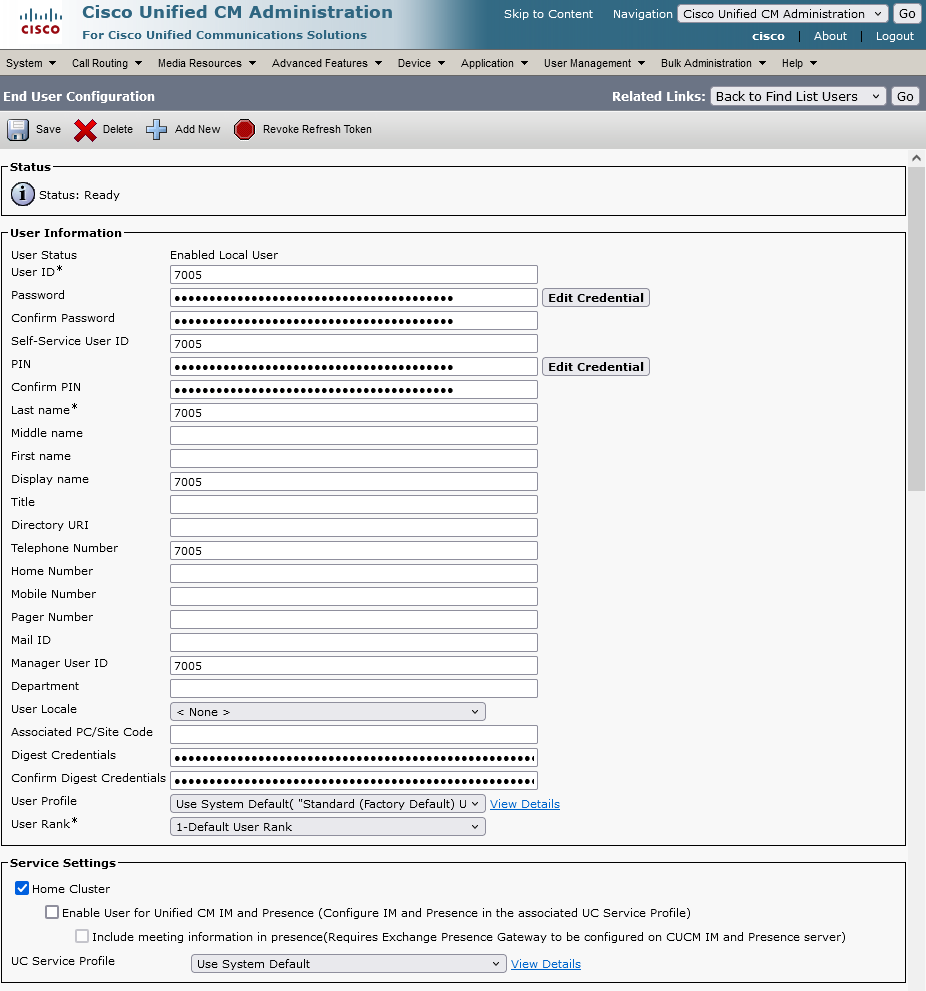 |
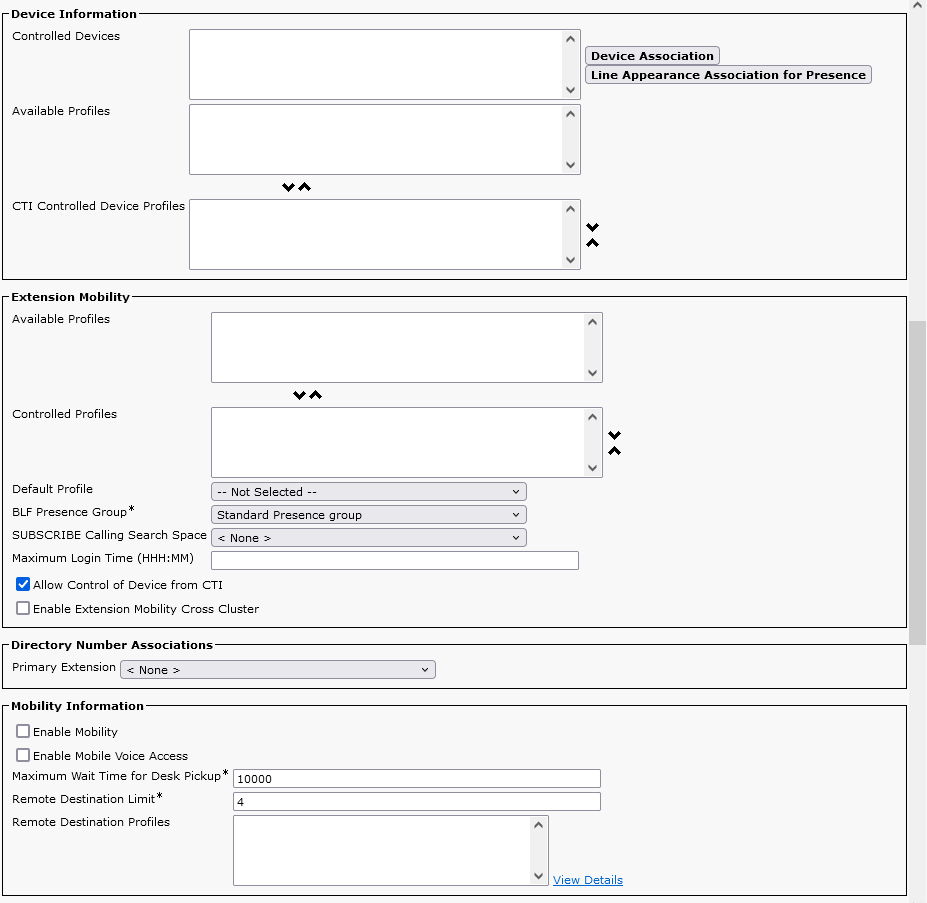 |
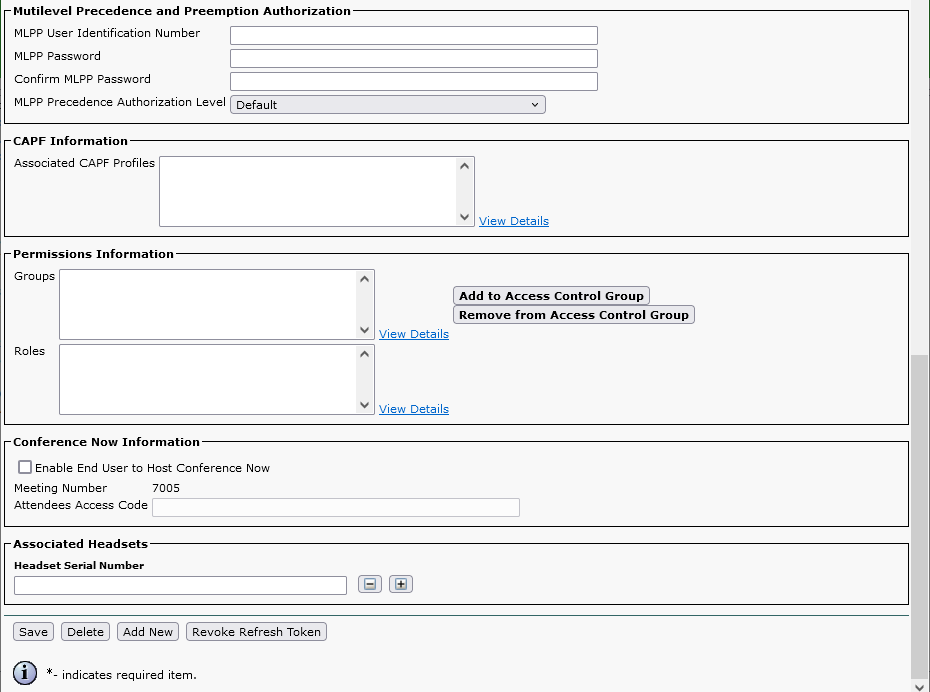 |
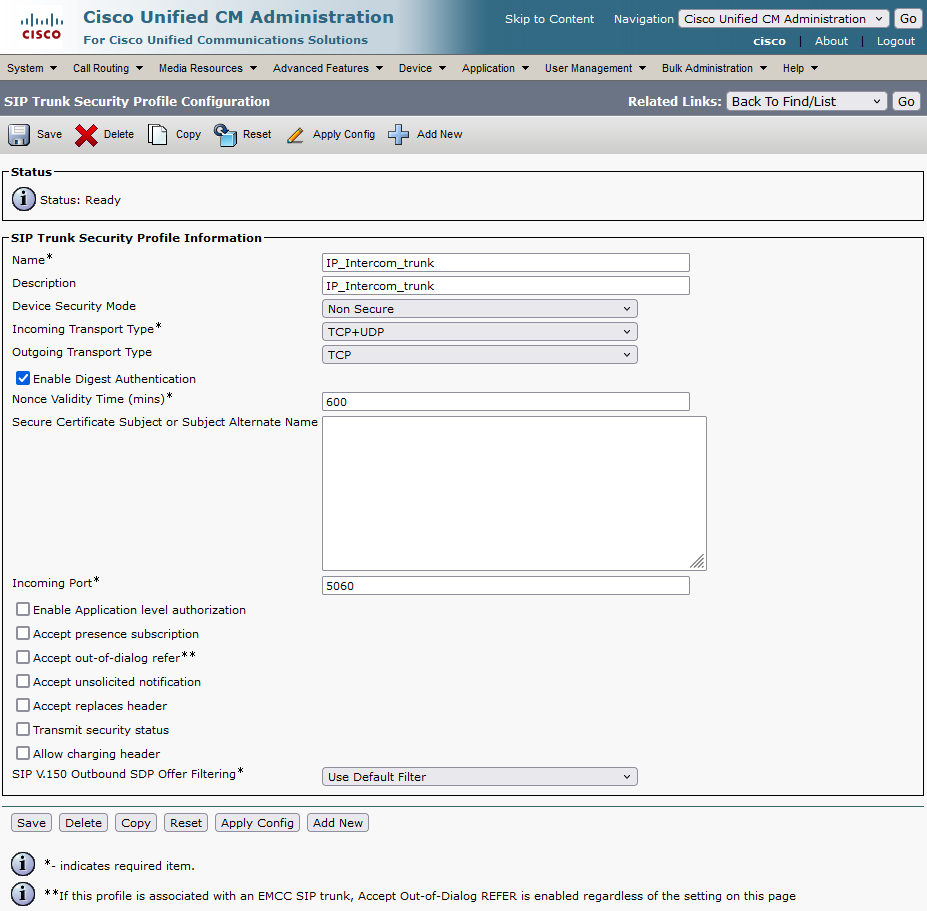
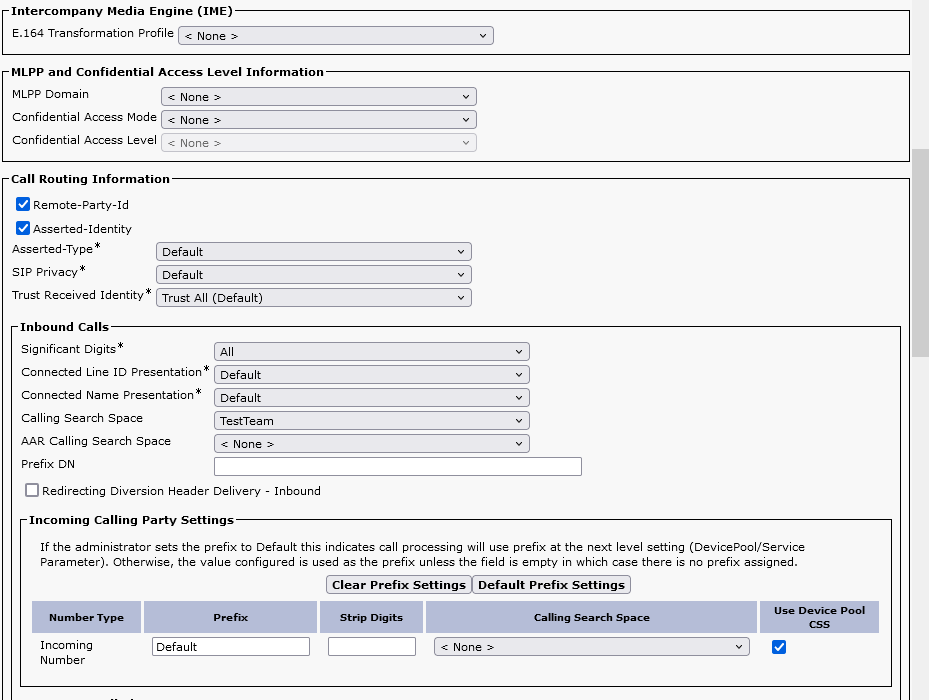
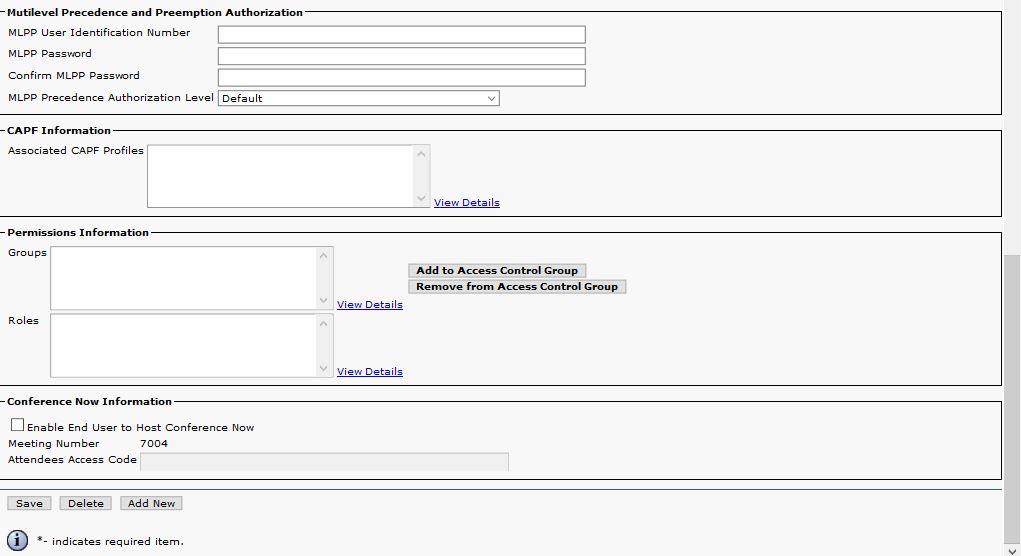
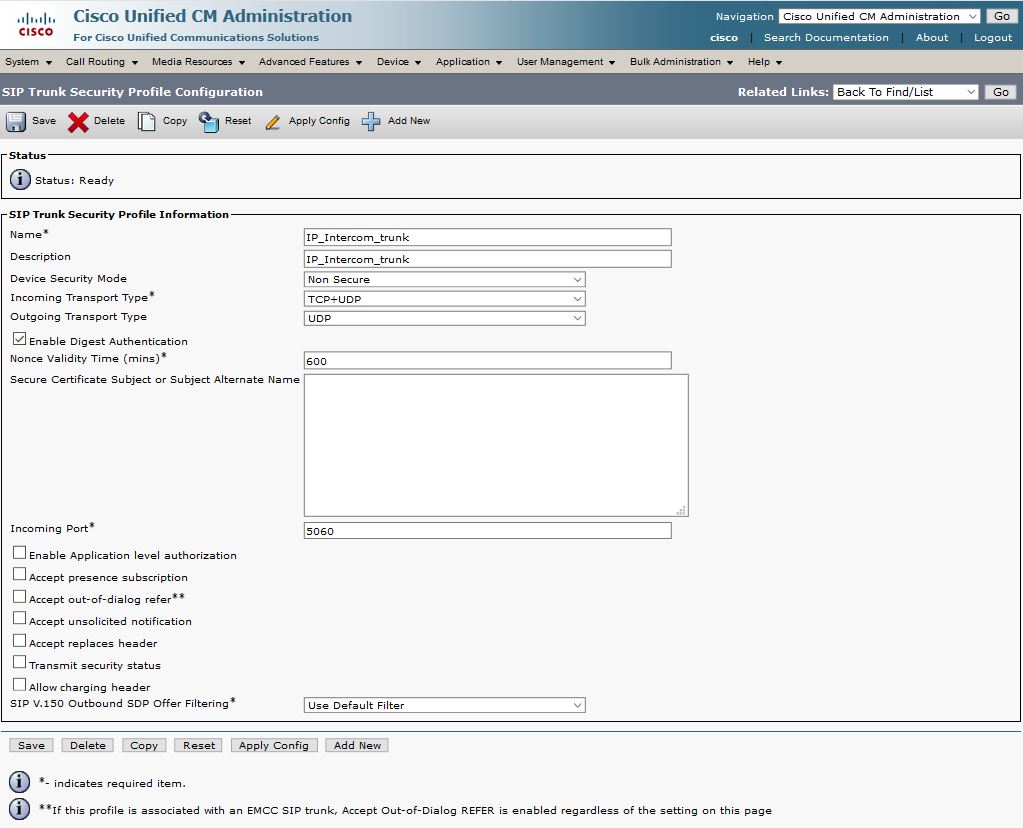
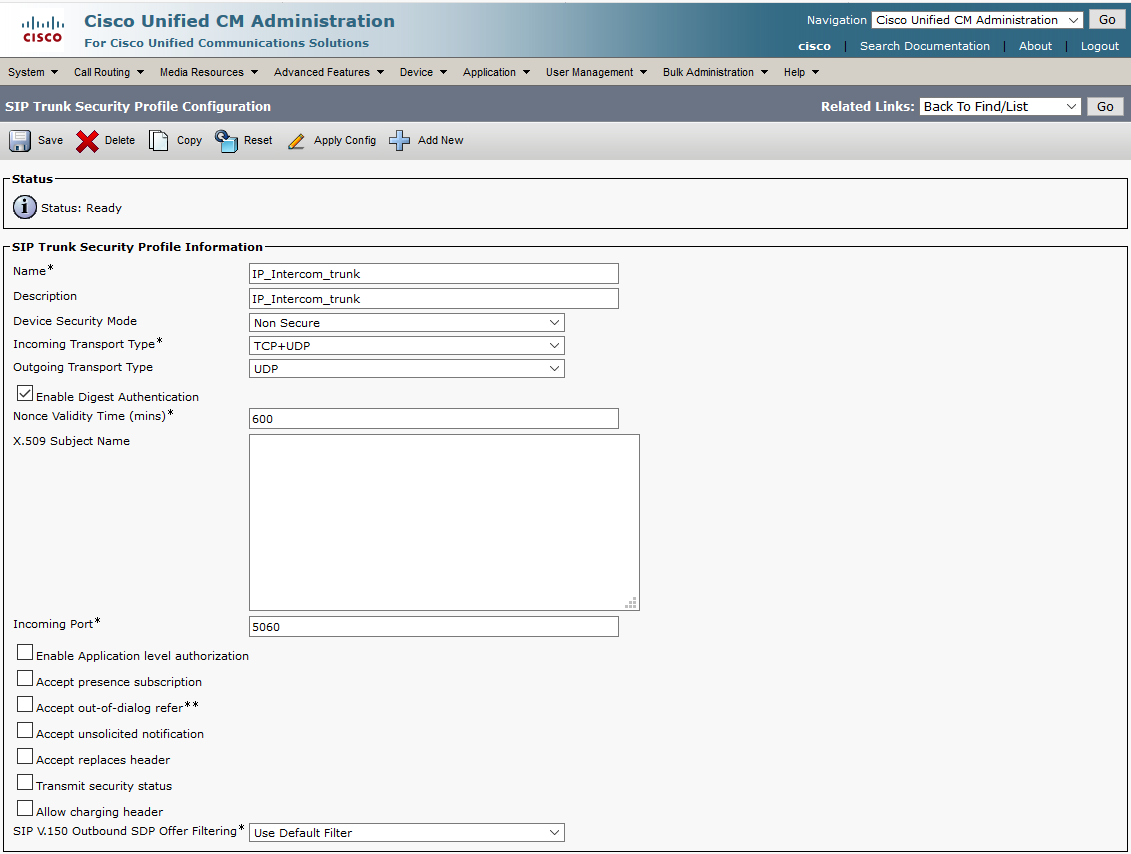
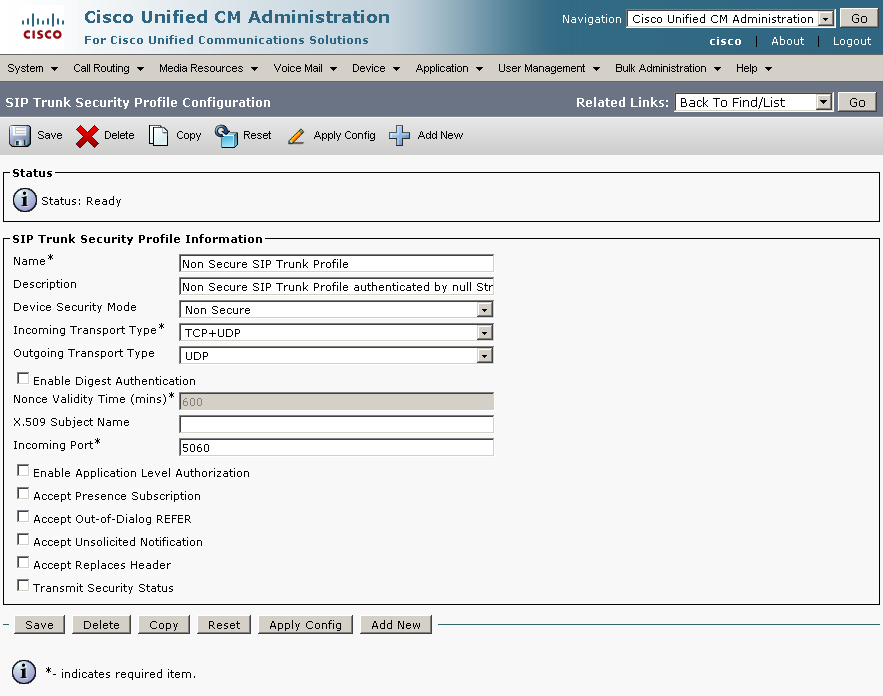
Configuration of trunk security
Configure trunk security (password which will be used for registration to the trunk). Security is configured in section System / Security / SIP Trunk Security Profile. Click on Add New. Configure the rest according to the pictures below.
 |
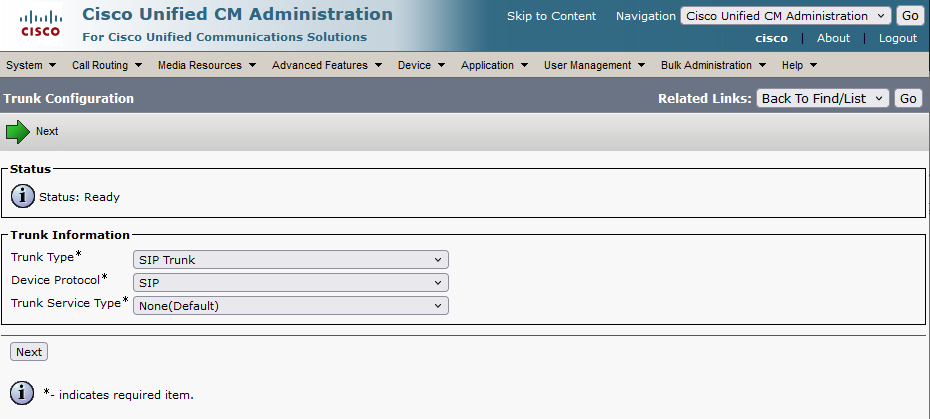
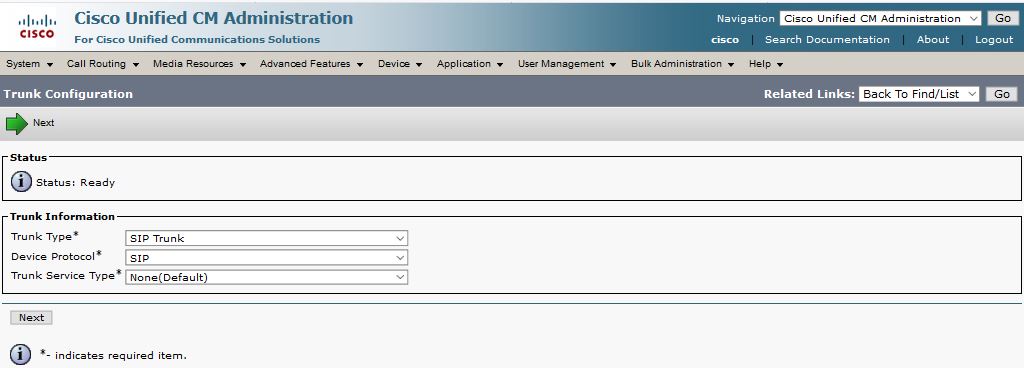
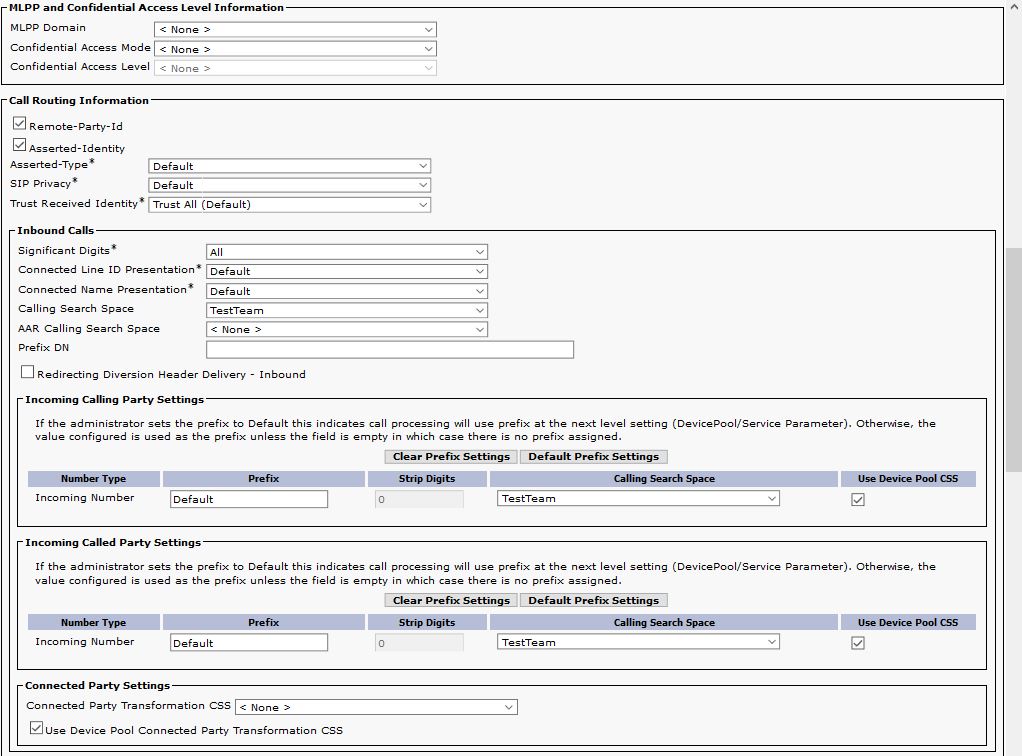
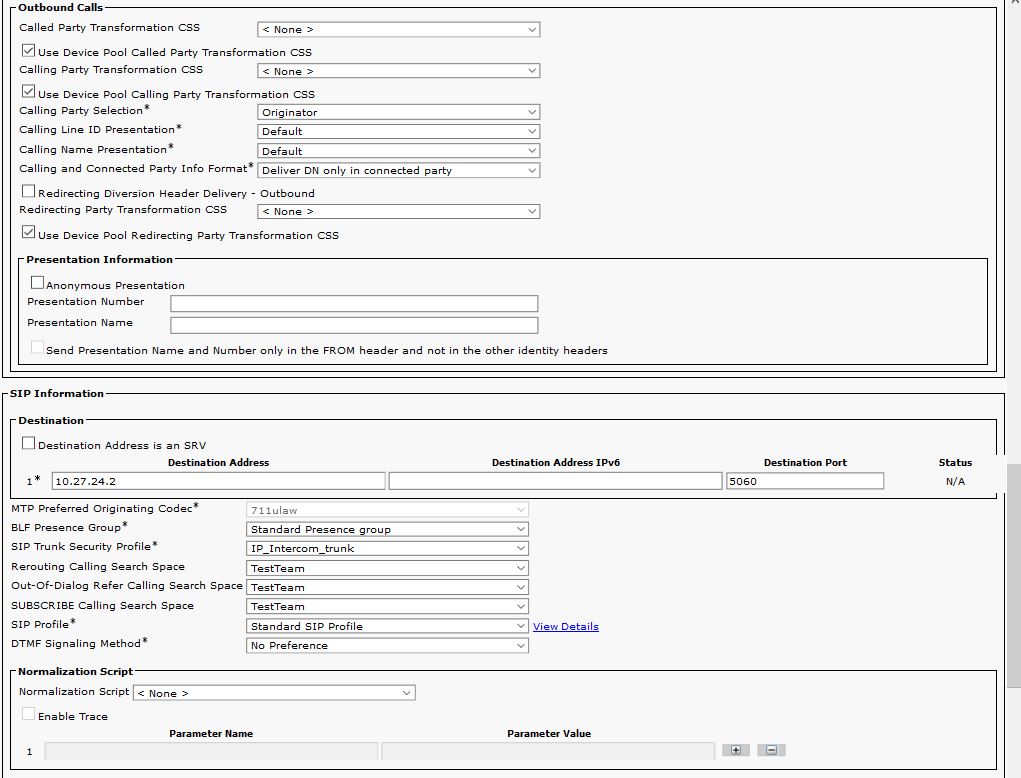
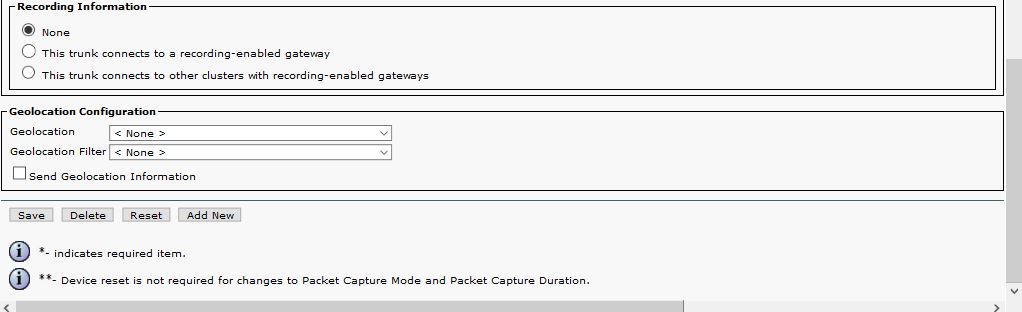
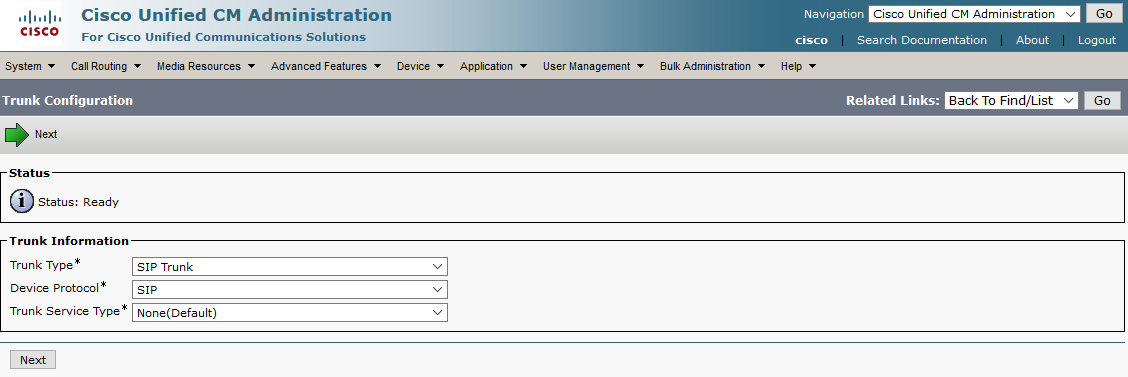
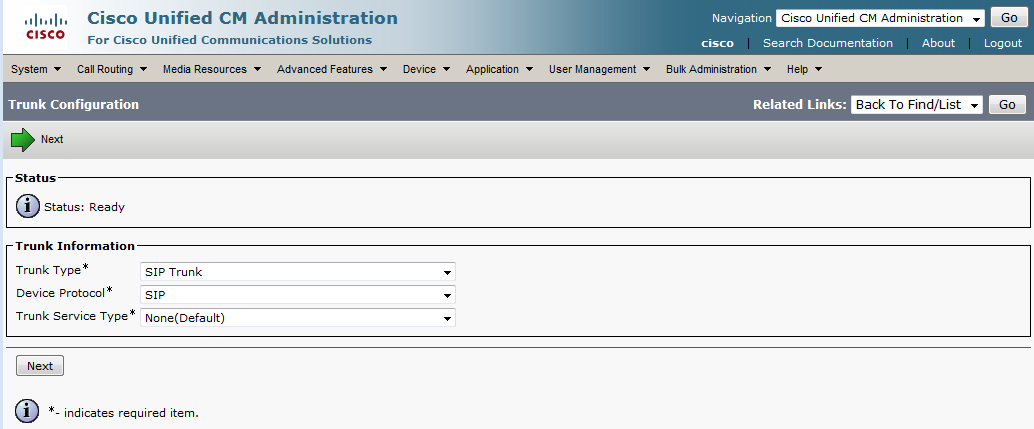
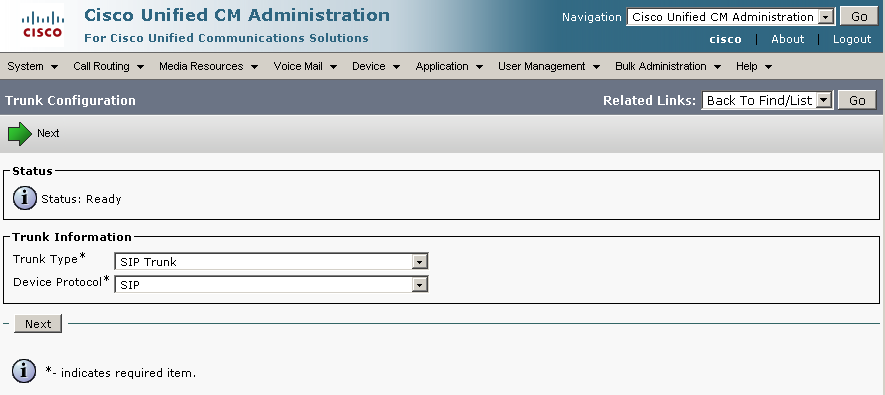
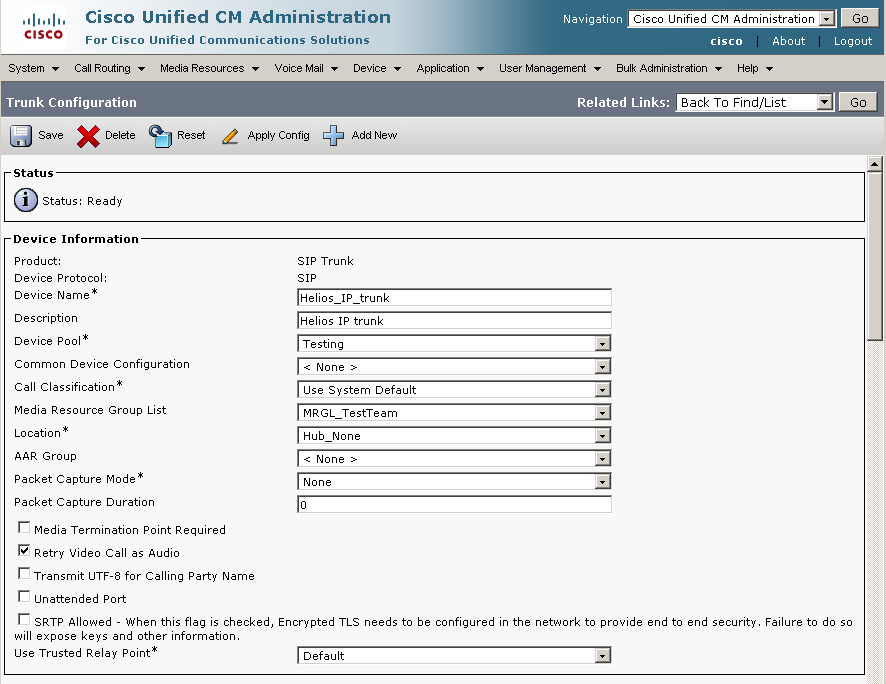
Configuration of SIP trunk
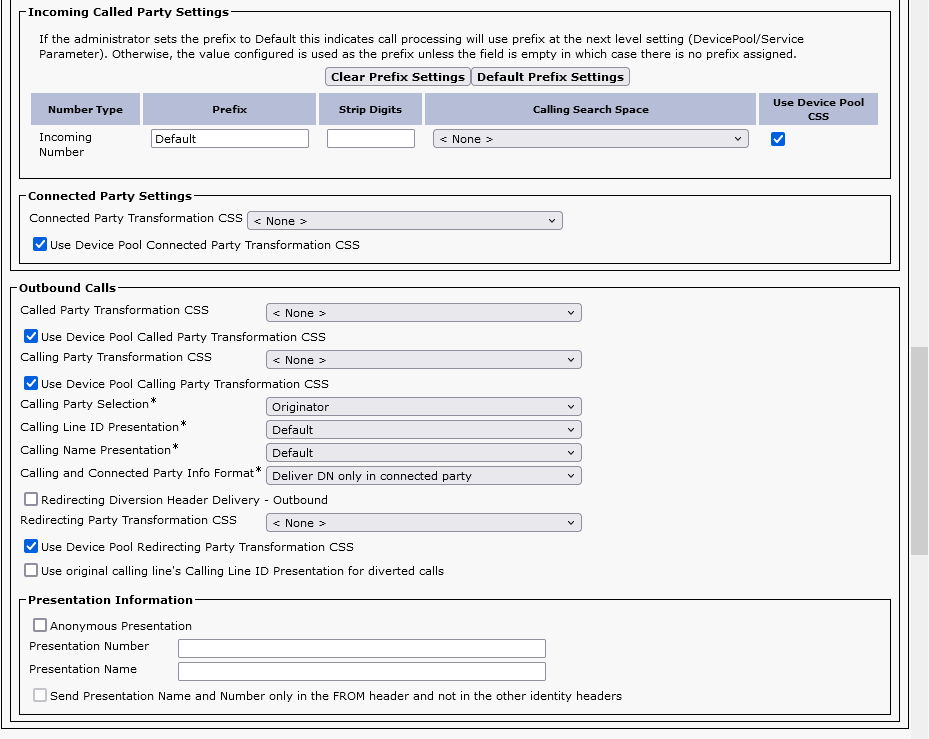
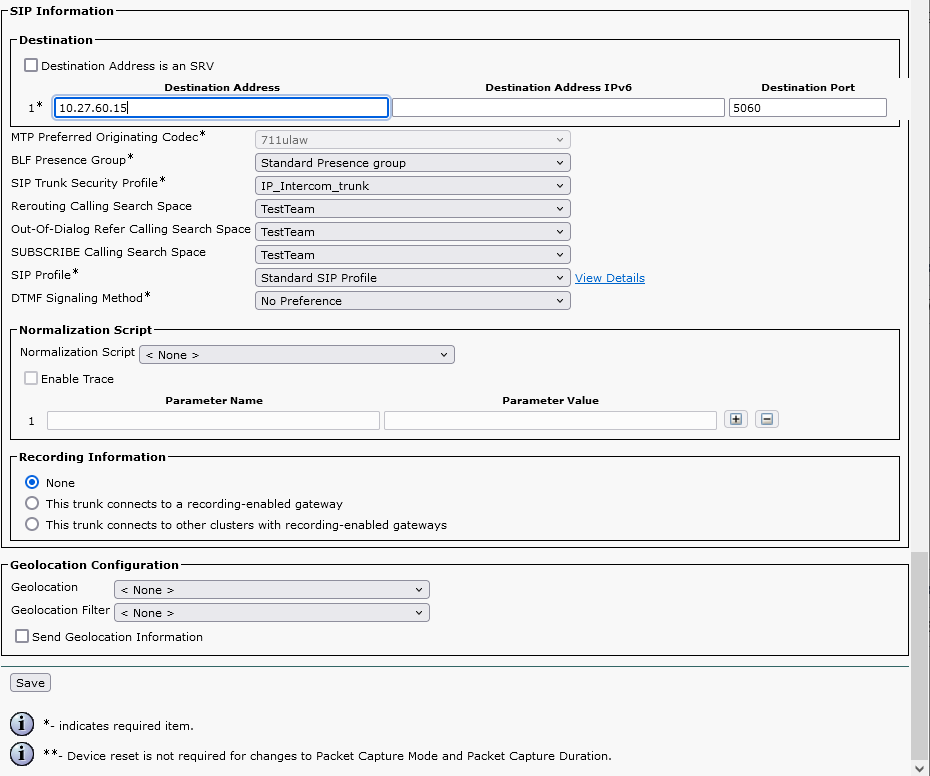
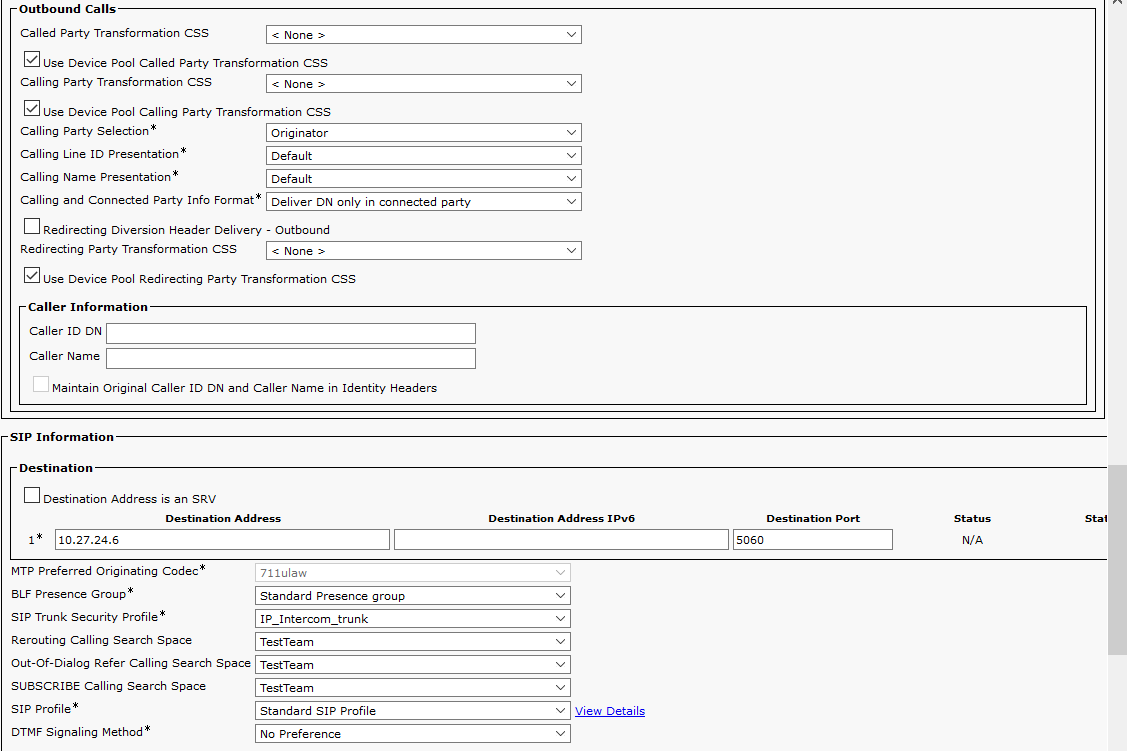
Go to menu Device / Trunk, set parameters regarding the picture below and click on Next.
 |
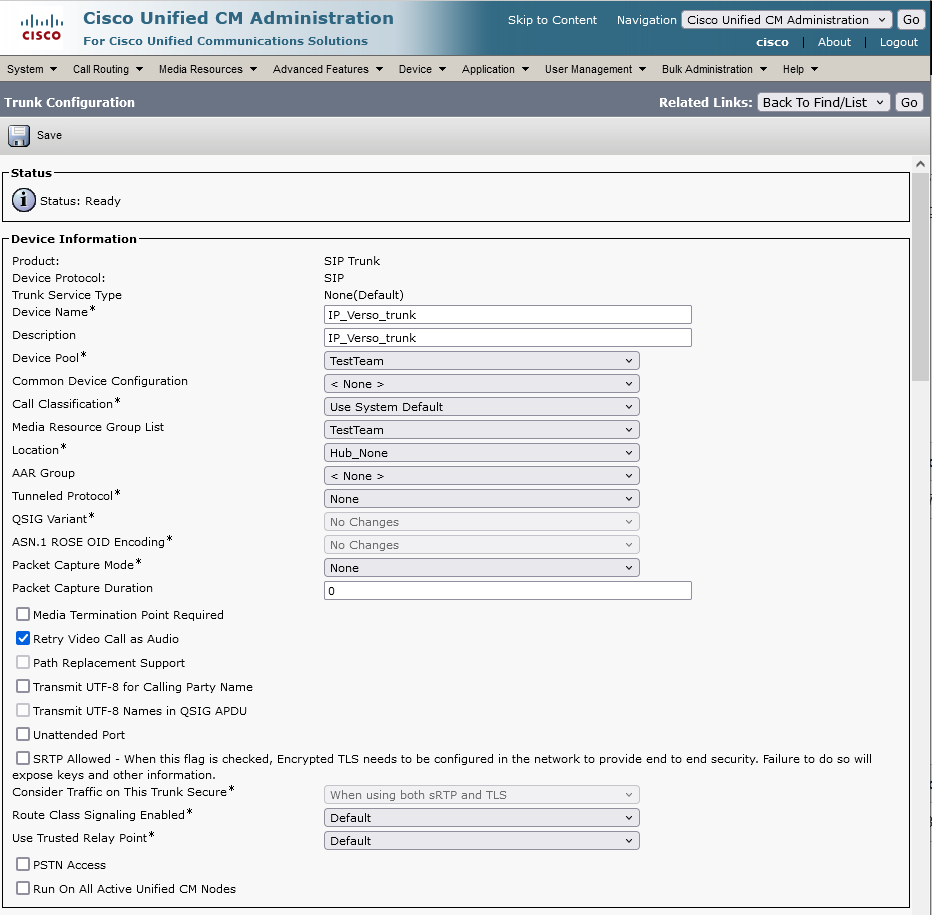
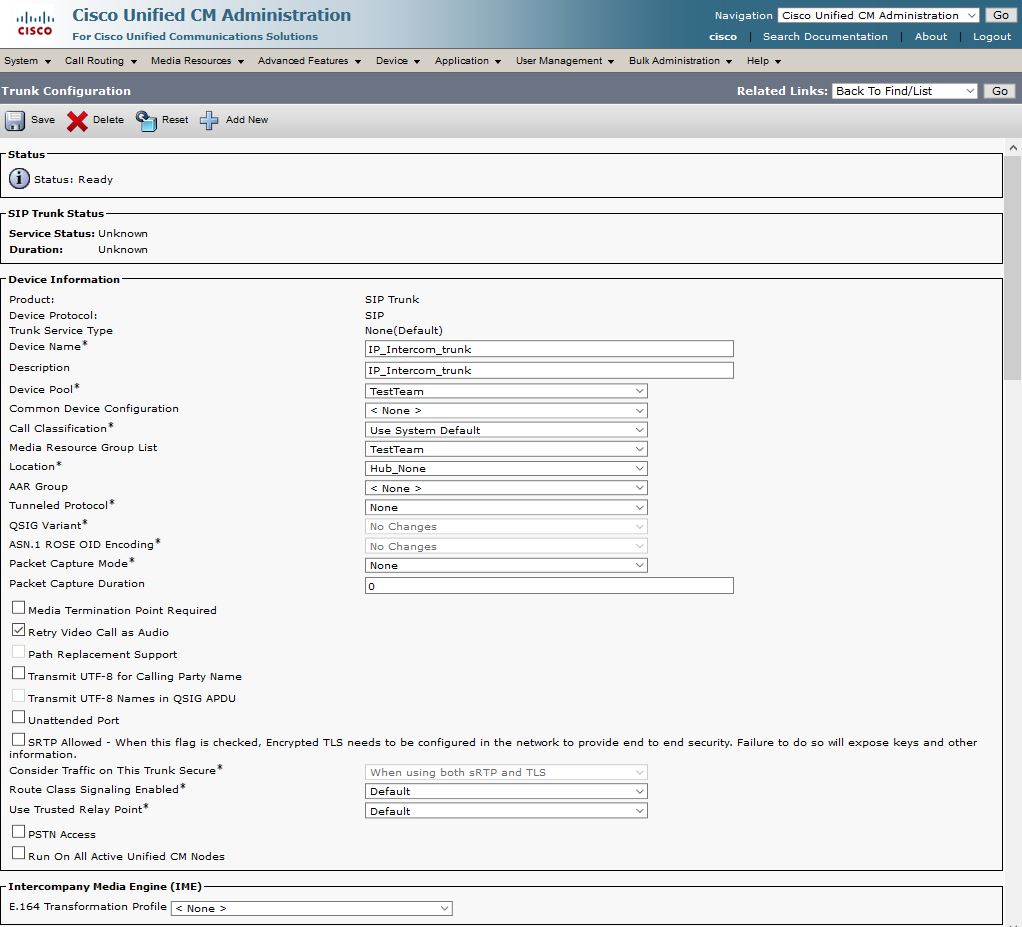
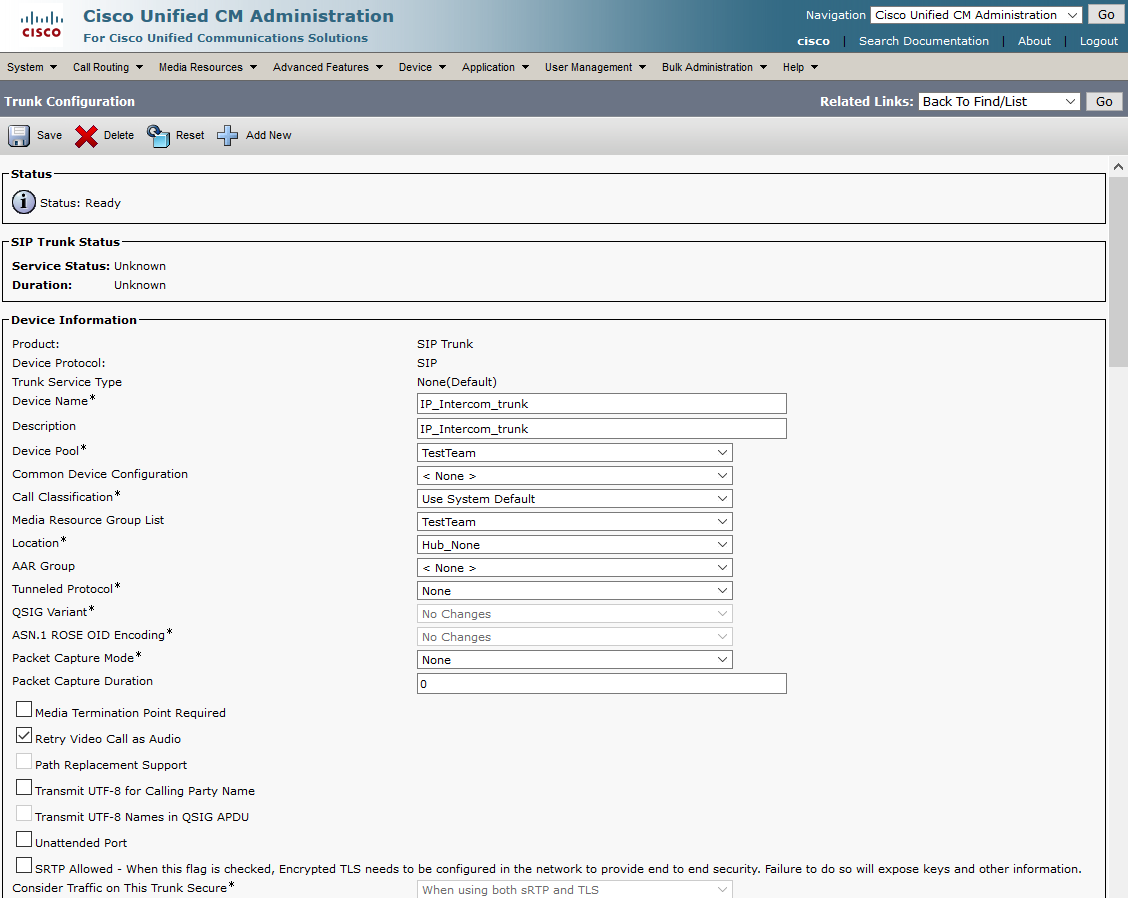
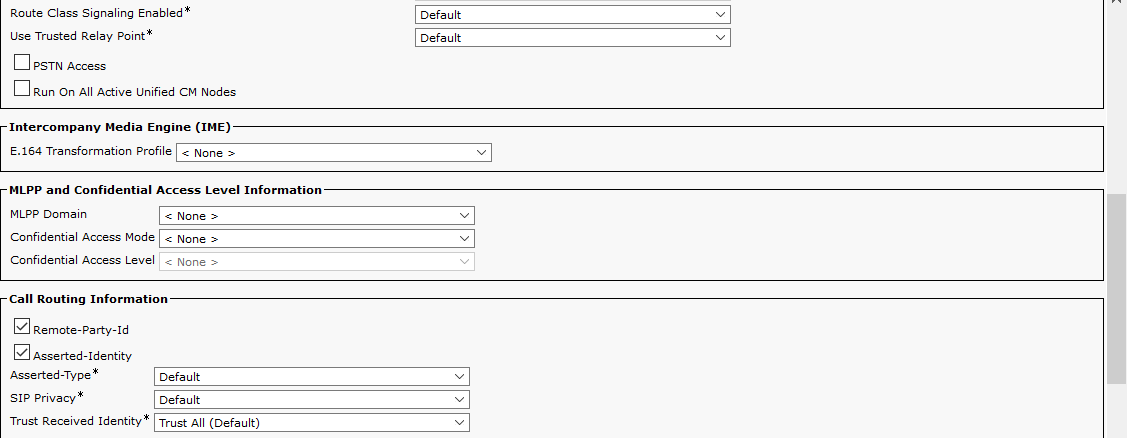
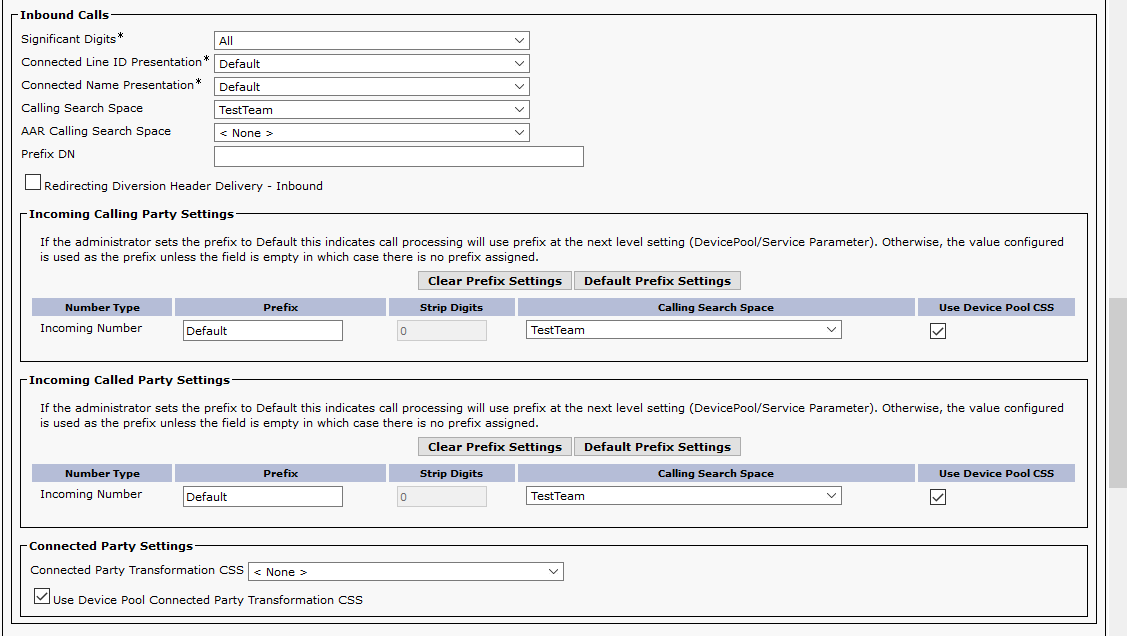
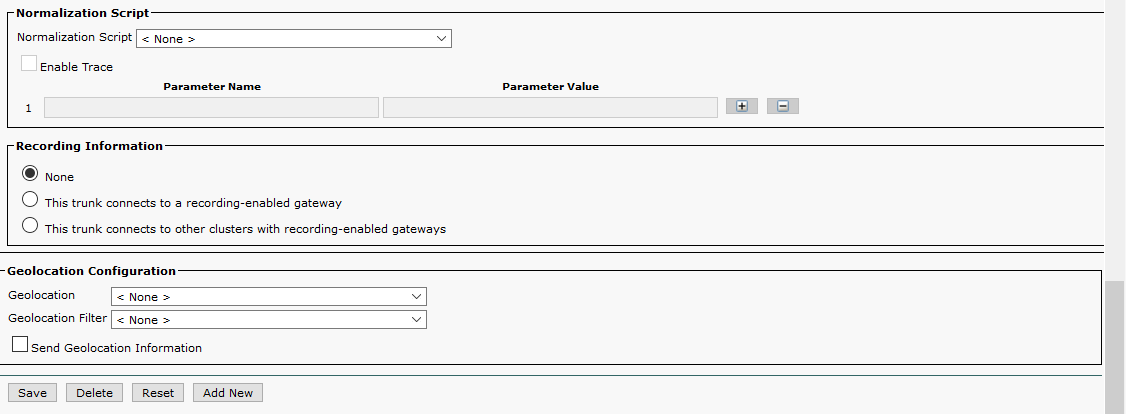
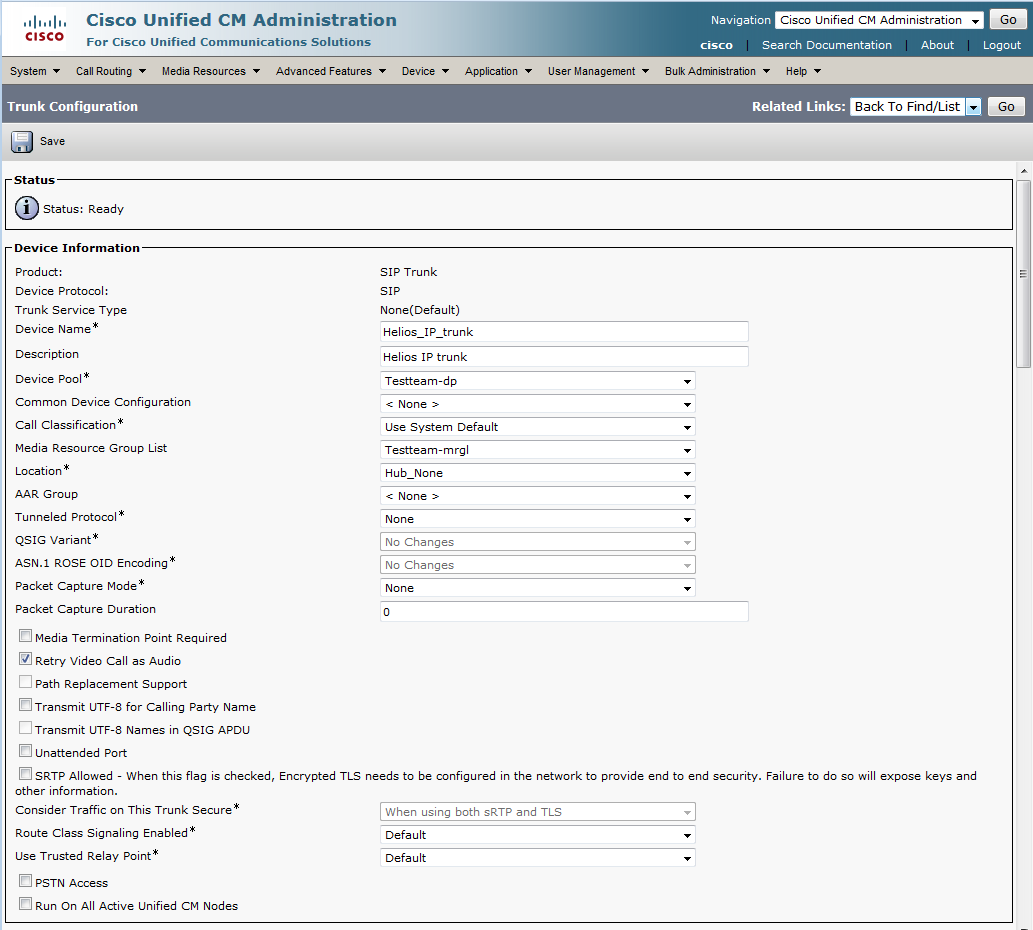
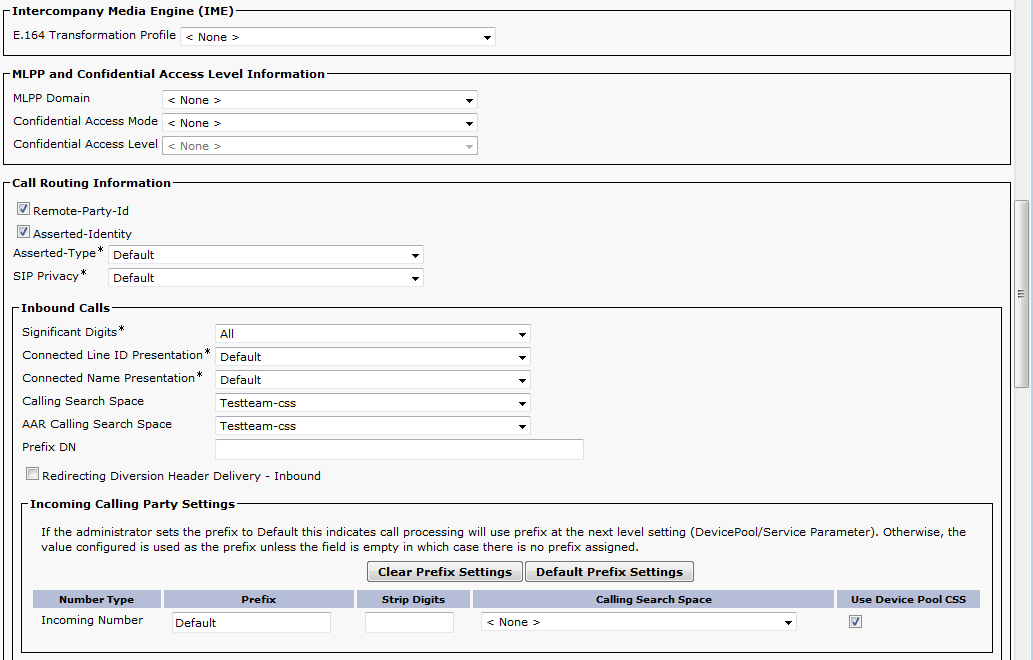
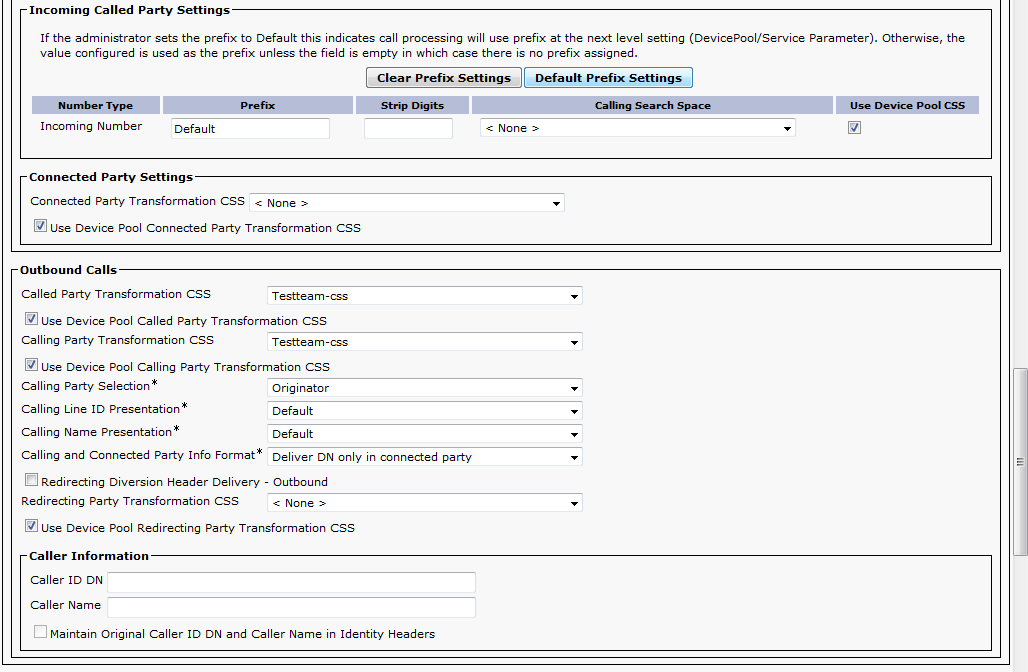
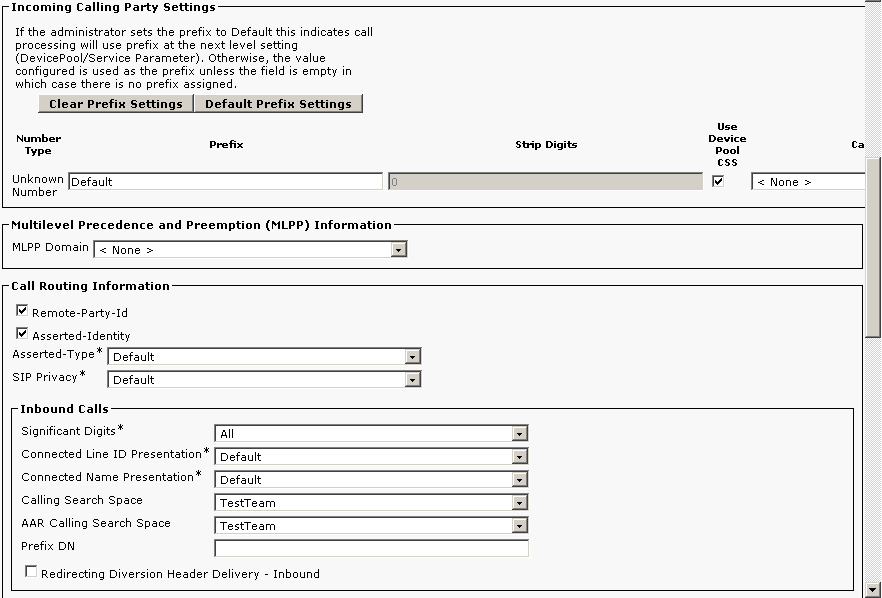
Continue in configuration according to the pictures below
 |
 |
 |
 |
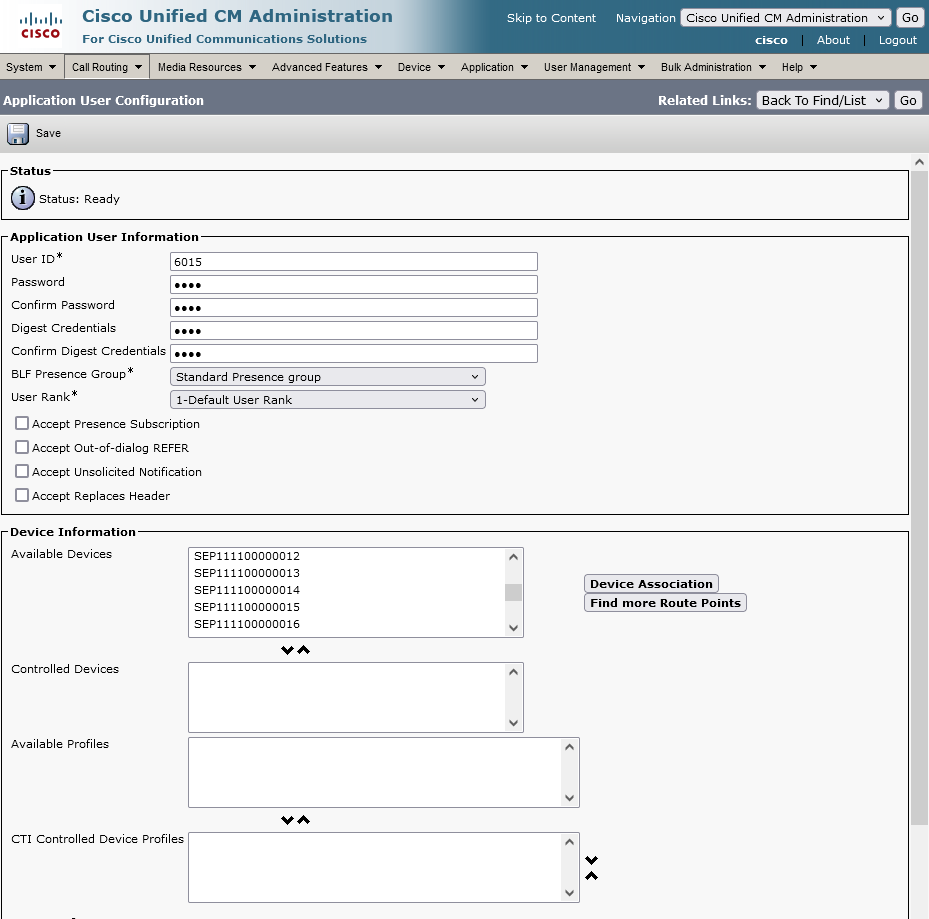
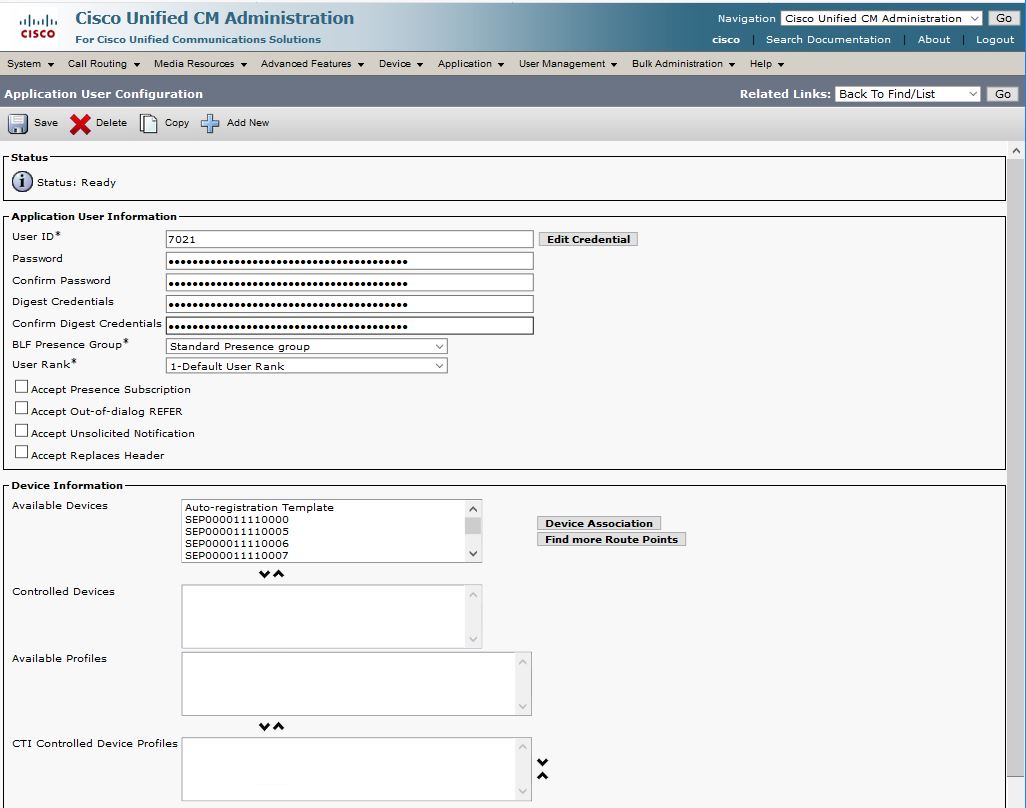
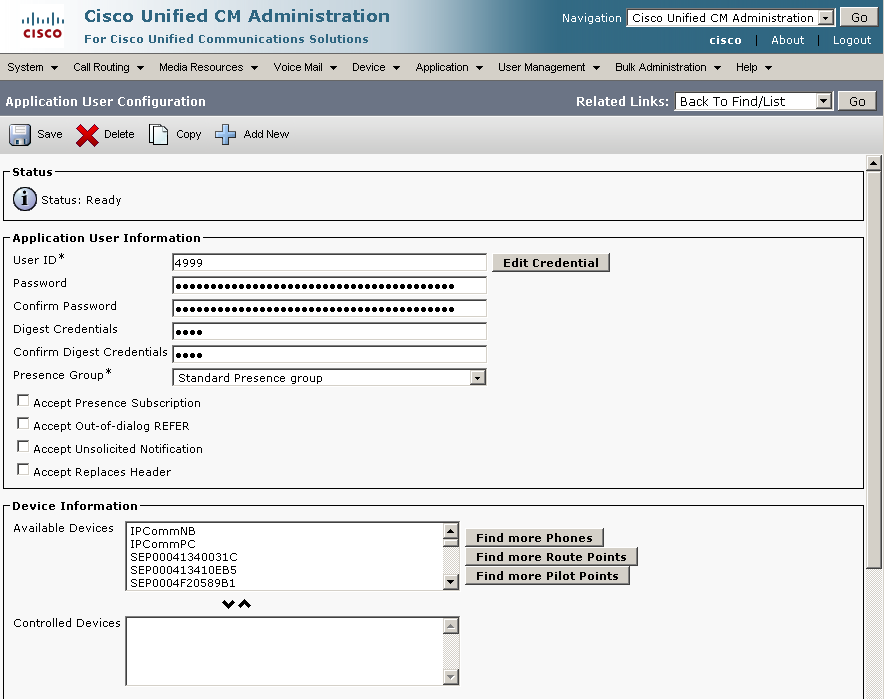
Add user
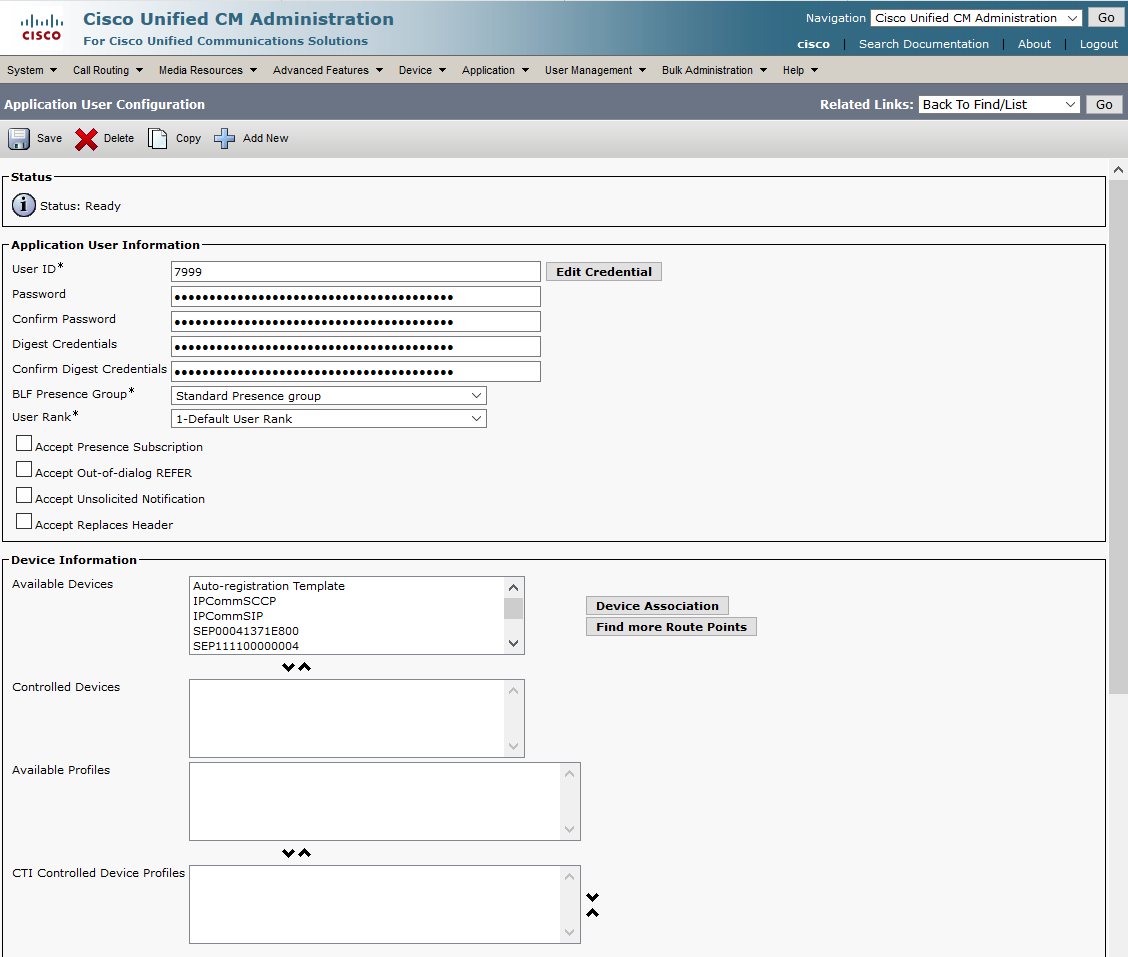
In this step add a user in menu User Management / Application User. Click on Add New. Continue with configuration according to pictures below.
 |
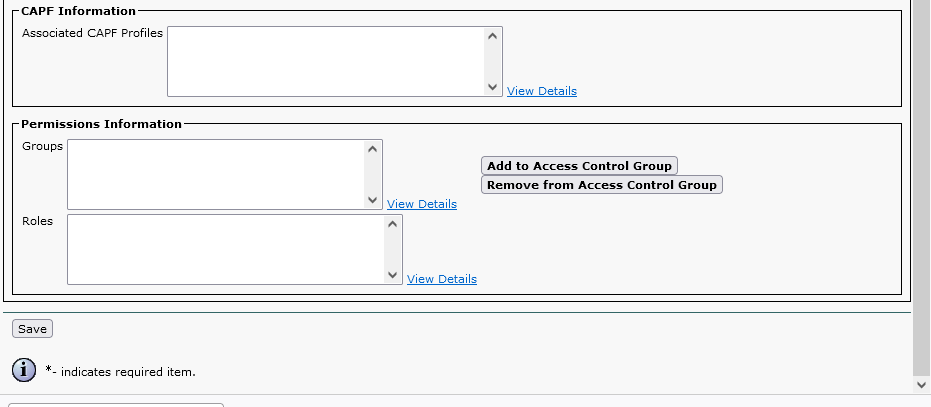 |
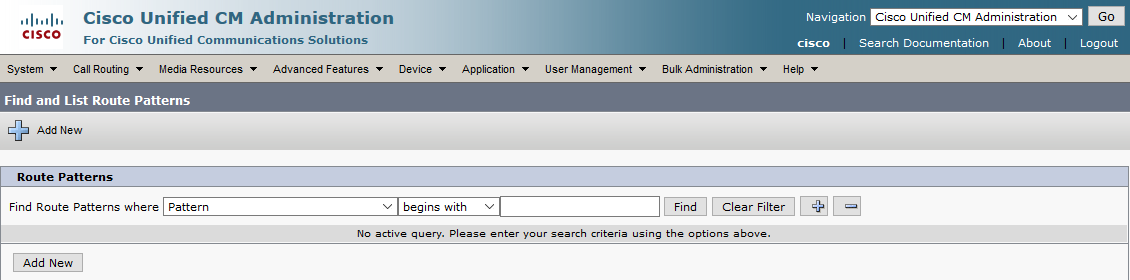
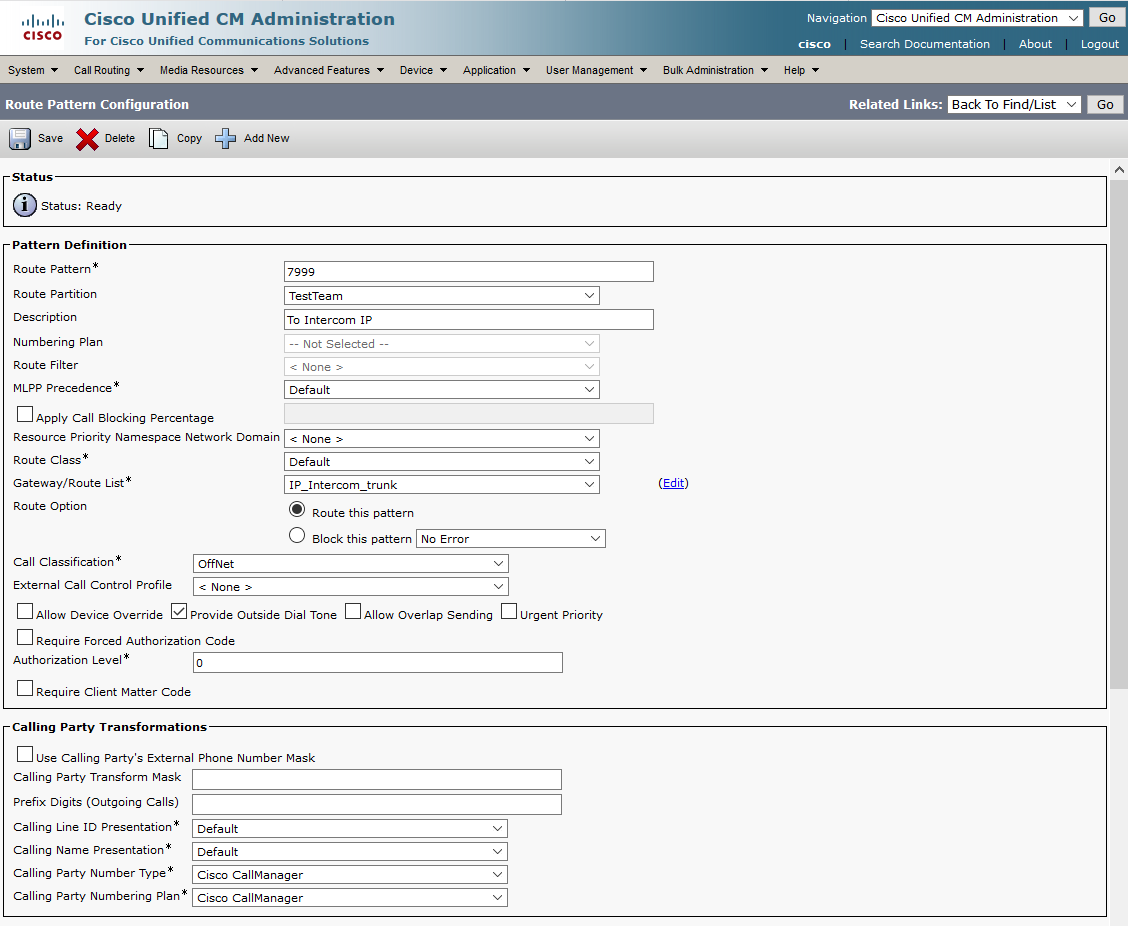
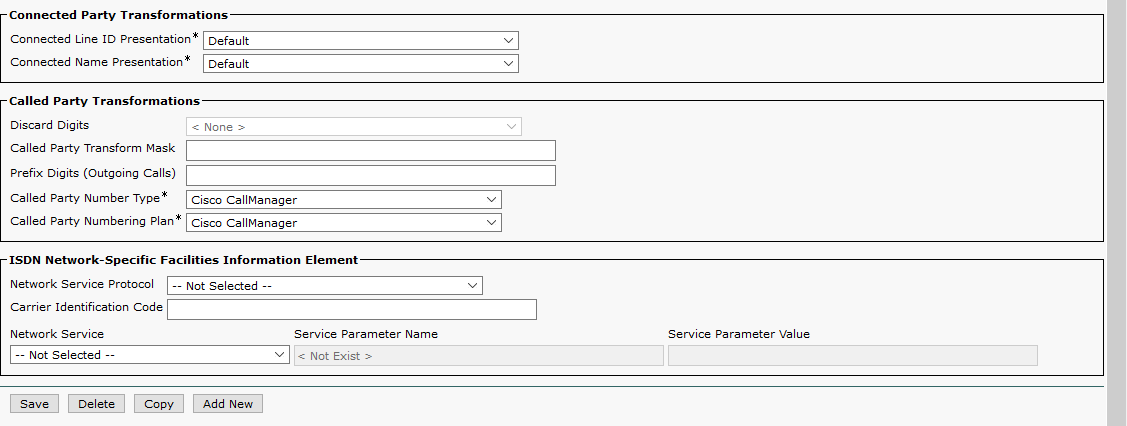
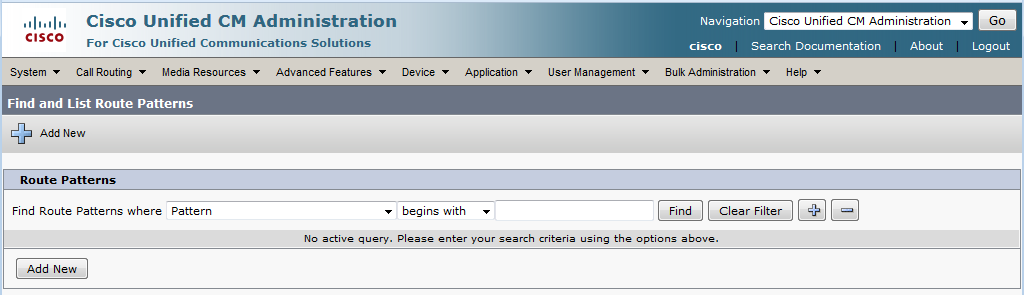
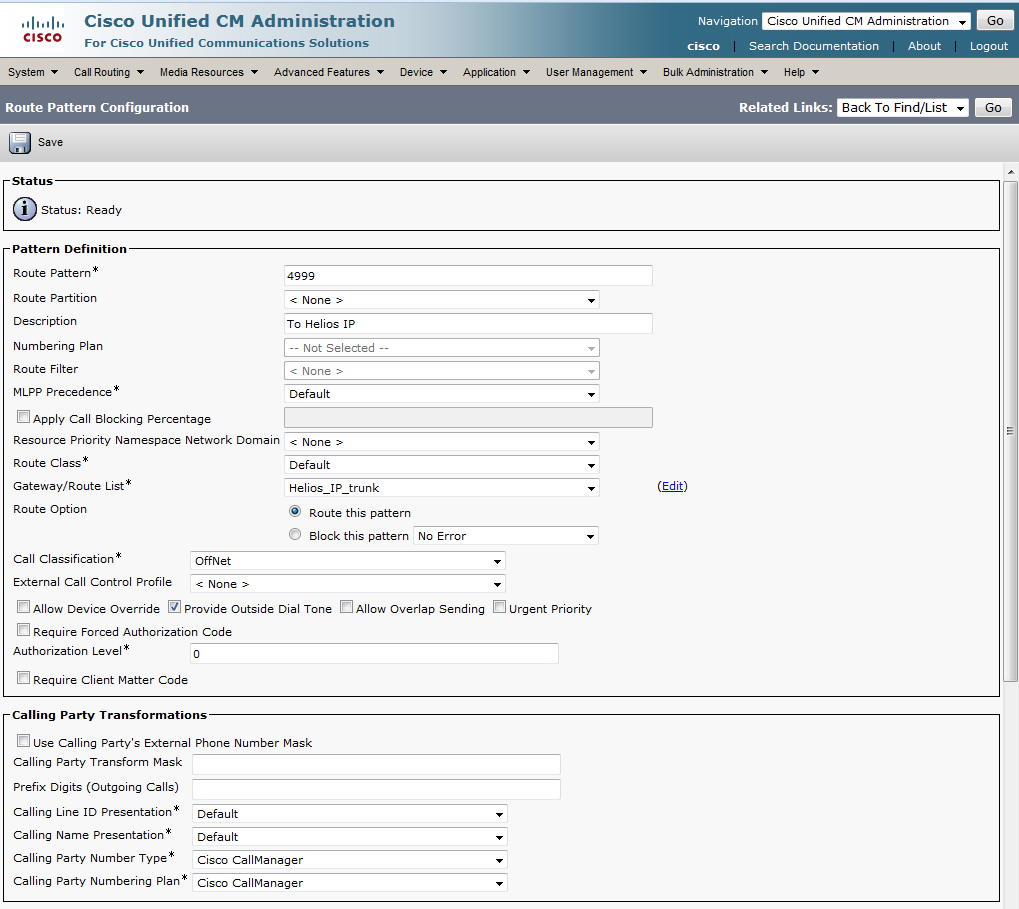
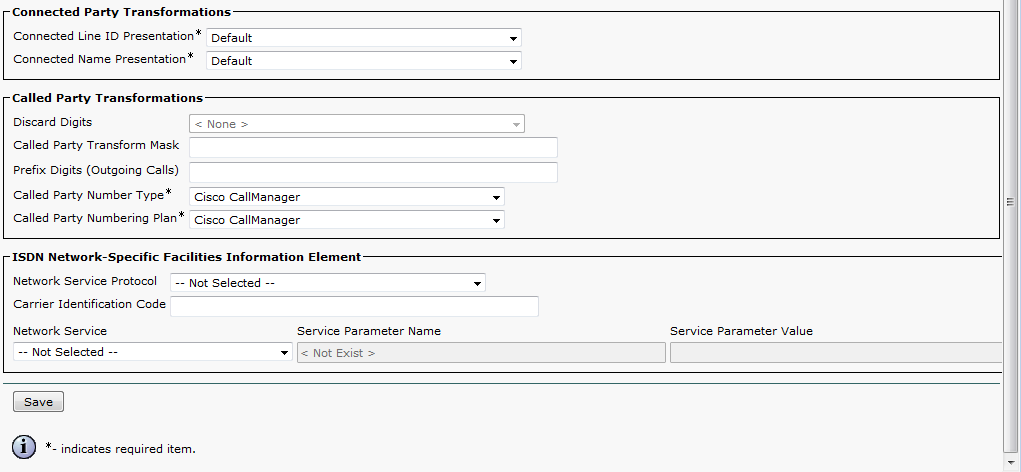
Add route pattern
In next step create route pattern (number which will be called by the intercom). Add Route pattern in section Call Routing / Route/Hunt / Route Pattern. Click Add New. Continue with configuration according to pictures below.
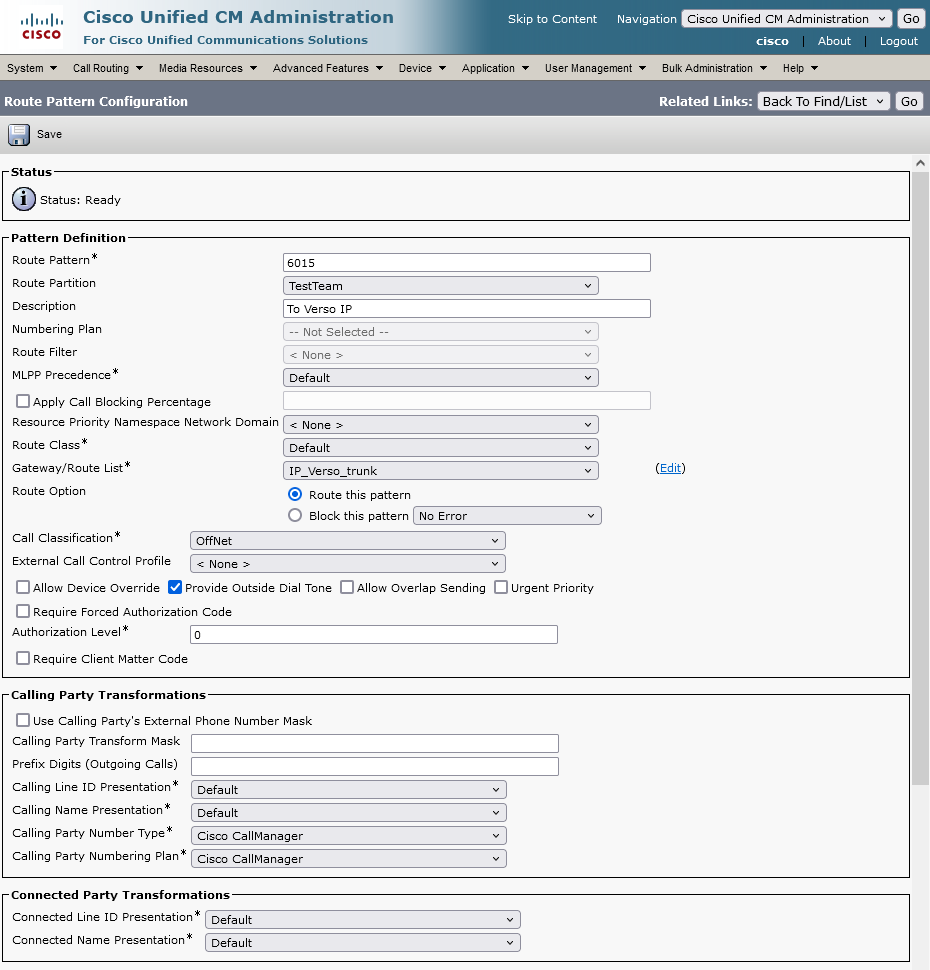 |
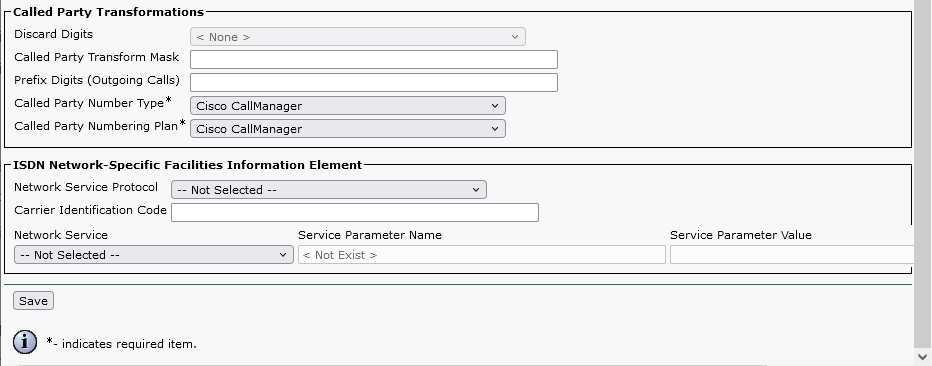 |
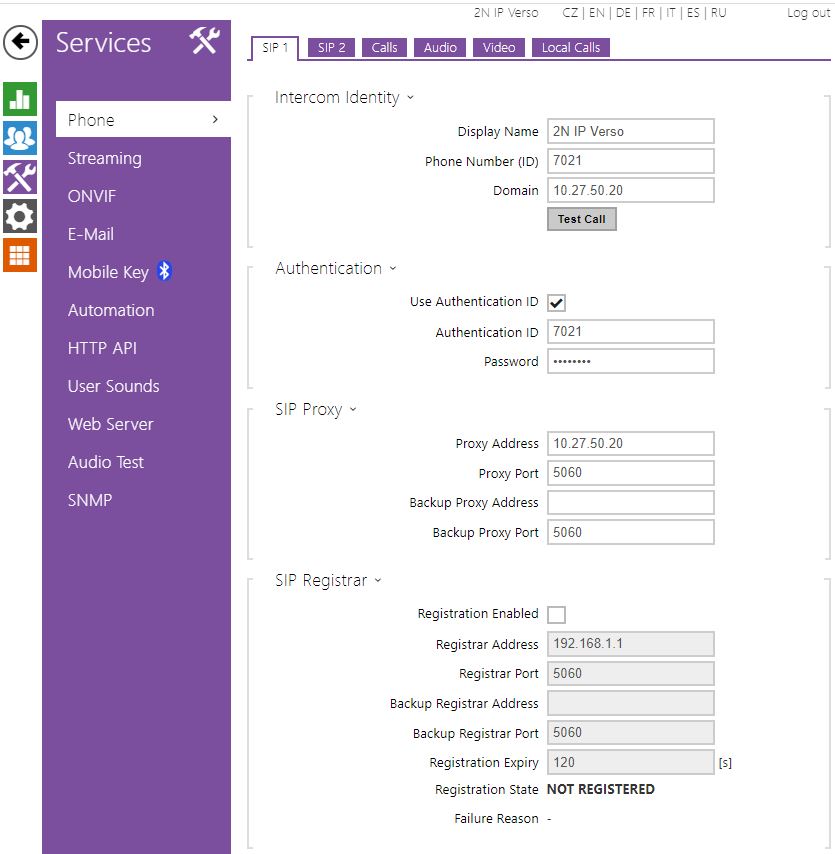
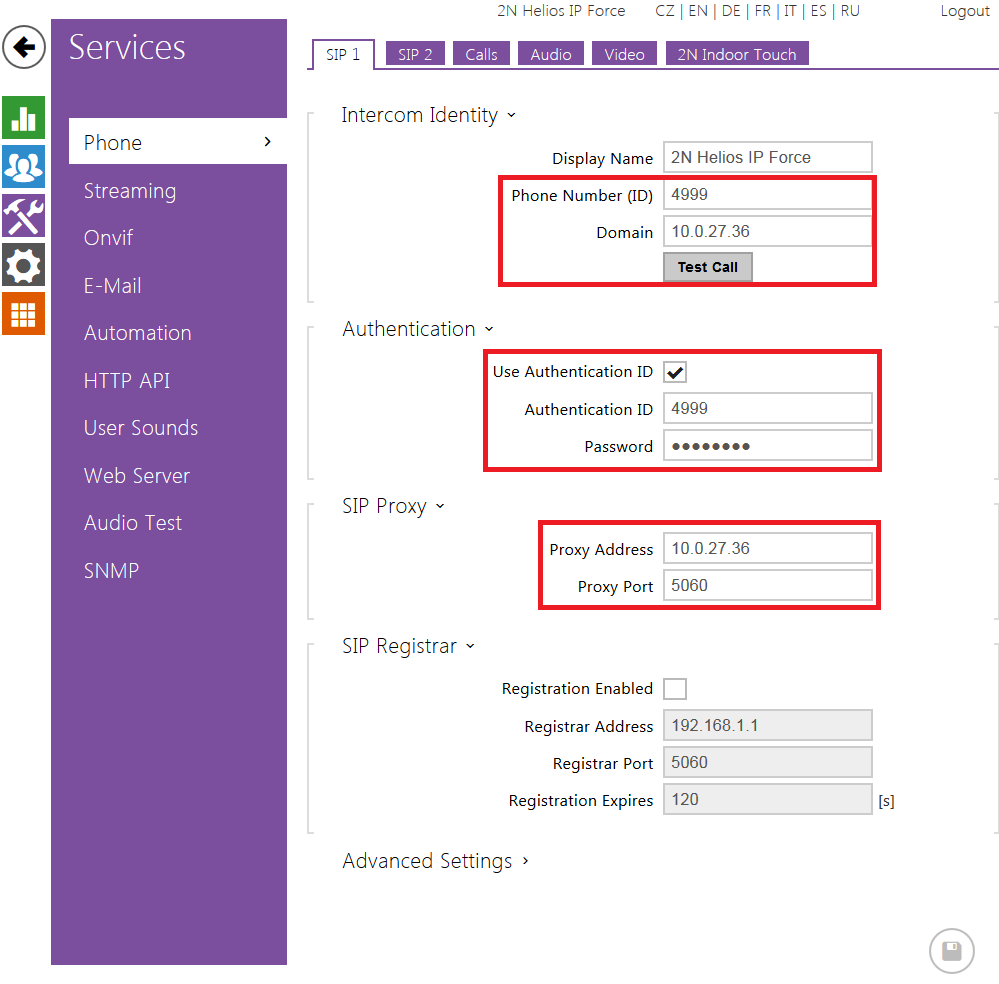
How to configure 2N IP Intercom
Now you can use the intercom to the newly created SIP trunk. Credentials for this example are 6015/6015 and address of CUCM 15 is 10.27.50.20. Instead of this address fill here address of your CUCM. Note: intercom is not registered to CUCM and SIP transport protocol is set to TCP
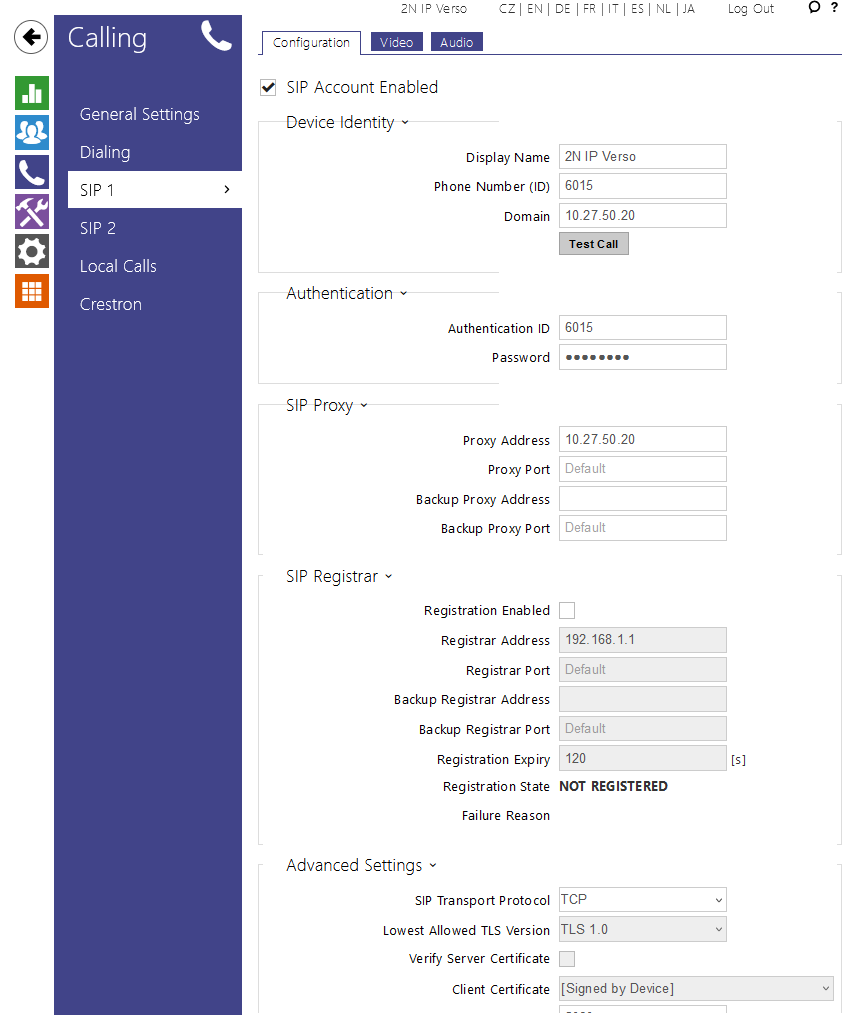 |
Version 14
Tested with
Cisco CUCM | 2N IP Intercom | Registrations | Calls |
|---|---|---|---|
| 14.0.1.10000-20 | 2.44.0.57.3 |
Settings
2N IP Intercom can be added as a SIP extension. We recommend using a static IP address for 2N IP Intercom .
SIP Settings
 |
Video Codecs Settings
 |
User Settings
 |
Quick Dial Button Settings
 |
Device Settings
- 2N IP Intercom with a camera requires a Third-party SIP Device (Advanced) phone type.
- 2N IP Intercom without a camera can use Third-party SIP Device (Basic).
 |
 |
Directory Number Settings
 |
 |
 |
User Settings
 |
 |
 |
Version 12.5
Tested with
Cisco CUCM | 2N IP Intercom | Registrations | Calls |
|---|---|---|---|
| 12.5.1.10000-22 | 2.29.0.38.3 |
Settings
2N IP Intercom can be added as a SIP extension. We recommend using a static IP address for 2N IP Intercom .
SIP Settings
 |
Video Codecs Settings
 |
User Settings
 |
Device Settings
- 2N IP Intercom with a camera requires a Third-party SIP Device (Advanced) phone type.
- 2N IP Intercom without a camera can use Third-party SIP Device (Basic).
 |
 |
Directory Number Settings
 |
 |
 |
 |
User Settings
 |
 |
 |
Configuration of trunk security
Configure trunk security (password which will be used for registration to the trunk). Security is configured in section "System->Security->SIP Trunk Security Profile". Click on "Add New". Configure the rest according to the pictures below.
 |
Configuration of SIP trunk
Go to section "Device->Trunk", set parameters regarding the picture below and click on "Next".
 |
Continue in configuration according to the pictures below.
 |
 |
 |
 |
Add user
In this step add a user in section "User Management->Application User". Click on "Add New". Continue with configuration according to pictures below.
 |
 |
Add route pattern
In next step create route pattern (number which will be called by the intercom). Add Route pattern in section "Call Routing->Route/Hunt->Route Pattern". Click "Add New". Continue with configuration according to pictures below.
 |
 |
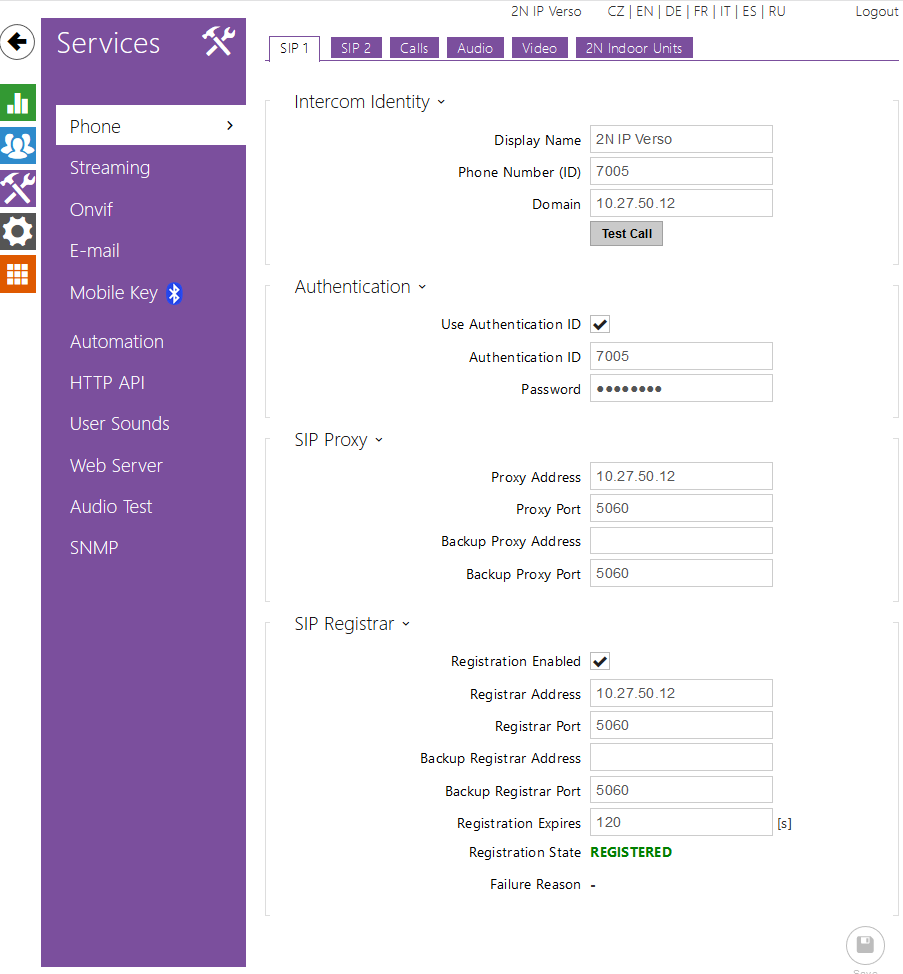
How to configure 2N IP Intercom
Now you can register the intercom to the newly created SIP trunk. Credentials for this example are 7021/7021 and address of CUCM 12.5 is 10.27.50.20. Instead of this address fill here address of your CUCM.
 |
Version 12
Tested with
Cisco CUCM | 2N IP Intercom | Registrations | Calls |
|---|---|---|---|
| 12.0.1.21900-7 | 2.24.0.33.7 |
Settings
2N IP Intercom can be added as a SIP extension. We recommend using a static IP address for 2N IP Intercom .
SIP Settings
 |
Video Codecs Settings
 |
User Settings
 |
Device Settings
- 2N IP Intercom with a camera requires a Third-party SIP Device (Advanced) phone type.
- 2N IP Intercom without a camera can use Third-party SIP Device (Basic).
 |
 |
Directory Number Settings
 |
 |
 |
 |
User Settings
 |
 |
 |
 |
Configuration of trunk security
Configure trunk security (password which will be used for registration to the trunk). Security is configured in section "System->Security->SIP Trunk Security Profile". Click on "Add New". Configure the rest according to the pictures below.
 |
Configuration of SIP trunk
Go to section "Device->Trunk", set parameters regarding the picture below and click on "Next".
 |
Continue in configuration according to the pictures below.
 |
 |
 |
 |
 |
Add user
In this step add a user in section "User Management->Application User". Click on "Add New".
 |
Continue with configuration according to pictures below.
 |
Add route pattern
In next step create route pattern (number which will be called by the intercom). Add Route pattern in section "Call Routing->Route->Hunt->Route Pattern". Click "Add New".
 |
Continue with configuration according to pictures below.
 |
 |
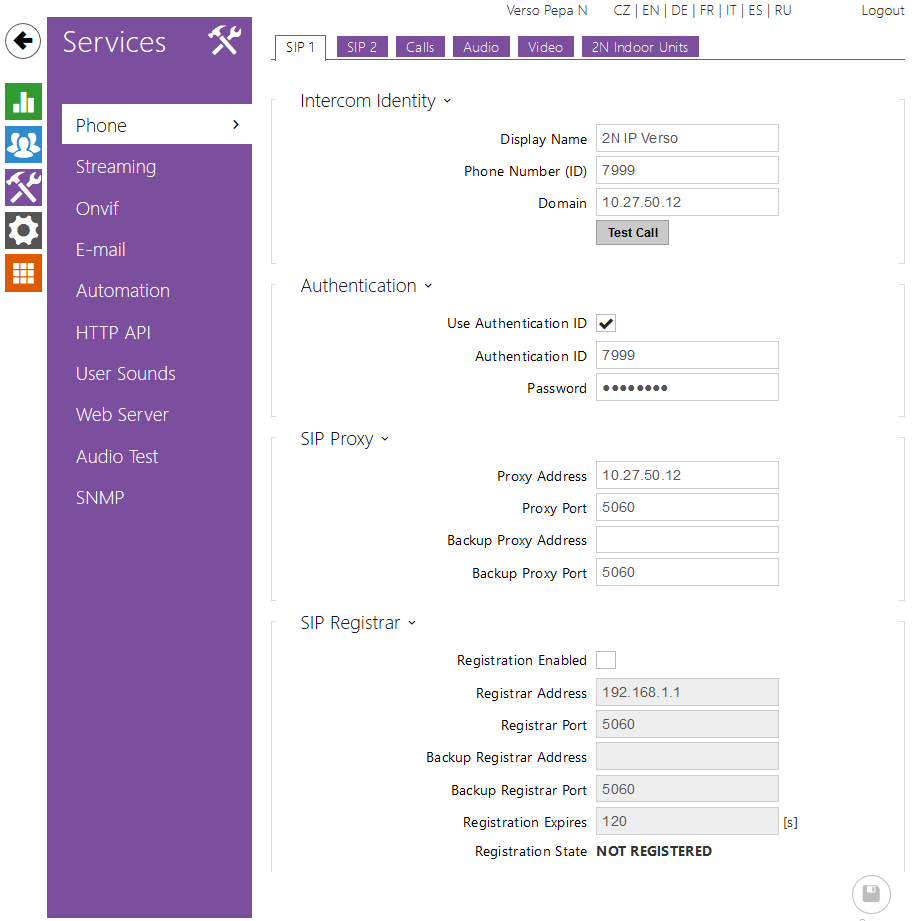
How to configure 2N IP Intercom
Now you can register the intercom to the newly created SIP trunk. Credentials for this example are 7999/7999 and address of CUCM 11 is 10.27.50.12. Instead of this address fill here address of your CUCM.
 |
Version 11
Tested with
Cisco CUCM | 2N IP Intercom | Registrations | Calls |
|---|---|---|---|
| 11.5.1.12900-21 | 2.19.0.28.5 | ||
| 11.0.1.20000-2 |
Settings
2N IP Intercom can be added as a SIP extension. We recommend using a static IP address for 2N IP Intercom .
SIP Settings
 |
Video Codecs Settings
 |
User Settings
 |
Device Settings
- 2N IP Intercom with a camera requires a Third-party SIP Device (Advanced) phone type.
- 2N IP Intercom without a camera can use Third-party SIP Device (Basic).
 |
 |
Directory Number Settings
 |
 |
 |
 |
User Settings
 |
 |
 |
 |
Configuration of SIP trunk
Go to section "Device->Trunk", set parameters regarding the picture below and click on "Next".
 |
Continue in configuration according to the pictures below.
 |
 |
 |
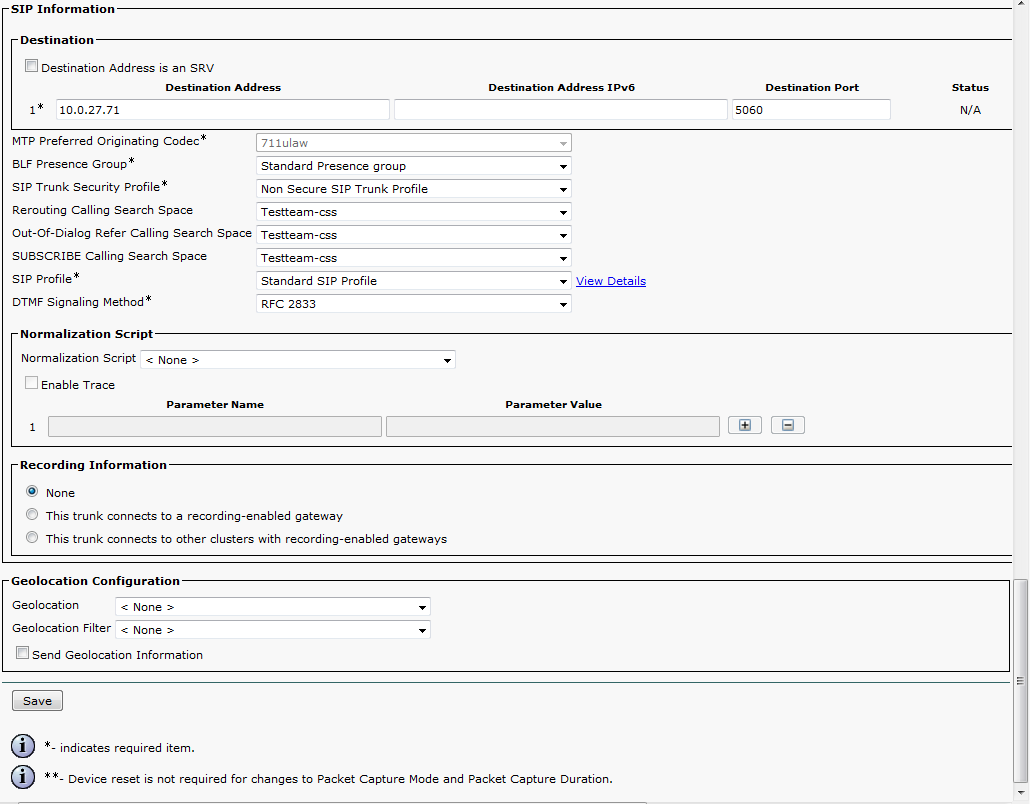 |
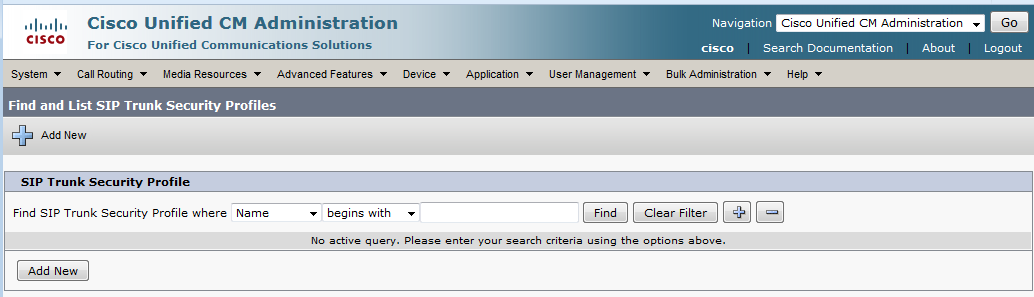
Configuratin of trunk security
In next step configure trunk security (password which will be used for registration to the trunk). Security is configured in section "System->Security->SIP Trunk Security Profile". Click on "Add New".
 |
Configure the rest according to the pictures below.
 |
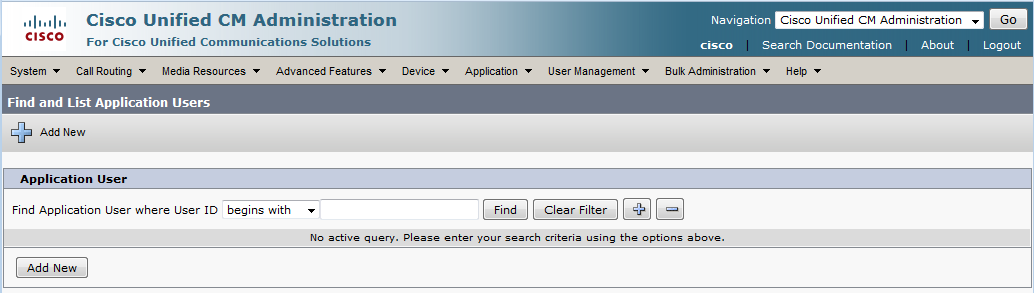
Add user
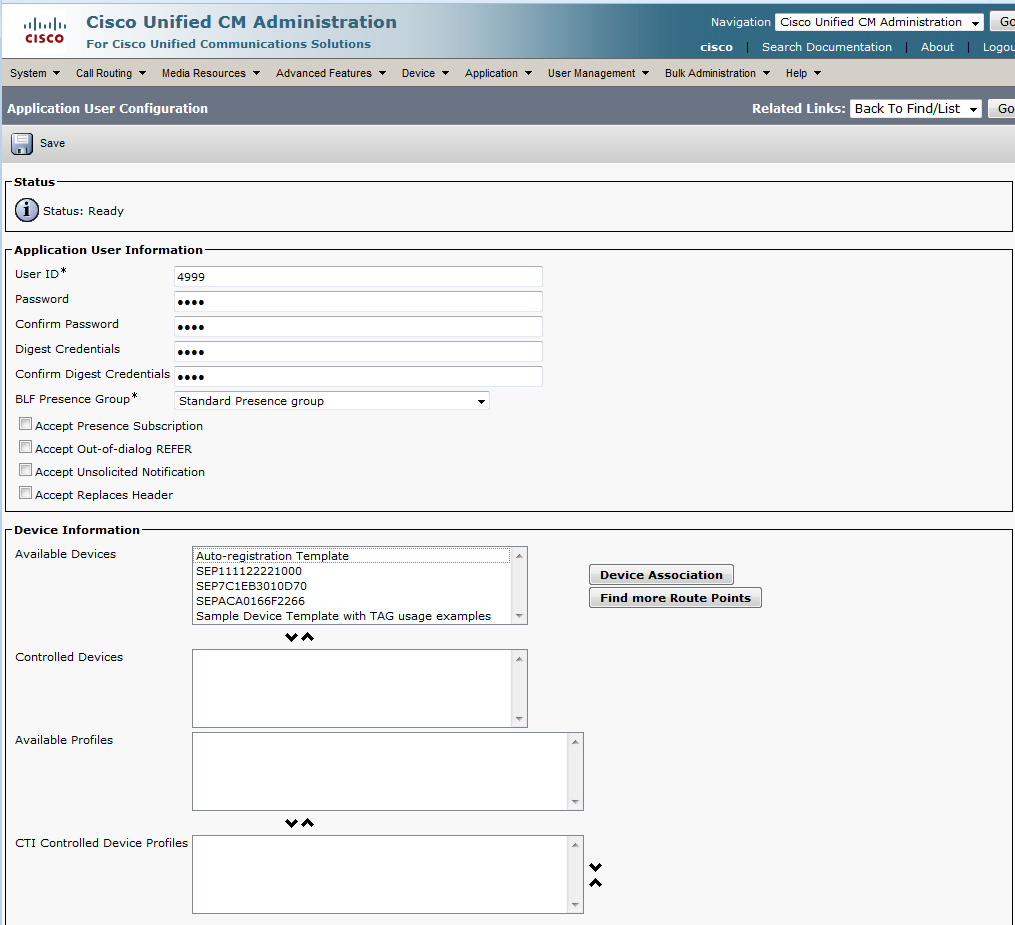
In this step add a user in section "User Management->Application User". Click on "Add New".
 |
Continue with configuration according to pictures below.
 |
Add route pattern
In next step create route pattern (number which will be called by the intercom). Add Route pattern in section "Call Routing->Route->Hunt->Route Pattern". Click "Add New".
 |
Continue with configuration according to pictures below.
 |
 |
How to configure 2N IP Intercom
Now you can register the intercom to the newly created SIP trunk. Credentials for this example are 4999/4999 and address of CUCM 11 is 10.0.27.36. Instead of this address fill here address of your CUCM.
 |
Version 9
Tested with
Cisco CUCM | 2N IP Intercom | Registrations | Calls |
|---|---|---|---|
| 9.0.0.98000-85 | 2.10.0.19.3 |
Settings
2N IP Intercom can be added as a SIP extension. We recommend using a static IP address for 2N IP Intercom .
SIP Settings
 |
Video Codecs Settings
 |
User Settings
 |
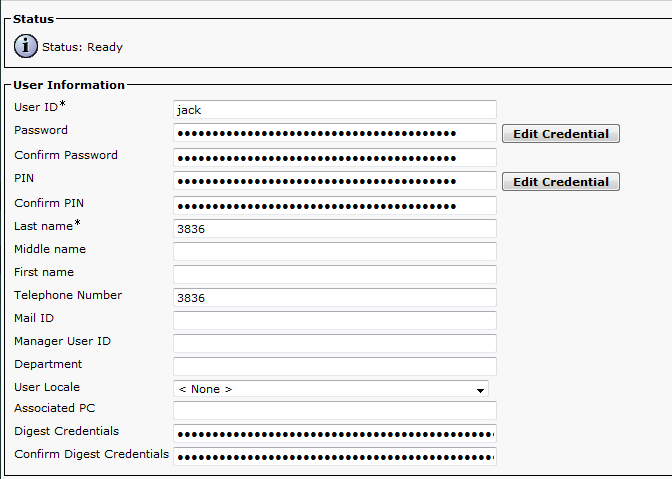
- 2N IP intercom will be added with these parameters:
- User ID: 3836
- Auth ID: jack
- Proxy address: 192.168.22.38
- 2N IP intercom address: 192.168.22.203
 |
- CCM 9 will be added with these parameters:
- User ID: jack
- Owner User ID: jack
- Digest User: jack
- Last name: 3836
- Tel. number: 3836
- CCM9 address: 192.168.22.38
 |
 |
Device Settings
- 2N IP Intercom with a camera requires a Third-party SIP Device (Advanced) phone type.
- 2N IP Intercom without a camera can use Third-party SIP Device (Basic).
 |
 |
Directory Number Settings
 |
 |
 |
User Settings
 |
 |
 |
Version 8
Tested with
Cisco CUCM | 2N IP Intercom | Registrations | Calls |
|---|---|---|---|
| 8.0.2.41003-1 | 1.16.0.309.12 | ||
| 8.6.2.21900-5 |
Settings
Basic Settings
2N IP Intercom can be added as a SIP extension. We recommend using a static IP address for 2N IP Intercom .
Network Settings
Chose an IP address not assigned by the DHCP server.
 |
SIP Settings
User ID can be chosen according to your will. 2N® IP Vario accepts all incoming calls from the SIP proxy.
 |
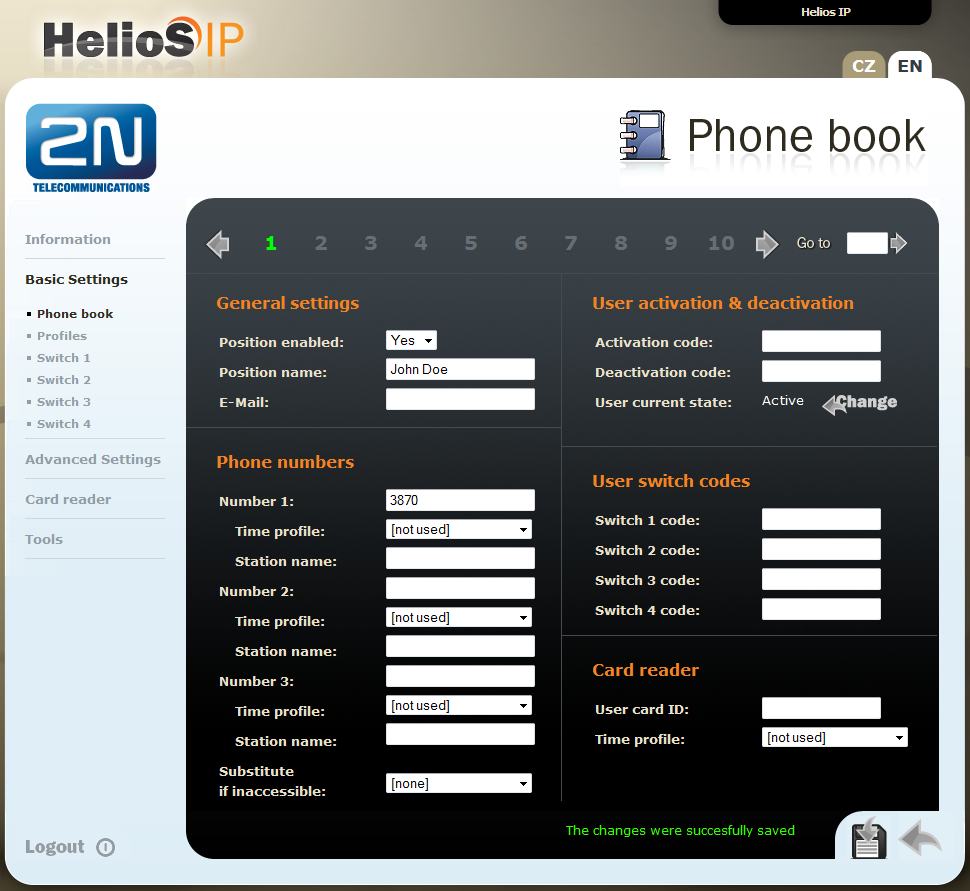
Phone Book Settings
 |
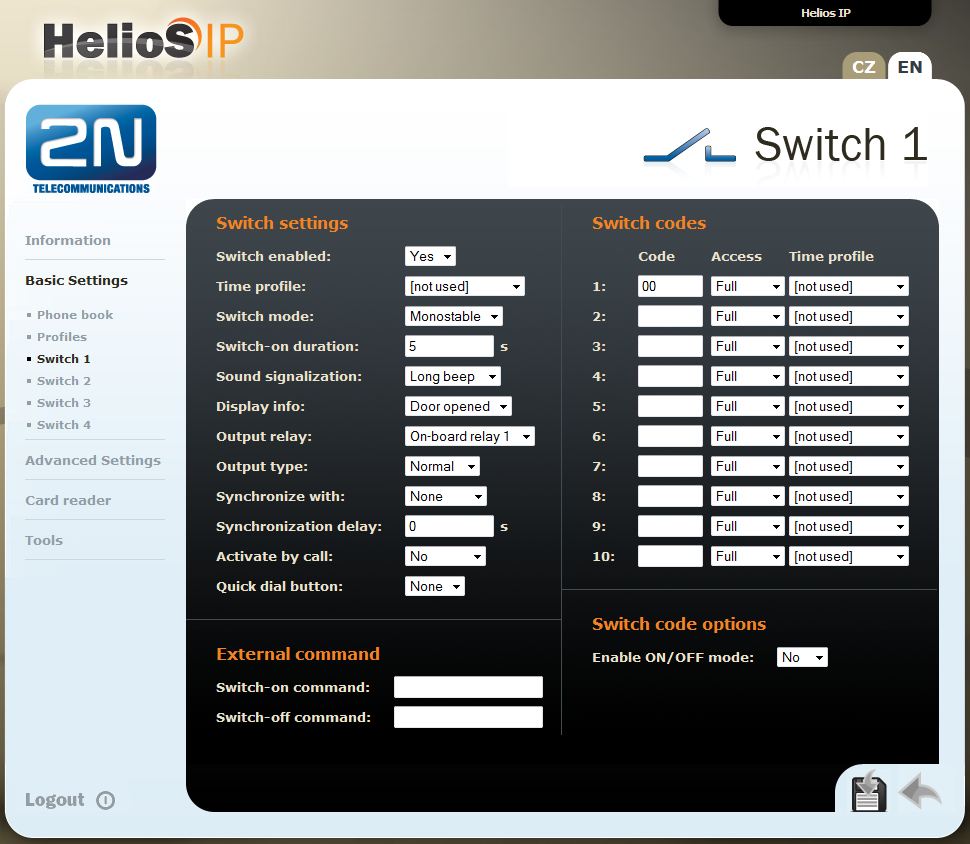
Switch Settings
 |
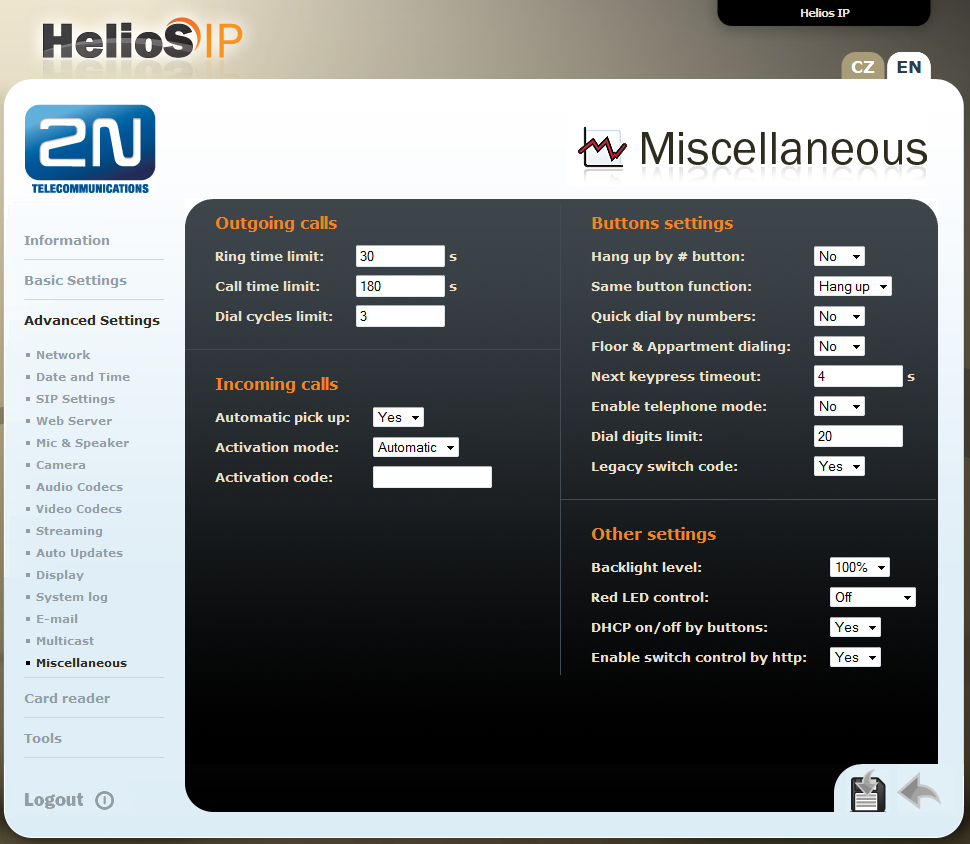
Miscellaneous Settings
Set the Legacy lock code to Yes in order to use the first lock code without confirming by a star key. Enable the Enable switch control by http parameter to allow the IP Phone Service to open the door.
 |
Device Settings
- 2N IP Intercom with a camera requires a Third-party SIP Device (Advanced) phone type.
- 2N IP Intercom without a camera can use Third-party SIP Device (Basic).
 |
 |
Directory Number Settings
 |
 |
 |
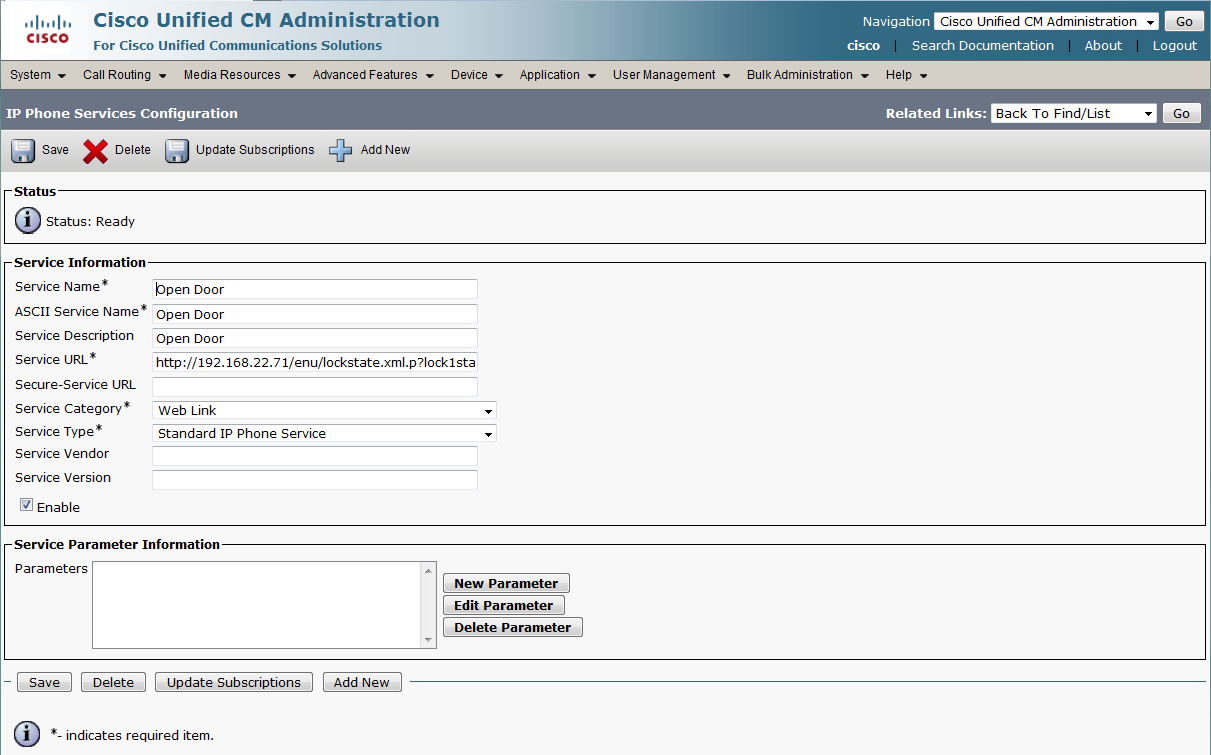
Configuration Guide for Additional IP Phone Services
In the CUCM, create an IP Phone Service in the menu Device / Device Settings / Phone services.
The Service URL is http://heliosip_address/enu/lockstate.xml.p?lockXstate=Y&answer=ANSWER
where
X is the switch number (1-4);
Y is 0 for switch off, 1 for switch on and 2 for change over;
ANSWER is the text you want to display on the phone.
Example Service URL: http://192.168.22.71/enu/lockstate.xml.p?lock1state=1&answer=The door has been opened.
This feature is available for Cisco IP phones, eg. 7941, 7985.
IP Phone Service Settings
 |
In the CUCM, create an IP Phone Service in the menu Device / Device Settings / Phone services.
Up to 2N IP Intercom version 2.9.0.18.5 - Service URL: http://192.168.22.71/enu/cisco7970-video.xml
From 2N IP Intercom version 2.19.2.28.9 - Service URL: http://192.168.22.71/enu/cisco-video.xmlThis feature is available for Cisco IP phone 7970.
IP Phone Service Settings
 |
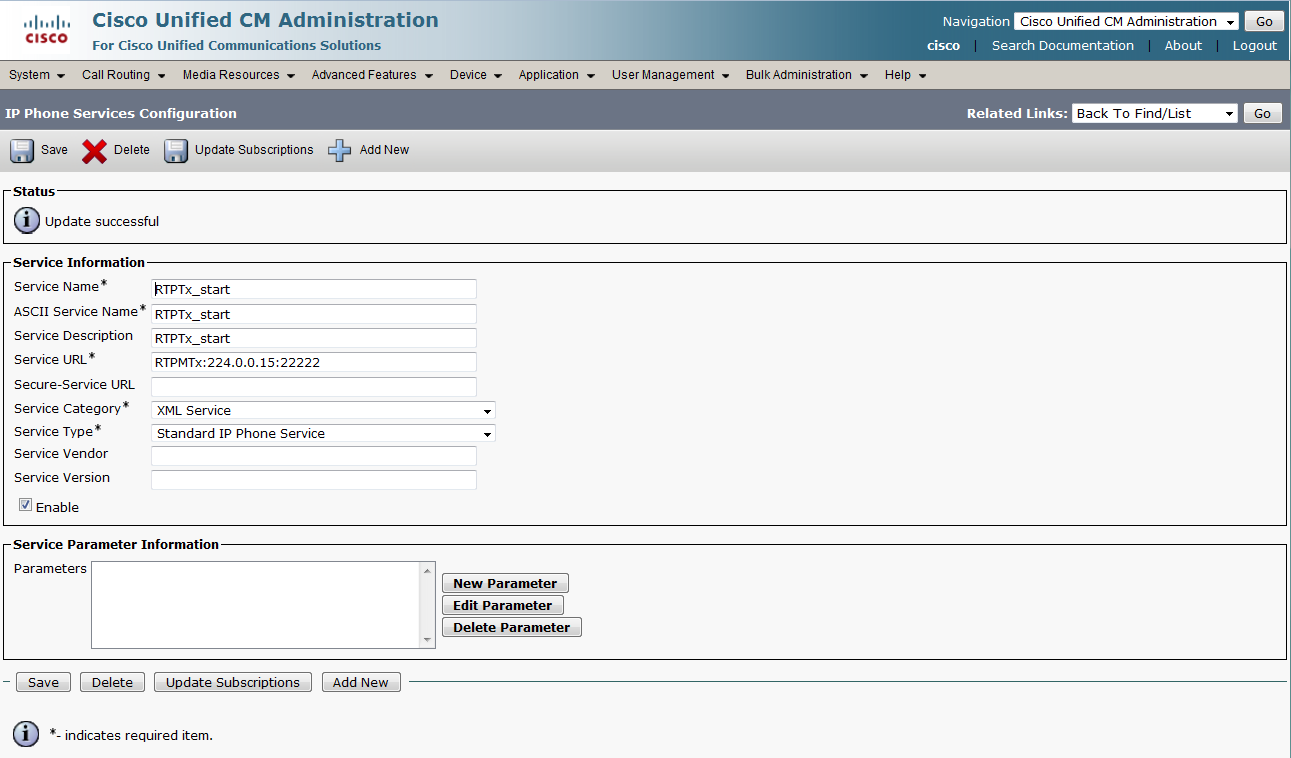
In the CUCM, create an IP Phone Service in the menu Device / Device Settings / Phone services.
The Service URL is RTPTx:i:p
were
i is the Multicast IP Address to which an RTP stream is transmitted;
p is the Multicast UDP port on which to transmit the RTP stream. Ensure that this is an even port number within the decimal range of 20480 to 32768.
Example Service URL: RTPTx:224.0.0.15:22222
RTPTx:Stop is the service that will stop any active RTP stream from being transmitted on channel one.
This feature is available for Cisco IP phones, eg. 7941.
IP Phone Service Settings
 |
Multicast Settings
 |
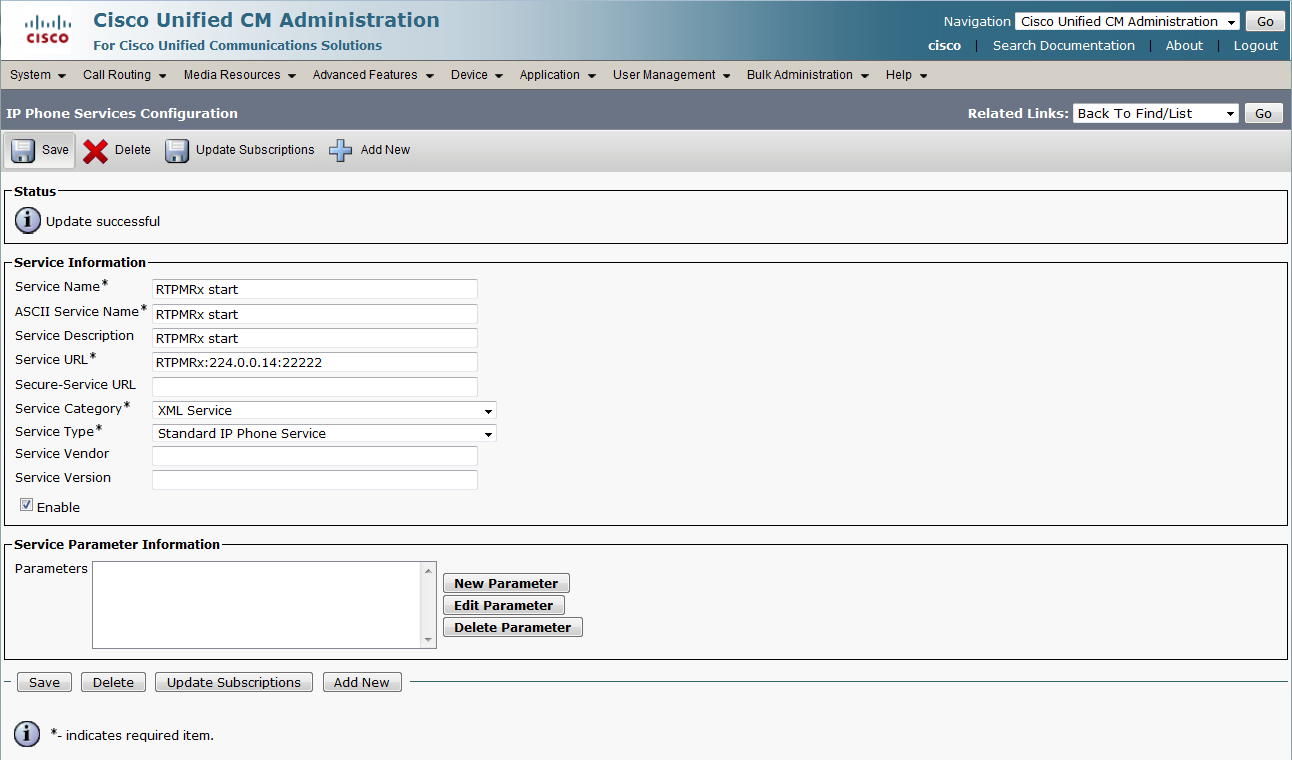
In the CUCM, create an IP Phone Service in the menu Device / Device Settings / Phone services.
The Service URL is RTPMRx:i:p:v
where
i = the Multicast IP Address from which to receive an RTP stream;
p = the Multicast UDP port from which to receive the RTP stream. Ensure that this is an even port number within the decimal range of 20480 to 32768.
v = the optional volume setting that controls the volume of stream playout. The supplied value is a percentage of the maximum volume level of the device and must be in the range 0-100. The phone converts the specified percentage into the closest device-supported volume level setting and uses it. After the initial volume level gets set and the stream starts, you can manually change the volume level as needed. If the optional volume parameter does not get included, the current volume setting on the phone gets used as the default.
Example Service URL: RTPMRx:224.0.0.14:22222
RTPRx:Stop is the service that will stop any active RTP stream from being received on channel one.
This feature is available for Cisco IP phones, eg. 7941.
IP Phone Service Settings
 |
Multicast Settings
 |
Other Tips for Configuration
Situation
User ID: jack
Telephone number: 3836
Solution
Define the user "jack" with Digest Credentials.
User Settings
 |
Device Settings
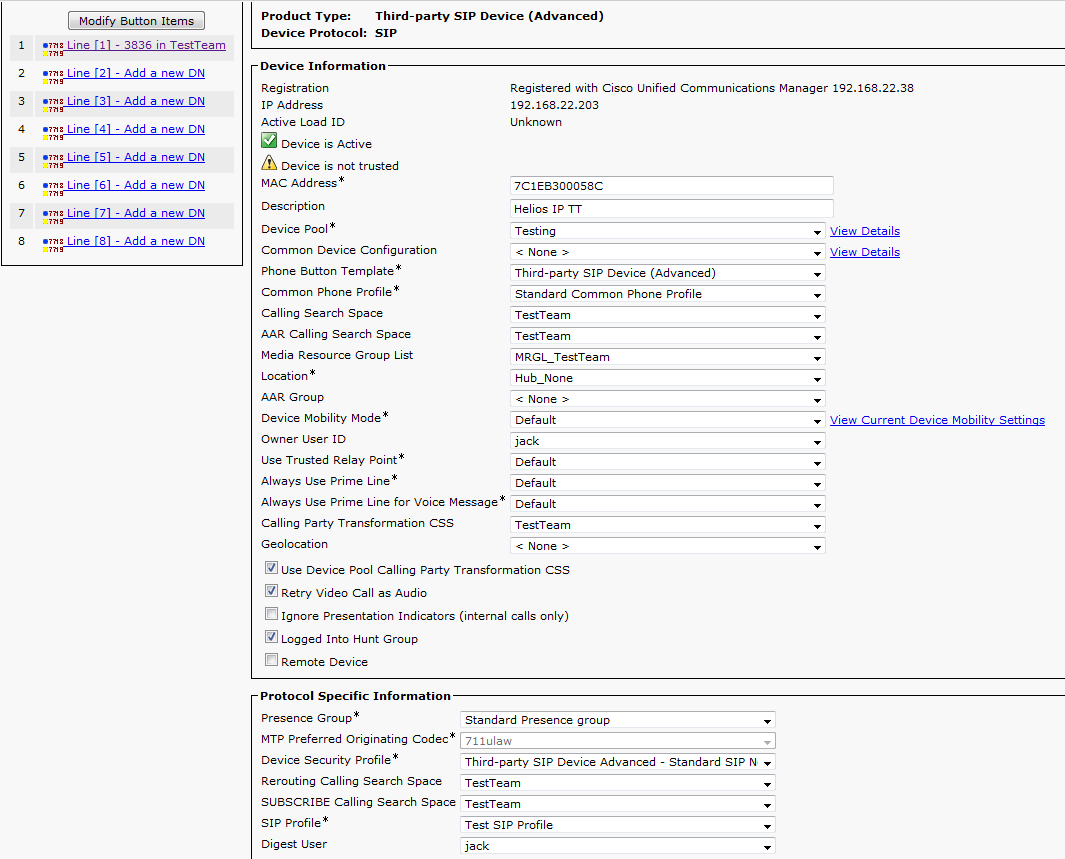 |
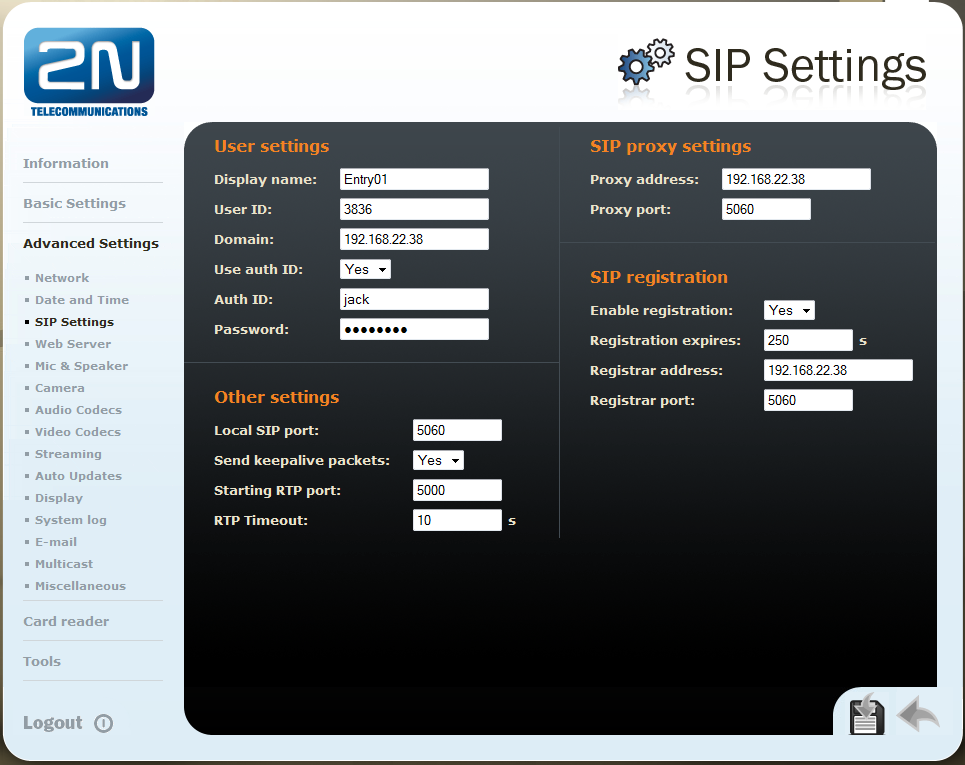
SIP Settings
In 2N IP Intercom , set User ID to the Cisco's Directory Number (3836), Auth ID to Cisco's User ID (jack), Password to the Cisco's Digest Credentials and enable the Use auth ID parameter.
 |
Version 7
Tested with
Cisco CUCM | 2N IP Intercom | Registrations | Calls |
|---|---|---|---|
| 7.1.3.10000 | 1.16.0.309.12 |
Settings
2N IP Intercom can be added as a SIP extension. We recommend using a static IP address for 2N IP Intercom .
SIP Settings
 |
Video Codecs Settings
 |
Device Settings
- 2N IP Intercom with a camera requires a Third-party SIP Device (Advanced) phone type.
- 2N IP Intercom without a camera can use a Third-party SIP Device (Basic).
 |
 |
Directory Number Settings
 |
 |
 |
 |
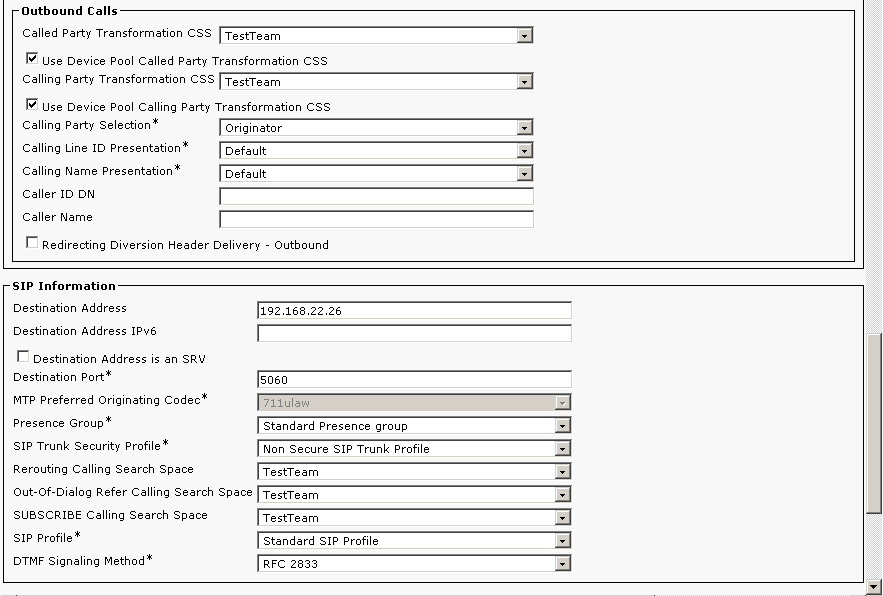
2N IP Intercom will be added with these parameters:
- user 4999
- incoming port 5060
- IP address of 2N IP Intercom 192.168.22.26
- incoming port to 2N IP Intercom 5060
- IP address of CUCM 192.168.22.35
used commands :
- create of application user – add_application_user
- SIP trunk security profile – SIP_trunk_security_profile
- add station as sIP trunk – SIP_trunk_for_IP_Intercom
SIP trunk for 2N IP Intercom
 |
 |
 |
 |
 |
SIP trunk security profile
 |
Add application user
 |
 |
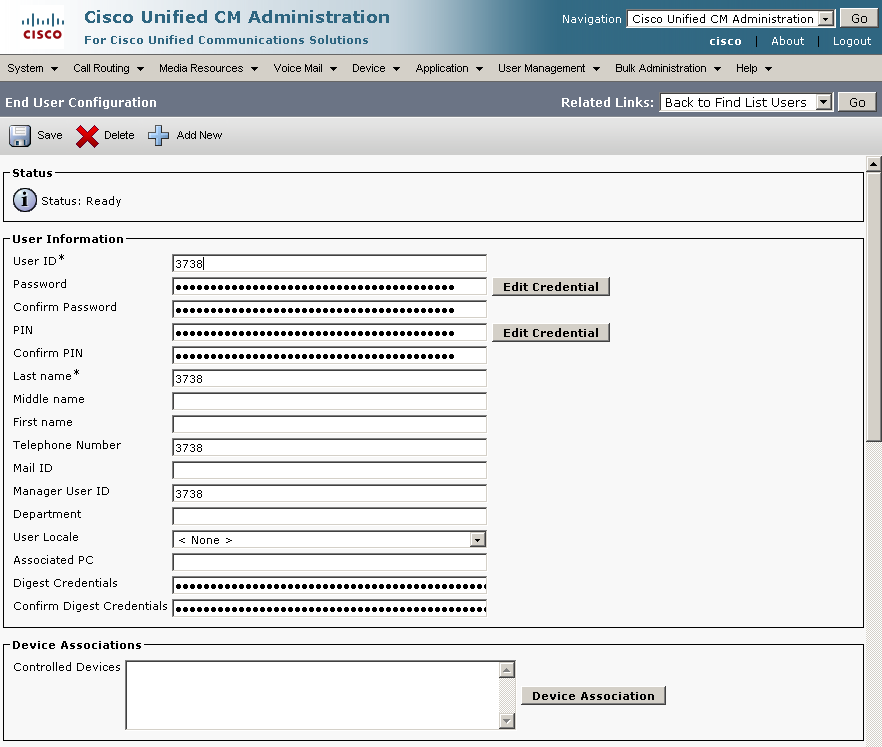
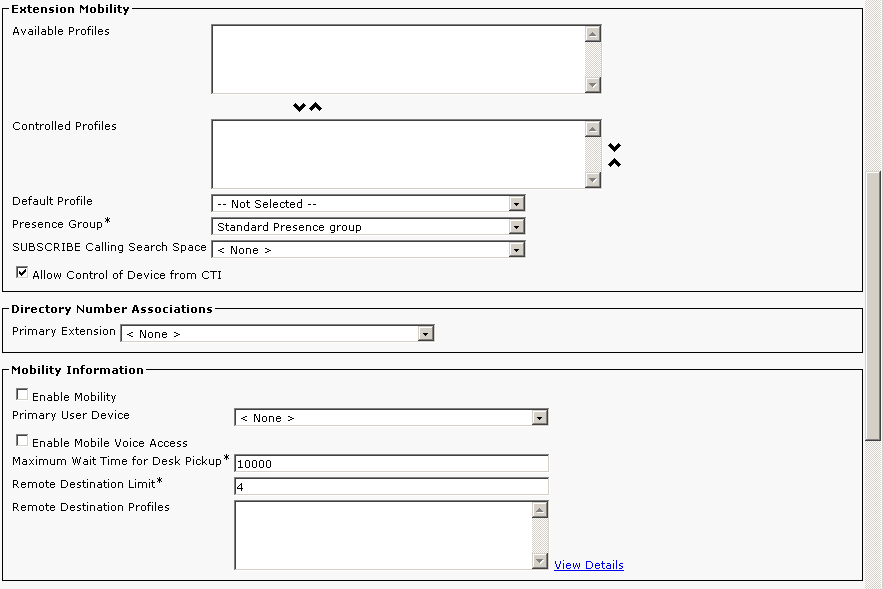
- 2N IP Intercom will be added with these parameters:
- user 3738
- station 3738
- MAC address 0050C281F1EB
- IP address 192.168.22.35
- Used commands:
license control – view_license
show routing – view_route_plan_report
creating of user – add_user
creating of station – add_station
creating of line for station – add_station_line
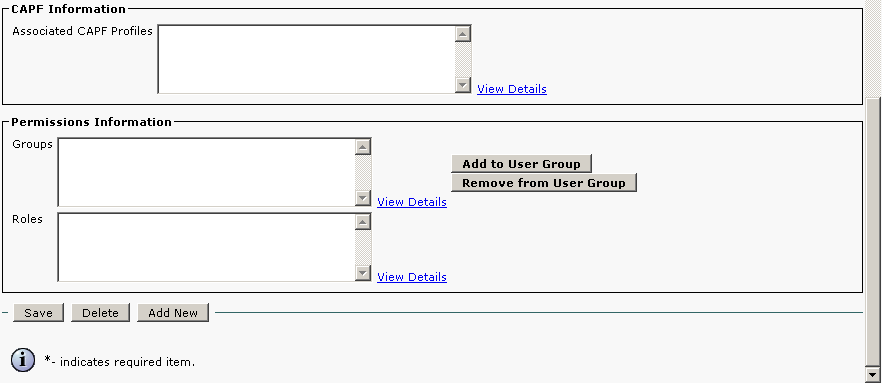
Add user
 |
 |
 |
Add station
 |
|
 |
Add station line
 |
 |
 |
 |
 |
Version 6
Tested with
Cisco CUCM | 2N IP Intercom | Registrations | Calls |
|---|---|---|---|
| 6.0.1.2000-4 | 1.16.0.309.12 |
Settings
2N IP Intercom can be added as a SIP extension. We recommend using a static IP address for 2N IP Intercom .
SIP Settings
 |
Video Codecs
 |
Device Settings
- 2N IP Intercom with a camera requires a Third-party SIP Device (Advanced) phone type.
- 2N IP Intercom without a camera can use a Third-party SIP Device (Basic).
 |
 |
Directory Number Settings
 |
 |
 |
 |
2N IP Intercom will be added with these parameters:
- user 4999
- incoming port 5060
- IP address of 2N IP Intercom 192.168.22.26
- incoming port to 2N IP Intercom 5060
- IP address of CUCM 192.168.22.35
used commands :
- create of application user – add_application_user
- SIP trunk security profile – SIP_trunk_security_profile
- add station as sIP trunk – SIP_trunk_for_IP_Intercom
SIP trunk for 2N IP Intercom
|
|
|
|
|
SIP trunk security profile
|
Add application user
|
|
- 2N IP Intercom will be added with these parameters:
- user 3738
- station 3738
- MAC address 0050C281F1EB
- IP address 192.168.22.35
- Used commands:
license control – view_license
show routing – view_route_plan_report
creating of user – add_user
creating of station – add_station
creating of line for station – add_station_line
Add user
|
|
|
Add station
|
|
|
Add station line
|
|
|
|
|
Used Symbols
![]() - Verified with video
- Verified with video
![]() * - Verified with video with CUVA (Cisco Unified Video Advantage)
* - Verified with video with CUVA (Cisco Unified Video Advantage)
![]() - Verified with audio only
- Verified with audio only
![]() - Work with limitation
- Work with limitation
![]() - Incompatible
- Incompatible