Control4
Content
About
Control4 develops smart home automation systems to control lighting, entertainment, security, energy, and other connected devices. The company's 2013 initial public offering was considered to be the first pure-play home automation IPO ever.
| Composer version | Controller version | 2N IP Intercom version | Driver version | SIP settings | Lock manipulation |
|---|---|---|---|---|---|
| 3.4.3 | 3.4.2.709259 | 2.47 | |||
| 3.1.0 | 3.1.0.566775 | 2.27.0.36.6 | 4 | ||
| 2.7.0 | - | 2.12.0.21.4 | 11 |
Version 3
Settings
In a web browser, direct the browser to the 2N IP Intercom IP Address and login either via the default credentials "Admin" and password "2n" or with the credentials already configured on the device. Please note that the computer running the browser will need to be on the same local network as the intercom.
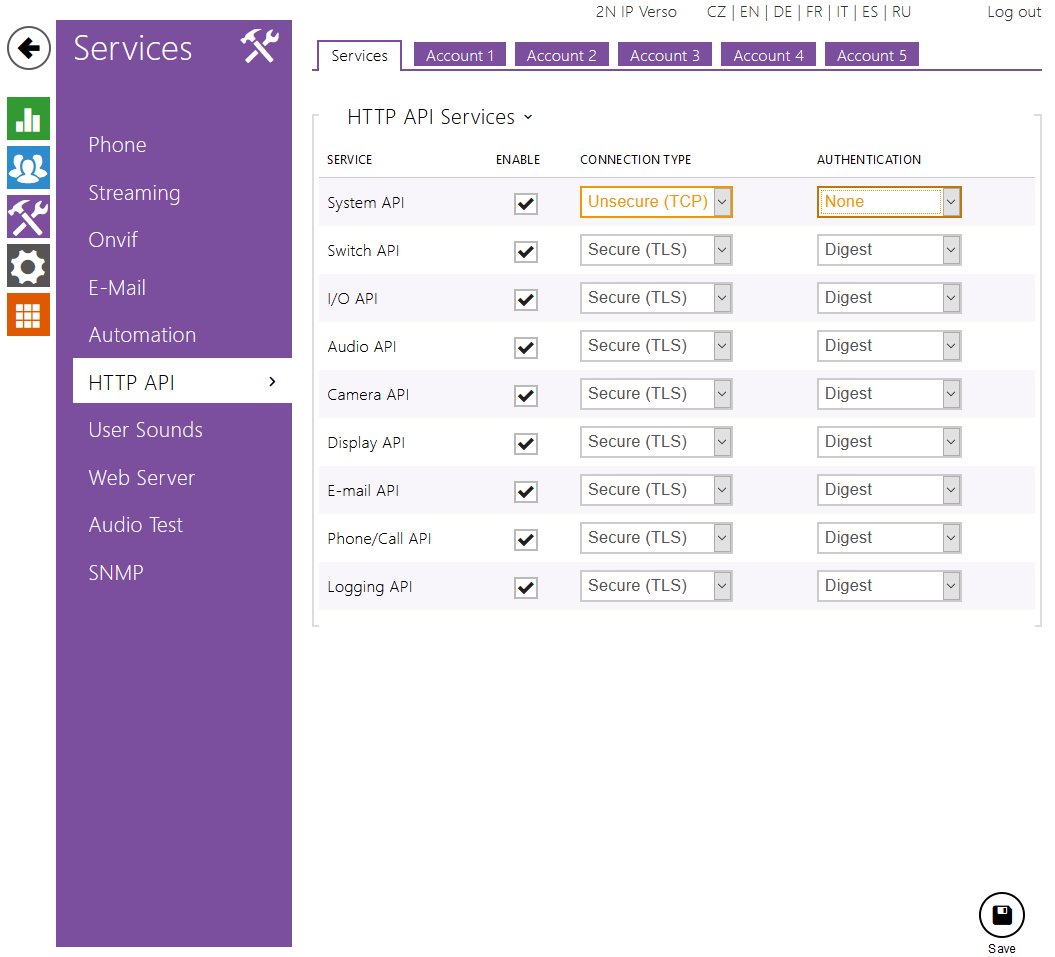
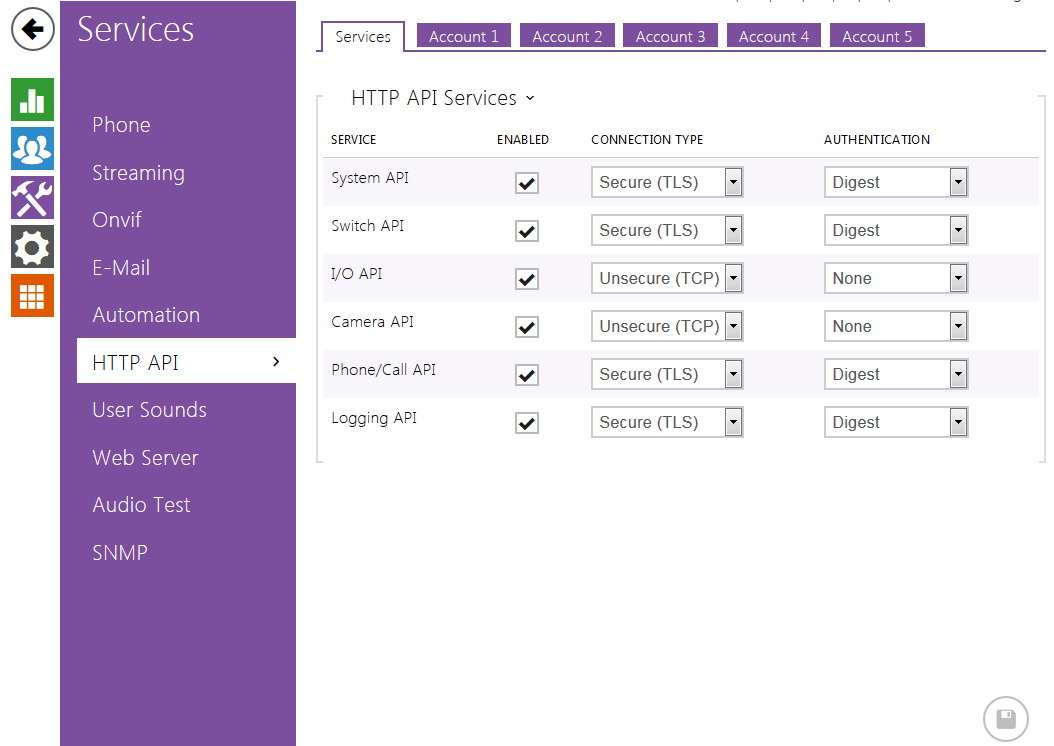
Go to Services / HTTP API page in the 2N IP Intercom web UI. Enable the System API service and set the Connection Type to Unsecure (TCP) and Authentication to None. Note that this will be automatically modified to use proper authentication after the driver setup is complete.
 |
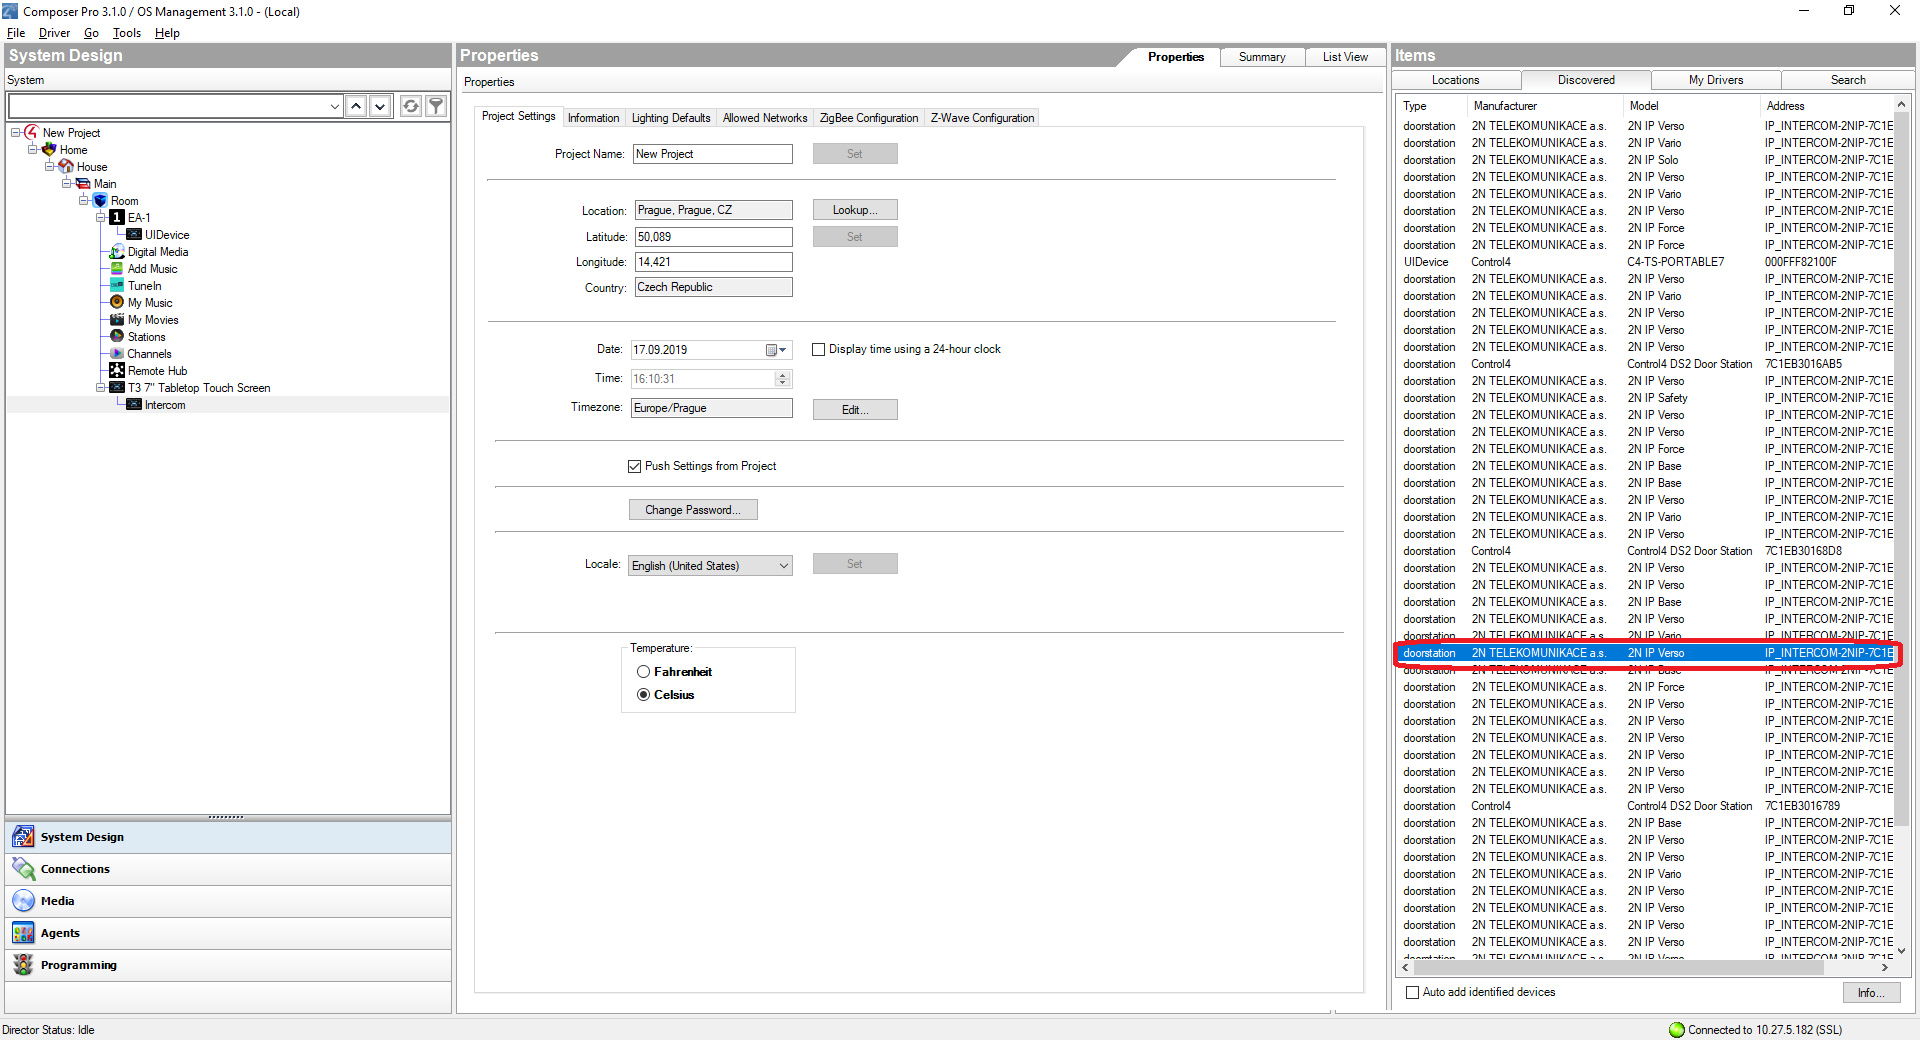
To add 2N IP Intercom go to Items Panel ang Discovered menu. There search for 2N IP Intercom that you need (Composer show you some informations about device after hold your mouse on it) and add device to project by double click on it.
 |
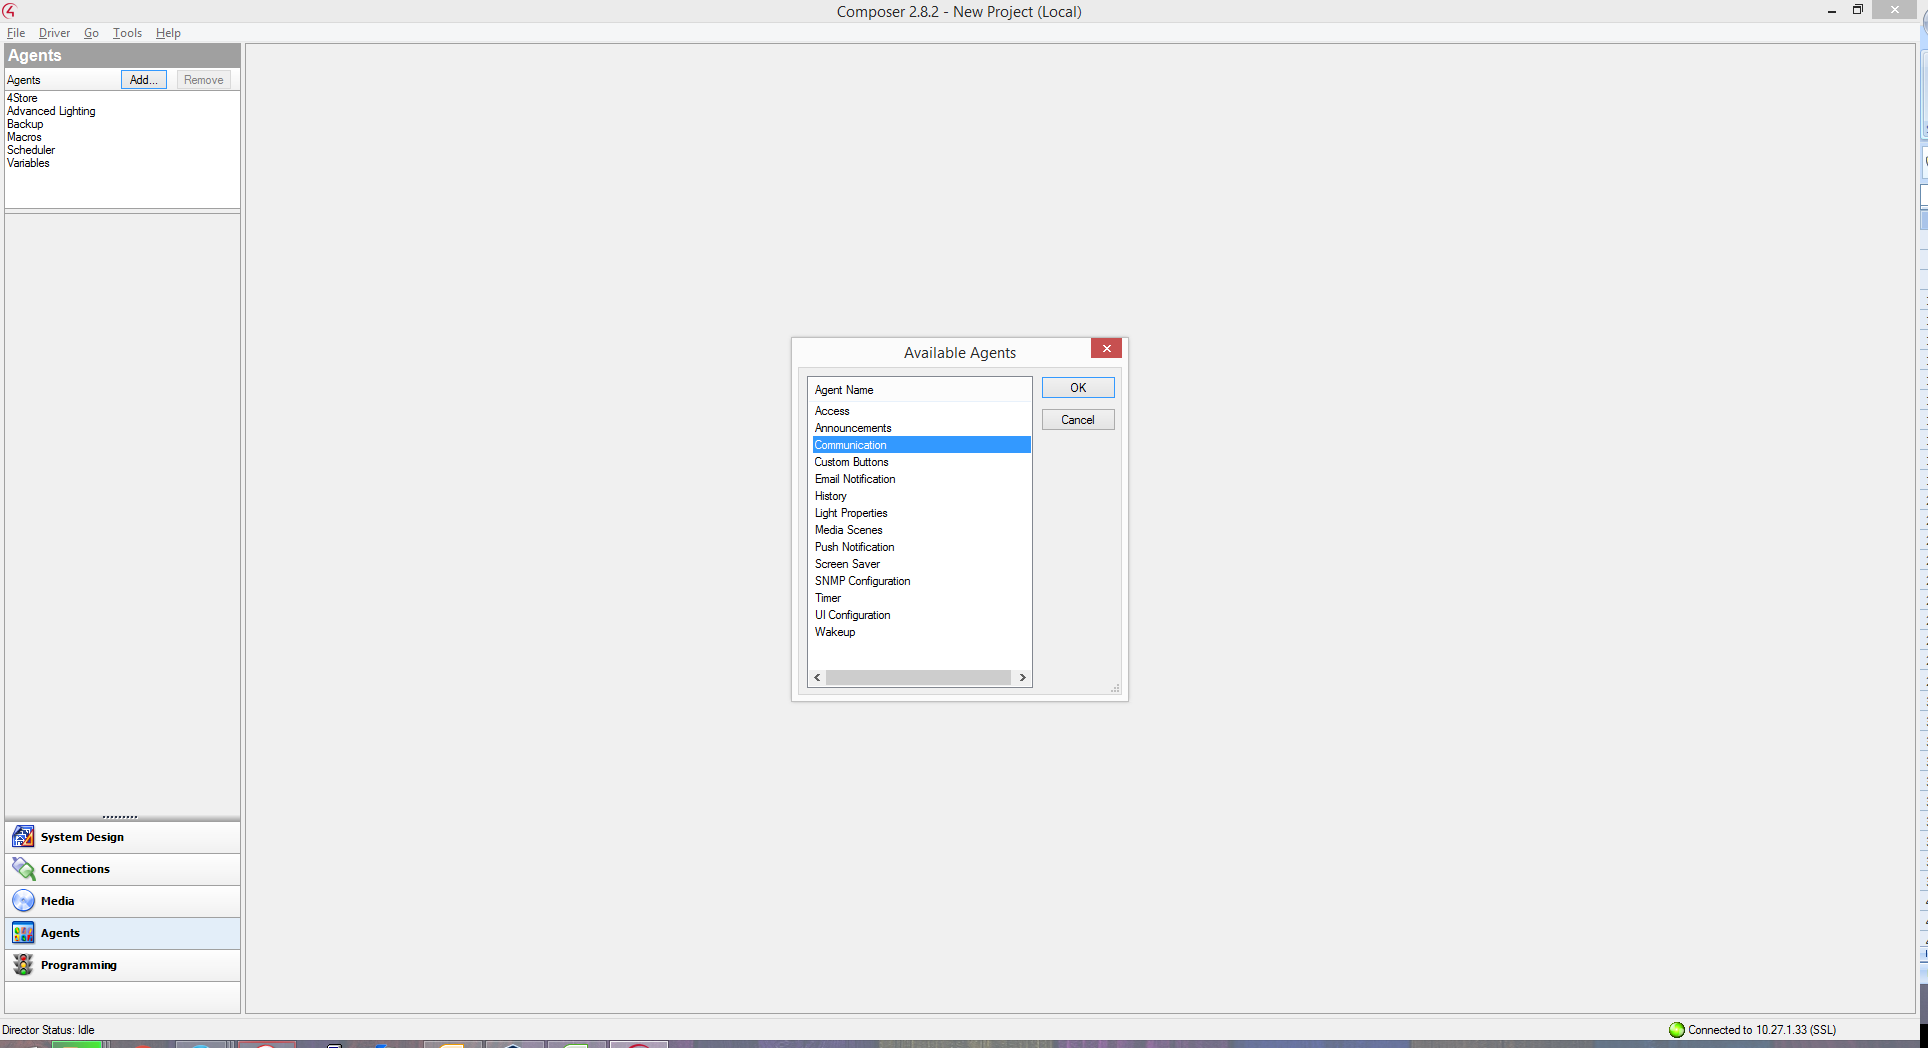
To communicate over SIP, the Communication agent must be added first. In Section Agents click on "Add..." and chose Communication in Avaiable Agents Pop-up window and confirm by OK.
 |
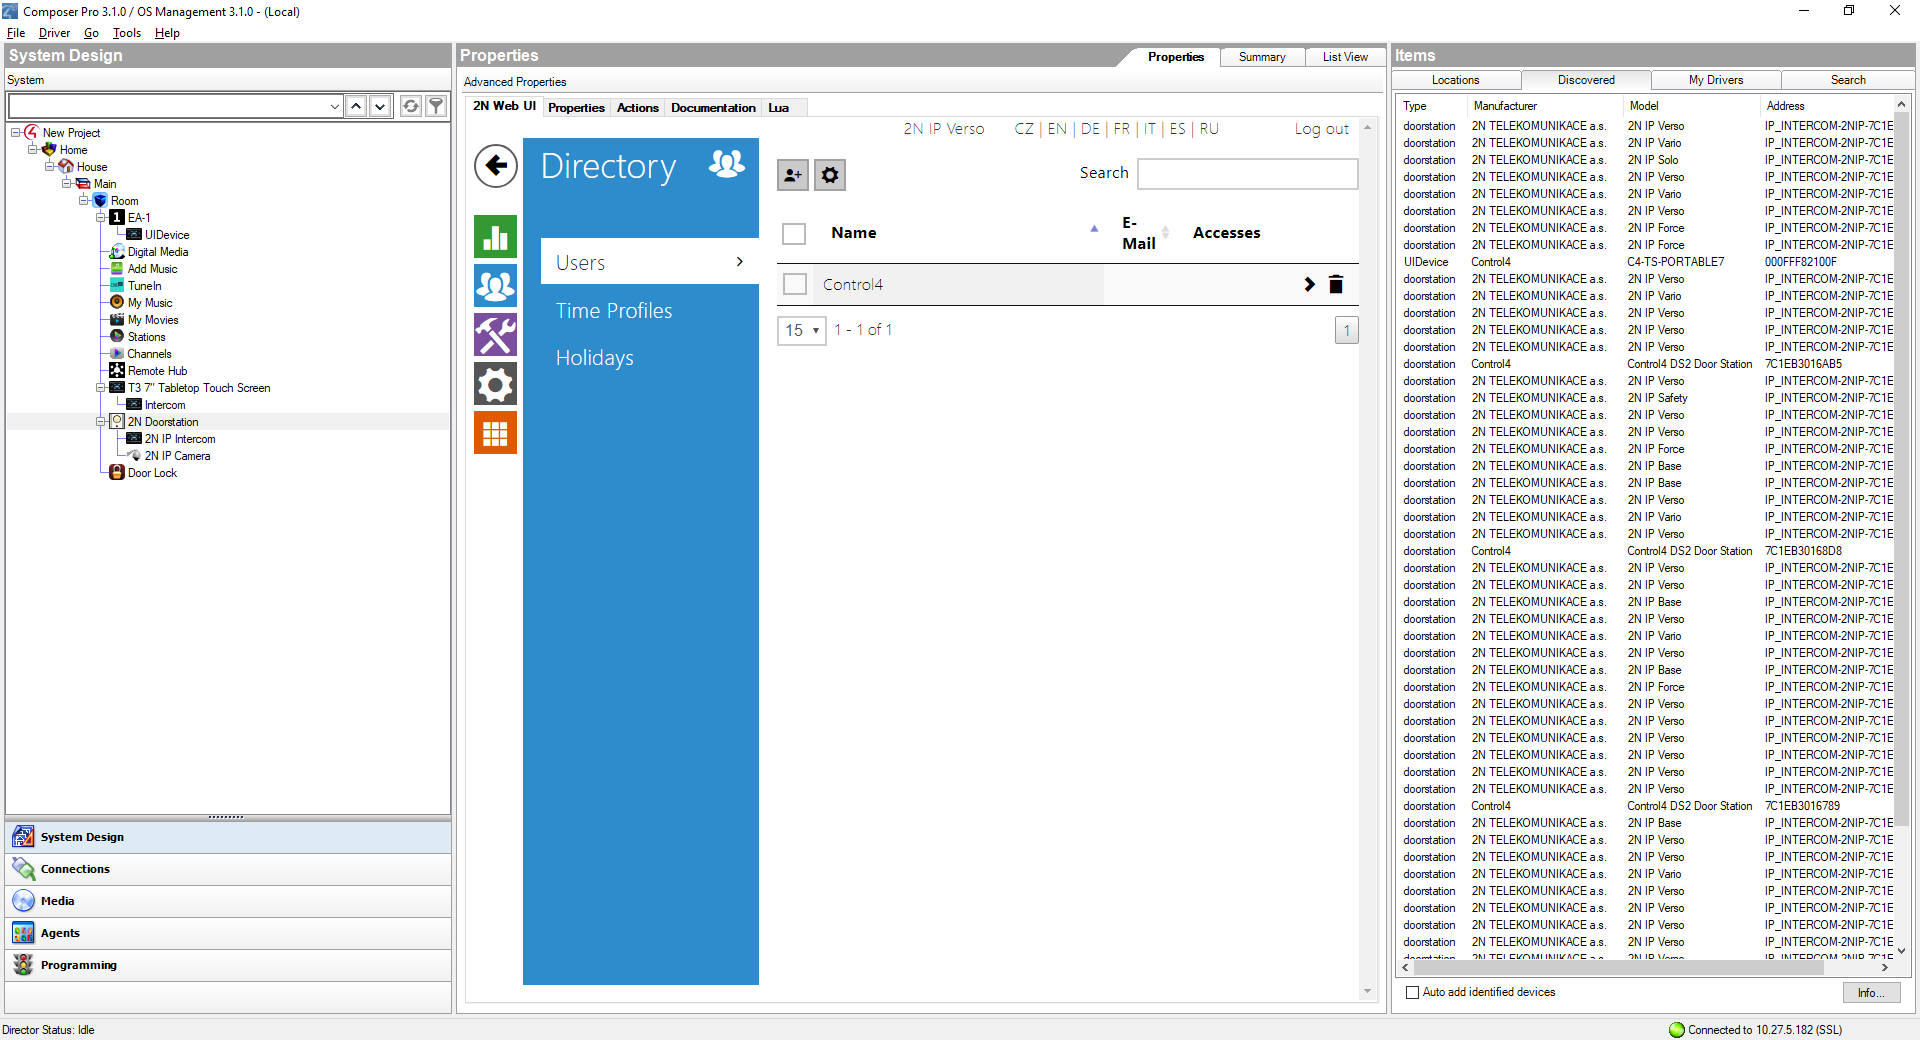
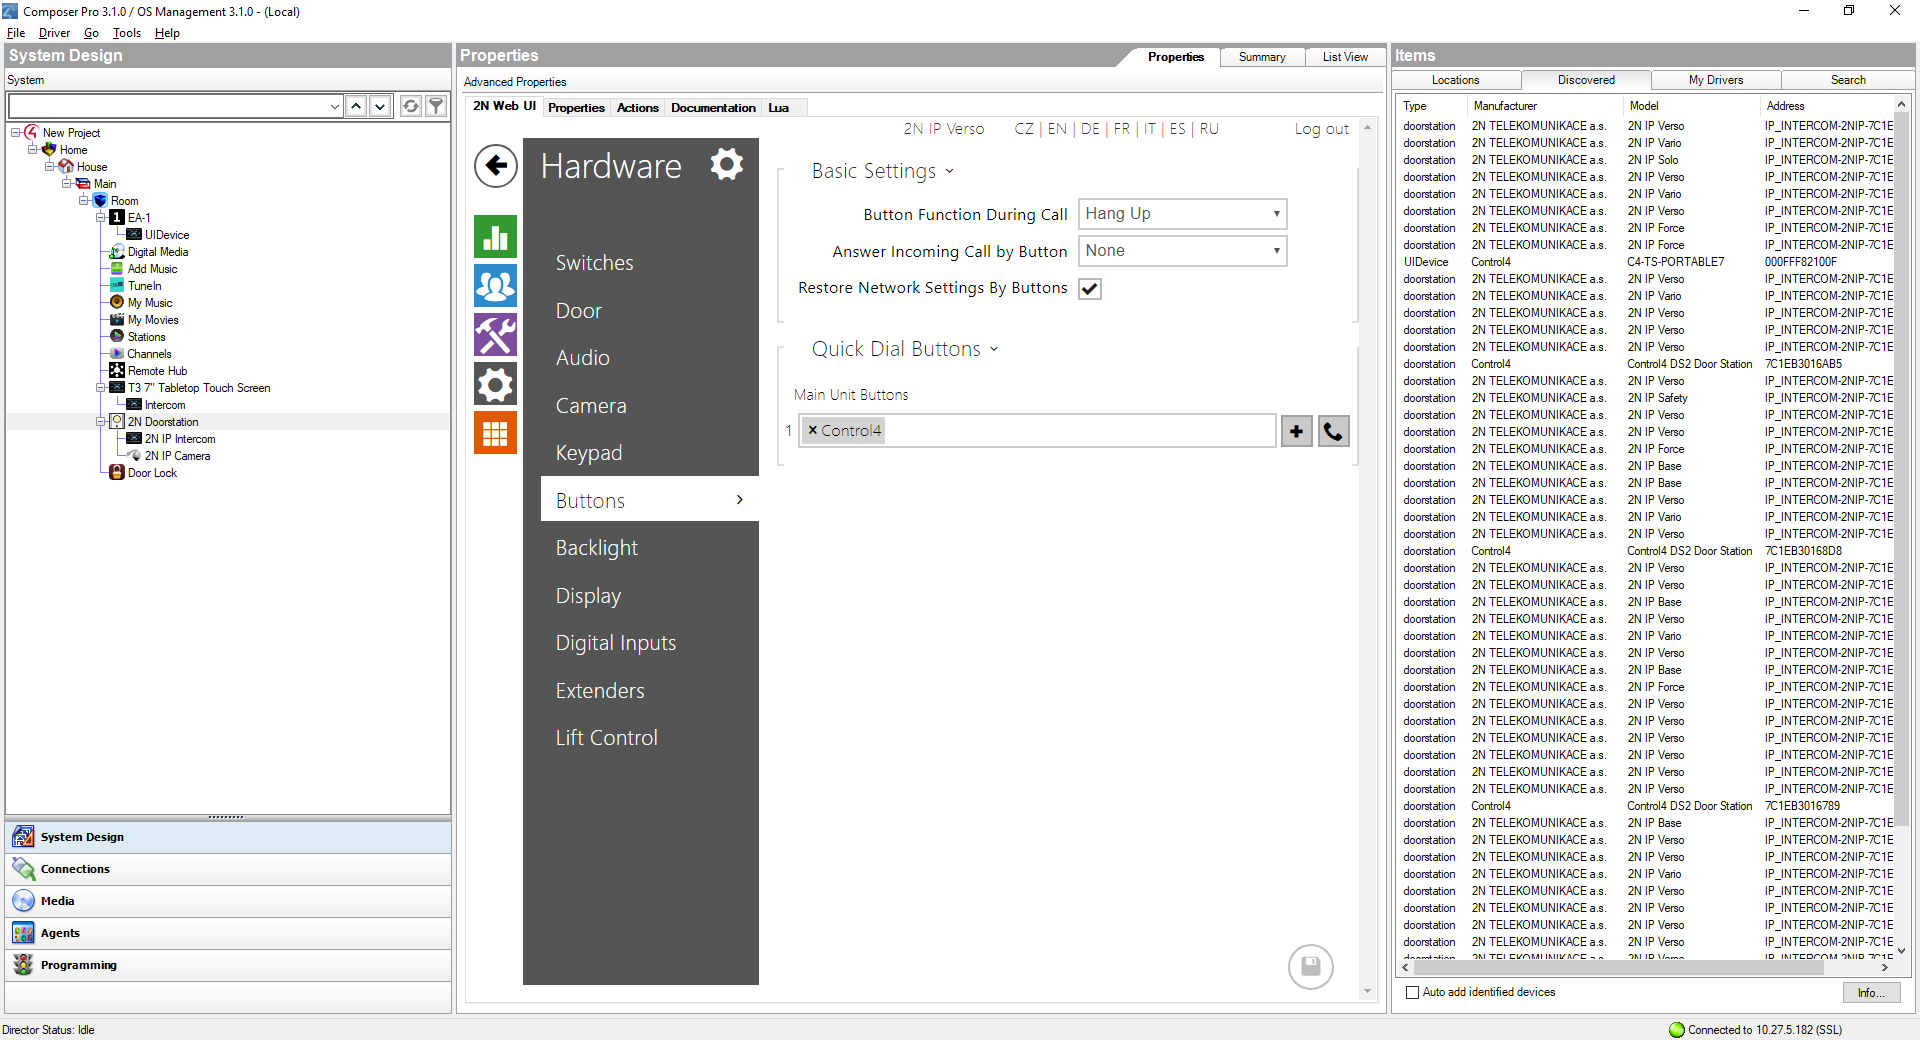
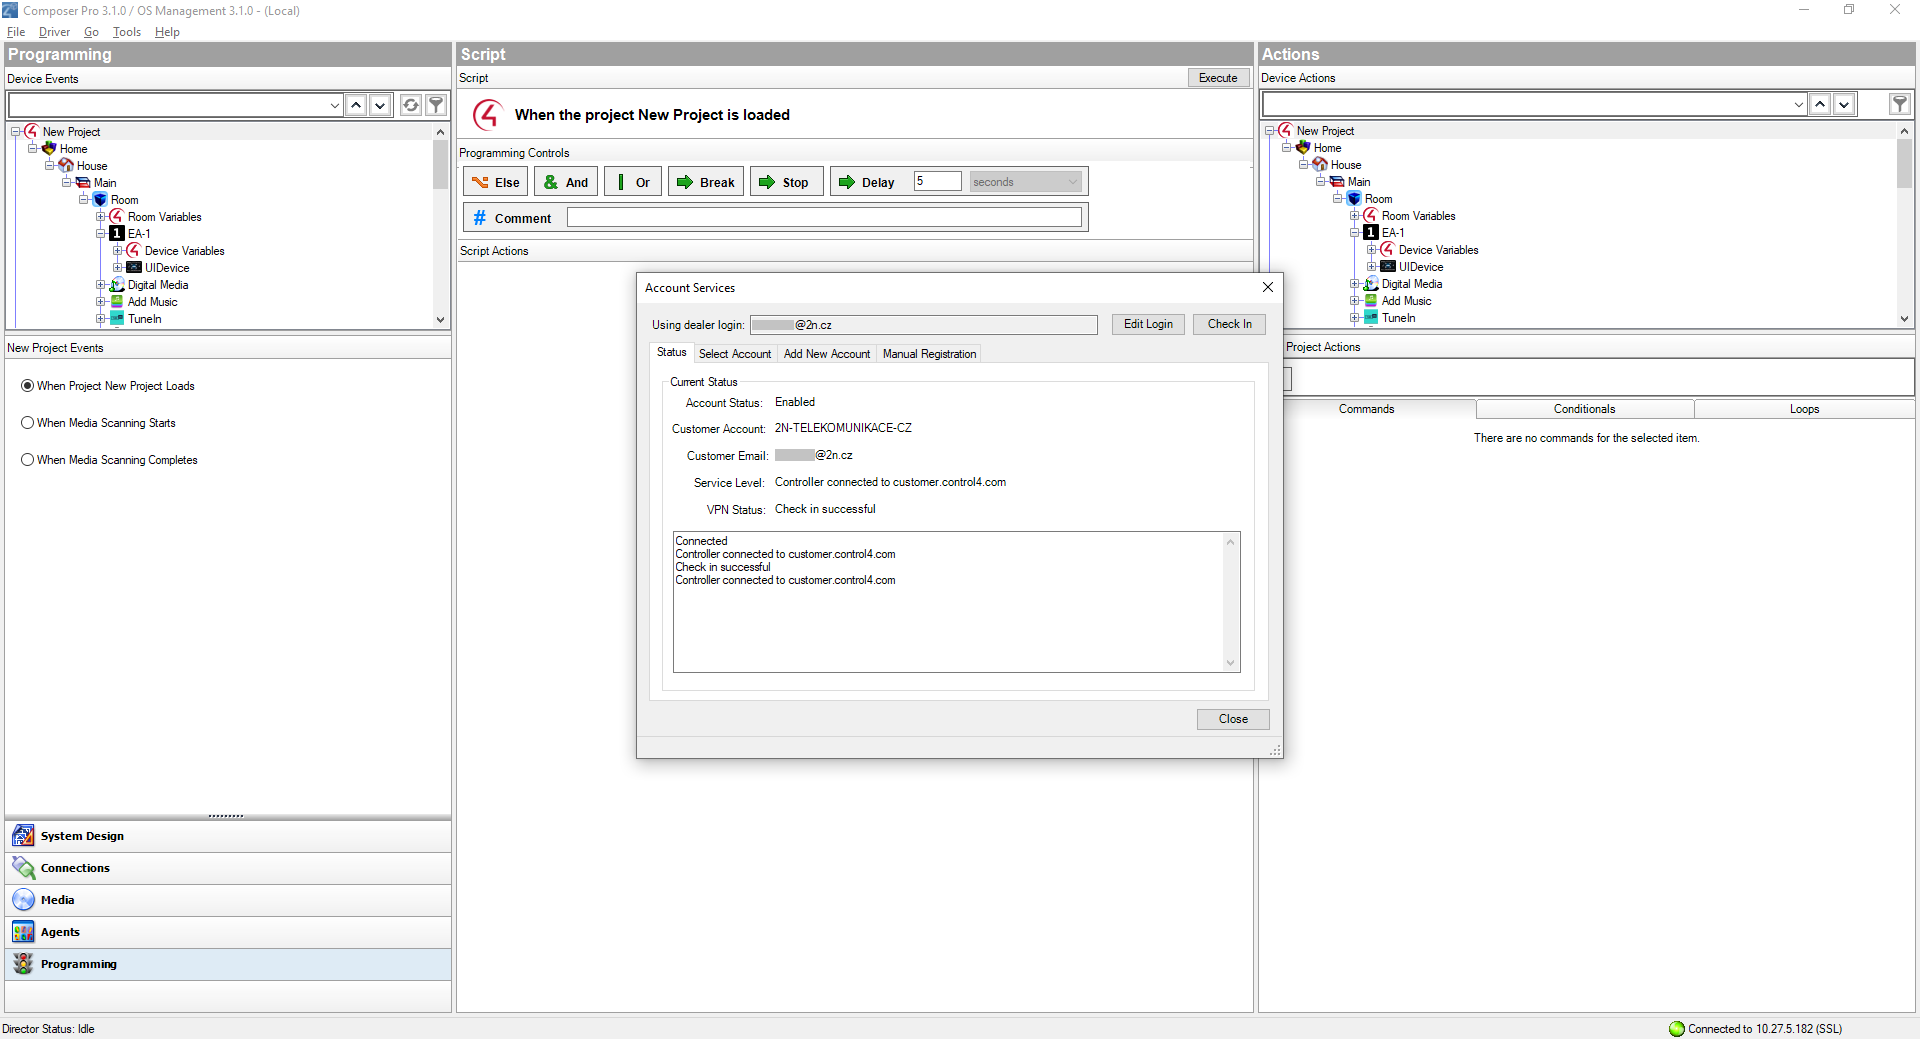
In Composer go to System Design / 2N Doorstation / Actions and click on Auto Config. After that, in intercom web interface, check if the user "Control4" was created in Directory and if it was added to the button in Hardware / Buttons. You can use 2N Web UI in Composer now.
 |
 |
To enable Lock manipulation it is needed to add driver for Lock, add Motorization / Door Lock from Items / MyDrivers (by double click).
 |
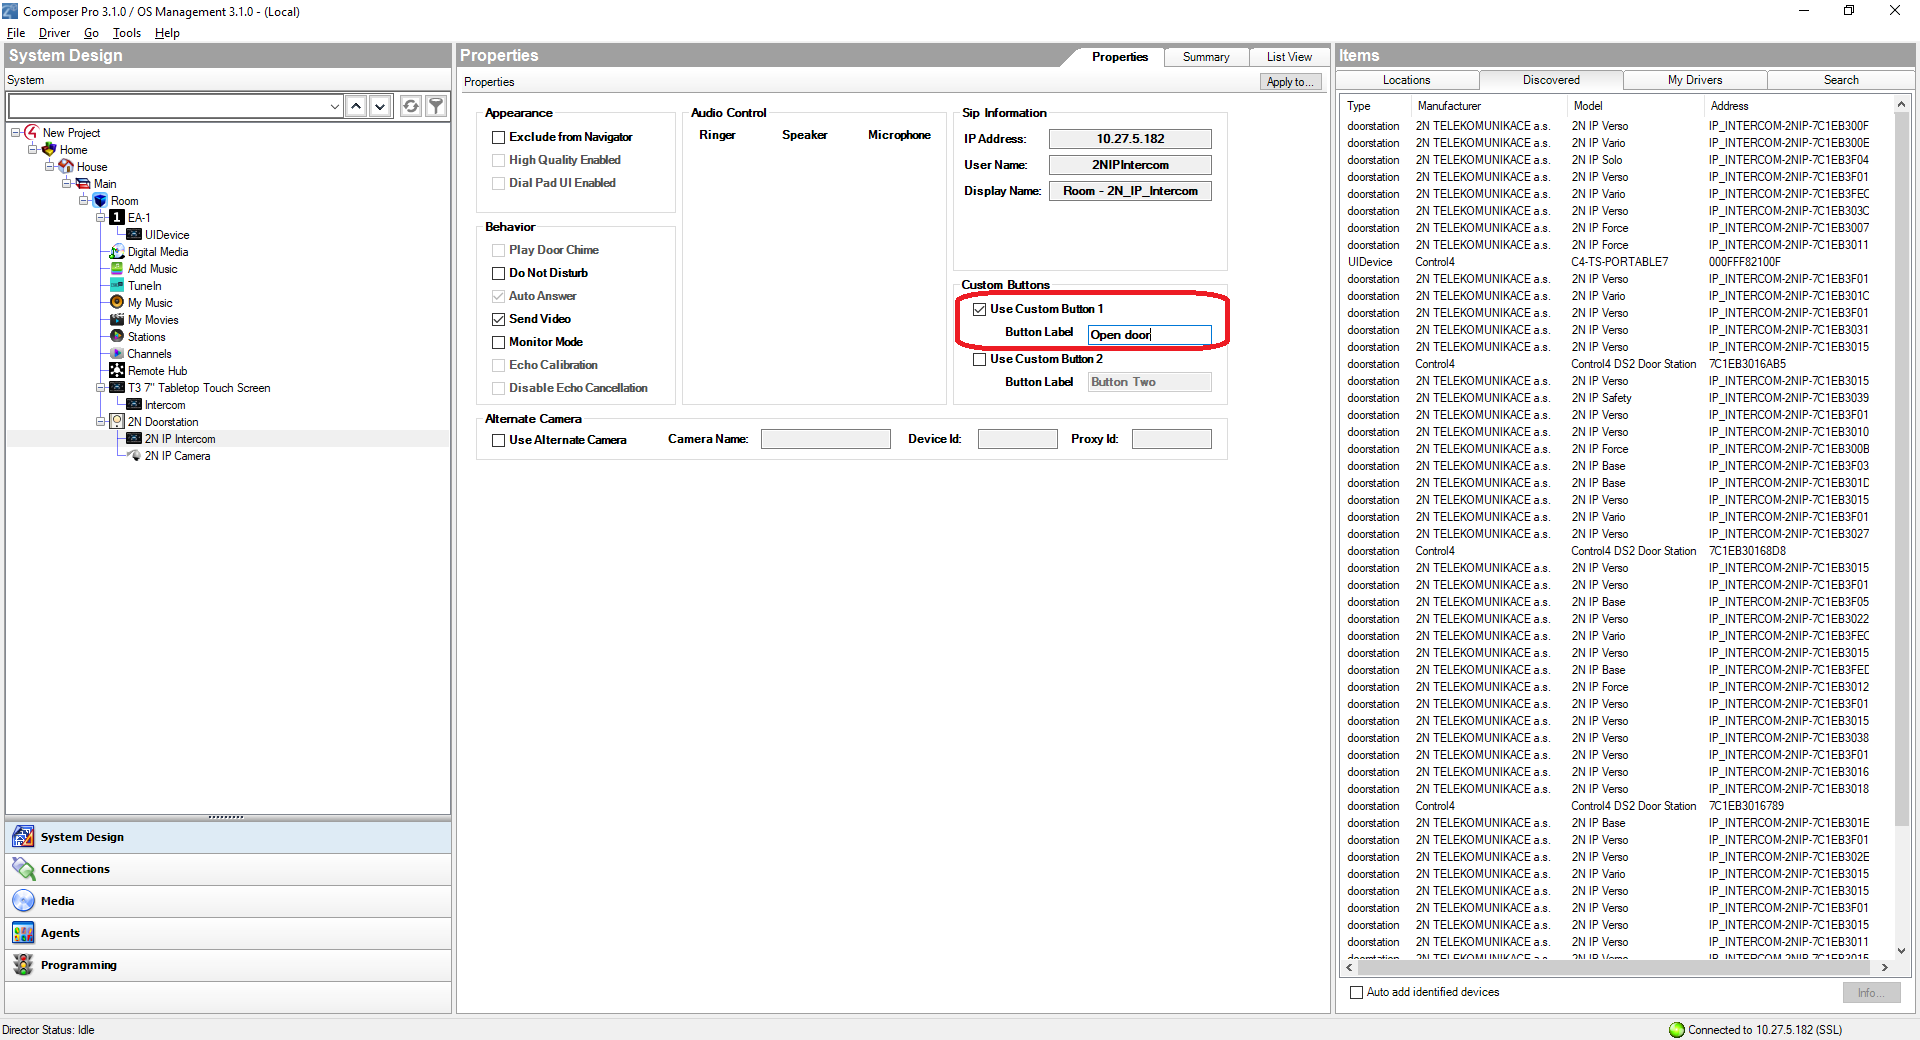
Next to 2N IP Intercom settings and in properties click on check box of Custom button1 and name it, in following it is named "Open Door".
 |
 |
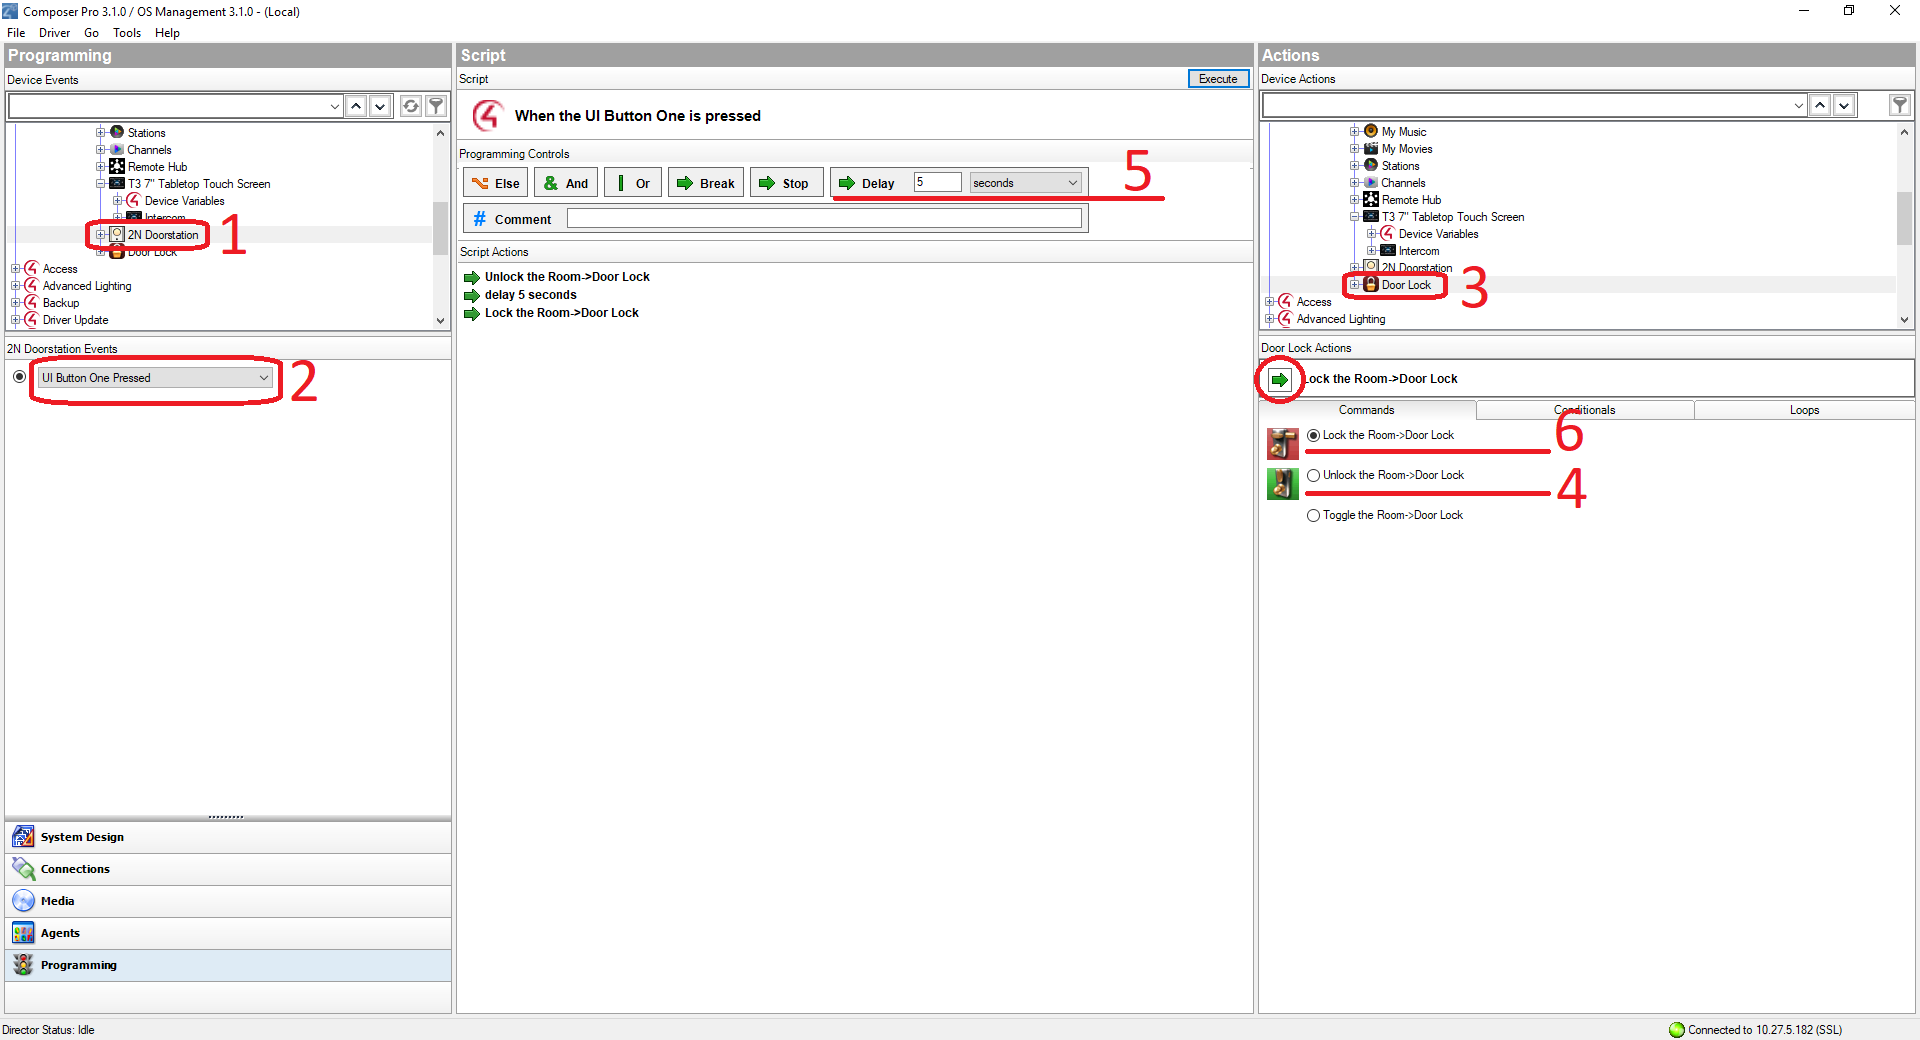
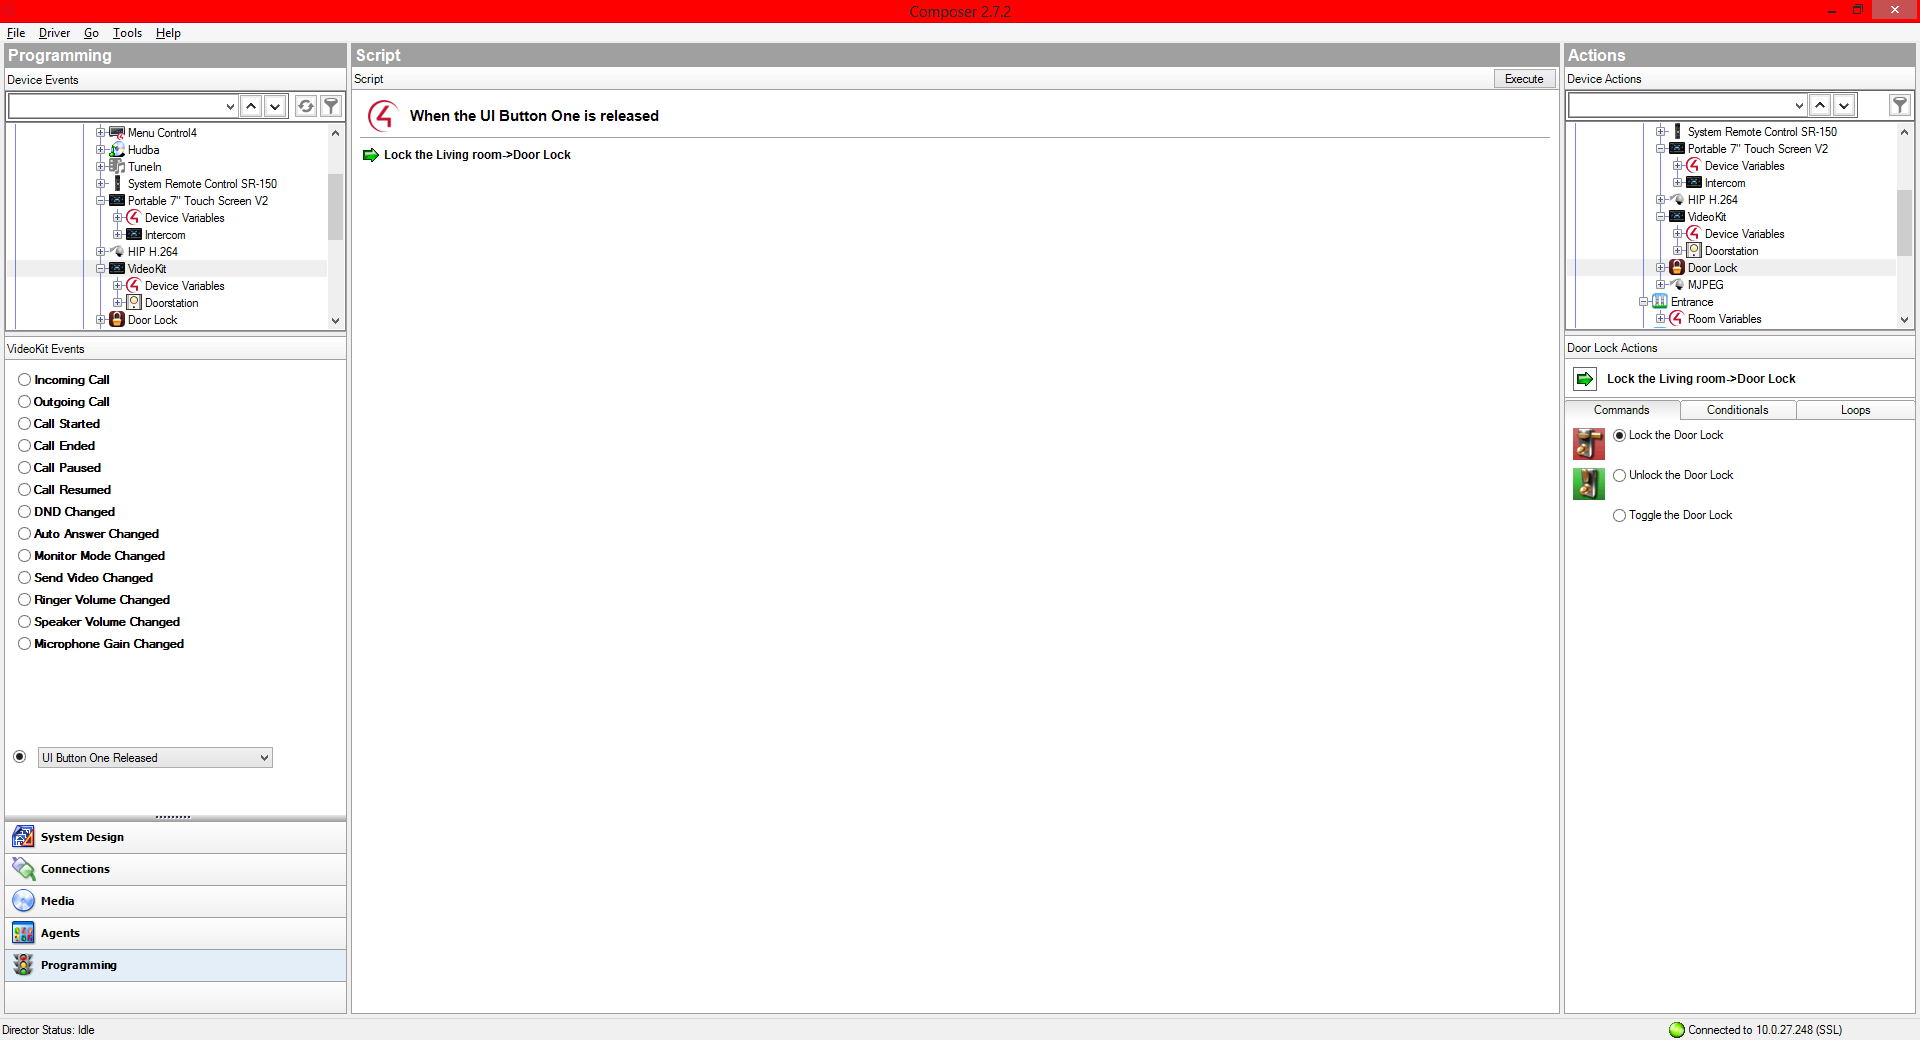
In Actions Panel choose Door Lock and in command below choose Unlock the Door Lock. And double click on Arrow Icon above commands to add this command.
Next in Programming Control add Delay 5 seconds command to the Script by double clicking on arrow icon.
At the end choose again Actions on Door Lock and add Lock the door and add to the script by doublick click on green arrow.
 |
Intercom Anywhere is Control4 application which enables you to accept incoming calls from 2N IP Intercom in your smartphone and open a door, if you need to.
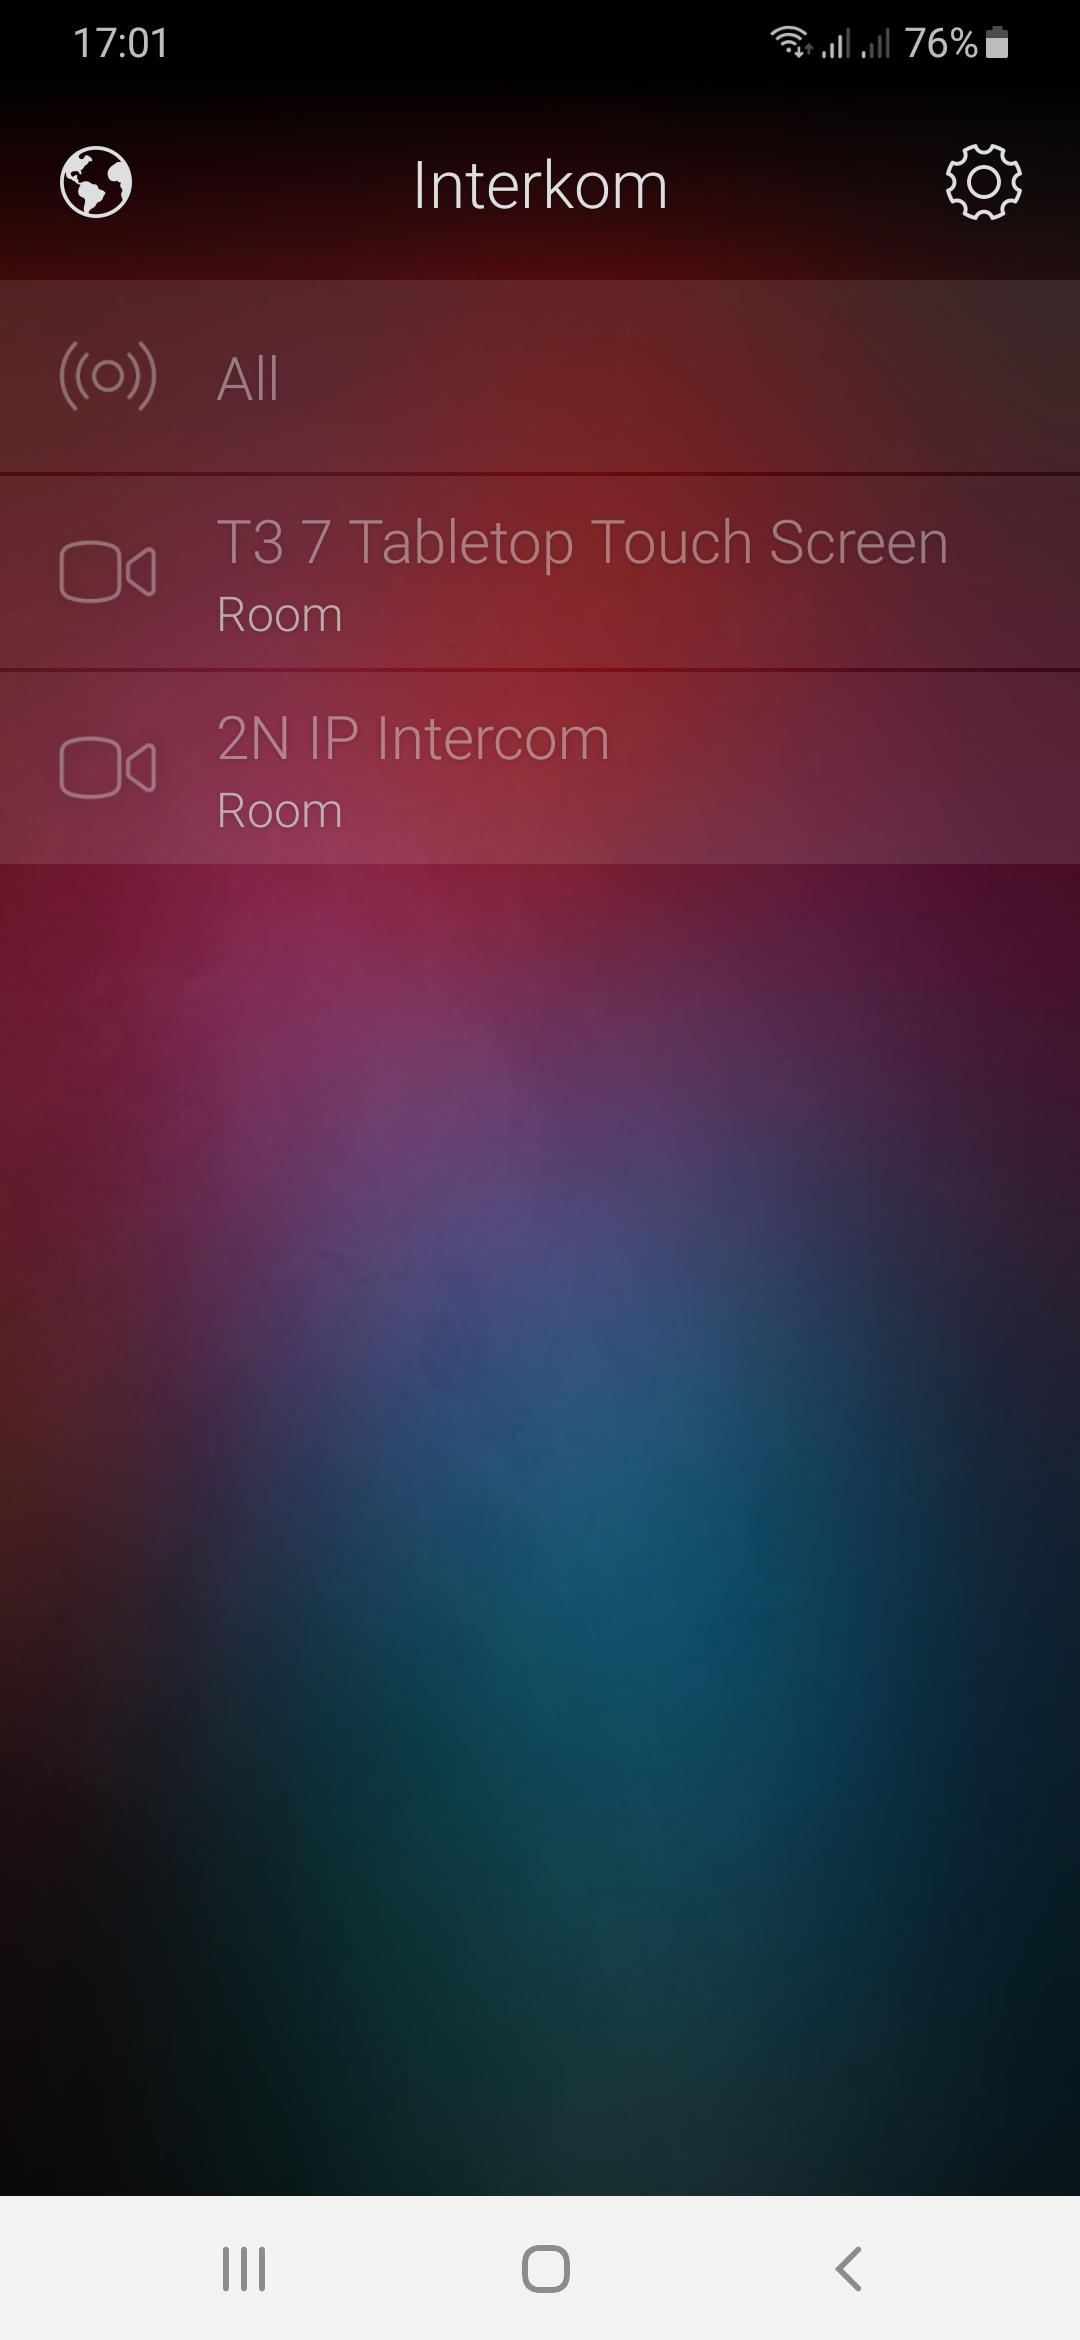 |
Check the registration of your Controller to Control4 account, or go by steps in Control4 guide. Then login by your credentials in the app installed on your smartphone. Call group "All" in Composer includes Intercom Anywhere account too, so then calls are made automatically.
 |
Version 2
Settings
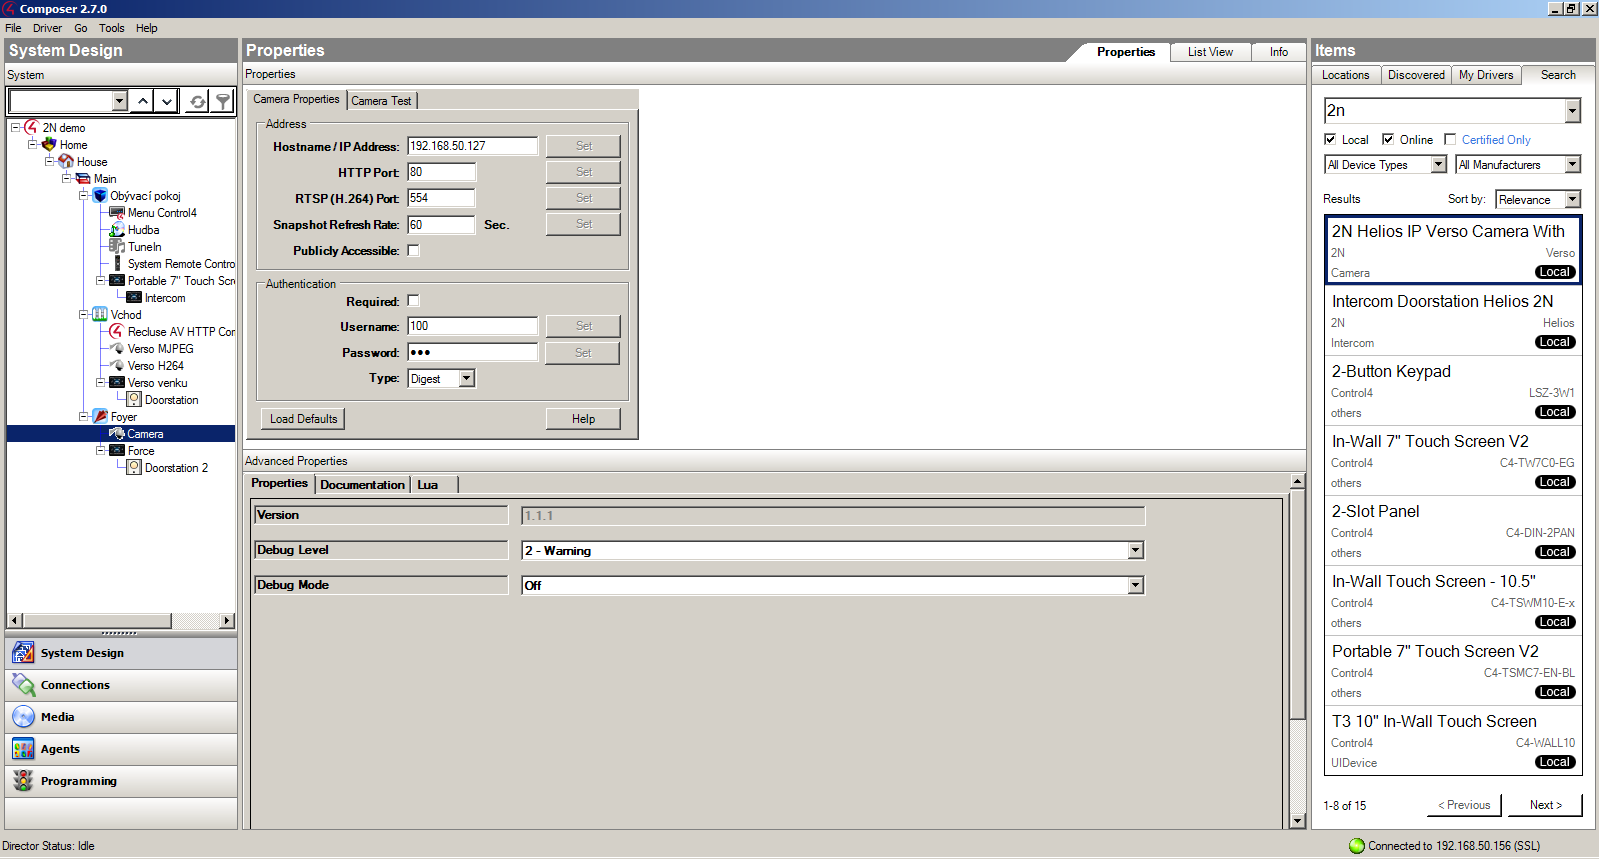
As the first step search driver 2N IP Intercom in the right column in the Composer software and add to the project by double clicking on the driver. There are two of them, one is receiving RTP stream via H264 and second one via MJPEG. Both of this drivers can handle the video stream from 2N IP Intercom with camera. Change the hostname/IP address field according to your 2N IP Intercom configuration and set Authentication parameters (picture below). Every row needs to be confirmed by clicking on the Set button.
 |
The Camera from 2N IP Intercom can be connected only via unsecured connection, without authentication. For this option we must go to section Services / HTTP API and set Camera API: Connection type to Unsecure and authentication to None.
This configuration of HTTP API we will need also for door opening (output activation). Set the same values as for the camera API to I/O API according to picture below.
 |
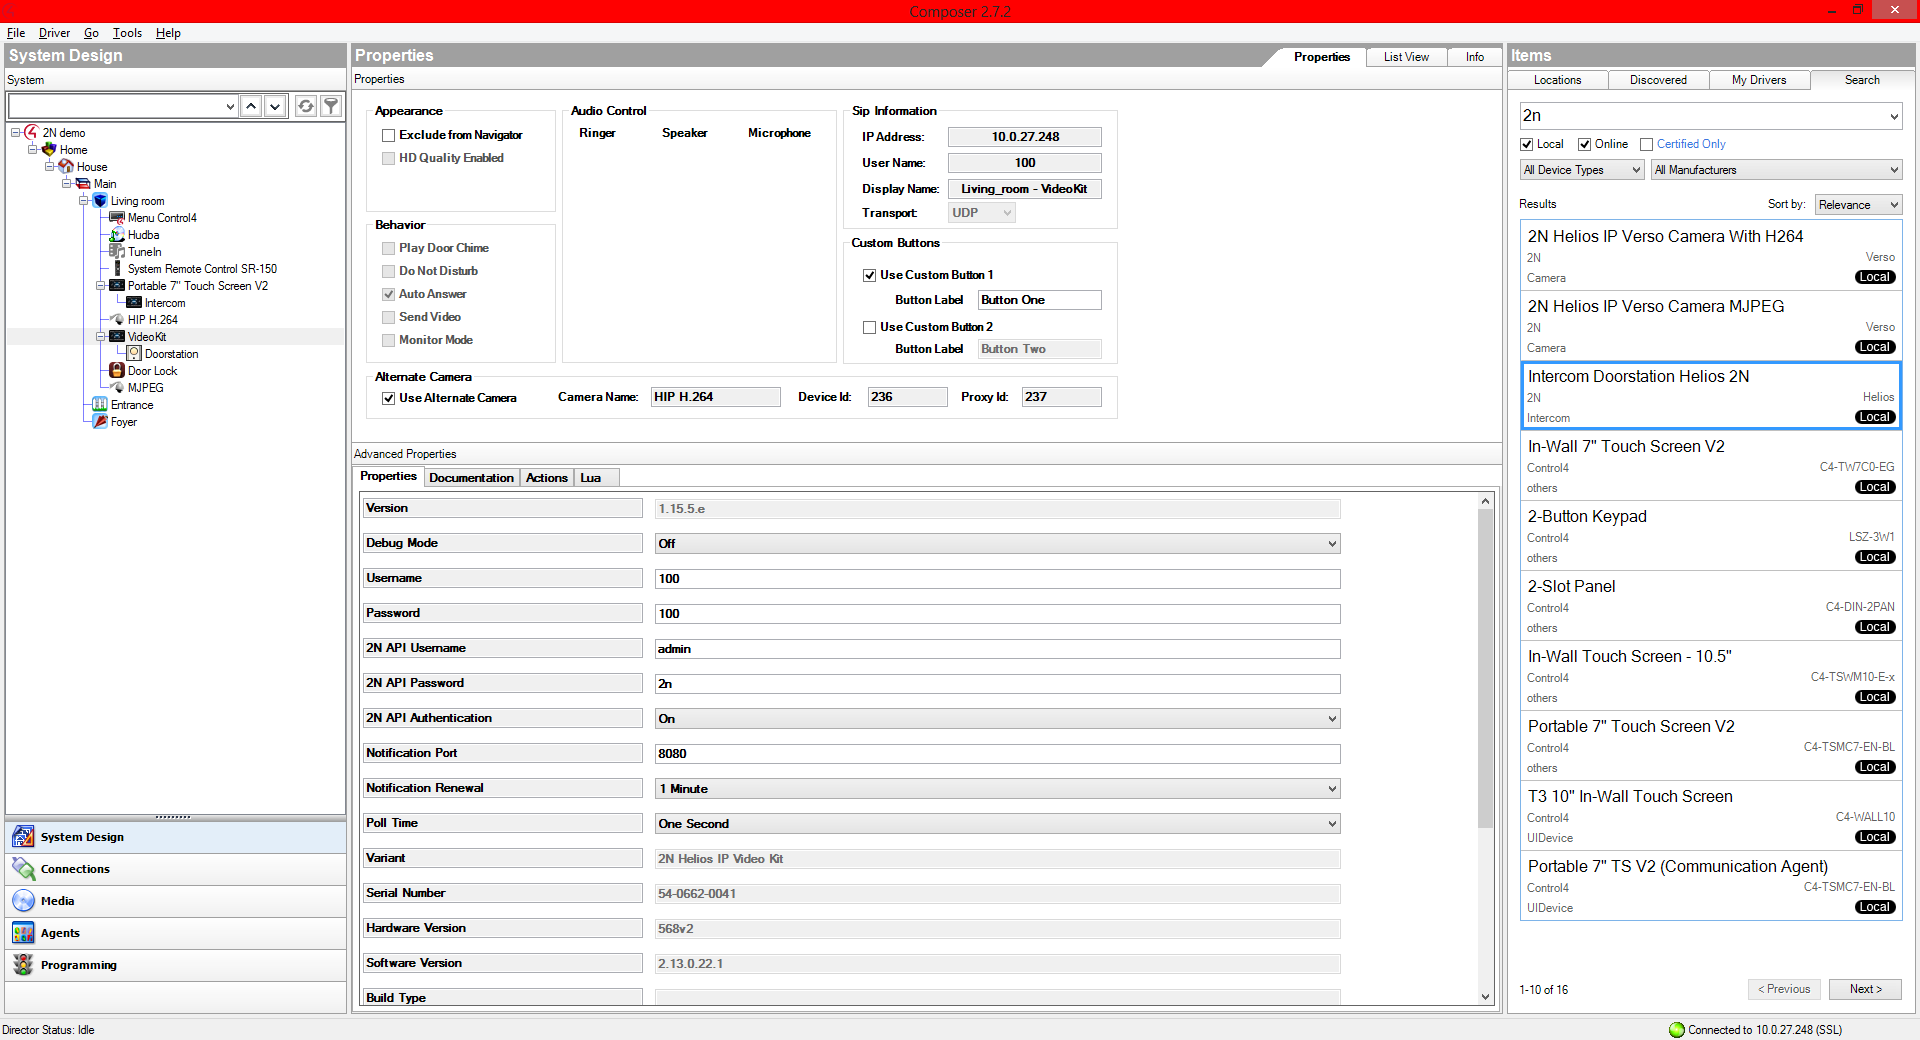
Add 2N IP Intercom driver to the project same way as previously the camera driver. Insert Username/Password that will be used for connecting SIP account on the 2N IP Intercom. Allow the parameter Use Alternate Camera, small popup window will appear. Here you can choose particular camera from previous step to connecting camera the intercom module. Also allow at least one Custom button that will be use as the trigger for sending HTTP command to 2N IP Intercom. This button will be used for opening the door. Every value need to be confirm by a Set button.
 |
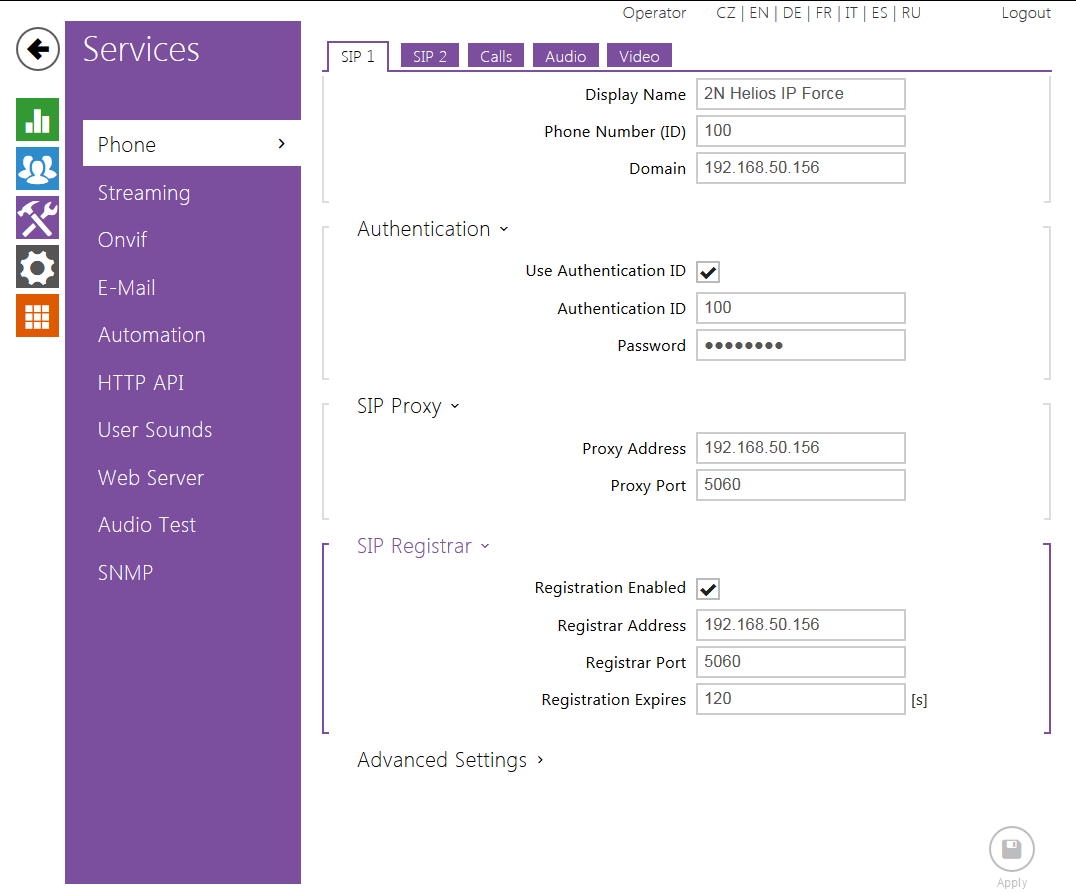
The next step is to configure 2N IP Intercom. Open the configuration interface and go to section Services / Phone and configure the SIP account. Example of the setting is in the picture below.
- Phone number ID: 100
- Authentication ID: 100; password: 100 (based on Composer configuration)
- SIP proxy: IP address of the Control4 controller
Allow SIP Registration with SIP proxy IP address
 |
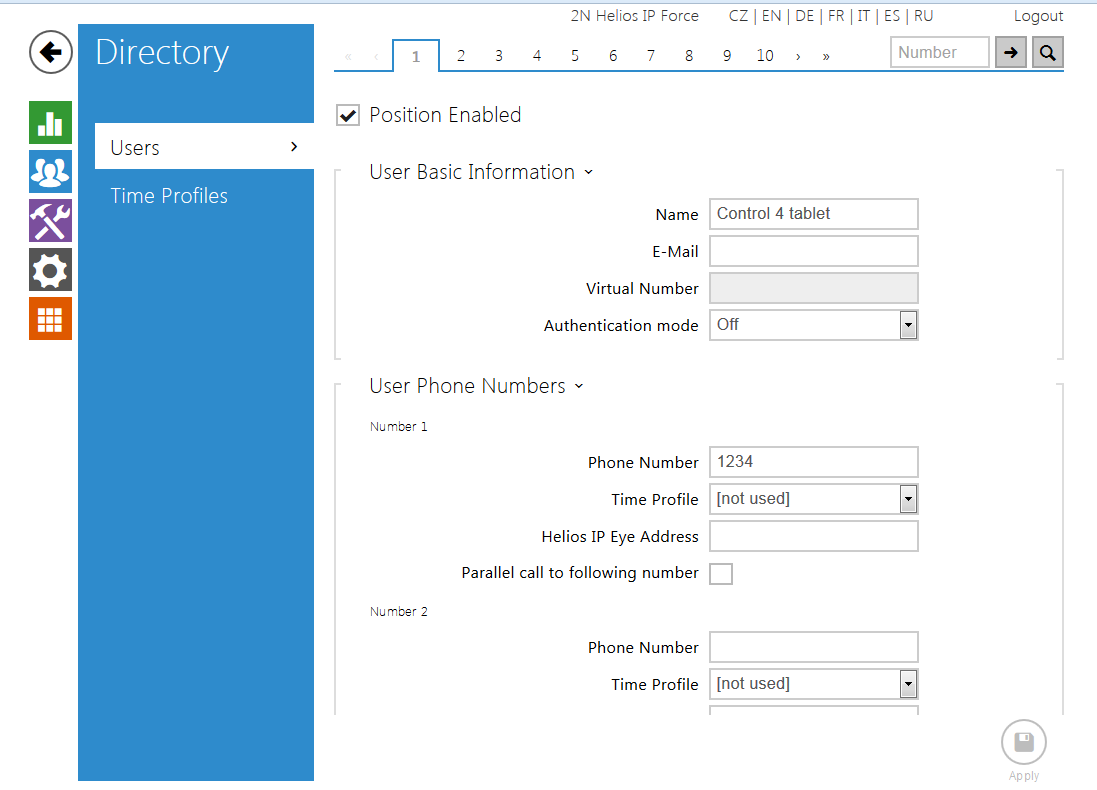
In this scenario we use Control 4 7'' tablet as the call destination. We need to add this to group in section Agents / Communication. This group is used as the phone number in 2N IP Intercom. We used group named 1234 and you can find settings of this group in the picture below. Don´t forget to Refresh Navigators after your configuration is done.
 |
 |
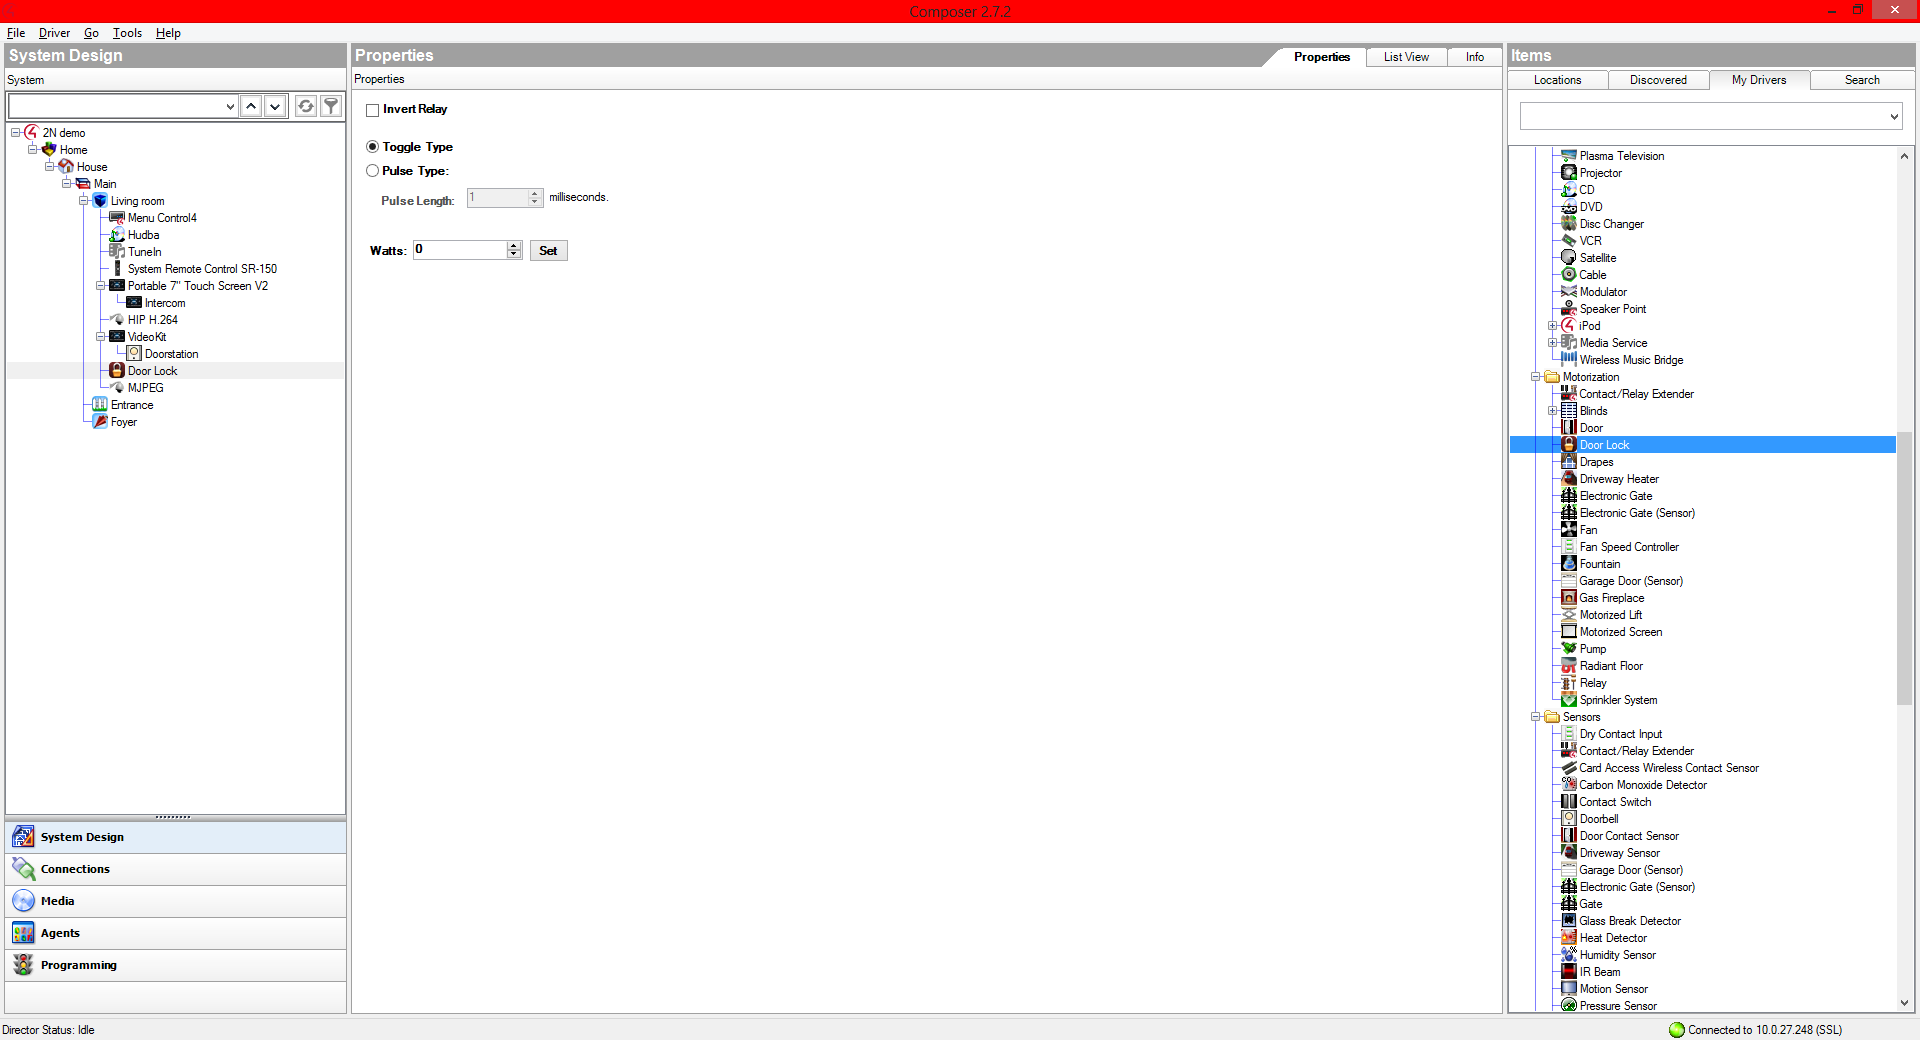
You need to add Door Lock driver for Door Opening in to your project.
 |
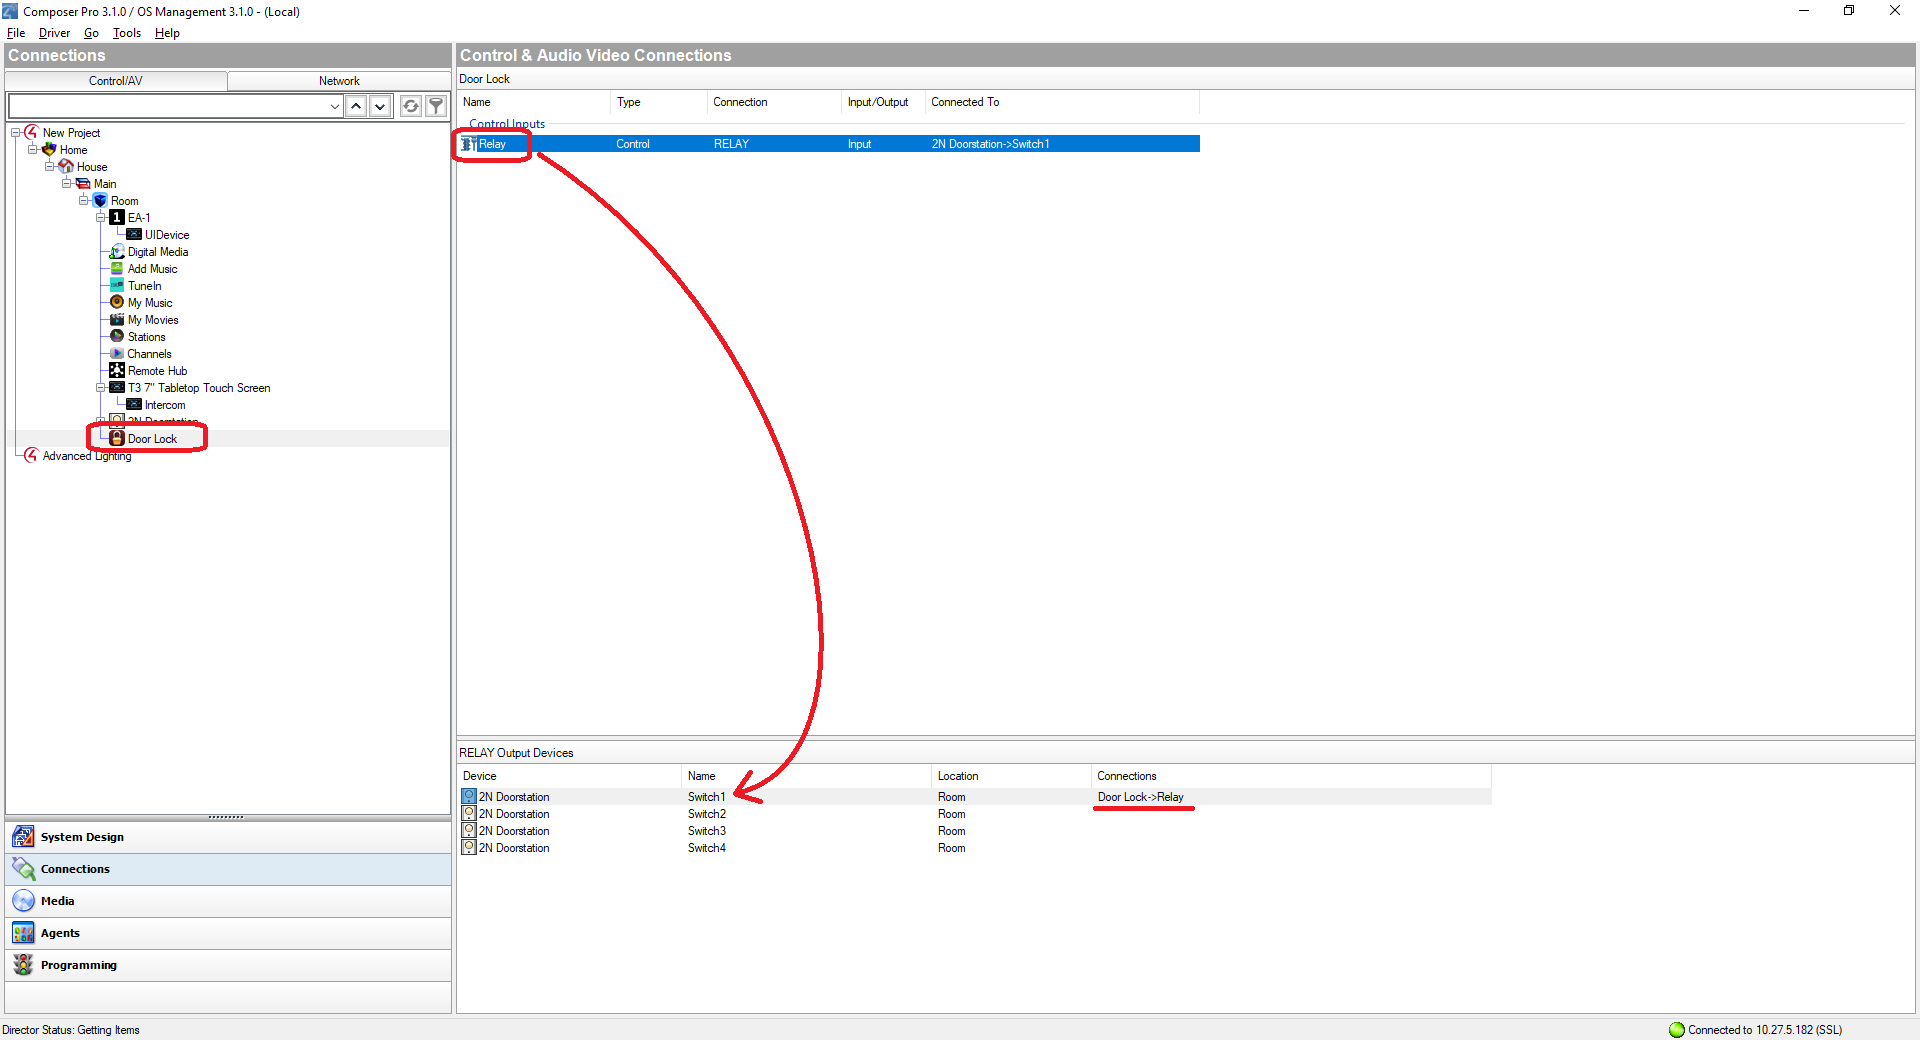
Now we need to interconnect this Door Lock driver with some specific output of 2N IP Intercom in Connection section using Drag&Drop.
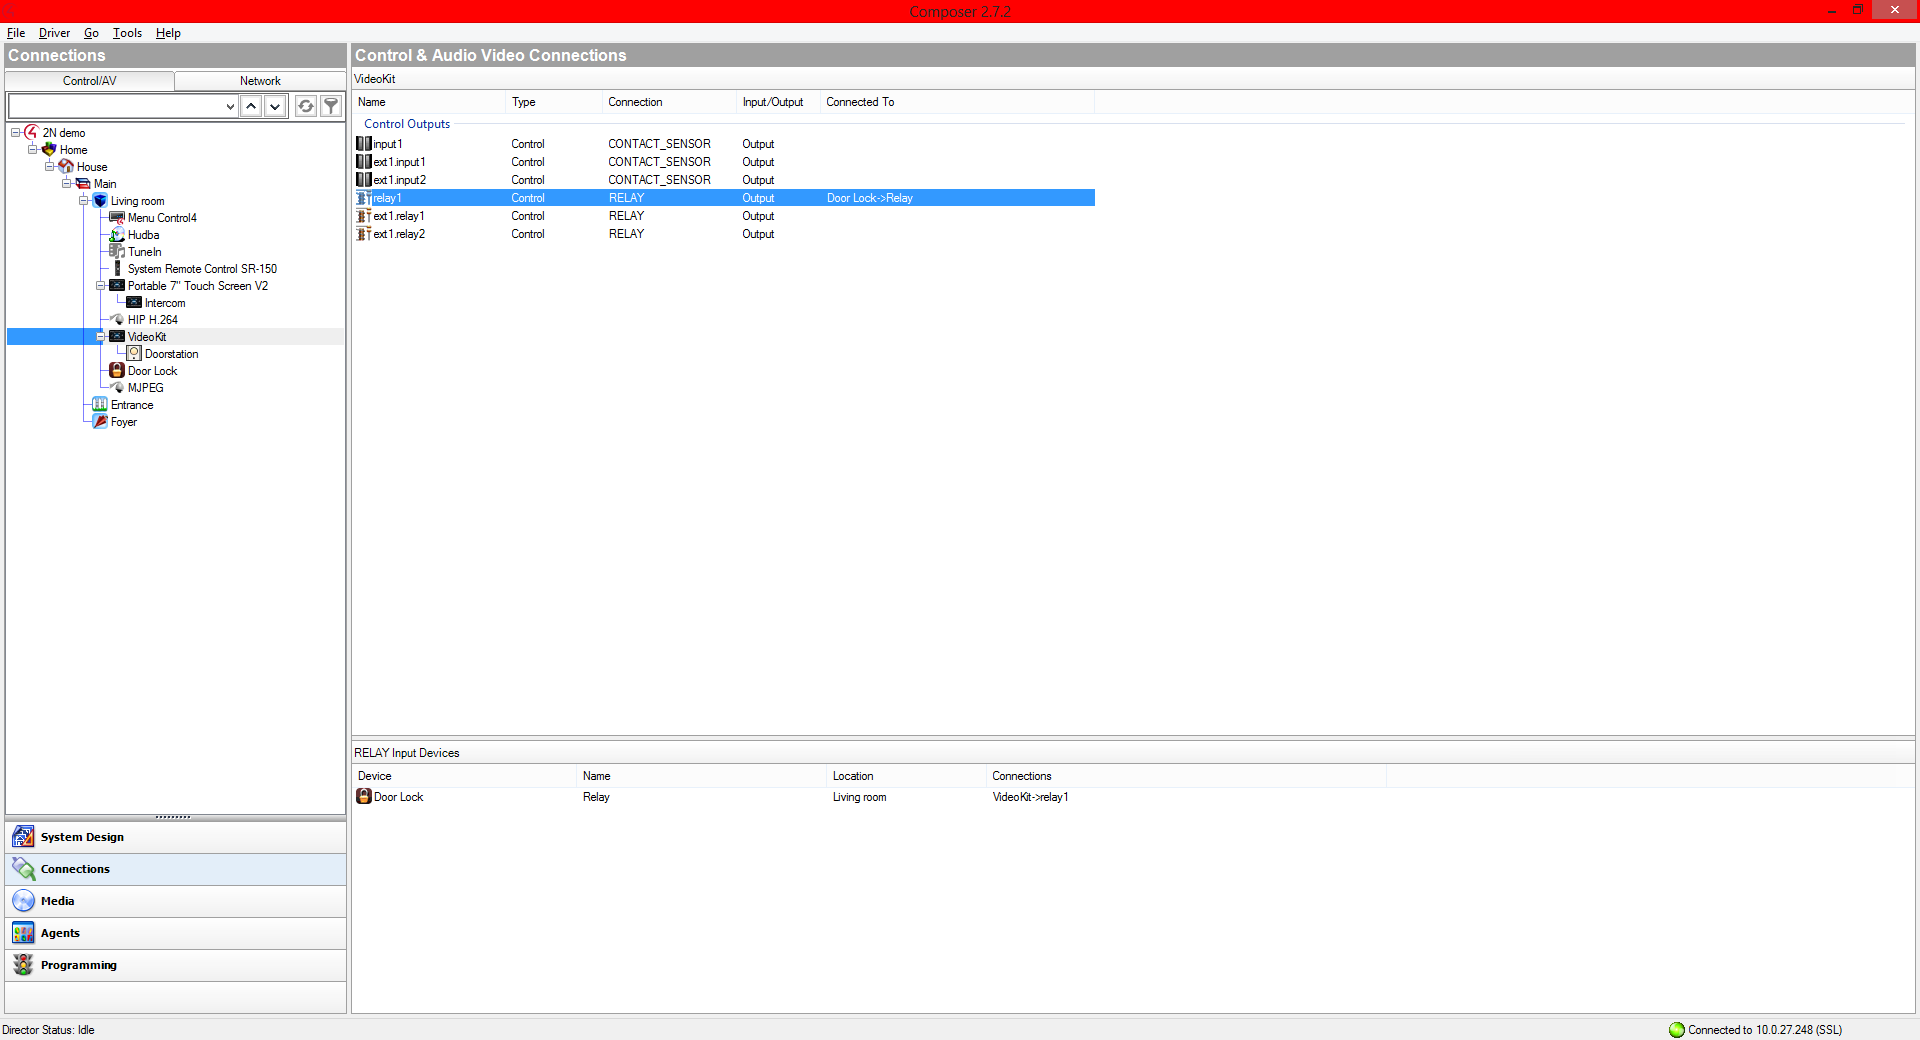 |
 |
 |
Required licenses
- Enhanced Video
- Enhanced Integration
Used Symbols
![]() - Compatible
- Compatible
![]() - Work with limitation
- Work with limitation
![]() - Incompatible
- Incompatible