Crestron
Content
About
Crestron Electronics has carved the path for technological innovation since 1971. Crestron Electronics create automation solutions that transform the way people live their lives, making their day-to-day tasks easier and improving efficiency and productivity. Crestron Electronics strive to be at the forefront of cutting-edge technology, constantly offering faster, better solutions that address the needs of customers the world over. With Crestron, users aren’t just buying top-of-the-line electronics, users are investing in scalable and customized solutions, gaining 24/7 global service and support, and sponsoring products that are designed and manufactured in America.
Version 3
| Crestron MC4-R | Crestron panel | Crestron Home App | 2N IP Intercom Version | Audio | Video | Switch control | Video Preview |
|---|---|---|---|---|---|---|---|
| 4.004.0241 | TSW-760 3.002.1061 | 2.16 | 2.47 | ||||
| 3.007.0166 | TSW-770 1.004.0046 | 1.15.3r | 2.32.4.41.2 | ||||
| 3.007.0166 | TSW-760 3.001.0026 | 1.12.8r | 2.32.4.41.2 | ||||
| - | TSW-760 2.009.0080 | - | 2.25.0.34.8 | - |
2N IP Intercom Settings
Open web browser and enter IP address of intercom (default login credentials: admin/2n). If you don´t know IP address of your Intercom, you can use 2N® IP Network Scanner (download https://www.2nusa.com/en_US/products/2n-network-scanner) to discover 2N devices in your network.
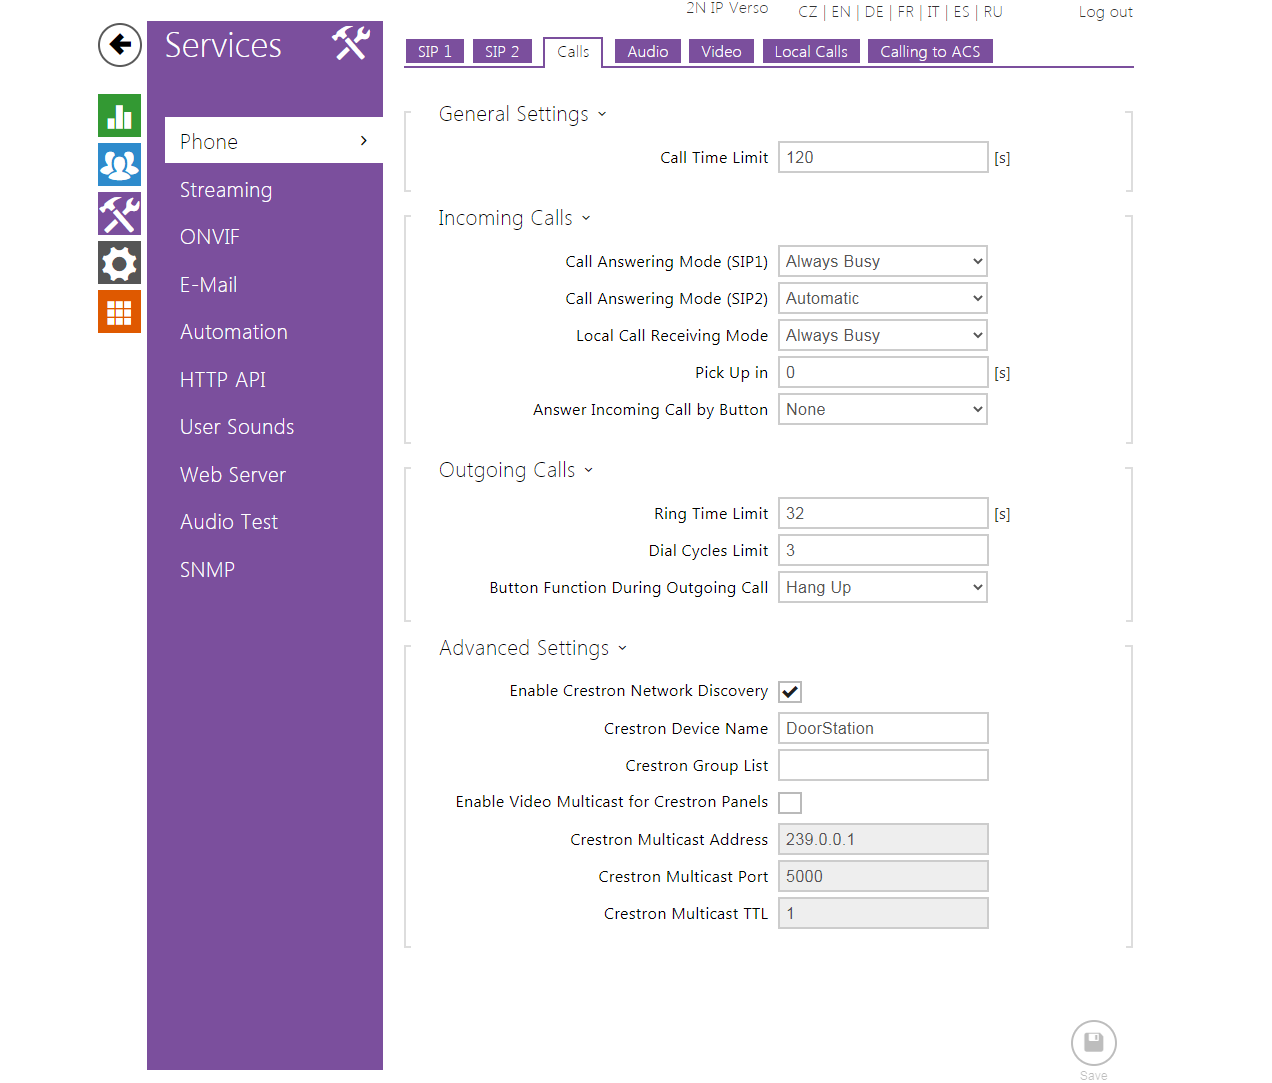
You will be asked to change the login credentials after your first login. In the web GUI navigate to Services – Phone – Calls - Advanced Settings and enable Crestron Network Discovery. You can set Crestron Device Name and Crestron Group Name of your intercom.
 |
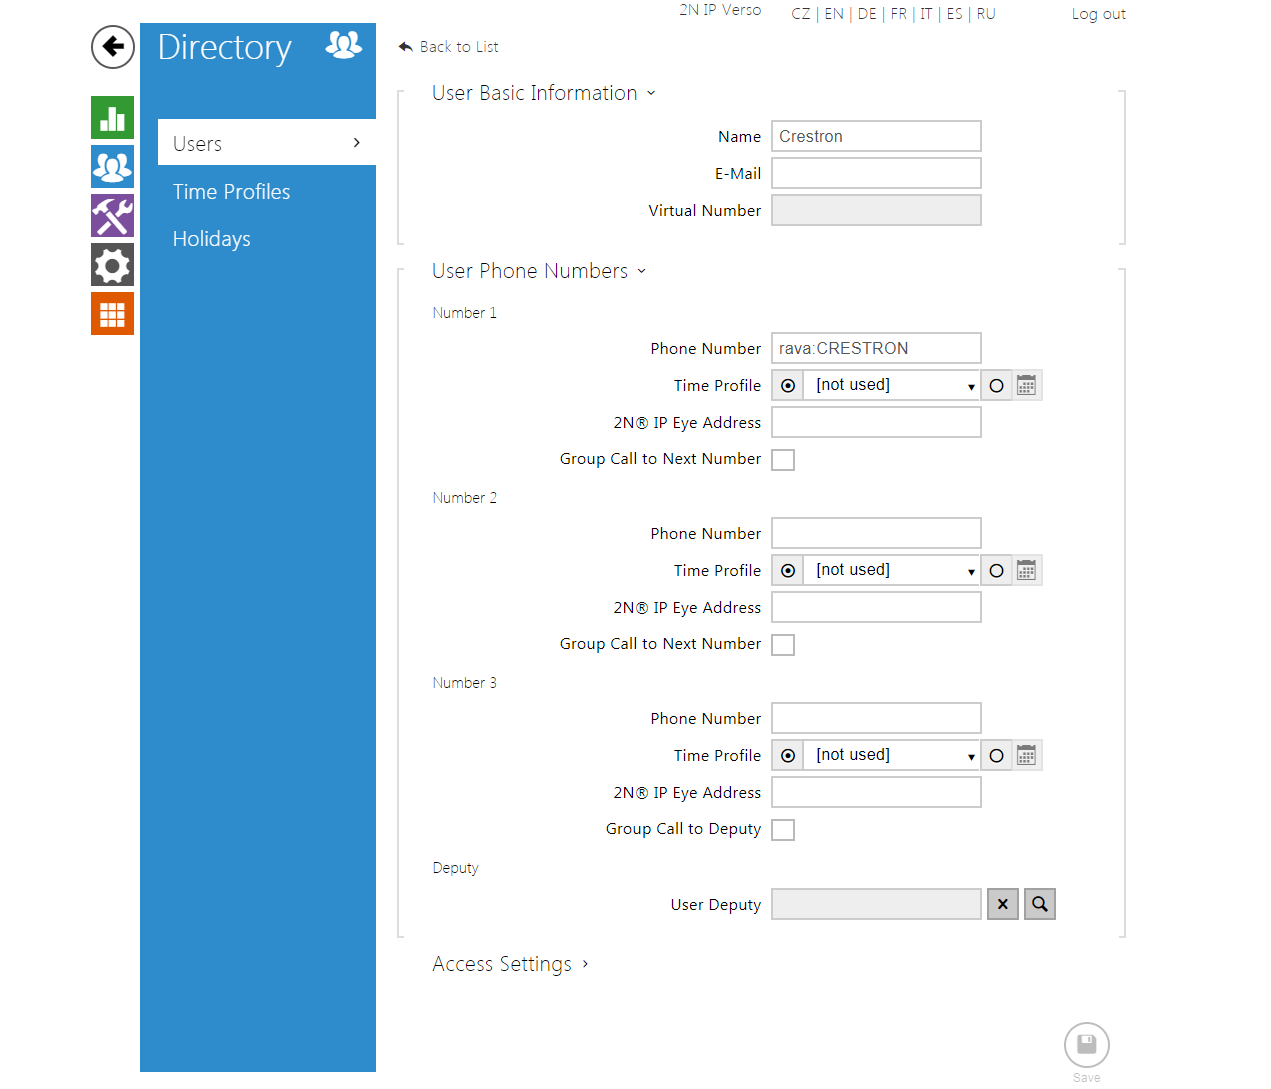
After you’ve did SAVE your previous settings go to section Directory - Users and create new user, who will be used for your calling from the intercom. Thanks to 2N implementation of Crestron RAVA protocol you can use directly Crestron Device name(s) to make calls to RAVA enabled devices. To make a RAVA call, fill in the Phone Number field rava: followed by one or more Crestron Device Names, Crestron Device Groups, extensions seperated by “,”.
Example of use: rava:CRESTRON. This will initiate a call to Crestron Panel with Device Name CRESTRON.
 |
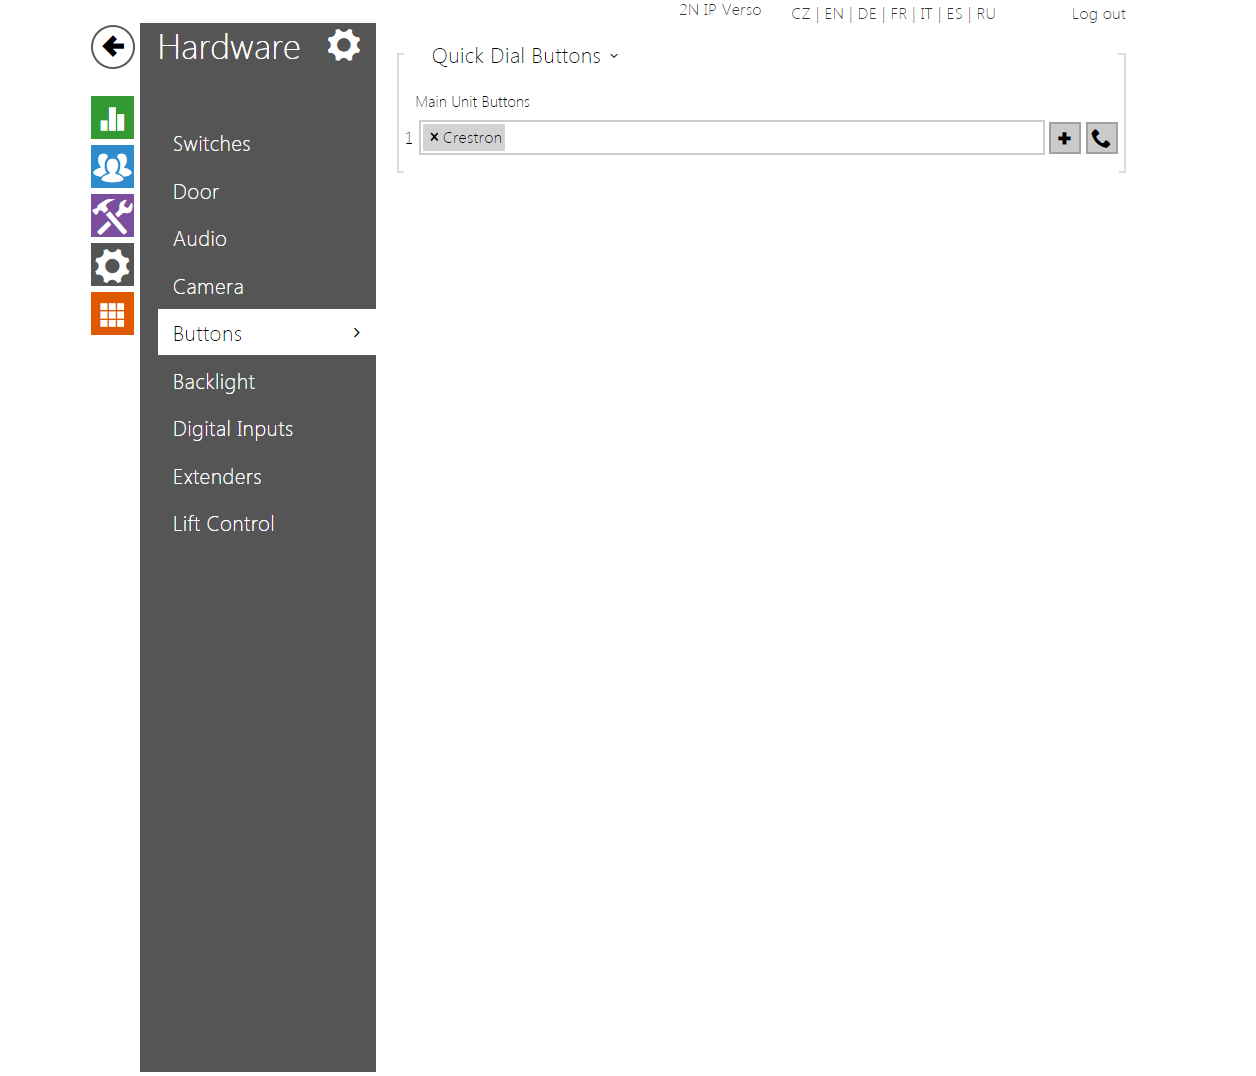
Go to menu Hardware - Buttons to assign users to the physical buttons on your intercom. If you have a unit with 1 button only, click in section Quick Dial Buttons on line 1 and select the name of the user you’ve created before. Save it and press the intercom button to make a RAVA call.
 |
 |
 |
Crestron MC4-R Settings
Open application Crestron Home Setup and connect your controller. Now please enter username and password of controller.
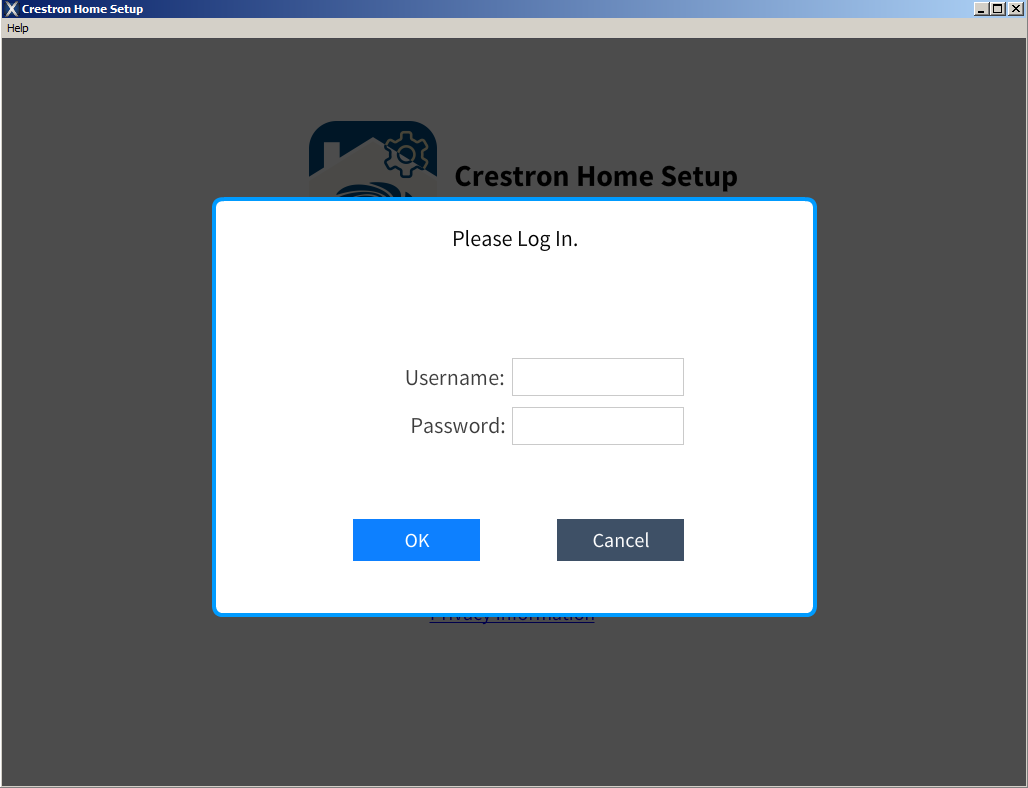 |
Your Crestron panel connect to Crestron controller. Crestron panel search controller, set username and password and connect it. Now all settings we set in application Crestron Home Setup. At the moment you can make a call from IP Intercom to Crestron panel.
 |
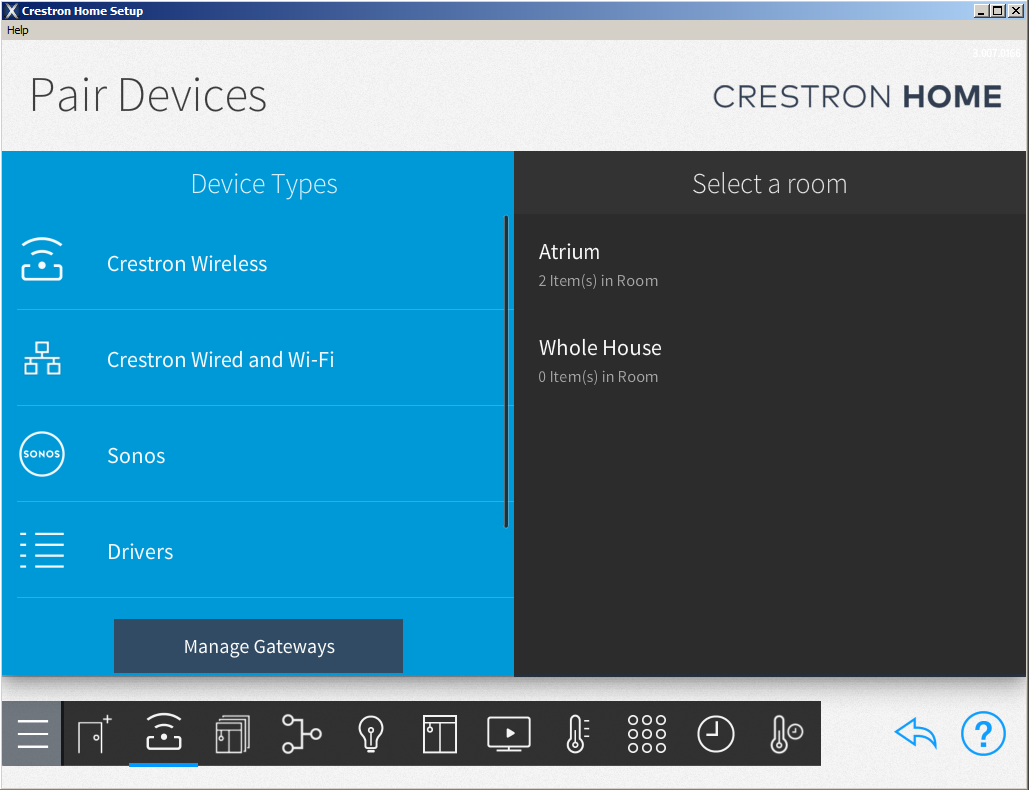
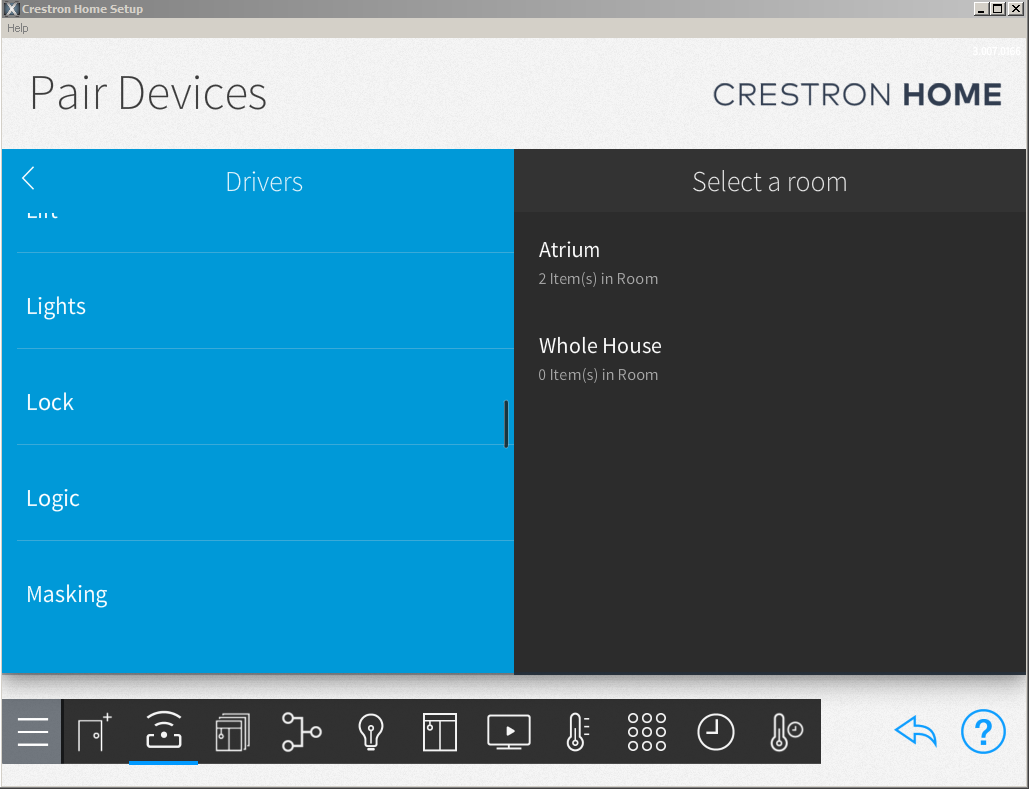
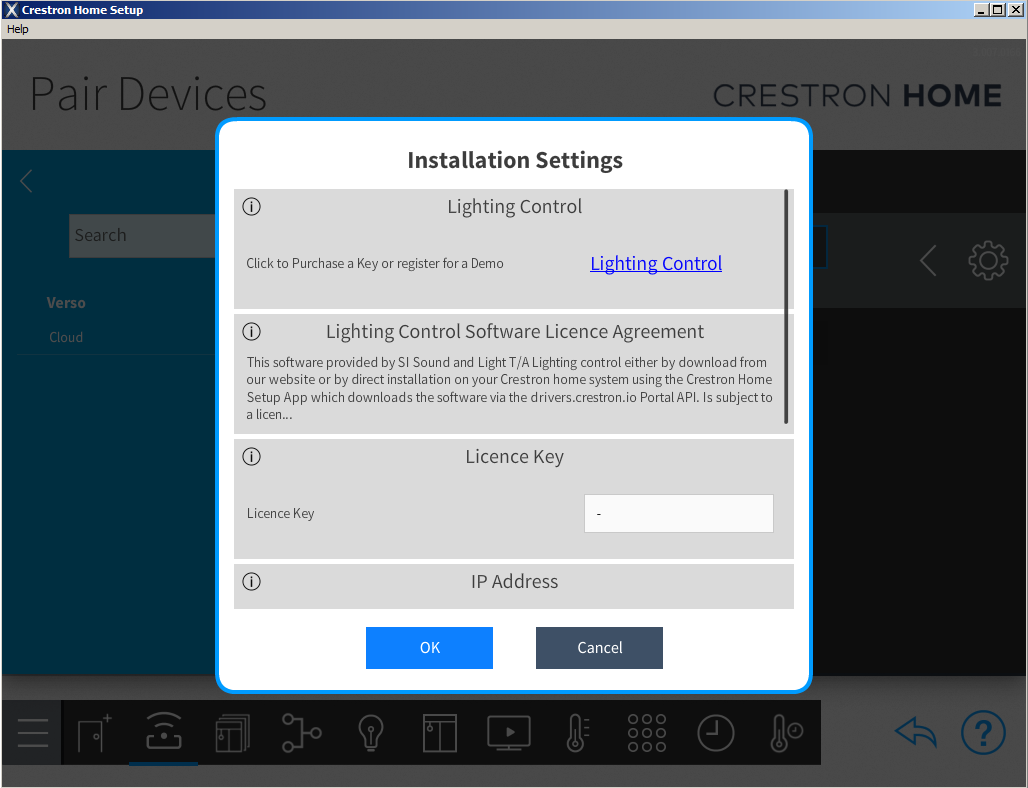
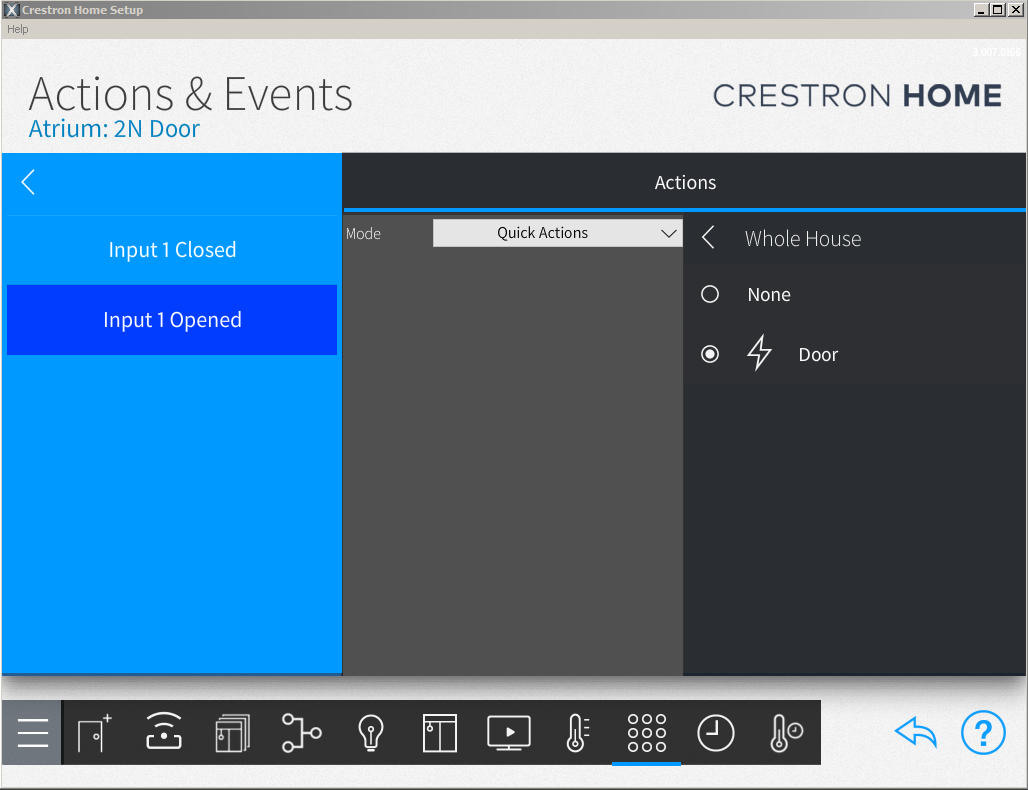
To control the intercom´s switches directly from Crestron Home, purchase and download the 2N Doorstation driver from LightingControl: https://lightingcontrol.co.uk/product/chtwonhw/.
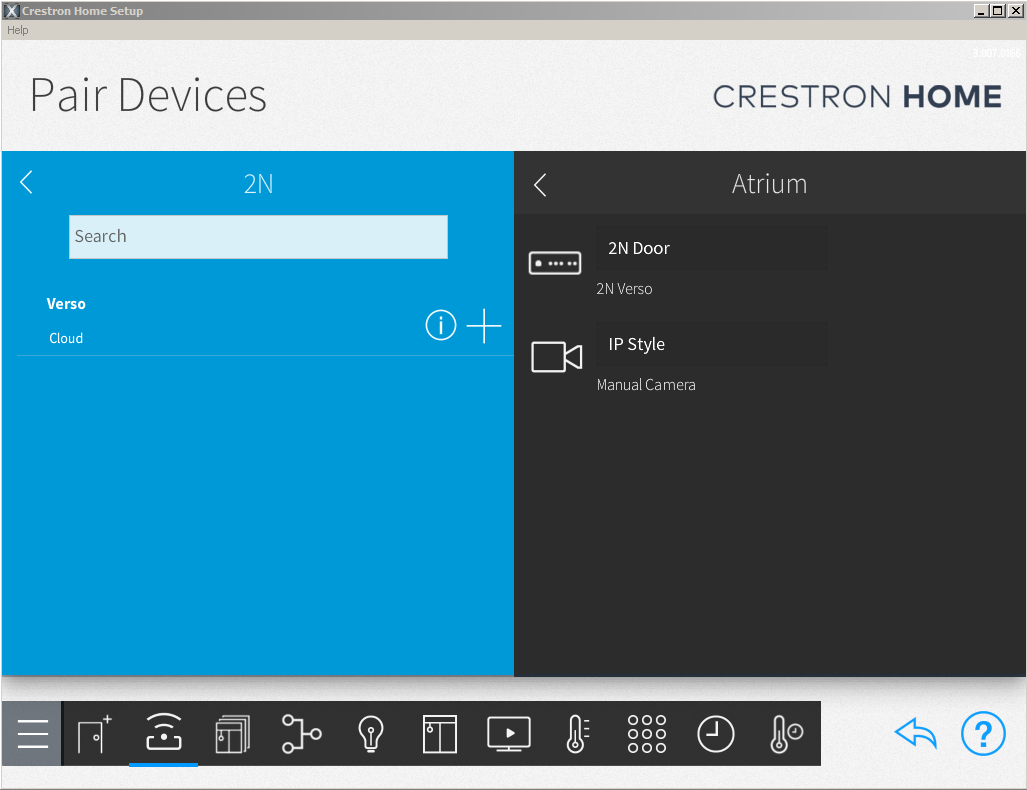
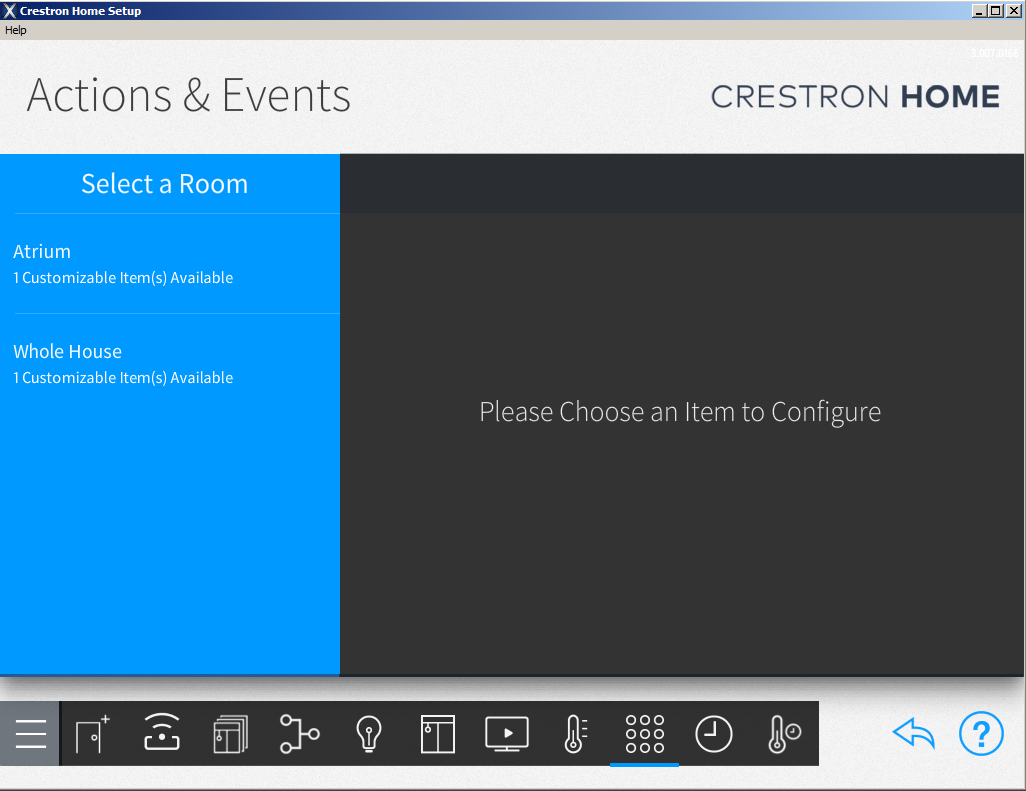
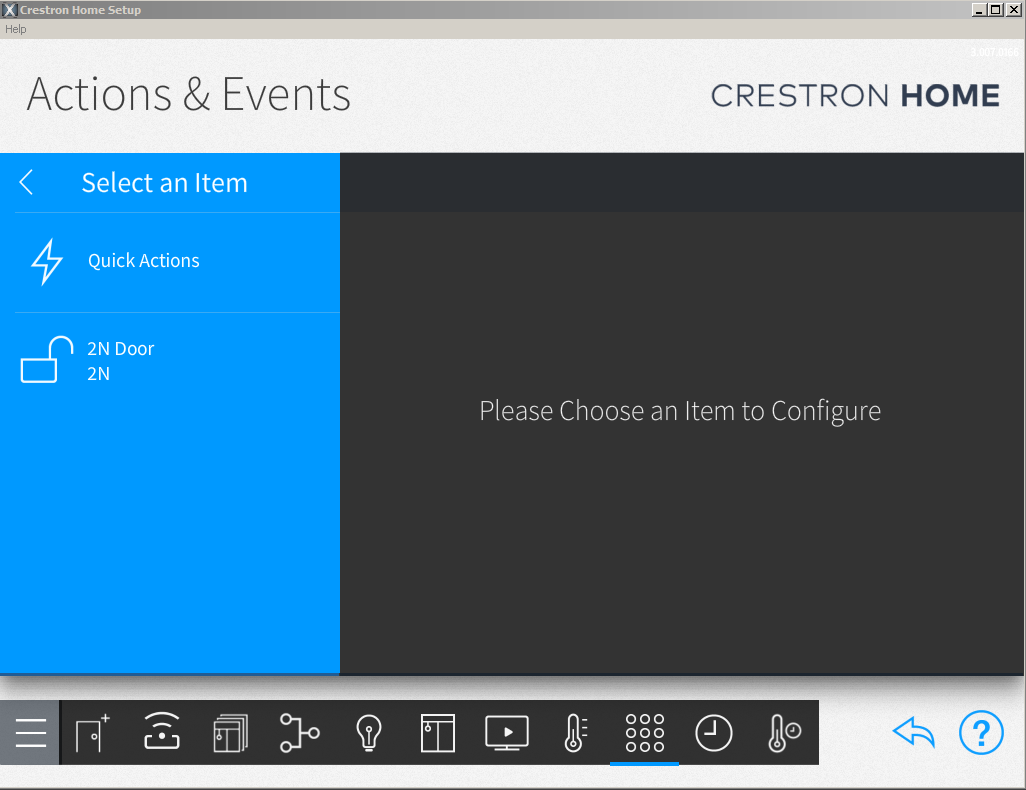
Go to menu Pair Devices.
|
Open menu Drivers.
 |
 |
 |
 |
 |
 |
 |
 |
 |
 |
Documents, video manual
Required Licenses
- Enhanced Integration (Part No. 9137907) for Switch Control
Used Symbols
![]() - Interoperable
- Interoperable
![]() - Work with limitation
- Work with limitation
![]() - Incompatible
- Incompatible